Create a LINE message
Create personalized LINE messages in campaigns or Canvas. Choose from text, image, rich, and card-based messages, and combine up to five messages in one send.
Prerequisites
Before you start, make sure you have the following:
| Requirement | Description |
|---|---|
| LINE connection | Complete LINE setup and review the channel’s policies, limits, and content rules. |
| Campaign or Canvas | Use a campaign for a single targeted message or Canvas for a multi-step user journey. |
| Message plan | Prepare your content, images, links, and subscription group. |
| Message or Action Credits | Confirm that your account has credits available. Sending LINE messages from Braze uses these credits. |
Create a message
Step 1: Choose where to build your message
- Go to Messaging > Campaigns and select Create Campaign.
- Select LINE, or, for campaigns targeting multiple channels, select Multichannel Campaign.
- Name your campaign something clear and meaningful.
- Add Teams and Tags as needed.
- Tags make your campaigns easier to find and use in reports.
- Add and name the variants for your campaign. Each variant can use different message types and layouts. For more information, see Multivariate and A/B testing.
If your campaign variants have similar content, compose the first message before adding more variants. You can then select Copy from Variant from the Add Variant dropdown.
- Create your Canvas using the Canvas composer.
- After you’ve set up your Canvas, add a step in the Canvas builder. Name your step something clear and meaningful.
- Choose a step schedule and specify a delay as needed.
- Filter your audience for this step as necessary. You can further refine the recipients of this step by specifying segments and adding additional filters. Audience options will be checked after the delay at the time messages are sent.
- Choose your advancement behavior.
- Choose any other messaging channels which you would like to pair with your message.
Step 2: Select a subscription group
Select the Subscription Group associated with the LINE channel that sends the message. A subscription group is required before you can launch the editor.
All variants in a LINE campaign must use the same subscription group. For more information about LINE subscription states, see LINE subscription groups.
Step 3: Compose your LINE message
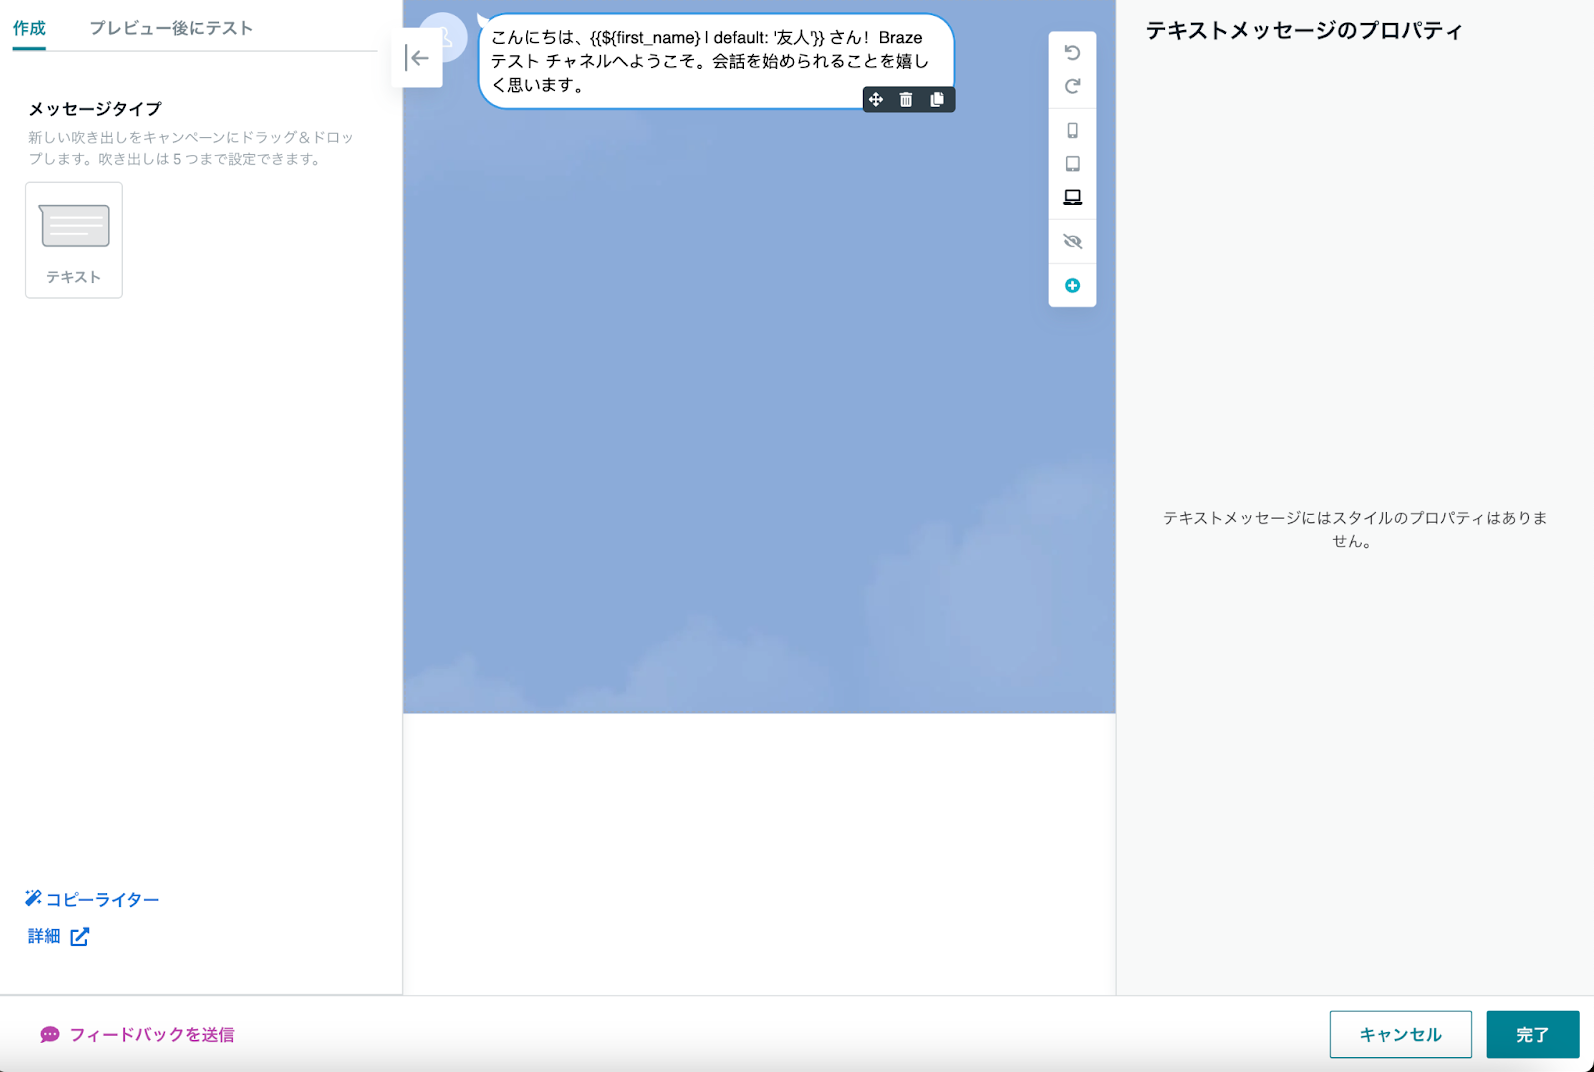
Select Launch editor, then drag message types into the editor. Combine up to five messages in one send and arrange them in the order that users receive them.
Message types
| Message type | Fields and settings | Limits and behavior |
|---|---|---|
| Text | Message body with emojis, Liquid, and URLs | Up to 5,000 characters. |
| Image | Image from the media library or a URL, including a dynamic URL | Image URLs can contain up to 2,000 characters. Standalone image messages don’t support click actions. |
| Rich message | Image, alternative text, template, and tappable areas with URI actions | Alternative text can contain up to 400 characters. Add between one and 50 tappable areas. Action labels can contain up to 100 characters, and each URI can contain up to 1,000 characters. |
| Card-based message | Up to 10 cards with an optional image and header, required body, and URI actions | Alternative text can contain up to 400 characters. A header can contain up to 40 characters. A body can contain up to 60 characters with an image or header, or 120 characters without either. Each card requires between one and three actions with labels of up to 20 characters. |
Character limits exclude Liquid syntax.
For image specifications, rich message templates, carousel image settings, and examples, see LINE message types.
Card-based messages apply the same optional fields and number of actions to every card. For example, if one card includes an image and two actions, every card must include an image and two actions.
On-click behavior
For tappable areas in rich messages and cards, select URI for On-click behavior, then enter the destination in Open URL. Choose whether the URL opens inside LINE.
Personalization
Use Liquid or Connected Content to personalize text, images, and URLs. Include a default value for Liquid personalization so that profiles with incomplete data don’t receive blank content.
If you are pulling in images with Connected Content or Liquid, ensure that your image URL begins with https://. Using http:// will crash your app.
For languages written from right to left, see Creating right-to-left messages.
Step 4: Configure click tracking
In the Settings tab, use Click Tracking to shorten and track links at send time. Click tracking is turned on by default for new messages and applies to HTTP and HTTPS URLs in text, rich, and card-based messages.
Braze uses https://brz.ai or the custom domain configured for the subscription group. You can personalize tracked URLs with Liquid. For setup by message type, testing behavior, custom domains, and retargeting, see LINE click tracking.
Step 5: Preview and test your message
Go to the Preview & Test tab to preview the message as a user or send a test LINE message to a content test group or individual user.
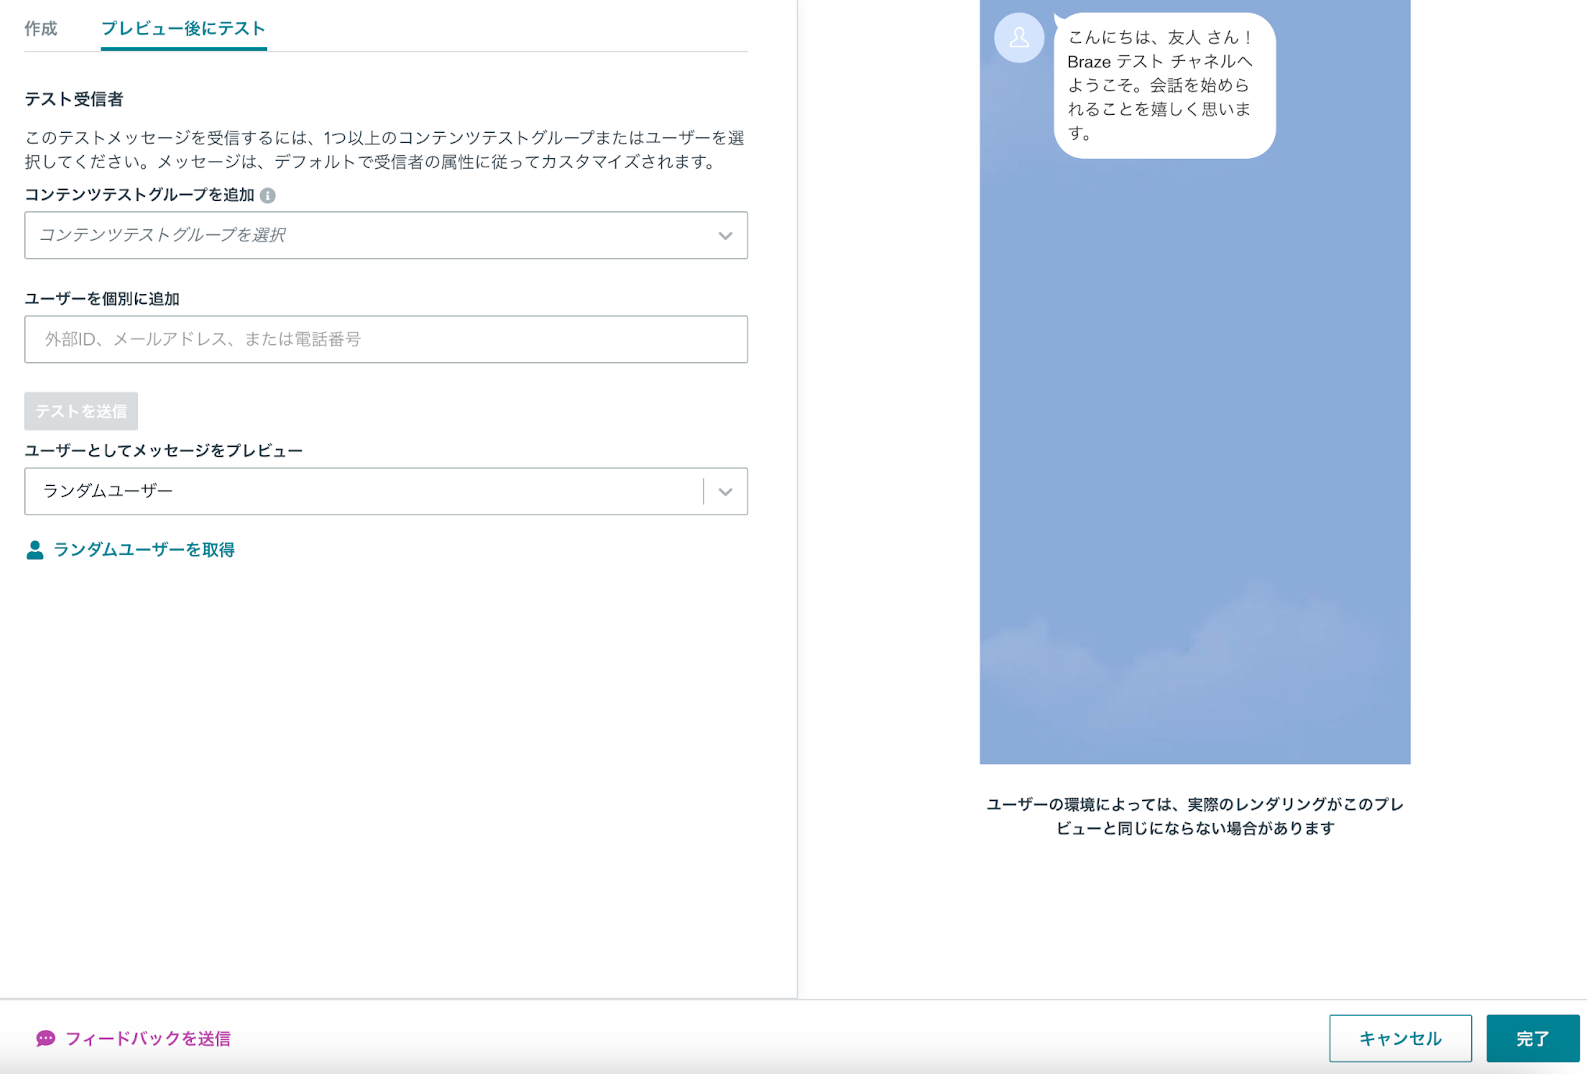
For testing requirements and steps, see Send test messages.
Step 6: Build the remainder of your campaign or Canvas
Choose a delivery schedule or trigger
Deliver LINE messages at a scheduled time or in response to an action or API trigger. For scheduling and trigger options, see Schedule your campaign.
Configure delivery controls such as re-eligibility and frequency capping. For action-based delivery, set the campaign duration and Quiet Hours.
Choose users to target
Target users by selecting segments and filters. Braze calculates exact segment membership before sending the message.
LINE controls each user’s subscription status. A user must have a native_line_id and follow the LINE channel associated with the selected subscription group to receive the message. For details, see LINE subscription status.
Choose conversion events
Use conversion events to measure actions after a user receives the campaign. Set a conversion window of up to 30 days.
Complete the remaining sections of your Canvas. For entry schedules, audience settings, and sending controls, see Create a Canvas.
You can use inbound LINE messages to start or branch a Canvas based on trigger words. For behavior and capitalization requirements, see Message LINE users.
Step 7: Review and deploy
After you’ve finished building your campaign or Canvas, review its details and test the message before sending it.
After launch, use LINE reporting to review message performance.
Things to know
- A LINE message can contain between one and five message bubbles.
- A subscription group maps to one LINE channel, and all variants in a campaign must use the same subscription group.
- LINE is the source of truth for subscription status. Users who don’t follow the selected LINE channel don’t receive the message.
- LINE calculates open and click-related statistics only when more than 20 users perform the event on a given day.