Web Targeting for Banners
Web Targeting lets you choose where a Banner appears on your website directly in Braze without needing a code change. Point a placement to a location on the page with a CSS selector, and the Braze Web SDK automatically inserts the Banner there.

Web Targeting for Banners is currently in early access. Contact your Braze account manager if you’re interested in participating in the early access.
Prerequisites
Before you can use Web Targeting, complete the following initial setup:
- Your website must have the Braze Web SDK installed and initialized.
- A developer must opt in to auto-insertion in the SDK. For the technical steps, see Web Targeting: auto-inserting Banners in the Developer Guide.
After this setup is complete, you can update placements with Web Targeting entirely from the dashboard without additional developer work for each placement targeting change.
What is Web Targeting?
Normally, showing a Banner on your website requires a developer to write code that places the Banner’s HTML into a specific spot on a page. Web Targeting removes that step. Instead of hardcoding where a Banner appears on your website, you describe the target location using a CSS selector. This is a short piece of text, such as #homepage-hero or .promo-banner-slot, that identifies an HTML element on the page using CSS. You can use web developer tools such as Google Chrome’s “Inspect” to find the CSS for the element you want to target. Braze Operator can also help you generate the proper selector.
Configure Web Targeting for a placement
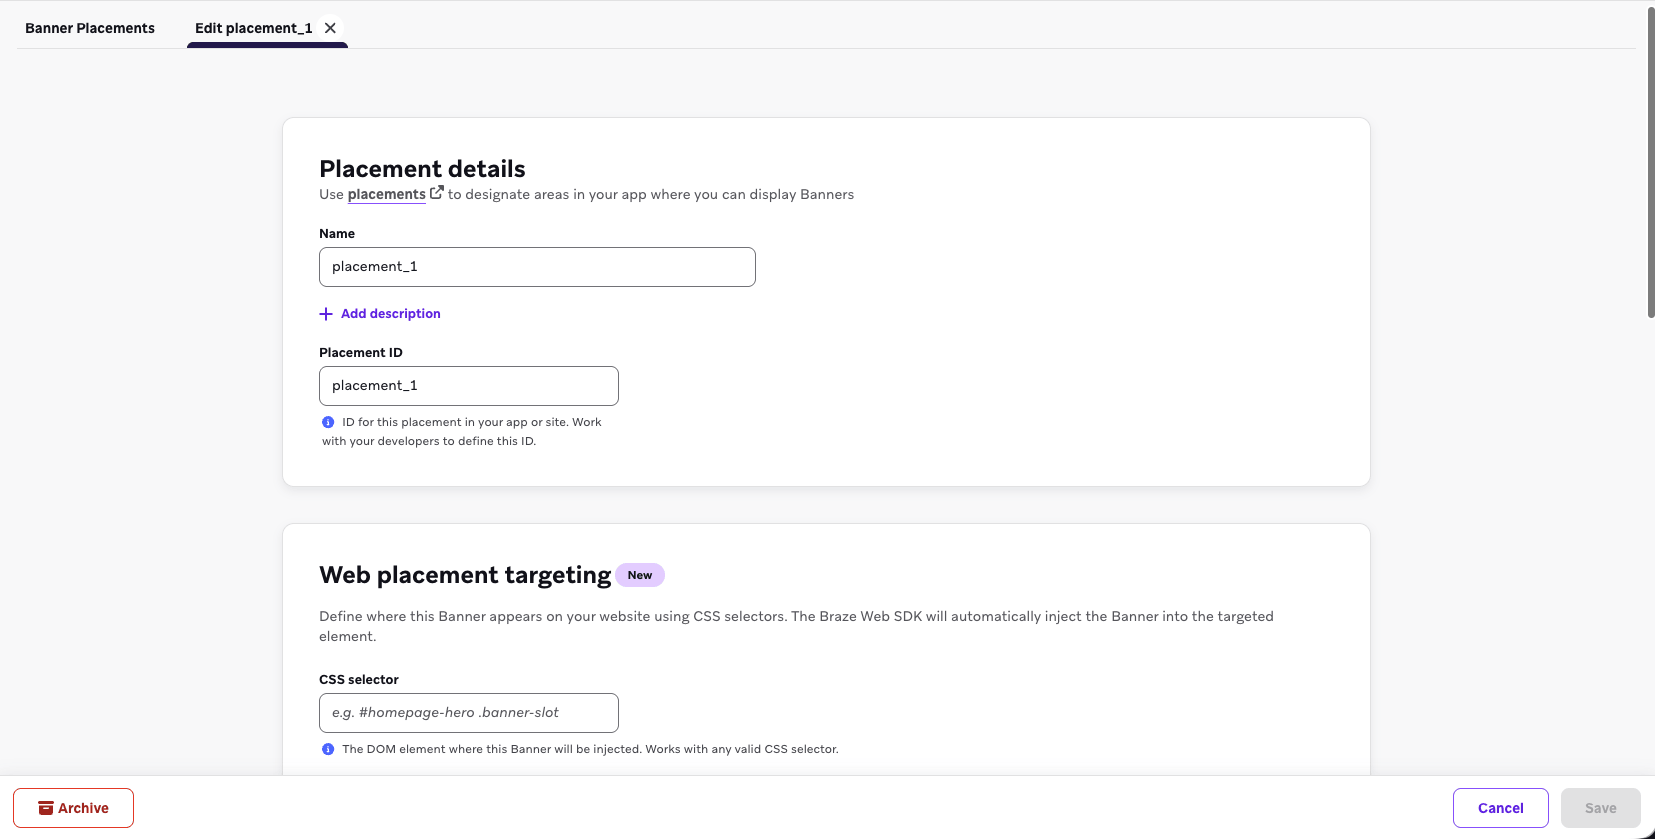
Web Targeting is configured on the placement, in Settings > Banners Placements. If you haven’t created a placement yet, see Placement IDs first.
- Go to Settings > Banners Placements, then select an existing placement to edit, or select Create Placement to start a new one.
- Scroll to the Web placement targeting section of the placement form.
- In CSS selector, enter the CSS selector for the element on your page where the Banner should appear (for example,
#homepage-heroor.promo-banner-slot). - For Insertion method, choose where the Banner should be placed relative to that element:
| Option | Result |
|---|---|
| Insert before | The Banner appears immediately before the target element. |
| Insert after | The Banner appears immediately after the target element. |
| Append inside | Braze adds the Banner as the last item inside the target element. |
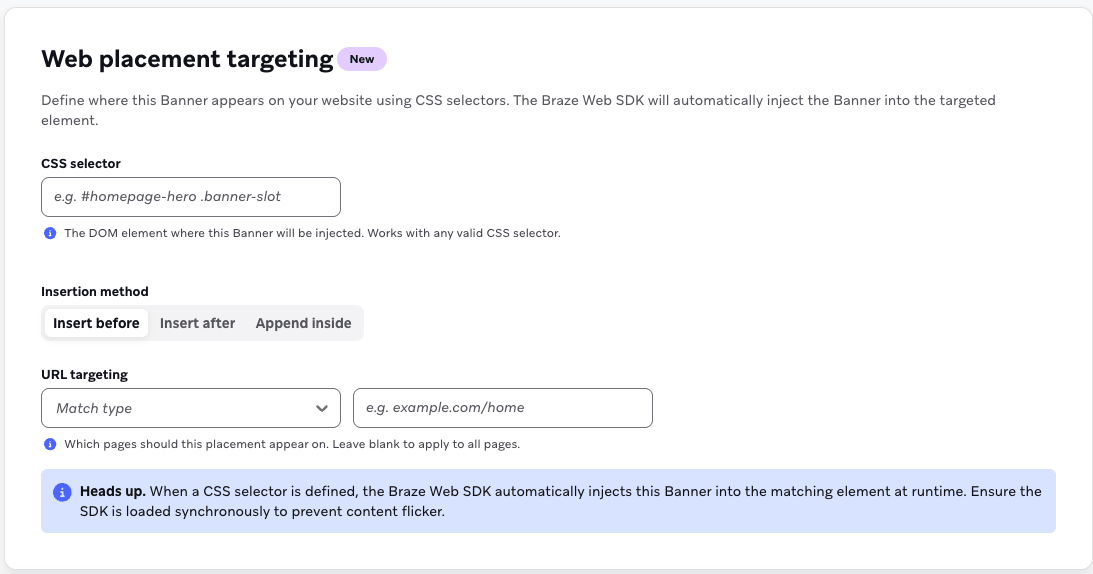
- (Optional) To limit the Banner to specific pages, fill in URL targeting:
- Match type: Choose whether the current page’s URL must contain, equal, or match a regular expression (regex) against the value you enter.
- URL: The page URL (or URL pattern) to match. Leave both fields blank to show the Banner on every page where the CSS selector is found.
- Select Save.

The CSS selector field works with any valid CSS selector your developers use elsewhere on the site—IDs (#element-id), classes (.element-class), or more specific combinations. If you’re not sure what to enter, ask Braze Operator or your development team which selector to use for the spot you want to target.
Limitations
- Web Targeting is available for the Web SDK only. It doesn’t apply to mobile placements.
- Append inside isn’t supported for some HTML elements (for example, images or form elements). If a Banner doesn’t appear with this option selected, try Insert before or Insert after, or ask your development team to confirm the target element.
Next steps
- Create a Banner — build the campaign or Canvas step that delivers content to this placement.
- About Banners — general Banner concepts, placement IDs, and priority.
- Web Targeting: auto-inserting Banners — the developer-facing setup required before this feature works on your site.