Canvas threshold alerts
Canvas threshold alerts let you know when something in a Canvas isn’t going as planned, so you can catch a stalled journey or an unexpected drop-off before it affects your customers.

Canvas threshold alerts is currently in early access. Contact your Braze account manager if you’re interested in participating in the early access.
Set a volume or percentage threshold for user entries or messages sent, and Braze notifies you by email or webhook if that threshold is crossed. You can also create multiple alerts for the same Canvas—for example, one alert for user entries and another for messages sent.
Not sure where to start? Operator can walk you through how to set up a Canvas threshold alert.
Step 1: Create an alert
Alerts are set at the Canvas level, and you can configure them for both active and draft Canvases. To open the Manage Alerts page for a Canvas, either:
- Go to Messaging > Canvas, and select Manage alerts from the context menu for an individual Canvas
- For active Canvases, open Canvas Analytics and select Manage alerts.
From the Manage Alerts page, select Configure alert to create a new alert.
Step 2: Name your alert and select a Canvas
Give your alert a name and confirm the Canvas it applies to.
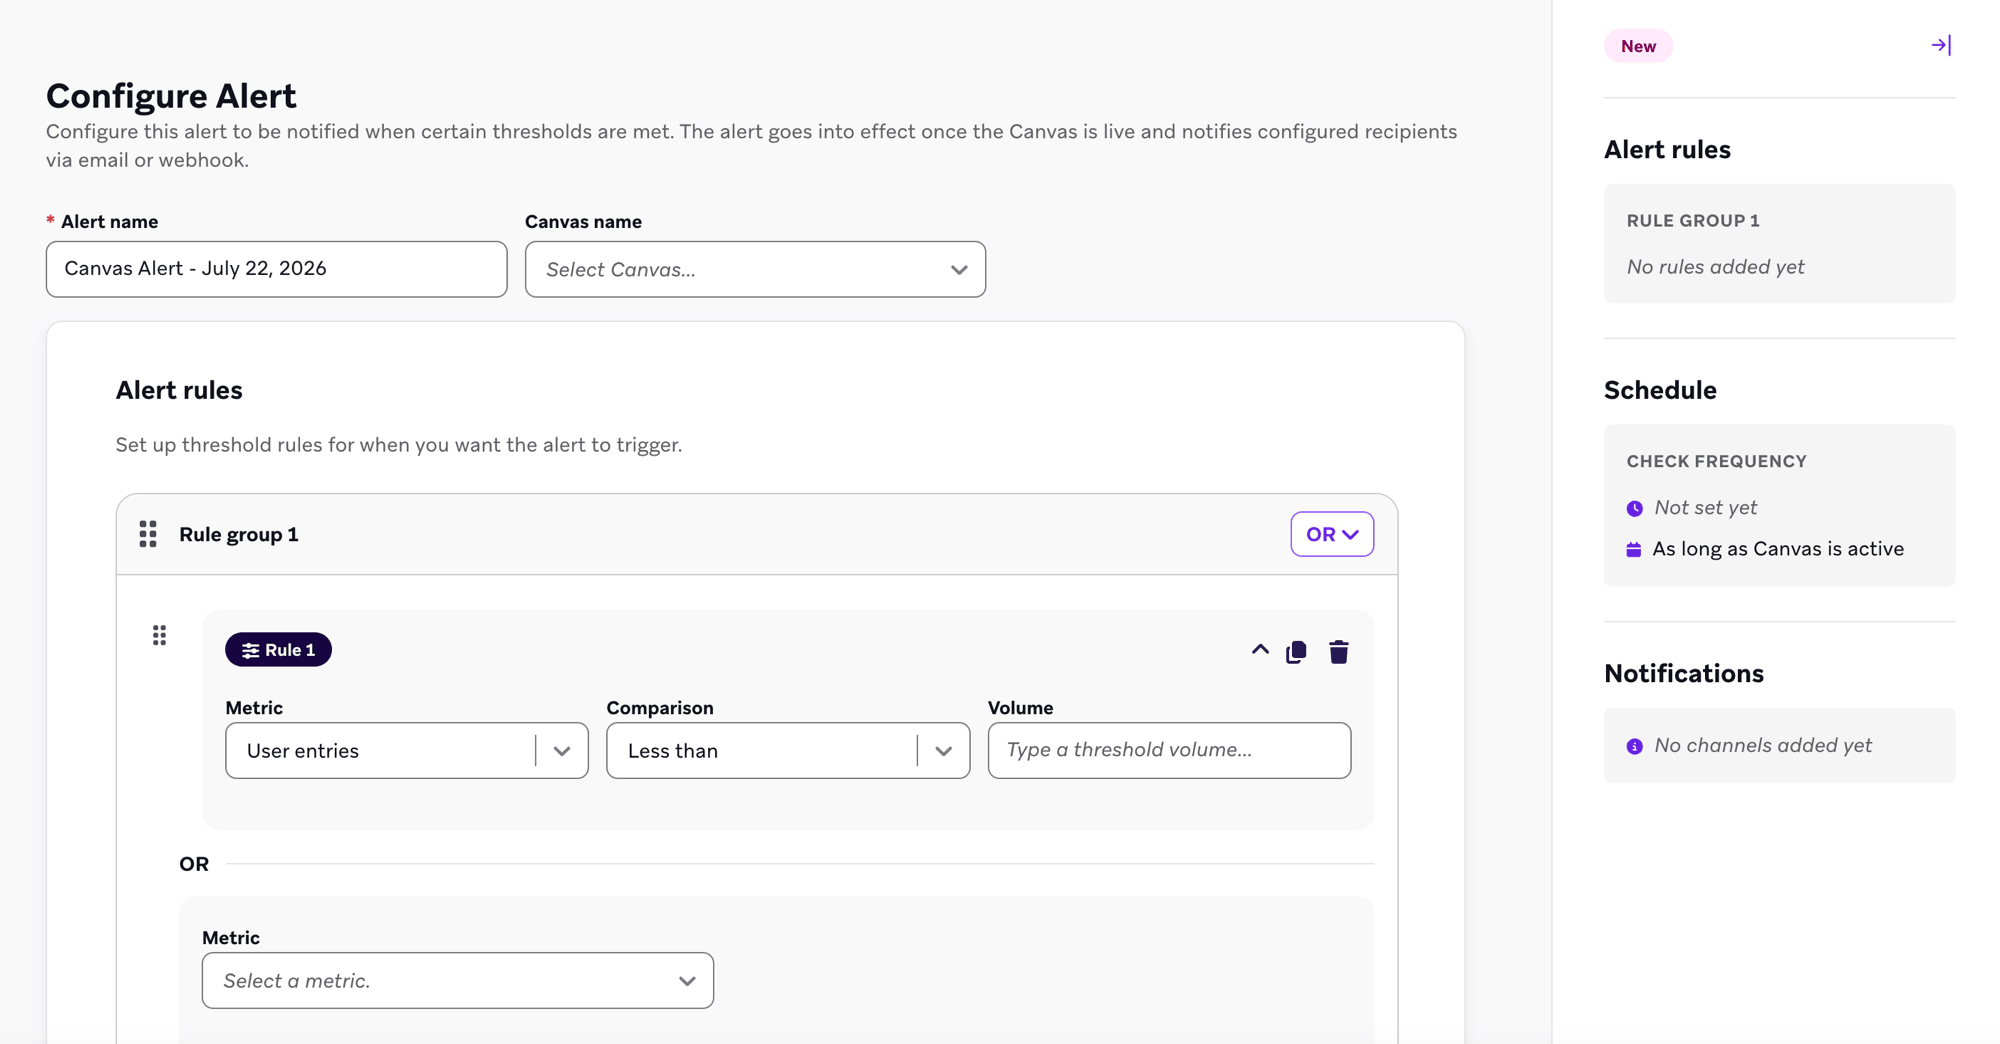
Step 3: Set alert rules
Alert rules define the threshold that triggers a notification. You can build rules using two metrics:
- User entries: Number of users who entered the Canvas
- Messages sent: Number of messages sent from the Canvas
For each rule, choose a comparison (less than, greater than, less than or equal to, greater than or equal to, or equal to), a unit, and a threshold.
- Volume: Compares the absolute count in the current check window. For example, “User entries less than 3,000” flags a Canvas that’s normally reaching thousands of users but has suddenly stalled—a sign of an upstream audience or entry issue worth investigating.
- Percentage: Compares the current count to a baseline for this Canvas. The baseline is the average of the same time window over the previous 7 days. For example, if the alert checks every 3 hours, a 2–5 pm check compares against the average of the previous seven 2–5 pm windows. A rule for “Messages sent less than 50%” flags a drop to under half of that usual volume.
Thresholds are whole numbers. For percentage rules with less than or less than or equal to, enter a value from 1 to 100. For greater than, greater than or equal to, or equal to, the percentage can be 0 or higher, including values above 100, so you can alert on a spike relative to the baseline.
You can group multiple rules together—including mixing volume and percentage rules—and combine rule groups with AND or OR logic to build more specific alert conditions.
Step 4: Set the alert schedule
Define how often your alert rules are checked. You can set the check frequency anywhere from 3 to 12 hours (in 1-hour increments), or every 24 hours. Once activated, an alert continues checking on this schedule for as long as the alert and its associated Canvas is active.
Step 5: Set up notifications
Choose who should be notified when an alert rule is met, and how they’re notified:
- Email: Add one or more recipient email addresses
- Webhook: Enter the webhook URL to notify, and optionally add custom request headers required by your webhook destination
You can enable one or both notification methods for a single alert.
Webhook alerts are useful for routing notifications to external platforms, such as a Slack channel—for more, see Slack’s documentation for sending messages using incoming webhooks. Each webhook notification sends a JSON payload with the alert name, evaluation window, and the conditions that triggered the alert. Each condition includes a threshold_unit of volume or percentage. Percentage conditions also include percentage_metric_value (the observed count as a whole-number percentage of the baseline). metric_value is always the absolute count.
Example webhook payload
The following is an example of the JSON payload sent in a POST request to your webhook endpoint when an alert is triggered. The first condition is a volume rule. The second is a percentage rule: 51,235 messages sent, which is 57% of the 7-day same-window baseline, against a threshold of greater than 55%.
1
2
3
4
5
6
7
8
9
10
11
12
13
14
15
16
17
18
19
20
21
22
23
24
25
26
27
{
  "alert": {
    "name": "Canvas Alert - August 6, 2026",
    "target_type": "CANVAS"
  },
  "evaluation_window_start": "2026-08-06T10:28:01Z",
  "evaluation_window_end": "2026-08-06T13:28:01Z",
  "conditions": [
    {
      "subject": "user_entries",
      "operator": "lt",
      "threshold_value": 500,
      "metric_value": 0.0,
      "group_index": 0,
      "threshold_unit": "volume"
    },
    {
      "subject": "messages_sent",
      "operator": "gt",
      "threshold_value": 55,
      "metric_value": 51235.0,
      "group_index": 0,
      "threshold_unit": "percentage",
      "percentage_metric_value": 57
    }
  ]
}
Step 6: Save your alert
Review your alert rules, schedule, and notification settings in the summary panel, then select Save alert.
Step 7: Activate the alert
Saving an alert doesn’t activate it. To turn it on, go to the Manage Alerts page and use the Status toggle for your alert. An alert stays active until you deactivate it or until its associated Canvas is no longer active. The Alerts Configured column on the Canvas page shows a bell icon for any Canvas with at least one saved alert.
Considerations
- Draft Canvases: You can set up a threshold alert for a Canvas that’s still in draft, but the alert won’t start checking against your rules until the Canvas launches.
- Percentage baseline: Percentage rules need seven complete prior same-window days after the Canvas launches. Until those windows exist, or when the baseline average is zero (no activity in those prior windows), percentage rules don’t trigger a notification.