Content Cards 만들기
이 문서에서는 커스텀 Content Cards를 구현할 때 사용할 기본 접근 방식과 세 가지 일반적인 사용 사례에 대해 설명합니다. 기본적으로 수행할 수 있는 작업과 커스텀 코드가 필요한 작업을 이해하기 위해 Content Cards 커스터마이징 가이드의 다른 문서를 이미 읽었다고 가정합니다. 커스텀 Content Cards에 대한 분석을 기록하는 방법을 이해하면 특히 유용합니다.

카드 만들기
1단계: 커스텀 UI 만들기
먼저, 카드를 렌더링하는 데 사용할 커스텀 HTML 컴포넌트를 만듭니다.
먼저, 커스텀 프래그먼트를 직접 만듭니다. 기본 ContentCardsFragment는 기본 Content Cards 유형만 처리하도록 설계되어 있지만, 출발점으로 활용하기에 좋습니다.
먼저, 커스텀 뷰 컨트롤러 컴포넌트를 직접 만듭니다. 기본 BrazeContentCardUI.ViewController는 기본 Content Cards 유형만 처리하도록 설계되어 있지만, 출발점으로 활용하기에 좋습니다.
2단계: 카드 업데이트 구독하기
카드가 새로고침될 때 데이터 업데이트를 구독하려면 콜백 함수를 등록합니다. Content Cards 객체를 파싱하여 title, cardDescription, imageUrl 등의 페이로드 데이터를 추출한 다음, 결과 모델 데이터를 사용하여 커스텀 UI를 채울 수 있습니다.
Content Cards 데이터 모델을 가져오려면 Content Cards 업데이트를 구독합니다. 다음 속성정보에 특히 주의하세요:
id: Content Cards ID 문자열을 나타냅니다. 커스텀 Content Cards에서 분석을 기록하는 데 사용되는 고유 식별자입니다.extras: Braze 대시보드의 모든 키-값 페어를 포함합니다.
id와 extras 이외의 모든 속성정보는 커스텀 Content Cards에서 파싱하지 않아도 됩니다. 데이터 모델에 대한 자세한 내용은 각 플랫폼의 통합 문서를 참고하세요: Android, iOS, 웹.
subscribeToContentCardsEvents를 사용하여 Content Cards 이벤트를 수신합니다. SDK는 이벤트 객체와 함께 핸들러를 호출합니다. event.type에 따라 각 이벤트 유형을 처리합니다. 이벤트 값에 대한 자세한 내용은 이벤트 구독을 참고하세요.
import * as braze from "@braze/web-sdk";
function renderCards(cards) {
// For example:
cards.forEach(card => {
if (card.isControl) {
// Do not display the control card, but remember to call `logContentCardImpressions([card])`
}
else if (card instanceof braze.ClassicCard || card instanceof braze.CaptionedImage) {
// Use `card.title`, `card.imageUrl`, etc.
}
else if (card instanceof braze.ImageOnly) {
// Use `card.imageUrl`, etc.
}
});
}
// - Available in version 7.0.0+
const subscriptionId = braze.subscribeToContentCardsEvents((event) => {
switch (event.type) {
case braze.ChannelEventType.CACHE_REPLAY:
// Sent once, right away, with the cards that are already cached.
// Render them now instead of waiting for the network.
renderCards(event.cacheSnapshot.contentCards.cards);
break;
case braze.ChannelEventType.CACHE_LOAD:
// The cache changed without a refresh, such as after changeUser().
// The snapshot can be empty, so clear cards from the previous user.
renderCards(event.cacheSnapshot.contentCards.cards);
break;
case braze.ChannelEventType.DATA_UPDATED:
// A refresh finished, even if no cards changed, or a card was dismissed.
renderCards(event.cacheSnapshot.contentCards.cards);
break;
case braze.ChannelEventType.ERROR:
switch (event.retryState) {
case braze.RetryState.SDK_WILL_RETRY:
// The SDK is retrying. Keep the current cards and wait.
break;
case braze.RetryState.INTEGRATOR_MAY_RETRY: {
// The SDK stopped retrying. Try again later, and limit how often you retry.
const delayMs = event.rateLimitedUntil
? Math.max(event.rateLimitedUntil.getTime() - Date.now(), 0)
: 30000;
setTimeout(() => braze.requestContentCardsRefresh(), delayMs);
break;
}
case braze.RetryState.DO_NOT_RETRY:
// The failure is final. For example, Content Cards are disabled for this workspace.
if (event.reason === braze.ChannelErrorReason.FEATURE_DISABLED) {
// Hide your Content Cards UI.
}
break;
}
break;
}
});
const deprecatedSubscriptionId = braze.subscribeToContentCardsUpdates((updates) => {
renderCards(updates.cards);
});
braze.openSession();
// Remove the subscription when you no longer need it
// braze.removeSubscription(subscriptionId);

Content Cards는 openSession() 전에 subscribeToContentCardsEvents()(또는 더 이상 사용되지 않는 subscribeToContentCardsUpdates())를 호출한 경우에만 세션 시작 시 새로고침됩니다. 언제든지 수동으로 피드를 새로고침할 수도 있습니다.
각 이벤트가 언제 발생하는지, 그리고 각 업데이트 사유, 재시도 상태, 분석 액션, 오류 사유의 의미에 대해서는 이벤트 구독을 참고하세요.
웹 SDK 7.0.0 이상에서는 subscribeToContentCardsEvents를 사용합니다. subscribeToContentCardsUpdates는 이전 패턴으로, 7.0.0 기준으로 더 이상 사용되지 않습니다. 이전 패턴은 현재 카드만 전달하므로, 카드가 변경된 이유나 새로고침 실패 시점을 알 수 없습니다.
2a단계: 프라이빗 구독자 변수 만들기
카드 업데이트를 구독하려면 먼저 커스텀 클래스에 구독자를 보관할 프라이빗 변수를 선언합니다:
// - Available in version 44.0.0+
private IEventSubscriber<ContentCardsEvent> mContentCardsEventSubscriber;
private IEventSubscriber<ContentCardsUpdatedEvent> mContentCardsUpdatedSubscriber;
2b단계: 이벤트 구독하기
subscribeToContentCardsEvents()로 구독하려면 다음 코드를 추가합니다. 일반적으로 커스텀 Content Cards 액티비티의 Activity.onCreate() 내부에서 수행합니다. 필요한 ContentCardsEvent 하위 클래스를 패턴 매칭합니다.
// - Available in version 44.0.0+
// Remove the previous subscriber before rebuilding a new one with our new activity.
Braze.getInstance(context).removeSingleSubscription(mContentCardsEventSubscriber, ContentCardsEvent.class);
mContentCardsEventSubscriber = new IEventSubscriber<ContentCardsEvent>() {
@Override
public void trigger(ContentCardsEvent event) {
if (event instanceof ContentCardsEvent.CacheReplay) {
handleCards(((ContentCardsEvent.CacheReplay) event).getCacheSnapshot());
} else if (event instanceof ContentCardsEvent.CacheLoad) {
handleCards(((ContentCardsEvent.CacheLoad) event).getCacheSnapshot());
} else if (event instanceof ContentCardsEvent.DataUpdated) {
handleCards(((ContentCardsEvent.DataUpdated) event).getCacheSnapshot());
}
}
};
Braze.getInstance(context).subscribeToContentCardsEvents(mContentCardsEventSubscriber);
Braze.getInstance(context).requestContentCardsRefresh();
// Remove the previous subscriber before rebuilding a new one with our new activity.
Braze.getInstance(context).removeSingleSubscription(mContentCardsUpdatedSubscriber, ContentCardsUpdatedEvent.class);
mContentCardsUpdatedSubscriber = new IEventSubscriber<ContentCardsUpdatedEvent>() {
@Override
public void trigger(ContentCardsUpdatedEvent event) {
List<Card> allCards = event.getAllCards();
}
};
Braze.getInstance(context).subscribeToContentCardsUpdates(mContentCardsUpdatedSubscriber);
Braze.getInstance(context).requestContentCardsRefresh();
private void handleCards(ContentCardsCacheSnapshot cacheSnapshot) {
List<Card> allCards = cacheSnapshot.getCards();
}
이벤트는 백그라운드 스레드에서 전달됩니다. 뷰를 업데이트하기 전에 메인 스레드로 전환하세요.
2c단계: 구독 해제하기
커스텀 액티비티가 화면에서 벗어날 때 구독을 해제합니다. 액티비티의 onDestroy() 라이프사이클 메서드에 다음 코드를 추가합니다:
// - Available in version 44.0.0+
Braze.getInstance(context).removeSingleSubscription(mContentCardsEventSubscriber, ContentCardsEvent.class);
Braze.getInstance(context).removeSingleSubscription(mContentCardsUpdatedSubscriber, ContentCardsUpdatedEvent.class);
2a단계: 프라이빗 구독자 변수 만들기
카드 이벤트를 구독하려면 먼저 커스텀 클래스에 구독자를 보관할 프라이빗 변수를 선언합니다:
// - Available in version 44.0.0+
private var contentCardsEventSubscriber: IEventSubscriber<ContentCardsEvent>? = null
private var contentCardsUpdatedSubscriber: IEventSubscriber<ContentCardsUpdatedEvent>? = null
2b단계: 이벤트 구독하기
subscribeToContentCardsEvents()로 구독하려면 다음 코드를 추가합니다. 일반적으로 커스텀 Content Cards 액티비티의 Activity.onCreate() 내부에서 수행합니다. 필요한 ContentCardsEvent 하위 클래스를 패턴 매칭합니다.
// - Available in version 44.0.0+
// Remove the previous subscriber before rebuilding a new one with our new activity.
Braze.getInstance(context).removeSingleSubscription(contentCardsEventSubscriber, ContentCardsEvent::class.java)
contentCardsEventSubscriber = IEventSubscriber { event ->
when (event) {
is ContentCardsEvent.CacheReplay -> handleCards(event.cacheSnapshot)
is ContentCardsEvent.CacheLoad -> handleCards(event.cacheSnapshot)
is ContentCardsEvent.DataUpdated -> handleCards(event.cacheSnapshot)
else -> {}
}
}
Braze.getInstance(context).subscribeToContentCardsEvents(contentCardsEventSubscriber)
Braze.getInstance(context).requestContentCardsRefresh()
// Remove the previous subscriber before rebuilding a new one with our new activity.
Braze.getInstance(context).removeSingleSubscription(contentCardsUpdatedSubscriber, ContentCardsUpdatedEvent::class.java)
contentCardsUpdatedSubscriber = IEventSubscriber { event ->
val allCards = event.allCards
}
Braze.getInstance(context).subscribeToContentCardsUpdates(contentCardsUpdatedSubscriber)
Braze.getInstance(context).requestContentCardsRefresh()
private fun handleCards(cacheSnapshot: ContentCardsCacheSnapshot) {
val allCards = cacheSnapshot.cards
}
이벤트는 백그라운드 스레드에서 전달됩니다. 뷰를 업데이트하기 전에 메인 스레드로 전환하세요.
2c단계: 구독 해제하기
커스텀 액티비티가 화면에서 벗어날 때 구독을 해제합니다. 액티비티의 onDestroy() 라이프사이클 메서드에 다음 코드를 추가합니다:
// - Available in version 44.0.0+
Braze.getInstance(context).removeSingleSubscription(contentCardsEventSubscriber, ContentCardsEvent::class.java)
Braze.getInstance(context).removeSingleSubscription(contentCardsUpdatedSubscriber, ContentCardsUpdatedEvent::class.java)
각 이벤트가 언제 발생하는지, 그리고 각 업데이트 사유, 재시도 상태, 분석 액션, 오류 사유의 의미에 대해서는 이벤트 구독을 참고하세요.
Android SDK 44.0.0 이상에서는 subscribeToContentCardsEvents를 사용합니다. subscribeToContentCardsUpdates는 이전 패턴으로, 44.0.0 기준으로 더 이상 사용되지 않습니다.
Content Cards 데이터 모델에 접근하려면 braze 인스턴스에서 contentCards.cards를 호출합니다.
let cards: [Braze.ContentCard] = AppDelegate.braze?.contentCards.cards
추가로, Content Cards 이벤트를 구독하여 캐시 변경, 분석, 오류를 관찰할 수 있습니다. 다음 두 가지 방법 중 하나로 수행할 수 있습니다:
- cancellable 유지; 또는
AsyncStream유지.
Cancellable
// - Available in version 19.0.0+
// This subscription is maintained through a Braze cancellable, which will observe for events until the subscription is cancelled.
// You must keep a strong reference to the cancellable to keep the subscription active.
// The subscription is canceled either when the cancellable is deinitialized or when you call its `.cancel()` method.
let cancellable = AppDelegate.braze?.contentCards.subscribeToEvents { [weak self] event in
switch event {
case .cacheReplay(let cacheSnapshot):
// Initial cache snapshot, delivered immediately after subscribing
break
case .cacheLoad(let cacheSnapshot):
// Cache loaded at the start of a user session (for example, after `changeUser()`)
break
case .dataUpdated(let cacheSnapshot, let reason):
// Cache changed after the initial replay
break
case .impressionEvent(let card, let action):
break
case .clickEvent(let card, let action):
break
case .dismissEvent(let card, let action):
break
case .error(let reason, let retryState):
break
}
}
let cancellable = AppDelegate.braze?.contentCards.subscribeToUpdates { [weak self] contentCards in
// Implement your completion handler to respond to updates in `contentCards`.
}
AsyncStream
// - Available in version 19.0.0+
Task {
for await event in AppDelegate.braze?.contentCards.eventsStream ?? AsyncStream { _ in } {
// Same switch statement as the cancellable example above.
}
}
let stream: AsyncStream<[Braze.ContentCard]> = AppDelegate.braze?.contentCards.cardsStream
Swift SDK 19.0.0 이상에서는 subscribeToEvents(_:) 또는 eventsStream을 사용합니다. subscribeToUpdates(_:) 및 cardsStream은 이전 패턴으로, 19.0.0 기준으로 더 이상 사용되지 않습니다.
NSArray<BRZContentCardRaw *> *contentCards = AppDelegate.braze.contentCards.cards;
추가로, Content Cards 이벤트를 구독하려면 subscribeToEvents:를 호출할 수 있습니다. 각 이벤트 유형은 고유한 클래스로 브리지됩니다(예: BRZContentCardsDataUpdatedEvent). isKindOfClass:를 사용하여 구분할 수 있습니다. 초기 캐시 리플레이와 이후 데이터 업데이트는 모두 BRZContentCardsDataUpdatedEvent로 브리지됩니다. 이를 구분하려면 reason을 BRZContentCardsDataUpdatedEvent.cacheReplayReason과 비교하세요:
// - Available in version 19.0.0+
// This subscription is maintained through a Braze cancellable, which will continue to observe for events until the subscription is cancelled.
BRZCancellable *cancellable = [self.braze.contentCards subscribeToEvents:^(BRZContentCardsEvent *event) {
if ([event isKindOfClass:[BRZContentCardsDataUpdatedEvent class]]) {
BRZContentCardsDataUpdatedEvent *updated = (BRZContentCardsDataUpdatedEvent *)event;
if (updated.reason == BRZContentCardsDataUpdatedEvent.cacheReplayReason) {
// Initial cache snapshot, delivered immediately after subscribing
} else {
// Cache changed after the initial replay
}
} else if ([event isKindOfClass:[BRZContentCardsCacheLoadEvent class]]) {
// Cache loaded at the start of a user session (for example, after `changeUser()`)
}
}];
BRZCancellable *cancellable = [self.braze.contentCards subscribeToUpdates:^(NSArray<BRZContentCardRaw *> *contentCards) {
// Implement your completion handler to respond to updates in `contentCards`.
}];
Swift SDK 19.0.0 이상에서는 subscribeToEvents:를 사용합니다. subscribeToUpdates:는 이전 패턴으로, 19.0.0 기준으로 더 이상 사용되지 않습니다.
각 이벤트가 언제 발생하는지, 그리고 각 업데이트 사유, 재시도 상태, 분석 액션, 오류 사유의 의미에 대해서는 이벤트 구독을 참고하세요.
3단계: 분석 구현하기
커스텀 뷰에서는 Content Cards 노출, 클릭, 해제가 자동으로 기록되지 않습니다. Braze 대시보드 분석에 모든 측정기준을 올바르게 기록하려면 각 메서드를 구현해야 합니다.
4단계: 카드 테스트하기 (선택 사항)
Content Cards를 테스트하려면 다음을 수행합니다:
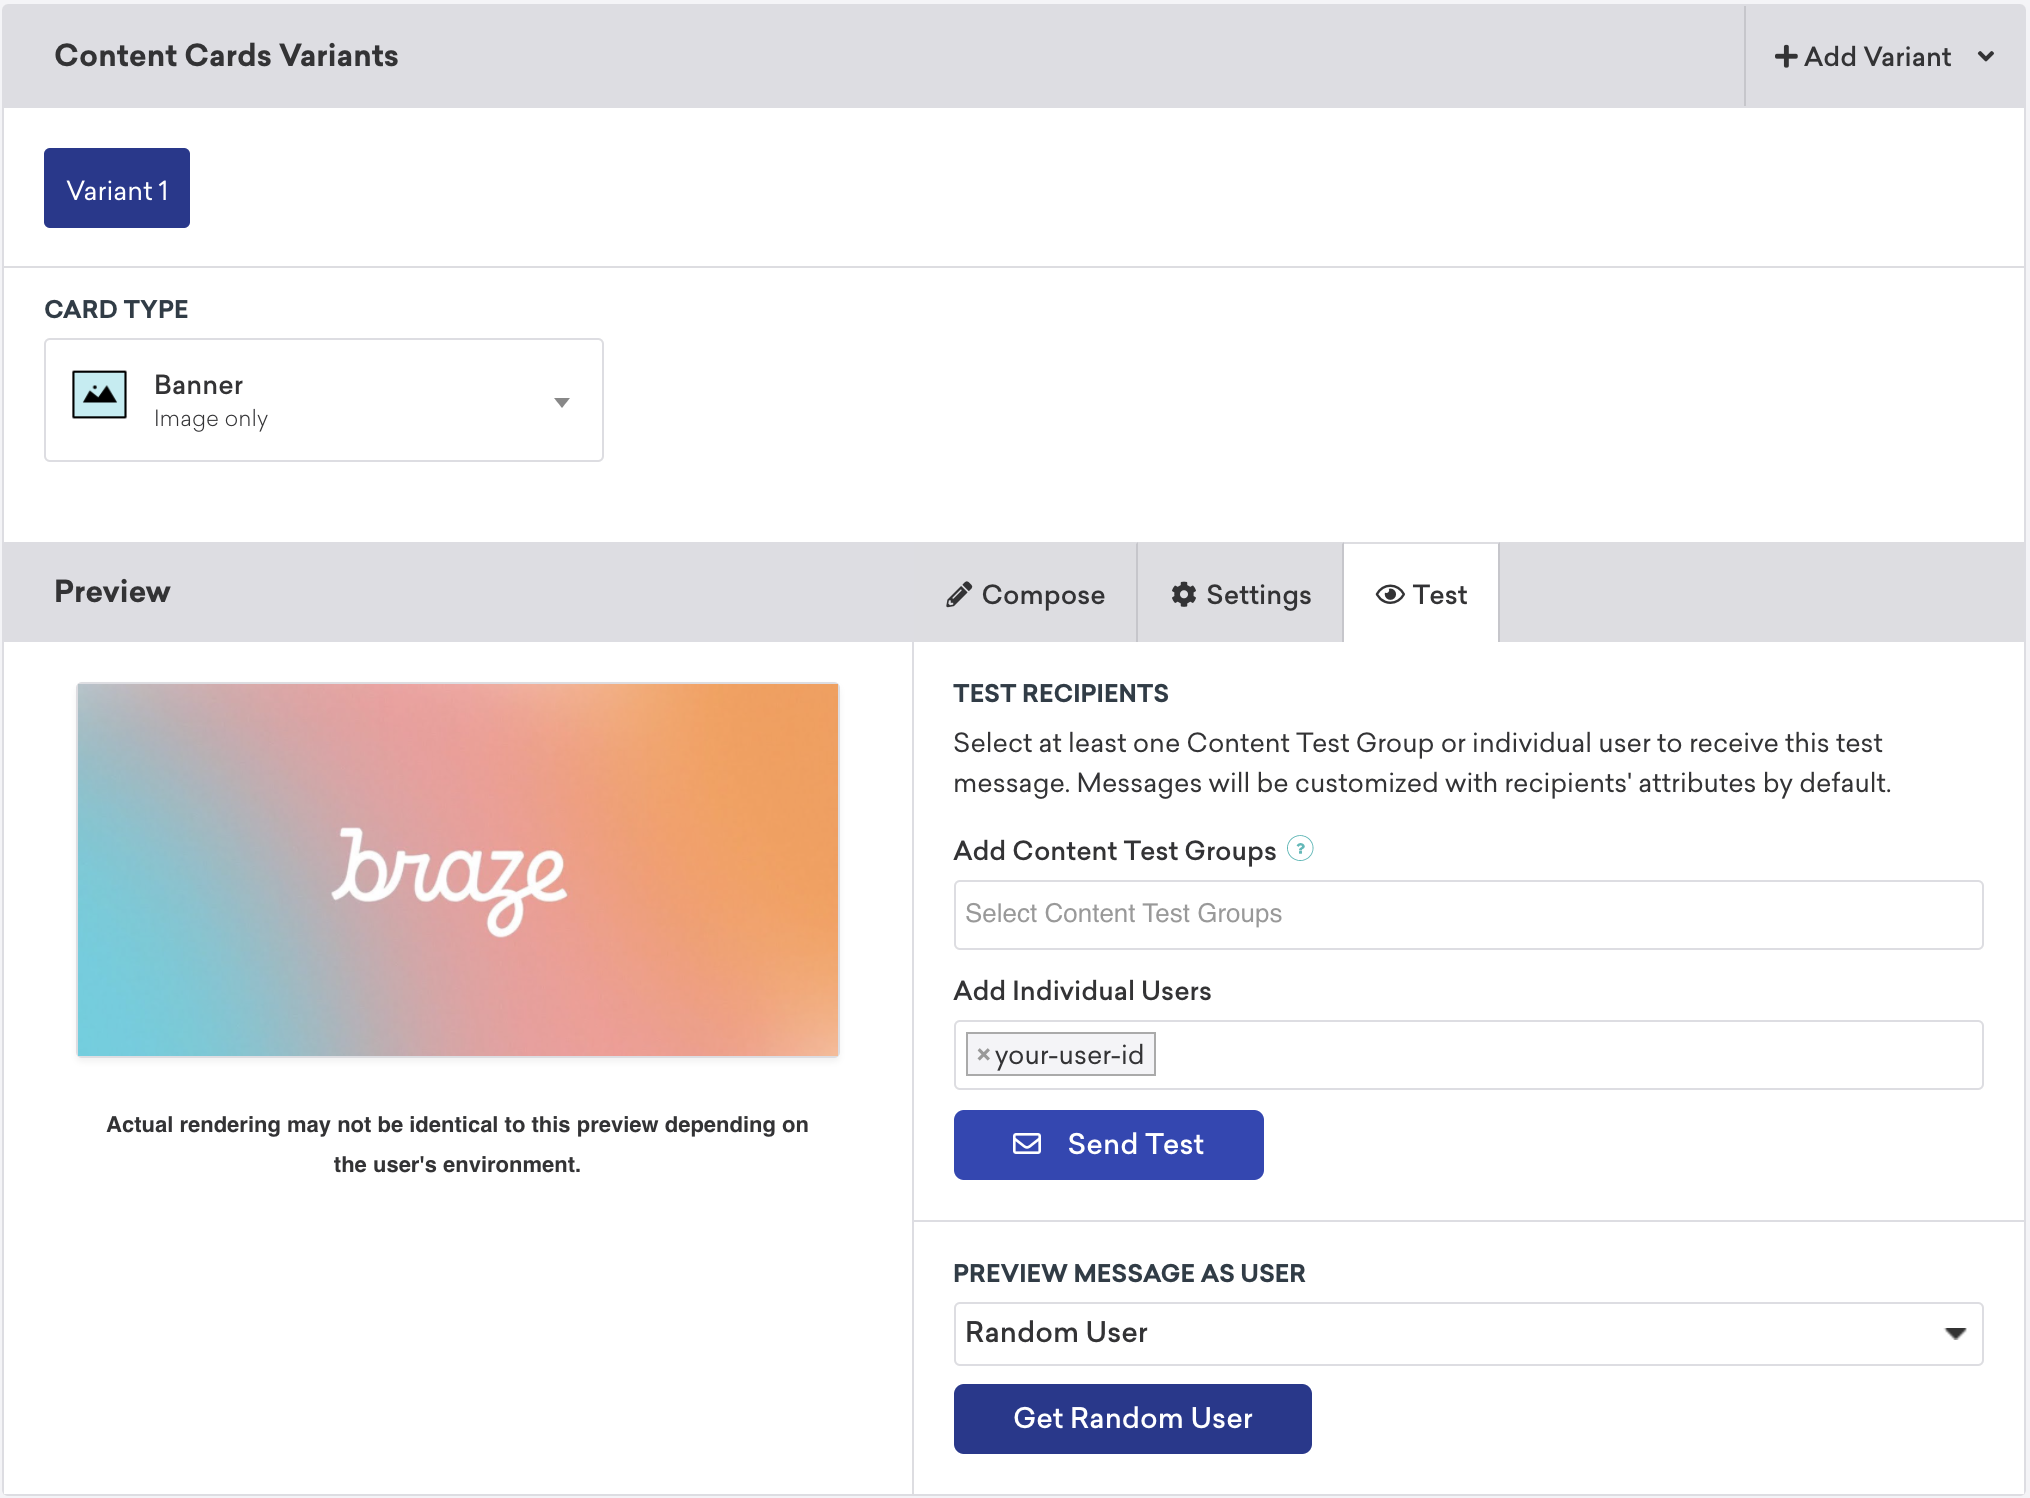
changeUser()메서드를 호출하여 애플리케이션에서 활성 사용자를 설정합니다.- Braze에서 Campaigns로 이동한 후, 새 콘텐츠 카드 캠페인을 만듭니다.
- Campaign에서 테스트를 선택하고 테스트 사용자의
user-id를 입력합니다. 준비가 되면 테스트 전송을 선택합니다. 곧 기기에서 콘텐츠 카드를 실행할 수 있습니다.
Content Cards 배치
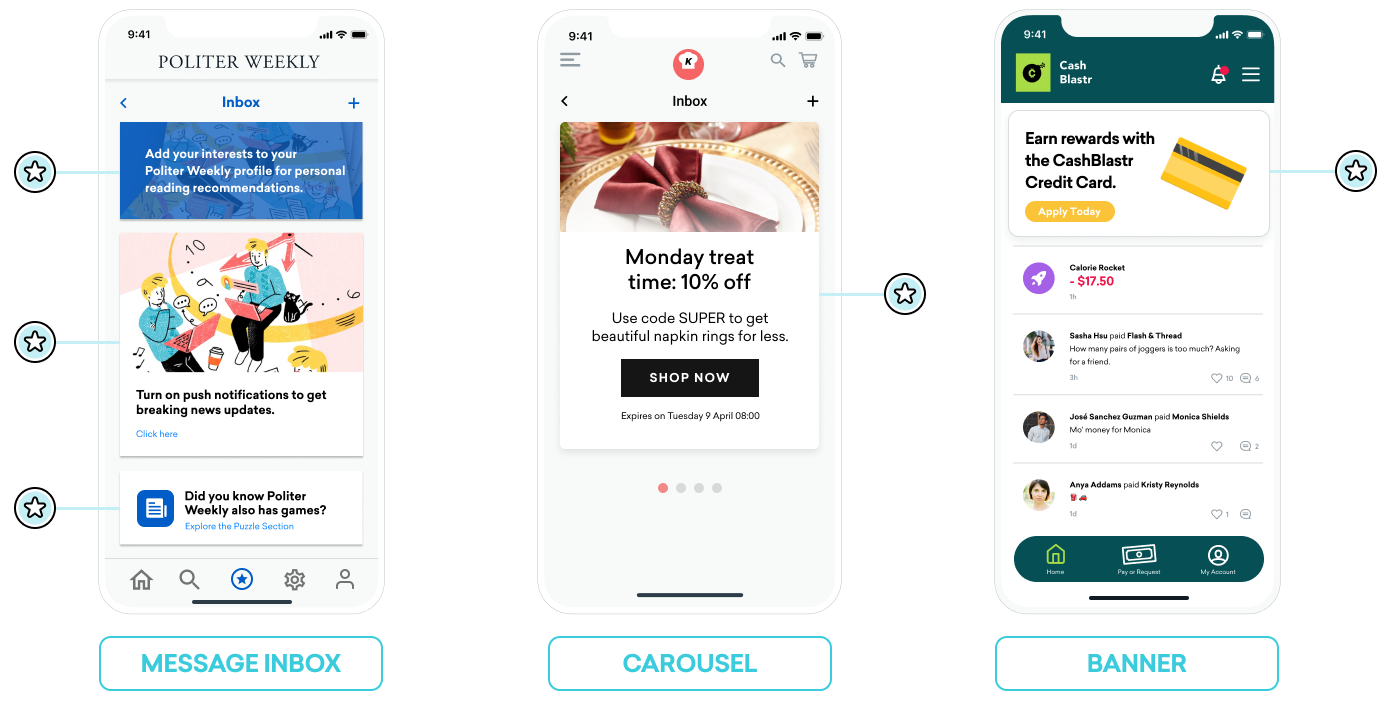
Content Cards는 다양한 방식으로 사용할 수 있습니다. 일반적인 세 가지 구현 방법은 메시지 센터, 동적 이미지 광고, 이미지 캐러셀로 활용하는 것입니다. 이러한 각 배치에서 Content Cards에 키-값 페어(데이터 모델의 extras 속성정보)를 할당하고, 해당 값을 기반으로 런타임 중 카드의 동작, 외관 또는 기능을 동적으로 조정합니다.
메시지 받은편지함
Content Cards를 메시지 센터처럼 시뮬레이션할 수 있습니다. 이 형식에서는 각 메시지가 클릭 시 이벤트를 구동하는 키-값 페어를 포함하는 개별 카드입니다. 이러한 키-값 페어는 사용자가 받은편지함 메시지를 클릭할 때 어디로 이동할지 애플리케이션이 결정하는 데 참조하는 핵심 식별자입니다. 키-값 페어의 값은 임의로 설정할 수 있습니다.
예시
예를 들어, 사용자에게 읽기 추천을 활성화하도록 유도하는 행동 유도 메시지 카드와 신규 구독자 Segment에 제공되는 쿠폰 코드, 이렇게 두 가지 메시지 카드를 만들 수 있습니다.
body, title, buttonText와 같은 키에는 마케터가 설정할 수 있는 간단한 문자열 값이 들어갑니다. terms와 같은 키에는 법무 부서에서 승인한 문구 모음을 제공하는 값이 들어갑니다. style과 class_type과 같은 키에는 앱이나 사이트에서 카드가 렌더링되는 방식을 결정하는 문자열 값을 설정할 수 있습니다.
읽기 추천 카드의 키-값 페어:
| 키 | 값 |
|---|---|
body |
Add your interests to your Politer Weekly profile for personal reading recommendations. |
style |
info |
class_type |
notification_center |
card_priority |
1 |
신규 구독자 쿠폰의 키-값 페어:
| 키 | 값 |
|---|---|
title |
Subscribe for unlimited games |
body |
End of Summer Special - Enjoy 10% off Politer games |
buttonText |
Subscribe Now |
style |
promo |
class_type |
notification_center |
card_priority |
2 |
terms |
new_subscribers_only |
추가 정보 (Android)
Android 및 FireOS SDK에서 메시지 센터 로직은 Braze의 키-값 페어에서 제공되는 class_type 값에 의해 구동됩니다. createContentCardable 메서드를 사용하면 이러한 클래스 유형을 필터링하고 식별할 수 있습니다.
클릭 시 동작을 위한 class_type 사용
Content Cards 데이터를 커스텀 클래스로 인플레이트할 때, 데이터의 ContentCardClass 속성정보를 사용하여 데이터를 저장하는 데 사용할 구체적인 서브클래스를 결정합니다.
private fun createContentCardable(metadata: Map<String, Any>, type: ContentCardClass?): ContentCardable?{
return when(type){
ContentCardClass.AD -> Ad(metadata)
ContentCardClass.MESSAGE_WEB_VIEW -> WebViewMessage(metadata)
ContentCardClass.NOTIFICATION_CENTER -> FullPageMessage(metadata)
ContentCardClass.ITEM_GROUP -> Group(metadata)
ContentCardClass.ITEM_TILE -> Tile(metadata)
ContentCardClass.COUPON -> Coupon(metadata)
else -> null
}
}
그런 다음, 메시지 목록에서 사용자 상호작용을 처리할 때 메시지 유형을 사용하여 사용자에게 표시할 뷰를 결정할 수 있습니다.
override fun onCreate(savedInstanceState: Bundle?) {
super.onCreate(savedInstanceState)
//...
listView.onItemClickListener = AdapterView.OnItemClickListener { parent, view, position, id ->
when (val card = dataProvider[position]){
is WebViewMessage -> {
val intent = Intent(this, WebViewActivity::class.java)
val bundle = Bundle()
bundle.putString(WebViewActivity.INTENT_PAYLOAD, card.contentString)
intent.putExtras(bundle)
startActivity(intent)
}
is FullPageMessage -> {
val intent = Intent(this, FullPageContentCard::class.java)
val bundle = Bundle()
bundle.putString(FullPageContentCard.CONTENT_CARD_IMAGE, card.icon)
bundle.putString(FullPageContentCard.CONTENT_CARD_TITLE, card.messageTitle)
bundle.putString(FullPageContentCard.CONTENT_CARD_DESCRIPTION, card.cardDescription)
intent.putExtras(bundle)
startActivity(intent)
}
}
}
}
클릭 시 동작을 위한 class_type 사용
Content Cards 데이터를 커스텀 클래스로 인플레이트할 때, 데이터의 ContentCardClass 속성정보를 사용하여 데이터를 저장하는 데 사용할 구체적인 서브클래스를 결정합니다.
private ContentCardable createContentCardable(Map<String, ?> metadata, ContentCardClass type){
switch(type){
case ContentCardClass.AD:{
return new Ad(metadata);
}
case ContentCardClass.MESSAGE_WEB_VIEW:{
return new WebViewMessage(metadata);
}
case ContentCardClass.NOTIFICATION_CENTER:{
return new FullPageMessage(metadata);
}
case ContentCardClass.ITEM_GROUP:{
return new Group(metadata);
}
case ContentCardClass.ITEM_TILE:{
return new Tile(metadata);
}
case ContentCardClass.COUPON:{
return new Coupon(metadata);
}
default:{
return null;
}
}
}
그런 다음, 메시지 목록에서 사용자 상호작용을 처리할 때 메시지 유형을 사용하여 사용자에게 표시할 뷰를 결정할 수 있습니다.
@Override
protected void onCreate(Bundle savedInstanceState) {
super.onCreate(savedInstanceState)
//...
listView.setOnItemClickListener(new AdapterView.OnItemClickListener() {
@Override
public void onItemClick(AdapterView<?> parent, View view, int position, long id){
ContentCardable card = dataProvider.get(position);
if (card instanceof WebViewMessage){
Bundle intent = new Intent(this, WebViewActivity.class);
Bundle bundle = new Bundle();
bundle.putString(WebViewActivity.INTENT_PAYLOAD, card.getContentString());
intent.putExtras(bundle);
startActivity(intent);
}
else if (card instanceof FullPageMessage){
Intent intent = new Intent(this, FullPageContentCard.class);
Bundle bundle = Bundle();
bundle.putString(FullPageContentCard.CONTENT_CARD_IMAGE, card.getIcon());
bundle.putString(FullPageContentCard.CONTENT_CARD_TITLE, card.getMessageTitle());
bundle.putString(FullPageContentCard.CONTENT_CARD_DESCRIPTION, card.getCardDescription());
intent.putExtras(bundle)
startActivity(intent)
}
}
});
}
캐러셀
완전히 커스텀된 캐러셀 피드에 Content Cards를 설정하여 사용자가 스와이프하며 추가 추천 카드를 볼 수 있도록 할 수 있습니다. 기본적으로 Content Cards는 생성 날짜순(최신순)으로 정렬되며, 사용자는 자신이 받을 자격이 있는 모든 카드를 볼 수 있습니다.
Content Cards 캐러셀을 구현하려면:
- Content Cards의 변경 사항을 관찰하고 Content Cards 도착을 처리하는 커스텀 로직을 만듭니다.
- 특정 시점에 캐러셀에 표시할 카드 수를 결정하는 커스텀 클라이언트 측 로직을 만듭니다. 예를 들어, 배열에서 처음 다섯 개의 Content Cards 객체를 선택하거나 키-값 페어를 도입하여 조건 로직을 구성할 수 있습니다.
이미지만 표시
Content Cards가 반드시 “카드”처럼 보일 필요는 없습니다. 예를 들어, Content Cards를 홈 페이지나 지정된 페이지 상단에 지속적으로 표시되는 동적 이미지로 나타낼 수 있습니다.
이를 구현하려면 마케터가 이미지 전용 유형의 Content Cards로 Campaign 또는 캔버스 단계를 만듭니다. 그런 다음, 보조 콘텐츠로 Content Cards를 사용하기에 적합한 키-값 페어를 설정합니다.