Zapier integration
Zapier is an automation web tool that allows you to share data between web apps and then use that information to automate actions.
The Braze and Zapier partnership leverages the Braze API and Braze webhooks to connect with third-party applications—such as Google Workplace, Slack, Salesforce, WordPress, etc. to automate various actions.
Prerequisites
| Requirements | Description |
|---|---|
| Zapier account | A Zapier account is required to take advantage of this partnership. |
| Braze REST API key | A Braze REST API key with permissions for the endpoints your zap calls (for example, canvas.trigger.send for /canvas/trigger/send, or users.track for /users/track). This can be created in the Braze dashboard from Settings > APIs and Identifiers. |
| Braze REST endpoint | Your REST endpoint URL. Your endpoint depends on the Braze URL for your instance. |
Integration
In the following Zapier example, we send information from WordPress to Braze using a POST webhook. This information can then be used to create a Braze Canvas.
Step 1: Create a Zapier trigger
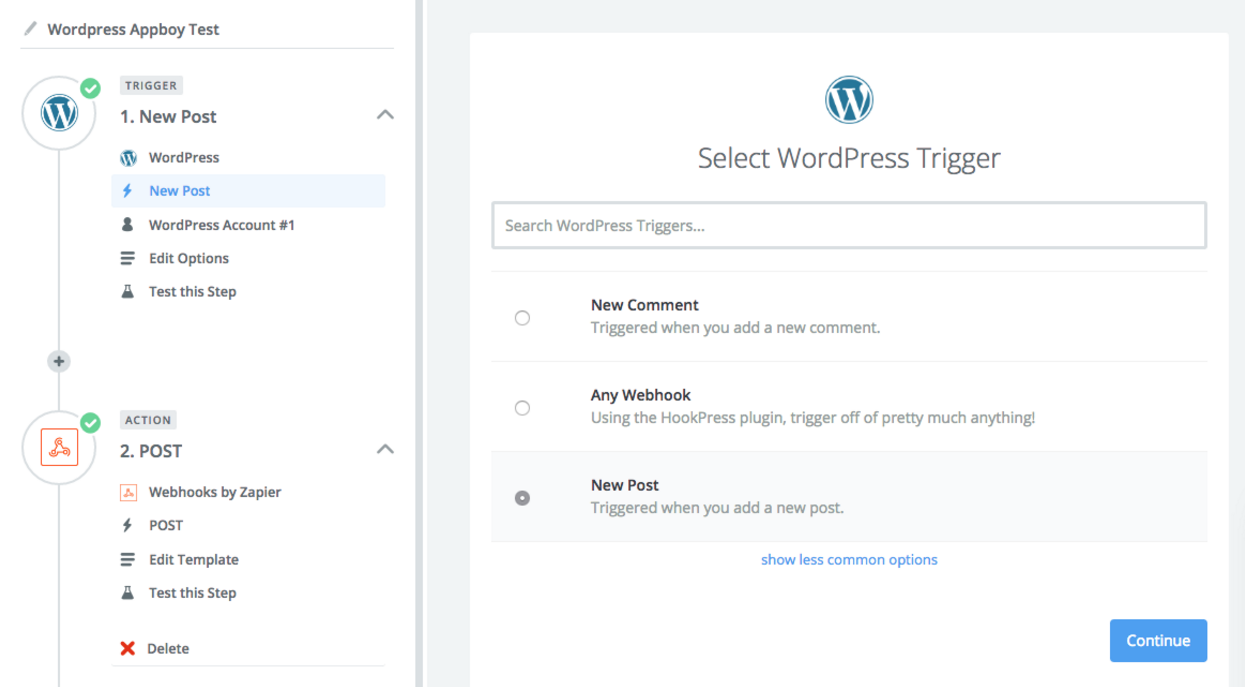
Using Zapier’s terminology, a “zap” is an automated workflow that connects your apps and services. The first part of any zap is to designate a trigger. After your zap is enabled, Zapier automatically performs the respective actions whenever your trigger is detected.
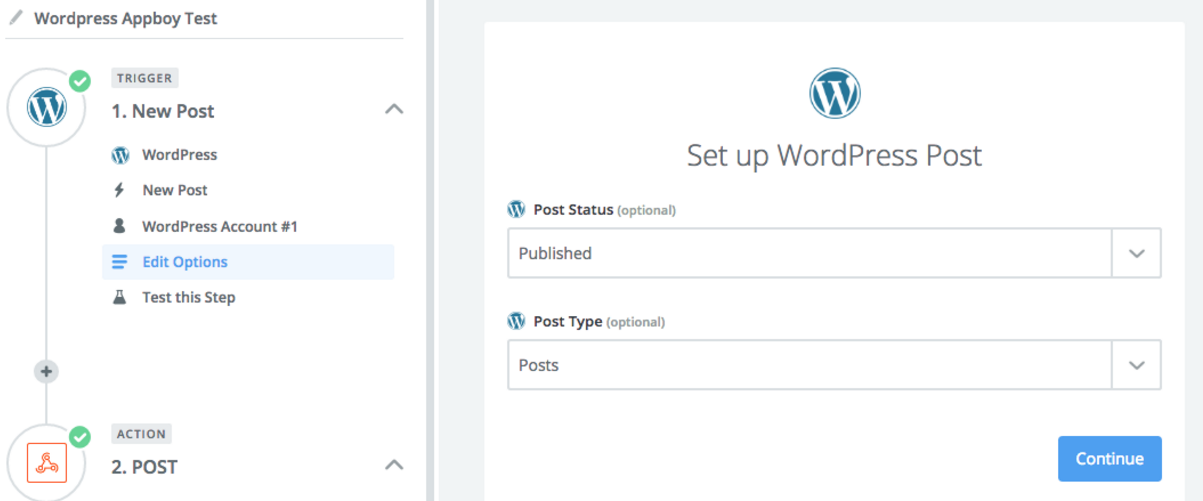
Using our WordPress example, in the Zapier platform, we’ll set up our zap to trigger when a new WordPress post gets added and select Published and Posts as Post Status and Post Type.
Step 2: Add an action webhook
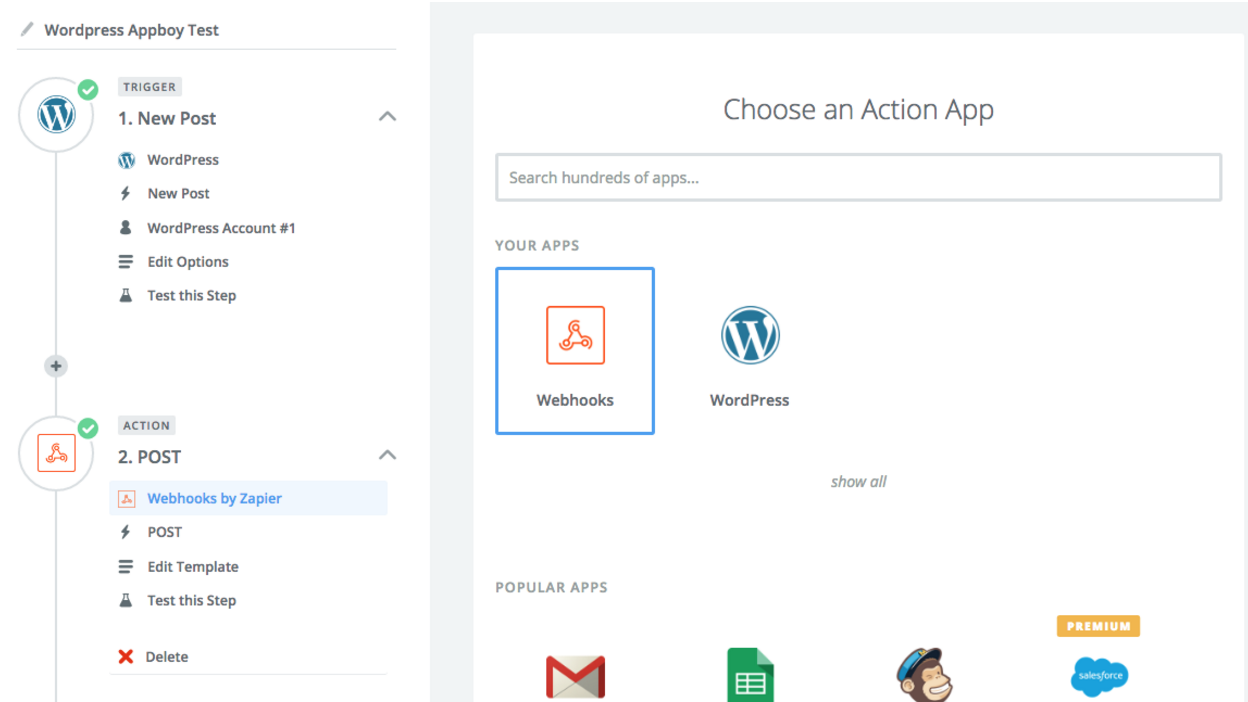
Next, define the zap action. When your zap is enabled, and your trigger is detected, the action automatically occurs.
Continuing our example, we want to send a POST request as a JSON to a Braze endpoint. This can be done by selecting the Webhooks option under Apps.
Step 3: Set up Braze POST
When setting up your webhook, use the following settings and provide your Braze REST endpoint in the webhook URL. When complete, select Publish.
- Method : POST
- Webhook URL:
https://rest.iad-01.braze.com/canvas/trigger/send - Data Pass-Though: False
- Unflatten: No
- Request Header:
- Content-Type: application/json
- Authorization: Bearer YOUR-API-KEY
- Data:
{
"canvas_id": "your_canvas_identifier",
"recipients": [
{
"external_user_id": "external_user_identifier",
"context":{
"string_property": "Your example string",
"example_integer_property": 1
}
}
]
}

Step 4: Create a Braze campaign
Once you’ve successfully set up your zap, you can customize your Braze campaigns or Canvases with WordPress data by using Liquid formatting to display the information in your messages.
Using Zapier with the /users/track endpoint
To send data to the Braze /users/track endpoint (for example, when using a trigger like New or Updated Spreadsheet Row in Google Sheets), use Webhooks by Zapier with a Custom Request—do not use the standard POST action. The standard POST action formats the request in a way that is not compatible with the /users/track endpoint.
- In Zapier, choose your trigger (for example, New or Updated Spreadsheet Row in Google Sheets).
- For the action, select Webhooks by Zapier and choose Custom Request (not POST).
- Set Method to POST, enter your Braze REST endpoint URL (for example,
https://rest.iad-01.braze.com/users/track), and format the request body with double quotes around each element, as you would in a Postman or API call. Map fields from your trigger (for example, spreadsheet columns) into the JSON body where appropriate. - Add the required headers:
- Content-Type:
application/json - Authorization:
Bearer YOUR-REST-API-KEY(use your Braze REST API key with no brackets or quotes)
- Content-Type:
- Test the step and turn on your zap.