Lob
Lob.com is an online service that allows you to send direct mail to your users.
This integration is maintained by Lob.
About the integration
With this integration, you can:
- Send mail-like letters, postcards, and checks through the mail using Braze webhooks and the Lob API.
- Share Lob events with Braze as custom attributes and events using Braze Data Transformation and Lob webhooks.
Prerequisites
| Requirement | Description |
|---|---|
| Lob account | A Lob account is required to take advantage of this partnership. |
| Lob API key | You Lob API key can be found under the settings section under your name in the Lob dashboard. |
Sending mail using Braze webhooks
Step 1: Choose a Lob endpoint
Depending on what you’d like to do you in Lob, you’ll need to use the corresponding endpoint in your webhook’s HTTP request. For detailed information on each endpoint, see Lob’s API reference documentation.
| Base URL | Available endpoints |
|---|---|
https://api.lob.com/ |
/v1/addresses<br>/v1/addresses/{id}/v1/verify/v1/postcards/v1/postcards/{id}/v1/letter/v1/letter/{id}/v1/checks<br>/v1/checks/{id}/v1/bank_accounts/v1/bank_accounts/{id}/v1/bank_accounts/{id}/verify/v1/areas<br>/v1/areas/{id}/v1/routes/{zip_code}/v1/routes/v1/countries<br>/v1/states |
Step 2: Create your Braze webhook template
To create a Lob webhook template to use in future campaigns or Canvases, go to Templates > Webhook Templates in the Braze dashboard.
If you’d like to make a one-off Lob webhook campaign or use an existing template, select Webhook in Braze when creating a new campaign.
In your new Webhook template, fill out the following fields:
- Webhook URL:
<LOB_API_ENDPOINT> - Request Body: Raw Text
Request headers and method
Lob requires an HTTP Header for authorization and an HTTP method. The following will already be included within the template as a key-value pair, but in the Settings tab, you must replace the <LOB_API_KEY> with your Lob API key. This key must include a “:” directly after the key and be encoded in base 64.
- HTTP Method: POST
- Request Headers:
- Authorization: Basic
<LOB_API_KEY>: - Content-Type: application/json
- Authorization: Basic

Request body
The following is an example request body for the Lob postcards endpoint. While this request body is provided in the base Lob template in Braze, if you wish to use other endpoints, you must adjust your Liquid fields accordingly.
1
2
3
4
5
6
7
8
9
10
"description": "Demo Postcard",
"to": {
    "name": "{{${first_name}}} {{${last_name}}}",
    "address_line1": "{{custom_attribute.${address_line1}}}",
    "address_city": "{{custom_attribute.${address_city}}}"
    "address_zip": "{{custom_attribute.${address_zip}}}",
    "address_country": "{{custom_attribute.${address_country}}}"
},
"front": "https://lob.com/postcardfront.pdf",
"back": "https://lob.com/postcardback.pdf"
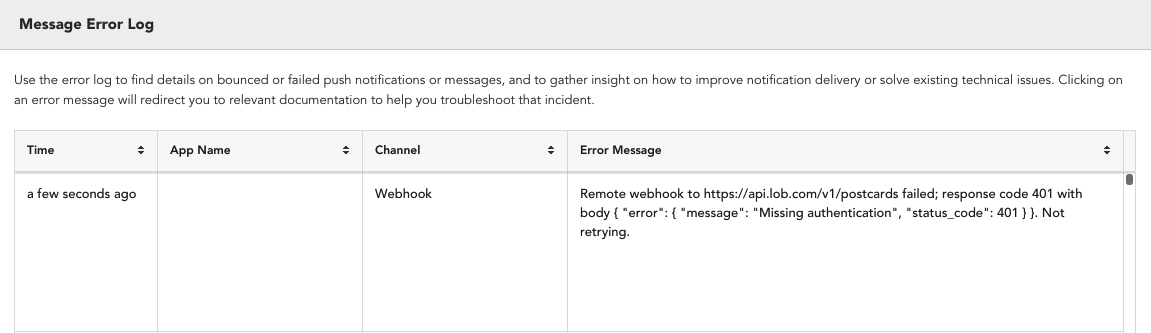
Step 3: Preview your request
At this point, your campaign should be ready to test and send. Check the Lob dashboard and the Braze developer console error message logs if you run into errors. For example, the following error was caused by an incorrectly formatted authentication header.
Remember to save your template before leaving the page!
Updated webhook templates can be found in the Saved Webhook Templates list when creating a new webhook campaign.
Sharing events using Lob webhooks
Braze Data Transformation lets you build and manage webhooks for automating data flow from external platforms into Braze. Each transformation is given a unique endpoint, which other platforms can use for their webhook’s destination.
Lob’s Data Transformation template sends events using your /users/track endpoint, which logs data points. We recommend setting a rate limit in your Lob webhook settings to avoid over-logging data.
Step 1: Create a transformation in Braze
- In the Braze Dashboard, go to Data Settings > Data Transformations, then select Create Transformation.
- Enter a short, descriptive name for your transformation.
- Under Editing experience, select Use a template, then search for Lob and check the box.
- When you’re finished, select Create Transformation. You’ll be redirected to the transformation editor, which you’ll use in the next step.
Step 2: Fill out the Lob template
With this template, you can transform one of your Lob events into a custom event or attribute that can be used in Braze. Follow the in-line comments to finish building out the template.
For detailed information about Lob’s webhook payload structure, see Lob: Using webhooks.
1
2
3
4
5
6
7
8
9
10
11
12
13
14
15
16
17
18
19
20
21
22
23
24
25
26
27
28
29
30
31
32
33
34
35
36
// First, this code defines a variable, "brazecall", to build up a /users/track request
// Everything from the incoming webhook is accessible via the special variable "payload". As such, you can template in desired values in your /users/track request with JavaScript dot notation, such as payload.x.y.z

// In this example, this function removes the periods and underscores of the event_type.id sent in the Lob payload so that an event id that is formatted like: `letter.processed_for_delivery` will log an event to Braze with the name `letter processed for delivery`.

function formatString(input) {
    return input.replace(/[._]/g, ' ');
}

let braze_event = formatString(payload.event_type.id);

// In this example, a metadata value passed in the Lob Webhook called 'external_ID' is being used to match the Event to the corresponding Braze user.

let brazecall = {
  "attributes": [
    {
      "external_id": payload.body.metadata.external_id,
      "_update_existing_only": true,
      "Most Recent Mailer": payload.body.description
    }
  ],
  "events": [
    {
      "external_id": payload.body.metadata.external_id,
      "_update_existing_only": true,
      "name": braze_event,
      "time": new Date().toISOString(),
// Customize the properties to the Lob event you are syncing. Our example below pulls in the Tracking Events array of objects associated with certain Lob events.
      "properties": {
        "tracking_events": payload.body.tracking_events
      }
    }
  ]
};
// After the /users/track request is assigned to brazecall, you will want to explicitly return brazecall to create an output
return brazecall;
Step 3: Create a webhook in Lob
- When you’re finished building your template, select Activate, then copy the Webhook URL to your clipboard.
- In Lob, create a new webhook, then use your webhook URL from Braze to receive the webhook.
 Edit this page on GitHub