Automated user provisioning
Use SCIM provisioning to automatically create and manage Braze users through API. This article walks you through what information to provide, how to generate your SCIM token, and where to find your SCIM API endpoint.
SCIM provisioning is currently in early access. Contact your Braze account manager if you’re interested in participating in the early access.
Accessing SCIM provisioning settings
- In the Braze dashboard, go to Settings > Admin Settings > SCIM Provisioning, and then select Configure SCIM integration.
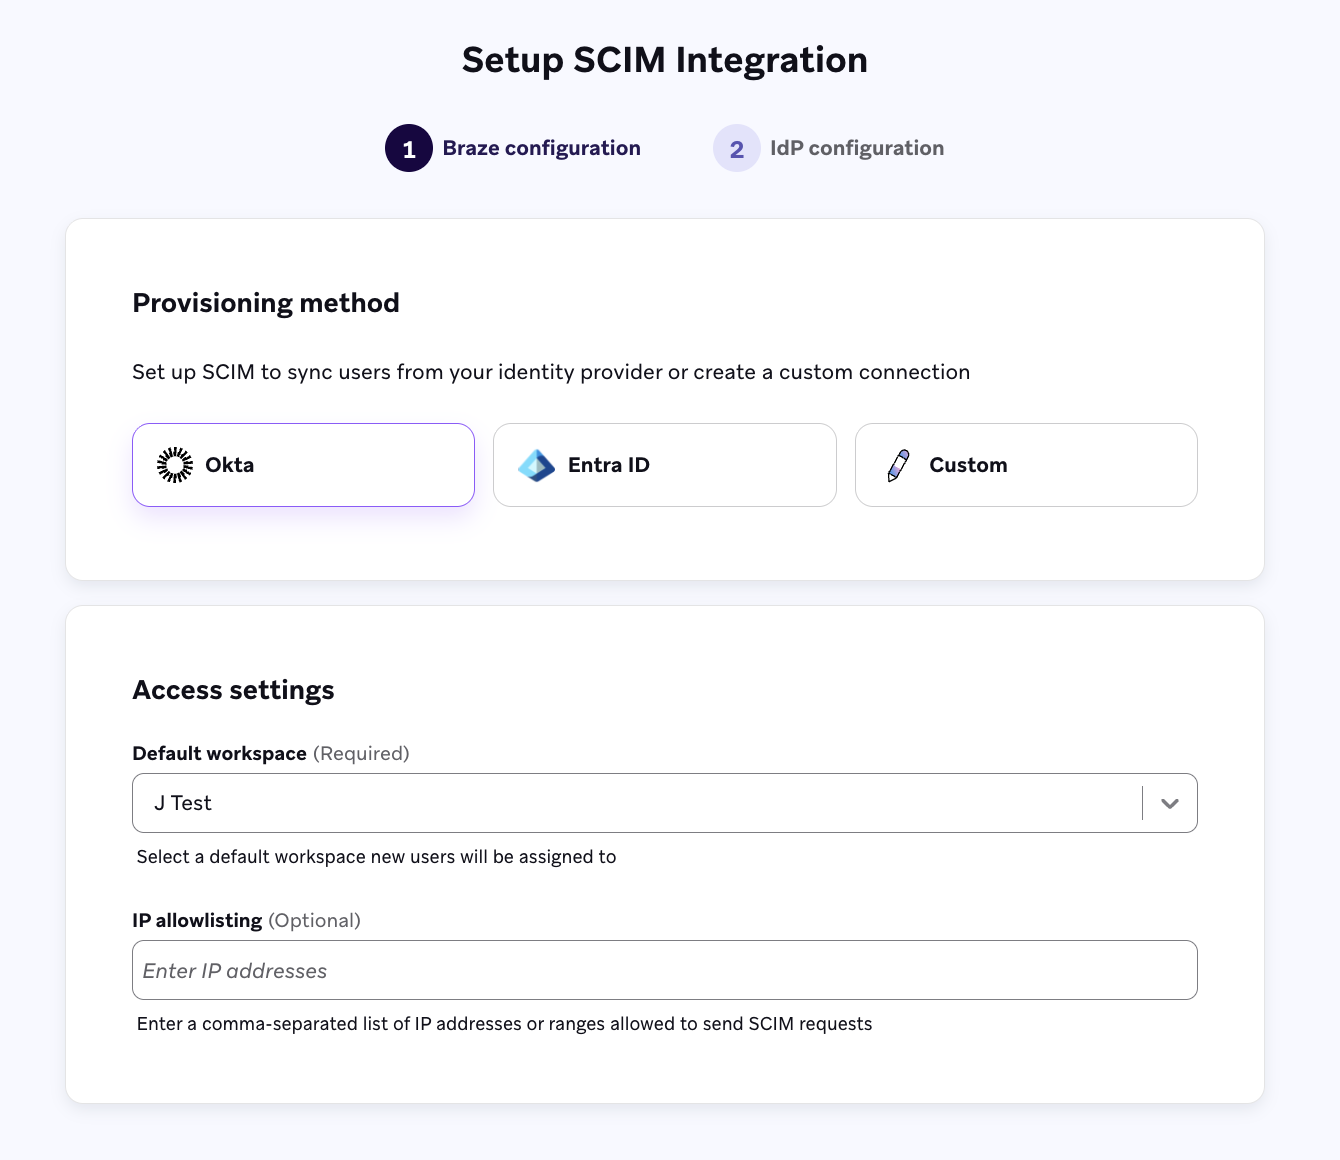
- In the Braze configuration step, select a provisioning method and provide access settings.
- In the IdP configuration step, follow the steps within the platform for your selected provisioning method.
The Okta integration is currently in early access. Contact your Braze account manager if you’re interested in participating in the early access.
Use the Okta - Braze app option if you set up the Braze app for SAML SSO in Okta. If you set up a custom app for SSO, follow the instructions in the Okta - Custom app integration tab.
Step 1: Set up SCIM provisioning
Step 1.1: Enable SCIM
- In Okta, go to Applications > Applications, then select Create App Integration. Select SAML 2.0 as the sign-in method.
- Fill in the following details (which are located in the Braze IdP configuration step) to create a custom app:
- App logo
- Single sign-on URL
- Audience URL (SP entity ID)
- Select Finish.
- Select the General tab.
- In the App Settings section, select Edit.
- In the Provisioning field, select SCIM.
Step 1.2: Disable application visibility
- In the Application visibility field, select the Do not display application icon to user checkbox. This prevents users from accessing SSO through the app, which is intended solely for SCIM.
- Select Save.
Step 1.3: Set up the SCIM integration
- Select the Provisioning tab.
- In Settings > Integration > SCIM Connection select Edit and fill in the field values that populate within the table on the Setup SCIM provisioning page.
Step 1.4: Test the API credentials
Select Test API Credentials. A verification message appears if the integration is successful and you can save.
Step 1.5: Enable provisioning to the app
- In Provisioning > Settings > To App > Provisioning to App, select Edit.
- Enable the following:
- Create Users
- Update Users Attributes
- Deactivate Users
- Review and configure the Attribute Mapping section with the mappings that populate within the table on the Setup SCIM provisioning page.
Step 2: Assign users to the app
- Select the Assignment tab.
- Select Assign and select an option.
- Assign the app to the people who should have access to Braze.
- Select Done when you’ve completed the assignment.
The Okta integration is currently in early access. Contact your Braze account manager if you’re interested in participating in the early access.
Use the Okta - Custom app integration option if you set up a custom app for SSO. If you set up the Braze app for SAML SSO in Okta, follow the instructions in the Okta - Braze app tab.
Step 1: Set up SCIM provisioning
Step 1.1: Enable SCIM
- In Okta, go to your Braze app.
- Select the General tab.
- In the App Settings section, select Edit.
- In the Provisioning field, select SCIM.
- Select Save.
Step 1.2: Set up SCIM integration
- Select the Provisioning tab.
- In Settings > Integration > SCIM Connection, select Edit, and fill in the field values that populate within the table on the Setup SCIM provisioning page.
- Test the API credentials by selecting Test API Credentials.
- Select Save.
Step 1.3: Enable provisioning to the app
- In Provisioning > Settings > To App > Provisioning to App, select Edit.
- Enable the following:
- Create Users
- Update Users Attributes
- Deactivate Users
- Review and configure the Attribute Mapping section with the mappings that populate within the table on the Setup SCIM provisioning page.
Step 2: Assign users to the app
- Select the Assignment tab.
- Select Assign and select an option.
- Assign the app to the people who should have access to Braze.
- Select Done.
The Entra ID integration is currently in early access. Contact your Braze account manager if you’re interested in participating in the early access.
Step 1: Set up SCIM provisioning app
Step 1.1: Log into Microsoft Entra admin center
Log in to your Microsoft Entra admin center.
Step 1.2: Create and set up your SCIM app
- In the navigation menu, go to Entra ID > Enterprise apps.
- Select New application.
- Select Create your own application.
- In the panel, input a name for your app.
- In the What are you looking to do with your application? section, select Integrate application you don’t find in the gallery (Non-gallery).
- Select Create.
Step 1.3: Set up SCIM integration
- Go to the Manage > Provisioning section of your SCIM application.
- Select Connect your application or New configuration and fill in the field values that populate within the table on the Setup SCIM provisioning page.
Step 1.4: Enable provisioning to the app
- Go to the Manage > Attribute mapping (Preview) section of your SCIM application.
- Select Provision Microsoft Entra ID Users.
- Review and configure the Attribute Mapping section to match the attributes that populate within the table on the Setup SCIM provisioning page.
- Close the Attribute Mapping page.
Step 2: Assign users to the app
- Go to Manage > Users and Groups.
- Select Add user/group.
- Select None Selected to assign users to the app.
- Select the Select button to confirm assignment.
Step 1: Configure your SCIM settings
- Default Workspace: Select the workspace where new users should be added by default. If you don’t specify a workspace in your SCIM API request, Braze assigns users to this workspace.
- Service Origin: Enter the origin domain of your SCIM requests. Braze uses this in the
X-Request-Originheader to verify where requests are coming from. - IP Allowlisting (optional): You can restrict SCIM requests to specific IP addresses. Enter a comma-separated list or range of IP addresses to allow. The
X-Request-Originheader in each request is used to check the request IP address against the allowlist.

Step 2: Generate a SCIM token
After completing the required fields, press Generate SCIM token to generate a SCIM token and see your SCIM API endpoint. Make sure to copy the SCIM token before you navigate away. This token appears only once.

Braze expects all SCIM requests to contain the SCIM API bearer token attached via an HTTP Authorization header.
 Edit this page on GitHub