Movable Ink
Movable Ink is a cloud-based software platform that offers digital marketers a way to create compelling and unique visual experiences that move customers. The Movable Ink platform provides valuable customization options that can easily be inserted into your campaigns.
This integration is maintained by Movable Ink.
About the integration
Expand our creative capabilities by leveraging Movable Ink’s Intelligent Creative features like polling, countdown timer, and scratch-off. The Movable Ink and Braze integration powers a more well-rounded approach to dynamic data-driven messages, providing users with real-time elements about the things that matter.
Prerequisites
| Requirement | Description |
|---|---|
| Movable Ink account | A Movable Ink account is required to take advantage of this partnership. |
| Data source | You’ll need to connect a data source to Movable Ink. This can be done through CSV, website import, or API. Make sure that you pass data with a unifying identifier between Braze and Movable Ink (for example, external_id). |
Use cases
- Personalized monthly or end-of-year recaps.
- Dynamically personalize images for email, push, or rich notifications based on last known behavior.
For Example:- Using a rich push message to dynamically create a schedule of events by pulling data from API.
- Using the countdown timer to notify users when a big sale is approaching (for example, Black Friday, Valentine’s Day, or holiday deals)
- Use the Scratch Off feature as a fun and interactive way to disburse promotion codes.
Supported Movable Ink capabilities
Intelligent Creative has many offerings that Braze users can take advantage of. The following list shows what capabilities are supported.
| Movable Ink Capability | Feature | Rich Push Notification | In-App Messaging / Content Cards / Email | Details |
|---|---|---|---|---|
| Creative Optimizer | Display A/B Contents | ✗ | ✔ | |
| Optimize | ✗ | ✔* | * Must Use Branch’s Deeplinking solution | |
| Targeting Rules | Date | ✔* | ✔ | * Supported but not recommended because push notifications are cached upon receipt and do not refresh |
| Day of Week | ✔* | ✔ | * Supported but not recommended because push notifications are cached upon receipt and do not refresh | |
| Time of Day | ✔* | ✔ | * Supported but not recommended because push notifications are cached upon receipt and do not refresh | |
| Stories/Behavior Activity | ✔* | ✔* | * The unique user identifier used for Braze must be linked to your ESP’s identifier | |
| Deep Linking within the app | ✔* | ✔* | * To provide a streamlined experience for your customers, either use established deep linking solution via Branch, or a validated solution with Movable Ink’s Client Experience team. | |
| Apps | Countdown Timer | ✔* | ✔ | * Supported but not recommended because push notifications are cached upon receipt and do not refresh |
| Polling | ✗ | ✔* | * After voting, will leave the app to be a mobile landing page | |
| Scratch Off | ✔* | ✔* | * On click, will leave the app for the Scratch Off experience | |
| Video | ✔* | ✔* | * Animated GIFs only, For Android, Braze requires GIF support in implementation |
Integration
Step 1: Create a data source for Movable Ink
Customers will need to create a data source that can either be a CSV, website import, or API integration.
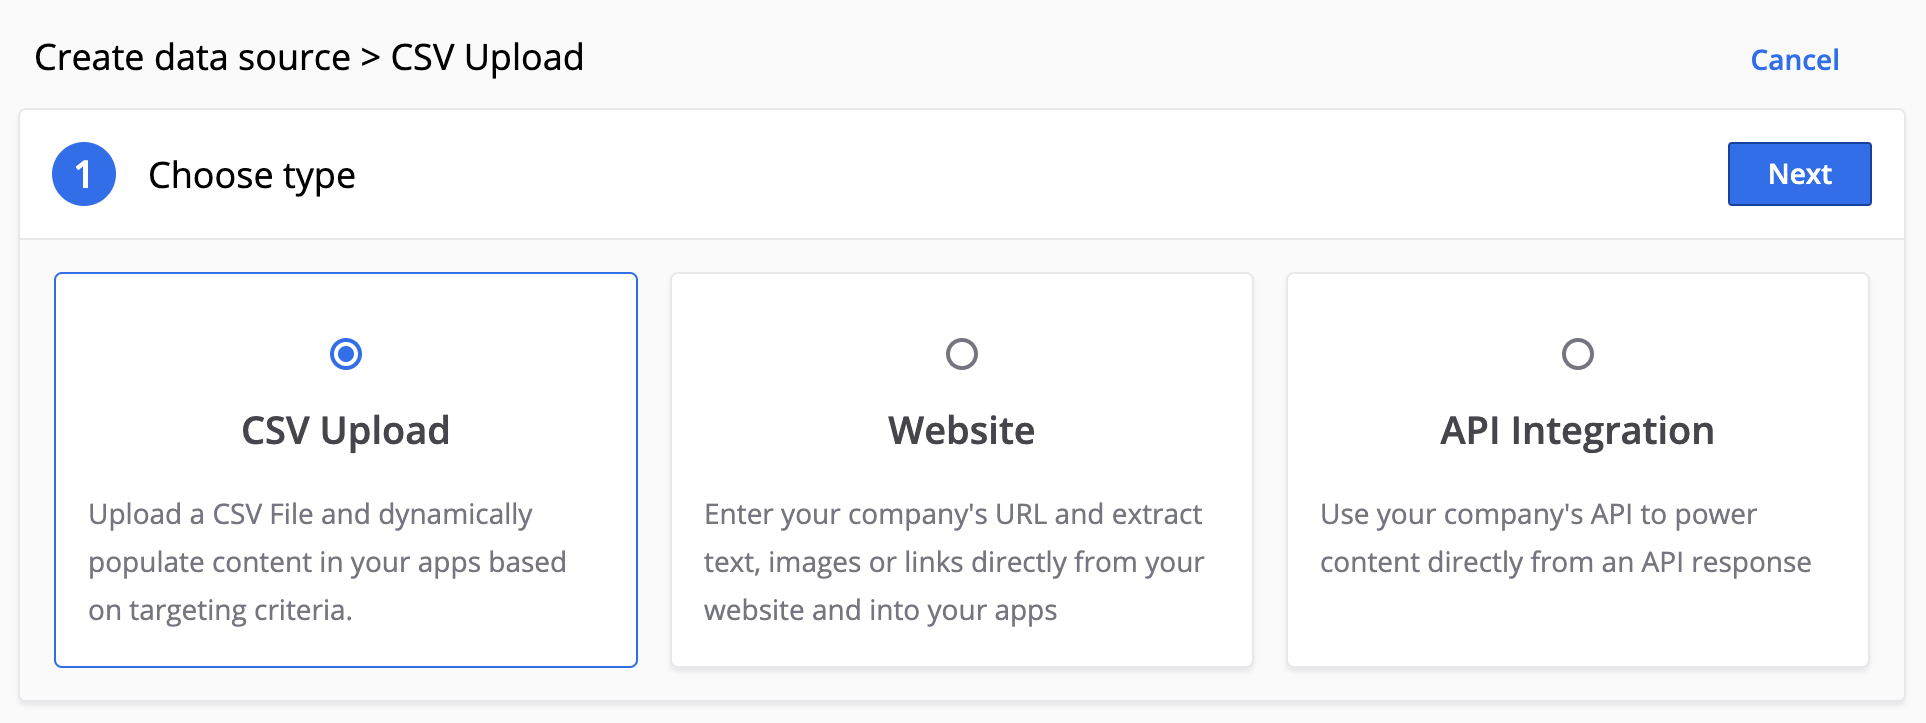
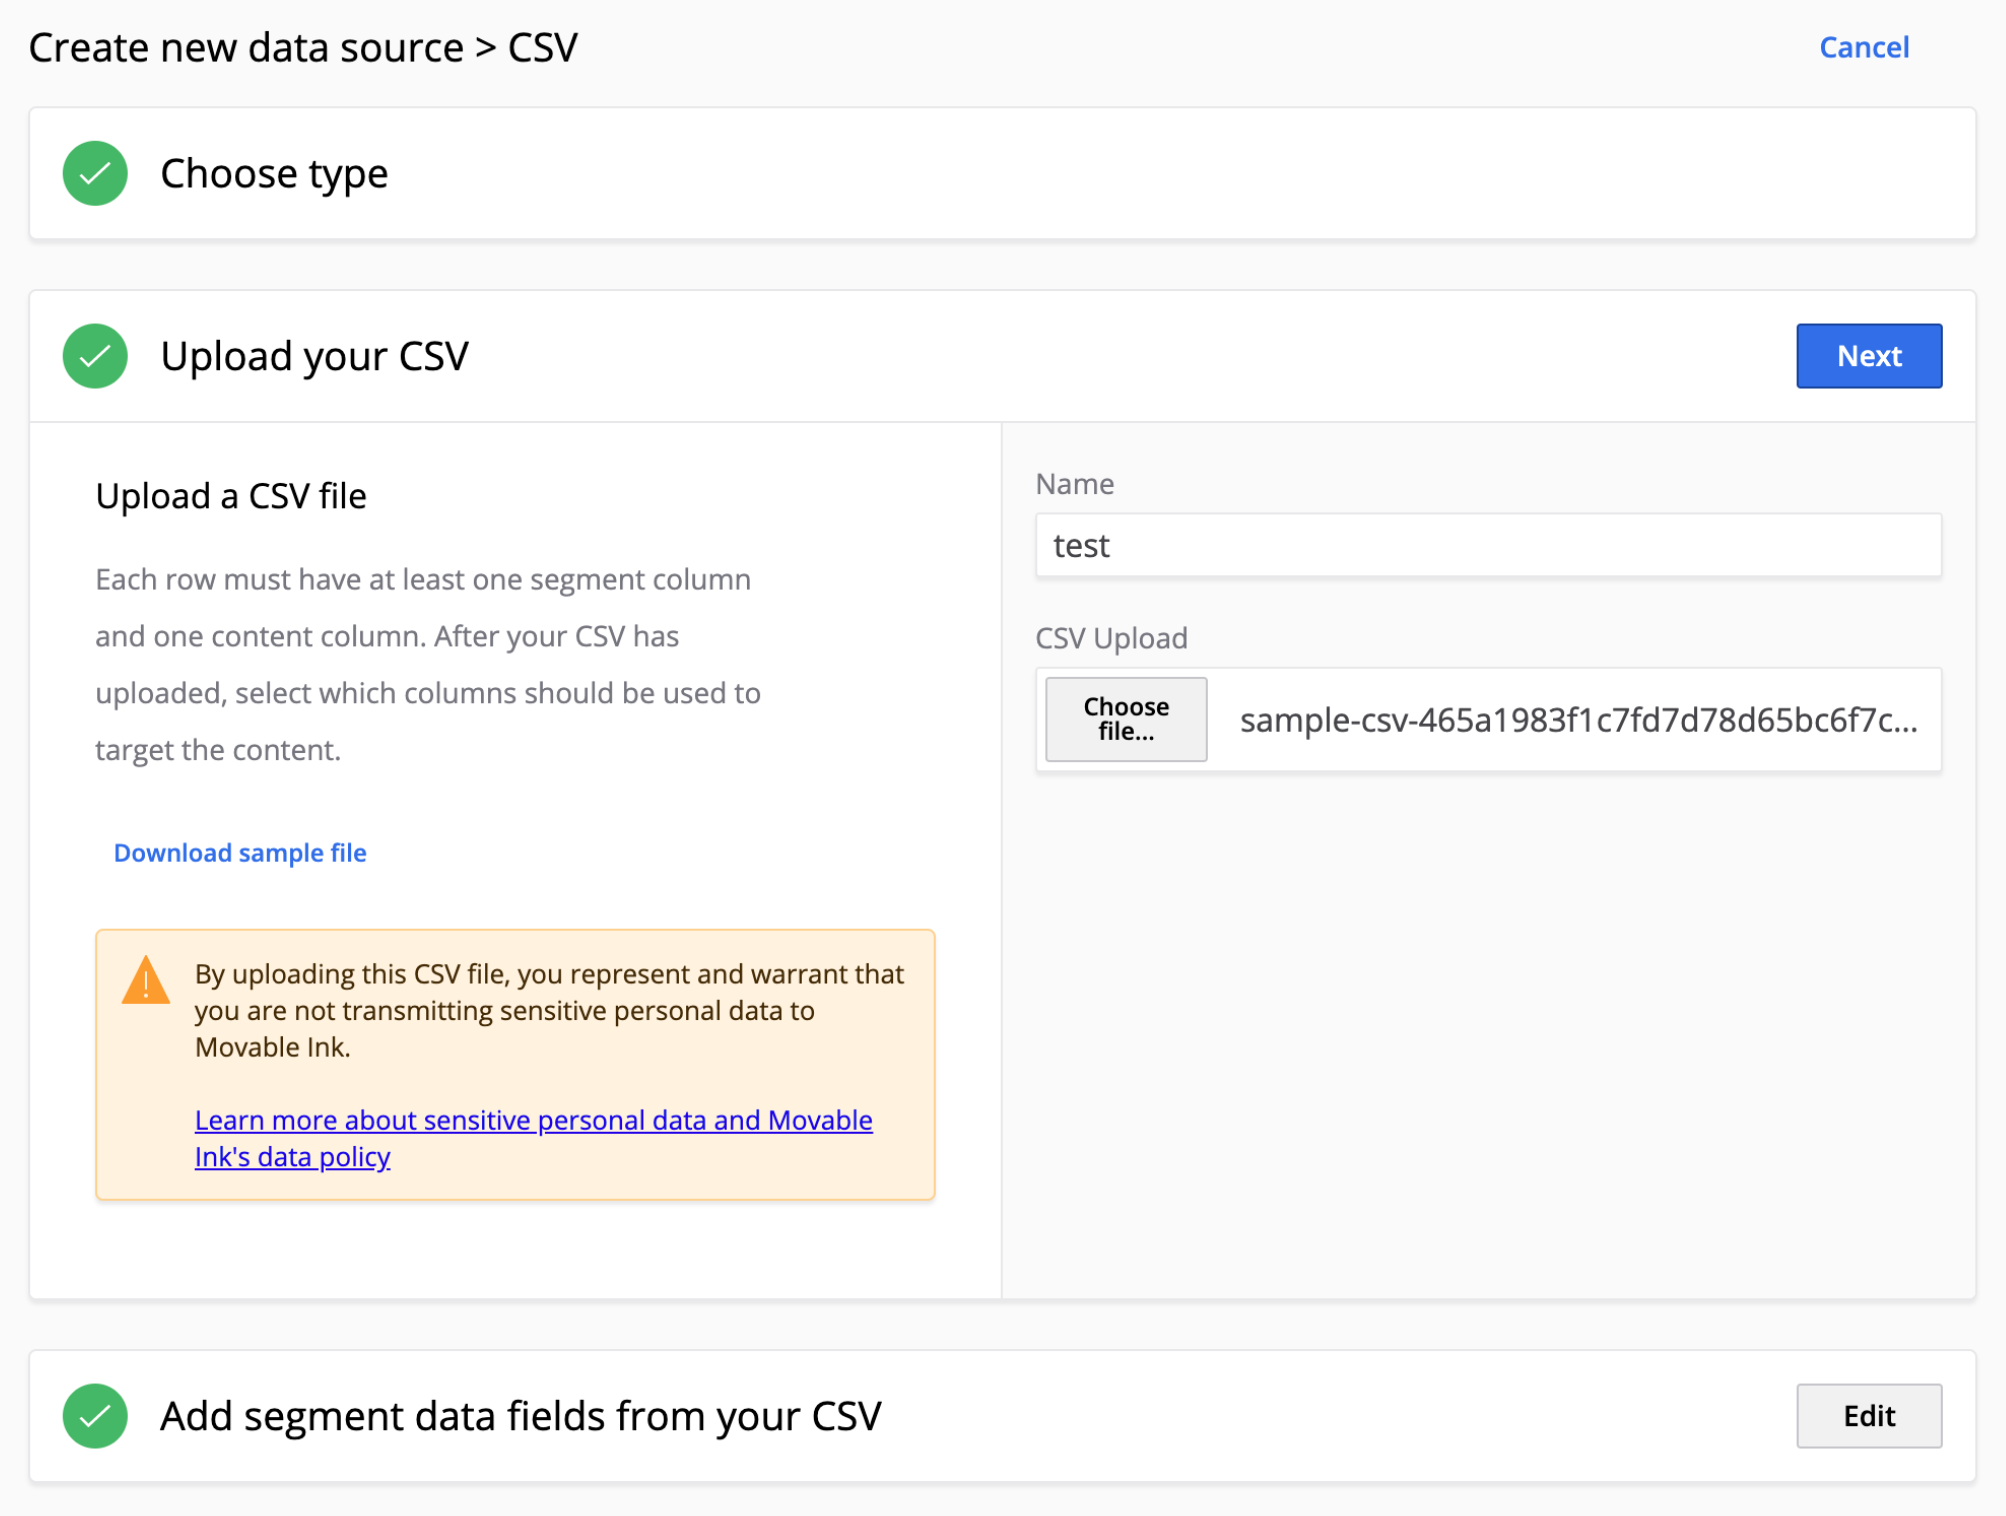
- CSV Data Source: Each row must have at least one segment column and one content column. After your CSV has been uploaded, select which columns should be used to target the content. Example CSV File
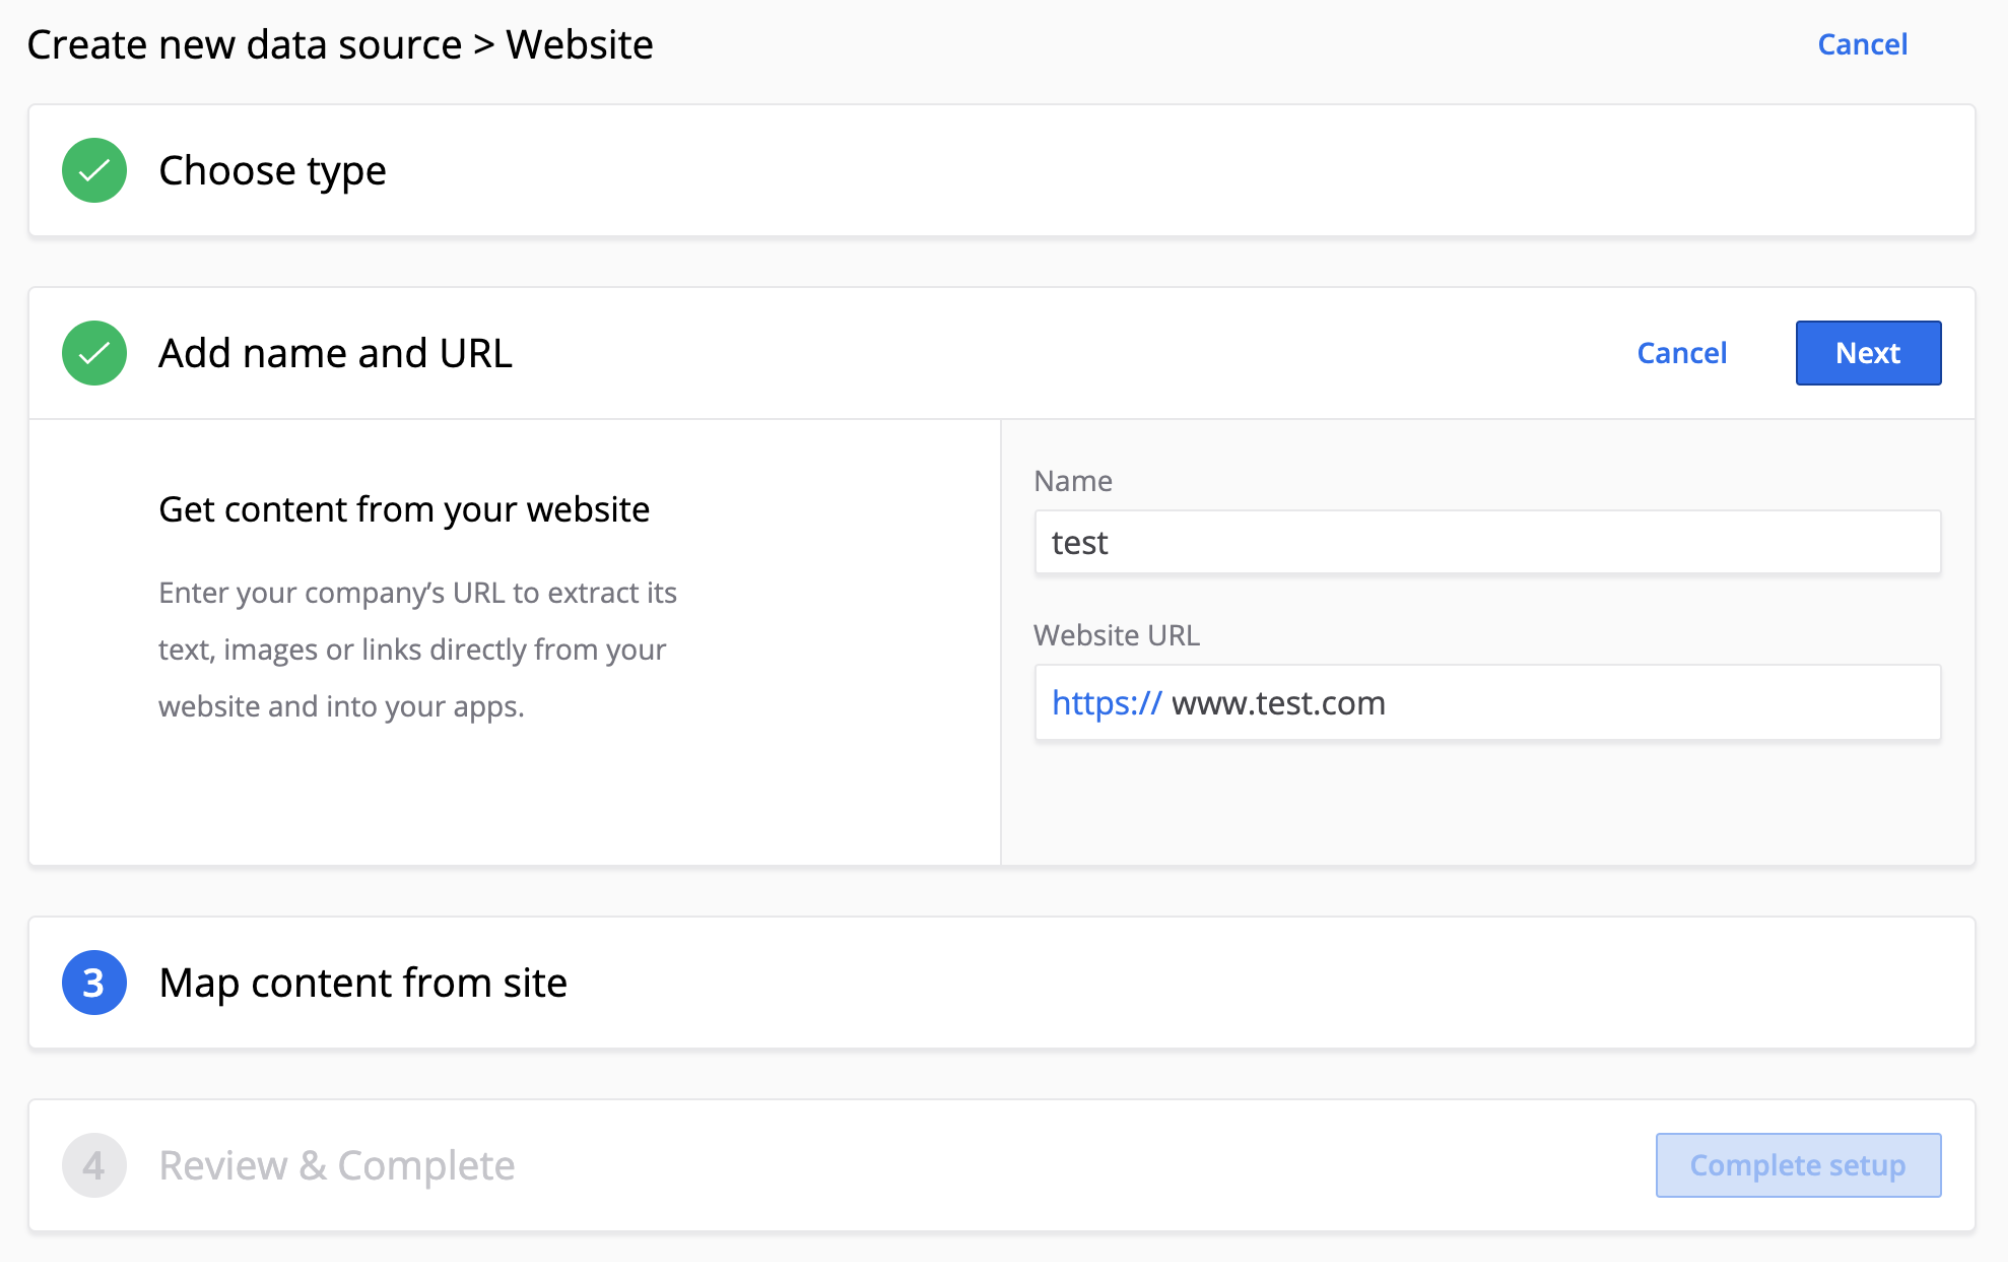
- Website Data Source: Each row must have at least one segment column and one content column. After your CSV has been uploaded, select which columns should be used to target the content.
- Within this process, you’ll need to map:
- Which fields will be used as Segments
- Which fields you want as data fields that can be dynamically personalized in the creative (ex: user attributes or custom attributes like first name, last name, city, etc.)
- Within this process, you’ll need to map:
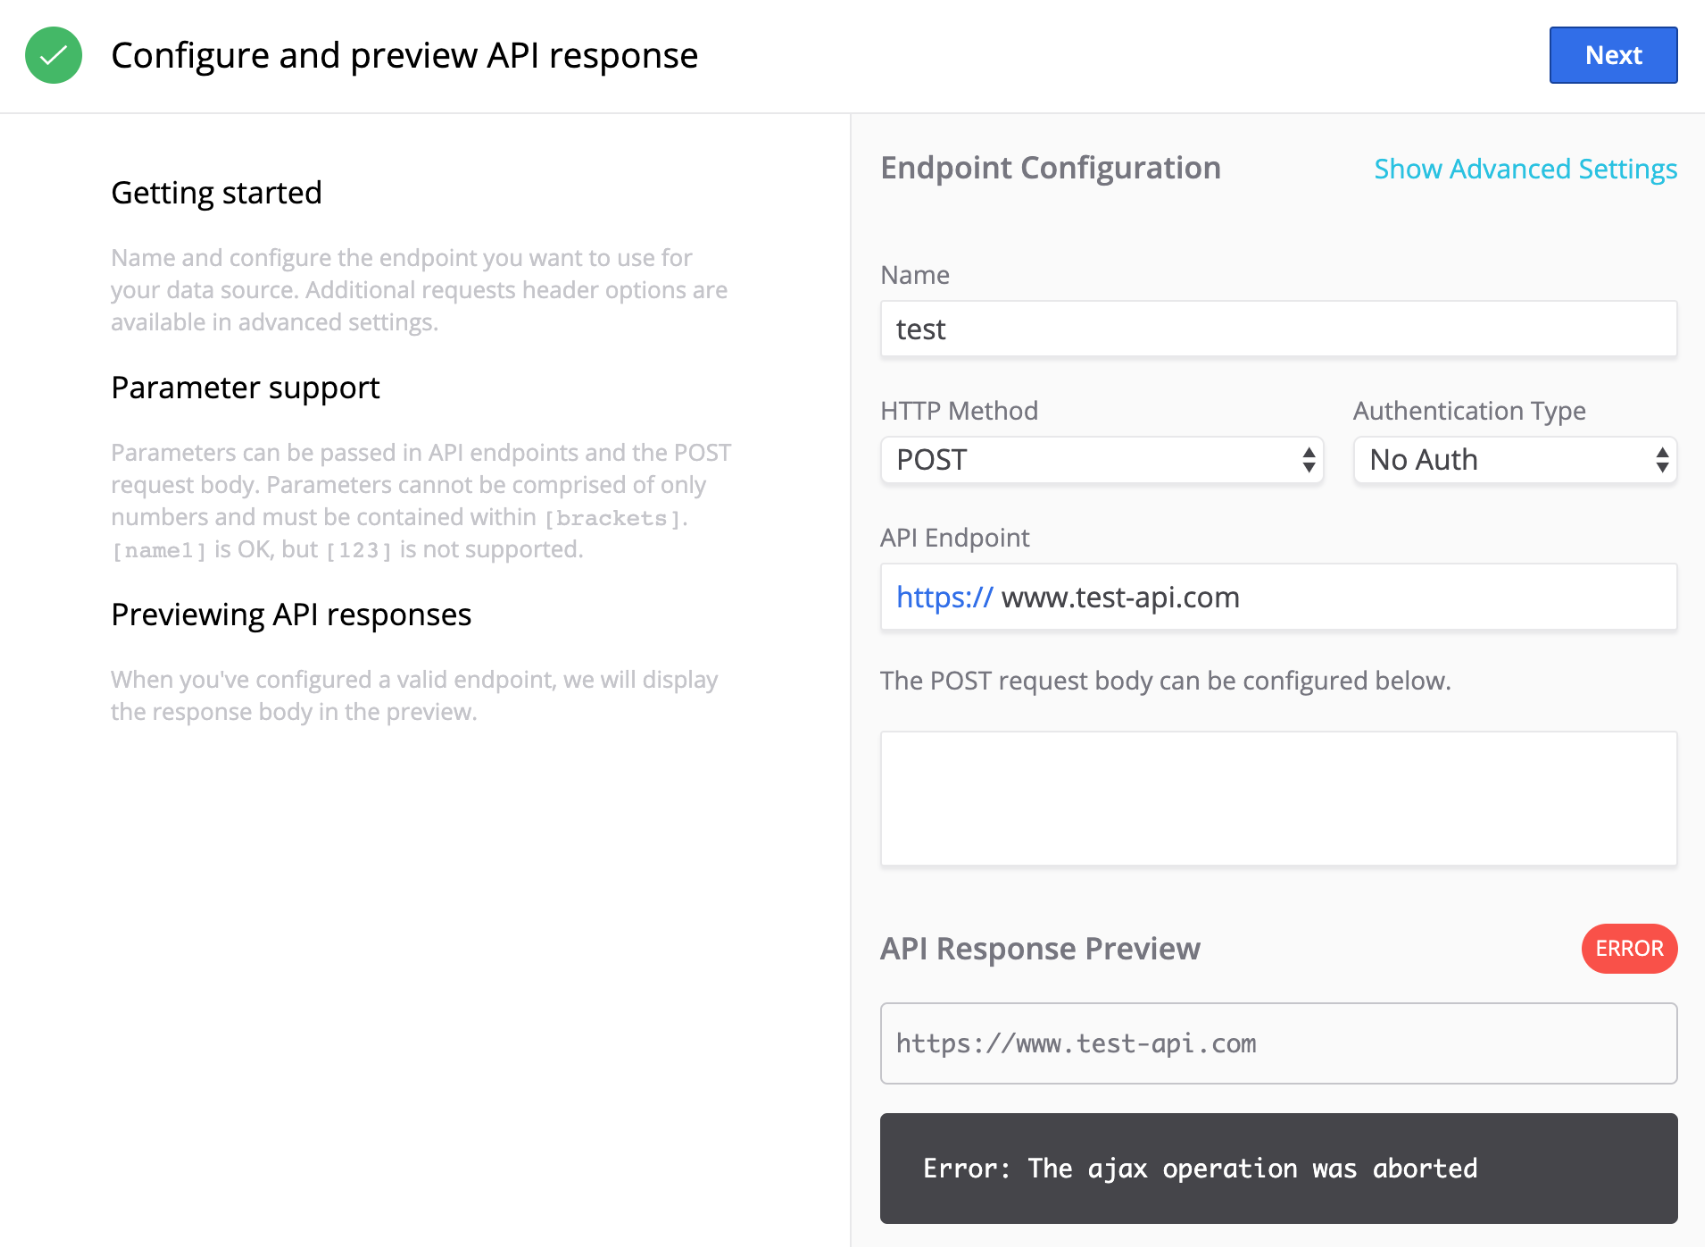
- API Integrations: Use your company’s API to power content directly from an API response.
Step 2: Create a campaign on the Movable Ink platform
From the Movable Ink home screen, create a campaign. You can select from email from HTML, email from image, or a block that can be used in any channel, including push, in-app message, and Content Cards (suggested). We also suggest taking a look at the various content options available through blocks.
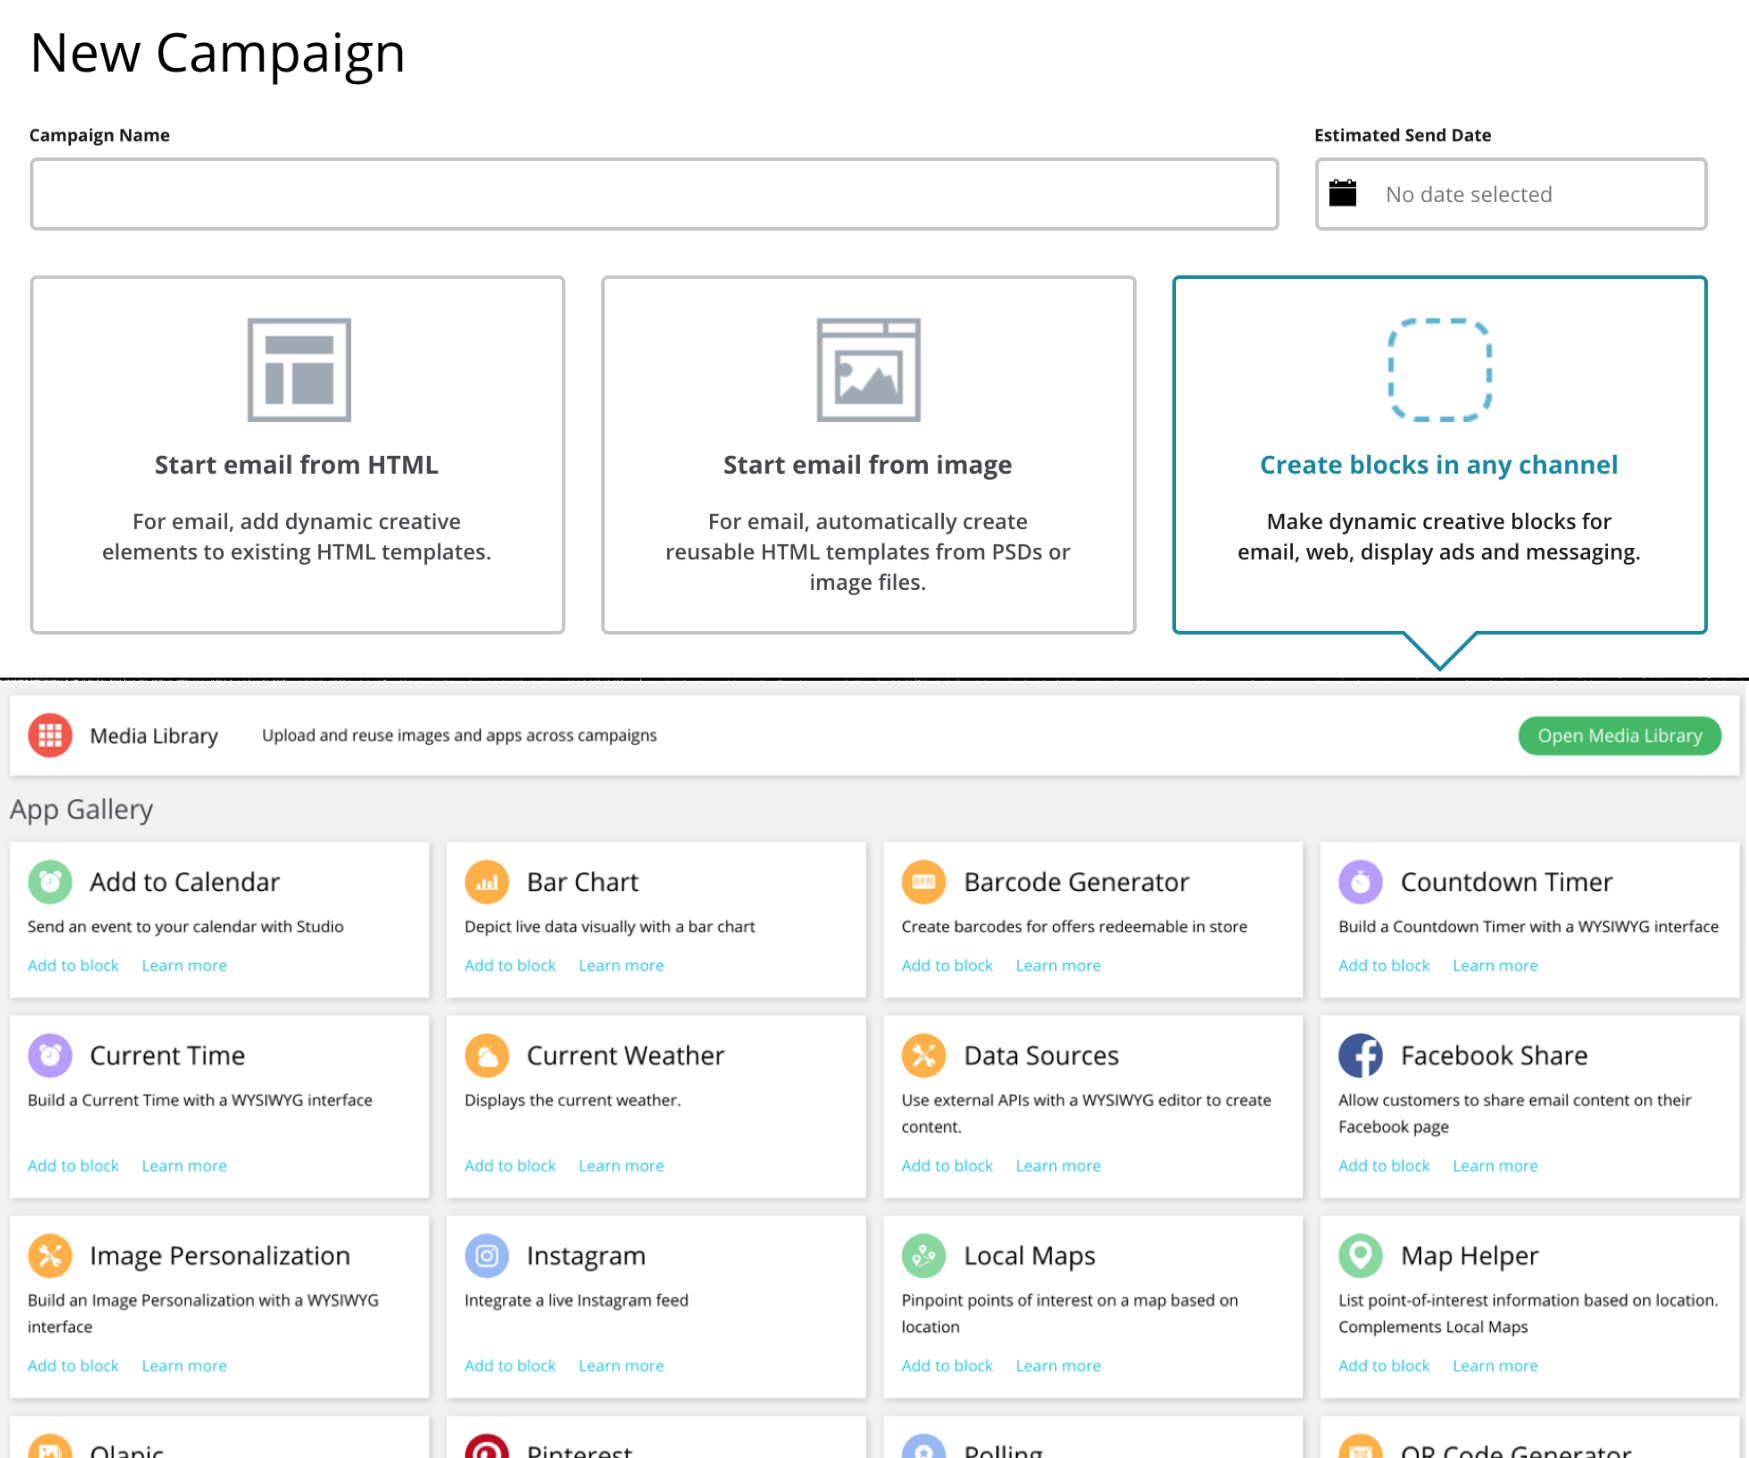
Movable Ink has an easy editor for you to drag and drop elements like text, image, etc. If you have populated your data source, you can dynamically generate an image using the data properties. In addition, you can also create fallbacks within this flow for users if the campaign is sent and a user doesn’t fit within the personalization criteria.

Before finishing your campaign, make sure to preview the dynamic images and test out the query parameters to see what the images will look upon view. When complete, a dynamic URL will generate that can then be inserted into Braze!
For more information on how to use the Movable Ink Platform, visit the Movable Ink support center
Step 3: Obtain Movable Ink content URL
To include Movable Ink content into Braze messages, you must locate the source URL Movable Ink has provided you.
To obtain the source URL, you must have set up the content in the Movable Ink dashboard, and then from there, finish and export your content. On the Finish page, copy the source URL(img src) from the creative tag.
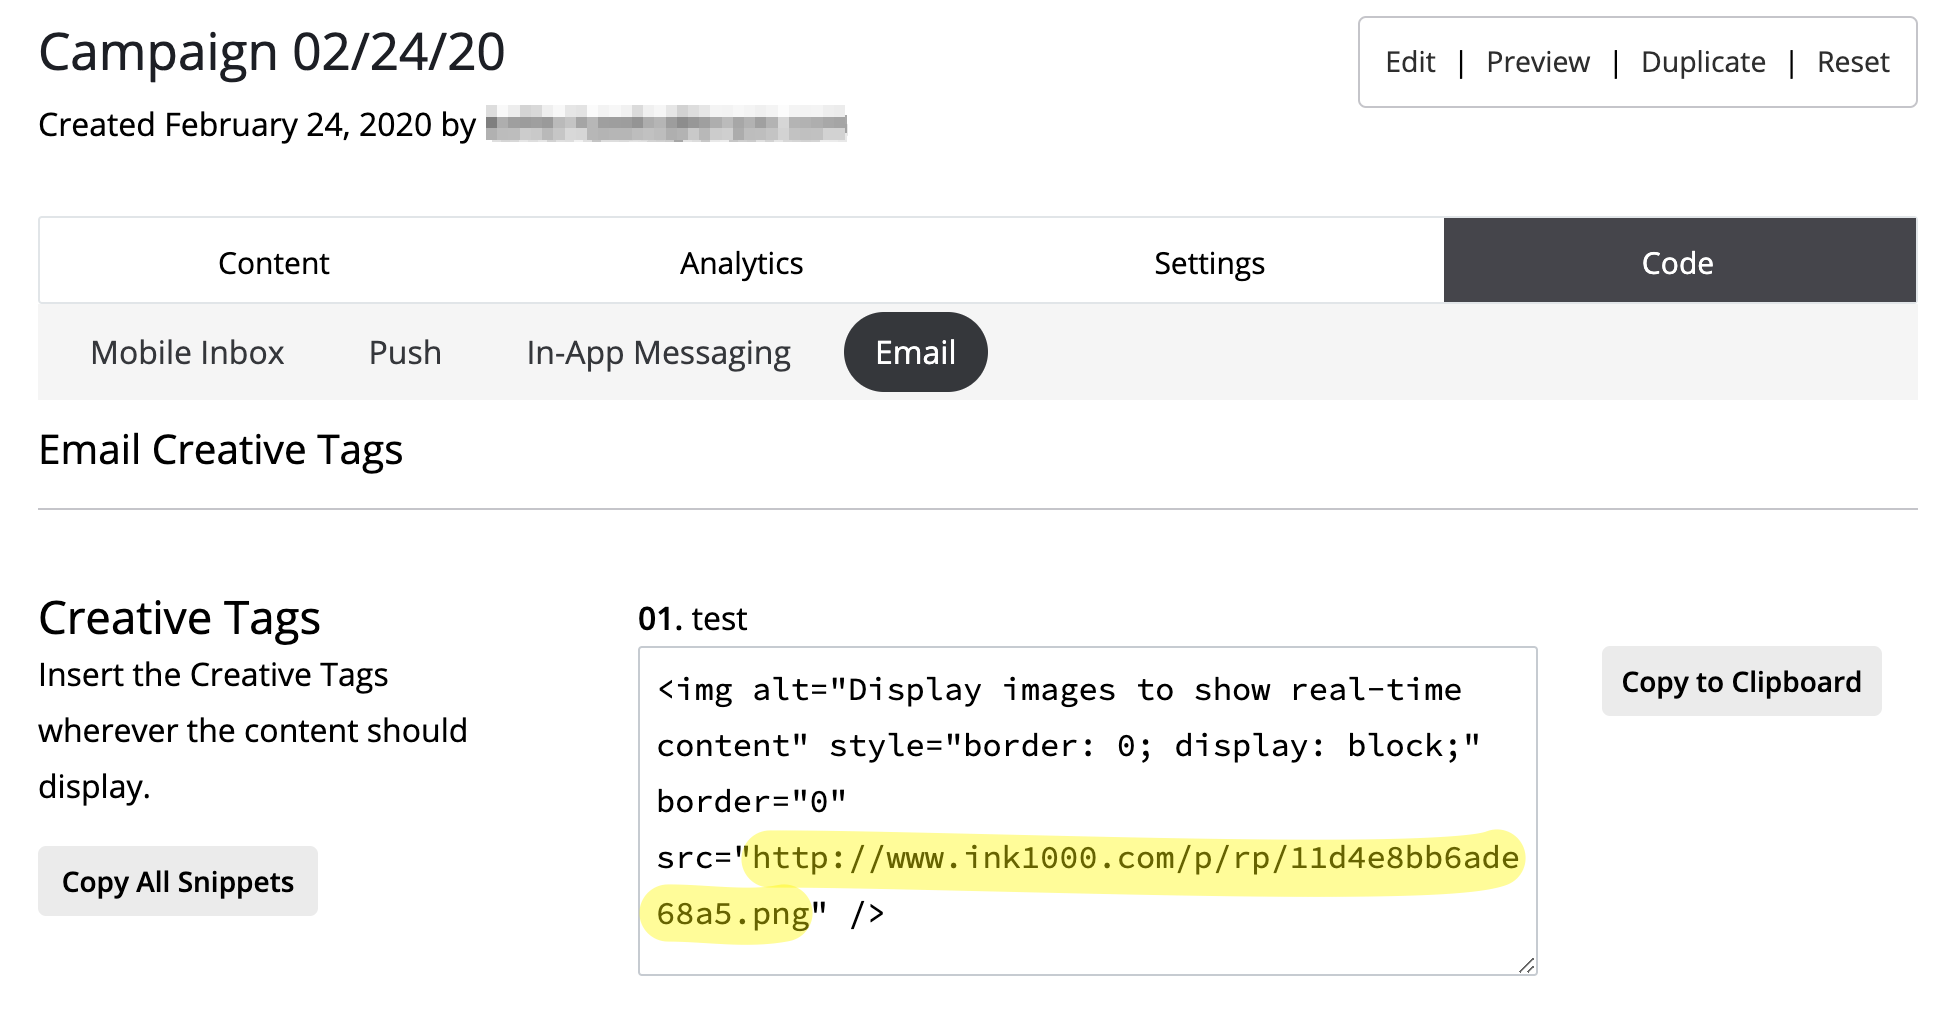
Next, in the Braze Platform, paste the URL in the appropriate field. Appropriate fields for your messaging channel can be found in step 4. Lastly, replace any merge tags (such as &mi_u=%%email%%) with the corresponding Liquid variable (such as &mi_u={{${email_address}}}).
Step 4: Braze experience
In the Braze platform, paste your creative tag into your email body.
- In the Braze Platform:
- Android Push: Paste the URL in the Push Icon Image and Expanded Notification Image fields.

- iOS Push: Paste URL in Media link field and denote the file format you are using.

- Web Push: Paste the URL in the Push Icon Image and Large Notification Image fields.

- Android Push: Paste the URL in the Push Icon Image and Expanded Notification Image fields.
- To make sure images are not cached, prepend the URL in the message with empty Liquid tags:
{% if true %}{% endif %}https://movable-ink-image-url-goes-here
- In the Braze platform, paste the URL in the Rich Notification Media field.

- For mobile: Content Cards images on iOS and Android are cached upon receipt and do not refresh.
- As a workaround, schedule your campaign as a daily, weekly, or monthly recurring message with a corresponding expiration so the Content Card will be re-templated. For example, a Content Card that should refresh once a day should be set as a daily scheduled send with a 1 day expiration.
- To ensure that Movable Ink’s real-time images work and will not be affected by caching when the Content Card is re-templated, use Liquid to append a timestamp to the end of the Movable Ink image URL.
To do this, use the following syntax, replacing the image URL as needed:
1
2
3
{% assign timestamp = "now" | date: "%s" %}
{% assign img = "https://movable-ink-image-url-goes-here" | append:timestamp %}
{{img}}
This template will take the current time (in seconds), append it to the end of the Movable Ink image tab (as a query param), and then output the final result. You can preview it with the Test tab, which will evaluate the code and show a preview.
Troubleshooting
Dynamic images not showing correctly? What channel are you experiencing difficulties with?
- Push: Make sure that you have empty logic before your Movable Ink image URL:
{% if true %}{% endif %}https://movable-ink-image-url-goes-here - In-app messages and Content Cards: Make sure that the image URL is unique for each impression. This can be done by appending the appropriate Liquid so that each URL is different. See in-app and content card messages instructions.
- Image not loading: Be sure to replace any “merge tags” with the corresponding Liquid fields in the Braze dashboard. For example:
https://mi-msg.com/p/rp/image.png?mi_u=%%email%%withhttps://mi-msg.com/p/rp/image.png?mi_u={{${email_address}}}.
Having trouble showing GIFs on Android?
- Android requires GIF support in implementation. Follow the Android in-app message customization article if you do not have this setup.
 Edit this page on GitHub