Fivetran
Fivetran is a globally recognized brand whose analyst-focused products and fully managed pipelines enable data-backed decisions by delivering ready-to-query data into your cloud warehouse.
The Braze and Fivetran integration allows users to create a zero-maintenance pipeline that enables you to collect and analyze Braze data by connecting all of your applications and databases to a central warehouse. After data has been collected in the central warehouse, data teams can explore Braze data effectively using their preferred business intelligence tools.
Prerequisites
| Requirement | Description |
|---|---|
| Fivetran account | A Fivetran account is required to take advantage of this partnership. |
| Braze REST API key | A Braze REST API key with the following permissions: - users.export.ids - users.export.segment - email.unsubscribe - email.hard_bounces - messages.schedule_broadcasts - campaigns.list - campaigns.details - canvas.list - canvas.details - segments.list - segments.details - purchases.product_list - events.list - feed.list - feed.details - templates.email.info - templates.email.list - subscription.status.get - subscription.groups.get This can be created in the Braze dashboard from Settings > API Keys. |
| Braze REST endpoint | Your REST endpoint URL. Your endpoint will depend on the Braze URL for your instance. |
| Braze Currents | Braze Currents should be connected to either Amazon S3 or Google Cloud Storage. |
| Amazon S3 or Google Cloud Storage | This integration requires you have access to one Amazon S3 or Google Cloud Storage. |
Integration
The following Currents integration is supported for both Amazon S3 and Google Cloud Storage.
Setting up Braze Currents for S3
Step 1: Locate your external ID
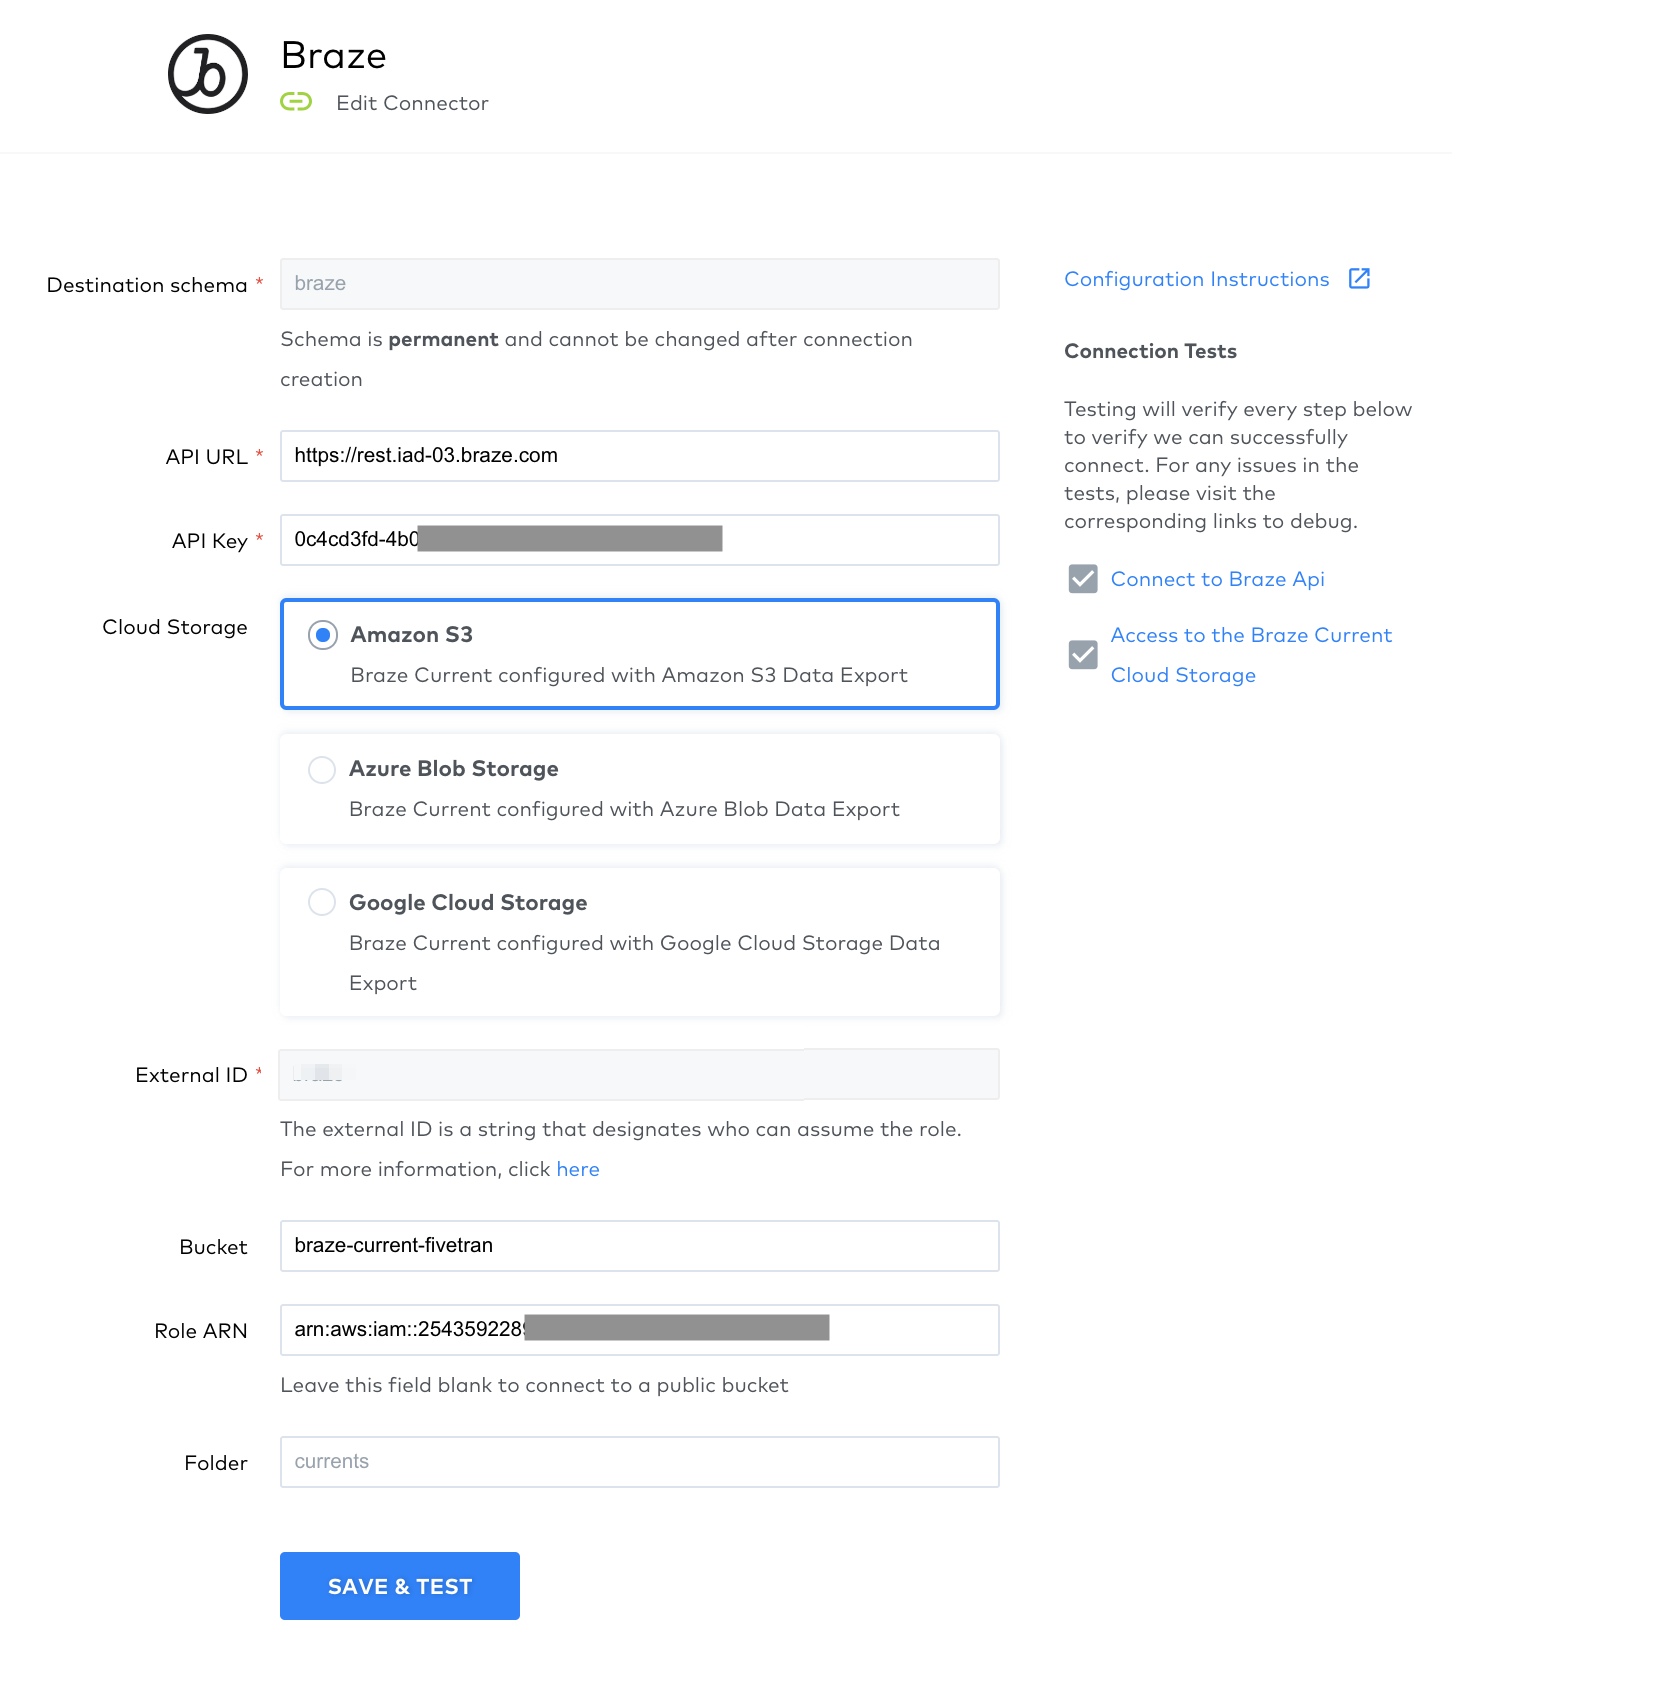
In the Fivetran Dashboard, select + Connector, and then select the Braze connector to launch the setup form. Next, select Amazon S3. Note the external ID provided here; you will need it to allow Fivetran to access your S3 bucket.
Step 2: Give Fivetran access to a specified S3 bucket
Creating an IAM policy
Open the Amazon IAM Console and navigate to Policies > Create Policy.
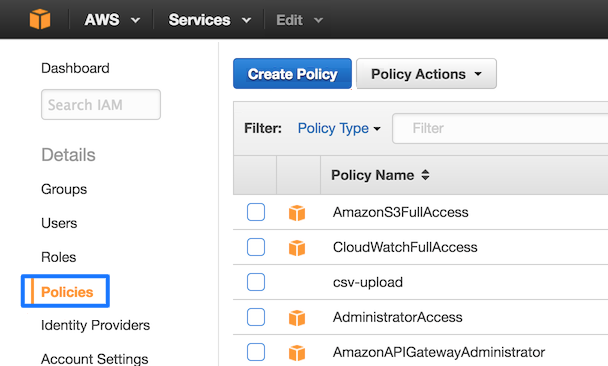
Next, open the JSON tab and paste the following policy. Make sure to replace {your-bucket-name} with the name of your S3 bucket.
1
2
3
4
5
6
7
8
9
10
11
12
13
14
15
16
17
18
19
20
21
{
"Version": "2012-10-17",
"Statement": [
    {
      "Effect": "Allow",
      "Action": [
"s3:Get*",
"s3:List*"
      ],
      "Resource": "arn:aws:s3:::{your-bucket-name}/*"
    },
    {
      "Effect": "Allow",
      "Action": [
"s3:Get*",
"s3:List*"
      ],
      "Resource": "arn:aws:s3:::{your-bucket-name}"
    }
  ]
}
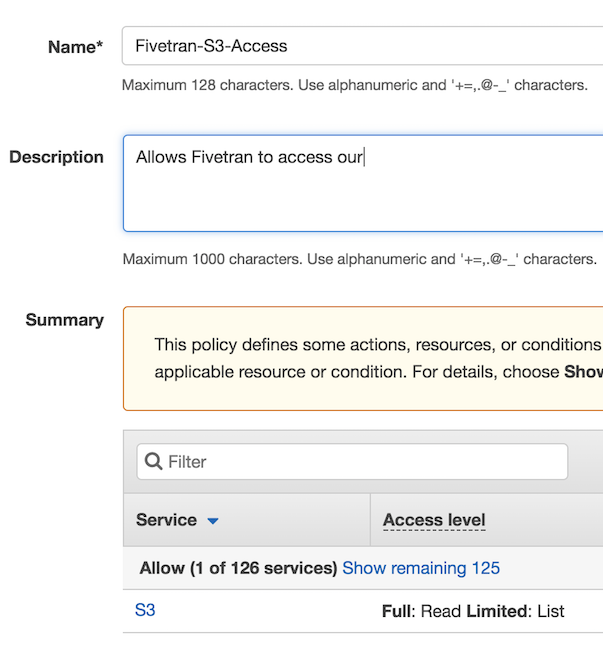
Lastly, select Review Policy and give the policy a unique name and description. Select Create Policy to build your policy.
Create an IAM role
In AWS, navigate to Roles, then select Create New Role.
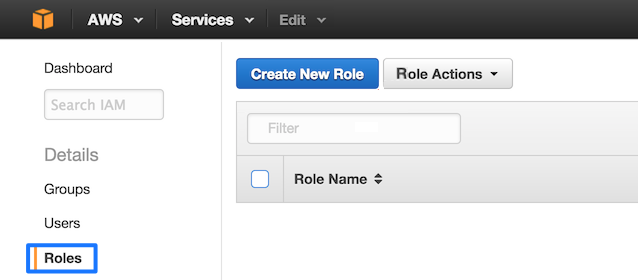
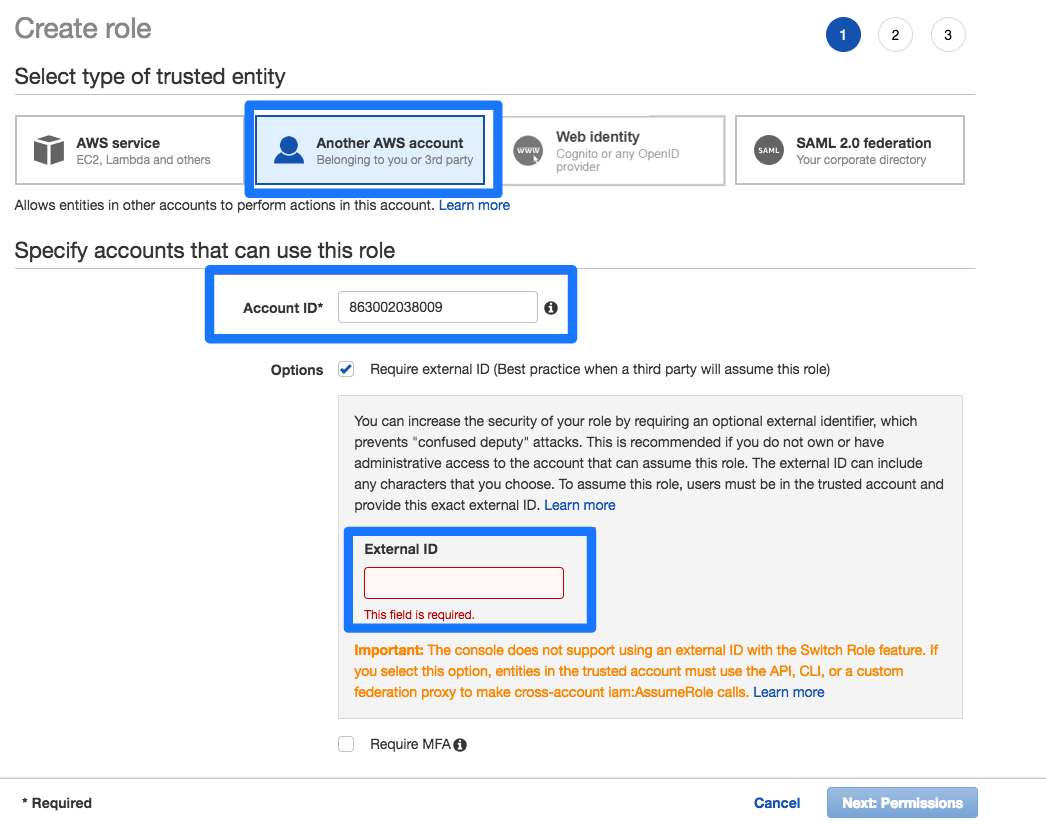
Select Another AWS Account and provide the Fivetran account ID 834469178297. Make sure to check the Require external ID checkbox. Here, you will provide the external ID found in step 1.
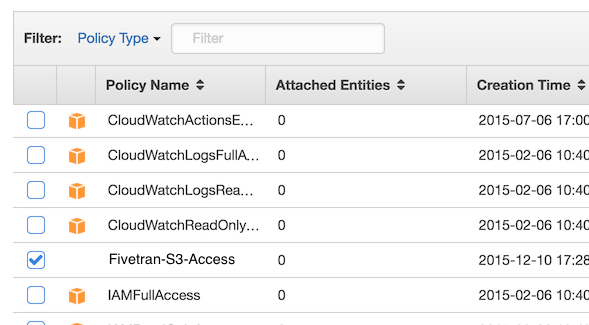
Next, select Next: Permissions to select the policy you just created.
Select Next: Review, name your new role (such as Fivetran), and select Create Role. After the role is created, select it and note the Role ARN shown.
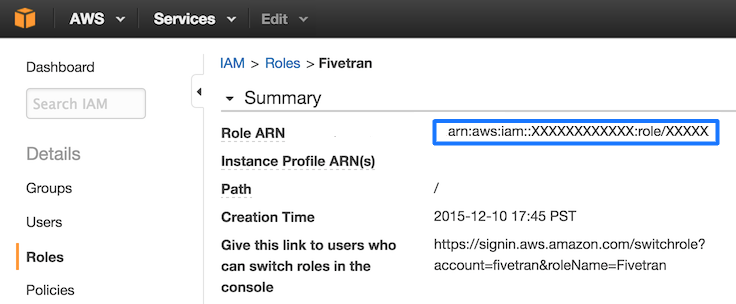
You can specify permissions for the Role ARN that you designate for Fivetran. Giving selective permissions to this Role will allow Fivetran to only sync what it has permissions to see.
Step 3: Complete the Fivetran connector
In Fivetran, select + Connector, and then select the Braze connector to launch the setup form. Within the form, fill the given fields with the appropriate values:
Destination schema: A unique schema name.API URL: Your Braze REST API endpoint.API Key: Your Braze REST API key.External ID: The external ID set in step 2 of the Currents set up directions. This ID is a fixed value.Bucket: Found in your Braze account by navigating to Partner Integrations > Data Export > your Current name.Role ARN: The Role ARN can be found in step 1 of the Current setup directions.
Ensure Amazon S3 is selected as the Cloud Storage choice.
Lastly, select Save & Test, and Fivetran will do the rest by syncing with the data from your Braze account!
Setting up Braze Currents for Google Cloud Storage
Step 1: Retrieve your Fivetran email from Google Cloud Storage
In the Fivetran dashboard, select + Connector, and then select the Braze connector to launch the setup form. Next, select Google Cloud storage. Make a note of the email address that appears.
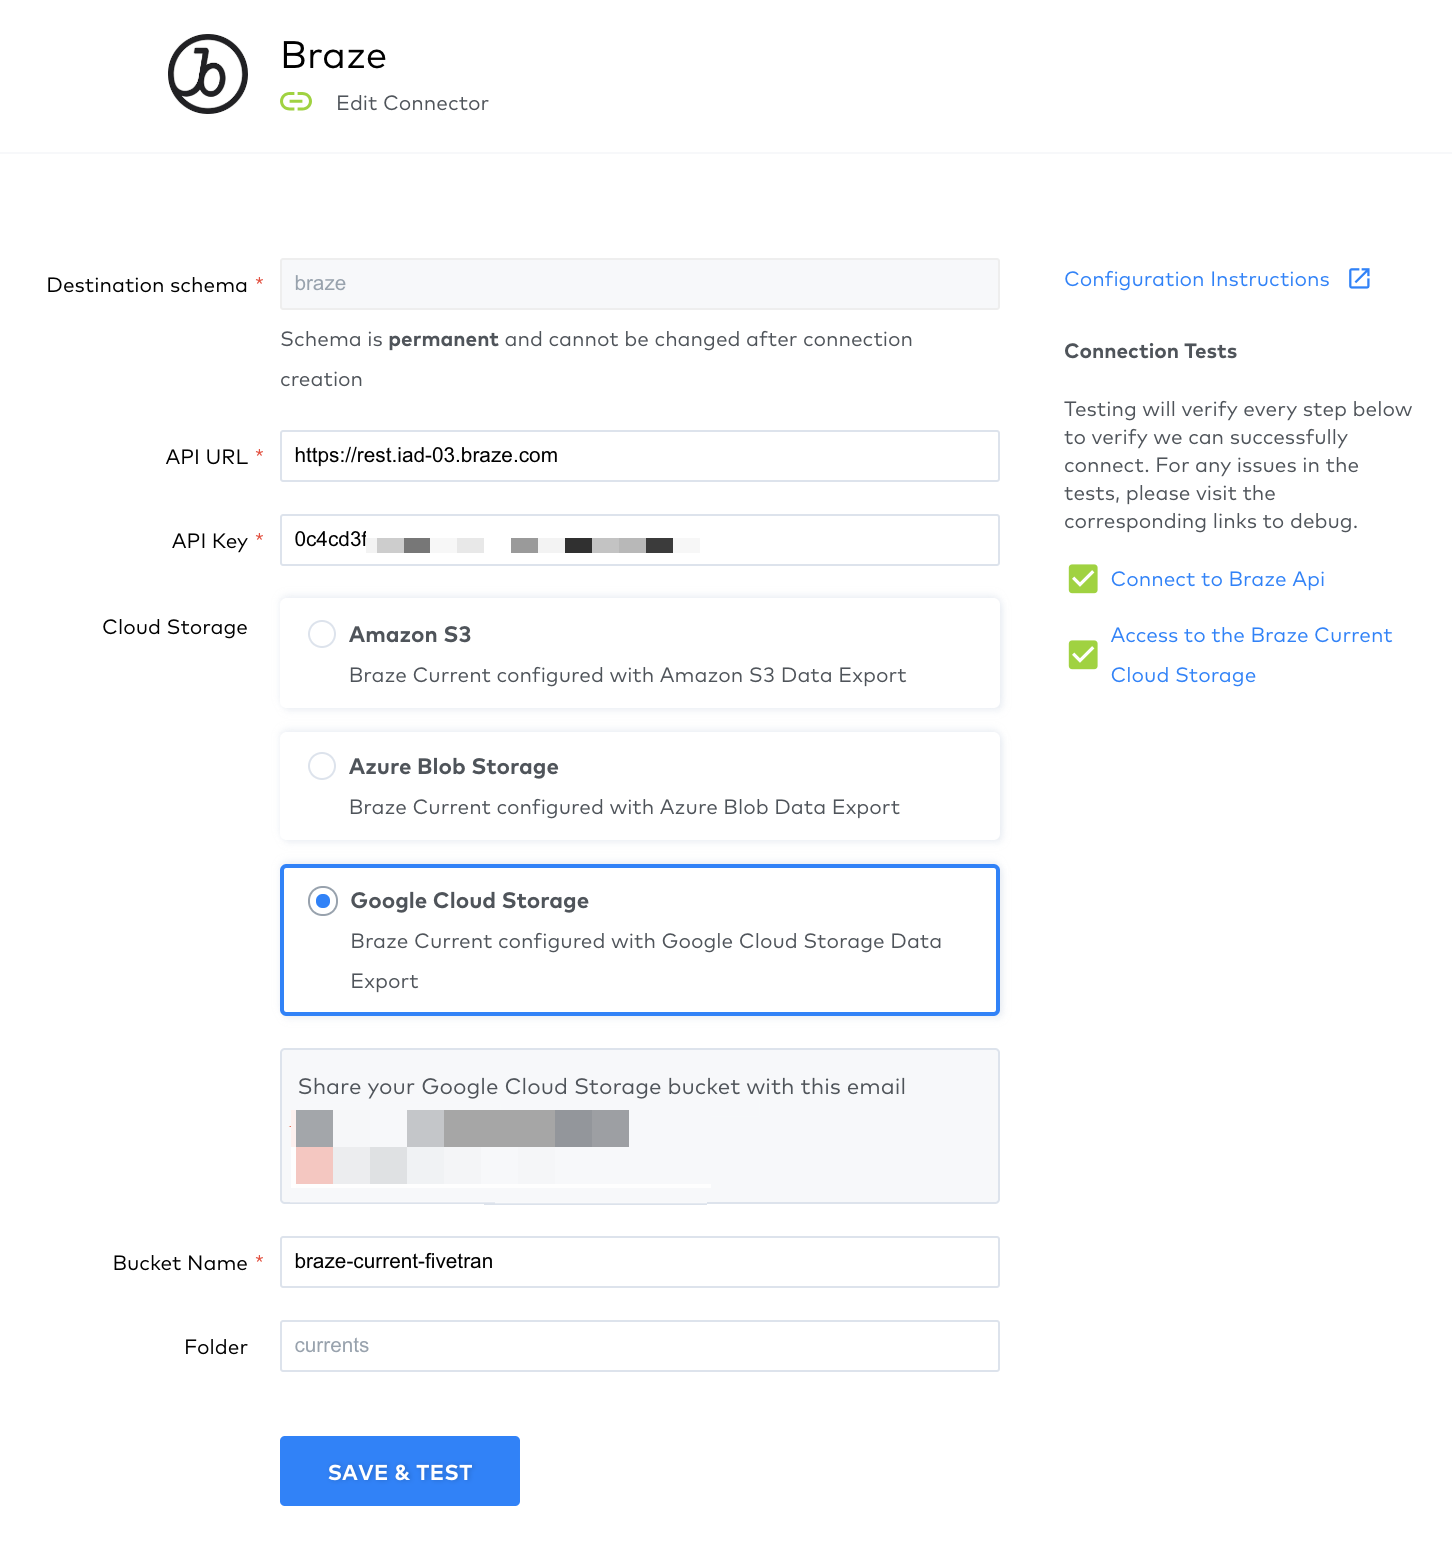
Step 2: Grant bucket access
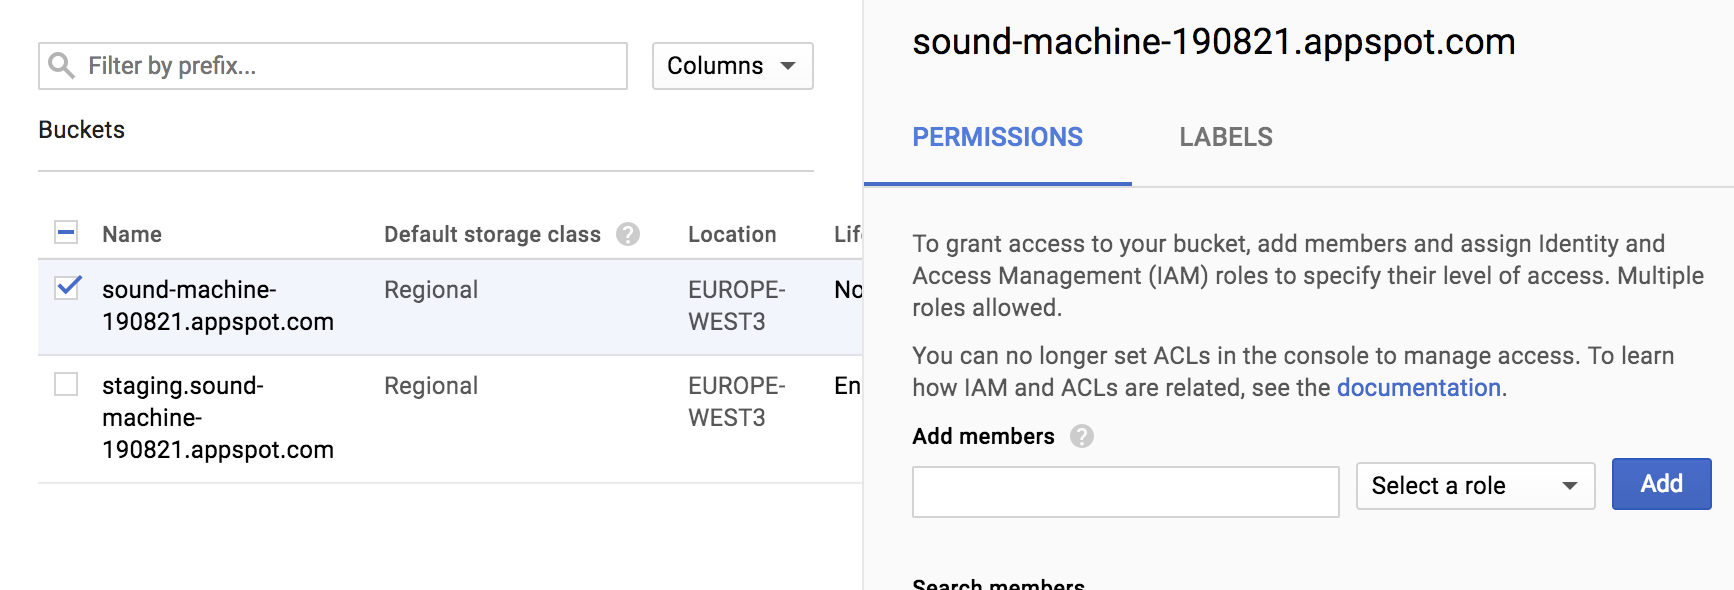
Navigate to your Google Storage Console and select the bucket you configured Braze Currents with, and select Edit bucket permissions.

Next, grant Storage Object Viewer access to the email from step 1 by adding the email as a member. Make a note of the bucket name; you will need it in the next step to configure Fivetran.
Step 3: Complete the Fivetran connector
In Fivetran, select + Connector, and then select the Braze connector to launch the setup form. Within the form, fill the given fields with the appropriate values:
Destination schema: A unique schema name.API URL: Your Braze REST API endpoint.API Key: Your Braze REST API key.Bucket Name: Found in your Braze account by navigating to Partner Integrations > Data Export > your Current name.Folder: Found in your Braze account by navigating to Partner Integrations > Data Export > your Current name.
Ensure Google Cloud Storage is selected as the Cloud Storage choice.
Lastly, select Save & Test, and Fivetran will do the rest by syncing with the data from your Braze account!
 Edit this page on GitHub