# Braze Developer Guide Full Text
Consolidated full markdown text for all pages in the Developer Guide collection.
# Guide du développeur Braze
Source: /docs/fr/developer_guide/home/index.md
Guide du développeur Braze
C'est ici que les développeurs trouveront tout ce qu'ils doivent savoir sur le SDK Braze. Chaque SDK est hébergé dans son propre dépôt public GitHub, qui comprend des exemples d'applications entièrement compilables que vous pouvez utiliser pour tester les fonctionnalités de Braze ou les intégrer à vos propres applications. Pour en savoir plus, consultez Références, dépôts et exemples d'applications . Vous souhaitez échanger, apprendre et vous inspirer d'autres développeurs qui créent avec Braze ? Rejoignez la communauté des développeurs Braze !
Cette page d'accueil est l'endroit où les développeurs peuvent trouver toutes les intégrations disponibles avec Braze.
Featured:
- Web
- Android
- Swift
# Démarrage
Source: /docs/fr/developer_guide/getting_started/index.md
Vous pouvez suivre ce guide, ou consulter [Braze Learning](https://learning.braze.com) pour des cours guidés, tels que nos parcours d'apprentissage [Marketeur](https://learning.braze.com/path/marketer) et [Développeur](https://learning.braze.com/path/developer).
# Présentation du SDK pour les développeurs
Source: /docs/fr/developer_guide/getting_started/sdk_overview/index.md
# [](https://learning.braze.com/path/developer/sdk-integration-basics){: style="float:right;width:120px;border:0;" class="noimgborder"}Aperçu du SDK pour les développeurs {#braze-learning-course-image_buster-assetsimgbl_icon3png-httpslearningbrazecompathdevelopersdk-integration-basics-stylefloatrightwidth120pxborder0-classnoimgbordersdk-overview-for-developers}
> Avant de commencer à intégrer les SDK Braze, vous vous demandez peut-être exactement ce que vous concevez et intégrez. Vous pourriez être curieux de savoir comment personnaliser davantage le SDK pour mieux répondre à vos besoins. Cet article peut vous aider à répondre à toutes vos questions concernant le SDK.
Vous êtes marketeur et cherchez un aperçu de base du SDK ? Consultez plutôt notre [présentation pour les marketeurs](https://www.braze.com/docs/fr/fr/user_guide/get_started/sdk_overview/).
Le SDK Braze en bref :
* Collecte et synchronise les données de l'utilisateur dans un profil utilisateur consolidé
* Recueille automatiquement les données de session, les informations sur l'appareil et les jetons de notification push
* Capture les données d'engagement marketing et les données personnalisées spécifiques à votre entreprise
* Alimente les canaux de communication de notifications push, de messages in-app et de carte de contenu
Regardez la vidéo suivante pour une brève introduction aux bases de l'intégration du SDK Braze et à ses fonctionnalités principales.
## Performances applicatives {#app-performance}
Braze ne devrait avoir aucun impact négatif sur les performances de votre application.
Les SDK Braze ont une empreinte très légère. Nous modifions automatiquement le taux auquel nous purgeons les données des utilisateurs en fonction de la qualité du réseau, en plus de permettre un contrôle manuel du réseau. Nous regroupons automatiquement les requêtes d'API depuis le SDK pour nous assurer que les données sont journalisées rapidement tout en maintenant une efficacité maximale du réseau. Enfin, la quantité de données envoyées par le client à Braze dans chaque appel d'API est extrêmement faible.
## Compatibilité du SDK {#sdk-compatibility}
Le SDK Braze est conçu pour se comporter au mieux et ne pas interférer avec les autres SDK présents dans votre application. Si vous rencontrez des difficultés qui pourraient être dues à une incompatibilité avec un autre SDK, contactez l'assistance Braze.
## Analyses par défaut et gestion de session {#default-analytics-and-session-handling}
Certaines données utilisateur sont collectées automatiquement par notre SDK, par exemple, Première application utilisée, Dernière application utilisée, Nombre total de sessions, Système d'exploitation de l'appareil, etc. Si vous suivez nos guides d'intégration pour mettre en œuvre nos SDK, vous pourrez profiter de cette [collecte de données par défaut](https://www.braze.com/docs/fr/fr/user_guide/data/unification/user_data/sdk_data_collection/). Vérifier cette liste peut vous aider à éviter de stocker plusieurs fois les mêmes informations sur les utilisateurs. À l'exception du début et de la fin de session, toutes les autres données suivies automatiquement ne sont pas prises en compte dans votre utilisation des points de donnée.
**Note:**
Toutes nos fonctionnalités sont configurables, mais il est judicieux de mettre en œuvre le modèle de collecte de données par défaut.
Si cela est nécessaire pour votre cas d'utilisation, vous pouvez [limiter la collecte de certaines données](#blocking-data-collection) une fois l'intégration terminée.
## Envoi et réception des données {#data-upload-and-download}
Le SDK Braze met les données en cache (sessions, événements personnalisés, etc.) et les envoie périodiquement. Les valeurs ne seront mises à jour sur le tableau de bord qu'après l'envoi des données. L'intervalle d'envoi tient compte de l'état de l'appareil et est régi par la qualité de la connexion réseau :
| Qualité de connexion réseau | Intervalle de purge des données |
|---|---|
| Excellente | 10 secondes |
| Bonne | 30 secondes |
| Mauvaise | 60 secondes |
{: .reset-td-br-1 .reset-td-br-2 aria-label="Data upload and download" }
S'il n'y a pas de connexion réseau, les données sont mises en cache localement sur l'appareil jusqu'à ce que la connexion réseau soit rétablie. Lorsque la connexion est rétablie, les données sont envoyées à Braze.
Braze envoie des données au SDK au début d'une session en fonction des segments dans lesquels l'utilisateur se trouve au moment de la session. Les nouveaux messages in-app ne seront pas mis à jour pendant la session. Cependant, les données de l'utilisateur pendant la session seront traitées en continu au fur et à mesure qu'elles seront envoyées par le client. Par exemple, un utilisateur inactif (qui a utilisé l'application pour la dernière fois il y a plus de 7 jours) recevra toujours du contenu destiné aux utilisateurs inactifs lors de sa première session de retour dans l'application.
## Blocage de la collecte des données {#blocking-data-collection}
Il est possible, bien que non recommandé, de bloquer la collecte automatique de certaines données de votre intégration SDK, ou de mettre en liste d'autorisations les processus qui le font.
Il n'est pas recommandé de bloquer la collecte de données, car la suppression des données d'analyse réduit la capacité de personnalisation et de ciblage de votre plateforme. Par exemple :
- Si vous choisissez de ne pas intégrer complètement la localisation dans l'un des SDK, vous ne pourrez pas personnaliser vos messages en fonction de la langue ou de la localisation.
- Si vous choisissez de ne pas intégrer le fuseau horaire, vous ne pourrez peut-être pas envoyer de messages dans le fuseau horaire d'un utilisateur.
- Si vous choisissez de ne pas intégrer les informations visuelles d'un appareil spécifique, le contenu du message pourrait ne pas être optimisé pour cet appareil.
Nous recommandons fortement d'intégrer pleinement les SDK pour tirer le meilleur parti des capacités de nos produits.
Vous pouvez soit simplement ne pas intégrer certaines parties du SDK, soit utiliser [`disableSDK`](https://js.appboycdn.com/web-sdk/latest/doc/modules/braze.html#disablesdk) pour un utilisateur. Cette méthode synchronisera les données enregistrées avant l'appel de `disableSDK()`, et tous les appels ultérieurs au SDK Braze pour le Web pour cette page et les chargements de page suivants seront ignorés. Si vous souhaitez reprendre la collecte de données ultérieurement, vous pouvez utiliser la méthode [`enableSDK()`](https://js.appboycdn.com/web-sdk/latest/doc/modules/braze.html#enablesdk) pour reprendre la collecte des données. Pour en savoir plus, consultez notre article [Désactivation du suivi Web](https://www.braze.com/docs/fr/fr/developer_guide/analytics/managing_data_collection/?sdktab=web).
Vous pouvez utiliser [`setDeviceObjectAllowlist`](https://braze-inc.github.io/braze-android-sdk/kdoc/braze-android-sdk/com.braze.configuration/-braze-config/-builder/set-device-object-allowlist.html?query=fun%20setDeviceObjectAllowlist(deviceObjectAllowlist:%20EnumSet%3CDeviceKey%3E):%20BrazeConfig.Builder) pour configurer le SDK de manière à n'envoyer qu'un sous-ensemble de clés ou de valeurs d'objets d'appareils conformément à une liste d'autorisations définie. Cette fonction doit être activée via [`setDeviceObjectAllowlistEnabled`](https://braze-inc.github.io/braze-android-sdk/kdoc/braze-android-sdk/com.braze.configuration/-braze-config/-builder/set-device-object-allowlist-enabled.html?query=fun%20setDeviceObjectAllowlistEnabled(enabled:%20Boolean):%20BrazeConfig.Builder).
**Important:**
Si la liste d'autorisations est vide, **aucune** donnée relative à l'appareil ne sera envoyée à Braze.
Vous pouvez attribuer un ensemble de champs éligibles à [`configuration.devicePropertyAllowList`](https://braze-inc.github.io/braze-swift-sdk/documentation/brazekit/braze/configuration-swift.class/devicepropertyallowlist) sur votre `Braze.Configuration` pour spécifier une liste d'autorisations pour les champs de l'appareil collectés par le SDK. La liste complète des champs est définie dans [`Braze.Configuration.DeviceProperty`](https://braze-inc.github.io/braze-swift-sdk/documentation/brazekit/braze/configuration-swift.class/deviceproperty). Pour désactiver la collecte de tous les champs de l'appareil, définissez la valeur de cette propriété sur un ensemble vide (`[]`).
**Important:**
Par défaut, tous les champs sont collectés par le SDK Braze Swift. La suppression de certaines propriétés de l'appareil peut entraîner la désactivation de certaines fonctionnalités du SDK.
Pour plus de détails sur l'utilisation, reportez-vous à la rubrique [Stockage](https://www.braze.com/docs/fr/fr/developer_guide/storage/?tab=swift) dans la documentation du SDK Swift.
## Quelle est la version du SDK que j'utilise ? {#what-version-of-the-sdk-am-i-on}
Vous pouvez utiliser le tableau de bord pour voir la version du SDK d'une application particulière en sélectionnant **Paramètres** > **Paramètres des applications**. La **version du SDK en production** indique la version la plus élevée du SDK Braze utilisée par votre application en production la plus récente pour au moins 5 % de vos utilisateurs.
{: style="max-width:80%"}
**Tip:**
Si vous avez une application iOS, vous pouvez confirmer que vous utilisez le [SDK Swift](https://www.braze.com/docs/fr/fr/developer_guide/sdk_integration/?sdktab=swift) au lieu de l'ancien [SDK iOS Objective-C](https://www.braze.com/docs/fr/fr/developer_guide/platforms/legacy_sdks/ios/initial_sdk_setup/overview/) si la **version de votre SDK en production** est égale ou supérieure à 5.0.0, qui était la première version publiée du SDK Swift.
# Aperçu de la plateforme
Source: /docs/fr/developer_guide/getting_started/platform_overview/index.md
# [](https://learning.braze.com/path/developer){: style="float:right;width:120px;border:0;" class="noimgborder"}Premiers pas : Aperçu de la plateforme {#braze-learning-course-image_buster-assetsimgbl_icon3png-httpslearningbrazecompathdeveloper-stylefloatrightwidth120pxborder0-classnoimgbordergetting-started-platform-overview}
> Cet article traite des composants et capacités de base de la plateforme Braze. Les liens de cet article renvoient à des rubriques essentielles de Braze.
**Tip:**
Consultez notre [parcours d'apprentissage gratuit pour les développeurs](https://learning.braze.com/path/developer) ainsi que ces articles.
## Qu'est-ce que Braze ? {#what-is-braze}
Braze est une plateforme d'engagement client. Elle ingère les données des utilisateurs, met en évidence leurs actions et leurs comportements, et vous permet d'agir en conséquence. La plateforme comprend trois composants principaux : le SDK, le tableau de bord et la REST API.
Si vous êtes un marketeur à la recherche d'un aperçu plus général de Braze, consultez plutôt la [section Démarrer pour les marketeurs](https://www.braze.com/docs/fr/fr/user_guide/get_started/).
{: style="max-width:55%;float:right;margin-left:15px;"}
### SDK
Les [SDK de Braze](#integrating-braze) peuvent être intégrés dans vos applications mobiles et web pour fournir de puissants outils de marketing, de gestion des utilisateurs et d'analyse.
En bref, dans le cas d'une intégration complète, le SDK :
* Collecte et synchronise les données de l'utilisateur dans un profil utilisateur consolidé
* Recueille automatiquement les données de session, les informations sur l'appareil et les jetons push
* Capture les données d'engagement marketing et les données personnalisées spécifiques à votre entreprise
* Est conçu pour la sécurité et fait l'objet de tests de pénétration par des tiers
* Est optimisé pour les appareils à faible niveau de batterie ou à réseau lent
* Prend en charge les signatures JWT côté serveur pour une sécurité accrue
* Dispose d'un accès en écriture seule à vos systèmes (ne peut pas récupérer les données de l'utilisateur)
* Alimente les canaux de communication de notifications push, de messages in-app et de Content Cards
### Interface utilisateur du tableau de bord {#dashboard-user-interface}
Le tableau de bord est l'interface utilisateur qui contrôle l'ensemble des données et des interactions au cœur de la plateforme Braze. Les marketeurs utiliseront le tableau de bord pour faire leur travail et créer du contenu. Les développeurs peuvent utiliser le tableau de bord pour gérer les paramètres d'intégration des applications, comme les clés API et les informations d'identification de notifications push.
Si vous débutez, l'administrateur de votre équipe devrait vous ajouter (ainsi que tous les autres membres de l'équipe qui ont besoin d'accéder à Braze) en tant qu'[utilisateurs sur votre tableau de bord](https://www.braze.com/docs/fr/fr/user_guide/administer/personal/).
### REST API
La REST API de Braze vous permet de déplacer des données à l'intérieur et à l'extérieur de Braze à grande échelle. Utilisez l'API pour apporter des mises à jour depuis votre back-end, vos entrepôts de données et d'autres sources first-party et third-party. En outre, utilisez l'API pour ajouter des événements personnalisés à des fins de segmentation, directement à partir d'une application web. Vous pouvez déclencher et envoyer des messages via l'API, ce qui permet aux ressources techniques d'inclure des métadonnées JSON complexes dans le cadre de vos Campaigns.
L'API fournit également un service web où vous pouvez enregistrer des actions prises par vos utilisateurs directement via HTTP, plutôt que par le biais des SDK mobiles et web. Combiné aux webhooks, cela signifie que vous pouvez suivre les actions et déclencher des activités pour les utilisateurs à l'intérieur et à l'extérieur de votre expérience sur l'application. Le [guide de l'API](https://www.braze.com/docs/fr/fr/api/home/) répertorie les endpoints de la REST API Braze disponibles et leur utilisation.
Pour en savoir plus sur les différentes parties de Braze, consultez : [Premiers pas : Aperçu de l'architecture](https://www.braze.com/docs/fr/fr/developer_guide/getting_started/architecture_overview/).
## Analyse des données et action {#data-analysis-and-action}
Les données stockées dans Braze sont conservées et utilisables à des fins de segmentation, de personnalisation et de ciblage tant que vous êtes client de Braze. Cela vous permet d'agir sur les données du profil utilisateur (par exemple, l'activité de la session ou les achats) jusqu'à ce que vous décidiez de supprimer ces informations. Par exemple, un service de streaming pourrait suivre les contenus consultés par chaque abonné depuis son premier jour sur le service (même si cela remonte à plusieurs années) et utiliser ces données pour envoyer des messages pertinents.
{: style="max-width:80%"}
### Analyse des applications {#app-analytics}
Le tableau de bord de Braze affiche des graphiques mis à jour en temps réel en fonction des indicateurs analytiques et des événements personnalisés que vous configurez. Des mesures et une optimisation cohérentes à l'aide de tests A/B, de rapports personnalisés, d'analyses et d'intelligence automatisée contribuent à renforcer l'engagement client et à vous démarquer.
### Segmentation utilisateur {#user-segmentation}
La segmentation vous permet de créer des groupes d'utilisateurs reposant sur des critères précis de comportement dans l'application, des données démographiques, etc. Braze vous permet également de définir toute action utilisateur in-app comme un « événement personnalisé » si l'action souhaitée n'est pas capturée par défaut. Il en va de même pour les caractéristiques de l'utilisateur via des « attributs personnalisés ». Une fois qu'un segment d'utilisateurs est créé dans le tableau de bord, vos utilisateurs entrent et sortent du segment lorsqu'ils répondent (ou ne répondent pas) aux critères définis. Par exemple, vous pouvez créer un segment qui inclut tous les utilisateurs qui ont dépensé de l'argent in-app et dont la dernière utilisation remonte à plus de deux semaines.
Pour en savoir plus sur nos modèles de données, consultez : [Premiers pas : Présentation des analyses](https://www.braze.com/docs/fr/fr/developer_guide/getting_started/architecture_overview/).
## Communication multicanale {#multichannel-messaging}
Après avoir défini un segment, les outils de communication de Braze vous permettent d'engager le dialogue avec vos utilisateurs de manière dynamique et personnalisée. Braze a été conçu avec un modèle de données indépendant des canaux et centré sur l'utilisateur. L'envoi de messages se fait à l'intérieur de votre application ou de votre site (comme l'envoi de messages in-app ou par le biais d'éléments graphiques tels que les carrousels de Content Cards et les bannières) ou en dehors de votre expérience sur l'application (comme les notifications push ou les e-mails). Par exemple, vos marketeurs peuvent envoyer une notification push et un e-mail au segment défini dans la section précédente.
{: style="border:none" }
| Canal | Description |
| ---------------------------------------------------------------------------------------------------- | ------------------------------------------------------------------------------------------------------------------------------------------------------ |
| [Content Cards](https://www.braze.com/docs/fr/fr/user_guide/channels/content_cards/)* | Envoyez des notifications in-app très ciblées et dynamiques sans interrompre le client. |
| [E-mail](https://www.braze.com/docs/fr/fr/user_guide/channels/email/) | Envoyez des messages HTML riches en créant votre e-mail à l'aide de l'éditeur de texte enrichi, de notre éditeur par glisser-déposer ou en téléchargeant l'un de vos modèles HTML existants. |
| [Messages in-app](https://www.braze.com/docs/fr/fr/in-app_messages/) | Envoyez des notifications in-app discrètes à l'aide de l'interface utilisateur native créée sur mesure par Braze. |
| [Push](https://www.braze.com/docs/fr/fr/user_guide/channels/push/) | Déclenchez automatiquement des notifications push à partir de Campaigns ou d'actualités à l'aide du service de notification push d'Apple (APNs) pour iOS ou de Firebase Cloud Messaging (FCM) pour Android. |
| [SMS, MMS et RCS](https://www.braze.com/docs/fr/fr/user_guide/channels/sms_mms_and_rcs/)* | Utilisez les SMS, MMS ou RCS pour envoyer des notifications transactionnelles, partager des promotions, envoyer des rappels, et plus encore. |
| [Push web](https://www.braze.com/docs/fr/fr/user_guide/channels/push/platform_specific_resources/web/) | Envoyez des notifications au navigateur web, même si vos utilisateurs ne sont pas actuellement actifs sur votre site. |
| [Webhooks](https://www.braze.com/docs/fr/fr/about_webhooks/) | Utilisez les webhooks pour déclencher des actions hors application, en fournissant à d'autres systèmes et applications des données en temps réel. |
| [WhatsApp](https://www.braze.com/docs/fr/fr/user_guide/channels/whatsapp/whatsapp_setup/)* | Entrez directement en contact avec vos utilisateurs et vos clients en tirant parti de la plateforme de messagerie pair à pair très plébiscitée : WhatsApp. |
{: .reset-td-br-1 .reset-td-br-2 aria-label="Communication multicanale" }
*Disponible en tant que fonctionnalité supplémentaire.*
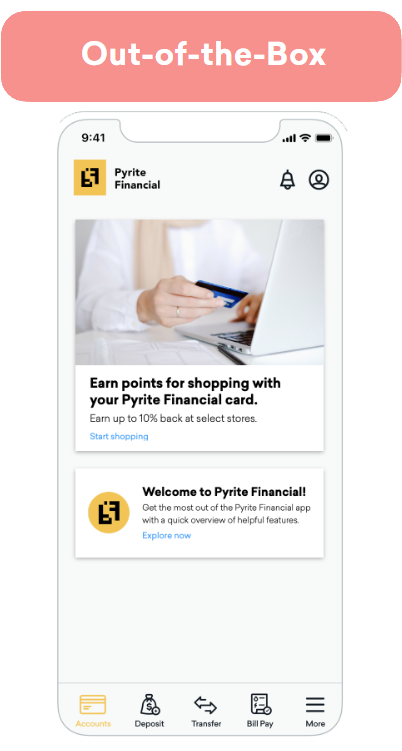
### Composants personnalisables {#customizable-components}
Tous les composants de Braze sont conçus pour être accessibles, adaptables et personnalisables. Vous pouvez commencer avec Braze en utilisant les composants par défaut de BrazeUI et en les personnalisant en fonction des besoins de votre marque et de votre cas d’utilisation.
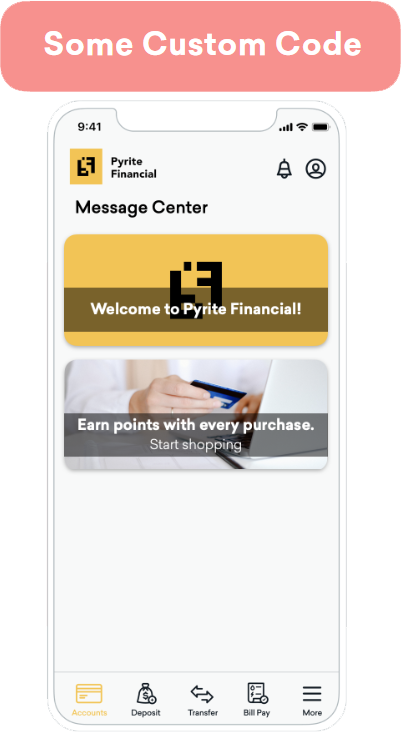
Pour aller au-delà des options par défaut, vous pouvez écrire du code personnalisé pour mettre à jour l’aspect et la convivialité d’un canal de communication afin qu’il corresponde mieux à votre marque. Il s’agit notamment de modifier le type de police, la taille de la police et les couleurs d’un composant. Les marketeurs conservent le contrôle de l’audience, du contenu, du comportement lors du clic et de l’expiration directement dans le tableau de bord de Braze.
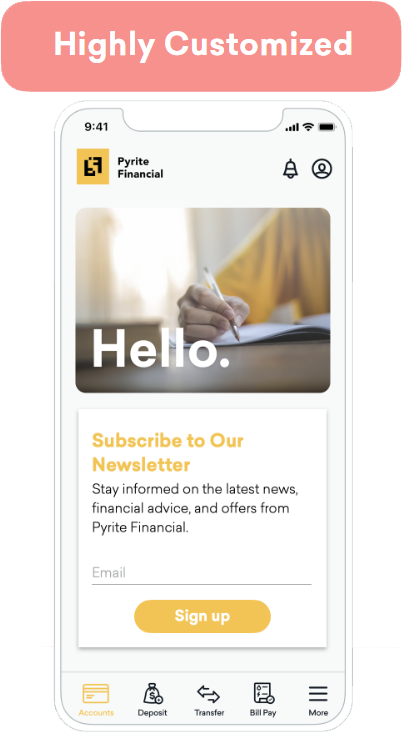
Vous pouvez également créer des composants entièrement personnalisés pour contrôler l’aspect de vos messages, leur comportement et leur interaction avec d’autres canaux de communication (par exemple, déclencher une Content Card sur la base d’une notification push). Braze fournit des méthodes SDK pour vous permettre d’enregistrer des indicateurs tels que les impressions, les clics et les rejets dans le tableau de bord de Braze. Chaque canal de communication dispose d’un article d’analyse pour faciliter cette démarche.
## Intégration de Braze {#integrating-braze}
Braze est conçu pour une intégration rapide. Le délai moyen de rentabilisation est de six semaines pour l'ensemble de notre clientèle. Pour plus d'informations sur le processus d'intégration, consultez [Premiers pas : Aperçu de l'intégration](https://www.braze.com/docs/fr/fr/developer_guide/getting_started/integration_overview/).
## Ressources à mettre en favoris {#resources-to-bookmark}
En tant que ressource technique, vous interviendrez dans une grande partie des rouages de Braze. En plus de notre documentation, voici des ressources utiles à conserver dans vos favoris. Au fur et à mesure que vous avancez, gardez notre glossaire des [termes à connaître](https://www.braze.com/docs/fr/fr/user_guide/get_started/terms_to_know/) à portée de main au cas où vous auriez des questions sur des termes propres à Braze.
| Ressource | Ce que vous allez apprendre |
|---|---|
| [Débogage du SDK](https://www.braze.com/docs/fr/fr/developer_guide/sdk_integration/debugging/) | Lors de la résolution des problèmes de votre intégration, l'outil de débogage du SDK vous sera d'une grande utilité. Assurez-vous de l'avoir sous la main ! |
| [Référentiel GitHub public de Braze](https://github.com/braze-inc/) | Vous trouverez, dans notre référentiel GitHub, des informations détaillées sur l'intégration ainsi que des exemples de code. |
| [Référentiel GitHub du SDK Android](https://github.com/braze-inc/braze-android-sdk/) | Le dépôt GitHub du SDK Android. |
| [Référence du SDK Android](https://appboy.github.io/appboy-android-sdk/kdoc/index.html) | Documentation des classes pour le SDK Android. |
| [Référentiel GitHub du SDK iOS (Swift)](https://github.com/braze-inc/braze-swift-sdk) | Le dépôt GitHub du SDK Swift. |
| [Référence du SDK iOS (Swift)](https://braze-inc.github.io/braze-swift-sdk/) | Documentation des classes pour le SDK iOS. |
| [Référentiel GitHub du SDK Web](https://github.com/braze-inc/braze-web-sdk) | Le dépôt GitHub du SDK Web. |
| [Référence du SDK Web](https://js.appboycdn.com/web-sdk/5.0/doc/modules/braze.html) | Documentation des classes pour le SDK Web. |
| [Journaux de modifications du SDK](https://www.braze.com/docs/fr/fr/developer_guide/changelogs/) | Braze propose des versions mensuelles prévisibles, en plus des versions ciblant les problèmes critiques et les mises à jour majeures du système d'exploitation. |
| [Collection Postman de l'API Braze](https://documenter.getpostman.com/view/4689407/SVYrsdsG?version=latest) | Téléchargez notre collection Postman ici. |
| [Moniteur d'état du système Braze](https://braze.statuspage.io/) | Notre page d'état est mise à jour chaque fois qu'il y a des incidents ou des pannes. Rendez-vous sur cette page pour vous abonner aux alertes. |
{: .reset-td-br-1 .reset-td-br-2 aria-label="Ressources à mettre en favoris" }
# Présentation de l'intégration
Source: /docs/fr/developer_guide/getting_started/integration_overview/index.md
# [](https://learning.braze.com/sdk-integration-basics){: style="float:right;width:120px;border:0;" class="noimgborder"} Premiers pas : Présentation de l'intégration {#braze-learning-course-image_buster-assetsimgbl_icon3png-httpslearningbrazecomsdk-integration-basics-stylefloatrightwidth120pxborder0-classnoimgbordergetting-started-integration-overview}
> Cet article donne un aperçu du processus d'onboarding.
{: style="max-width:50%;float:right;margin-left:15px;border:none;"}
En tant que ressource technique, vous donnerez à votre équipe les moyens d'agir en intégrant Braze dans votre pile technologique. L'onboarding se divise globalement en quatre étapes :
* [Découverte et planification](#discovery) : Travaillez avec votre équipe pour vous aligner sur la portée, planifier une structure pour les données et les campagnes, et créer une structure d'espace de travail appropriée.
* [Intégration](#integration) : Exécutez votre plan en intégrant le SDK et l'API, en activant les canaux de communication et en configurant l'importation et l'exportation des données.
* [Assurance qualité](#qa) : Confirmez que la boucle de données et d'envoi de messages entre la plateforme Braze et votre application ou site fonctionne comme prévu.
* [Maintenance](#maintenance) : Une fois que vous aurez transmis Braze à votre équipe marketing, vous continuerez à veiller à ce que tout se passe bien.
**Tip:**
Nous sommes conscients que chaque organisation a des besoins distincts, et Braze est conçu pour répondre à une gamme variée d'options de personnalisation qui peuvent être adaptées à vos exigences spécifiques. Les délais d'intégration varient en fonction de votre cas d'utilisation.
## Découverte et planification {#discovery}
Au cours de cette phase, vous travaillerez avec votre équipe pour définir les tâches d'onboarding et veiller à ce que toutes les parties prenantes s'alignent sur un objectif commun.
Votre équipe effectuera une planification de bout en bout de vos cas d'utilisation pour s'assurer que tout peut être créé comme prévu, avec les bonnes données disponibles pour le faire. Cette phase inclut votre chef de projet, votre responsable CRM, l'ingénierie front-end et back-end, les propriétaires de produits et les marketeurs.
La phase de découverte et de planification dure en moyenne six semaines. Les responsables de l'ingénierie peuvent s'attendre à passer 2 à 4 heures par semaine au cours de cette phase. Les développeurs qui travaillent avec le produit peuvent s'attendre à passer 10 à 20 heures par semaine sur Braze pendant la phase de découverte et de planification.
**Tip:**
Pendant la période d'onboarding de votre entreprise, Braze organisera des séances de présentation technique. Nous recommandons vivement aux ingénieurs de participer à ces sessions. Les sessions de présentation technique vous donnent l'occasion d'aborder l'évolutivité de l'architecture de la plateforme et de voir des exemples pratiques de la façon dont certaines entreprises de votre taille ont précédemment réussi avec des cas d'utilisation similaires.
{: style="max-width:40%;float:right;margin-left:15px;"}
### Planification des campagnes {#campaign-planning}
Votre équipe CRM planifiera les cas d'utilisation des communications que vous lancerez dans un avenir proche. Ceci inclut les éléments suivants :
* [Canal](https://www.braze.com/docs/fr/fr/user_guide/channels/) (par exemple, notifications push ou messages in-app)
* [Méthode de réception/distribution](https://www.braze.com/docs/fr/fr/user_guide/messaging/campaigns/schedule_your_campaign/) (par exemple, livraison planifiée ou livraison par événement)
* [Audience cible](https://www.braze.com/docs/fr/fr/user_guide/audience/segments/)
* [Indicateurs de réussite](https://www.braze.com/docs/fr/fr/user_guide/messaging/messaging_fundamentals/conversion_events/)
Par exemple, une campagne destinée aux nouveaux clients pourrait consister en un e-mail envoyé tous les jours à 10 heures à un segment de clients qui ont enregistré leur première session hier. L'événement de conversion (indicateur de réussite) consiste à enregistrer une session.
**Important:**
L'intégration ne peut pas commencer tant que l'étape de planification des campagnes n'est pas terminée. Cette étape permettra de déterminer quelles parties et pièces de Braze doivent être configurées au cours de la phase d'intégration.
### Créer des exigences en matière de données {#creating-data-requirements}
Ensuite, votre équipe CRM doit définir les données nécessaires pour lancer les campagnes qu'elle a planifiées, en créant des exigences en matière de données.
De nombreux types courants d'attributs utilisateur, tels que le nom, l'e-mail, la date de naissance, le pays et autres, font automatiquement l'objet d'un suivi après l'intégration du SDK Braze. Les autres types de données devront être définis comme des données personnalisées.
En tant que développeur, vous travaillerez avec votre équipe pour définir les données supplémentaires et personnalisées qu'il serait judicieux de suivre. Vos données personnalisées auront un impact sur la façon dont votre base d'utilisateurs sera classée et segmentée. Vous mettrez en place une taxonomie d'événements à travers vos outils de croissance, en structurant vos données de manière à ce qu'elles soient compatibles avec vos systèmes lorsqu'elles entrent et sortent de Braze.
**Tip:**
Veillez à ce que la nomenclature des données soit cohérente d'un outil à l'autre. Par exemple, votre entrepôt de données peut enregistrer « offre d'achat à durée limitée » d'une manière particulière. Vous devrez décider si un événement personnalisé est nécessaire dans Braze pour correspondre à ce format.
En savoir plus sur les [données collectées automatiquement et les données personnalisées](https://www.braze.com/docs/fr/fr/developer_guide/analytics/).
### Planification des personnalisations {#customizations-planning}
Discutez avec vos marketeurs des personnalisations qu'ils souhaitent. Par exemple, souhaitez-vous implémenter les Content Cards par défaut de Braze ? Souhaitez-vous modifier légèrement leur apparence pour qu'elles correspondent à vos directives de marque ? Voulez-vous développer une toute nouvelle interface utilisateur pour un composant et faire en sorte que Braze suive son analytique ? Différents niveaux de personnalisation nécessitent différents niveaux de portée.
### Obtenir l'accès au tableau de bord {#getting-dashboard-access}
Le tableau de bord de Braze constitue notre interface utilisateur sur le Web. Les marketeurs utiliseront le tableau de bord pour faire leur travail et créer du contenu. Les développeurs utilisent le tableau de bord pour gérer les paramètres d'intégration des applications, comme les clés API et les informations d'identification de notifications push.
L'administrateur de votre équipe doit vous ajouter (ainsi que tous les autres membres de l'équipe qui ont besoin d'accéder à Braze) en tant qu'utilisateurs sur votre tableau de bord.
### Espaces de travail et clés API {#workspaces-and-api-keys}
L'administrateur de votre équipe créera également différents [espaces de travail](https://www.braze.com/docs/fr/fr/user_guide/administer/global/create_and_manage_workspaces/). Les espaces de travail regroupent vos données — utilisateurs, segments, clés API — en un seul emplacement. Nous vous conseillons de ne regrouper que les différentes versions d'une même application ou d'applications très similaires au sein d'un même espace de travail.
Fait important, les espaces de travail fournissent des clés API pour plusieurs plateformes (comme iOS et Android). Vous utiliserez les clés API corrélées pour associer les données du SDK à un espace de travail particulier. Naviguez vers vos espaces de travail pour accéder à la clé API de chacune de vos applications. Assurez-vous que chaque clé API dispose des autorisations nécessaires pour effectuer le travail que vous avez défini. Pour plus de détails, consultez l'[article sur le provisionnement de l'API](https://www.braze.com/docs/fr/fr/api/basics/#rest-api-key).
**Important:**
Il est important que vous mettiez en place des environnements différents pour le développement et la production. La mise en place d'un environnement de test vous évitera de dépenser de l'argent réel lors de l'onboarding et de l'assurance qualité. Pour créer un environnement de test, configurez un espace de travail de test et veillez à utiliser sa clé API afin de ne pas alimenter votre espace de travail de production avec des données de test.
## Intégration {#integration}
{: style="max-width:45%;float:right;margin-left:15px;"}
Braze prend en charge les applications iOS, les applications Android, les applications web, et bien plus encore. Vous pouvez également opter pour l'utilisation d'un SDK wrapper multiplateforme, comme React Native ou Unity. En règle générale, les clients intègrent le système en 1 à 6 semaines. De nombreux clients ont intégré Braze avec un seul ingénieur, en fonction de l'étendue de ses compétences techniques et de sa bande passante. Cela dépend entièrement de votre périmètre d'intégration spécifique et du temps que votre équipe consacre au projet Braze.
Vous aurez besoin de développeurs capables de :
* Travailler dans la couche native de votre application ou de votre site
* Créer des processus pour utiliser notre REST API
* Effectuer des tests d'intégration
* Gérer l'authentification par jeton web JSON
* Maîtriser les compétences générales en matière de gestion des données
* Configurer des enregistrements DNS
### Partenaires d'intégration CDP {#cdp-integration-partners}
De nombreux clients profitent de l'onboarding de Braze pour réaliser également une intégration avec une plateforme de données client (CDP) en tant que partenaire d'intégration. Braze assure le suivi et l'analytique des données, tandis qu'un CDP peut fournir un acheminement et une orchestration supplémentaires des données. Braze offre une intégration fluide avec de nombreux CDP, tels que [mParticle](https://www.braze.com/docs/fr/fr/partners/data_and_analytics/customer_data_platform/mparticle/mparticle/) et [Segment](https://www.braze.com/docs/fr/fr/partners/data_and_analytics/customer_data_platform/segment/segment/).
Si vous effectuez une intégration côte à côte avec un CDP, vous mapperez les appels du SDK de votre CDP vers le SDK de Braze. Globalement, vous devrez :
* Mapper les appels d'identification sur `changeUser` ([Android](https://braze-inc.github.io/braze-android-sdk/kdoc/braze-android-sdk/com.braze/-i-braze/change-user.html), [iOS](https://braze-inc.github.io/braze-swift-sdk/documentation/brazekit/braze/changeuser(userid:sdkauthsignature:fileid:line:)/), [web](https://js.appboycdn.com/web-sdk/latest/doc/modules/braze.html#changeuser)) et définir les attributs.
* Mapper les appels de vidage de données sur `requestImmediateDataFlush` ([Android](https://braze-inc.github.io/braze-android-sdk/kdoc/braze-android-sdk/com.braze/-i-braze/request-immediate-data-flush.html?query=abstract%20fun%20requestImmediateDataFlush()), [iOS](https://braze-inc.github.io/braze-swift-sdk/documentation/brazekit/braze/requestimmediatedataflush()), [web](https://js.appboycdn.com/web-sdk/latest/doc/modules/braze.html#requestimmediatedataflush)).
* Enregistrer les événements personnalisés ou les achats.
Des exemples d'intégration entre le SDK de Braze et le CDP de votre choix peuvent être disponibles, en fonction de la plateforme que vous avez choisie. Pour plus d'informations, consultez notre [liste de partenaires technologiques CDP](https://www.braze.com/docs/fr/fr/partners/data_and_analytics/).
### Intégration du SDK Braze {#braze-sdk-integration}
Le SDK de Braze fournit deux fonctionnalités essentielles : il collecte et synchronise les données des utilisateurs dans un profil utilisateur consolidé, et alimente les canaux d'envoi de messages tels que les notifications push, les messages in-app et les Content Cards.
**Tip:**
Lorsqu'il est entièrement intégré à votre application ou à votre site, le SDK de Braze offre un niveau de sophistication marketing pleinement abouti. Si vous différez l'intégration du SDK de Braze, certaines des fonctionnalités décrites dans la documentation ne seront pas disponibles.
**Note:**
Pour renforcer la sécurité, vous pouvez activer l'[authentification SDK](https://www.braze.com/docs/fr/fr/developer_guide/sdk_integration/authentication/) afin d'empêcher les requêtes SDK non autorisées. Cette fonctionnalité est disponible sur toutes les principales plateformes, notamment Web, iOS, Android, React Native, Flutter, Unity, Cordova, .NET MAUI (Xamarin) et Expo.
Au cours de l'implémentation du SDK, vous devrez :
* Rédiger un code d'intégration SDK pour chaque plateforme que vous souhaitez prendre en charge.
* Activer les canaux d'envoi de messages pour chaque plateforme, en veillant à ce que le SDK de Braze suive les données issues de vos interactions avec vos clients par e-mail, SMS, notifications push et autres canaux.
* Créer toutes les personnalisations prévues pour les composants de l'interface utilisateur (par exemple, des Content Cards personnalisées). Pour un contenu entièrement personnalisé, vous devrez enregistrer les analyses, étant donné que la collecte automatique des données du SDK n'aura pas connaissance de vos nouveaux composants. Vous pouvez reproduire cette implémentation sur nos composants par défaut.
### Utiliser l'API de Braze {#using-the-braze-api}
Vous utiliserez notre REST API pour différentes tâches à différents moments de votre utilisation de Braze. L'API de Braze est utile pour :
1. L'importation de données historiques ; et
2. Les mises à jour continues qui ne sont pas déclenchées dans Braze. Par exemple, un profil utilisateur passe au niveau VIP sans qu'il se connecte à une application, l'API doit donc communiquer cette information à Braze.
Commencez à utiliser l'[API de Braze](https://www.braze.com/docs/fr/fr/api/basics/).
**Important:**
Lorsque vous utilisez l'API, veillez à grouper vos requêtes et à n'envoyer que des valeurs delta. Braze réécrit chaque attribut envoyé. Ne mettez pas à jour un attribut personnalisé si sa valeur n'a pas changé.
### Mise en place de l'analytique produit {#setting-up-product-analytics}
Braze est une plateforme orientée données. Les données dans Braze sont stockées sur le profil utilisateur.
Les points de données constituent une structure qui vous permet de vous assurer que vous capturez les bonnes données pour vos marketeurs, et pas seulement « n'importe quelle » donnée que vous pourriez aspirer. Familiarisez-vous avec les [points de données](https://www.braze.com/docs/fr/fr/user_guide/data/infrastructure/data_points/).
### Migration des données utilisateur existantes {#migrating-legacy-user-data}
Vous pouvez utiliser l'endpoint [`/users/track`](https://www.braze.com/docs/fr/fr/api/endpoints/user_data/post_user_track/) de Braze pour migrer des données historiques qui ont été enregistrées en dehors de Braze. Les jetons de notification push et les achats passés sont des exemples de données couramment importées. Cet endpoint peut être utilisé pour des importations ponctuelles ou des mises à jour régulières par lots.
Vous pouvez également importer des utilisateurs et mettre à jour les valeurs des attributs personnalisés en chargeant une seule fois un [fichier CSV](https://www.braze.com/docs/fr/fr/user_guide/data_and_analytics/user_data_collection/user_import/#importing-a-csv) dans le tableau de bord. Le chargement de fichiers CSV peut être utile pour les marketeurs, tandis que notre REST API permet une plus grande flexibilité.
### Mise en place du suivi de session {#setting-up-session-tracking}
Le SDK Braze génère des points de données « session ouverte » et « session fermée ». Le SDK Braze vide également les données à intervalles réguliers. Consultez ces liens pour connaître les valeurs par défaut du suivi de session, qui peuvent toutes être personnalisées ([Android](https://www.braze.com/docs/fr/fr/developer_guide/analytics/tracking_sessions/?tab=android), [iOS](https://www.braze.com/docs/fr/fr/developer_guide/analytics/tracking_sessions/?tab=swift), [web](https://www.braze.com/docs/fr/fr/developer_guide/analytics/tracking_sessions/?tab=web)).
### Suivi des événements personnalisés, des attributs et des événements d'achat {#tracking-custom-events-attributes-and-purchase-events}
Coordonnez avec votre équipe la mise en place de votre schéma de données planifié, y compris les événements personnalisés, les attributs utilisateur et les événements d'achat. Votre [schéma de données personnalisé](https://www.braze.com/docs/fr/fr/user_guide/data/activation/events/custom_events/) sera saisi à l'aide du tableau de bord et doit correspondre exactement à ce que vous avez mis en œuvre lors de l'intégration SDK.
**Tip:**
Les ID des utilisateurs, appelés `external_id` dans Braze, doivent être définis pour tous les utilisateurs connus. Ces éléments doivent être immuables et accessibles lorsque l'utilisateur ouvre l'application, vous permettant de suivre vos utilisateurs sur différents appareils et plateformes. Consultez l'article sur le [cycle de vie de l'utilisateur](https://www.braze.com/docs/fr/fr/user_guide/data/unification/user_data/user_profile_lifecycle/) pour connaître les meilleures pratiques.
### Autres outils {#other-tools}
En fonction de votre cas d'utilisation, il se peut que vous ayez besoin de mettre en place d'autres outils. Par exemple, vous pourriez avoir besoin de configurer un outil comme les [géorepérages](https://www.braze.com/docs/fr/fr/user_guide/engagement_tools/locations_and_geofences#about-locations-and-geofences/) pour réaliser vos scénarios utilisateur. Nous avons constaté que les clients qui ont la possibilité de configurer ces outils supplémentaires après avoir effectué les étapes essentielles de l'intégration sont ceux qui réussissent le mieux.
## Assurance qualité {#qa}
Au fur et à mesure de l'exécution de votre intégration, vous fournirez une assurance qualité afin de vous assurer que tout ce que vous mettez en place fonctionne comme prévu. Cette assurance qualité se divise en deux catégories générales : l'ingestion de données et les canaux de communication.
**Important:**
Assurez-vous que vos environnements de production et de test sont configurés avant de commencer l'assurance qualité.
| **Ingestion de données pour l'assurance qualité** | **Envoi de messages pour l'assurance qualité** |
|---------------------------|---------------------------------------------------------------|
| Vous assurerez la qualité de l'ingestion, du stockage et de l'exportation des données. | Vous vous assurerez que vos messages sont envoyés correctement à vos utilisateurs et que tout se présente bien. |
| Effectuez des tests pour confirmer que les données sont stockées correctement. | Créez des segments d'utilisateurs. |
| Confirmez que les données de session sont correctement attribuées à l'espace de travail prévu dans Braze. | Lancez des Campaigns et des Canvas avec succès. |
| Confirmez que les débuts et les fins de session sont enregistrés. | Confirmez que les bonnes Campaigns sont diffusées aux bons segments d'utilisateurs. |
| Confirmez que les informations relatives aux attributs des utilisateurs sont correctement enregistrées dans les profils utilisateur. | Confirmez que les jetons de notification push sont correctement enregistrés. |
| Testez que les données personnalisées sont correctement enregistrées par rapport aux profils utilisateur. | Confirmez que les jetons de notification push sont correctement retirés. |
| Créez des profils utilisateur anonymes. | Testez que les Campaigns push sont correctement envoyées aux appareils et que l'engagement est enregistré. |
| Confirmez que les profils utilisateur anonymes deviennent des profils utilisateur connus lorsque la méthode `changeUser()` est appelée. | Testez que les messages in-app sont distribués et que les indicateurs sont enregistrés. |
| | Vérifiez que les Content Cards sont distribuées et que les indicateurs sont enregistrés. |
| | Facilitez le contenu connecté (par exemple, AccuWeather). |
| | Confirmez que toutes les intégrations des canaux de communication fonctionnent correctement. |
{: .reset-td-br-1 .reset-td-br-2 aria-label="Quality assurance #qa" }
**Note:**
Lors de l'assurance qualité de votre intégration SDK, utilisez l'[outil de débogage du SDK](https://www.braze.com/docs/fr/fr/developer_guide/sdk_integration/debugging/) pour résoudre les problèmes sans avoir à activer la journalisation détaillée pour votre application.
### Transmission de Braze aux marketeurs {#passing-braze-off-to-marketers}
Une fois que vous avez intégré votre plateforme ou votre site, vous devriez impliquer votre équipe marketing pour lui transmettre la propriété de la plateforme. Ce processus est différent d'une entreprise à l'autre, mais il peut comprendre les éléments suivants :
* Composer une [logique Liquid](https://www.braze.com/docs/fr/fr/user_guide/personalization_and_dynamic_content/liquid/#about-liquid) complexe
* Faciliter le [réchauffement d'adresses IP des e-mails](https://www.braze.com/docs/fr/fr/user_guide/channels/email/email_setup/ip_warming/)
* S'assurer que les autres parties prenantes comprennent le type de données qui font l'objet d'un suivi
### Développer pour l'avenir {#develop-for-the-future}
Vous est-il déjà arrivé d'hériter d'une base de code et de n'avoir aucune idée de ce à quoi pensait le développeur initial ? Pire encore, avez-vous déjà écrit du code, l'avez compris parfaitement, puis vous êtes senti complètement déconcerté lorsque vous y êtes revenu un an plus tard ?
Lors de l'onboarding de Braze, les décisions collectives que vous prenez concernant les données, les profils utilisateur, les intégrations qui étaient ou non dans le périmètre, la façon dont les personnalisations sont censées fonctionner, et plus encore, vous sembleront fraîches dans votre esprit et donc évidentes. Lorsque votre équipe souhaite développer Braze ou lorsque d'autres ressources techniques sont affectées à votre projet Braze, ces informations seront obscures.
Créez une ressource pour consolider les informations que vous avez apprises au cours de vos séances de présentation technique. Cette ressource vous aidera à réduire le temps nécessaire à l'onboarding des nouveaux développeurs qui rejoignent votre équipe (ou vous servira d'aide-mémoire lorsque vous devrez étendre votre implémentation actuelle de Braze).
## Maintenance {#maintenance}
Après le transfert à vos marketeurs, vous continuerez à servir de ressource pour la maintenance. Vous serez attentif aux mises à jour d'iOS et d'Android susceptibles d'avoir un impact sur le SDK Braze et vous vous assurerez que vos fournisseurs tiers sont à jour.
Vous assurerez le suivi des mises à jour de la plateforme Braze via le [référentiel GitHub](https://github.com/braze-inc/) de Braze. Occasionnellement, votre administrateur recevra également des e-mails concernant des mises à jour urgentes et des corrections de bogues directement de Braze.
## Limites de débit du SDK {#sdk-rate-limits}
### Utilisateurs actifs par mois CY 24-25, MAU universel, MAU Web et MAU mobile {#monthly-active-users-cy-24-25-universal-mau-web-mau-and-mobile-mau}
Pour les clients ayant souscrit aux offres Utilisateurs actifs mensuels CY 24-25, MAU universels, MAU Web et MAU mobiles, Braze applique des limites de débit côté serveur sur les requêtes API utilisées par nos SDK pour mettre à jour les sessions, les attributs utilisateur, les événements et autres données de profil utilisateur. Ceci afin d'assurer la stabilité de la plateforme et de maintenir un service rapide et fiable.
* Les limites de débit horaires sont fixées en fonction du trafic SDK prévu sur votre compte, qui peut correspondre au nombre d'utilisateurs actifs mensuels (MAU) que vous avez acheté, au secteur d'activité, à la saisonnalité ou à d'autres facteurs. Lorsque la limite de débit horaire est atteinte, Braze limite les requêtes jusqu'à l'heure suivante.
* Toutes les requêtes soumises à une limite de débit sont automatiquement relancées par le SDK.
* Les requêtes du SDK sont corrélées à la quantité de données personnalisées collectées dans le cadre de votre implémentation. Si vous êtes constamment proche ou à la limite de votre débit horaire, envisagez de :
* Réviser votre intégration SDK afin de réduire la collecte excessive de données.
* Bloquer les données personnalisées qui ne sont pas essentielles pour vos cas d'utilisation marketing.
* Les limites de débit en rafale sont des limites de courte durée qui s'appliquent lorsqu'un volume important de requêtes arrive dans un laps de temps très court (c'est-à-dire en l'espace de quelques secondes). Vous n'avez pas besoin d'agir lorsque des limites de rafale se produisent, et le SDK réessayera peu de temps après.
* Les limites de débit constant contrôlent le volume de requêtes soutenu sur une fenêtre glissante plus longue que la fenêtre de rafale (par exemple, plusieurs minutes) et contribuent à lisser le trafic continu entre les limites de rafale et votre limite de débit horaire.
### Trouver vos limites de débit {#finding-your-rate-limits}
Pour connaître les limites actuelles basées sur le débit attendu du SDK, allez dans **Paramètres** > **Clés API** > **Limites API et SDK**.
Pour consulter l'historique d'utilisation, allez dans **Paramètres** > **Clés API** > **Tableau de bord API et SDK**.
### Demander une augmentation des limites de débit {#requesting-higher-rate-limits}
Si vous avez besoin d'une limite de débit Braze plus élevée, contactez l'assistance Braze ou votre gestionnaire de la satisfaction client et incluez les informations suivantes :
* Si vous avez besoin d'une augmentation temporaire ou permanente.
* Pourquoi vous avez besoin de cette augmentation.
* Quels endpoints et environnements sont concernés.
* Votre volume de trafic approximatif et votre calendrier, y compris la date de début, la durée et les heures de pointe.
* Si vous pouvez regrouper les appels ou répartir le trafic dans le temps.
Une fois votre demande soumise, Braze l'examine et vous informe du résultat.
### Modifications et assistance {#changes-and-support}
Braze peut modifier les limites de débit afin de protéger la stabilité du système ou de permettre une augmentation du débit de données sur votre compte. Contactez l'assistance Braze ou votre gestionnaire de la satisfaction client pour toute question ou préoccupation concernant les limites de débit et leur impact sur votre entreprise.
# Vue d'ensemble architecturale
Source: /docs/fr/developer_guide/getting_started/architecture_overview/index.md
# Démarrage : Vue d'ensemble architecturale {#getting-started-architectural-overview}
> Cet article traite des différentes parties et composants de la pile technologique Braze, avec des liens vers des articles pertinents.
Globalement, Braze est une plateforme orientée données. La plateforme Braze, alimentée par le SDK, la REST API et les intégrations partenaires, vous permet d'agréger et d'exploiter vos données.
{: style="display:block;margin:auto;" }
* [Ingestion de données](#ingestion) : Braze tire des données de diverses sources.
* [Classification](#classification) : Votre équipe marketing segmente dynamiquement votre base d'utilisateurs en utilisant ces indicateurs.
* [Orchestration](#orchestration) : Braze coordonne intelligemment les messages à différents segments d'audience au moment idéal.
* [Action](#action) : Votre équipe marketing exploite les données en créant du contenu à travers une variété de canaux de communication, tels que les SMS et les e-mails.
* [Personnalisation](#personalization) : Les données sont transformées en temps réel avec des informations personnalisées sur votre audience.
* [Exportation](#exporting-data) : Ensuite, Braze suit l'engagement de vos utilisateurs avec ces messages et le renvoie dans la plateforme, créant une boucle. Vous obtenez des informations sur ces données grâce à des rapports et des analyses en temps réel.
Tout cela fonctionne ensemble pour créer des interactions réussies entre votre base d'utilisateurs et votre marque afin que vous puissiez atteindre vos objectifs. Braze fait tout cela dans le contexte de ce que nous appelons notre pile intégrée verticalement. Examinons chaque couche, une à la fois.
## Ingestion de données {#ingestion}
La plateforme Braze s'appuie sur une architecture de flux de données en continu, exploitant Snowflake, Kafka, MongoDB et Redis. Les données provenant de diverses sources peuvent être intégrées à Braze via le SDK et l'API. La plateforme est capable de gérer toutes les données en temps réel, quelle que soit leur imbrication ou leur structure. Les données dans Braze sont stockées sur le profil utilisateur.
**Tip:**
Braze peut suivre les données d'un utilisateur tout au long de son parcours avec vous, depuis le moment où il est anonyme jusqu'au moment où il est connecté à votre application et identifié. Les identifiants d'utilisateur, appelés `external_id`s dans Braze, doivent être définis pour chacun de vos utilisateurs. Ces identifiants doivent être immuables et accessibles lorsque l'utilisateur ouvre l'application, vous permettant de suivre vos utilisateurs sur différents appareils et plateformes. Consultez l'[article sur le cycle de vie des utilisateurs](https://www.braze.com/docs/fr/fr/user_guide/data/unification/user_data/user_profile_lifecycle/) pour connaître les bonnes pratiques.
{: style="display:block;margin:auto;" }
**Note:**
Cette base de données de profils utilisateur centrée sur la personne permet une vitesse interactive en temps réel. Braze pré-calcule les valeurs lorsque les données arrivent et stocke les résultats dans un format de document léger pour une récupération rapide. Et comme la plateforme a été conçue de cette manière dès le départ, elle est idéale pour la plupart des cas d'utilisation d'envoi de messages, en particulier en combinaison avec d'autres concepts de données tels que le Contenu connecté, les catalogues de produits et les attributs imbriqués.
### Répartition des sources de données {#data-source-breakdown}
Braze utilise différents systèmes de stockage de données pour diverses fonctionnalités. Il est essentiel de comprendre quelles fonctionnalités utilisent quelles sources de données pour la gestion des données et la résolution des problèmes.
#### Fonctionnalités basées sur MongoDB {#mongodb-powered-features}
- Événements personnalisés (suivis par le SDK et l'API)
- Attributs personnalisés
- Profils utilisateur
- Événements d'achat
- La plupart des fonctionnalités de segmentation et de ciblage
#### Fonctionnalités optimisées par Snowflake {#snowflake-powered-features}
- [Extensions de segments SQL](https://www.braze.com/docs/fr/fr/user_guide/audience/segments/segment_extension/sql_segments/)
- [Suite de prédiction](https://www.braze.com/docs/fr/fr/user_guide/brazeai/)
- [Chemins personnalisés](https://www.braze.com/docs/fr/fr/user_guide/messaging/canvas/canvas_components/experiment_step/personalized_paths/) et [variante personnalisée](https://www.braze.com/docs/fr/fr/user_guide/engagement_tools/testing/multivariant_testing/optimizations/#personalized-variant)
- [Recommandations d'articles personnalisées par l'intelligence artificielle](https://www.braze.com/docs/fr/fr/user_guide/brazeai/item_recommendations/creating_recommendations/ai/)
- [Taux d'ouverture réel estimé](https://www.braze.com/docs/fr/fr/user_guide/message_building_by_channel/email/reporting_and_analytics/email_reporting/#estimated-real-open-rate) (n'utilise pas les événements personnalisés)
**Important:**
**Considérations relatives à la suppression des données :** Les événements personnalisés sont stockés dans MongoDB et sont distincts des données Snowflake. Si vous devez supprimer des données d'événements personnalisés erronées, vous devez le faire dans MongoDB. Les fonctionnalités optimisées par Snowflake (telles que les extensions de segments SQL et d'autres fonctionnalités optimisées par Snowflake) utilisent les données de Snowflake, qui sont traitées séparément. La suppression de données d'un système ne les supprime pas automatiquement de l'autre.
### Sources de données backend via l'API Braze {#backend-data-sources-through-the-braze-api}
Braze peut extraire des données des bases de données utilisateur, des transactions hors ligne et des entrepôts de données par le biais de notre [REST API](https://www.braze.com/docs/fr/fr/api/endpoints/user_data/).
### Sources de données frontend via le SDK Braze {#frontend-data-sources-through-braze-sdk}
Braze capture automatiquement des données first-party à partir de sources de données frontend, telles que les appareils des utilisateurs, par le biais du [SDK Braze](https://www.braze.com/docs/fr/fr/user_guide/get_started/sdk_overview/). Le SDK gère les nouveaux utilisateurs (anonymes) et gère les données de leur profil utilisateur tout au long de leur cycle de vie.
### Intégrations partenaires {#partner-integrations}
Braze compte plus de 150 partenaires technologiques, que nous appelons « Alloys ». Vous pouvez compléter vos flux de données par un réseau solide de [technologies interopérables et d'API de données.](https://www.braze.com/docs/fr/fr/partners/home/)
### Connexion directe à l'entrepôt via l'Ingestion de données cloud de Braze {#direct-warehouse-connection-through-braze-cloud-data-ingestion}
Vous pouvez transmettre des données clients de votre entrepôt de données à la plateforme via l'[Ingestion de données cloud de Braze](https://www.braze.com/docs/fr/fr/user_guide/data/unification/cloud_ingestion/) en quelques minutes seulement, ce qui vous permet de synchroniser les attributs, les événements et les achats pertinents des utilisateurs. L'intégration de l'Ingestion de données cloud prend en charge des structures de données complexes, y compris des JSON imbriqués et des tableaux d'objets.
L'Ingestion de données cloud peut synchroniser les données de Snowflake, Amazon Redshift, Databricks et Google BigQuery.
## Classification {#classification}
La couche de classification permet à votre équipe de classer et de créer dynamiquement des audiences, appelées [segments](https://www.braze.com/docs/fr/fr/user_guide/audience/segments/), en fonction des données qui transitent par Braze.
**Note:**
Les couches de classification, d'orchestration et de personnalisation sont celles où votre équipe marketing effectuera une grande partie de son travail. Elle interagit avec ces couches le plus souvent via le tableau de bord de Braze, notre interface web. Les développeurs ont un rôle dans la configuration et la personnalisation de ces couches.
De nombreux types courants d'attributs utilisateur, tels que le nom, l'e-mail, la date de naissance, le pays et d'autres, font l'objet d'un suivi automatique par le SDK par défaut. En tant que développeur, vous travaillerez avec votre équipe pour définir quelles données supplémentaires et personnalisées il est pertinent de suivre pour votre cas d'utilisation. Vos données personnalisées auront un impact sur la façon dont votre base d'utilisateurs sera classée et segmentée. Vous mettrez en place ce modèle de données au cours du processus d'implémentation.
En savoir plus sur les [données collectées automatiquement et les données personnalisées](https://www.braze.com/docs/fr/fr/developer_guide/analytics/).
## Orchestration {#orchestration}
La couche d'orchestration permet à votre équipe marketing de concevoir des parcours utilisateur basés sur vos données utilisateur et vos engagements antérieurs. Ce travail s'effectue principalement via notre interface de tableau de bord, mais vous avez également la possibilité de lancer des [campagnes via l'API](https://www.braze.com/docs/fr/fr/api/api_campaigns/#api-campaigns). Par exemple, vous pouvez demander à votre backend d'indiquer à Braze quand envoyer les messages et les campagnes que vos marketeurs ont conçus dans le tableau de bord, et de les déclencher selon la logique de votre backend. Un exemple de message déclenché par une API pourrait être des réinitialisations de mot de passe ou des confirmations d'expédition.
**Note:**
Les campagnes déclenchées par API sont idéales pour des cas d'utilisation transactionnels plus avancés. Elles permettent aux marketeurs de gérer le texte des campagnes, les tests multivariés et les règles de rééligibilité dans le tableau de bord de Braze, tout en déclenchant la distribution de ce contenu depuis vos serveurs et systèmes. La requête API pour déclencher le message peut également inclure des données supplémentaires à intégrer dans le message en temps réel.
### Indicateurs de fonctionnalité {#feature-flags}
Braze vous permet d'activer ou de désactiver à distance des fonctionnalités pour une sélection d'utilisateurs au moyen d'[indicateurs de fonctionnalité](https://www.braze.com/docs/fr/fr/developer_guide/feature_flags/). Cela permet à vos marketeurs de cibler le bon segment de votre base d'utilisateurs avec des messages pour des fonctionnalités que vous n'avez pas encore déployées à l'ensemble de votre audience. Mais plus que cela, les indicateurs de fonctionnalité peuvent être utilisés pour activer et désactiver une fonctionnalité en production sans déploiement de code supplémentaire ni mises à jour de l'App Store. Cela vous permet de déployer de nouvelles fonctionnalités en toute sécurité et en toute confiance.
## Personnalisation {#personalization}
La couche de personnalisation représente la capacité à fournir du contenu dynamique dans vos messages. En utilisant Liquid, un langage de personnalisation largement utilisé, votre équipe peut extraire dynamiquement des données existantes pour afficher le message adapté à chaque destinataire. De plus, vous pouvez insérer toute information accessible sur votre serveur web ou via une API directement dans les messages que vous envoyez, tels que les notifications push ou les e-mails, en utilisant le [Contenu connecté](https://www.braze.com/docs/fr/fr/user_guide/messaging/design_and_edit/personalize/connected_content/). Le Contenu connecté s'appuie sur Liquid et utilise une syntaxe familière.
De plus, étant donné que ce contenu dynamique est programmable, les marketeurs peuvent inclure des valeurs calculées, des réponses d'autres appels ou des éléments du catalogue de produits. Après avoir mis en place ces systèmes lors de l'implémentation, votre équipe marketing pourra le faire avec peu ou pas de soutien des équipes techniques.
## Action {#action}
La couche d'action permet de transmettre vos messages réels à vos utilisateurs. Le but de la couche d'action est d'envoyer le bon message au bon utilisateur au bon moment, en fonction des données disponibles à travers toutes les couches précédemment décrites. L'envoi de messages se fait à l'intérieur de votre application ou site (comme l'envoi de messages in-app ou via des éléments graphiques tels que des carrousels de Content Cards et des bannières) ou en dehors de votre expérience sur l'application (comme l'envoi de notifications push ou d'e-mails).
### Canaux de communication {#messaging-channels}
Braze a été conçu pour gérer un paysage technologique en évolution avec son modèle de données centré sur l'utilisateur et indépendant des canaux. Le tableau de bord gère la distribution des messages et les déclencheurs transactionnels. Par exemple, vos marketeurs peuvent déclencher un message SMS offrant un bon de réduction dans l'une de vos nouvelles boutiques lorsqu'un utilisateur entre dans le géorepérage situé près de cet emplacement, ou envoyer un e-mail à un utilisateur pour lui faire savoir que son émission préférée a une nouvelle saison.
Le [SDK Braze](https://www.braze.com/docs/fr/fr/user_guide/get_started/sdk_overview/) alimente des canaux de communication supplémentaires : push, messages in-app et Content Cards. Vous intégrez le SDK à votre application ou site pour permettre à votre équipe marketing d'utiliser le tableau de bord de Braze pour coordonner ses campagnes sur tous les canaux de communication pris en charge.

## Exportation des données {#exporting-data}
De manière essentielle, toutes les interactions des utilisateurs finaux avec Braze sont suivies afin que vous puissiez mesurer votre engagement et votre portée. Et une fois que Braze a agrégé vos données issues de toutes ces sources, celles-ci peuvent être réexportées vers votre pile technologique à l'aide de divers outils, bouclant ainsi la boucle.
### Currents
[Currents](https://www.braze.com/docs/fr/fr/user_guide/data/distribution/braze_currents/) est un module complémentaire optionnel de Braze qui fournit une exportation granulaire en flux continu alimentant d'autres destinations de votre pile. Currents est un flux de données brutes par utilisateur et par événement qui exporte des données toutes les cinq minutes, ou tous les 15 000 événements, selon la première éventualité. Parmi les exemples de destinations en aval pour Currents, on trouve Segment, S3, Redshift et Mixpanel, entre autres.
### Partage de données Snowflake {#snowflake-data-sharing}
La fonctionnalité de [partage sécurisé des données](https://www.braze.com/docs/fr/fr/partners/data_and_analytics/data_warehouses/snowflake/) de Snowflake permet à Braze de vous donner un accès sécurisé aux données sur notre portail Snowflake sans avoir à vous soucier des frictions de flux de travail, des points de défaillance et des coûts inutiles qui accompagnent les relations habituelles avec les fournisseurs de données. Tout le partage est accompli grâce à la couche de services unique et au magasin de métadonnées de Snowflake : aucune donnée n'est réellement copiée ou transférée entre les comptes. Il s'agit d'un concept important, car les données partagées ne prennent pas de place dans un compte consommateur et, par conséquent, ne contribuent pas à vos frais mensuels de stockage des données. Les seuls frais pour les consommateurs concernent les ressources informatiques (c'est-à-dire les entrepôts virtuels) utilisées pour interroger les données partagées.
### API d'exportation Braze {#braze-export-apis}
L'API Braze fournit des [endpoints](https://www.braze.com/docs/fr/fr/api/endpoints/export/) qui vous permettent d'exporter de manière programmatique des analyses agrégées, ainsi que d'exporter des données d'utilisateurs individuels. Ces données peuvent être exportées pour des audiences et des segments de toute taille.
### CSV {#csvs}
Enfin, il est possible de télécharger vos données agrégées directement à partir du tableau de bord sous la forme d'un fichier [CSV](https://www.braze.com/docs/fr/fr/user_guide/data/distribution/export_braze_data/). L'option CSV permet facilement à vos membres d'équipe d'exporter des données depuis Braze.
**Tip:**
Bien que l'exportation CSV ait une limite de base de 500 000 lignes, les API n'ont pas de limite à cet égard.
## Tout mettre en perspective {#putting-it-all-together}
L'un de vos utilisateurs, appelons-le Mel, vient de recevoir votre annonce de produit. En arrière-plan, toutes les couches de la plateforme Braze ont fonctionné ensemble pour garantir la fluidité de ce processus.
Les informations de Mel ont été importées dans Braze depuis votre ancienne plateforme d'engagement client via une importation CSV. Chaque fois que Mel interagissait avec votre application après l'intégration, de nouvelles données étaient ajoutées à son profil client.
Votre annonce de produit a été envoyée à tous les clients qui ont aimé un article similaire dans votre application. Vous avez défini ces données comme un événement personnalisé. Le SDK a suivi cet événement et a segmenté votre base d'utilisateurs en conséquence. Braze a orchestré le meilleur moment de la journée pour envoyer cette annonce et a personnalisé l'annonce en appelant Mel par son prénom préféré.
Lorsque Mel ouvre l'annonce, elle ajoute votre nouveau produit à sa liste de souhaits. Braze enregistre automatiquement le fait qu'elle ait cliqué sur l'e-mail. Le SDK suit qu'elle a ajouté votre nouveau produit à sa liste de souhaits. Chaque fois qu'ils interagissent avec votre marque, vous et vos utilisateurs en apprenez davantage les uns sur les autres.

# Créer avec un LLM
Source: /docs/fr/developer_guide/getting_started/build_with_llm/index.md
# Créer avec un LLM {#building-with-an-llm}
> Utilisez des assistants de codage basés sur l'intelligence artificielle pour accélérer votre flux de travail d'intégration Braze. Connectez votre IDE au serveur MCP Braze Docs via Context7 et obtenez des conseils précis et actualisés sur le SDK directement dans votre environnement de développement.
Les assistants de codage basés sur l'intelligence artificielle peuvent vous aider à écrire du code d'intégration, à résoudre des problèmes et à explorer les fonctionnalités du SDK Braze, mais uniquement s'ils disposent du contexte approprié. Le serveur Braze Docs MCP permet à votre assistant d'intelligence artificielle d'accéder directement à la documentation Braze, afin qu'il puisse générer des extraits de code précis et répondre à des questions techniques en se basant sur les dernières références SDK.
## Connexion au Braze Docs MCP {#connecting-to-the-braze-docs-mcp}
[Context7](https://context7.com/braze-inc/braze-docs) sert de pont entre votre assistant d'intelligence artificielle et la bibliothèque de documentation Braze. En ajoutant Context7 à la configuration MCP de votre IDE, votre assistant d'intelligence artificielle peut interroger l'ensemble de la documentation Braze et récupérer à la demande les références SDK, les exemples de code et les guides d'intégration pertinents.
### Configuration de Context7 {#setting-up-context7}
Pour connecter votre assistant d'intelligence artificielle au Braze Docs MCP via Context7, ajoutez la configuration suivante au fichier `mcp.json` de votre IDE.
Dans [Cursor](https://cursor.com/), rendez-vous dans **Settings** > **Tools and Integrations** > **MCP Tools** > **Add Custom MCP**, puis ajoutez l'extrait de code suivant :
```json
{
"mcpServers": {
"context7": {
"command": "npx",
"args": ["-y", "@upstash/context7-mcp@latest"]
}
}
}
```
Enregistrez la configuration et redémarrez Cursor. Votre assistant d'intelligence artificielle peut désormais accéder à la documentation Braze via Context7 lorsque vous incluez `use context7` dans vos prompts.
Dans Claude Desktop, rendez-vous dans **Settings** > **Developer** > **Edit Config**, puis ajoutez ce qui suit à votre fichier `claude_desktop_config.json` :
```json
{
"mcpServers": {
"context7": {
"command": "npx",
"args": ["-y", "@upstash/context7-mcp@latest"]
}
}
}
```
Enregistrez la configuration et redémarrez Claude Desktop.
Ajoutez les éléments suivants à votre fichier VS Code `settings.json` ou `.vscode/mcp.json` :
```json
{
"mcpServers": {
"context7": {
"command": "npx",
"args": ["-y", "@upstash/context7-mcp@latest"]
}
}
}
```
Enregistrez la configuration et redémarrez VS Code.
**Note:**
Context7 est différent du [serveur Braze MCP](https://www.braze.com/docs/fr/fr/developer_guide/mcp_server/). Context7 permet à votre assistant d'intelligence artificielle d'accéder à la **documentation Braze**, tandis que le serveur Braze MCP offre un accès en lecture seule aux **données de votre espace de travail Braze** (telles que les campagnes, les segments et les analyses). Vous pouvez utiliser les deux ensemble pour bénéficier d'une expérience de développement assistée par l'intelligence artificielle plus complète.
## Rédiger des prompts pour le développement du SDK Braze {#writing-prompts-for-braze-sdk-development}
Une fois Context7 configuré, incluez `use context7` dans vos prompts afin d'indiquer à votre assistant d'intelligence artificielle d'utiliser la documentation Braze comme contexte. Les exemples suivants illustrent comment rédiger des prompts efficaces pour les tâches courantes du SDK.
### React Native SDK {#react-native-sdk}
Ces prompts illustrent les tâches d'intégration courantes pour le [SDK Braze React Native](https://www.braze.com/docs/fr/fr/developer_guide/sdk_integration/?sdktab=react%20native).
#### Initialisation du SDK {#initializing-the-sdk}
```text
Using the Braze React Native SDK, show me how to initialize the SDK
in my App.tsx with an API key and custom endpoint. Include the
configuration for automatic session tracking. Use context7.
```
#### Enregistrement d'événements personnalisés avec des propriétés {#logging-custom-events-with-properties}
```text
I need to track user activity in my React Native app using the Braze
React Native SDK. Show me how to log a custom event called
"ProductViewed" with properties for product_id, category, and price.
Use context7.
```
#### Configuration des notifications push {#setting-up-push-notifications}
```text
Using the Braze React Native SDK, walk me through requesting push
notification permissions on both iOS and Android 13+. Include the
code for registering the push token with Braze. Use context7.
```
#### Gestion des messages in-app {#handling-in-app-messages}
```text
Show me how to subscribe to in-app messages using the Braze React
Native SDK, including how to log impressions and button clicks
programmatically. Use context7.
```
### Web SDK {#web-sdk}
Ces prompts illustrent les tâches d'intégration courantes pour le [SDK Web Braze](https://www.braze.com/docs/fr/fr/developer_guide/sdk_integration/?sdktab=web).
#### Initialisation du SDK
```text
Using the Braze Web SDK, show me how to initialize the SDK with
braze.initialize(), including the API key, base URL, and options
for enabling logging and automatic in-app message display.
Use context7.
```
#### Suivi des événements personnalisés et des achats {#tracking-custom-events-and-purchases}
```text
Using the Braze Web SDK, create a JavaScript module that logs a
custom event called "VideoPlayed" with properties for video_id,
duration_seconds, and completion_percentage. Also show how to log
a purchase with product ID, price, currency code, and quantity.
Use context7.
```
#### Inscription aux notifications push Web {#registering-for-web-push}
```text
Using the Braze Web SDK, provide the HTML and JavaScript needed to
register a user for web push notifications after they click a
"Subscribe to updates" button. Include the service worker setup.
Use context7.
```
#### Gestion des attributs utilisateur {#managing-user-attributes}
```text
Using the Braze Web SDK, show me how to set standard user attributes
(first name, email, country) and custom user attributes (favorite_genre,
subscription_tier) for the current user. Use context7.
```
## Documentation en texte brut {#plain-text-documentation}
Vous pouvez accéder à la documentation du guide du développeur Braze sous forme de fichiers texte brut optimisés pour les outils d'intelligence artificielle et les LLM. Ces fichiers fournissent la documentation Braze dans un format que les assistants d'intelligence artificielle peuvent analyser et comprendre sans les contraintes du rendu HTML.
| Fichier | Description |
|------|-------------|
| [llms.txt](https://www.braze.com/docs/fr/fr/developer_guide/llms.txt) | Un index des pages de documentation pour les développeurs Braze, avec titres et descriptions. Utilisez-le comme point de départ pour découvrir la documentation disponible. |
| [llms-full.txt](https://www.braze.com/docs/fr/fr/developer_guide/llms-full.txt) | La documentation complète pour les développeurs Braze dans un seul fichier texte brut, formaté pour être utilisé par les LLM. |
{: .reset-td-br-1 .reset-td-br-2 aria-label="Documentation en texte brut" }
Ces fichiers respectent la [norme llms.txt](https://llmstxt.org/), une convention émergente visant à rendre la documentation accessible aux outils d'intelligence artificielle. Vous pouvez référencer ces fichiers directement dans vos prompts ou coller leur contenu dans un LLM pour fournir du contexte.
# Aperçu de la personnalisation
Source: /docs/fr/developer_guide/getting_started/customization_overview/index.md
# Aperçu de la personnalisation {#customization-overview}
> Chez Braze, presque tout est entièrement personnalisable ! Les articles de ce guide de personnalisation vous montrent comment affiner votre expérience Braze grâce à un mélange de configuration et de personnalisation. Au cours de ce processus, les équipes marketing et d'ingénierie doivent travailler en étroite collaboration pour coordonner exactement la manière de personnaliser les canaux d'envoi de messages de Braze.
**Note:**
Le SDK de Braze est une boîte à outils puissante, mais à un niveau élevé, il fournit deux fonctionnalités importantes : il aide à collecter et à synchroniser les données des utilisateurs entre les plateformes vers un profil utilisateur consolidé, et gère également les canaux d'envoi de messages tels que les messages in-app, les notifications push et les Content Cards. Les articles du guide de personnalisation partent du principe que vous avez déjà suivi le [processus d'implémentation du SDK](https://www.braze.com/docs/fr/fr/developer_guide/home/).
Tous les composants de Braze sont conçus pour être accessibles, adaptables et personnalisables. À ce titre, nous vous recommandons de commencer par les composants par défaut de `BrazeUI` et de les personnaliser en fonction des besoins de votre marque et de votre cas d'utilisation. Chez Braze, nous avons défini trois approches de personnalisation en fonction de leur niveau d'effort et de flexibilité. Ces approches sont appelées « Crawl » (ramper), « Walk » (marcher) et « Run » (courir).
- **Crawl (ramper) :** Tirez parti des options de style de base pour une mise en œuvre rapide et nécessitant peu d'effort.
- **Walk (marcher) :** Ajoutez un style personnalisé aux modèles par défaut pour qu'ils correspondent mieux à l'expérience de votre marque.
- **Run (courir) :** Personnalisez chaque partie de vos messages, du style au comportement en passant par les connexions cross-canal.
{: style="max-width:35%;float:right;margin-left:15px;border:none;"}
L'approche Crawl place le pouvoir de personnalisation directement entre les mains des marketeurs. Bien qu'un petit travail de développement soit nécessaire en amont pour intégrer les canaux de communication de Braze à votre application ou à votre site, cette approche vous permet d'être opérationnel plus rapidement.
Les marketeurs déterminent le contenu, l'audience et le moment de diffusion des messages via le tableau de bord. Les options de style sont toutefois limitées. Cette approche convient mieux aux équipes dont les ressources en développeurs sont limitées ou qui souhaitent partager rapidement un contenu simple.
Aperçu de la personnalisation
Personnalisation
Description
Effort
Faible
Travail du développeur
0-1 heures
Style de carte
Utilisez les modèles par défaut de Braze.
Comportement
Choisissez parmi les options de comportement par défaut.
Suivi analytique
Les données analytiques sont capturées dans Braze.
Paires clé-valeur
Facultatif, permet une personnalisation supplémentaire de l'UI/UX.
{: style="max-width:35%;float:right;margin-left:15px;border:none;"}
Approche hybride de mise en œuvre, l'approche Walk implique la collaboration des équipes marketing et de développement pour correspondre à l'image de marque de votre application ou de votre site.
Au cours du processus de mise en œuvre, les développeurs écrivent du code personnalisé pour mettre à jour l'aspect et la convivialité d'un canal de communication, afin qu'il corresponde mieux à votre marque. Vous pouvez notamment modifier le type et la taille des polices, les coins arrondis et les couleurs. Cette approche utilise toujours les options par défaut, mais avec un style de modèle programmatique.
Les marketeurs conservent le contrôle de l'audience, du contenu, du comportement lors du clic et de l'expiration directement dans le tableau de bord de Braze.
Aperçu de la personnalisation
Personnalisation
Description
Effort
Faible
Travail du développeur
0-4 heures
Interface utilisateur
Utilisez les modèles de Braze ou ceux créés par vos propres développeurs.
Comportement
Choisissez parmi les options de comportement par défaut.
Suivi analytique
Les données analytiques par défaut sont capturées dans Braze.
Paires clé-valeur
Facultatif, permet une personnalisation supplémentaire de l'UI/UX.
{: style="max-width:35%;float:right;margin-left:15px;border:none;"}
Avec l'approche Run, les développeurs prennent les commandes avec un contrôle total sur l'expérience utilisateur. Le code personnalisé dicte l'apparence des messages, leur comportement et leur interaction avec d'autres canaux de communication (par exemple, le déclenchement d'une Content Card sur la base d'une notification push).
Lorsque vous créez un contenu personnalisé entièrement nouveau, comme de nouveaux types de Content Cards ou des messages in-app avec une interface utilisateur sur mesure, le SDK de Braze ne [suivra pas automatiquement les données analytiques](https://www.braze.com/docs/fr/fr/developer_guide/analytics/). Vous devez gérer le suivi analytique de manière programmatique afin que les marketeurs continuent d'avoir accès à des indicateurs tels que les impressions, les clics et les rejets dans le tableau de bord de Braze. Appelez les méthodes d'analyse du SDK de Braze pour que le SDK retransmette ces données à Braze. Chaque canal de communication dispose d'un article dédié à l'analyse pour faciliter cette démarche.
Aperçu de la personnalisation
Personnalisation
Description
Effort
Dépend du cas d'utilisation.
Travail du développeur
Effort faible : 1-4 heures Effort moyen : 4-8 heures Effort important : plus de 8 heures
Interface utilisateur
Personnalisée
Comportement
Personnalisé
Suivi analytique
Personnalisé
Paires clé-valeur
Requis
**Tip:**
Lorsque les développeurs et les responsables de l'implémentation créent du contenu personnalisé pour Braze, c'est l'occasion d'une collaboration transversale avec les marketeurs. Par exemple, si vous développez une nouvelle interface utilisateur ou une nouvelle fonctionnalité pour un composant particulier, préparez votre équipe à réussir en documentant le nouveau comportement et la façon dont il s'intègre à votre backend.
# Tutoriels SDK de Braze
Source: /docs/fr/developer_guide/tutorials/index.md
# Intégrer le SDK Braze
Source: /docs/fr/developer_guide/sdk_integration/index.md
# {: style="float:right;width:120px;border:0;" class="noimgborder"}Intégrer le SDK Braze {#braze-logo-image_buster-assetsbraze_primary_icon_blacksvg-stylefloatrightwidth120pxborder0-classnoimgborderintegrate-the-braze-sdk}
> Découvrez comment intégrer le SDK de Braze. Chaque SDK est hébergé dans son propre dépôt public GitHub, qui comprend des exemples d'applications entièrement compilables que vous pouvez utiliser pour tester les fonctionnalités de Braze ou implémenter parallèlement à vos propres applications. Pour en savoir plus, consultez [Références, dépôts et exemples d'applications](https://www.braze.com/docs/fr/fr/developer_guide/references/). Pour plus d'informations générales sur le SDK, consultez [Premiers pas : aperçu de l'intégration](https://www.braze.com/docs/fr/fr/developer_guide/getting_started/integration_overview/).
Pour consulter le contenu des fichiers README du SDK reproduit dans la documentation, voir [Guides des dépôts](https://www.braze.com/docs/fr/fr/developer_guide/sdk_repository_guides/).
**Tip:**
Après avoir intégré le SDK, vous pouvez activer l'[authentification SDK](https://www.braze.com/docs/fr/fr/developer_guide/sdk_integration/authentication/) afin d'ajouter un niveau de sécurité supplémentaire en empêchant les requêtes SDK non autorisées. L'authentification SDK est disponible pour Web, Android, Swift, React Native, Flutter, Unity, Cordova, .NET MAUI (Xamarin) et Expo.
## About the Web Braze SDK
The Web Braze SDK lets you collect analytics and display rich in-app messages, push, and Content Card messages to your web users. For more information, see [Braze JavaScript reference documentation](https://js.appboycdn.com/web-sdk/latest/doc/modules/braze.html).
**Note:**
This guide uses code samples from the Braze Web SDK 4.0.0+. To upgrade to the latest Web SDK version, see [SDK Upgrade Guide](https://github.com/braze-inc/braze-web-sdk/blob/master/UPGRADE_GUIDE.md).
## Integrate the Web SDK
You can integrate the Web Braze SDK using the following methods. For additional options, see [other integration methods](#web_other-integration-methods).
- **Code-based integration:** Integrate the Web Braze SDK directly in your codebase using your preferred package manager or the Braze CDN. This gives you full control over how the SDK is loaded and configured.
- **Google Tag Manager:** A no-code solution that lets you integrate the Web Braze SDK without modifying your site's code. For more information, see [Google Tag Manager with the Braze SDK](https://www.braze.com/docs/fr/fr/developer_guide/sdk_integration/google_tag_manager/).
**Important:**
We recommend using the [NPM integration method](https://www.braze.com/docs/fr/fr/developer_guide/sdk_integration/?subtab=package%20manager&sdktab=web). Benefits include storing SDK libraries locally on your website, providing immunity from ad-blocker extensions, and contributing to faster load times as part of bundler support.
### Step 1: Install the Braze library
You can install the Braze library using one of the following methods. However, if your website uses a `Content-Security-Policy`, review the [Content Security Policy](https://www.braze.com/docs/fr/fr/developer_guide/platforms/web/content_security_policy/) before continuing.
**Important:**
While most ad blockers do not block the Braze Web SDK, some more-restrictive ad blockers are known to cause issues.
If your site uses NPM or Yarn package managers, you can add the [Braze NPM package](https://www.npmjs.com/package/@braze/web-sdk) as a dependency.
Typescript definitions are now included as of v3.0.0. For notes on upgrading from 2.x to 3.x, see our [changelog](https://github.com/braze-inc/braze-web-sdk/blob/master/UPGRADE_GUIDE.md).
```bash
npm install --save @braze/web-sdk
# or, using yarn:
# yarn add @braze/web-sdk
```
Once installed, you can `import` or `require` the library in the typical fashion:
```typescript
import * as braze from "@braze/web-sdk";
// or, using `require`
const braze = require("@braze/web-sdk");
```
Add the Braze Web SDK directly to your HTML by referencing our CDN-hosted script, which loads the library asynchronously.
**Important:**
The default **Prevent Cross-Site Tracking** setting in Safari can prevent in-app message types like Banners and Content Cards from displaying when you use the CDN integration method. To avoid this issue, use the NPM integration method so that Safari does not classify these messages as cross-site traffic and your web users can see them in all supported browsers.
### Step 2: Initialize the SDK
After the Braze Web SDK is added to your website, initialize the library with the API key and [SDK endpoint URL](https://www.braze.com/docs/fr/fr/user_guide/administrative/access_braze/sdk_endpoints) found in **Settings** > **App Settings** within your Braze dashboard. For a complete list of options for `braze.initialize()`, along with our other JavaScript methods, see [Braze JavaScript documentation](https://js.appboycdn.com/web-sdk/latest/doc/modules/braze.html#initialize).
**Note:**
**Custom domains for Web SDK requests are not supported**: The Web SDK `baseUrl` must be a Braze SDK endpoint (for example, `sdk.iad-05.braze.com`). Braze does not support routing Web SDK traffic through a customer-owned domain via CNAME records. If you need Web SDK requests to originate from your own domain, contact Braze support.
```javascript
// initialize the SDK
braze.initialize('YOUR-API-KEY-HERE', {
baseUrl: "YOUR-SDK-ENDPOINT-HERE",
enableLogging: false, // set to `true` for debugging
allowUserSuppliedJavascript: false, // set to `true` to support custom HTML messages
});
// Enable automatic display of in-app messages
// Required if you want in-app messages to display automatically when triggered
braze.automaticallyShowInAppMessages();
// if you use Content Cards
braze.subscribeToContentCardsUpdates(function(cards){
// cards have been updated
});
// optionally set the current user's external ID before starting a new session
// you can also call `changeUser` later in the session after the user logs in
if (isLoggedIn){
braze.changeUser(userIdentifier);
}
// `openSession` should be called last - after `changeUser` and `automaticallyShowInAppMessages`
braze.openSession();
```
**Important:**
**In-App Message Display**: To display in-app messages automatically when they're triggered, you must call `braze.automaticallyShowInAppMessages()`. Without this call, in-app messages don't display automatically. If you want to manage message display manually, remove this call and use `braze.subscribeToInAppMessage()` instead. For more information, see [In-app message delivery](https://www.braze.com/docs/fr/fr/developer_guide/in_app_messages/delivery/).
#### Troubleshooting missing sessions for anonymous users
If you're seeing "Session missing" behavior, or you're not able to track the session for users who stay anonymous on web, make sure your integration calls `braze.openSession()` during initialization.
- **Scenario:** Anonymous users can return a Braze ID, but session data is blank or missing.
- **Cause:** The implementation doesn't call `braze.openSession()`.
- **Resolution:** Always call `braze.openSession()` after initialization (and after `braze.changeUser()` if you set an external ID).
For more information, see [Step 2: Initialize the SDK](https://www.braze.com/docs/fr/fr/developer_guide/sdk_integration/?sdktab=web&tab=code-based%20integration#step-2-initialize-the-sdk).
**Important:**
Anonymous users on mobile or web devices may be counted towards your [MAU](https://www.braze.com/docs/fr/fr/user_guide/data_and_analytics/reporting/understanding_your_app_usage_data/#monthly-active-users). As a result, you may want to conditionally load or initialize the SDK to exclude these users from your MAU count.
### Prerequisites
Before you can use this integration method, you'll need to [create an account and container for Google Tag Manager](https://support.google.com/tagmanager/answer/14842164).
### Step 1: Open the tag template gallery
In [Google Tag Manager](https://tagmanager.google.com/), choose your workspace, then select **Templates**. In the **Tag Template** pane, select **Search Gallery**.
{: style="max-width:95%;"}
### Step 2: Add the initialization tag template
In the template gallery, search for `braze-inc`, then select **Braze Initialization Tag**.
{: style="max-width:80%;"}
Select **Add to workspace** > **Add**.
{: style="max-width:70%;"}
### Step 3: Configure the tag
From the **Templates** section, select your newly added template.
{: style="max-width:95%;"}
Select the pencil icon to open the **Tag Configuration** dropdown.

Enter the minimum required information:
| Field | Description |
| ------------- | ----------- |
| **API Key** | Your [Braze API Key](https://www.braze.com/docs/fr/fr/api/basics/#about-rest-api-keys), found in the Braze dashboard under **Settings** > **App Settings**. |
| **API Endpoint** | Your REST endpoint URL. Your endpoint will depend on the Braze URL for [your instance](https://www.braze.com/docs/fr/fr/api/basics/#endpoints). |
| **SDK Version** | The most recent `MAJOR.MINOR` version of the Web Braze SDK listed in the [changelog](https://www.braze.com/docs/fr/fr/developer_guide/changelogs/?sdktab=web). For example, if the latest version is `4.1.2`, enter `4.1`. For more information, see [About SDK version management](https://www.braze.com/docs/fr/fr/developer_guide/sdk_integration/version_management/). |
{: .reset-td-br-1 .reset-td-br-2 aria-label="Step 3: Configure the tag" }
For additional initialization settings, select **Braze Initialization Options** and choose any options you need.
{: style="max-width:65%;"}
### Step 4: Choose initialization options
The Braze Initialization Tag exposes the following options. Most of these map directly to the [Web SDK `InitializationOptions`](https://js.appboycdn.com/web-sdk/latest/doc/modules/braze.html#initializationoptions), and some correspond to Web SDK methods that the tag will call during initialization. Select the options that match your integration needs:
| GTM option | Web SDK configuration or method | Description |
| --- | --- | --- |
| **Allow HTML In-App Messages** | `allowUserSuppliedJavascript` | Enables HTML in-app messages, Banners, and user-supplied JavaScript click actions. Required for [HTML in-app messages](https://www.braze.com/docs/fr/fr/user_guide/channels/in_app_messages/message_types/custom_html/) and [Banners](https://www.braze.com/docs/fr/fr/developer_guide/banners/placements/?sdktab=web) that use custom HTML. Only enable this when you trust the HTML and JavaScript content, as it allows user-supplied JavaScript execution. |
| **App Version Number** | `appVersion`, `appVersionNumber` | App version for segmentation (for example, `1.2.3.4`). |
| **Automatically Open New Session** | `braze.openSession()` | Opens a new session after the SDK is initialized by calling this method for you. |
| **Automatically show new in app messages** | `braze.automaticallyShowInAppMessages()` | Automatically displays new in-app messages when they arrive from the server by calling this method after initialization. |
| **Disable Automatic Push Token Maintenance** | `disablePushTokenMaintenance` | Stops the SDK from syncing push tokens with the Braze backend on new sessions. |
| **Disable Automatic Service Worker Registration** | `manageServiceWorkerExternally` | Use if you register and control the service worker yourself. |
| **Disable Cookies** | `noCookies` | Uses localStorage instead of cookies for user/session data. Prevents cross-subdomain recognition. |
| **Disable Font Awesome** | `doNotLoadFontAwesome` | Prevents the SDK from loading Font Awesome from the CDN. Use if your site has its own Font Awesome. |
| **Enable SDK Authentication** | `enableSdkAuthentication` | Enables [SDK Authentication](https://www.braze.com/docs/fr/fr/developer_guide/sdk_integration/authentication/). |
| **Enable Web SDK Logging** | `enableLogging` | Enables console logging for debugging. Remove before production. |
| **Minimum Interval Between Triggered Messages** | `minimumIntervalBetweenTriggerActionsInSeconds` | Minimum seconds between trigger actions (default: 30). |
| **Open Cards in New Tab** | `openCardsInNewTab` | Opens Content Card links in a new tab when using the default Feed UI. |
| **Service Worker Location** | `serviceWorkerLocation` | Custom path for the service worker file (default: `/service-worker.js`). |
| **Session Timeout (seconds)** | `sessionTimeoutInSeconds` | Session timeout in seconds (default: 1800). |
{: .reset-td-br-1 .reset-td-br-2 .reset-td-br-3 aria-label="Step 4: Choose initialization options" }
**Note:**
To enable [Custom HTML in-app messages](https://www.braze.com/docs/fr/fr/user_guide/channels/in_app_messages/message_types/custom_html/) when using the Google Tag Manager Braze Initialization Tag, select **Allow HTML In-App Messages** in **Braze Initialization Options**. This checkbox maps to the `allowUserSuppliedJavascript` initialization option in `braze.initialize()` and sets it to `true`. The Google Tag Manager Braze Initialization Tag uses this label instead of the option name.
For options not exposed in the GTM template (such as `contentSecurityNonce`, `localization`, or `devicePropertyAllowlist`), use [runtime initialization](https://www.braze.com/docs/fr/fr/developer_guide/sdk_integration/?sdktab=web) instead.
### Step 5: Set to Trigger on *all pages*
The initialization tag should be run on all pages of your site. This allows you to use Braze SDK methods and record web push analytics.
### Step 6: Verify your integration
You can verify your integration using either of the following options:
- **Option 1:** Using Google Tag Manager's [debugging tool](https://support.google.com/tagmanager/answer/6107056?hl=en), you can check if the Braze Initialization Tag is triggering correctly on your configured pages or events.
- **Option 2:** Check for any network requests made to Braze from your web page. Additionally, the global `window.braze` library should now be defined.
## Filtering bot traffic {#bot-filtering}
MAU can include a percentage of bot users, which inflates your monthly active user count. While the Braze Web SDK includes built-in detection for some common web crawlers (such as search engine bots and social media preview bots), it is especially important to stay proactive with robust solutions to detect bots, as SDK updates alone cannot consistently detect every new bot.
### Limitations of SDK-side bot detection
The Web SDK includes basic user-agent-based bot detection that filters out known crawlers. However, this approach has limitations:
- **New bots emerge constantly**: AI companies and other actors regularly create new bots that may disguise themselves to avoid detection.
- **User-agent spoofing**: Sophisticated bots can mimic legitimate browser user-agents.
- **Custom bots**: Non-technical users can now easily create bots using large language models (LLMs), making bot behavior unpredictable.
### Implementing bot filtering
**Important:**
The solutions outlined below are general suggestions. Tailor bot filtering logic to your unique environment and traffic patterns.
The most robust solution is to implement your own bot filtering logic before initializing the Braze SDK. Common approaches include:
#### Require user interaction
Consider delaying SDK initialization until a user performs a meaningful interaction, such as accepting a cookie consent banner, scrolling, or clicking. This approach is often easier to implement and can be highly effective at filtering bot traffic.
**Important:**
Delaying SDK initialization until user interaction might cause Banners and Content Cards to also not display until that interaction occurs.
#### Custom bot detection
Implement custom detection based on your specific bot traffic patterns, such as:
- Analyzing user-agent strings for patterns you've identified in your traffic
- Checking for headless browser indicators
- Using third-party bot detection services
- Monitoring behavioral signals specific to your site
**Example of conditional initialization:**
```javascript
// Only initialize Braze if your custom bot detection determines this is not a bot
if (!isLikelyBot()) {
braze.initialize('YOUR-API-KEY-HERE', {
baseUrl: "YOUR-SDK-ENDPOINT-HERE"
});
braze.automaticallyShowInAppMessages();
braze.openSession();
}
```
### Best practices
- Regularly analyze your MAU data and web traffic patterns to identify new bot behavior.
- Test thoroughly to ensure your bot filtering doesn't prevent legitimate users from being tracked.
- Update your filtering logic based on the bot traffic patterns you observe in your environment.
## Optional configurations
### Logging
To quickly enable logging, you can add `?brazeLogging=true` as a parameter to your website URL. Alternatively, you can enable [basic](#web_basic-logging) or [custom](#web_custom-logging) logging. For a centralized overview across all platforms, see [Verbose logging](https://www.braze.com/docs/fr/fr/developer_guide/sdk_integration/verbose_logging).
#### Basic logging
Use `enableLogging` to log basic debugging messages to the JavaScript console before the SDK is initialized.
```javascript
enableLogging: true
```
Your method should be similar to the following:
```javascript
braze.initialize('API-KEY', {
baseUrl: 'API-ENDPOINT',
enableLogging: true
});
braze.openSession();
```
Use `braze.toggleLogging()` to log basic debugging messages to the JavaScript console after the SDK is initialized. Your method should be similar to the following:
```javascript
braze.initialize('API-KEY', {
baseUrl: 'API-ENDPOINT',
});
braze.openSession();
...
braze.toggleLogging();
```
**Important:**
Basic logs are visible to all users, so consider disabling, or switch to [`setLogger`](#web_custom-logging), before releasing your code to production.
#### Custom logging
Use `setLogger` to log custom debugging messages to the JavaScript console. Unlike basic logs, these logs are not visible to users.
```javascript
setLogger(loggerFunction: (message: STRING) => void): void
```
Replace `STRING` with your message as a single string parameter. Your method should be similar to the following:
```javascript
braze.initialize('API-KEY');
braze.setLogger(function(message) {
console.log("Braze Custom Logger: " + message);
});
braze.openSession();
```
## Upgrading the SDK
**Note:**
This guide uses code samples from the Braze Web SDK 4.0.0+. To upgrade to the latest Web SDK version, see [SDK Upgrade Guide](https://github.com/braze-inc/braze-web-sdk/blob/master/UPGRADE_GUIDE.md).
When you reference the Braze Web SDK from our content delivery network, for example, `https://js.appboycdn.com/web-sdk/a.a/braze.min.js` (as recommended by our default integration instructions), your users receive minor updates (bug fixes and backward compatible features, versions `a.a.a` through `a.a.z` in the above examples) automatically when they refresh your site.
However, when we release major changes, we require you to upgrade the Braze Web SDK manually to ensure that breaking changes do not impact your integration. Additionally, if you download our SDK and host it yourself, you don't receive any version updates automatically and should upgrade manually to receive the latest features and bug fixes.
You can keep up-to-date with our latest release [following our release feed](https://github.com/braze-inc/braze-web-sdk/tags.atom) with the RSS Reader or service of your choice, and see [our changelog](https://github.com/braze-inc/braze-web-sdk/blob/master/CHANGELOG.md) for a full accounting of our Web SDK release history. To upgrade the Braze Web SDK:
- Update the Braze library version by changing the version number of `https://js.appboycdn.com/web-sdk/[OLD VERSION NUMBER]/braze.min.js`, or in your package manager's dependencies.
- If you have web push integrated, update the service worker file on your site - by default, this is located at `/service-worker.js` at your site's root directory, but the location may be customized in some integrations. You must access the root directory to host a service worker file.
You must update these two files in coordination with each other for proper functionality.
## Other integration methods
### Accelerated Mobile Pages (AMP)
**See more**
#### Step 1: Include AMP web push script
Add the following async script tag to your head:
```js
```
#### Step 2: Add subscription widgets
Add a widget to the body of your HTML that allows users to subscribe and unsubscribe from push.
```js
```
#### Step 3: Add `helper-iframe` and `permission-dialog`
The AMP Web Push component creates a popup to handle push subscriptions, so you must add the following helper files to your project to enable this feature:
- [`helper-iframe.html`](https://cdn.ampproject.org/v0/amp-web-push-helper-frame.html)
- [`permission-dialog.html`](https://cdn.ampproject.org/v0/amp-web-push-permission-dialog.html)
#### Step 4: Create a service worker file
Create a `service-worker.js` file in the root directory of your website and add the following snippet:
#### Step 5: Configure the AMP web push HTML element
Add the following `amp-web-push` HTML element to your HTML body. Keep in mind, you need to append your [`apiKey` and `baseUrl`](https://documenter.getpostman.com/view/4689407/SVYrsdsG) as query parameters to `service-worker-URL`.
```js
```
### Asynchronous Module Definition (AMD)
#### Disable support
If your site uses RequireJS or another AMD module-loader, but you prefer to load the Braze Web SDK through one of the other options in this list, you can load a version of the library that does not include AMD support. This version of the library can be loaded from the following CDN location:
#### Module loader
If you use RequireJS or other AMD module-loaders we recommend self-hosting a copy of our library and referencing it as you would with other resources:
```javascript
require(['path/to/braze.min.js'], function(braze) {
braze.initialize('YOUR-API-KEY-HERE', { baseUrl: 'YOUR-SDK-ENDPOINT' });
// Required if you want in-app messages to display automatically
braze.automaticallyShowInAppMessages();
braze.openSession();
});
```
### Electron {#electron}
Electron does not officially support web push notifications (see: this [GitHub issue](https://github.com/electron/electron/issues/6697)). There are other [open source workarounds](https://github.com/MatthieuLemoine/electron-push-receiver) you may try that have not been tested by Braze.
### Jest framework {#jest}
When using Jest, you may see an error similar to `SyntaxError: Unexpected token 'export'`. To fix this, adjust your configuration in `package.json` to ignore the Braze SDK:
```
"jest": {
"transformIgnorePatterns": [
"/node_modules/(?!@braze)"
]
}
```
### SSR frameworks {#ssr}
The Web SDK runs in a browser environment. In SSR frameworks, initialize Braze in a client-only component so your server never executes SDK code.
#### Framework-agnostic dynamic import
If your framework isn't listed in this section, you can dynamically import Braze from a client-only lifecycle hook.
```javascript
// MyComponent/braze-exports.js
// Export the parts of the SDK that you need.
export { initialize, openSession } from "@braze/web-sdk";
// MyComponent/MyComponent.js
useEffect(() => {
import("./braze-exports.js").then(({ initialize, openSession }) => {
initialize("YOUR-API-KEY-HERE", {
baseUrl: "YOUR-SDK-ENDPOINT",
enableLogging: true,
});
openSession();
});
}, []);
```
If you're using webpack, you can dynamically import only specific SDK exports.
```javascript
// MyComponent.js
useEffect(() => {
import(
/* webpackExports: ["initialize", "openSession"] */
"@braze/web-sdk"
).then(({ initialize, openSession }) => {
initialize("YOUR-API-KEY-HERE", {
baseUrl: "YOUR-SDK-ENDPOINT",
enableLogging: true,
});
openSession();
});
}, []);
```
#### Shared hook for Next.js and Remix
Create a reusable `useBraze` hook and call it near your app root.
```tsx
// hooks/useBraze.ts
import { useEffect, useRef } from "react";
export function useBraze() {
const didInit = useRef(false);
useEffect(() => {
if (didInit.current) {
return;
}
didInit.current = true;
import("@braze/web-sdk")
.then((braze) => {
const initialized = braze.initialize("YOUR-API-KEY-HERE", {
// Use your Braze Web SDK endpoint, such as sdk.iad-01.braze.com.
baseUrl: "YOUR-SDK-ENDPOINT",
enableLogging: false,
});
if (!initialized) {
return;
}
// Optional: Identify signed-in users before opening a session.
// braze.changeUser("external-id");
// Optional: Automatically display in-app messages.
// braze.automaticallyShowInAppMessages();
braze.openSession();
})
.catch((error) => {
console.error("Unable to load Braze SDK:", error);
});
}, []);
}
```
#### Next.js (App Router)
Call `useBraze` in a client component that wraps your app.
```tsx
// app/components/AppRoot.tsx
"use client";
import type { ReactNode } from "react";
import { useBraze } from "../hooks/useBraze";
export function AppRoot({ children }: { children: ReactNode }) {
useBraze();
return <>{children};
}
```
```tsx
// app/layout.tsx
import type { ReactNode } from "react";
import { AppRoot } from "./components/AppRoot";
export default function RootLayout({
children,
}: {
children: ReactNode;
}) {
return (
{children}
);
}
```
#### Next.js (Pages Router)
Call `useBraze` at the top of your custom app component.
```tsx
// pages/_app.tsx
import type { AppProps } from "next/app";
import { useBraze } from "../hooks/useBraze";
export default function App({ Component, pageProps }: AppProps) {
useBraze();
return (
);
}
```
#### Remix
Call `useBraze` at the top of your root route component.
For local Remix validation examples, run `PORT=4013 npm run dev`.
```tsx
// app/root.tsx
import { Outlet } from "@remix-run/react";
import { useBraze } from "./hooks/useBraze";
export default function App() {
useBraze();
return ;
}
```
#### Logging events and updating users
After `useBraze` initializes the SDK at your app root, other client components can call Braze methods. A common pattern is to call them inside user actions, such as `onClick` or `onSubmit`. In the example, the SDK methods are loaded inside the click handler instead of at the top of the file. This keeps the Web SDK out of server code and loads only what that action needs. The `webpackExports` comment tells webpack which methods to include, so your bundle stays smaller.
```tsx
// app/components/BuyButton.tsx
"use client";
export function BuyButton() {
const handleClick = async () => {
const { logCustomEvent, logPurchase, getUser } = await import(
/* webpackExports: ["logCustomEvent", "logPurchase", "getUser"] */
"@braze/web-sdk"
);
getUser()?.setCustomUserAttribute("last_purchase_date", "2026-05-04");
logCustomEvent("clicked_buy", { source: "product_page" });
logPurchase("sku_123", 19.99, "USD");
};
return ;
}
```
This example shows a `BuyButton` component that logs activity when someone clicks **Buy**. First, it imports only `logCustomEvent`, `logPurchase`, and `getUser` at click time. Then it updates a user attribute, logs a custom event, and logs a purchase. This pattern helps you keep initialization centralized in `useBraze`, while still tracking meaningful actions from any client component.
If you're using Remix with Vite and package-root imports fail at runtime, use the existing Vite workaround. For more information, see [Vite](https://www.braze.com/docs/fr/fr/developer_guide/sdk_integration/?sdktab=web#web_vite).
For a full list of available methods, see the [Braze JavaScript reference documentation](https://js.appboycdn.com/web-sdk/latest/doc/modules/braze.html).
### Tealium iQ
Tealium iQ offers a basic turnkey Braze integration. To configure the integration, search for Braze in the Tealium Tag Management interface, and provide the Web SDK API key from your dashboard.
For more details or in-depth Tealium configuration support, check out our [integration documentation](https://www.braze.com/docs/fr/fr/partners/data_and_infrastructure_agility/customer_data_platform/tealium/#about-tealium) or contact your Tealium account manager.
### Vite {#vite}
If you use Vite and see a warning around circular dependencies or `Uncaught TypeError: Class extends value undefined is not a constructor or null`, you may need to exclude the Braze SDK from its [dependency discovery](https://vitejs.dev/guide/dep-pre-bundling.html#customizing-the-behavior):
```
optimizeDeps: {
exclude: ['@braze/web-sdk']
},
```
### Other tag managers
Braze may also be compatible with other tag management solutions by following our integration instructions within a custom HTML tag. Contact a Braze representative if you need help evaluating these solutions.
## Integrating the Android SDK
### Step 1: Update your Gradle build configuration
In your project's repository configuration (for example, `settings.gradle`, `settings.gradle.kts`, or top-level `build.gradle`), add [`mavenCentral()`](https://docs.gradle.org/current/kotlin-dsl/gradle/org.gradle.api.artifacts.dsl/-repository-handler/maven-central.html) to your list of repositories. This syntax is the same for both Groovy and Kotlin DSL.
```groovy
repositories {
mavenCentral()
}
```
Next, add Braze to your dependencies. In the following examples, replace `SDK_VERSION` with the current version of your Android Braze SDK. For the full list of versions, see [Changelogs](https://www.braze.com/docs/fr/fr/developer_guide/changelogs/?sdktab=android).
**Note:**
- For Kotlin DSL (`build.gradle.kts`), use the `implementation("...")` syntax.
- For Groovy (`build.gradle`), use the `implementation '...'` syntax.
- For [version catalogs](https://developer.android.com/build/migrate-to-catalogs), add entries to your `gradle/libs.versions.toml` file and reference them using the generated accessors.
If you don't plan on using Braze UI components, add the following to your dependencies.
```groovy
dependencies {
implementation 'com.braze:android-sdk-base:SDK_VERSION' // (Required) Adds dependencies for the base Braze SDK.
implementation 'com.braze:android-sdk-location:SDK_VERSION' // (Optional) Adds dependencies for Braze location services.
}
```
```kotlin
dependencies {
implementation("com.braze:android-sdk-base:SDK_VERSION") // (Required) Adds dependencies for the base Braze SDK.
implementation("com.braze:android-sdk-location:SDK_VERSION") // (Optional) Adds dependencies for Braze location services.
}
```
In your `gradle/libs.versions.toml` file:
```toml
[versions]
braze = "SDK_VERSION"
[libraries]
braze-android-sdk-base = { group = "com.braze", name = "android-sdk-base", version.ref = "braze" }
braze-android-sdk-location = { group = "com.braze", name = "android-sdk-location", version.ref = "braze" }
```
Then, in your `build.gradle` or `build.gradle.kts` file, add the following dependencies. This syntax is the same for both Groovy and Kotlin DSL.
```groovy
dependencies {
implementation(libs.braze.android.sdk.base) // (Required) Adds dependencies for the base Braze SDK.
implementation(libs.braze.android.sdk.location) // (Optional) Adds dependencies for Braze location services.
}
```
If you plan on using Braze UI components, add the following to your dependencies.
```groovy
dependencies {
implementation 'com.braze:android-sdk-ui:SDK_VERSION' // (Required) Adds dependencies for the Braze SDK and Braze UI components.
implementation 'com.braze:android-sdk-location:SDK_VERSION' // (Optional) Adds dependencies for Braze location services.
}
```
```kotlin
dependencies {
implementation("com.braze:android-sdk-ui:SDK_VERSION") // (Required) Adds dependencies for the Braze SDK and Braze UI components.
implementation("com.braze:android-sdk-location:SDK_VERSION") // (Optional) Adds dependencies for Braze location services.
}
```
In your `gradle/libs.versions.toml` file:
```toml
[versions]
braze = "SDK_VERSION"
[libraries]
braze-android-sdk-ui = { group = "com.braze", name = "android-sdk-ui", version.ref = "braze" }
braze-android-sdk-location = { group = "com.braze", name = "android-sdk-location", version.ref = "braze" }
```
Then, in your `build.gradle` or `build.gradle.kts` file, add the following dependencies. This syntax is the same for both Groovy and Kotlin DSL.
```groovy
dependencies {
implementation(libs.braze.android.sdk.ui) // (Required) Adds dependencies for the Braze SDK and Braze UI components.
implementation(libs.braze.android.sdk.location) // (Optional) Adds dependencies for Braze location services.
}
```
### Step 2: Configure your `braze.xml`
**Note:**
As of December 2019, custom endpoints are no longer given out, if you have a pre-existing custom endpoint, you may continue to use it. For more details, refer to our list of available endpoints.
Create a `braze.xml` file in your project's `res/values` folder. If you are on a specific data cluster or have a pre-existing custom endpoint, you need to specify the endpoint in your `braze.xml` file as well.
The contents of that file should resemble the following code snippet. Make sure to substitute `YOUR_APP_IDENTIFIER_API_KEY` with the identifier found in the **Manage Settings** page of the Braze dashboard. Log in at [dashboard.braze.com](https://dashboard.braze.com) to find your [cluster address](https://www.braze.com/docs/fr/fr/user_guide/administrative/access_braze/sdk_endpoints).
```xml
YOUR_APP_IDENTIFIER_API_KEYYOUR_CUSTOM_ENDPOINT_OR_CLUSTER
```
### Step 3: Add permissions to `AndroidManifest.xml`
Next, add the following permissions to your `AndroidManifest.xml`:
```xml
```
**Note:**
With the release of Android M, Android switched from an install-time to a runtime permissions model. However, both of these permissions are normal permissions and are granted automatically if listed in the app manifest. For more information, visit Android's [permission documentation](https://developer.android.com/training/permissions/index.html).
### Step 4: Enable delayed initialization (optional)
To use delayed initialization, the minimum Braze SDK version is required:
**Note:**
While delayed initialization is enabled, all network connections are canceled, preventing the SDK from sending data to the Braze servers.
#### Step 4.1: Update your `braze.xml`
Delayed initialization is disabled by default. To enable, use one of the following options:
In your project's `braze.xml` file, set `com_braze_enable_delayed_initialization` to `true`.
```xml
true
```
To enable delayed initialization at runtime, use the following method.
```java
Braze.enableDelayedInitialization(context);
```
```kotlin
Braze.enableDelayedInitialization(context)
```
**Note:**
When delayed initialization is enabled and a push notification contains a deep link action, the deep link does not resolve.
#### Step 4.2: Configure push analytics (optional)
When delayed initialization is enabled, push analytics are queued by default. However, you can choose to [explicitly queue](#explicitly-queue-push-analytics) or [drop](#drop-push-analytics) push analytics instead.
##### Explicitly queue {#explicitly-queue-push-analytics}
To explicitly queue push analytics, choose one of the following options:
In your `braze.xml` file, set `com_braze_delayed_initialization_analytics_behavior` to `QUEUE`:
```xml
QUEUE
```
Add `QUEUE` to your [`Braze.enableDelayedInitialization()`](https://braze-inc.github.io/braze-android-sdk/kdoc/braze-android-sdk/com.braze/-braze/-companion/enable-delayed-initialization.html) method:
```java
Braze.enableDelayedInitialization(context, DelayedInitializationAnalyticsBehavior.QUEUE);
```
```kotlin
Braze.enableDelayedInitialization(context, DelayedInitializationAnalyticsBehavior.QUEUE)
```
##### Drop {#drop-push-analytics}
To drop push analytics, choose one of the following options:
In your `braze.xml` file, set `com_braze_delayed_initialization_analytics_behavior` to `DROP`:
```xml
DROP
```
Add `DROP` to the [`Braze.enableDelayedInitialization()`](https://braze-inc.github.io/braze-android-sdk/kdoc/braze-android-sdk/com.braze/-braze/-companion/enable-delayed-initialization.html) method:
```java
Braze.enableDelayedInitialization(context, DelayedInitializationAnalyticsBehavior.DROP);
```
```kotlin
Braze.enableDelayedInitialization(context, DelayedInitializationAnalyticsBehavior.DROP)
```
#### Step 4.3: Manually initialize the SDK
After your chosen delay period, use the [`Braze.disableDelayedInitialization()`](https://braze-inc.github.io/braze-android-sdk/kdoc/braze-android-sdk/com.braze/-braze/-companion/disable-delayed-initialization.html) method to manually initialize the SDK.
```java
Braze.disableDelayedInitialization(context);
```
```kotlin
Braze.disableDelayedInitialization(context)
```
### Step 5: Enable user session tracking
When you enable user session tracking, calls to `openSession()`, `closeSession()`,[`ensureSubscribedToInAppMessageEvents()`](https://braze-inc.github.io/braze-android-sdk/kdoc/braze-android-sdk/com.braze.ui.inappmessage/-braze-in-app-message-manager/ensure-subscribed-to-in-app-message-events.html), and `InAppMessageManager` registration can be handled automatically.
To register activity lifecycle callbacks, add the following code to the `onCreate()` method of your `Application` class.
```java
public class MyApplication extends Application {
@Override
public void onCreate() {
super.onCreate();
registerActivityLifecycleCallbacks(new BrazeActivityLifecycleCallbackListener());
}
}
```
```kotlin
class MyApplication : Application() {
override fun onCreate() {
super.onCreate()
registerActivityLifecycleCallbacks(BrazeActivityLifecycleCallbackListener())
}
}
```
For the list of available parameters, see [`BrazeActivityLifecycleCallbackListener`](https://braze-inc.github.io/braze-android-sdk/kdoc/braze-android-sdk/com.braze/-braze-activity-lifecycle-callback-listener/index.html).
## Testing session tracking
**Tip:**
You can also use the [SDK Debugger](https://www.braze.com/docs/fr/fr/developer_guide/debugging) to diagnose SDK issues.
If you experience issues while testing, enable [verbose logging](#android_enabling-logs), then use logcat to detect missing `openSession` and `closeSession` calls in your activities.
1. In Braze, go to **Overview**, select your app, then in the **Display Data For** dropdown choose **Today**.

2. Open your app, then refresh the Braze dashboard. Verify that your metrics have increased by 1.
3. Navigate through your app and verify that only one session has been logged to Braze.
4. Send the app to the background for at least 10 seconds, then bring it to the foreground. Verify that a new session was logged.
## Optional configurations
### Runtime configuration
To set your Braze options in code rather than your `braze.xml` file, use [runtime configuration](https://braze-inc.github.io/braze-android-sdk/kdoc/braze-android-sdk/com.braze/-braze/-companion/configure.html). If a value exists in both places, the runtime value will be used instead. After all required settings are supplied at runtime, you can delete your `braze.xml` file.
In the following example, a [builder object](https://braze-inc.github.io/braze-android-sdk/kdoc/braze-android-sdk/com.braze.configuration/-braze-config/-builder/index.html) is created and then passed to [`Braze.configure()`](https://braze-inc.github.io/braze-android-sdk/kdoc/braze-android-sdk/com.braze/-braze/-companion/configure.html). Note that only some of the available runtime options are shown—refer to our [KDoc](https://braze-inc.github.io/braze-android-sdk/kdoc/braze-android-sdk/com.braze.configuration/-braze-config/-builder/index.html) for the full list.
```java
BrazeConfig brazeConfig = new BrazeConfig.Builder()
.setApiKey("api-key-here")
.setCustomEndpoint("YOUR_CUSTOM_ENDPOINT_OR_CLUSTER")
.setSessionTimeout(60)
.setHandlePushDeepLinksAutomatically(true)
.setGreatNetworkDataFlushInterval(10)
.build();
Braze.configure(this, brazeConfig);
```
```kotlin
val brazeConfig = BrazeConfig.Builder()
.setApiKey("api-key-here")
.setCustomEndpoint("YOUR_CUSTOM_ENDPOINT_OR_CLUSTER")
.setSessionTimeout(60)
.setHandlePushDeepLinksAutomatically(true)
.setGreatNetworkDataFlushInterval(10)
.build()
Braze.configure(this, brazeConfig)
```
**Tip:**
Looking for another example? Check out our [Hello Braze sample app](https://github.com/braze-inc/braze-android-sdk/blob/master/samples/hello-braze/src/main/java/com/braze/helloworld/CustomApplication.java).
### Google Advertising ID
The [Google Advertising ID (GAID)](https://support.google.com/googleplay/android-developer/answer/6048248/advertising-id?hl=en) is an optional user-specific, anonymous, unique, and resettable ID for advertising, provided by Google Play services. GAID gives users the power to reset their identifier, opt-out of interest-based ads within Google Play apps, and provides developers with a simple, standard system to continue to monetize their apps.
The Google Advertising ID is not automatically collected by the Braze SDK and must be set manually via the [`Braze.setGoogleAdvertisingId()`](https://braze-inc.github.io/braze-android-sdk/kdoc/braze-android-sdk/com.braze/-i-braze/set-google-advertising-id.html) method.
```java
new Thread(new Runnable() {
@Override
public void run() {
try {
AdvertisingIdClient.Info idInfo = AdvertisingIdClient.getAdvertisingIdInfo(getApplicationContext());
Braze.getInstance(getApplicationContext()).setGoogleAdvertisingId(idInfo.getId(), idInfo.isLimitAdTrackingEnabled());
} catch (Exception e) {
e.printStackTrace();
}
}
}).start();
```
```kotlin
suspend fun fetchAndSetAdvertisingId(
context: Context,
scope: CoroutineScope = GlobalScope
) {
scope.launch(Dispatchers.IO) {
try {
val idInfo = AdvertisingIdClient.getAdvertisingIdInfo(context)
Braze.getInstance(context).setGoogleAdvertisingId(
idInfo.id,
idInfo.isLimitAdTrackingEnabled
)
} catch (e: Exception) {
e.printStackTrace()
}
}
}
```
**Important:**
Google requires the Advertising ID to be collected on a non-UI thread.
### Location tracking
To enable Braze location collection, set `com_braze_enable_location_collection` to `true` in your `braze.xml` file:
```xml
true
```
**Important:**
Starting with Braze Android SDK version 3.6.0, Braze location collection is disabled by default.
### Logging
By default, the Braze Android SDK log level is set to `INFO`. You can [suppress these logs](#android_suppressing-logs) or [set a different log level](#android_enabling-logs), such as `VERBOSE`, `DEBUG`, or `WARN`.
#### Enabling logs
To help troubleshoot issues in your app, or reduce turnaround times with Braze Support, you can enable verbose logs for the SDK. When you send verbose logs to Braze Support, ensure they begin as soon as you launch your application and end far after your issue occurs. For a centralized overview, see [Verbose logging](https://www.braze.com/docs/fr/fr/developer_guide/sdk_integration/verbose_logging). To learn how to interpret log output, see [Reading verbose logs](https://www.braze.com/docs/fr/fr/developer_guide/sdk_integration/reading_verbose_logs).
Keep in mind, verbose logs are only intended for your development environment, so you'll want to disable them before releasing your app.
**Important:**
Enable verbose logs before any other calls in `Application.onCreate()` to ensure your logs are as complete as possible.
To enable logs directly in your app, add the following to your application's `onCreate()` method before any other methods.
```java
BrazeLogger.setLogLevel(Log.MIN_LOG_LEVEL);
```
```kotlin
BrazeLogger.logLevel = Log.MIN_LOG_LEVEL
```
Replace `MIN_LOG_LEVEL` with the **Constant** of the log level you'd like to set as your minimum log level. Any logs at a level `>=` to your set `MIN_LOG_LEVEL` will be forwarded to Android's default [`Log`](https://developer.android.com/reference/android/util/Log) method. Any logs `<` your set `MIN_LOG_LEVEL` will be discarded.
| Constant | Value | Description |
|-------------|----------------|---------------------------------------------------------------------------|
| `VERBOSE` | 2 | Logs the most detailed messages for debugging and development. |
| `DEBUG` | 3 | Logs descriptive messages for debugging and development. |
| `INFO` | 4 | Logs informational messages for general highlights. |
| `WARN` | 5 | Logs warning messages for identifying potentially harmful situations. |
| `ERROR` | 6 | Logs error messages for indicating application failure or serious issues. |
| `ASSERT` | 7 | Logs assertion messages when conditions are false during development. |
{: .reset-td-br-1 .reset-td-br-2 .reset-td-br-3 aria-label="Enabling logs" }
For example, the following code will forward log levels `2`, `3`, `4`, `5`, `6`, and `7` to the `Log` method.
```java
BrazeLogger.setLogLevel(Log.VERBOSE);
```
```kotlin
BrazeLogger.logLevel = Log.VERBOSE
```
To enable logs in the `braze.xml`, add the following to your file:
```xml
MIN_LOG_LEVEL
```
Replace `MIN_LOG_LEVEL` with the **Value** of the log level you'd like to set as your minimum log level. Any logs at a level `>=` to your set `MIN_LOG_LEVEL` will be forwarded to Android's default [`Log`](https://developer.android.com/reference/android/util/Log) method. Any logs `<` your set `MIN_LOG_LEVEL` will be discarded.
| Constant | Value | Description |
|-------------|----------------|---------------------------------------------------------------------------|
| `VERBOSE` | 2 | Logs the most detailed messages for debugging and development. |
| `DEBUG` | 3 | Logs descriptive messages for debugging and development. |
| `INFO` | 4 | Logs informational messages for general highlights. |
| `WARN` | 5 | Logs warning messages for identifying potentially harmful situations. |
| `ERROR` | 6 | Logs error messages for indicating application failure or serious issues. |
| `ASSERT` | 7 | Logs assertion messages when conditions are false during development. |
{: .reset-td-br-1 .reset-td-br-2 .reset-td-br-3 aria-label="Enabling logs" }
For example, the following code will forward log levels `2`, `3`, `4`, `5`, `6`, and `7` to the `Log` method.
```xml
2
```
#### Verifying verbose logs
To verify that your logs are set to `VERBOSE`, check if `V/Braze` occurs somewhere in your logs. If it does, then verbose logs have been successfully enabled. For example:
```
2077-11-19 16:22:49.591 ? V/Braze v9.0.01 .bo.app.d3: Request started
```
#### Suppressing logs
To suppress all logs for the Braze Android SDK, set the log level to `BrazeLogger.SUPPRESS` in your application's `onCreate()` method _before_ any other methods.
```java
BrazeLogger.setLogLevel(BrazeLogger.SUPPRESS);
```
```kotlin
BrazeLogger.setLogLevel(BrazeLogger.SUPPRESS)
```
### Multiple API keys
The most common use case for multiple API keys is separating API keys for debug and release build variants.
To easily switch between multiple API keys in your builds, we recommend creating a separate `braze.xml` file for each relevant [build variant](https://developer.android.com/studio/build/build-variants.html). A build variant is a combination of build type and product flavor. By default, new Android projects are configured with [`debug` and `release` build types](https://developer.android.com/reference/tools/gradle-api/8.3/null/com/android/build/api/dsl/BuildType) and no product flavors.
For each relevant build variant, create a new `braze.xml` in the `src//res/values/` directory. When the build variant is compiled, it will use the new API key.
```xml
REPLACE_WITH_YOUR_BUILD_VARIANT_API_KEY
```
**Tip:**
To learn how to set up the API key in your code, see [Runtime configuration](https://www.braze.com/docs/fr/fr/developer_guide/sdk_initalization/?sdktab=android).
### Exclusive in-app message TalkBack
In adherence to the [Android accessibility guidelines](https://developer.android.com/guide/topics/ui/accessibility), the Braze Android SDK offers Android Talkback by default. To ensure that only the contents of in-app messages are read out loud—without including other screen elements like the app title bar or navigation—you can enable exclusive mode for TalkBack.
To enable exclusive mode for in-app messages:
```xml
true
```
```kotlin
val brazeConfigBuilder = BrazeConfig.Builder()
brazeConfigBuilder.setIsInAppMessageAccessibilityExclusiveModeEnabled(true)
Braze.configure(this, brazeConfigBuilder.build())
```
```java
BrazeConfig.Builder brazeConfigBuilder = new BrazeConfig.Builder()
brazeConfigBuilder.setIsInAppMessageAccessibilityExclusiveModeEnabled(true);
Braze.configure(this, brazeConfigBuilder.build());
```
### R8 and ProGuard
[Code shrinking](https://developer.android.com/build/shrink-code) configuration is automatically included with your Braze integration.
Client apps that obfuscate Braze code must store release mapping files for Braze to interpret stack traces. If you want to continue to keep all Braze code, add the following to your ProGuard file:
```
-keep class bo.app.** { *; }
-keep class com.braze.** { *; }
```
## Integrating the Swift SDK
You can integrate and customize the Braze Swift SDK using the Swift Package Manager (SPM), CocoaPods, or manual integration methods. For more information about the various SDK symbols, see [Braze Swift reference documentation](https://braze-inc.github.io/braze-swift-sdk/documentation/brazekit/).
### Prerequisites
Before you start, verify your environment is supported by the [latest Braze Swift SDK version](https://github.com/braze-inc/braze-swift-sdk#version-information).
### Step 1: Install the Braze Swift SDK
We recommend using the [Swift Package Manager (SwiftPM)](https://swift.org/package-manager/) or [CocoaPods](http://cocoapods.org/) to install the Braze Swift SDK. Alternatively, you can install the SDK manually.
#### Step 1.1: Import SDK version
Open your project and navigate to your project's settings. Select the **Swift Packages** tab and click on the add button below the packages list.

**Note:**
Starting in version 7.4.0, the Braze Swift SDK has additional distribution channels as [static XCFrameworks](https://github.com/braze-inc/braze-swift-sdk-prebuilt-static) and [dynamic XCFrameworks](https://github.com/braze-inc/braze-swift-sdk-prebuilt-dynamic). If you'd like to use either of these formats instead, follow the installation instructions from its respective repository.
Enter the URL of our iOS Swift SDK repository `https://github.com/braze-inc/braze-swift-sdk` in the text field. Under the **Dependency Rule** section, select the SDK version. Finally, click **Add Package**.

#### Step 1.2: Select your packages
The Braze Swift SDK separates features into standalone libraries to provide developers with more control over which features to import into their projects.
| Package | Details |
| --------------- | --------------------------------------------------------------------------------------------------------------------------------------------------------------- |
| `BrazeKit` | Main SDK library providing support for analytics and push notifications. |
| `BrazeLocation` | Location library providing support for location analytics and geofence monitoring. |
| `BrazeUI` | Braze-provided user interface library for in-app messages, Content Cards, and Banners. Import this library if you intend to use the default UI components. |
{: .reset-td-br-1 .reset-td-br-2 aria-label="Step 1.2: Select your packages" }
{: .ws-td-nw-1}
##### About Extension libraries
**Warning:**
[BrazeNotificationService](https://braze-inc.github.io/braze-swift-sdk/tutorials/braze/b2-rich-push-notifications) and [BrazePushStory](https://braze-inc.github.io/braze-swift-sdk/tutorials/braze/b3-push-stories) are extension modules that provide additional functionality and should not be added directly to your main application target. Instead follow the linked guides to integrate them separately into their respective target extensions.
| Package | Details |
| -------------------------- | ------------------------------------------------------------------------------------- |
| `BrazeNotificationService` | Notification service extension library providing support for rich push notifications. |
| `BrazePushStory` | Notification content extension library providing support for Push Stories. |
{: .reset-td-br-1 .reset-td-br-2 aria-label="About Extension libraries" }
{: .ws-td-nw-1}
Select the package that best suits your needs and click **Add Package**. Make sure you select `BrazeKit` at a minimum.

#### Step 1.1: Install CocoaPods
For a full walkthrough, see CocoaPods' [Getting Started Guide](https://guides.cocoapods.org/using/getting-started.html). Otherwise, you can run the following command to get started quickly:
```bash
$ sudo gem install cocoapods
```
If you get stuck, checkout CocoaPods' [Troubleshooting Guide](http://guides.cocoapods.org/using/troubleshooting.html).
#### Step 1.2: Constructing the Podfile
Next, create a file in your Xcode project directory named `Podfile`.
**Note:**
Starting in version 7.4.0, the Braze Swift SDK has additional distribution channels as [static XCFrameworks](https://github.com/braze-inc/braze-swift-sdk-prebuilt-static) and [dynamic XCFrameworks](https://github.com/braze-inc/braze-swift-sdk-prebuilt-dynamic). If you'd like to use either of these formats instead, follow the installation instructions from its respective repository.
Add the following line to your Podfile:
```
target 'YourAppTarget' do
pod 'BrazeKit'
end
```
`BrazeKit` contains the main SDK library, providing support for analytics and push notifications.
We suggest you version Braze so pod updates automatically grab anything smaller than a minor version update. This looks like `pod 'BrazeKit' ~> Major.Minor.Build`. If you want to automatically integrate the latest Braze SDK version, even with major changes, you can use `pod 'BrazeKit'` in your Podfile.
##### About additional libraries
The Braze Swift SDK separates features into standalone libraries to provide developers with more control over which features to import into their projects. In addition to `BrazeKit`, you may add the following libraries to your Podfile:
| Library | Details |
| --------------------- | --------------------------------------------------------------------------------------------------------------------------------------------------------------- |
| `pod 'BrazeLocation'` | Location library providing support for location analytics and geofence monitoring. |
| `pod 'BrazeUI'` | Braze-provided user interface library for in-app messages, Content Cards, and Banners. Import this library if you intend to use the default UI components. |
{: .reset-td-br-1 .reset-td-br-2 aria-label="About additional libraries" }
{: .ws-td-nw-1}
###### Extension libraries
[BrazeNotificationService](https://braze-inc.github.io/braze-swift-sdk/tutorials/braze/b2-rich-push-notifications) and [BrazePushStory](https://braze-inc.github.io/braze-swift-sdk/tutorials/braze/b3-push-stories) are extension modules that provide additional functionality and should not be added directly to your main application target. Instead, you will need to create separate extension targets for each of these modules and import the Braze modules into their corresponding targets.
| Library | Details |
| -------------------------------- | ------------------------------------------------------------------------------------- |
| `pod 'BrazeNotificationService'` | Notification service extension library providing support for rich push notifications. |
| `pod 'BrazePushStory'` | Notification content extension library providing support for Push Stories. |
{: .reset-td-br-1 .reset-td-br-2 aria-label="Extension libraries" }
{: .ws-td-nw-1}
#### Step 1.3: Install the SDK
To install the Braze SDK CocoaPod, navigate to the directory of your Xcode app project within your terminal and run the following command:
```
pod install
```
At this point, you should be able to open the new Xcode project workspace created by CocoaPods. Make sure to use this Xcode workspace instead of your Xcode project.

#### Updating the SDK using CocoaPods
To update a CocoaPod, simply run the following command within your project directory:
```
pod update
```
#### Step 1.1: Download the Braze SDK
Go to the [Braze SDK release page on GitHub](https://github.com/braze-inc/braze-swift-sdk/releases), then download `braze-swift-sdk-prebuilt.zip`.

#### Step 1.2: Choose your frameworks
The Braze Swift SDK contains a variety of standalone XCFrameworks, which gives you the freedom to integrate the features you want—without needing to integrate them all. Reference the following table to choose your XCFrameworks:
| Package | Required? | Description |
| -------------------------- | --------- | ------------------------------------------------------------------------------------------------------------------------------------------------------------------------------------------------------------------------------------------------------------------------------------------------------------------------------------ |
| `BrazeKit` | Yes | Main SDK library that provides support for analytics and push notifications. |
| `BrazeLocation` | No | Location library that provides support for location analytics and geofence monitoring. |
| `BrazeUI` | No | Braze-provided user interface library for in-app messages, Content Cards, and Banners. Import this library if you intend to use the default UI components. |
| `BrazeNotificationService` | No | Notification service extension library that provides support for rich push notifications. Do not add this library directly to your main application target, instead [add the `BrazeNotificationService` library separately](https://braze-inc.github.io/braze-swift-sdk/tutorials/braze/b2-rich-push-notifications). |
| `BrazePushStory` | No | Notification content extension library that provides support for Push Stories. Do not add this library directly to your main application target, instead [add the `BrazePushStory` library separately](https://braze-inc.github.io/braze-swift-sdk/tutorials/braze/b3-push-stories). |
| `BrazeKitCompat` | No | Compatibility library containing all the `Appboy` and `ABK*` classes and methods that were available in the `Appboy-iOS-SDK` version 4.X.X. For usage details, refer to the minimal migration scenario in the [migration guide](https://braze-inc.github.io/braze-swift-sdk/documentation/braze/appboy-migration-guide/). |
| `BrazeUICompat` | No | Compatibility library containing all the `ABK*` classes and methods that were available in the `AppboyUI` library from `Appboy-iOS-SDK` version 4.X.X. For usage details, refer to the minimal migration scenario in the [migration guide](https://braze-inc.github.io/braze-swift-sdk/documentation/braze/appboy-migration-guide/). |
| `SDWebImage` | No | Dependency used only by `BrazeUICompat` in the minimal migration scenario. |
{: .reset-td-br-1 .reset-td-br-2 .reset-td-br-3 aria-label="Step 1.2: Choose your frameworks" }
{: .ws-td-nw-1 .reset-td-br-1 .reset-td-br-2 aria-label="Step 1.2: Choose your frameworks" }
#### Step 1.3: Prepare your files
Decide whether you want to use **Static** or **Dynamic** XCFrameworks, then prepare your files:
1. Create a temporary directory for your XCFrameworks.
2. In `braze-swift-sdk-prebuilt`, open the `dynamic` directory and move `BrazeKit.xcframework` into your directory. Your directory should be similar to the following:
```bash
temp_dir
└── BrazeKit.xcframework
```
3. Move each of your [chosen XCFrameworks](#swift_step-2-choose-your-frameworks) into your temporary directory. Your directory should be similar to the following:
```bash
temp_dir
├── BrazeKit.xcframework
├── BrazeKitCompat.xcframework
├── BrazeLocation.xcframework
└── SDWebImage.xcframework
```
#### Step 1.4: Integrate your frameworks
Next, integrate the **Dynamic** or **Static** XCFrameworks you [prepared previously](#swift_step-3-prepare-your-files):
In your Xcode project, select your build target, then **General**. Under **Frameworks, Libraries, and Embedded Content**, drag and drop the [files you prepared previously](#swift_step-3-prepare-your-files).

**Note:**
Starting with the Swift SDK 12.0.0, you should always select **Embed & Sign** for the Braze XCFrameworks for both the static and dynamic variants. This ensures that the frameworks resources are properly embedded in your app bundle.
**Tip:**
To enable GIF support, add `SDWebImage.xcframework`, located in either `braze-swift-sdk-prebuilt/static` or `braze-swift-sdk-prebuilt/dynamic`.
#### Common errors for Objective-C projects
If your Xcode project only contains Objective-C files, you may get "missing symbol" errors when you try to build your project. To fix these errors, open your project and add an empty Swift file to your file tree. This will force your build toolchain to embed [Swift Runtime](https://support.apple.com/kb/dl1998) and link to the appropriate frameworks during build time.
```bash
FILE_NAME.swift
```
Replace `FILE_NAME` with any non-spaced string. Your file should look similar to the following:
```bash
empty_swift_file.swift
```
### Step 2: Set up delayed initialization (optional)
You can choose to delay when the Braze Swift SDK is initialized, which is useful if your app needs to load a configuration or wait for user consent before starting the SDK. Delayed initialization makes sure Braze push notifications and push tokens received before SDK initialization are enqueued and processed once the SDK is initialized.
To use delayed initialization, the minimum Braze SDK version is required:
#### Step 2.1: Prepare for delayed initialization
Call `Braze.prepareForDelayedInitialization()` as early as possible in your app's lifecycle, ideally in or before `application(_:didFinishLaunchingWithOptions:)`. This makes sure that push notifications received before the SDK is initialized are properly captured and processed later.
**Note:**
This only applies to push notifications from Braze. Other push notifications are handled normally by system delegates.
```swift
func application(_ application: UIApplication, didFinishLaunchingWithOptions launchOptions: [UIApplication.LaunchOptionsKey: Any]?) -> Bool {
// Prepare the SDK for delayed initialization
Braze.prepareForDelayedInitialization()
// ... Additional non-Braze setup code
return true
}
```
```swift
@main
struct MyApp: App {
@UIApplicationDelegateAdaptor var appDelegate: AppDelegate
var body: some Scene {
WindowGroup {
ContentView()
}
}
}
class AppDelegate: NSObject, UIApplicationDelegate {
func application(_ application: UIApplication, didFinishLaunchingWithOptions launchOptions: [UIApplication.LaunchOptionsKey : Any]? = nil) -> Bool {
// Prepare the SDK for delayed initialization
Braze.prepareForDelayedInitialization()
// ... Additional non-Braze setup code
return true
}
}
```
```objc
- (BOOL)application:(UIApplication *)application didFinishLaunchingWithOptions:(NSDictionary *)launchOptions {
// Prepare the SDK for delayed initialization
[Braze prepareForDelayedInitialization];
// ... Additional non-Braze setup code
return YES;
}
```
When using delayed initialization, push notification automation is implicitly enabled. You can [customize the push automation](#swift_step-23-customize-push-automation-optional) configuration by passing a `pushAutomation` parameter.
#### Step 2.2: Configure push analytics behavior (optional)
When delayed initialization is enabled, push analytics are queued by default. However, you can choose to explicitly queue or drop push analytics instead.
##### Explicitly queue
To explicitly queue push analytics (default behavior), pass `.queue` to the `analyticsBehavior` parameter. Push analytics events that are queued prior to initialization will be processed and flushed to the server upon initialization.
```swift
Braze.prepareForDelayedInitialization(analyticsBehavior: .queue)
```
```objc
[Braze prepareForDelayedInitializationWithAnalyticsBehavior:BRZPushEnqueueBehaviorQueue];
```
##### Drop
To drop push analytics received before SDK initialization, pass `.drop` to the `analyticsBehavior` parameter. With this option, any push analytics event that occurs while the SDK is not initialized will be ignored.
```swift
Braze.prepareForDelayedInitialization(analyticsBehavior: .drop)
```
```objc
[Braze prepareForDelayedInitializationWithAnalyticsBehavior:BRZPushEnqueueBehaviorDrop];
```
#### Step 2.3: Customize push automation (optional)
You can customize the push automation configuration by passing a `pushAutomation` parameter. By default, all automation features are enabled except `requestAuthorizationAtLaunch`.
```swift
// Enable all push automation
featuresBraze.prepareForDelayedInitialization(pushAutomation: true)
// Or customize specific automation options
let automation = Braze.Configuration.Push.Automation()
automation.automaticSetup = true
automation.requestAuthorizationAtLaunch = false
Braze.prepareForDelayedInitialization(pushAutomation: automation)
```
```objc
// Enable all push automation features
[Braze prepareForDelayedInitializationWithPushAutomation:[[BRZConfigurationPushAutomation alloc] initWithAutomationEnabled:YES]];
// Or customize specific automation options
BRZConfigurationPushAutomation *automation = [[BRZConfigurationPushAutomation alloc] init];
automation.automaticSetup = YES;
automation.requestAuthorizationAtLaunch = NO;
[Braze prepareForDelayedInitializationWithPushAutomation:automation analyticsBehavior:BRZPushEnqueueBehaviorQueue];
```
#### Step 2.4: Initialize the SDK
After your chosen delay period (for example, after fetching configuration from a server or after user consent), initialize the SDK as normal:
```swift
func initializeBraze() {
let configuration = Braze.Configuration(apiKey: "YOUR-API-KEY", endpoint: "YOUR-ENDPOINT")
// Enable push automation to match the delayed initialization configuration
configuration.push.automation = true
let braze = Braze(configuration: configuration)
// Store the Braze instance for later use
AppDelegate.braze = braze
}
```
```objc
- (void)initializeBraze {
BRZConfiguration *configuration = [[BRZConfiguration alloc] initWithApiKey:@"YOUR-API-KEY" endpoint:@"YOUR-ENDPOINT"];
// Enable push automation to match the delayed initialization configuration
configuration.push.automation = [[BRZConfigurationPushAutomation alloc] initWithAutomationEnabled:YES];
Braze *braze = [[Braze alloc] initWithConfiguration:configuration];
// Store the Braze instance for later use
AppDelegate.braze = braze;
}
```
**Note:**
When the SDK is initialized, all queued push notifications, push tokens, and deep links are automatically processed.
### Step 3: Update your app delegate
**Important:**
The following assumes you've already added an `AppDelegate` to your project (which are not generated by default) and you are not using the delayed initialization feature. If you don't plan on using an `AppDelegate`, be sure to initialize the Braze SDK as early as possible, like during the app's launch. If you are using the delayed initialization feature, refer to [Step 2.4](#swift_step-24-initialize-the-sdk) for initializing the SDK and ignore this step.
Add the following line of code to your `AppDelegate.swift` file to import the features included in the Braze Swift SDK:
```swift
import BrazeKit
```
Next, add a static property to your `AppDelegate` class to keep a strong reference to the Braze instance throughout your application's lifetime:
```swift
class AppDelegate: UIResponder, UIApplicationDelegate {
static var braze: Braze? = nil
}
```
The SDK requires your application to retain a strong reference to the Braze instance throughout its usage. To prevent any unexpected side effects, ensure that you have fully captured that reference before accessing or modifying any properties or methods on the Braze instance.
Finally, in `AppDelegate.swift`, add the following snippet to your `application:didFinishLaunchingWithOptions:` method:
```swift
let configuration = Braze.Configuration(
apiKey: "YOUR-APP-IDENTIFIER-API-KEY",
endpoint: "YOUR-BRAZE-ENDPOINT"
)
let braze = Braze(configuration: configuration)
AppDelegate.braze = braze
```
Update `YOUR-APP-IDENTIFIER-API-KEY` and `YOUR-BRAZE-ENDPOINT` with the correct value from your **App Settings** page. Check out our [API identifier types](https://www.braze.com/docs/fr/fr/api/identifier_types/?tab=app%20ids) for more information on where to find your app identifier API key.
Add the following line of code to your `AppDelegate.m` file:
```objc
@import BrazeKit;
```
Next, add a static variable to your `AppDelegate.m` file to keep a reference to the Braze instance throughout your application's lifetime:
```objc
static Braze *_braze;
@implementation AppDelegate
+ (Braze *)braze {
return _braze;
}
+ (void)setBraze:(Braze *)braze {
_braze = braze;
}
@end
```
The SDK requires your application to retain a strong reference to the Braze instance throughout its usage. To prevent any unexpected side effects, ensure that you have fully captured that reference before accessing or modifying any properties or methods on the Braze instance.
Finally, within your `AppDelegate.m` file, add the following snippet within your `application:didFinishLaunchingWithOptions:` method:
```objc
BRZConfiguration *configuration = [[BRZConfiguration alloc] initWithApiKey:"YOUR-APP-IDENTIFIER-API-KEY"
endpoint:"YOUR-BRAZE-ENDPOINT"];
Braze *braze = [[Braze alloc] initWithConfiguration:configuration];
AppDelegate.braze = braze;
```
Update `YOUR-APP-IDENTIFIER-API-KEY` and `YOUR-BRAZE-ENDPOINT` with the correct value from your **Manage Settings** page. Check out our [API documentation](https://www.braze.com/docs/fr/fr/api/api_key/#the-app-identifier-api-key) for more information on where to find your app identifier API key.
## Optional configurations
### Logging
For a centralized overview across all platforms, see [Verbose logging](https://www.braze.com/docs/fr/fr/developer_guide/sdk_integration/verbose_logging). To learn how to interpret log output, see [Reading verbose logs](https://www.braze.com/docs/fr/fr/developer_guide/sdk_integration/reading_verbose_logs).
#### Log levels
The default log level for the Braze Swift SDK is `.error`—it's also the minimum supported level when logs are enabled. These are the full list of log levels:
| Swift | Objective-C | Description |
| ----------- | ------------------------ | ------------------------------------------------------------ |
| `.debug` | `BRZLoggerLevelDebug` | Log debugging information + `.info` + `.error`. |
| `.info` | `BRZLoggerLevelInfo` | Log general SDK information (user changes, etc.) + `.error`. |
| `.error` | `BRZLoggerLevelError` | Log errors. |
| `.disabled` | `BRZLoggerLevelDisabled` | No logging occurs. |
{: .reset-td-br-1 .reset-td-br-2 .reset-td-br-3 aria-label="Log levels" }
{: .reset-td-br-1 .reset-td-br-2 .reset-td-br-3 aria-label="Log levels" }
#### Setting the log level
You can assign the log level at runtime in your `Braze.Configuration` object. For complete usage details, see [`Braze.Configuration.Logger`](https://braze-inc.github.io/braze-swift-sdk/documentation/brazekit/braze/configuration-swift.class/logger-swift.class).
```swift
let configuration = Braze.Configuration(
apiKey: "",
endpoint: ""
)
// Enable logging of general SDK information (such as user changes, etc.)
configuration.logger.level = .info
let braze = Braze(configuration: configuration)
```
```objc
BRZConfiguration *configuration = [[BRZConfiguration alloc] initWithApiKey:self.APIKey
endpoint:self.apiEndpoint];
// Enable logging of general SDK information (such as user changes, etc.)
[configuration.logger setLevel:BRZLoggerLevelInfo];
Braze *braze = [[Braze alloc] initWithConfiguration:configuration];
```
## Integrating the Cordova SDK
### Prerequisites
Before you start, verify your environment is supported by the [latest Braze Cordova SDK version](https://github.com/braze-inc/braze-cordova-sdk?tab=readme-ov-file#minimum-version-requirements).
### Step 1: Add the SDK to your project
**Warning:**
Only add the Braze Cordova SDK using the methods below. Do not attempt to install using other methods as it could lead to a security breach.
If you're on Cordova 6 or later, you can add the SDK directly from GitHub. Alternatively, you can download a ZIP of the [GitHub repository](https://github.com/braze-inc/braze-cordova-sdk) and add the SDK manually.
If you don't plan on using location collection and geofences, use the `master` branch from GitHub.
```bash
cordova plugin add https://github.com/braze-inc/braze-cordova-sdk#master
```
If you plan on using location collection and geofences, use the `geofence-branch` from GitHub.
```bash
cordova plugin add https://github.com/braze-inc/braze-cordova-sdk#geofence-branch
```
**Tip:**
You can switch between `master` and `geofence-branch` at anytime by repeating this step.
### Step 2: Configure your project
Next, adding the following preferences to the `platform` element in your project's `config.xml` file.
```xml
```
```xml
```
Replace the following:
| Value | Description |
| --------------------- | -------------------------------------------------------------------------------------------------------------------------------- |
| `BRAZE_API_KEY` | Your [Braze REST API key](https://www.braze.com/docs/fr/fr/user_guide/administrative/app_settings/api_settings_tab/#rest-api-keys). |
| `CUSTOM_API_ENDPOINT` | A custom API endpoint. This endpoint is used to route your Braze instance data to the correct App Group in your Braze dashboard. |
{: .reset-td-br-1 .reset-td-br-2 aria-label="Step 2: Configure your project" }
The `platform` element in your `config.xml` file should be similar to the following:
```xml
```
```xml
```
## Platform-specific syntax
The following section covers the platform-specific syntax when using Cordova with iOS or Android.
### Integers
Integer preferences are read as string representations, like in the following example:
```xml
```
Due to how the Cordova 8.0.0+ framework handles preferences, integer-only preferences (such as sender IDs) must be set to strings prepended with `str_`, like in the following example:
```xml
```
### Booleans
Boolean preferences are read by the SDK using `YES` and `NO` keywords as a string representation, like in the following example:
```xml
```
Boolean preferences are read by the SDK using `true` and `false` keywords as a string representation, like in the following example:
```xml
```
## Optional configurations {#optional}
You can add any of the following preferences to the `platform` element in your project's `config.xml` file:
| Method | Description |
| ------------------------------------------------- | ----------------------------------------------------------------------------------------------------------------------------------------------------------------------------------------------------------------------------------------------------- |
| `ios_api_key` | Sets the API key for your application. |
| `ios_api_endpoint` | Sets the [SDK endpoint](https://www.braze.com/docs/fr/fr/api/basics/#endpoints) for your application. |
| `ios_disable_automatic_push_registration` | Sets whether automatic push registration should be disabled. |
| `ios_disable_automatic_push_handling` | Sets whether automatic push handling should be disabled. |
| `ios_enable_idfa_automatic_collection` | Sets whether the Braze SDK should automatically collect the IDFA information. For more information, see [the Braze IDFA method documentation](https://braze-inc.github.io/braze-swift-sdk/documentation/brazekit/braze/set(identifierforadvertiser:)/). |
| `enable_location_collection` | Sets whether the automatic location collection is enabled (if the user permits). The `geofence-branch` |
| `geofences_enabled` | Sets whether geofences are enabled. |
| `ios_session_timeout` | Sets the Braze session timeout for your application in seconds. Defaults to 10 seconds. |
| `sdk_authentication_enabled` | Sets whether to enable the [SDK Authentication](https://www.braze.com/docs/fr/fr/developer_guide/platform_wide/sdk_authentication#sdk-authentication) feature. |
| `display_foreground_push_notifications` | Sets whether push notifications should be displayed while the application is in the foreground. |
| `ios_disable_un_authorization_option_provisional` | Sets whether `UNAuthorizationOptionProvisional` should be disabled. |
| `trigger_action_minimum_time_interval_seconds` | Sets the minimum time interval in seconds between triggers. Defaults to 30 seconds. |
| `ios_push_app_group` | Sets the app group ID for iOS push extensions. |
| `ios_forward_universal_links` | Sets whether the SDK automatically recognizes and forwards universal links to the system methods. Required for deep links from push notifications to work on iOS. Defaults to disabled. |
| `ios_log_level` | Sets the minimum logging level for `Braze.Configuration.Logger`. |
| `ios_use_uuid_as_device_id` | Sets if a randomly generated UUID should be used as the device ID. |
| `ios_flush_interval_seconds` | Sets the interval in seconds between automatic data flushes. Defaults to 10 seconds. |
| `ios_use_automatic_request_policy` | Sets whether the request policy for `Braze.Configuration.Api` should be automatic or manual. |
| `should_opt_in_when_push_authorized` | Sets if a user’s notification subscription state should automatically be set to `optedIn` when push permissions are authorized. |
{: .reset-td-br-1 .reset-td-br-2 aria-label="Optional configurations #optional" }
**Tip:**
For more detailed information, see [GitHub: Braze iOS Cordova plugin](https://github.com/braze-inc/braze-cordova-sdk/blob/master/src/ios/BrazePlugin.m).
| Method | Description |
| ----------------------------------------------------------------- | --------------------------------------------------------------------------------------------------------------------------------------------------------------------------------------------- |
| `android_api_key` | Sets the API key for your application. |
| `android_api_endpoint` | Sets the [SDK endpoint](https://www.braze.com/docs/fr/fr/api/basics/#endpoints) for your application. |
| `android_small_notification_icon` | Sets the notification small icon. |
| `android_large_notification_icon` | Sets the notification large icon. |
| `android_notification_accent_color` | Sets the notification accent color using a hexadecimal representation. |
| `android_default_session_timeout` | Sets the Braze session timeout for your application in seconds. Defaults to 10 seconds. |
| `android_handle_push_deep_links_automatically` | Sets whether the Braze SDK automatically handles push deep links. Required for deep links from push notifications to work on Android. Defaults to disabled. |
| `android_log_level` | Sets the log level for your application. The default log level is 4 and will minimally log info. To enable verbose logging for debugging, use log level 2. |
| `firebase_cloud_messaging_registration_enabled` | Sets whether to use Firebase Cloud Messaging for push notifications. |
| `android_fcm_sender_id` | Sets the Firebase Cloud Messaging sender ID. |
| `enable_location_collection` | Sets whether the automatic location collection is enabled (if the user permits). |
| `geofences_enabled` | Sets whether geofences are enabled. |
| `android_disable_auto_session_tracking` | Disable the Android Cordova plugin from automatically tracking sessions. For more information, see [Disabling automatic session tracking](#cordova_disable-automatic-session-tracking) |
| `sdk_authentication_enabled` | Sets whether to enable the [SDK Authentication](https://www.braze.com/docs/fr/fr/developer_guide/platform_wide/sdk_authentication#sdk-authentication) feature. |
| `trigger_action_minimum_time_interval_seconds` | Sets the minimum time interval in seconds between triggers. Defaults to 30 seconds. |
| `is_session_start_based_timeout_enabled` | Sets whether the session timeout behavior to be based either on session start or session end events. |
| `default_notification_channel_name` | Sets the user-facing name as seen via `NotificationChannel.getName` for the Braze default `NotificationChannel`. |
| `default_notification_channel_description` | Sets the user-facing description as seen via `NotificationChannel.getDescription` for the Braze default `NotificationChannel`. |
| `does_push_story_dismiss_on_click` | Sets whether a Push Story is automatically dismissed when clicked. |
| `is_fallback_firebase_messaging_service_enabled` | Sets whether the use of a fallback Firebase Cloud Messaging Service is enabled. |
| `fallback_firebase_messaging_service_classpath` | Sets the classpath for the fallback Firebase Cloud Messaging Service. |
| `is_content_cards_unread_visual_indicator_enabled` | Sets whether the Content Cards unread visual indication bar is enabled. |
| `is_firebase_messaging_service_on_new_token_registration_enabled` | Sets whether the Braze SDK will automatically register tokens in `com.google.firebase.messaging.FirebaseMessagingService.onNewToken`. |
| `is_push_deep_link_back_stack_activity_enabled` | Sets whether Braze will add an activity to the back stack when automatically following deep links for push. |
| `push_deep_link_back_stack_activity_class_name` | Sets the activity that Braze will add to the back stack when automatically following deep links for push. |
| `should_opt_in_when_push_authorized` | Sets if Braze should automatically opt-in the user when push is authorized. |
{: .reset-td-br-1 .reset-td-br-2 aria-label="Optional configurations #optional" }
**Tip:**
For more detailed information, see [GitHub: Braze Android Cordova plugin](https://github.com/braze-inc/braze-cordova-sdk/blob/master/src/android/BrazePlugin.kt).
The following is an example `config.xml` file with additional configurations:
```xml
```
```xml
```
## Disabling automatic session tracking (Android only) {#disable-automatic-session-tracking}
By default, the Android Cordova plugin automatically tracks sessions. To disable automatic session tracking, add the following preference to the `platform` element in your project's `config.xml` file:
```xml
```
To start tracking sessions again, call `BrazePlugin.startSessionTracking()`. Keep in mind, only sessions started after the next `Activity.onStart()` will be tracked.
## About the Flutter Braze SDK
After you integrate the Braze Flutter SDK on Android and iOS, you'll be able to use the Braze API within your [Flutter apps](https://flutter.dev/) written in Dart. This plugin provides basic analytics functionality and lets you integrate in-app messages and Content Cards for both iOS and Android with a single codebase.
## Integrating the Flutter SDK
### Prerequisites
Before you integrate the Braze Flutter SDK, you'll need to complete the following:
| Prerequisite | Description |
| --- | --- |
| Braze API app identifier | To locate your app's identifier, go to **Settings** > **APIs and Identifiers** > **App Identifiers**. For more information see, [API Identifier Types](https://www.braze.com/docs/fr/fr/api/identifier_types/#app-identifier).|
| Braze SDK endpoint | Your SDK endpoint URL (for example, `sdk..braze.com`). Your endpoint will depend on the [Braze URL for your instance](https://www.braze.com/docs/fr/fr/developer_guide/rest_api/basics/#endpoints).|
| Flutter SDK | Install the official [Flutter SDK](https://docs.flutter.dev/get-started/install) and ensure it meets the Braze Flutter SDK's [minimum supported version](https://github.com/braze-inc/braze-flutter-sdk#requirements). |
{: .reset-td-br-1 .reset-td-br-2 aria-label="Prerequisites" }
### Step 1: Integrate the Braze library
Add the Braze Flutter SDK package from the command line. This will add the appropriate line to your `pubspec.yaml`.
```bash
flutter pub add braze_plugin
```
### Step 2: Complete native SDK setup
#### 2.1 Set up Android
##### Provide credentials at compile time
Create a `braze.xml` file in your project's `android/res/values` folder. The API key and endpoint are provided at runtime from Dart, so they are not required in this file. To enable delayed initialization, add `com_braze_enable_delayed_initialization` to the file:
```xml
true
```
##### Provide credentials at runtime
Alternatively, you can enable delayed initialization programmatically in your `MainActivity.kt`:
```kotlin
import com.braze.Braze
class MainActivity : FlutterActivity() {
override fun onCreate(savedInstanceState: Bundle?) {
super.onCreate(savedInstanceState)
Braze.enableDelayedInitialization(context = this)
}
}
```
Add the required permissions to your `AndroidManifest.xml` file:
```xml
```
#### 2.2 Set up iOS
Within your existing `application(_:didFinishLaunchingWithOptions:)` method, add a call to `BrazePlugin.configure(_:postInitialization:)` to store your configuration. The Braze instance is created later when `initialize()` is called from Dart. The API key and endpoint are not set here.
Add the following code to your `AppDelegate.swift`:
```swift
import BrazeKit
import braze_plugin
// ...
override func application(
_ application: UIApplication,
didFinishLaunchingWithOptions launchOptions: [UIApplication.LaunchOptionsKey : Any]? = nil
) -> Bool {
// ... your existing didFinishLaunchingWithOptions setup ...
BrazePlugin.configure(
{ configuration in
configuration.logger.level = .info
// Set other non-API-key configurations here, such as:
// configuration.push.automation = true
// configuration.sessionTimeout = 60
},
postInitialization: { braze in
// Optional: Customize the Braze instance after creation.
// For example, set a custom in-app message presenter:
// let customPresenter = CustomInAppMessagePresenter()
// braze.inAppMessagePresenter = customPresenter
}
)
return true
}
```
Add the following code to your `AppDelegate.m`:
```objc
@import BrazeKit;
@import braze_plugin;
// ...
- (BOOL)application:(UIApplication *)application
didFinishLaunchingWithOptions:(NSDictionary *)launchOptions {
[BrazePlugin configure:^(BRZConfiguration *configuration) {
configuration.logger.level = BRZLoggerLevelInfo;
// Set other non-API-key configurations here, such as:
// configuration.push.automation = ...
// configuration.sessionTimeout = 60;
} postInitialization:^(Braze *braze) {
// Optional: customize the Braze instance after creation.
}];
return YES;
}
```
**Important:**
`BrazePlugin.configure()` only stores your configuration. No Braze instance exists until `initialize()` is called from Dart, so do not call any Braze SDK methods in the AppDelegate after `configure()`.
#### 2.1 Set up Android
To connect to Braze servers, create a `braze.xml` file in your project's `android/res/values` folder. Paste the following code and replace the API identifier key and endpoint with your values:
```xml
YOUR_APP_IDENTIFIER_API_KEYYOUR_CUSTOM_ENDPOINT_OR_CLUSTER
```
Add the required permissions to your `AndroidManifest.xml` file:
```xml
```
#### 2.2 Set up iOS
Add the Braze SDK imports at the top of the `AppDelegate.swift` file:
```swift
import BrazeKit
import braze_plugin
```
In the same file, create the Braze configuration object in the `application(_:didFinishLaunchingWithOptions:)` method and replace the API key and endpoint with your app's values. Then, create the Braze instance using the configuration, and create a static property on the `AppDelegate` for easy access:
```swift
static var braze: Braze? = nil
override func application(
_ application: UIApplication,
didFinishLaunchingWithOptions launchOptions: [UIApplication.LaunchOptionsKey : Any]? = nil
) -> Bool {
// Setup Braze
let configuration = Braze.Configuration(
apiKey: "",
endpoint: ""
)
// - Enable logging or customize configuration here
configuration.logger.level = .info
let braze = BrazePlugin.initBraze(configuration)
AppDelegate.braze = braze
return true
}
```
Import the Braze SDK at the top of the `AppDelegate.m` file:
```objc
@import BrazeKit;
@import braze_plugin;
```
In the same file, create the Braze configuration object in the `application:didFinishLaunchingWithOptions:` method and replace the API key and endpoint with your app's values. Then, create the Braze instance using the configuration, and create a static property on the `AppDelegate` for easy access:
```objc
- (BOOL)application:(UIApplication *)application
didFinishLaunchingWithOptions:(NSDictionary *)launchOptions {
// Setup Braze
BRZConfiguration *configuration =
[[BRZConfiguration alloc] initWithApiKey:@""
endpoint:@""];
// - Enable logging or customize configuration here
configuration.logger.level = BRZLoggerLevelInfo;
Braze *braze = [BrazePlugin initBraze:configuration];
AppDelegate.braze = braze;
[self.window makeKeyAndVisible];
return YES;
}
#pragma mark - AppDelegate.braze
static Braze *_braze = nil;
+ (Braze *)braze {
return _braze;
}
+ (void)setBraze:(Braze *)braze {
_braze = braze;
}
```
### Step 3: Set up the plugin
Import the plugin and create a single instance of `BrazePlugin`:
```dart
import 'package:braze_plugin/braze_plugin.dart';
final BrazePlugin braze = BrazePlugin();
```
Then call `initialize()` with your app identifier API key and SDK endpoint to create the Braze instance. See the options below for where to call this method in your app.
#### Standard initialization
To initialize the SDK when your app starts, call `initialize()` in `initState()`:
```dart
@override
void initState() {
super.initState();
braze.initialize("", "");
}
```
#### Delayed initialization
To defer SDK initialization until a later point in the session — for example, after the user grants consent or completes login — call `initialize()` when you're ready:
```dart
// ...
void onUserConsent() {
braze.initialize("", "");
}
```
**Warning:**
Push notifications and deep links received before `initialize()` is called are not processed on iOS. On Android, deep links from push notifications do not resolve while the SDK is waiting to be initialized. If your app relies on push or deep links at launch, use [standard initialization](#standard-initialization) instead.
#### Platform-specific API keys
Since your Android and iOS apps use different API keys, use platform detection:
```dart
import 'dart:io' show Platform;
if (Platform.isAndroid) {
braze.initialize("", "");
} else if (Platform.isIOS) {
braze.initialize("", "");
}
```
#### Re-initialization
You can call `initialize()` multiple times to re-initialize the SDK with a different API key and endpoint mid-session. Each call tears down the previous Braze instance and creates a new one.
**Important:**
To avoid undefined behaviors, only allocate and use a single instance of the `BrazePlugin` in your Dart code. All SDK method calls made before `initialize()` are ignored on iOS, so call `initialize()` before using any other Braze methods.
To import the plugin into your Dart code, use the following:
```dart
import 'package:braze_plugin/braze_plugin.dart';
```
Then, initialize an instance of the Braze plugin by calling `new BrazePlugin()` like in [our sample app](https://github.com/braze-inc/braze-flutter-sdk/blob/master/example/lib/main.dart).
**Important:**
To avoid undefined behaviors, only allocate and use a single instance of the `BrazePlugin` in your Dart code.
## Testing the integration
You can verify that the SDK is integrated by checking session statistics in the dashboard. If you run your application on either platform, you should see a new session in the dashboard (in the **Overview** section).
Open a session for a particular user by calling the following code in your app.
```dart
BrazePlugin braze = BrazePlugin();
braze.initialize("", "");
braze.changeUser("{some-user-id}");
```
```dart
BrazePlugin braze = BrazePlugin();
braze.changeUser("{some-user-id}");
```
Search for the user with `{some-user-id}` in the dashboard under **Audience** > **Search Users**. There, you can verify that session and device data have been logged.
## About the React Native Braze SDK
Integrating the React Native Braze SDK provides basic analytics functionality and lets you integrate in-app messages and Content Cards for both iOS and Android with one codebase.
## New Architecture compatibility
The following minimum SDK version is compatible with all apps using [React Native's New Architecture](https://reactnative.dev/docs/the-new-architecture/landing-page):
Starting with SDK version 6.0.0, Braze uses a React Native Turbo Module, which is compatible with both the New Architecture and legacy bridge architecture. This means no additional setup is required.
**Warning:**
If your iOS app conforms to `RCTAppDelegate` and follows our previous `AppDelegate` setup, review the samples in [Complete native setup](#reactnative_step-2-complete-native-setup) to prevent crashes when subscribing to events in the Turbo Module.
## React and React Native version requirements
Braze doesn't publish separate minimum React versions beyond what the React Native SDK supports. To integrate the SDK, use React Native version 0.71 or later. For the full list of supported React Native versions, see the [React Native SDK GitHub repository](https://github.com/braze-inc/braze-react-native-sdk?tab=readme-ov-file#version-support).
When you upgrade React, React Native, or the Braze SDK, review the SDK [CHANGELOG](https://github.com/braze-inc/braze-react-native-sdk/blob/master/CHANGELOG.md) for breaking changes before you deploy.
## Integrating the React Native SDK
### Prerequisites
For supported React Native versions and upgrade guidance, see [React and React Native version requirements](#react-and-react-native-version-requirements).
### Step 1: Integrate the Braze library
```bash
npm install @braze/react-native-sdk
```
```bash
yarn add @braze/react-native-sdk
```
### Step 2: Complete native setup
If your app uses Expo, see [Using the Expo plugin](#reactnative-using-the-expo-plugin). If your app uses pure React Native, see [Using React Native CLI](#reactnative-using-react-native-cli).
Choose one setup method in each version tab: Expo plugin or React Native CLI.
#### Method 1: Using the Expo plugin {#reactnative-using-the-expo-plugin}
##### 2.1 Install the Braze Expo plugin
Ensure that your version of the Braze Expo plugin is at least 4.1.0. For the full list of supported versions, see the [Braze Expo plugin repository](https://github.com/braze-inc/braze-expo-plugin?tab=readme-ov-file#version-support).
The following code snippet shows the command to install the Braze Expo plugin:
```bash
npx expo install @braze/expo-plugin
```
##### 2.2 Add the plugin to your app.json
In your `app.json`, add the Braze Expo plugin. The API key and endpoint are no longer set here. Provide them at runtime through `Braze.initialize()` from JavaScript. Add the following optional configuration parameters based on your implementation needs:
| Method | Type | Description |
| --------------------------------------------- | ------- | -------------------------------------------------------------------------------------------------------------------------------------------------------- |
| `enableBrazeIosPush` | boolean | iOS only. Whether to use Braze to handle push notifications on iOS. |
| `enableFirebaseCloudMessaging` | boolean | Android only. Whether to use Firebase Cloud Messaging for push notifications. |
| `firebaseCloudMessagingSenderId` | string | Android only. Your Firebase Cloud Messaging sender ID. |
| `sessionTimeout` | integer | The Braze session timeout for your application in seconds. |
| `enableSdkAuthentication` | boolean | Whether to enable the [SDK Authentication](https://www.braze.com/docs/fr/fr/developer_guide/platform_wide/sdk_authentication#sdk-authentication) feature. |
| `logLevel` | integer | The log level for your application. The default log level is 8 and minimally logs info. To enable verbose logging for debugging, use log level 0. |
| `minimumTriggerIntervalInSeconds` | integer | The minimum time interval in seconds between triggers. Defaults to 30 seconds. |
| `enableAutomaticLocationCollection` | boolean | Whether automatic location collection is enabled (if the user permits). |
| `enableGeofence` | boolean | Whether geofences are enabled. |
| `enableAutomaticGeofenceRequests` | boolean | Whether geofence requests should be made automatically. |
| `dismissModalOnOutsideTap` | boolean | iOS only. Whether a modal in-app message is dismissed when the user clicks outside of the in-app message. |
| `androidHandlePushDeepLinksAutomatically` | boolean | Android only. Whether the Braze SDK should automatically handle push deep links. |
| `androidPushNotificationHtmlRenderingEnabled` | boolean | Android only. Sets whether the text content in a push notification should be interpreted and rendered as HTML using `android.text.Html.fromHtml`. |
| `androidNotificationAccentColor` | string | Android only. Sets the Android notification accent color. |
| `androidNotificationLargeIcon` | string | Android only. Sets the Android notification large icon. |
| `androidNotificationSmallIcon` | string | Android only. Sets the Android notification small icon. |
| `iosRequestPushPermissionsAutomatically` | boolean | iOS only. Whether the user should automatically be prompted for push permissions on app launch. |
| `enableBrazeIosRichPush` | boolean | iOS only. Whether to enable rich push features for iOS. |
| `enableBrazeIosPushStories` | boolean | iOS only. Whether to enable Braze Push Stories for iOS. |
| `iosPushStoryAppGroup` | string | iOS only. The app group used for iOS Push Stories. |
| `iosUseUUIDAsDeviceId` | boolean | iOS only. Whether the device ID uses a randomly generated UUID. |
| `iosForwardUniversalLinks` | boolean | iOS only. Specifies if the SDK should automatically recognize and forward universal links to the system methods (default: `false`). |
{: .reset-td-br-1 .reset-td-br-2 .reset-td-br-3 aria-label="2.2 Add the plugin to your app.json" }
The following code snippet shows an example `app.json` configuration:
```json
{
"expo": {
"plugins": [
[
"@braze/expo-plugin",
{
"sessionTimeout": 60,
"enableGeofence": false,
"enableBrazeIosPush": false,
"enableFirebaseCloudMessaging": false,
"firebaseCloudMessagingSenderId": "YOUR-FCM-SENDER-ID",
"androidHandlePushDeepLinksAutomatically": true,
"enableSdkAuthentication": false,
"logLevel": 0,
"minimumTriggerIntervalInSeconds": 0,
"enableAutomaticLocationCollection": false,
"enableAutomaticGeofenceRequests": false,
"dismissModalOnOutsideTap": true,
"androidPushNotificationHtmlRenderingEnabled": true,
"androidNotificationAccentColor": "#ff3344",
"androidNotificationLargeIcon": "@drawable/custom_app_large_icon",
"androidNotificationSmallIcon": "@drawable/custom_app_small_icon",
"iosRequestPushPermissionsAutomatically": false,
"enableBrazeIosPushStories": true,
"iosPushStoryAppGroup": "group.com.example.myapp.PushStories",
"iosForwardUniversalLinks": false
}
]
]
}
}
```
###### Configuring Android push notification icons {#android-push-icons}
When using `androidNotificationLargeIcon` and `androidNotificationSmallIcon`, follow these best practices for proper icon display:
**Icon placement and format**
To use custom push notification icons with the Braze Expo plugin:
1. Create your icon files following the Icon requirements listed below.
2. Place them in your project's Android native directories at `android/app/src/main/res/drawable-/`.
For example, use `android/app/src/main/res/drawable-mdpi/` and `android/app/src/main/res/drawable-hdpi/`.
3. Alternatively, if you're managing assets in your React Native directory, you can use Expo's [app.json icon configuration](https://docs.expo.dev/versions/latest/config/app/#icon) or create an [Expo config plugin](https://docs.expo.dev/config-plugins/introduction/) to copy the icons to the Android drawable folders during prebuild.
The Braze Expo plugin references these icons using Android's drawable resource system.
**Icon requirements**
- **Small icon:** Must be a white silhouette on a transparent background (this is an Android platform requirement)
- **Large icon:** Can be a full-color image.
- **Format:** PNG format is recommended.
- **Naming:** Use lowercase letters, numbers, and underscores only (for example, `my_large_icon.png`)
**Configuration in app.json**
The following code snippet shows how to reference Android notification icons in `app.json` using the `@drawable/` prefix:
```json
{
"expo": {
"plugins": [
[
"@braze/expo-plugin",
{
"androidNotificationLargeIcon": "@drawable/large_icon",
"androidNotificationSmallIcon": "@drawable/small_icon"
}
]
]
}
}
```
**Important:**
Do not use relative file paths (such as `src/assets/images/icon.png`) or include the file extension when referencing icons. The Expo plugin requires the `@drawable/` prefix to properly locate the icons in the Android native folders after the prebuild process.
**How it works**
The Braze Expo plugin references your icon files from the Android `drawable` directories. When you run `npx expo prebuild`, Expo generates the native Android project structure. Your icons must be present in the Android `drawable` folders (either placed manually or copied through a config plugin) before the build process. The plugin then configures the Braze SDK to use these drawable resources by their names (without path or extension), which is why the `@drawable/` prefix is required in your configuration.
For more information on Android notification icons, see [Android's notification icon guidelines](https://developer.android.com/develop/ui/views/notifications#icon).
##### 2.3 Build and run your application
Prebuilding your application generates the native files necessary for the Braze Expo plugin to work.
The following code snippet shows the command to prebuild your application:
```bash
npx expo prebuild
```
Run your application as specified in the [Expo docs](https://docs.expo.dev/workflow/customizing/). If you make changes to the configuration options, prebuild and run the application again.
#### Method 2: Using React Native CLI {#reactnative-using-react-native-cli}
##### Set up Android
**2.1 Add the Kotlin Gradle plugin**
The following code snippet shows how to add the Kotlin Gradle plugin in your top-level project `build.gradle` under `buildscript` > `dependencies`:
```groovy
buildscript {
dependencies {
...
// Choose your Kotlin version
classpath("org.jetbrains.kotlin:kotlin-gradle-plugin:1.8.10")
}
}
```
This adds Kotlin to your project.
**2.2 Configure the Braze SDK**
Create a `braze.xml` file in your project's `res/values` folder. The API key and endpoint are provided at runtime from JavaScript, so they are not required in this file. The following code snippet shows how to enable delayed initialization with `com_braze_enable_delayed_initialization`:
```xml
true
```
**Note:**
You can still add other native configuration values to `braze.xml` (such as push, session timeout, and logging settings). These are applied automatically when `Braze.initialize()` is called from JavaScript.
The following code snippet shows the required permissions for your `AndroidManifest.xml` file:
```xml
```
**Tip:**
On Braze Android SDK version 12.2.0 or later, you can automatically pull in the android-sdk-location library by setting `importBrazeLocationLibrary=true` in your `gradle.properties` file.
**2.3 Implement user session tracking**
The calls to `openSession()` and `closeSession()` are handled automatically.
The following code snippet shows what to add to the `onCreate()` method of your `MainApplication` class:
```java
import com.braze.BrazeActivityLifecycleCallbackListener;
@Override
public void onCreate() {
super.onCreate();
...
registerActivityLifecycleCallbacks(new BrazeActivityLifecycleCallbackListener());
}
```
```kotlin
import com.braze.BrazeActivityLifecycleCallbackListener
override fun onCreate() {
super.onCreate()
...
registerActivityLifecycleCallbacks(BrazeActivityLifecycleCallbackListener())
}
```
**2.4 Handle intent updates**
If your MainActivity has `android:launchMode` set to `singleTask`, the following code snippet shows what to add to your `MainActivity` class:
```java
@Override
public void onNewIntent(Intent intent) {
super.onNewIntent(intent);
setIntent(intent);
}
```
```kotlin
override fun onNewIntent(intent: Intent) {
super.onNewIntent(intent)
setIntent(intent)
}
```
##### Set up iOS
**2.5 (Optional) Configure Podfile for dynamic XCFrameworks**
To import certain Braze libraries, such as BrazeUI, into an Objective-C++ file, you must use the `#import` syntax. Starting in version `7.4.0` of the Braze Swift SDK, binaries have an [optional distribution channel as dynamic XCFrameworks](https://github.com/braze-inc/braze-swift-sdk-prebuilt-dynamic), which are compatible with this syntax.
If you'd like to use this distribution channel, manually override the CocoaPods source locations in your Podfile. Reference the sample below and replace `{your-version}` with the relevant version you wish to import:
```ruby
pod 'BrazeKit', :podspec => 'https://raw.githubusercontent.com/braze-inc/braze-swift-sdk-prebuilt-dynamic/{your-version}/BrazeKit.podspec'
pod 'BrazeUI', :podspec => 'https://raw.githubusercontent.com/braze-inc/braze-swift-sdk-prebuilt-dynamic/{your-version}/BrazeUI.podspec'
pod 'BrazeLocation', :podspec => 'https://raw.githubusercontent.com/braze-inc/braze-swift-sdk-prebuilt-dynamic/{your-version}/BrazeLocation.podspec'
```
**2.6 Install pods**
Since React Native automatically links the libraries to the native platform, you can install the SDK with the help of CocoaPods.
The following code snippet shows how to install pods from the root folder of the project:
```bash
# To install using the React Native New Architecture
cd ios && pod install
# To install using the React Native legacy architecture
cd ios && RCT_NEW_ARCH_ENABLED=0 pod install
```
**2.7 Configure the Braze SDK**
Use `BrazeReactInitializer.configure` in your `AppDelegate` to register native configuration. The closures you provide are stored and applied later when `Braze.initialize(apiKey, endpoint)` is called from JavaScript.
The following code snippet shows how to import the Braze SDK at the top of the `AppDelegate.swift` file:
```swift
import BrazeKit
import braze_react_native_sdk
```
In the `application(_:didFinishLaunchingWithOptions:)` method, register your native configuration using `BrazeReactInitializer.configure`. Do not set the API key or endpoint here. They are provided from JavaScript through `Braze.initialize()`.
- **`configure` closure**: Receives a `Braze.Configuration` and lets you set native configuration properties (logging, push, sessions, and more).
- **`postInitialization` closure** _(optional)_: Receives the live `Braze` instance after creation, for setup that requires the instance (for example, storing a reference or setting delegates).
The following code snippet shows an example `AppDelegate.swift` implementation that uses `BrazeReactInitializer.configure`:
```swift
@main
class AppDelegate: UIResponder, UIApplicationDelegate {
static var braze: Braze? = nil
func application(
_ application: UIApplication,
didFinishLaunchingWithOptions launchOptions: [UIApplication.LaunchOptionsKey: Any]? = nil
) -> Bool {
BrazeReactInitializer.configure { configuration in
configuration.logger.level = .info
configuration.push.automation = true
} postInitialization: { braze in
AppDelegate.braze = braze
}
// ... React Native setup
return true
}
}
```
The following code snippet shows how to import the Braze SDK at the top of the `AppDelegate.m` file:
```objc
@import BrazeKit;
@import braze_react_native_sdk;
```
In the `application:didFinishLaunchingWithOptions:` method, register your native configuration using `BrazeReactInitializer`. Do not set the API key or endpoint here. They are provided from JavaScript through `Braze.initialize()`.
The following code snippet shows an example `AppDelegate.m` implementation that uses `BrazeReactInitializer`:
```objc
- (BOOL)application:(UIApplication *)application
didFinishLaunchingWithOptions:(NSDictionary *)launchOptions {
[BrazeReactInitializer configure:^(BRZConfiguration *configuration) {
configuration.logger.level = BRZLoggerLevelInfo;
configuration.push.automation = [[BRZConfigurationPushAutomation alloc] initWithAutomationEnabled:YES];
} postInitialization:^(Braze *braze) {
// Store the Braze instance for later use.
}];
/* Other configuration */
return YES;
}
```
**Important:**
`BrazeReactInitializer.configure()` only stores your configuration. No Braze instance exists until `Braze.initialize()` is called from JavaScript, so do not call any Braze SDK methods in the AppDelegate after `configure()`.
When you call `Braze.initialize()` again, the same `configure` and `postInitialization` blocks are applied to the new Braze instance.
#### Method 1: Using the Expo plugin
##### Step 2.1: Install the Braze Expo plugin
Ensure that your version of the Braze React Native SDK is at least 1.37.0. For the full list of supported versions, see the [Braze React Native repository](https://github.com/braze-inc/braze-react-native-sdk?tab=readme-ov-file#version-support).
The following code snippet shows the command to install the Braze Expo plugin:
```bash
npx expo install @braze/expo-plugin
```
##### Step 2.2: Add the plugin to your app.json
In your `app.json`, add the Braze Expo plugin. You can provide the following configuration options:
| Method | Type | Description |
| --------------------------------------------- | ------- | -------------------------------------------------------------------------------------------------------------------------------------------------------- |
| `androidApiKey` | string | Required. The [API key](https://www.braze.com/docs/fr/fr/api/identifier_types/) for your Android application, located in your Braze dashboard under **Manage Settings**. |
| `iosApiKey` | string | Required. The [API key](https://www.braze.com/docs/fr/fr/api/identifier_types/) for your iOS application, located in your Braze dashboard under **Manage Settings**. |
| `baseUrl` | string | Required. The [SDK endpoint](https://www.braze.com/docs/fr/fr/api/basics/#endpoints) for your application, located in your Braze dashboard under **Manage Settings**. |
| `enableBrazeIosPush` | boolean | iOS only. Whether to use Braze to handle push notifications on iOS. Introduced in React Native SDK v1.38.0 and Expo Plugin v0.4.0. |
| `enableFirebaseCloudMessaging` | boolean | Android only. Whether to use Firebase Cloud Messaging for push notifications. Introduced in React Native SDK v1.38.0 and Expo Plugin v0.4.0. |
| `firebaseCloudMessagingSenderId` | string | Android only. Your Firebase Cloud Messaging sender ID. Introduced in React Native SDK v1.38.0 and Expo Plugin v0.4.0. |
| `sessionTimeout` | integer | The Braze session timeout for your application in seconds. |
| `enableSdkAuthentication` | boolean | Whether to enable the [SDK Authentication](https://www.braze.com/docs/fr/fr/developer_guide/platform_wide/sdk_authentication#sdk-authentication) feature. |
| `logLevel` | integer | The log level for your application. The default log level is 8 and minimally logs info. To enable verbose logging for debugging, use log level 0. |
| `minimumTriggerIntervalInSeconds` | integer | The minimum time interval in seconds between triggers. Defaults to 30 seconds. |
| `enableAutomaticLocationCollection` | boolean | Whether automatic location collection is enabled (if the user permits). |
| `enableGeofence` | boolean | Whether geofences are enabled. |
| `enableAutomaticGeofenceRequests` | boolean | Whether geofence requests should be made automatically. |
| `dismissModalOnOutsideTap` | boolean | iOS only. Whether a modal in-app message is dismissed when the user clicks outside of the in-app message. |
| `androidHandlePushDeepLinksAutomatically` | boolean | Android only. Whether the Braze SDK should automatically handle push deep links. |
| `androidPushNotificationHtmlRenderingEnabled` | boolean | Android only. Sets whether the text content in a push notification should be interpreted and rendered as HTML using `android.text.Html.fromHtml`. |
| `androidNotificationAccentColor` | string | Android only. Sets the Android notification accent color. |
| `androidNotificationLargeIcon` | string | Android only. Sets the Android notification large icon. |
| `androidNotificationSmallIcon` | string | Android only. Sets the Android notification small icon. |
| `iosRequestPushPermissionsAutomatically` | boolean | iOS only. Whether the user should automatically be prompted for push permissions on app launch. |
| `enableBrazeIosRichPush` | boolean | iOS only. Whether to enable rich push features for iOS. |
| `enableBrazeIosPushStories` | boolean | iOS only. Whether to enable Braze Push Stories for iOS. |
| `iosPushStoryAppGroup` | string | iOS only. The app group used for iOS Push Stories. |
| `iosUseUUIDAsDeviceId` | boolean | iOS only. Whether the device ID will use a randomly generated UUID. |
| `iosForwardUniversalLinks` | boolean | iOS only. Specifies if the SDK should automatically recognize and forward universal links to the system methods (default: `false`). When enabled, the SDK will automatically forward universal links to the system methods defined in [Supporting universal links in your app](https://braze-inc.github.io/braze-swift-sdk/documentation/brazekit/braze/configuration-swift.class/forwarduniversallinks/). Introduced in React Native SDK v11.1.0 and Expo Plugin v3.2.0. |
{: .reset-td-br-1 .reset-td-br-2 .reset-td-br-3 aria-label="Step 2.2: Add the plugin to your app.json" }
The following code snippet shows an example `app.json` configuration:
```json
{
"expo": {
"plugins": [
[
"@braze/expo-plugin",
{
"androidApiKey": "YOUR-ANDROID-API-KEY",
"iosApiKey": "YOUR-IOS-API-KEY",
"baseUrl": "YOUR-SDK-ENDPOINT",
"sessionTimeout": 60,
"enableGeofence": false,
"enableBrazeIosPush": false,
"enableFirebaseCloudMessaging": false,
"firebaseCloudMessagingSenderId": "YOUR-FCM-SENDER-ID",
"androidHandlePushDeepLinksAutomatically": true,
"enableSdkAuthentication": false,
"logLevel": 0,
"minimumTriggerIntervalInSeconds": 0,
"enableAutomaticLocationCollection": false,
"enableAutomaticGeofenceRequests": false,
"dismissModalOnOutsideTap": true,
"androidPushNotificationHtmlRenderingEnabled": true,
"androidNotificationAccentColor": "#ff3344",
"androidNotificationLargeIcon": "@drawable/custom_app_large_icon",
"androidNotificationSmallIcon": "@drawable/custom_app_small_icon",
"iosRequestPushPermissionsAutomatically": false,
"enableBrazeIosPushStories": true,
"iosPushStoryAppGroup": "group.com.example.myapp.PushStories",
"iosForwardUniversalLinks": false
}
],
]
}
}
```
###### Configuring Android push notification icons
When using `androidNotificationLargeIcon` and `androidNotificationSmallIcon`, follow these best practices for proper icon display:
**Icon placement and format**
To use custom push notification icons with the Braze Expo plugin:
1. Create your icon files following the Icon requirements listed below.
2. Place them in your project's Android native directories at `android/app/src/main/res/drawable-/` (for example, `android/app/src/main/res/drawable-mdpi/`, `drawable-hdpi/`, or similar.)
3. Alternatively, if you're managing assets in your React Native directory, you can use Expo's [app.json icon configuration](https://docs.expo.dev/versions/latest/config/app/#icon) or create an [Expo config plugin](https://docs.expo.dev/config-plugins/introduction/) to copy the icons to the Android drawable folders during prebuild.
The Braze Expo plugin references these icons using Android's drawable resource system.
**Icon requirements**
- **Small icon:** Must be a white silhouette on a transparent background (this is an Android platform requirement)
- **Large icon:** Can be a full-color image.
- **Format:** PNG format is recommended.
- **Naming:** Use lowercase letters, numbers, and underscores only (for example, `my_large_icon.png`)
**Configuration in app.json**
The following code snippet shows how to reference Android notification icons in `app.json` using the `@drawable/` prefix:
```json
{
"expo": {
"plugins": [
[
"@braze/expo-plugin",
{
"androidNotificationLargeIcon": "@drawable/large_icon",
"androidNotificationSmallIcon": "@drawable/small_icon"
}
]
]
}
}
```
**Important:**
Do not use relative file paths (such as `src/assets/images/icon.png`) or include the file extension when referencing icons. The Expo plugin requires the `@drawable/` prefix to properly locate the icons in the Android native folders after the prebuild process.
**How it works**
The Braze Expo plugin references your icon files from the Android `drawable` directories. When you run `npx expo prebuild`, Expo generates the native Android project structure. Your icons must be present in the Android `drawable` folders (either placed manually or copied through a config plugin) before the build process. The plugin then configures the Braze SDK to use these drawable resources by their names (without path or extension), which is why the `@drawable/` prefix is required in your configuration.
For more information on Android notification icons, see [Android's notification icon guidelines](https://developer.android.com/develop/ui/views/notifications#icon).
##### Step 2.3: Build and run your application
Prebuilding your application generates the native files necessary for the Braze Expo plugin to work.
The following code snippet shows the command to prebuild your application:
```bash
npx expo prebuild
```
Run your application as specified in the [Expo docs](https://docs.expo.dev/workflow/customizing/). Keep in mind, if you make any changes to the configuration options, you'll be required to prebuild and run the application again.
#### Method 2: Using React Native CLI
##### Set up Android
**Step 2.1: Add the Kotlin Gradle plugin**
The following code snippet shows how to add the Kotlin Gradle plugin in your top-level project `build.gradle` under `buildscript` > `dependencies`:
```groovy
buildscript {
dependencies {
...
// Choose your Kotlin version
classpath("org.jetbrains.kotlin:kotlin-gradle-plugin:1.8.10")
}
}
```
This adds Kotlin to your project.
**Step 2.2: Configure the Braze SDK**
To connect to Braze servers, create a `braze.xml` file in your project's `res/values` folder. The following code snippet shows an example `braze.xml` configuration. Replace the API [key](https://www.braze.com/docs/fr/fr/api/identifier_types/) and [endpoint](https://www.braze.com/docs/fr/fr/api/basics/#endpoints) with your values:
```xml
YOU_APP_IDENTIFIER_API_KEYYOUR_CUSTOM_ENDPOINT_OR_CLUSTER
```
The following code snippet shows the required permissions for your `AndroidManifest.xml` file:
```xml
```
**Tip:**
On Braze Android SDK version 12.2.0 or later, you can automatically pull in the android-sdk-location library by setting `importBrazeLocationLibrary=true` in your `gradle.properties` file.
**Step 2.3: Implement user session tracking**
The calls to `openSession()` and `closeSession()` are handled automatically.
The following code snippet shows what to add to the `onCreate()` method of your `MainApplication` class:
```java
import com.braze.BrazeActivityLifecycleCallbackListener;
@Override
public void onCreate() {
super.onCreate();
...
registerActivityLifecycleCallbacks(new BrazeActivityLifecycleCallbackListener());
}
```
```kotlin
import com.braze.BrazeActivityLifecycleCallbackListener
override fun onCreate() {
super.onCreate()
...
registerActivityLifecycleCallbacks(BrazeActivityLifecycleCallbackListener())
}
```
**Step 2.4: Handle intent updates**
If your MainActivity has `android:launchMode` set to `singleTask`, the following code snippet shows what to add to your `MainActivity` class:
```java
@Override
public void onNewIntent(Intent intent) {
super.onNewIntent(intent);
setIntent(intent);
}
```
```kotlin
override fun onNewIntent(intent: Intent) {
super.onNewIntent(intent)
setIntent(intent)
}
```
##### Set up iOS
**Step 2.5: (Optional) Configure Podfile for dynamic XCFrameworks**
To import certain Braze libraries, such as BrazeUI, into an Objective-C++ file, you must use the `#import` syntax. Starting in version `7.4.0` of the Braze Swift SDK, binaries have an [optional distribution channel as dynamic XCFrameworks](https://github.com/braze-inc/braze-swift-sdk-prebuilt-dynamic), which are compatible with this syntax.
If you'd like to use this distribution channel, manually override the CocoaPods source locations in your Podfile. The following code snippet shows a sample override. Replace `{your-version}` with the relevant version you wish to import:
```ruby
pod 'BrazeKit', :podspec => 'https://raw.githubusercontent.com/braze-inc/braze-swift-sdk-prebuilt-dynamic/{your-version}/BrazeKit.podspec'
pod 'BrazeUI', :podspec => 'https://raw.githubusercontent.com/braze-inc/braze-swift-sdk-prebuilt-dynamic/{your-version}/BrazeUI.podspec'
pod 'BrazeLocation', :podspec => 'https://raw.githubusercontent.com/braze-inc/braze-swift-sdk-prebuilt-dynamic/{your-version}/BrazeLocation.podspec'
```
**Step 2.6: Install pods**
Since React Native automatically links the libraries to the native platform, you can install the SDK with the help of CocoaPods.
The following code snippet shows how to install pods from the root folder of the project:
```bash
# To install using the React Native New Architecture
cd ios && pod install
# To install using the React Native legacy architecture
cd ios && RCT_NEW_ARCH_ENABLED=0 pod install
```
**Step 2.7: Configure the Braze SDK**
The following code snippet shows how to import the Braze SDK at the top of the `AppDelegate.swift` file:
```swift
import BrazeKit
import braze_react_native_sdk
```
In the `application(_:didFinishLaunchingWithOptions:)` method, replace the API [key](https://www.braze.com/docs/fr/fr/api/identifier_types/) and [endpoint](https://www.braze.com/docs/fr/fr/api/basics/#endpoints) with your app's values. Then, create the Braze instance using the configuration, and create a static property on the `AppDelegate` for easy access.
**Note:**
Our example assumes an implementation of [RCTAppDelegate](https://github.com/facebook/react-native/blob/e64756ae5bb5c0607a4d97a134620fafcb132b3b/packages/react-native/Libraries/AppDelegate/RCTAppDelegate.h), which provides a number of abstractions in the React Native setup. If you are using a different setup for your app, be sure to adjust your implementation as needed.
The following code snippet shows an example `AppDelegate.swift` setup:
```swift
func application(
_ application: UIApplication,
didFinishLaunchingWithOptions launchOptions: [UIApplication.LaunchOptionsKey : Any]? = nil
) -> Bool {
// Setup Braze
let configuration = Braze.Configuration(
apiKey: "{BRAZE_API_KEY}",
endpoint: "{BRAZE_ENDPOINT}")
// Enable logging and customize the configuration here.
configuration.logger.level = .info
let braze = BrazeReactBridge.perform(
#selector(BrazeReactBridge.initBraze(_:)),
with: configuration
).takeUnretainedValue() as! Braze
AppDelegate.braze = braze
/* Other configuration */
return true
}
// MARK: - AppDelegate.braze
static var braze: Braze? = nil
```
The following code snippet shows how to import the Braze SDK at the top of the `AppDelegate.m` file:
```objc
#import
#import "BrazeReactBridge.h"
```
In the `application:didFinishLaunchingWithOptions:` method, replace the API [key](https://www.braze.com/docs/fr/fr/api/identifier_types/) and [endpoint](https://www.braze.com/docs/fr/fr/api/basics/#endpoints) with your app's values. Then, create the Braze instance using the configuration, and create a static property on the `AppDelegate` for easy access.
**Note:**
Our example assumes an implementation of [RCTAppDelegate](https://github.com/facebook/react-native/blob/e64756ae5bb5c0607a4d97a134620fafcb132b3b/packages/react-native/Libraries/AppDelegate/RCTAppDelegate.h), which provides a number of abstractions in the React Native setup. If you are using a different setup for your app, be sure to adjust your implementation as needed.
The following code snippet shows an example `AppDelegate.m` setup:
```objc
- (BOOL)application:(UIApplication *)application
didFinishLaunchingWithOptions:(NSDictionary *)launchOptions {
// Setup Braze
BRZConfiguration *configuration = [[BRZConfiguration alloc] initWithApiKey:@"{BRAZE_API_KEY}"
endpoint:@"{BRAZE_ENDPOINT}"];
// Enable logging and customize the configuration here.
configuration.logger.level = BRZLoggerLevelInfo;
Braze *braze = [BrazeReactBridge initBraze:configuration];
AppDelegate.braze = braze;
/* Other configuration */
return YES;
}
#pragma mark - AppDelegate.braze
static Braze *_braze = nil;
+ (Braze *)braze {
return _braze;
}
+ (void)setBraze:(Braze *)braze {
_braze = braze;
}
```
### Step 3: Initialize the SDK
The following code snippet shows how to import the library in your React Native code:
```javascript
import Braze from "@braze/react-native-sdk";
```
Then call `Braze.initialize()` with your app identifier API key and SDK endpoint to create the Braze instance. See the options below for where to call this method in your app.
#### Standard initialization
The following code snippet shows how to initialize the SDK when your app starts by calling `Braze.initialize()` in a `useEffect`:
```javascript
import React, { useEffect } from "react";
import Braze from "@braze/react-native-sdk";
const App = () => {
useEffect(() => {
Braze.initialize("YOUR-API-KEY", "YOUR-SDK-ENDPOINT");
}, []);
return (
// Your app components
);
};
```
#### Delayed initialization
The following code snippet shows how to defer SDK initialization until later in the session. For example, after the user grants consent or completes login:
```javascript
function onUserConsent() {
Braze.initialize("YOUR-API-KEY", "YOUR-SDK-ENDPOINT");
}
```
**Warning:**
On iOS, push notifications received before `Braze.initialize()` are queued and processed after initialization. On Android, deep links from push notifications do not resolve while the SDK is waiting to be initialized. If your app relies on immediate deep link handling at launch, use [standard initialization](#standard-initialization) instead.
#### Platform-specific API keys
The following code snippet shows how to use platform detection when your Android and iOS apps use different API keys:
```javascript
import { Platform } from "react-native";
import Braze from "@braze/react-native-sdk";
const apiKey = Platform.select({
android: "YOUR-ANDROID-API-KEY",
ios: "YOUR-IOS-API-KEY",
}) ?? "";
Braze.initialize(apiKey, "YOUR-SDK-ENDPOINT");
```
#### Re-initialization
You can call `Braze.initialize()` multiple times to re-initialize the SDK with a different API key and endpoint mid-session. Each call tears down the previous Braze instance and creates a new one.
**Important:**
All SDK method calls made before `Braze.initialize()` are ignored on iOS, so call `Braze.initialize()` before using any other Braze methods.
For React Native SDK 19.1.0 and earlier, native initialization happens in Step 2. Import the library in your React Native code to call Braze methods. For more details, check out our [sample project](https://github.com/braze-inc/braze-react-native-sdk/tree/master/BrazeProject).
```javascript
import Braze from "@braze/react-native-sdk";
```
### Step 4: Test the integration (optional)
You can verify that the SDK is integrated by checking session statistics in the dashboard. If you run your application on either platform, you should see a new session in the dashboard (in the **Overview** section).
The following code snippet shows how to open a session for a particular user in your app:
```javascript
import Braze from "@braze/react-native-sdk";
Braze.initialize("YOUR-API-KEY", "YOUR-SDK-ENDPOINT");
Braze.changeUser("{some-user-id}");
```
Search for the user with `{some-user-id}` in the dashboard under **Audience** > **Search Users**. There, you can verify that session and device data have been logged.
To test your SDK integration, the following code snippet shows how to start a new session on either platform for a user.
```javascript
Braze.changeUser("userId");
```
The following code snippet shows an example of assigning the user ID at app startup:
```javascript
import React, { useEffect } from "react";
import Braze from "@braze/react-native-sdk";
const App = () => {
useEffect(() => {
Braze.changeUser("some-user-id");
}, []);
return (
...
)
```
In the Braze dashboard, go to [User Search](https://www.braze.com/docs/fr/fr/user_guide/engagement_tools/segments/using_user_search#using-user-search) and look for the user with the ID matching `some-user-id`. Here, you can verify that session and device data were logged.
## Next steps
After integrating the Braze SDK, you can start implementing common messaging features:
- [Push Notifications](https://www.braze.com/docs/fr/fr/developer_guide/push_notifications/): Set up and send push notifications to your users.
- [In-App Messages](https://www.braze.com/docs/fr/fr/developer_guide/in_app_messages/): Display contextual messages within your app.
- [Banners](https://www.braze.com/docs/fr/fr/developer_guide/banners/): Show persistent banners in your app interface.
## Integrating the Roku SDK
### Step 1: Add files
Braze SDK files can be found in the `sdk_files` directory in the [Braze Roku SDK repository](https://github.com/braze-inc/braze-roku-sdk).
1. Add `BrazeSDK.brs` to your app in the `source` directory.
2. Add `BrazeTask.brs` and `BrazeTask.xml` to your app in the `components` directory.
### Step 2: Add references
Add a reference to `BrazeSDK.brs` in your main scene using the following `script` element:
```
```
### Step 3: Configure
Within `main.brs`, set the Braze configuration on the global node:
```brightscript
globalNode = screen.getGlobalNode()
config = {}
config_fields = BrazeConstants().BRAZE_CONFIG_FIELDS
config[config_fields.API_KEY] = {YOUR_API_KEY}
' example endpoint: "https://sdk.iad-01.braze.com/"
config[config_fields.ENDPOINT] = {YOUR_ENDPOINT}
config[config_fields.HEARTBEAT_FREQ_IN_SECONDS] = 5
globalNode.addFields({brazeConfig: config})
```
You can find your [SDK endpoint](https://www.braze.com/docs/fr/fr/user_guide/administrative/access_braze/sdk_endpoints/) and API key within the Braze dashboard.
### Step 4: Initialize Braze
Initialize the Braze instance:
```brightscript
m.BrazeTask = createObject("roSGNode", "BrazeTask")
m.Braze = getBrazeInstance(m.BrazeTask)
```
## Optional configurations
### Logging
To debug your Braze integration, you can view the Roku debug console for Braze logs. Refer to [Debugging code](https://developer.roku.com/docs/developer-program/debugging/debugging-channels.md) from Roku Developers to learn more.
## About the Unity Braze SDK
For a full list of types, functions, variables, and more, see [Unity Declaration File](https://github.com/braze-inc/braze-unity-sdk/blob/master/Assets/Plugins/Appboy/BrazePlatform.cs). Additionally, if you've already integrated Unity manually for iOS, you can [switch to an automated integration](#unity_automated-integration) instead.
## Integrating the Unity SDK
### Prerequisites
Before you start, verify your environment is supported by the [latest Braze Unity SDK version](https://github.com/braze-inc/braze-unity-sdk/releases).
### Step 1: Choose your Braze Unity package
The Braze [`.unitypackage`](https://docs.unity3d.com/Manual/AssetPackages.html) bundles native bindings for the Android and iOS platforms, along with a C# interface.
There are several Braze Unity packages available for download on the [Braze Unity releases page](https://github.com/Appboy/appboy-unity-sdk/releases):
- `Appboy.unitypackage`
- This package bundles the Braze Android and iOS SDKs and the [SDWebImage](https://github.com/SDWebImage/SDWebImage) dependency for the iOS SDK, which is required for the proper functionality of Braze in-app messaging, and Content Cards features on iOS. The SDWebImage framework is used for downloading and displaying images, including GIFs. If you intend on utilizing full Braze functionality, download and import this package.
- `Appboy-nodeps.unitypackage`
- This package is similar to `Appboy.unitypackage` except for the [SDWebImage](https://github.com/SDWebImage/SDWebImage) framework is not present. This package is useful if you do not want the SDWebImage framework present in your iOS app.
**Note:**
As of Unity 2.6.0, the bundled Braze Android SDK artifact requires [AndroidX](https://developer.android.com/jetpack/androidx) dependencies. If you were previously using a `jetified` unitypackage, you can safely transition to the corresponding `unitypackage`.
If Android builds fail with "This project uses AndroidX dependencies, but the 'android.useAndroidX' property is not enabled", enable [Custom Gradle Properties Template](https://docs.unity3d.com/Manual/class-PlayerSettingsAndroid.html#Publishing) in your Unity Publishing Settings. Then open `Assets/Plugins/Android/gradleTemplate.properties` and set `android.useAndroidX=true`. For a working template, see the [Braze Unity sample app](https://github.com/braze-inc/braze-unity-sdk/tree/master/unity-samples) and its [`gradleTemplate.properties`](https://github.com/braze-inc/braze-unity-sdk/blob/master/unity-samples/Assets/Plugins/Android/gradleTemplate.properties) file.
The Braze [`.unitypackage`](https://docs.unity3d.com/Manual/AssetPackages.html) bundles native bindings for the Android and iOS platforms, along with a C# interface.
The Braze Unity package is available for download on the [Braze Unity releases page](https://github.com/Appboy/appboy-unity-sdk/releases) with two integration options:
1. `Appboy.unitypackage` only
- This package bundles the Braze Android and iOS SDKs without any additional dependencies. With this integration method, there will not be proper functionality of Braze in-app messaging, and Content Cards features on iOS. If you intend on utilizing full Braze functionality without custom code, use the option below instead.
- To use this integration option, ensure that the box next to `Import SDWebImage dependency` is *unchecked* in the Unity UI under "Braze Configuration".
2. `Appboy.unitypackage` with `SDWebImage`
- This integration option bundles the Braze Android and iOS SDKs and the [SDWebImage](https://github.com/SDWebImage/SDWebImage) dependency for the iOS SDK, which is required for the proper functionality of Braze in-app messaging, and Content Cards features on iOS. The `SDWebImage` framework is used for downloading and displaying images, including GIFs. If you intend on utilizing full Braze functionality, download and import this package.
- To automatically import `SDWebImage`, be sure to *check* the box next to `Import SDWebImage dependency` in the Unity UI under "Braze Configuration".
**Note:**
To see if you require the [SDWebImage](https://github.com/SDWebImage/SDWebImage) dependency for your iOS project, visit the [iOS in-app message documentation](https://www.braze.com/docs/fr/fr/developer_guide/platform_integration_guides/swift/in-app_messaging/overview/).
### Step 2: Import the package
In the Unity Editor, import the package into your Unity project by navigating to **Assets > Import Package > Custom Package**. Next, click **Import**.
Alternatively, follow the [Unity asset package import](https://docs.unity3d.com/Manual/AssetPackages.html) instructions for a more detailed guide on importing custom Unity packages.
**Note:**
If you only wish to import the iOS or Android plugin, deselect the `Plugins/Android` or `Plugins/iOS` subdirectory when importing the Braze `.unitypackage`.
### Step 3: Configure the SDK
#### Step 3.1: Configure `AndroidManifest.xml`
Configure [`AndroidManifest.xml`](https://docs.unity3d.com/Manual/android-manifest.html) so the Braze SDK can function. If your app does not have an `AndroidManifest.xml`, you can use the following as a template. Otherwise, if you already have an `AndroidManifest.xml`, ensure that any of the following missing sections are added to your existing `AndroidManifest.xml`.
1. Go to the `Assets/Plugins/Android/` directory and open your `AndroidManifest.xml` file. This is the [default location in the Unity editor](https://docs.unity3d.com/Manual/android-manifest.html).
2. In your `AndroidManifest.xml`, add the required permissions and activities from in the following template.
3. When you're finished, your `AndroidManifest.xml` should only contain a single Activity with `"android.intent.category.LAUNCHER"` present.
```xml
```
**Important:**
All Activity classes registered in your `AndroidManifest.xml` file should be fully integrated with the Braze Android SDK, otherwise your analytics won't be collected. If you add your own Activity class, be sure you [extend the Braze Unity player](#unity_extend-unity-player) so you can prevent this.
#### Step 3.2: Update `AndroidManifest.xml` with your package name
To find your package name, click **File > Build Settings > Player Settings > Android Tab**.

In your `AndroidManifest.xml`, all instances of `REPLACE_WITH_YOUR_PACKAGE_NAME` should be replaced with your `Package Name` from the previous step.
#### Step 3.3: Add gradle dependencies
To add gradle dependencies to your Unity project, first enable ["Custom Main Gradle Template"](https://docs.unity3d.com/Manual/class-PlayerSettingsAndroid.html#Publishing) in your Publishing Settings. This will create a template gradle file that your project will use. A gradle file handles setting dependencies and other build-time project settings. For more information, check out the Braze Unity sample app's [mainTemplate.gradle](https://github.com/braze-inc/braze-unity-sdk/blob/master/unity-samples/Assets/Plugins/Android/mainTemplate.gradle).
The following dependencies are required:
```groovy
implementation 'com.google.firebase:firebase-messaging:22.0.0'
implementation "androidx.swiperefreshlayout:swiperefreshlayout:1.1.0"
implementation "androidx.recyclerview:recyclerview:1.2.1"
implementation "org.jetbrains.kotlin:kotlin-stdlib:1.6.0"
implementation "org.jetbrains.kotlinx:kotlinx-coroutines-android:1.6.1"
implementation 'androidx.core:core:1.6.0'
```
You may also set these dependencies using the [External Dependency Manager](https://github.com/googlesamples/unity-jar-resolver).
#### Step 3.4: Automate the Unity Android integration
Braze provides a native Unity solution for automating the Unity Android integration.
1. In the Unity Editor, open the Braze Configuration Settings by navigating to **Braze > Braze Configuration**.
2. Check the **Automate Unity Android Integration** box.
3. In the **Braze API Key** field, input your application's API key found in **Manage Settings** from the Braze dashboard.
**Note:**
This automatic integration should not be used with a manually created `braze.xml` file since the configuration values may conflict during project building. If you require a manual `braze.xml`, disable the automatic integration.
#### Step 3.1: Set your API key
Braze provides a native Unity solution for automating the Unity iOS integration. This solution modifies the built Xcode project using Unity's [`PostProcessBuildAttribute`](http://docs.unity3d.com/ScriptReference/Callbacks.PostProcessBuildAttribute.html) and subclasses the `UnityAppController` using the `IMPL_APP_CONTROLLER_SUBCLASS` macro.
1. In the Unity Editor, open the Braze Configuration Settings by navigating to **Braze > Braze Configuration**.
2. Check the **Automate Unity iOS Integration** box.
3. In the **Braze API Key** field, input your application's API key found in **Manage Settings**.

If your application is already using another `UnityAppController` subclass, you will need to merge your subclass implementation with `AppboyAppDelegate.mm`.
## Customizing the Unity package
### Step 1: Clone the repository
In your terminal, clone the [Braze Unity SDK GitHub repository](https://github.com/braze-inc/braze-unity-sdk), then navigate to that folder:
```bash
git clone git@github.com:braze-inc/braze-unity-sdk.git
cd ~/PATH/TO/DIRECTORY/braze-unity-sdk
```
```powershell
git clone git@github.com:braze-inc/braze-unity-sdk.git
cd C:\PATH\TO\DIRECTORY\braze-unity-sdk
```
### Step 2: Export package from repository
First, launch Unity and keep it running in the background. Then, in the repository root, run the following command to export the package to `braze-unity-sdk/unity-package/`.
```bash
/Applications/Unity/Unity.app/Contents/MacOS/Unity -batchmode -nographics -projectPath "$(pwd)" -executeMethod Appboy.Editor.Build.ExportAllPackages -quit
```
```powershell
"%UNITY_PATH%" -batchmode -nographics -projectPath "%PROJECT_ROOT%" -executeMethod Appboy.Editor.Build.ExportAllPackages -quit
```
**Tip:**
If you experience any issues after running these commands, refer to [Unity: Command Line Arguments](https://docs.unity3d.com/2017.2/Documentation/Manual/CommandLineArguments.html).
### Step 3: Import package into Unity
1. In Unity, import the desired package into your Unity project by navigating to **Assets** > **Import Package** > **Custom Package**.
2. If there's any files you don't want want to import, deselect them now.
3. Customize the exported Unity package located in `Assets/Editor/Build.cs`.
## Switch to an automated integration (Swift only) {#automated-integration}
To take advantage of the automated iOS integration offered in the Braze Unity SDK, follow these steps on transitioning from a manual to an automated integration.
1. Remove all Braze-related code from your Xcode project's `UnityAppController` subclass.
2. Remove Braze iOS libraries from your Unity or Xcode project (such as `Appboy_iOS_SDK.framework` and `SDWebImage.framework`).
3. Import the Braze Unity package into your project again. For a full walkthrough, see [Step 2: Import the package](#unity_step-2-import-the-package).
4. Set your API key again. For a full walkthrough, see [Step 3.1: Set your API key](#unity_step-31-set-your-api-key).
## Optional configurations
### Verbose logging
To enable verbose logging in the Unity Editor, do the following:
1. Open the Braze Configuration Settings by navigating to **Braze** > **Braze Configuration**.
2. Click the **Show Braze Android Settings** dropdown.
3. In the **SDK Log Level** field, input the value "0".
### Prime 31 compatibility
To use the Braze Unity plugin with Prime31 plugins, edit your project's `AndroidManifest.xml` to use the Prime31 compatible Activity classes. Change all references of
`com.braze.unity.BrazeUnityPlayerActivity` to `com.braze.unity.prime31compatible.BrazeUnityPlayerActivity`
### Amazon Device Messaging (ADM)
Braze supports integrating [ADM push](https://developer.amazon.com/public/apis/engage/device-messaging) into Unity apps. If you want to integrate ADM push, create a file called `api_key.txt` containing your ADM API key and place it in the `Plugins/Android/assets/` folder. For more information on integrating ADM with Braze, visit our [ADM push integration instructions](https://www.braze.com/docs/fr/fr/developer_guide/push_notifications/?sdktab=unity).
### Extending the Braze Unity player (Android only) {#extend-unity-player}
The example `AndroidManifest.xml` file provided has one Activity class registered, [`BrazeUnityPlayerActivity`](https://github.com/braze-inc/braze-android-sdk/blob/e804cb3a10ae68364b354b52abf1bef8a0d1a9dc/android-sdk-unity/src/main/java/com/braze/unity/BrazeUnityPlayerActivity.kt). This class is integrated with the Braze SDK and extends `UnityPlayerActivity` with session handling, in-app message registration, push notification analytics logging, and more. See [Unity](https://docs.unity3d.com/Manual/AndroidUnityPlayerActivity.html) for more information on extending the `UnityPlayerActivity` class.
If you are creating your own custom `UnityPlayerActivity` in a library or plugin project, you will need to extend our `BrazeUnityPlayerActivity` to integrate your custom functionality with Braze. Before beginning work on extending `BrazeUnityPlayerActivity`, follow our instructions for integrating Braze into your Unity project.
1. Add the Braze Android SDK as a dependency to your library or plugin project as described in the [Braze Android SDK integration instructions](https://www.braze.com/docs/fr/fr/developer_guide/sdk_integration/?sdktab=android).
2. Integrate our Unity `.aar`, which contains our Unity-specific functionality, to your Android library project you are building for Unity. The `appboy-unity.aar` is available from our [public repo](https://github.com/braze-inc/braze-unity-sdk/tree/master/Assets/Plugins/Android). After our Unity library is successfully integrated, modify your `UnityPlayerActivity` to extend `BrazeUnityPlayerActivity`.
3. Export your library or plugin project and drop it into `//Assets/Plugins/Android` as normal. Do not include any Braze source code in your library or plugin as they will already be present in `//Assets/Plugins/Android`.
4. Edit your `//Assets/Plugins/Android/AndroidManifest.xml` to specify your `BrazeUnityPlayerActivity` subclass as the main activity.
You should now be able to package an `.apk` from the Unity IDE that is fully integrated with Braze and contains your custom `UnityPlayerActivity` functionality.
## Troubleshooting
### Error: "File could not be read"
Errors resembling the following may be safely ignored. Apple software uses a proprietary PNG extension called CgBI, which Unity does not recognize. These errors will not affect your iOS build or the proper display of the associated images in the Braze bundle.
```
Could not create texture from Assets/Plugins/iOS/AppboyKit/Appboy.bundle/...png: File could not be read
```
## Integrating the .NET MAUI SDK
Integrating the Braze .NET MAUI (formerly Xamarin) SDK will provide you with basic analytics functionality as well as working in-app messages with which you can engage your users.
### Prerequisites
Before you can integrate the .NET MAUI Braze SDK, be sure you meet the following requirements:
- Starting in `version 3.0.0`, this SDK requires using .NET 6+ and removes support for projects using the Xamarin framework.
- Starting in `version 4.0.0`, this SDK dropped support for Xamarin & Xamarin.Forms and added support for .NET MAUI. See [Microsoft's policy](https://dotnet.microsoft.com/en-us/platform/support/policy/xamarin) around the end of support for Xamarin.
### Step 1: Get the .NET MAUI binding
A .NET MAUI binding is a way to use native libraries in .NET MAUI apps. The implementation of a binding consists of building a C# interface to the library, and then using that interface in your application. See the [.NET MAUI documentation](http://developer.xamarin.com/guides/android/advanced_topics/java_integration_overview/binding_a_java_library_%28.jar%29/). There are two ways to include the Braze SDK binding: using NuGet or compiling from source.
The simplest integration method involves getting the Braze SDK from the [NuGet.org](https://www.nuget.org/) central repository. In the Visual Studio sidebar, right click `Packages` folder and click `Add Packages...`. Search for 'Braze' and install the [`BrazePlatform.BrazeAndroidBinding`](https://www.nuget.org/packages/BrazePlatform.BrazeAndroidBinding/) package into your project.
To use Braze location services and geofences, also install the [`BrazePlatform.BrazeAndroidLocationBinding`](https://www.nuget.org/packages/BrazePlatform.BrazeAndroidLocationBinding/) package.
The second integration method is to include the [binding source](https://github.com/braze-inc/braze-xamarin-sdk). Under [`appboy-component/src/androidnet6`](https://github.com/braze-inc/braze-xamarin-sdk/tree/master/appboy-component/src/androidnet6/BrazeAndroidNet6Binding) you will find our binding source code; adding a project reference to the ```BrazeAndroidBinding.csproj``` in your .NET MAUI application will cause the binding to be built with your project and provide you access to the Braze Android SDK.
To use Braze location services and geofences, also add a project reference to the ```BrazeAndroidLocationBinding.csproj``` found under [`appboy-component/src/androidnet6/BrazeAndroidLocationBinding`](https://github.com/braze-inc/braze-xamarin-sdk/tree/master/appboy-component/src/androidnet6/BrazeAndroidLocationBinding).
**Important:**
The iOS bindings for .NET MAUI SDK version 4.0.0 and later use the [Braze Swift SDK](https://github.com/braze-inc/braze-swift-sdk/), while previous versions use the [legacy AppboyKit SDK](https://github.com/Appboy/Appboy-ios-sdk).
A .NET MAUI binding is a way to use native libraries in .NET MAUI apps. The implementation of a binding consists of building a C# interface to the library and then using that interface in your application. There are two ways to include the Braze SDK binding: using NuGet or compiling from source.
The simplest integration method involves getting the Braze SDK from the [NuGet.org](https://www.nuget.org/) central repository. In the Visual Studio sidebar, right-click `Packages` folder and click `Add Packages...`. Search for 'Braze' and install the latest .NET MAUI iOS NuGet packages: [Braze.iOS.BrazeKit](https://www.nuget.org/packages/Braze.iOS.BrazeKit), [Braze.iOS.BrazeUI](https://www.nuget.org/packages/Braze.iOS.BrazeUI), and [Braze.iOS.BrazeLocation](https://www.nuget.org/packages/Braze.iOS.BrazeLocation) into your project.
We also provide the compatibility libraries packages: [Braze.iOS.BrazeKitCompat](https://www.nuget.org/packages/Braze.iOS.BrazeKitCompat) and [Braze.iOS.BrazeUICompat](https://www.nuget.org/packages/Braze.iOS.BrazeUICompat), to help make your migration to .NET MAUI easier.
The second integration method is to include the [binding source](https://github.com/braze-inc/braze-xamarin-sdk). Under [`appboy-component/src/iosnet6`](https://github.com/braze-inc/braze-xamarin-sdk/tree/master/appboy-component/src/iosnet6/BrazeiOSNet6Binding) you will find our binding source code; adding a project reference to the ```BrazeiOSBinding.csproj``` in your .NET MAUI application will cause the binding to be built with your project and provide you access to the Braze iOS SDK. Make sure `BrazeiOSBinding.csproj` is showing in your project's "Reference" folder.
### Step 2: Configure your Braze instance
#### Step 2.1: Configure the Braze SDK in Braze.xml
Now that the libraries have been integrated, you have to create an `Braze.xml` file in your project's `Resources/values` folder. The contents of that file should resemble the following code snippet:
**Note:**
Be sure to substitute `YOUR_API_KEY` with the API key located at **Settings** > **API Keys** in the Braze dashboard.
```xml
YOUR_API_KEYYOUR_CUSTOM_ENDPOINT_OR_CLUSTERXAMARINNUGET
```
If you are including the binding source manually, remove `NUGET` from your code.
**Tip:**
To see an example `Braze.xml`, check out our [Android MAUI sample app](https://github.com/braze-inc/braze-xamarin-sdk/blob/master/appboy-component/samples/android-net-maui/BrazeAndroidMauiSampleApp/BrazeAndroidMauiSampleApp/Resources/values/Braze.xml).
#### Step 2.2: Add required permissions to Android manifest
Now that you've added your API key, you need to add the following permissions to your `AndroidManifest.xml` file:
```xml
```
For an example of your `AndroidManifest.xml`, see the [Android MAUI](https://github.com/braze-inc/braze-xamarin-sdk/blob/master/appboy-component/samples/android-net-maui/BrazeAndroidMauiSampleApp/BrazeAndroidMauiSampleApp/AndroidManifest.xml) sample application.
#### Step 2.3: Track user sessions and registering for in-app messages
To enable user session tracking and register your app for in-app messages, add the following call to the `OnCreate()` lifecycle method of the `Application` class in your app:
```kotlin
RegisterActivityLifecycleCallbacks(new BrazeActivityLifecycleCallbackListener());
```
When setting up your Braze instance, add the following snippet to configure your instance:
**Note:**
Be sure to substitute `YOUR_API_KEY` with the API key located at **Settings** > **API Keys** in the Braze dashboard.
```csharp
var configuration = new BRZConfiguration("YOUR_API_KEY", "YOUR_ENDPOINT");
configuration.Api.AddSDKMetadata(new[] { BRZSDKMetadata.Xamarin });
braze = new Braze(configuration);
```
See the `App.xaml.cs` file in the [iOS MAUI](https://github.com/braze-inc/braze-xamarin-sdk/blob/master/appboy-component/samples/ios-net-maui/BrazeiOSMauiSampleApp/BrazeiOSMauiSampleApp/App.xaml.cs) sample application.
### Step 3: Test the integration
Now you can launch your application and see sessions being logged to the Braze dashboard (along with device information and other analytics). For a more in-depth discussion of best practices for the basic SDK integration, consult the [Android integration instructions](https://www.braze.com/docs/fr/fr/developer_guide/sdk_integration/?sdktab=android).
Now you can launch your application and see sessions being logged to the Braze dashboard. For a more in-depth discussion of best practices for the basic SDK integration, consult the [iOS integration instructions](https://www.braze.com/docs/fr/fr/developer_guide/sdk_integration/?sdktab=swift).
**Important:**
Our current public .NET MAUI binding for the iOS SDK does not connect to the iOS Facebook SDK (linking social data) and does not include sending the IDFA to Braze.
# ChatGPT app integration
## Setup
### Step 1: Get the Braze integration file
Copy the `braze.js` file from our [ChatGPT apps integration repository](https://github.com/braze-inc/chatgpt-apps-braze-integration/blob/main/src/braze/braze.ts) to your project. This file contains all the necessary Braze SDK configuration and helper functions.
### Step 2: Install dependencies
Install our Web SDK for Braze's most up-to-date set of features:
**For client-side integration:**
```bash
npm install @braze/web-sdk
```
## Implementation
There are two ways to integrate Braze with your ChatGPT app depending on your use case:
### Client-side integration (custom widgets)
**Tip:**
**Recommended Approach:** This method enables rich messaging experiences and real-time user interaction tracking within your ChatGPT app widgets.
For displaying Braze messaging and tracking user interactions within your custom ChatGPT app widgets, use the Web SDK integration. A full messaging example can be found in our sample repository [here](https://github.com/braze-inc/chatgpt-apps-braze-integration/tree/main/src/inbox).
#### Configure widget metadata
Add the following metadata to your MCP server file to allow Braze domains, ensuring to update the CDN domain based on [your region](https://www.braze.com/docs/fr/fr/developer_guide/platforms/web/content_security_policy):
```javascript
"openai/widgetCSP": {
connect_domains: ["https://YOUR-SDK-ENDPOINT"],
resource_domains: [
"https://appboy-images.com",
"https://braze-images.com",
"https://cdn.braze.eu",
"https://use.fontawesome.com"
],
}
```
Replace `YOUR-SDK-ENDPOINT` with your actual Braze SDK endpoint.
#### Set up the useBraze hook
```javascript
import { useBraze } from "./utils/braze";
function YourWidget() {
const braze = useBraze({
apiKey: "your-braze-api-key",
baseUrl: "your-braze-endpoint.braze.com",
});
useEffect(() => {
if (!braze.isInitialized) {
return;
}
// Set user identity
braze.changeUser("user-id-123");
// Log widget interactions
braze.logCustomEvent("viewed_pizzaz_list");
}, [braze.isInitialized]);
return (
// Your widget JSX
);
}
```
#### Display Braze Content Cards
```javascript
const [cards, setCards] = useState([]);
useEffect(() => {
// Get cached content cards
setCards(braze.getCachedContentCards()?.cards ?? []);
// Subscribe to content card updates
braze.subscribeToContentCardsUpdates((contentCards) => {
setCards(contentCards.cards);
});
// Open session
braze.openSession();
return () => {
braze.removeAllSubscriptions();
}
}, []);
```
#### Track widget events
```javascript
// Track user interactions within your widget
const handleButtonClick = () => {
braze.logCustomEvent("widget_button_clicked", {
button_type: "save_list",
widget_name: "pizza_list"
});
};
const handleItemInteraction = (itemId) => {
braze.logCustomEvent("item_interacted", {
item_id: itemId,
interaction_type: "view_details"
});
};
```
### Server-side integration (MCP server)
If you also need a server-side integration for messaging functionality on your MCP server, contact `mcp-product@braze.com`. For tracking events and purchases from your MCP server, use our [REST API](https://www.braze.com/docs/fr/fr/api/home).
## About the Braze Vega SDK
The Braze Vega SDK lets you collect analytics and display rich in-app messages to your users. Most methods in the Braze Vega SDK are asynchronous and return promises that should be awaited or resolved.
## Integrating the Braze Vega SDK
### Step 1: Install the Braze library
Install the Braze Vega SDK using your preferred package manager.
If your project uses NPM, you can add the Braze Vega SDK as a dependency.
```bash
npm install @braze/vega-sdk --save
```
After installation, you can import the methods you need:
```javascript
import { initialize, changeUser, openSession } from "@braze/vega-sdk";
```
If your project uses Yarn, you can add the Braze Vega SDK as a dependency.
```bash
yarn add @braze/vega-sdk
```
After installation, you can import the methods you need:
```javascript
import { initialize, changeUser, openSession } from "@braze/vega-sdk";
```
### Step 2: Initialize the SDK
After the Braze Vega SDK is added to your project, initialize the library with the API key and [SDK endpoint URL](https://www.braze.com/docs/fr/fr/user_guide/administrative/access_braze/sdk_endpoints) found in **Settings** > **App Settings** within your Braze dashboard.
**Important:**
You must await or resolve the `changeUser` promise before calling other Braze methods, or events and attributes may be set on the incorrect user.
```javascript
import { useEffect } from "react-native";
import {
initialize,
changeUser,
logCustomEvent,
openSession,
setCustomUserAttribute,
setUserCountry
} from "@braze/vega-sdk";
const App = () => {
useEffect(() => {
const initBraze = async () => {
// Initialize the SDK
await initialize("YOUR-API-KEY", "YOUR-SDK-ENDPOINT", {
sessionTimeoutInSeconds: 60,
appVersionNumber: "1.2.3.4",
enableLogging: true, // set to `true` for debugging
});
// Change user
await changeUser("user-id-123");
// Start a session
await openSession();
// Log custom events and set user attributes
logCustomEvent("visited-page", { pageName: "home" });
setCustomUserAttribute("my-attribute", "my-attribute-value");
setUserCountry("USA");
};
initBraze();
}, []);
return (
// Your app components
);
};
```
**Important:**
Anonymous users may be counted towards your [MAU](https://www.braze.com/docs/fr/fr/user_guide/data_and_analytics/reporting/understanding_your_app_usage_data/#monthly-active-users). As a result, you may want to conditionally load or initialize the SDK to exclude these users from your MAU count.
## Optional configurations
### Logging
You can enable SDK logging to help with debugging and troubleshooting. There are multiple ways to enable logging.
#### Enable logging during initialization
Pass `enableLogging: true` to `initialize()` to log debugging messages to the console:
```javascript
initialize("YOUR-API-KEY", "YOUR-SDK-ENDPOINT", {
enableLogging: true
});
```
**Important:**
Basic logs are visible to all users, so consider disabling logging before releasing your code to production.
#### Enable logging after initialization
Use `toggleLogging()` to enable or disable SDK logging after initialization:
```javascript
import { toggleLogging } from "@braze/vega-sdk";
// Enable logging
toggleLogging();
```
#### Custom logging
Use `setLogger()` to provide a custom logger function for more control over how SDK logs are handled:
```javascript
import { setLogger } from "@braze/vega-sdk";
setLogger((message) => {
console.log("Braze Custom Logger: " + message);
// Add your custom logging logic here
});
```
### Configuration options
You can pass additional configuration options to `initialize()` to customize the SDK behavior:
```javascript
await initialize("YOUR-API-KEY", "YOUR-SDK-ENDPOINT", {
sessionTimeoutInSeconds: 60, // Configure session timeout (default is 1800 seconds)
appVersionNumber: "1.2.3.4", // Set your app version
enableLogging: true, // Enable SDK logging
});
```
## Upgrading the SDK
When you reference the Braze Vega SDK from NPM or Yarn, you can upgrade to the latest version by updating your package dependency:
```bash
npm update @braze/vega-sdk
# or, using yarn:
yarn upgrade @braze/vega-sdk
```
## Testing your integration
To verify your SDK integration is working correctly:
1. Initialize the SDK with `enableLogging: true` to see debug messages in the console
2. Ensure you `await changeUser()` before calling other SDK methods
3. Call `await openSession()` to start a session
4. Check your Braze dashboard under **Overview** to verify that session data is being recorded
5. Test logging a custom event and verify it appears in your dashboard
**Note:**
Lors de l'assurance qualité de votre intégration SDK, utilisez l'[outil de débogage du SDK](https://www.braze.com/docs/fr/fr/developer_guide/sdk_integration/debugging/) pour résoudre les problèmes sans avoir à activer la journalisation détaillée dans votre application.
# Google Tag Manager avec le SDK Braze
Source: /docs/fr/developer_guide/sdk_integration/google_tag_manager/index.md
# Google Tag Manager avec le SDK Braze {#google-tag-manager-with-the-braze-sdk}
> Découvrez comment utiliser [Google Tag Manager (GTM)](https://developers.google.com/tag-platform/tag-manager) avec le SDK Braze afin de contrôler à distance le suivi des événements Braze et les mises à jour des attributs utilisateur sans avoir à modifier le code ou à publier de nouvelles versions de l'application.
## About Google Tag Manager for Web {#google-tag-manager}
Google Tag Manager (GTM) lets you remotely add, remove, and edit tags on your website without requiring a production code release or engineering resources. Braze offers the following templates for the Web SDK:
|Tag Type|Use Case|
|--------|--------|
| Initialization tag | This tag lets you [integrate the Web Braze SDK](https://www.braze.com/docs/fr/fr/developer_guide/sdk_integration/?tab=google%20tag%20manager&sdktab=web) without needing to modify your site’s code.|
| Action tag | This tag lets you [create Content Cards](https://www.braze.com/docs/fr/fr/developer_guide/content_cards/?sdktab=web#web_using-google-tag-manager), [set user attributes](https://www.braze.com/docs/fr/fr/developer_guide/analytics/setting_user_attributes/?tab=google%20tag%20manager&sdktab=web), and [manage data collection](https://www.braze.com/docs/fr/fr/developer_guide/analytics/managing_data_collection/?tab=google%20tag%20manager&sdktab=web).|
{: .reset-td-br-1 .reset-td-br-2 aria-label="About Google Tag Manager for Web #google-tag-manager" }
## Tag sequencing for Braze action tags
Custom events and other Braze action tags can fail when they fire before the **Braze Initialization** tag finishes loading the Web SDK. In Google Tag Manager, open the action tag, go to **Advanced Settings** > **Tag Sequencing**, select **A tag that fires before [this tag] is fired**, and choose your Braze Initialization tag.
For more detail, see [Verify tag sequencing for custom events](https://www.braze.com/docs/fr/fr/developer_guide/content_cards/?sdktab=web#tag-sequencing).
## Log purchases with GTM
In Braze action tags and Custom HTML tags, call `braze.logPurchase()` to record revenue. The legacy `appboy.logPurchase()` namespace is not supported in current Web SDK integrations.
## Logging custom events with GTM
You can log custom events using a **Custom HTML** tag in GTM. This approach uses the GTM [data layer](https://developers.google.com/tag-platform/tag-manager/datalayer) to pass event data from your site to a GTM tag that calls the Braze Web SDK.
### Step 1: Push the event to the data layer
In your site's code, push an event to the data layer wherever you want to trigger the custom event. For example, to log a custom event when a button is clicked:
```html
```
### Step 2: Create a trigger in GTM
1. In your GTM container, go to **Triggers** and create a new trigger.
2. Set the **Trigger Type** to **Custom Event**.
3. Set the **Event Name** to the same value you pushed to the data layer (for example, `my_custom_event`).
4. Choose when the trigger should fire (for example, **All Custom Events**).
### Step 3: Create a Custom HTML tag
1. In GTM, go to **Tags** and create a new tag.
2. Set the **Tag Type** to **Custom HTML**.
3. In the HTML field, add the following:
```html
```
4. Under **Triggering**, select the trigger you created in step 2.
5. Save and publish your container.
To include event properties, pass them as the second argument:
```html
```
## Google's EU User Consent Policy
**Important:**
Google is updating their [EU User Consent Policy](https://www.google.com/about/company/user-consent-policy/) in response to changes to the [Digital Markets Act (DMA)](https://ads-developers.googleblog.com/2023/10/updates-to-customer-match-conversion.html), which is in effect as of March 6, 2024. This new change requires advertisers to disclose certain information to their EEA and UK end users, as well as obtain necessary consents from them. Review the following documentation to learn more.
As part of Google's EU User Consent Policy, the following boolean custom attributes need to be logged to user profiles:
- `$google_ad_user_data`
- `$google_ad_personalization`
If setting these via the GTM integration, custom attributes require creating a custom HTML tag. The following is an example of how to log these values as boolean data types (not as strings):
```js
```
For more information, refer to [Audience Sync to Google](https://www.braze.com/docs/fr/fr/partners/canvas_audience_sync/google_audience_sync/).
## Prerequisites
Before you can use this feature, you'll need to [integrate the Android Braze SDK](https://www.braze.com/docs/fr/fr/developer_guide/sdk_integration/?sdktab=android).
## Using Google Tag Manager for Android
In the following example, a music streaming app wants to log different events as users listen to songs. Using Google Tag Manager for Android, they can control which of the Braze third-party vendors receive this event, and create tags specific to Braze.
### Step 1: Create a trigger for custom events
Custom events are logged with `actionType` set to `logEvent`. The Braze custom tag provider in this example is expecting the custom event name to be set using `eventName`.
To get started, create a trigger that looks for an "Event Name" that equals `played song`

Next, create a new tag (also known as a "Function Call") and enter the class path of your [custom tag provider](#adding-android-google-tag-provider) described later in this article. This tag will be triggered when you log the `played song` event.
In the tag's custom parameters (also known as the key-value pairs), set `eventName` to `played song`. This will be the custom event name logged to Braze.

**Important:**
When sending a custom event, be sure to set `actionType` to `logEvent`, and set a value for `eventName` so Braze receives the correct event name and action to take.
You can also include additional key-value pair arguments to the tag, which will be sent as custom event properties to Braze. `eventName` and `actionType` will not be ignored for custom event properties. In the following example tag, `genre` is passed and defined using a tag variable in Google Tag Manager, which is sourced from the custom event logged in the app.
Because Google Tag Manager for Android uses Firebase as the data layer, the `genre` event property is sent to Google Tag Manager as a "Firebase - Event Parameter" variable.

When a user plays a song in the app, an event will be logged through Firebase and Google Tag Manager using the Firebase analytics event name that matches the tag's trigger name, `played song`:
```java
Bundle params = new Bundle();
params.putString("genre", "pop");
params.putInt("number of times listened", 42);
mFirebaseAnalytics.logEvent("played song", params);
```
```kotlin
val params = Bundle()
params.putString("genre", "pop")
params.putInt("number of times listened", 42);
mFirebaseAnalytics.logEvent("played song", params)
```
### Step 2: Log custom attributes
Custom attributes are set via an `actionType` set to `customAttribute`. The Braze custom tag provider is expecting the custom attribute key-value to be set via `customAttributeKey` and `customAttributeValue`:
```java
Bundle params = new Bundle();
params.putString("customAttributeKey", "favorite song");
params.putString("customAttributeValue", "Private Eyes");
mFirebaseAnalytics.logEvent("customAttribute", params);
```
```kotlin
val params = Bundle()
params.putString("customAttributeKey", "favorite song")
params.putString("customAttributeValue", "Private Eyes")
mFirebaseAnalytics.logEvent("customAttribute", params)
```
### Step 3: Call `changeUser()`
Calls to `changeUser()` are made via an `actionType` set to `changeUser`. The Braze custom tag provider is expecting the Braze user ID to be set via an `externalUserId` key-value pair within your tag:
```java
Bundle params = new Bundle();
params.putString("externalUserId", userId);
mFirebaseAnalytics.logEvent("changeUser", params);
```
```kotlin
val params = Bundle()
params.putString("externalUserId", userId)
mFirebaseAnalytics.logEvent("changeUser", params)
```
### Step 4: Add a custom tag provider {#adding-android-google-tag-provider}
With the tags and triggers set up, you will also need to implement Google Tag Manager in your Android app which can be found in Google's [documentation](https://developers.google.com/tag-manager/android/v5/).
After the Google Tag Manager is installed in your app, add a custom tag provider to call Braze SDK methods based on the tags you've configured within Google Tag Manager.
Be sure to note the "Class Path" to the file - this is what you'll enter when setting up a Tag in the [Google Tag Manager](https://tagmanager.google.com/) console.
This example highlights one of many ways you can structure your custom tag provider. Specifically, it shows how to determine which Braze SDK method to call based on the `actionType` key-value pair sent from the GTM Tag.
The `actionType` shown in this example are `logEvent`, `customAttribute`, and `changeUser`, but you may prefer to change how your tag provider handles data from Google Tag Manager.
```java
public class BrazeGtmTagProvider implements CustomTagProvider {
private static final String TAG = BrazeLogger.getBrazeLogTag(BrazeGtmTagProvider.class);
private static final String ACTION_TYPE_KEY = "actionType";
// Custom Events
private static final String LOG_EVENT_ACTION_TYPE = "logEvent";
private static final String EVENT_NAME_VARIABLE = "eventName";
// Custom Attributes
private static final String CUSTOM_ATTRIBUTE_ACTION_TYPE = "customAttribute";
private static final String CUSTOM_ATTRIBUTE_KEY = "customAttributeKey";
private static final String CUSTOM_ATTRIBUTE_VALUE_KEY = "customAttributeValue";
// Change User
private static final String CHANGE_USER_ACTION_TYPE = "changeUser";
private static final String CHANGE_USER_ID_VARIABLE = "externalUserId";
private static Context sApplicationContext;
/**
* Must be set before calling any of the following methods
* so that the proper application context is available when needed.
*
* Recommended to be called in your {@link Application#onCreate()}.
*/
public static void setApplicationContext(Context applicationContext) {
if (applicationContext != null) {
sApplicationContext = applicationContext.getApplicationContext();
}
}
@Override
public void execute(Map map) {
BrazeLogger.i(TAG, "Got google tag manager parameters map: " + map);
if (sApplicationContext == null) {
BrazeLogger.w(TAG, "No application context provided to this tag provider.");
return;
}
if (!map.containsKey(ACTION_TYPE_KEY)) {
BrazeLogger.w(TAG, "Map does not contain the Braze action type key: " + ACTION_TYPE_KEY);
return;
}
String actionType = String.valueOf(map.remove(ACTION_TYPE_KEY));
switch (actionType) {
case LOG_EVENT_ACTION_TYPE:
logEvent(map);
break;
case CUSTOM_ATTRIBUTE_ACTION_TYPE:
setCustomAttribute(map);
break;
case CHANGE_USER_ACTION_TYPE:
changeUser(map);
break;
default:
BrazeLogger.w(TAG, "Got unknown action type: " + actionType);
break;
}
}
private void logEvent(Map tagParameterMap) {
String eventName = String.valueOf(tagParameterMap.remove(EVENT_NAME_VARIABLE));
Braze.getInstance(sApplicationContext).logCustomEvent(eventName, parseMapIntoProperties(tagParameterMap));
}
private BrazeProperties parseMapIntoProperties(Map map) {
BrazeProperties brazeProperties = new BrazeProperties();
for (Map.Entry entry : map.entrySet()) {
final Object value = entry.getValue();
final String key = entry.getKey();
if (value instanceof Boolean) {
brazeProperties.addProperty(key, (Boolean) value);
} else if (value instanceof Integer) {
brazeProperties.addProperty(key, (Integer) value);
} else if (value instanceof Date) {
brazeProperties.addProperty(key, (Date) value);
} else if (value instanceof Long) {
brazeProperties.addProperty(key, (Long) value);
} else if (value instanceof String) {
brazeProperties.addProperty(key, (String) value);
} else if (value instanceof Double) {
brazeProperties.addProperty(key, (Double) value);
} else {
BrazeLogger.w(TAG, "Failed to parse value into an BrazeProperties "
+ "accepted type. Key: '" + key + "' Value: '" + value + "'");
}
}
return brazeProperties;
}
private void setCustomAttribute(Map tagParameterMap) {
String key = String.valueOf(tagParameterMap.get(CUSTOM_ATTRIBUTE_KEY));
Object value = tagParameterMap.get(CUSTOM_ATTRIBUTE_VALUE_KEY);
Braze.getInstance(sApplicationContext).getCurrentUser(new IValueCallback() {
@Override
public void onSuccess(BrazeUser brazeUser) {
if (value instanceof Boolean) {
brazeUser.setCustomUserAttribute(key, (Boolean) value);
} else if (value instanceof Integer) {
brazeUser.setCustomUserAttribute(key, (Integer) value);
} else if (value instanceof Long) {
brazeUser.setCustomUserAttribute(key, (Long) value);
} else if (value instanceof String) {
brazeUser.setCustomUserAttribute(key, (String) value);
} else if (value instanceof Double) {
brazeUser.setCustomUserAttribute(key, (Double) value);
} else if (value instanceof Float) {
brazeUser.setCustomUserAttribute(key, (Float) value);
} else {
BrazeLogger.w(TAG, "Failed to parse value into a custom "
+ "attribute accepted type. Key: '" + key + "' Value: '" + value + "'");
}
}
});
}
private void changeUser(Map tagParameterMap) {
String userId = String.valueOf(tagParameterMap.get(CHANGE_USER_ID_VARIABLE));
Braze.getInstance(sApplicationContext).changeUser(userId);
}
}
```
```kotlin
class BrazeGtmTagProvider : CustomTagProvider {
override fun execute(map: MutableMap) {
BrazeLogger.i(TAG, "Got google tag manager parameters map: $map")
if (sApplicationContext == null) {
BrazeLogger.w(TAG, "No application context provided to this tag provider.")
return
}
if (!map.containsKey(ACTION_TYPE_KEY)) {
BrazeLogger.w(TAG, "Map does not contain the Braze action type key: $ACTION_TYPE_KEY")
return
}
val actionType = map.remove(ACTION_TYPE_KEY).toString()
when (actionType) {
LOG_EVENT_ACTION_TYPE -> logEvent(map)
CUSTOM_ATTRIBUTE_ACTION_TYPE -> setCustomAttribute(map)
CHANGE_USER_ACTION_TYPE -> changeUser(map)
else -> BrazeLogger.w(TAG, "Got unknown action type: $actionType")
}
}
private fun logEvent(tagParameterMap: MutableMap) {
val eventName = tagParameterMap.remove(EVENT_NAME_VARIABLE).toString()
Braze.getInstance(sApplicationContext).logCustomEvent(eventName, parseMapIntoProperties(tagParameterMap))
}
private fun parseMapIntoProperties(map: Map): BrazeProperties {
val brazeProperties = BrazeProperties()
map.forEach { param ->
val key = param.key
val value = param.value
when (value) {
is Boolean -> brazeProperties.addProperty(key, value)
is Int -> brazeProperties.addProperty(key, value)
is Date -> brazeProperties.addProperty(key, value)
is Long -> brazeProperties.addProperty(key, value)
is String -> brazeProperties.addProperty(key, value)
is Double -> brazeProperties.addProperty(key, value)
else -> BrazeLogger.w(TAG, "Failed to parse value into an BrazeProperties "
+ "accepted type. Key: '" + key + "' Value: '" + value + "'")
}
}
return brazeProperties
}
private fun setCustomAttribute(tagParameterMap: Map) {
val key = tagParameterMap[CUSTOM_ATTRIBUTE_KEY].toString()
val value = tagParameterMap[CUSTOM_ATTRIBUTE_VALUE_KEY]
Braze.getInstance(sApplicationContext).getCurrentUser { brazeUser ->
when (value) {
is Boolean -> brazeUser.setCustomUserAttribute(key, value)
is Int -> brazeUser.setCustomUserAttribute(key, value)
is Long -> brazeUser.setCustomUserAttribute(key, value)
is String -> brazeUser.setCustomUserAttribute(key, value)
is Double -> brazeUser.setCustomUserAttribute(key, value)
is Float -> brazeUser.setCustomUserAttribute(key, value)
else -> BrazeLogger.w(
TAG, "Failed to parse value into a custom "
+ "attribute accepted type. Key: '" + key + "' Value: '" + value + "'"
)
}
}
}
private fun changeUser(tagParameterMap: Map) {
val userId = tagParameterMap[CHANGE_USER_ID_VARIABLE].toString()
Braze.getInstance(sApplicationContext).changeUser(userId)
}
companion object {
private val TAG = BrazeLogger.getBrazeLogTag(BrazeGtmTagProvider::class.java)
private val ACTION_TYPE_KEY = "actionType"
// Custom Events
private val LOG_EVENT_ACTION_TYPE = "logEvent"
private val EVENT_NAME_VARIABLE = "eventName"
// Custom Attributes
private val CUSTOM_ATTRIBUTE_ACTION_TYPE = "customAttribute"
private val CUSTOM_ATTRIBUTE_KEY = "customAttributeKey"
private val CUSTOM_ATTRIBUTE_VALUE_KEY = "customAttributeValue"
// Change User
private val CHANGE_USER_ACTION_TYPE = "changeUser"
private val CHANGE_USER_ID_VARIABLE = "externalUserId"
private var sApplicationContext: Context? = null
/**
* Must be set before calling any of the following methods so
* that the proper application context is available when needed.
*
* Recommended to be called in your [Application.onCreate].
*/
fun setApplicationContext(applicationContext: Context?) {
if (applicationContext != null) {
sApplicationContext = applicationContext.applicationContext
}
}
}
}
```
In your `Application.onCreate()` be sure to add the following initialization for the previous snippet:
```java
BrazeGtmTagProvider.setApplicationContext(this.getApplicationContext());
```
```kotlin
BrazeGtmTagProvider.setApplicationContext(this.applicationContext)
```
## Prerequisites
Before you can use this feature, you'll need to [integrate the Swift Braze SDK](https://www.braze.com/docs/fr/fr/developer_guide/sdk_integration/?sdktab=swift).
## Using Google Tag Manager for Swift
In the following example, a music streaming app wants to log different events as users listen to songs. Using Google Tag Manager for iOS, they can control which of the Braze third-party vendors receive this event and create tags specific to Braze.
### Step 1: Create a trigger for custom events
Custom events are logged with `actionType` set to `logEvent`. In this example, the Braze custom tag provider is expecting the custom event name to be set using `eventName`.
First, create a trigger that looks for an `eventName` that equals `played song`.

Next, create a new Tag (also known as a "Function Call") and enter the class path of your [custom tag provider](#adding-ios-google-tag-provider) described later in this article. This tag will be triggered when you log the `played song` event. Because `eventName` is set to `played song` it will be used as custom event name that's logged to Braze.
**Important:**
When sending a custom event, set `actionType` to `logEvent`, and set a value for `eventName` so Braze receives the correct event name and action to take.

You can also include additional key-value pair arguments to the tag, which will be sent as custom event properties to Braze. `eventName` and `actionType` will not be ignored for custom event properties. In the following example tag, pass in `genre`, which was defined using a tag variable in Google Tag Manager and sourced from the custom event logged in the app.
The `genre` event property is sent to Google Tag Manager as a "Firebase - Event Parameter" variable since Google Tag Manager for iOS uses Firebase as the data layer.

When a user plays a song in the app, log an event through Firebase and Google Tag Manager using the Firebase analytics event name that matches the tag's trigger name, `played song`:
```swift
let parameters: [String: Any] = ["genre": "pop",
"number of times listened": 42]
Analytics.logEvent("played song", parameters: parameters)
```
```obj-c
NSDictionary *parameters = @{@"genre" : @"pop",
@"number of times listened" : @42};
[FIRAnalytics logEventWithName:@"played song" parameters:parameters];
```
### Step 2: Log custom attributes
Custom attributes are set via an `actionType` set to `customAttribute`. The Braze custom tag provider is expecting the custom attribute key-value to be set via `customAttributeKey` and `customAttributeValue`:
```swift
let parameters: [String: Any] = ["customAttributeKey": "favoriteSong",
"customAttributeValue": "Private Eyes"]
FIRAnalytics.logEvent(withName:"customAttribute", parameters: parameters)
```
```obj-c
NSDictionary *parameters = @{@"customAttributeKey" : @"favoriteSong",
@"customAttributeValue" : @"Private Eyes"};
[FIRAnalytics logEventWithName:@"customAttribute" parameters:parameters];
```
### Step 3: Call `changeUser()`
Calls to `changeUser()` are made via an `actionType` set to `changeUser`. The Braze custom tag provider is expecting the Braze user ID to be set via an `externalUserId` key-value pair within your tag:
```swift
let parameters: [String: Any] = ["externalUserId": "favorite userId"]
Analytics.logEvent(withName:"changeUser", parameters: parameters)
```
```obj-c
NSDictionary *parameters = @{@"externalUserId" : userId};
[FIRAnalytics logEventWithName:@"changeUser" parameters:parameters];
```
### Step 4: Add a custom tag provider {#adding-ios-google-tag-provider}
With the tags and triggers set up, you will also need to implement Google Tag Manager in your iOS app which can be found in Google's [documentation](https://developers.google.com/tag-manager/ios/v5/).
After Google Tag Manager is installed in your app, add a custom tag provider to call Braze SDK methods based on the tags you've configured within Google Tag Manager.
Be sure to note the "Class Path" to the file - this is what you'll enter when setting up a tag in the [Google Tag Manager](https://tagmanager.google.com/) console.
This example highlights one of many ways you can structure your custom tag provider. Specifically, it shows how to determine which Braze SDK method to call based on the `actionType` key-value pair sent from the GTM Tag. This example assumes you've assigned the Braze instance as a variable in the AppDelegate.
The `actionType` supported in this example are `logEvent`, `customAttribute`, and `changeUser`, but you may prefer to change how your tag provider handles data from Google Tag Manager.
Add the following code to your `BrazeGTMTagManager.swift` file.
```swift
import FirebaseAnalytics
import GoogleTagManager
import BrazeKit
let ActionTypeKey: String = "actionType"
// Custom Events
let LogEventAction: String = "logEvent"
let LogEventName: String = "eventName"
// Custom Attributes
let CustomAttributeAction: String = "customAttribute"
let CustomAttributeKey: String = "customAttributeKey"
let CustomAttributeValueKey: String = "customAttributeValue"
// Change User
let ChangeUserAction: String = "changeUser"
let ChangeUserExternalUserId: String = "externalUserId"
@objc(BrazeGTMTagManager)
final class BrazeGTMTagManager : NSObject, TAGCustomFunction {
@objc func execute(withParameters parameters: [AnyHashable : Any]!) -> NSObject! {
var parameters: [String : Any] = parameters as! [String : Any]
guard let actionType: String = parameters[ActionTypeKey] as? String else {
print("There is no Braze action type key in this call. Doing nothing.")
return nil
}
parameters.removeValue(forKey: ActionTypeKey)
if actionType == LogEventAction {
logEvent(parameters: parameters)
} else if actionType == CustomAttributeAction {
logCustomAttribute(parameters: parameters)
} else if actionType == ChangeUserAction {
changeUser(parameters: parameters)
}
return nil
}
func logEvent(parameters: [String : Any]) {
var parameters: [String : Any] = parameters
guard let eventName: String = parameters[LogEventName] as? String else { return }
parameters.removeValue(forKey: LogEventName)
AppDelegate.braze?.logCustomEvent(name: eventName, properties: parameters)
}
func logCustomAttribute(parameters: [String: Any]) {
guard let customAttributeKey = parameters[CustomAttributeKey] as? String else { return }
let customAttributeValue = parameters[CustomAttributeValueKey]
if let customAttributeValue = customAttributeValue as? String {
AppDelegate.braze?.user.setCustomAttribute(key: customAttributeKey, value: customAttributeValue)
} else if let customAttributeValue = customAttributeValue as? Date {
AppDelegate.braze?.user.setCustomAttribute(key: customAttributeKey, value: customAttributeValue)
} else if let customAttributeValue = customAttributeValue as? Double {
AppDelegate.braze?.user.setCustomAttribute(key: customAttributeKey, value: customAttributeValue)
} else if let customAttributeValue = customAttributeValue as? Bool {
AppDelegate.braze?.user.setCustomAttribute(key: customAttributeKey, value: customAttributeValue)
} else if let customAttributeValue = customAttributeValue as? Int {
AppDelegate.braze?.user.setCustomAttribute(key: customAttributeKey, value: customAttributeValue)
} else if let customAttibuteValue = customAttributeValue as? [String] {
AppDelegate.braze?.user.setCustomAttributeArray(key: customAttributeKey, array: customAttibuteValue)
}
}
func changeUser(parameters: [String: Any]) {
guard let userId = parameters[ChangeUserExternalUserId] as? String else { return }
AppDelegate.braze?.changeUser(userId: userId)
}
}
```
Add the following code to your `BrazeGTMTagManager.h` file:
```obj-c
@import Firebase;
@import GoogleTagManager;
@interface BrazeGTMTagManager : NSObject
@end
```
And add the following code to your `BrazeGTMTagManager.m` file:
```obj-c
#import
#import "BrazeGTMTagManager.h"
#import "BrazeKit"
#import "AppDelegate.h"
static NSString *const ActionTypeKey = @"actionType";
// Custom Events
static NSString *const LogEventAction = @"logEvent";
static NSString *const LogEventEventName = @"eventName";
// Custom Attributes
static NSString *const CustomAttributeAction = @"customAttribute";
static NSString *const CustomAttributeKey = @"customAttributeKey";
static NSString *const CustomAttributeValueKey = @"customAttributeValue";
// Change User
static NSString *const ChangeUserAction = @"changeUser";
static NSString *const ChangeUserExternalUserId = @"externalUserId";
@implementation BrazeGTMTagManager
- (NSObject *)executeWithParameters:(NSDictionary *)parameters {
NSMutableDictionary *mutableParameters = [parameters mutableCopy];
NSString *actionType = mutableParameters[ActionTypeKey];
if (!actionType) {
NSLog(@"There is no Braze action type key in this call. Doing nothing.", nil);
return nil;
}
[mutableParameters removeObjectForKey:ActionTypeKey];
if ([actionType isEqualToString:LogEventAction]) {
[self logEvent:mutableParameters];
} else if ([actionType isEqualToString:CustomAttributeAction]) {
[self logCustomAttribute:mutableParameters];
} else if ([actionType isEqualToString:ChangeUserAction]) {
[self changeUser:mutableParameters];
} else {
NSLog(@"Invalid action type. Doing nothing.");
}
return nil;
}
- (void)logEvent:(NSMutableDictionary *)parameters {
NSString *eventName = parameters[LogEventEventName];
[parameters removeObjectForKey:LogEventEventName];
[AppDelegate.braze logCustomEvent:eventName
properties:parameters];
}
- (void)logCustomAttribute:(NSMutableDictionary *)parameters {
NSString *customAttributeKey = parameters[CustomAttributeKey];
id customAttributeValue = parameters[CustomAttributeValueKey];
if ([customAttributeValue isKindOfClass:[NSString class]]) {
[AppDelegate.braze logCustomEvent:customAttributeKey
properties:parameters];
} else if ([customAttributeValue isKindOfClass:[NSDate class]]) {
[AppDelegate.braze.user setCustomAttributeWithKey:customAttributeKey
dateValue:customAttributeValue];
} else if ([customAttributeValue isKindOfClass:[NSNumber class]]) {
if (strcmp([customAttributeValue objCType], [@(YES) objCType]) == 0) {
[AppDelegate.braze.user setCustomAttributeWithKey:customAttributeKey
boolValue:[(NSNumber *)customAttributeValue boolValue]];
} else if (strcmp([customAttributeValue objCType], @encode(short)) == 0 ||
strcmp([customAttributeValue objCType], @encode(int)) == 0 ||
strcmp([customAttributeValue objCType], @encode(long)) == 0) {
[AppDelegate.braze.user setCustomAttributeWithKey:customAttributeKey
intValue:[(NSNumber *)customAttributeValue integerValue]];
} else if (strcmp([customAttributeValue objCType], @encode(float)) == 0 ||
strcmp([customAttributeValue objCType], @encode(double)) == 0) {
[AppDelegate.braze.user setCustomAttributeWithKey:customAttributeKey
doubleValue:[(NSNumber *)customAttributeValue doubleValue]];
} else {
NSLog(@"Could not map NSNumber value to Braze custom attribute:%@", customAttributeValue);
}
} else if ([customAttributeValue isKindOfClass:[NSArray class]]) {
[AppDelegate.braze.user setCustomAttributeArrayWithKey:customAttributeKey
array:customAttributeValue];
}
}
- (void)changeUser:(NSMutableDictionary *)parameters {
NSString *userId = parameters[ChangeUserExternalUserId];
[AppDelegate.braze changeUser:userId];
}
@end
```
## Résolution des problèmes {#troubleshooting}
Si Braze ne s'initialise pas ou si les événements n'apparaissent pas comme prévu, vérifiez que votre conteneur GTM est publié, que les déclencheurs et l'ordre de déclenchement des balises correspondent au [cycle de vie et à la stratégie d'initialisation](https://www.braze.com/docs/fr/fr/developer_guide/sdk_integration/) de votre SDK, et que les appareils de test ne bloquent pas les endpoints de Braze.
En cas d'échec de l'initialisation, vérifiez que la balise Braze ou le fournisseur d'étiquettes personnalisé reçoit le `actionType` et les paramètres attendus (consultez les onglets Android, Swift et Web sur cette page). Pour activer la journalisation détaillée lors de la validation des événements déclenchés par GTM, activez la journalisation de débogage du SDK de votre plateforme comme décrit dans les guides d'intégration de la plateforme accessibles depuis ces onglets.
# Configurer l'authentification pour le SDK Braze
Source: /docs/fr/developer_guide/sdk_integration/authentication/index.md
# Configurer l'authentification SDK {#set-up-sdk-authentication}
> L'authentification SDK vous permet de fournir des preuves cryptographiques (générées côté serveur) aux requêtes SDK effectuées au nom des utilisateurs connectés.
## Fonctionnement {#how-it-works}
Après avoir activé cette fonctionnalité dans votre application, vous pouvez configurer le tableau de bord de Braze pour qu'il rejette toute requête avec un jeton Web JSON (JWT) invalide ou manquant, ce qui inclut :
- L'envoi d'événements personnalisés, d'attributs, d'achats et de données de session
- La création de nouveaux utilisateurs dans votre espace de travail Braze
- La mise à jour des attributs de profil utilisateur standard
- La réception ou le déclenchement de messages
Vous pouvez désormais empêcher les utilisateurs connectés non authentifiés d'utiliser la clé API SDK de votre application pour effectuer des actions malveillantes, telles que l'usurpation d'identité d'autres utilisateurs.
## Mise en place de l'authentification {#setting-up-authentication}
### Étape 1 : Configurez votre serveur {#server-side-integration}
#### Étape 1.1 : Générer une paire de clés publiques/privées {#generate-keys}
Générez une paire de clés publiques/privées RSA256. La clé publique sera ajoutée au tableau de bord de Braze, tandis que la clé privée devra être stockée en toute sécurité sur votre serveur.
Nous recommandons une clé RSA de 2048 bits pour une utilisation avec l'algorithme JWT RS256.
**Warning:**
N'oubliez pas de conserver vos clés privées _privées_. N'exposez jamais et ne codez jamais en dur votre clé privée dans votre application ou site web. Toute personne qui connaît votre clé privée peut se faire passer pour un autre utilisateur ou créer des utilisateurs au nom de votre application.
#### Étape 1.2 : Créer un jeton Web JSON pour l'utilisateur actuel {#create-jwt}
Une fois que vous disposez de votre clé privée, votre application côté serveur doit l'utiliser pour renvoyer un JWT à votre application ou site web pour l'utilisateur actuellement connecté.
En général, cette logique peut être placée partout où votre application demande normalement le profil de l'utilisateur actuel, comme un endpoint de connexion ou partout où votre application actualise le profil de l'utilisateur actuel.
Lors de la génération du JWT, les champs suivants sont attendus :
**En-tête JWT**
| Champ | Requis | Description |
| ----- | -------- | ----------------------------------- |
| `alg` | Oui | L'algorithme pris en charge est `RS256`. |
| `typ` | Oui | Le type doit être égal à `JWT`. |
{: .reset-td-br-1 .reset-td-br-2 .reset-td-br-3 aria-label="Étape 1.2 : Créer un jeton Web JSON pour l'utilisateur actuel" }
{: .reset-td-br-1 .reset-td-br-2 .reset-td-br-3 aria-label="Étape 1.2 : Créer un jeton Web JSON pour l'utilisateur actuel #create-jwt" }
**Payload JWT**
| Champ | Requis | Description |
| ----- | -------- | -------------------------------------------------------------------------------------- |
| `sub` | Oui | Le « sujet » doit être égal à l'ID utilisateur que vous fournissez au SDK Braze lorsque vous appelez `changeUser` |
| `exp` | Oui | L'« expiration » indiquant quand vous souhaitez que ce jeton expire, sous forme d'horodatage Unix en secondes (par exemple, `1893456000` pour le 1er janvier 2030). |
{: .reset-td-br-1 .reset-td-br-2 .reset-td-br-3 aria-label="Étape 1.2 : Créer un jeton Web JSON pour l'utilisateur actuel" }
{: .reset-td-br-1 .reset-td-br-2 .reset-td-br-3 aria-label="Étape 1.2 : Créer un jeton Web JSON pour l'utilisateur actuel #create-jwt" }
**Tip:**
Pour en savoir plus sur les jetons Web JSON ou pour parcourir les nombreuses bibliothèques open source qui simplifient ce processus de signature, consultez [https://jwt.io](https://jwt.io).
### Étape 2 : Configurer le SDK {#sdk-integration}
Cette fonctionnalité est disponible à partir des [versions SDK suivantes](https://www.braze.com/docs/fr/fr/user_guide/engagement_tools/campaigns/ideas_and_strategies/new_features/#filtering-by-most-recent-app-versions) :
**Note:**
Pour les intégrations iOS, cette page détaille les étapes pour le SDK Swift de Braze. Pour un exemple d'utilisation dans l'ancien SDK iOS AppboyKit, référez-vous à [ce fichier](https://github.com/Appboy/appboy-ios-sdk/blob/master/Example/Stopwatch/Sources/AppDelegate.m) et à [ce fichier](https://github.com/Appboy/appboy-ios-sdk/blob/master/Example/Stopwatch/Sources/Utils/SdkAuthDelegate.m).
#### Étape 2.1 : Activer l'authentification dans le SDK Braze {#step-21-enable-authentication-in-the-braze-sdk}
Lorsque cette fonctionnalité est activée, le SDK Braze ajoutera le dernier JWT connu de l'utilisateur actuel aux requêtes réseau effectuées vers les serveurs Braze.
**Note:**
Ne vous inquiétez pas, l'initialisation avec cette seule option n'aura aucun impact sur la collecte des données, jusqu'à ce que vous [appliquiez l'authentification](#braze-dashboard) dans le tableau de bord de Braze.
Lorsque vous appelez `initialize`, définissez la propriété facultative `enableSdkAuthentication` sur `true`.
```javascript
import * as braze from "@braze/web-sdk";
braze.initialize("YOUR-API-KEY-HERE", {
baseUrl: "YOUR-SDK-ENDPOINT-HERE",
enableSdkAuthentication: true,
});
```
L'authentification SDK doit être activée lors de l'initialisation du SDK natif. Ajoutez la configuration suivante à votre code natif iOS et Android :
**iOS (AppDelegate.swift)**
```swift
import BrazeKit
import braze_react_native_sdk
let configuration = Braze.Configuration(
apiKey: "{YOUR-BRAZE-API-KEY}",
endpoint: "{YOUR-BRAZE-ENDPOINT}"
)
configuration.api.sdkAuthentication = true
let braze = BrazeReactBridge.perform(
#selector(BrazeReactBridge.initBraze(_:)),
with: configuration
).takeUnretainedValue() as! Braze
```
**Android (braze.xml)**
```xml
true
```
Après avoir activé l'authentification SDK dans la couche native, vous pouvez utiliser les méthodes JavaScript React Native présentées dans les étapes suivantes.
Lors de la configuration de l'instance Braze, appelez `setIsSdkAuthenticationEnabled` avec la valeur `true`.
```java
BrazeConfig.Builder brazeConfigBuilder = new BrazeConfig.Builder()
.setIsSdkAuthenticationEnabled(true);
Braze.configure(this, brazeConfigBuilder.build());
```
Vous pouvez également ajouter `true` à votre braze.xml.
Lors de la configuration de l'instance Braze, appelez `setIsSdkAuthenticationEnabled` avec la valeur `true`.
```kotlin
BrazeConfig.Builder brazeConfigBuilder = BrazeConfig.Builder()
.setIsSdkAuthenticationEnabled(true)
Braze.configure(this, brazeConfigBuilder.build())
```
Vous pouvez également ajouter `true` à votre braze.xml.
Pour activer l'authentification SDK, définissez la propriété `configuration.api.sdkAuthentication` de votre objet `BRZConfiguration` sur `YES` avant d'initialiser l'instance Braze :
```objc
BRZConfiguration *configuration =
[[BRZConfiguration alloc] initWithApiKey:@"{BRAZE_API_KEY}"
endpoint:@"{BRAZE_ENDPOINT}"];
configuration.api.sdkAuthentication = YES;
Braze *braze = [[Braze alloc] initWithConfiguration:configuration];
AppDelegate.braze = braze;
```
Pour activer l'authentification SDK, définissez la propriété `configuration.api.sdkAuthentication` de votre objet `Braze.Configuration` sur `true` lors de l'initialisation du SDK :
```swift
let configuration = Braze.Configuration(apiKey: "{YOUR-BRAZE-API-KEY}",
endpoint: "{YOUR-BRAZE-ENDPOINT}")
configuration.api.sdkAuthentication = true
let braze = Braze(configuration: configuration)
AppDelegate.braze = braze
```
Actuellement, l'authentification SDK doit être activée dans le cadre de l'initialisation du SDK dans le code natif iOS et Android. Pour activer l'authentification SDK dans le SDK Flutter, suivez les intégrations pour iOS et Android depuis les autres onglets. Une fois l'authentification SDK activée, le reste de la fonctionnalité peut être intégré dans Dart.
L'authentification SDK doit être activée lors de l'initialisation du SDK dans le code natif iOS et Android. Lorsque cette fonctionnalité est activée dans la couche native, vous pouvez utiliser les méthodes du SDK Flutter pour transmettre la signature JWT.
**iOS**
Pour activer l'authentification SDK, définissez la propriété `configuration.api.sdkAuthentication` sur `true` dans votre code natif iOS :
```swift
let configuration = Braze.Configuration(apiKey: "{YOUR-BRAZE-API-KEY}", endpoint: "{YOUR-BRAZE-ENDPOINT}")
configuration.api.sdkAuthentication = true
let braze = Braze(configuration: configuration)
```
**Android (braze.xml)**
```xml
true
```
Après avoir activé l'authentification SDK dans la couche native, vous pouvez utiliser les méthodes du SDK Flutter présentées dans les étapes suivantes.
L'authentification SDK doit être activée lors de l'initialisation du SDK natif. Ajoutez la configuration suivante à votre code natif iOS et Android :
**iOS**
Définissez la propriété `SDKAuthenticationEnabled` sur `true` dans votre fichier de configuration :
```xml
SDKAuthenticationEnabled
```
**Android (braze.xml)**
```xml
true
```
Après avoir activé l'authentification SDK dans la couche native, vous pouvez utiliser les méthodes Unity C# présentées dans les étapes suivantes.
L'authentification SDK doit être activée lors de l'initialisation du SDK natif. Ajoutez la configuration suivante à votre code natif iOS et Android :
**iOS**
Pour activer l'authentification SDK, définissez la propriété `enableSDKAuthentication` sur `true` dans votre `config.xml` :
```xml
```
**Android (braze.xml)**
```xml
true
```
Après avoir activé l'authentification SDK dans la couche native, vous pouvez utiliser les méthodes JavaScript Cordova présentées dans les étapes suivantes.
L'authentification SDK doit être activée lors de l'initialisation du SDK natif. Configurez l'authentification SDK séparément pour iOS et Android :
**iOS**
Pour activer l'authentification SDK, définissez la propriété `configuration.Api.SdkAuthentication` sur `true` lors de l'initialisation du SDK :
```csharp
var configuration = new BRZConfiguration("YOUR-API-KEY", "YOUR-ENDPOINT");
configuration.Api.SdkAuthentication = true;
var braze = new Braze(configuration);
```
**Android (braze.xml)**
```xml
true
```
Après avoir activé l'authentification SDK, vous pouvez utiliser les méthodes .NET MAUI présentées dans les étapes suivantes.
Lorsque vous utilisez le plugin Braze Expo, définissez la propriété `enableSdkAuthentication` sur `true` dans la configuration de votre application. Cela configure automatiquement l'authentification SDK dans les couches natives iOS et Android sans nécessiter de modifications manuelles du code natif.
**app.json ou app.config.js**
```json
{
"expo": {
"plugins": [
[
"@braze/expo-plugin",
{
"enableSdkAuthentication": true
}
]
]
}
}
```
Après avoir activé l'authentification SDK dans la configuration de votre application, vous pouvez utiliser les méthodes JavaScript React Native indiquées dans l'onglet React Native pour les étapes suivantes.
**Note:**
Pour un exemple d'implémentation complet, consultez l'[application exemple du plugin Braze Expo](https://github.com/braze-inc/braze-expo-plugin/blob/main/example/components/Braze.tsx) sur GitHub.
#### Étape 2.2 : Définir le JWT de l'utilisateur actuel {#step-22-set-the-current-users-jwt}
Lorsque votre application appelle la méthode Braze `changeUser`, fournissez également le JWT qui a été [généré côté serveur](#braze-dashboard).
Vous pouvez également configurer le jeton pour qu'il s'actualise en cours de session pour l'utilisateur actuel.
**Note:**
Gardez à l'esprit que `changeUser` ne doit être appelée que lorsque l'ID utilisateur a _réellement changé_. Vous ne devez pas utiliser cette méthode pour mettre à jour le jeton d'authentification (JWT) si l'ID de l'utilisateur n'a pas changé.
Fournissez le JWT lors de l'appel à [`changeUser`](https://js.appboycdn.com/web-sdk/latest/doc/modules/braze.html#changeuser) :
```javascript
import * as braze from "@braze/web-sdk";
braze.changeUser("NEW-USER-ID", "JWT-FROM-SERVER");
```
Ou, lorsque vous avez actualisé le jeton de l'utilisateur en cours de session :
```javascript
import * as braze from "@braze/web-sdk";
braze.setSdkAuthenticationSignature("NEW-JWT-FROM-SERVER");
```
Fournissez le JWT lors de l'appel à [`changeUser`](https://braze-inc.github.io/braze-react-native-sdk/classes/Braze.Braze-1.html#changeUser) :
```typescript
import Braze from '@braze/react-native-sdk';
Braze.changeUser("NEW-USER-ID", "JWT-FROM-SERVER");
```
Ou, lorsque vous avez actualisé le jeton de l'utilisateur en cours de session :
```typescript
import Braze from '@braze/react-native-sdk';
Braze.setSdkAuthenticationSignature("NEW-JWT-FROM-SERVER");
```
Fournissez le JWT lors de l'appel à [`changeUser`](https://braze-inc.github.io/braze-android-sdk/kdoc/braze-android-sdk/com.braze/-i-braze/change-user.html) :
```java
Braze.getInstance(this).changeUser("NEW-USER-ID", "JWT-FROM-SERVER");
```
Ou, lorsque vous avez actualisé le jeton de l'utilisateur en cours de session :
```java
Braze.getInstance(this).setSdkAuthenticationSignature("NEW-JWT-FROM-SERVER");
```
Fournissez le JWT lors de l'appel à [`changeUser`](https://braze-inc.github.io/braze-android-sdk/kdoc/braze-android-sdk/com.braze/-i-braze/change-user.html) :
```kotlin
Braze.getInstance(this).changeUser("NEW-USER-ID", "JWT-FROM-SERVER")
```
Ou, lorsque vous avez actualisé le jeton de l'utilisateur en cours de session :
```kotlin
Braze.getInstance(this).setSdkAuthenticationSignature("NEW-JWT-FROM-SERVER")
```
Fournissez le JWT lors de l'appel à [`changeUser`](https://braze-inc.github.io/braze-swift-sdk/documentation/brazekit/braze/changeuser(userid:sdkauthsignature:fileid:line:)) :
```objc
[AppDelegate.braze changeUser:@"userId" sdkAuthSignature:@"JWT-FROM-SERVER"];
```
Ou, lorsque vous avez actualisé le jeton de l'utilisateur en cours de session :
```objc
[AppDelegate.braze setSDKAuthenticationSignature:@"NEW-JWT-FROM-SERVER"];
```
Fournissez le JWT lors de l'appel à [`changeUser`](https://braze-inc.github.io/braze-swift-sdk/documentation/brazekit/braze/changeuser(userid:sdkauthsignature:fileid:line:)) :
```swift
AppDelegate.braze?.changeUser(userId: "userId", sdkAuthSignature: "JWT-FROM-SERVER")
```
Ou, lorsque vous avez actualisé le jeton de l'utilisateur en cours de session :
```swift
AppDelegate.braze?.set(sdkAuthenticationSignature: "NEW-JWT-FROM-SERVER")
```
Fournissez le JWT lors de l'appel à [`changeUser`](https://js.appboycdn.com/web-sdk/latest/doc/modules/braze.html#changeuser) :
```dart
braze.changeUser("userId", sdkAuthSignature: "JWT-FROM-SERVER")
```
Ou, lorsque vous avez actualisé le jeton de l'utilisateur en cours de session :
```dart
braze.setSdkAuthenticationSignature("NEW-JWT-FROM-SERVER")
```
Fournissez le JWT lors de l'appel à `changeUser` :
```dart
import 'package:braze_plugin/braze_plugin.dart';
BrazePlugin braze = BrazePlugin();
braze.changeUser("NEW-USER-ID", sdkAuthSignature: "JWT-FROM-SERVER");
```
Ou, lorsque vous avez actualisé le jeton de l'utilisateur en cours de session :
```dart
import 'package:braze_plugin/braze_plugin.dart';
BrazePlugin braze = BrazePlugin();
braze.setSdkAuthenticationSignature("NEW-JWT-FROM-SERVER");
```
Fournissez le JWT lors de l'appel à `ChangeUser` :
```csharp
BrazeBinding.ChangeUser("NEW-USER-ID", "JWT-FROM-SERVER");
```
Ou, lorsque vous avez actualisé le jeton de l'utilisateur en cours de session :
```csharp
BrazeBinding.SetSdkAuthenticationSignature("NEW-JWT-FROM-SERVER");
```
Fournissez le JWT lors de l'appel à `changeUser` :
```javascript
BrazePlugin.changeUser("NEW-USER-ID", "JWT-FROM-SERVER");
```
Ou, lorsque vous avez actualisé le jeton de l'utilisateur en cours de session :
```javascript
BrazePlugin.setSdkAuthenticationSignature("NEW-JWT-FROM-SERVER");
```
Fournissez le JWT lors de l'appel à `ChangeUser` :
**iOS**
```csharp
Braze.SharedInstance?.ChangeUser("NEW-USER-ID", "JWT-FROM-SERVER");
```
Ou, lorsque vous avez actualisé le jeton de l'utilisateur en cours de session :
```csharp
Braze.SharedInstance?.SetSDKAuthenticationSignature("NEW-JWT-FROM-SERVER");
```
**Android**
```csharp
Braze.GetInstance(this).ChangeUser("NEW-USER-ID", "JWT-FROM-SERVER");
```
Ou, lorsque vous avez actualisé le jeton de l'utilisateur en cours de session :
```csharp
Braze.GetInstance(this).SetSdkAuthenticationSignature("NEW-JWT-FROM-SERVER");
```
Lorsque vous utilisez le plugin Braze Expo, employez les mêmes méthodes du SDK React Native. Fournissez le JWT lors de l'appel à `changeUser` :
```typescript
import Braze from '@braze/react-native-sdk';
Braze.changeUser("NEW-USER-ID", "JWT-FROM-SERVER");
```
Ou, lorsque vous avez actualisé le jeton de l'utilisateur en cours de session :
```typescript
import Braze from '@braze/react-native-sdk';
Braze.setSdkAuthenticationSignature("NEW-JWT-FROM-SERVER");
```
#### Étape 2.3 : Enregistrer une fonction de rappel pour les jetons invalides {#sdk-callback}
Lorsque cette fonctionnalité est définie comme [Requise](#enforcement-options), les scénarios suivants entraîneront le rejet des requêtes SDK par Braze :
- Le JWT avait expiré au moment où il a été reçu par l'API Braze
- Le JWT était vide ou manquant
- Le JWT n'a pas pu être vérifié avec les clés publiques que vous avez téléchargées sur le tableau de bord de Braze
Vous pouvez utiliser `subscribeToSdkAuthenticationFailures` pour vous abonner aux notifications lorsque les requêtes SDK échouent pour l'une de ces raisons. Une fonction de rappel contient un objet avec le [`errorCode`](#error-codes) correspondant, la `reason` de l'erreur, le `userId` de la requête (l'utilisateur ne peut pas être anonyme) et le jeton d'authentification (JWT) à l'origine de l'erreur.
Les requêtes échouées seront périodiquement relancées jusqu'à ce que votre application fournisse un nouveau JWT valide. Si cet utilisateur est toujours connecté, vous pouvez profiter de ce rappel pour demander un nouveau JWT à votre serveur et fournir au SDK Braze ce nouveau jeton valide.
Lorsque vous recevez une erreur d'authentification, vérifiez que le `userId` dans l'erreur correspond à celui de l'utilisateur actuellement connecté, puis récupérez une nouvelle signature depuis votre serveur et fournissez-la au SDK Braze. Vous pouvez également enregistrer ces erreurs dans votre service de surveillance ou de signalement des erreurs.
**Tip:**
Ces méthodes de rappel sont un excellent endroit pour ajouter votre propre service de surveillance ou de journalisation des erreurs afin de suivre la fréquence à laquelle vos requêtes Braze sont rejetées.
```javascript
import * as braze from "@braze/web-sdk";
braze.subscribeToSdkAuthenticationFailures((error) => {
console.error("SDK authentication failed:", error);
console.log("Error code:", error.errorCode);
console.log("User ID:", error.userId);
// Note: Do not log error.signature as it contains sensitive authentication credentials
// Verify the error.userId matches the currently logged-in user
// Fetch a new token from your server and set it
fetchNewSignature(error.userId).then((newSignature) => {
braze.setSdkAuthenticationSignature(newSignature);
});
});
```
```typescript
import Braze from '@braze/react-native-sdk';
const sdkAuthErrorSubscription = Braze.addListener(
Braze.Events.SDK_AUTHENTICATION_ERROR,
(error) => {
console.log(`SDK Authentication for ${error.userId} failed with error code ${error.errorCode}.`);
const updated_jwt = getNewTokenSomehow(error);
Braze.setSdkAuthenticationSignature(updated_jwt);
}
);
// Don't forget to remove the listener when done
// sdkAuthErrorSubscription.remove();
```
```java
Braze.getInstance(this).subscribeToSdkAuthenticationFailures(error -> {
String newToken = getNewTokenSomehow(error);
Braze.getInstance(getContext()).setSdkAuthenticationSignature(newToken);
});
```
```kotlin
Braze.getInstance(this).subscribeToSdkAuthenticationFailures({ error: BrazeSdkAuthenticationErrorEvent ->
val newToken: String = getNewTokenSomehow(error)
Braze.getInstance(getContext()).setSdkAuthenticationSignature(newToken)
})
```
```objc
Braze *braze = [[Braze alloc] initWithConfiguration:configuration];
braze.sdkAuthDelegate = delegate;
AppDelegate.braze = braze;
// Method to implement in delegate
- (void)braze:(Braze *)braze sdkAuthenticationFailedWithError:(BRZSDKAuthenticationError *)error {
NSLog(@"Invalid SDK Authentication Token.");
NSString *newSignature = getNewTokenSomehow(error);
[AppDelegate.braze setSDKAuthenticationSignature:newSignature];
}
```
```swift
let braze = Braze(configuration: configuration)
braze.sdkAuthDelegate = delegate
AppDelegate.braze = braze
// Method to implement in delegate
func braze(_ braze: Braze, sdkAuthenticationFailedWithError error: Braze.SDKAuthenticationError) {
print("Invalid SDK Authentication Token.")
let newSignature = getNewTokenSomehow(error)
AppDelegate.braze?.set(sdkAuthenticationSignature: newSignature)
}
```
```dart
braze.setBrazeSdkAuthenticationErrorCallback((BrazeSdkAuthenticationError error) async {
print("Invalid SDK Authentication Token.");
final newSignature = getNewTokenSomehow(error);
braze.setSdkAuthenticationSignature(newSignature);
});
```
```dart
import 'package:braze_plugin/braze_plugin.dart';
BrazePlugin braze = BrazePlugin();
braze.setBrazeSdkAuthenticationErrorCallback((BrazeSdkAuthenticationError error) async {
print("SDK Authentication for ${error.userId} failed with error code ${error.errorCode}.");
String newSignature = getNewTokenSomehow(error);
braze.setSdkAuthenticationSignature(newSignature);
});
```
**iOS**
Configurez le délégué d'authentification SDK dans votre implémentation iOS native :
```csharp
public class SdkAuthDelegate : BRZSdkAuthDelegate
{
public void Braze(Braze braze, BRZSDKAuthenticationError error)
{
Debug.Log("Invalid SDK Authentication Token.");
string newSignature = GetNewTokenSomehow(error);
BrazeBinding.SetSdkAuthenticationSignature(newSignature);
}
}
```
**Android**
```csharp
Braze.GetInstance(this).SubscribeToSdkAuthenticationFailures((error) => {
string newToken = GetNewTokenSomehow(error);
Braze.GetInstance(this).SetSdkAuthenticationSignature(newToken);
});
```
```javascript
BrazePlugin.subscribeToSdkAuthenticationFailures((error) => {
console.log(`SDK Authentication for ${error.user_id} failed with error code ${error.error_code}.`);
const newSignature = getNewTokenSomehow(error);
BrazePlugin.setSdkAuthenticationSignature(newSignature);
});
```
**iOS**
Configurez le délégué d'authentification SDK sur votre instance `Braze` :
```csharp
public class SdkAuthDelegate : BRZSdkAuthDelegate
{
public override void Braze(Braze braze, BRZSDKAuthenticationError error)
{
Console.WriteLine("Invalid SDK Authentication Token.");
string newSignature = GetNewTokenSomehow(error);
Braze.SharedInstance?.SetSDKAuthenticationSignature(newSignature);
}
}
// Set the delegate during initialization
var configuration = new BRZConfiguration("YOUR-API-KEY", "YOUR-ENDPOINT");
configuration.Api.SdkAuthentication = true;
var braze = new Braze(configuration);
braze.SdkAuthDelegate = new SdkAuthDelegate();
```
**Android**
```csharp
Braze.GetInstance(this).SubscribeToSdkAuthenticationFailures((error) => {
string newToken = GetNewTokenSomehow(error);
Braze.GetInstance(this).SetSdkAuthenticationSignature(newToken);
});
```
Lorsque vous utilisez le plugin Braze Expo, employez les mêmes méthodes du SDK React Native :
```typescript
import Braze from '@braze/react-native-sdk';
const sdkAuthErrorSubscription = Braze.addListener(
Braze.Events.SDK_AUTHENTICATION_ERROR,
(error) => {
console.log(`SDK Authentication for ${error.userId} failed with error code ${error.errorCode}.`);
const updated_jwt = getNewTokenSomehow(error);
Braze.setSdkAuthenticationSignature(updated_jwt);
}
);
// Don't forget to remove the listener when done
// sdkAuthErrorSubscription.remove();
```
### Étape 3 : Activer l'authentification dans le tableau de bord {#braze-dashboard}
Ensuite, vous pouvez activer l'authentification dans le tableau de bord de Braze pour les applications que vous avez configurées précédemment.
Gardez à l'esprit que les requêtes SDK continueront à circuler normalement sans authentification, sauf si le paramètre d'authentification SDK de l'application est défini sur **Requis** dans le tableau de bord de Braze.
En cas de problème avec votre intégration (par exemple, votre application transmet incorrectement des jetons au SDK ou votre serveur génère des jetons invalides), désactivez cette fonctionnalité dans le tableau de bord de Braze, et les données recommenceront à circuler normalement sans vérification.
#### Options d'application {#enforcement-options}
Dans la page **Gérer les paramètres** du tableau de bord, chaque application dispose de trois états d'authentification SDK qui contrôlent la manière dont Braze vérifie les requêtes.
| Réglage | Description |
| ------ | ---------- |
| **Désactivé** | Braze ne vérifiera pas le JWT fourni pour un utilisateur. (Paramètre par défaut) |
| **Facultatif** | Braze vérifiera les requêtes pour les utilisateurs connectés, mais ne rejettera pas les requêtes invalides. |
| **Requis** | Braze vérifiera les requêtes pour les utilisateurs connectés et rejettera les JWT invalides. |
{: .reset-td-br-1 .reset-td-br-2 aria-label="Options d'application #enforcement-options" }

Le paramètre **Facultatif** est un moyen utile de surveiller l'impact potentiel de cette fonctionnalité sur le trafic SDK de votre application.
Un JWT invalide sera signalé dans les deux états **Facultatif** et **Requis**, mais seul l'état **Requis** rejettera les requêtes SDK, obligeant les applications à réessayer et à demander un nouveau JWT.
## Gérer les clés publiques {#key-management}
### Ajouter une clé publique {#adding-a-public-key}
Vous pouvez ajouter jusqu'à trois clés publiques pour chaque application : une clé principale, une clé secondaire et une clé tertiaire. Si nécessaire, vous pouvez également ajouter la même clé à plusieurs applications. Pour ajouter une clé publique :
1. Rendez-vous sur le tableau de bord de Braze et sélectionnez **Settings** > **App Settings**.
2. Choisissez une application dans votre liste d'applications disponibles.
3. Sous **SDK Authentication**, sélectionnez **Add Public Key**.
4. Saisissez une description facultative, collez votre clé publique, puis sélectionnez **Add Public Key**.
### Affecter une nouvelle clé principale {#assign-a-new-primary-key}
Pour affecter une clé secondaire ou tertiaire comme nouvelle clé principale :
1. Rendez-vous sur le tableau de bord de Braze et sélectionnez **Settings** > **App Settings**.
2. Choisissez une application dans votre liste d'applications disponibles.
3. Sous **SDK Authentication**, choisissez une clé et sélectionnez **Manage** > **Make Primary Key**.
### Supprimer une clé {#deleting-a-key}
Pour supprimer une clé principale, [affectez d'abord une nouvelle clé principale](#assign-a-new-primary-key), puis supprimez votre clé. Pour supprimer une clé non principale :
1. Rendez-vous sur le tableau de bord de Braze et sélectionnez **Settings** > **App Settings**.
2. Choisissez une application dans votre liste d'applications disponibles.
3. Sous **SDK Authentication**, choisissez une clé non principale et sélectionnez **Manage** > **Delete Public Key**.
## Analyses {#analytics}
Chaque application affiche une ventilation des erreurs d'authentification SDK collectées lorsque cette fonctionnalité est dans l'état **Facultatif** ou **Requis**.
Les données sont disponibles en temps réel, et vous pouvez survoler les points du graphique pour voir la répartition des erreurs pour une date donnée.
{: style="max-width:80%"}
## Codes d'erreur {#error-codes}
| Code d'erreur | Cause de l'erreur | Description | Marche à suivre |
| -------- | ------------ | --------- | --------- |
| 10 | `EXPIRATION_REQUIRED` | L'expiration est un champ obligatoire pour l'utilisation de Braze. | Ajoutez un champ `exp` (expiration) à votre logique de création de JWT. |
| 20 | `DECODING_ERROR` | Clé publique non correspondante ou erreur générale non détectée. | Copiez votre JWT dans un outil de test JWT pour déterminer pourquoi votre JWT est dans un format invalide. |
| 21 | `SUBJECT_MISMATCH` | Les sujets attendu et réel ne sont pas les mêmes. | Le champ `sub` doit correspondre à l'ID utilisateur transmis à la méthode SDK `changeUser`. |
| 22 | `EXPIRED` | Le jeton fourni a expiré. | Prolongez la durée de validité ou actualisez périodiquement les jetons avant leur expiration. |
| 23 | `INVALID_PAYLOAD` | Le payload du jeton est invalide. | Copiez votre JWT dans un outil de test JWT pour déterminer pourquoi votre JWT est dans un format invalide. |
| 24 | `INCORRECT_ALGORITHM` | L'algorithme du jeton n'est pas pris en charge. | Modifiez votre JWT pour utiliser le chiffrement `RS256`. Les autres types ne sont pas pris en charge. |
| 25 | `PUBLIC_KEY_ERROR` | La clé publique n'a pas pu être convertie au format approprié. | Copiez votre JWT dans un outil de test JWT pour déterminer pourquoi votre JWT est dans un format invalide. |
| 26 | `MISSING_TOKEN` | Aucun jeton n'a été fourni dans la requête. | Assurez-vous que vous transmettez un jeton lors de l'appel à `changeUser(id, token)` et que votre jeton n'est pas vide. |
| 27 | `NO_MATCHING_PUBLIC_KEYS` | Aucune clé publique ne correspond au jeton fourni. | La clé privée utilisée dans le JWT ne correspond à aucune des clés publiques configurées pour votre application. Vérifiez que vous avez bien ajouté les clés publiques à l'application appropriée dans votre espace de travail correspondant à cette clé API. |
| 28 | `PAYLOAD_USER_ID_MISMATCH` | Tous les ID utilisateur dans le payload de la requête ne correspondent pas comme requis. | Ce cas est inattendu et peut entraîner un payload malformé. Ouvrez un ticket d'assistance pour obtenir de l'aide. |
{: .reset-td-br-1 .reset-td-br-2 .reset-td-br-3 .reset-td-br-4 aria-label="Codes d'erreur #error-codes" }
## Foire aux questions (FAQ) {#faq}
#### Cette fonctionnalité doit-elle être activée sur toutes mes applications en même temps ? {#faq-app-by-app}
Non, cette fonctionnalité peut être activée pour des applications spécifiques et n'a pas besoin d'être utilisée sur toutes vos applications en même temps.
#### Que se passe-t-il pour les utilisateurs qui utilisent encore des versions antérieures de mon application ? {#faq-sdk-backward-compatibility}
Lorsque vous commencez à appliquer cette fonctionnalité, les requêtes effectuées par les versions antérieures de l'application seront rejetées par Braze et relancées par le SDK. Une fois que les utilisateurs auront mis à jour leur application vers une version prise en charge, les requêtes en file d'attente seront à nouveau acceptées.
Dans la mesure du possible, vous devriez inciter les utilisateurs à effectuer la mise à jour comme pour toute autre mise à niveau obligatoire. Vous pouvez également laisser la fonctionnalité en mode [Facultatif](#enforcement-options) jusqu'à ce qu'un pourcentage acceptable d'utilisateurs ait effectué la mise à jour.
#### Quelle expiration dois-je utiliser lors de la génération d'un JWT ? {#faq-expiration}
Nous recommandons d'utiliser la valeur la plus élevée parmi : la durée moyenne de session, l'expiration du cookie/jeton de session, ou la fréquence à laquelle votre application actualise normalement le profil de l'utilisateur actuel.
#### Que se passe-t-il si un JWT expire au milieu de la session d'un utilisateur ? {#faq-jwt-expiration}
Si le jeton d'un utilisateur expire en cours de session, le SDK dispose d'une [fonction de rappel](#sdk-callback) qu'il invoquera pour indiquer à votre application qu'un nouveau JWT est nécessaire pour continuer à envoyer des données à Braze.
#### Que se passe-t-il si mon intégration côté serveur est interrompue et que je ne peux plus créer de JWT ? {#faq-server-downtime}
Si votre serveur n'est pas en mesure de fournir un JWT ou si vous remarquez un problème d'intégration, vous pouvez toujours désactiver la fonctionnalité dans le tableau de bord de Braze.
Une fois désactivée, toutes les requêtes SDK échouées en attente seront finalement relancées par le SDK et acceptées par Braze.
#### Pourquoi cette fonctionnalité utilise-t-elle des clés publiques/privées plutôt que des secrets partagés ? {#faq-shared-secrets}
Avec des secrets partagés, toute personne ayant accès à ce secret, comme la page du tableau de bord de Braze, serait en mesure de générer des jetons et d'usurper l'identité de vos utilisateurs finaux.
Nous utilisons plutôt des clés publiques/privées afin que même les employés de Braze (et a fortiori les utilisateurs de votre entreprise) n'aient pas accès à vos clés privées.
#### Comment les requêtes rejetées seront-elles relancées ? {#faq-retry-logic}
Lorsqu'une requête est rejetée en raison d'une erreur d'authentification, le SDK invoque votre rappel utilisé pour actualiser le JWT de l'utilisateur.
Les requêtes seront relancées périodiquement selon une approche de délais exponentiels. Après 50 tentatives consécutives échouées, les nouvelles tentatives seront suspendues jusqu'au début de la prochaine session. Chaque SDK dispose également d'une méthode permettant de demander manuellement un envoi des données.
#### Est-il possible d'utiliser l'authentification SDK pour les utilisateurs anonymes ? {#faq-anonymous-users}
Non. L'authentification SDK fonctionne en faisant valider l'identité d'une personne par votre site web, elle ne s'applique donc qu'aux utilisateurs identifiés. En tant qu'utilisateur anonyme, il n'y a pas d'identité à valider.
L'application de l'authentification commence après l'appel à `changeUser`. Avant qu'un utilisateur ne soit identifié (par exemple, lorsqu'il navigue de manière anonyme avant de s'inscrire), le SDK peut toujours envoyer des données à Braze sans JWT. Après l'appel à `changeUser`, les requêtes pour ce profil identifié nécessitent un JWT valide.
Cela signifie qu'un parcours utilisateur typique pourrait ressembler à ceci :
1. Un utilisateur visite votre site ou ouvre votre application de manière anonyme. Braze collecte cette activité sans JWT.
2. L'utilisateur s'inscrit ou se connecte, et votre application appelle `changeUser` avec un `external_id`.
3. Braze continue de collecter l'activité pour cet utilisateur, et l'authentification SDK est appliquée pour les requêtes concernant ce profil identifié.
#### L'authentification SDK fonctionne-t-elle avec les alias d'utilisateur ? {#faq-aliases}
Non. L'authentification SDK nécessite un `external_id`. Vous ne pouvez pas la configurer lorsque seul un `braze_id` ou un `alias_id` est disponible, les profils avec alias uniquement ne peuvent donc pas utiliser l'authentification SDK.
#### L'activation de l'authentification SDK bloque-t-elle la collecte d'activité non authentifiée ? {#faq-unauthenticated-collection}
Non. L'authentification SDK ne bloque pas la collecte légitime d'activité anonyme. Elle ne s'applique qu'après l'identification d'un profil avec `changeUser`.
# Débogage du SDK de Braze
Source: /docs/fr/developer_guide/sdk_integration/debugging/index.md
# Débogage du SDK de Braze {#debugging-the-braze-sdk}
> Découvrez comment utiliser le débogueur intégré au SDK de Braze pour résoudre les problèmes liés à vos canaux alimentés par le SDK, sans avoir à activer la journalisation détaillée dans votre application.
**Tip:**
Pour une analyse plus approfondie, vous pouvez également [activer la journalisation détaillée](https://www.braze.com/docs/fr/fr/developer_guide/sdk_integration/verbose_logging/) afin de capturer les sorties détaillées du SDK et [apprendre à lire les journaux détaillés](https://www.braze.com/docs/fr/fr/developer_guide/sdk_integration/reading_verbose_logs/) pour des canaux spécifiques.
## Conditions préalables {#prerequisites}
Pour utiliser l'outil de débogage du SDK de Braze, vous devez disposer des autorisations « View PII » et « View User Profiles (PII Redacted) ». Pour télécharger les journaux de vos sessions de débogage, vous aurez également besoin de l'autorisation « Export User Data ». De plus, votre SDK Braze doit être conforme ou pointer vers les versions minimales suivantes :
Pour collecter les journaux du débogueur lorsque `Braze.configuration.logger.level` est défini sur `.disabled`, utilisez le SDK Swift 11.9.0 ou une version ultérieure. Pour plus d'informations, consultez les [journaux des modifications Swift](https://www.braze.com/docs/fr/fr/developer_guide/changelogs/#swift_fixed-12).
## Débogage du SDK de Braze
**Tip:**
Pour activer le débogage du SDK Web de Braze, vous pouvez [utiliser un paramètre d'URL](https://www.braze.com/docs/fr/fr/developer_guide/platform_integration_guides/web/initial_sdk_setup/#logging).
### Étape 1 : Fermez votre application {#step-1-close-your-app}
Avant de commencer votre session de débogage, fermez l'application qui pose problème. Vous pourrez la relancer au début de votre session.
### Étape 2 : Créez une session de débogage {#step-2-create-a-debugging-session}
Dans Braze, accédez à **Paramètres**, puis sous **Configuration et test**, sélectionnez **Outil de débogage du SDK**.

Sélectionnez **Create debugging session**.

### Étape 3 : Sélectionnez un utilisateur {#step-3-select-a-user}
Recherchez un utilisateur à l'aide de son adresse e-mail, de son `external_id`, de son alias d'utilisateur ou de son jeton de notification push. Lorsque vous êtes prêt à démarrer votre session, sélectionnez **Select User**.
{: style="max-width:85%;"}
### Étape 4 : Relancez l'application {#step-4-relaunch-the-app}
Commencez par lancer l'application et vérifiez que votre appareil est bien apparié. Si l'appariement a réussi, relancez votre application — cela garantit que les journaux d'initialisation de l'application sont entièrement capturés.
### Étape 5 : Reproduisez les étapes {#step-5-complete-the-reproduction-steps}
Après avoir relancé votre application, suivez les étapes pour reproduire l'erreur.
**Tip:**
Lorsque vous reproduisez l'erreur, veillez à suivre les étapes de reproduction aussi fidèlement que possible afin de générer des [journaux de qualité](#step-6-export-your-session-logs-optional).
### Étape 6 : Terminez votre session {#step-6-end-your-session}
Une fois les étapes de reproduction terminées, sélectionnez **End Session** > **Close**.
{: style="max-width:85%;"}
**Note:**
La génération des journaux peut prendre quelques minutes selon la durée de la session et la connectivité réseau.
### Étape 7 : Partagez ou exportez votre session (facultatif) {#step-7-share-or-export-your-session-optional}
Après votre session, vous pouvez exporter vos journaux de session sous forme de fichier CSV. D'autres personnes peuvent également utiliser votre **Session ID** pour rechercher votre session de débogage, ce qui vous évite de leur envoyer directement vos journaux.

# Consignation prolixe
Source: /docs/fr/developer_guide/sdk_integration/verbose_logging/index.md
# Consignation prolixe
> La journalisation détaillée fournit des informations précises et de bas niveau provenant du SDK Braze, vous permettant ainsi de comprendre comment le SDK s'initialise, communique avec les serveurs et traite les canaux de communication tels que les notifications push, les messages in-app et les cartes de contenu.
Lorsque quelque chose ne fonctionne pas comme prévu, par exemple lorsqu'une notification push n'arrive pas, qu'un message in-app ne s'affiche pas ou que les données utilisateur ne se synchronisent pas, les journaux détaillés vous aident à identifier la cause profonde. Au lieu de deviner, vous pouvez observer précisément ce que fait le SDK à chaque étape.
**Tip:**
Si vous souhaitez effectuer un débogage sans activer manuellement la journalisation détaillée, vous pouvez utiliser le [débogueur SDK](https://www.braze.com/docs/fr/fr/developer_guide/sdk_integration/debugging) pour créer des sessions de débogage directement dans le tableau de bord de Braze.
## Quand utiliser la journalisation détaillée
Activez la journalisation détaillée lorsque nécessaire :
- **Vérifiez l'initialisation du SDK** : Veuillez vérifier que le SDK démarre correctement avec la clé API et l'endpoint appropriés.
- **Résolution des problèmes de réception/distribution des messages** : Veuillez vérifier si les jetons push sont enregistrés, si les messages in-app sont déclenchés ou si les cartes de contenu sont synchronisées.
- **Déboguer les liens profonds** : Veuillez vérifier que le SDK reçoit et ouvre les liens profonds provenant des notifications push, des messages in-app ou des cartes de contenu.
- **Vérifier le suivi de session** : Veuillez vérifier que les sessions commencent et se terminent comme prévu.
- **Diagnostiquer les problèmes de connectivité** : Veuillez examiner les requêtes réseau et les réponses entre le SDK et les serveurs Braze.
## Activation de la journalisation détaillée
**Important:**
Les journaux détaillés sont destinés exclusivement aux environnements de développement et de test. Veuillez désactiver la journalisation détaillée avant de déployer votre application en production afin d'éviter que des informations sensibles ne soient exposées.
Activez la journalisation détaillée avant tout autre appel SDK dans votre`Application.onCreate()`méthode afin de capturer la sortie la plus complète.
**En code :**
```java
BrazeLogger.setLogLevel(Log.VERBOSE);
```
```kotlin
BrazeLogger.logLevel = Log.VERBOSE
```
**Dans `braze.xml`:**
```xml
2
```
Pour vérifier que la journalisation détaillée est activée, veuillez rechercher`V/Braze`dans votre sortie Logcat. Par exemple :
```
2077-11-19 16:22:49.591 ? V/Braze v9.0.01 .bo.app.d3: Request started
```
Pour plus de détails, veuillez consulter [la documentation relative à la journalisation dans le SDK Android](https://www.braze.com/docs/fr/fr/developer_guide/sdk_integration#android_enabling-logs).
Veuillez définir le niveau de journalisation sur`.debug` votre`Braze.Configuration`objet lors de l'initialisation.
```swift
let configuration = Braze.Configuration(
apiKey: "",
endpoint: ""
)
configuration.logger.level = .debug
let braze = Braze(configuration: configuration)
```
```objc
BRZConfiguration *configuration = [[BRZConfiguration alloc] initWithApiKey:@""
endpoint:@""];
[configuration.logger setLevel:BRZLoggerLevelDebug];
Braze *braze = [[Braze alloc] initWithConfiguration:configuration];
```
Le`.debug`niveau est le plus détaillé et est recommandé pour la résolution des problèmes. Pour plus de détails, veuillez consulter [la documentation relative à la journalisation du SDK Swift](https://www.braze.com/docs/fr/fr/developer_guide/sdk_integration#swift_log-levels).
Veuillez ajouter`?brazeLogging=true` en tant que paramètre URL ou activer la journalisation lors de l'initialisation du SDK :
```javascript
braze.initialize('YOUR-API-KEY', {
baseUrl: 'YOUR-SDK-ENDPOINT',
enableLogging: true
});
```
Vous pouvez également basculer la journalisation après l'initialisation :
```javascript
braze.toggleLogging();
```
Les journaux apparaissent dans l'onglet **Console** des outils de développement de votre navigateur. Pour plus de détails, veuillez consulter [la section Journalisation du SDK Web](https://www.braze.com/docs/fr/fr/developer_guide/sdk_integration#web_logging).
1. Ouvrez les paramètres de configuration de Braze en sélectionnant **Braze** > **Configuration de Braze**.
2. Veuillez sélectionner le menu déroulant **Afficher les paramètres Android de Braze**.
3. Dans le champ **Niveau de journalisation SDK**, veuillez saisir `0`.
Définissez le niveau de journalisation lors de la configuration du SDK :
```javascript
const configuration = new Braze.BrazeConfiguration('YOUR-API-KEY', 'YOUR-SDK-ENDPOINT');
configuration.logLevel = Braze.LogLevel.Verbose;
```
## Collecte des journaux
Après avoir activé la journalisation détaillée, veuillez reproduire le problème que vous rencontrez lors de la résolution des problèmes, puis collecter les journaux à partir de la console ou de l'outil de débogage de votre plateforme.
Veuillez utiliser **Logcat** dans Android Studio pour enregistrer les journaux :
1. Veuillez connecter votre appareil ou démarrer un émulateur.
2. Dans Android Studio, veuillez ouvrir **Logcat** à partir du panneau inférieur.
3. Veuillez filtrer par`V/Braze`ou`D/Braze`pour isoler la sortie du SDK Braze.
4. Veuillez reproduire le problème.
5. Veuillez copier les journaux pertinents et les enregistrer dans un fichier texte.
Veuillez utiliser l'application **Console** sur macOS pour enregistrer les journaux :
1. Veuillez installer l'application sur votre appareil avec la journalisation détaillée activée.
2. Veuillez connecter votre appareil à votre Mac.
3. Veuillez ouvrir l'application **Console** et sélectionner votre appareil dans la barre latérale **Appareils**.
4. Veuillez filtrer les journaux en utilisant`Braze` ou`BrazeKit` dans la barre de recherche.
5. Veuillez reproduire le problème.
6. Veuillez copier les journaux pertinents et les enregistrer dans un fichier texte.
Veuillez utiliser les outils de développement de votre navigateur :
1. Veuillez ouvrir les outils de développement de votre navigateur (généralement **F12** ou **Cmd+Option+I**).
2. Veuillez vous rendre dans l'onglet **Console**.
3. Veuillez reproduire le problème.
4. Veuillez copier la sortie de la console et l'enregistrer dans un fichier texte.
**Tip:**
Lorsque vous collectez des journaux pour l'assistance Braze, veuillez commencer l'enregistrement avant de lancer votre application et poursuivre jusqu'à ce que le problème soit résolu. Cela permet de saisir l'intégralité de la séquence des événements.
## Lecture des journaux détaillés
Les journaux détaillés suivent une structure cohérente qui vous aide à suivre les activités du SDK. Pour apprendre à interpréter les sorties de journal pour des canaux spécifiques, y compris les entrées clés à rechercher et les modèles de résolution des problèmes courants, veuillez consulter [la section Lecture des journaux détaillés](https://www.braze.com/docs/fr/fr/developer_guide/sdk_integration/reading_verbose_logs).
## Partage des journaux avec le service d'assistance Braze
Lorsque vous contactez l'assistance Braze pour un problème lié au SDK, veuillez inclure les informations suivantes :
1. **Fichier journal détaillé** : Enregistrement complet des journaux depuis avant le lancement de l'application jusqu'à la survenue du problème.
2. **Étapes à suivre pour reproduire** le problème : Une description claire des actions de déclenchement du problème.
3. **Comportement attendu par rapport au comportement réel** : Ce que vous vous attendiez à ce qui se produise et ce qui s'est produit à la place.
4. **Version du SDK** : La version du SDK Braze que vous utilisez.
5. **Plateforme et version du système d'exploitation** : Par exemple, iOS 18.0, Android 14 ou Chrome 120.
# Lecture des journaux détaillés
Source: /docs/fr/developer_guide/sdk_integration/reading_verbose_logs/index.md
# Lecture des journaux détaillés {#reading-verbose-logs}
> Cette page explique comment interpréter les journaux détaillés générés par le SDK Braze. Pour chaque canal de communication, vous trouverez les entrées de journal importantes à rechercher, leur signification et les problèmes courants à surveiller.
Avant de commencer, assurez-vous d'avoir [activé la journalisation détaillée](https://www.braze.com/docs/fr/fr/developer_guide/sdk_integration/verbose_logging/) et de savoir comment collecter les journaux sur votre plateforme.
## Sessions {#sessions}
Les sessions constituent la base de l'analytique et de la distribution des messages de Braze. De nombreuses fonctionnalités d'envoi de messages, notamment les messages in-app et les Content Cards, nécessitent qu'une session valide soit démarrée avant de pouvoir fonctionner. Si les sessions ne sont pas enregistrées correctement, examinez ce point en priorité. Pour plus d'informations sur l'activation du suivi des sessions, consultez [Étape 5 : Activer le suivi des sessions utilisateur](https://www.braze.com/docs/fr/fr/developer_guide/sdk_integration/?sdktab=android#android_step-5-enable-user-session-tracking).
### Entrées de journal clés {#key-log-entries}
**Début de session :**
```
Started user session (id: )
```
**Fin de session :**
```
Ended user session (id: , duration: s)
Logged event:
- userId:
- sessionId:
- data: sessionEnd(duration: )
```
**Début de session :**
Recherchez les entrées suivantes :
```
New session created with ID:
Session start event for new session received
Completed the openSession call
Opened session with activity:
```
Filtrez les requêtes réseau vers votre endpoint Braze configuré (par exemple, sdk.iad-01.braze.com) pour voir l'événement de début de session (`ss`).
**Fin de session :**
```
Closed session with activity:
Closed session with session ID:
Requesting data flush on internal session close flush timer.
```
### Éléments à vérifier {#what-to-check}
- Vérifiez qu'un journal de début de session apparaît lorsque l'application est lancée.
- Si vous ne voyez pas de début de session, vérifiez que le SDK est correctement initialisé et que `openSession` (Android) est bien appelé.
- Sur Android, confirmez qu'une requête réseau est envoyée à l'endpoint Braze. Si vous ne la voyez pas, vérifiez votre clé API et la configuration de l'endpoint.
## Notifications push {#push-notifications}
Les journaux des notifications push vous permettent de vérifier que les jetons d'appareil sont enregistrés, que les notifications sont distribuées et que les événements de clic sont suivis.
### Enregistrement du jeton {#token-registration}
Lorsqu'une session démarre, le SDK enregistre le jeton push de l'appareil auprès de Braze.
```
Updated push notification authorization:
- authorization: authorized
Received remote notifications device token:
```
Filtrez les requêtes vers votre endpoint Braze configuré (par exemple, sdk.iad-01.braze.com) et recherchez `push_token` dans les attributs du corps de la requête :
```
"attributes": [
{
"push_token": "",
"user_id": ""
}
]
```
Confirmez également que les informations de l'appareil incluent :
```
"device": {
"ios_push_auth": "authorized",
"remote_notification_enabled": 1
}
```
Recherchez le journal d'enregistrement FCM :
```
Registering for Firebase Cloud Messaging token using sender id:
```
Vérifiez les éléments suivants :
- `com_braze_firebase_cloud_messaging_registration_enabled` est `true`.
- L'ID d'expéditeur FCM correspond à votre projet Firebase.
Une erreur courante est `SENDER_ID_MISMATCH`, ce qui signifie que l'ID d'expéditeur configuré ne correspond pas à votre projet Firebase.
### Éléments à vérifier
- Si `push_token` est absent du corps de la requête, le jeton n'a pas été capturé. Vérifiez la configuration push dans les paramètres de votre application.
- Si `ios_push_auth` affiche `denied` ou `provisional`, l'utilisateur n'a pas accordé l'autorisation push complète.
- Sur Android, si vous voyez `SENDER_ID_MISMATCH`, mettez à jour votre ID d'expéditeur FCM pour qu'il corresponde à votre projet Firebase.
### Distribution et clic push {#push-delivery-and-click}
Lorsqu'une notification push est sélectionnée, le SDK enregistre les événements de traitement et de clic.
```
Processing push notification:
- date:
- silent: false
- userInfo: {
"ab": { ... },
"ab_uri": "",
"aps": {
"alert": {
"body": "",
"title": ""
}
}
}
```
Suivi de l'événement de clic :
```
Logged event:
- userId:
- sessionId:
- data: pushClick(campaignId: ...)
```
Si la notification contient un lien profond, vous verrez également :
```
Opening '':
- channel: notification
- useWebView: false
- isUniversalLink: false
```
```
BrazeFirebaseMessagingService: Got Remote Message from FCM
```
Suivi du payload push et des journaux d'affichage. Pour les liens profonds, recherchez les entrées **Deep Link Delegate** ou **UriAction**.
### Éléments à vérifier
- Vérifiez que le payload de la notification push contient les éléments attendus : `title`, `body` et les liens profonds éventuels (`ab_uri`).
- Confirmez qu'un événement `pushClick` est enregistré après l'appui.
- Si l'événement de clic est manquant, vérifiez que votre délégué d'application ou votre gestionnaire de notifications transmet correctement les événements push au SDK Braze.
## Messages in-app {#in-app-messages}
Les journaux des messages in-app vous montrent l'ensemble du cycle de vie : distribution depuis le serveur, déclenchement en fonction des événements, affichage, enregistrement des impressions et suivi des clics.
### Distribution des messages {#message-delivery}
Lorsqu'un utilisateur démarre une session et est éligible à un message in-app, le SDK reçoit le payload du message depuis le serveur.
Filtrez les réponses provenant de votre endpoint Braze configuré (par exemple, sdk.iad-01.braze.com) contenant les données du message in-app.
Le corps de la réponse contient le payload du message, notamment :
```
"templated_message": {
"data": {
"message": "...",
"type": "HTML",
"message_close": "SWIPE",
"trigger_id": ""
},
"type": "inapp"
}
```
Recherchez le journal de correspondance de l'événement déclencheur :
```
Triggering action:
```
Cela confirme que le message in-app a été associé à un événement déclencheur.
### Affichage et impression du message {#message-display-and-impression}
```
In-app message ready for display:
- triggerId: (campaignId: , ...)
- extras: { ... }
```
Suivi du journal d'impression :
```
Logged event:
- userId:
- sessionId:
- data: inAppMessageImpression(triggerIds: [...])
```
```
handleExistingInAppMessagesInStackWithDelegate:: Displaying in-app message
```
### Événements de clic et de bouton {#click-and-button-events}
Lorsqu'un utilisateur appuie sur un bouton ou ferme le message :
```
Logged event:
- userId:
- sessionId:
- data: inAppMessageButtonClick(triggerIds: [...], buttonId: "")
```
Si aucun autre message déclenché ne correspond, vous verrez également :
```
No matching trigger for event.
```
Ce comportement est normal lorsqu'aucun message in-app supplémentaire n'est configuré pour l'événement.
Filtrez les requêtes vers votre endpoint Braze configuré (par exemple, sdk.iad-01.braze.com) et recherchez les événements portant le nom `sbc` (clic sur bouton) ou `si` (impression) dans le corps de la requête.
### Éléments à vérifier
- Si le message in-app ne s'affiche pas, vérifiez qu'un début de session a bien été enregistré au préalable.
- Filtrez les réponses provenant de votre endpoint Braze configuré pour confirmer que le payload du message a bien été distribué.
- Si les impressions ne sont pas enregistrées, vérifiez que vous n'avez pas implémenté un délégué `inAppMessageDisplay` personnalisé qui supprime l'enregistrement.
- Si « No matching trigger for event » apparaît, c'est normal et cela indique qu'aucun message in-app supplémentaire n'est configuré pour cet événement.
## Content Cards
Les journaux des Content Cards vous permettent de vérifier que les cartes sont synchronisées avec l'appareil, affichées à l'utilisateur et que les interactions (impressions, clics, rejets) sont suivies.
### Synchronisation des cartes {#card-sync}
Les Content Cards se synchronisent au début de la session et lorsqu'une actualisation manuelle est demandée. Si aucune session n'est enregistrée, aucune Content Card n'est affichée.
Filtrez les réponses provenant de votre endpoint Braze configuré (par exemple, sdk.iad-01.braze.com) contenant les données des cartes.
Le corps de la réponse contient les données des cartes, notamment :
```
"cards": [
{
"id": "",
"tt": "",
"ds": "",
"tp": "short_news",
"v": 0,
"cl": 0,
"p": 1
}
]
```
Champs clés :
- `v` (vu) : `0` = non vu, `1` = vu
- `cl` (cliqué) : `0` = non cliqué, `1` = cliqué
- `p` (épinglé) : `0` = non épinglé, `1` = épinglé
- `tp` (type) : `short_news`, `captioned_image`, `classic`, etc.
```
Requesting content cards sync.
```
Suivi d'une requête POST vers votre endpoint Braze configuré (par exemple, sdk.iad-01.braze.com) contenant les informations de l'utilisateur et de l'appareil.
### Impressions, clics et rejets {#impressions-clicks-and-dismissals}
**Impression :**
```
Logged event:
- userId:
- sessionId:
- data: contentCardImpression(cardIds: [...])
```
**Clic :**
```
Logged event:
- userId:
- sessionId:
- data: contentCardClick(cardIds: [...])
```
Si la carte comporte une URL, vous verrez également :
```
Opening '':
- channel: contentCard
- useWebView: true
```
**Rejet :**
```
Logged event:
- userId:
- sessionId:
- data: contentCardDismissed(cardIds: [...])
```
Filtrez les requêtes vers votre endpoint Braze configuré (par exemple, sdk.iad-01.braze.com) et recherchez les noms d'événements dans le corps de la requête :
- `cci` — Impression de Content Card
- `ccc` — Clic sur Content Card
- `ccd` — Content Card rejetée
### Éléments à vérifier
- **Aucune carte affichée** : vérifiez qu'un début de session est bien enregistré. Les Content Cards nécessitent une session active pour se synchroniser.
- **Cartes manquantes pour les nouveaux utilisateurs** : les nouveaux utilisateurs lors de leur première session peuvent ne pas voir les Content Cards avant la session suivante. Il s'agit d'un comportement normal.
- **La carte dépasse la limite de taille** : les Content Cards de plus de 2 Ko ne sont pas affichées et le message est abandonné.
- **La carte persiste après l'arrêt de la campagne** : vérifiez que la synchronisation s'est terminée après l'arrêt de la campagne. Les Content Cards sont supprimées de l'appareil après une synchronisation réussie. Lorsque vous arrêtez une campagne, assurez-vous que l'option permettant de supprimer les cartes actives des flux des utilisateurs est sélectionnée.
## Liens profonds {#deep-links}
Les journaux de liens profonds apparaissent dans les notifications push, les messages in-app et les Content Cards. La structure du journal est cohérente quel que soit le canal source.
Lorsque le SDK traite un lien profond :
```
Opening '':
- channel:
- useWebView: false
- isUniversalLink: false
- extras: { ... }
```
Où `` est l'un des suivants : `notification`, `inAppMessage` ou `contentCard`.
Pour les liens profonds, recherchez les entrées **Deep Link Delegate** ou **UriAction** dans Logcat. Pour tester la résolution des liens profonds de manière indépendante, exécutez la commande suivante :
```bash
adb shell am start -W -a android.intent.action.VIEW -d "" ""
```
Cela permet de vérifier si le lien profond fonctionne correctement en dehors du SDK Braze.
### Éléments à vérifier
- Vérifiez que l'URL du lien profond correspond à celle que vous avez configurée dans la campagne.
- Si le lien profond fonctionne depuis un canal (par exemple, push) mais pas depuis un autre (par exemple, Content Cards), vérifiez que votre implémentation de gestion des liens profonds prend en charge tous les canaux.
- Sur iOS, les liens universels nécessitent un traitement supplémentaire. Si les liens universels ne fonctionnent pas depuis les canaux Braze, vérifiez que votre application implémente le protocole `BrazeDelegate` pour la gestion des URL.
- Sur Android, vérifiez que la gestion automatique des liens profonds est désactivée si vous utilisez un gestionnaire personnalisé. Sinon, le gestionnaire par défaut pourrait entrer en conflit avec votre implémentation.
## Identification de l'utilisateur {#user-identification}
Lorsqu'un utilisateur est identifié avec un `external_id`, le SDK enregistre un événement de changement d'utilisateur.
```
changeUser called with:
```
Points importants à connaître :
- Appelez `changeUser` dès que l'utilisateur se connecte — le plus tôt sera le mieux.
- Si un utilisateur se déconnecte, il n'est pas possible d'appeler `changeUser` pour le ramener à un utilisateur anonyme.
- Si vous ne souhaitez pas d'utilisateurs anonymes, appelez `changeUser` au début de la session ou au démarrage de l'application.
Filtrez les requêtes vers votre endpoint Braze configuré (par exemple, sdk.iad-01.braze.com) et recherchez l'identification de l'utilisateur dans le corps de la requête :
```
"user_id": ""
```
## Requêtes réseau {#network-requests}
Les journaux détaillés incluent l'ensemble des détails des requêtes et réponses HTTP pour la communication du SDK avec les serveurs Braze. Ces informations sont utiles pour diagnostiquer les problèmes de connectivité.
### Structure de la requête {#request-structure}
Filtrez les requêtes vers votre endpoint Braze configuré (par exemple, sdk.iad-01.braze.com). La structure de la requête comprend :
```
[http] request POST:
- Headers:
- Content-Type: application/json
- X-Braze-Api-Key:
- X-Braze-Req-Attempt: 1
- X-Braze-Req-Tokens-Remaining:
- Body: { ... }
```
```
Making request(id = ) to
```
### Éléments à vérifier
- **Clé API** : vérifiez que `X-Braze-Api-Key` correspond à la clé API de votre espace de travail.
- **Endpoint** : confirmez que l'URL de la requête correspond à l'endpoint SDK que vous avez configuré.
- **Tentatives de réessai** : une valeur de `X-Braze-Req-Attempt` supérieure à 1 indique que le SDK réessaie une requête échouée, ce qui peut signaler des problèmes de connectivité.
- **Limite de débit** : `X-Braze-Req-Tokens-Remaining` affiche les jetons de requête restants. Un nombre faible peut indiquer que le SDK approche des limites de débit.
- **Requêtes manquantes** : sur Android, si vous ne voyez aucune requête vers l'endpoint Braze après le début de la session, vérifiez votre clé API et la configuration de l'endpoint.
## Abréviations courantes des événements {#common-event-abbreviations}
Dans les payloads des journaux détaillés, Braze utilise des noms d'événements abrégés. Voici une référence :
| Abréviation | Événement |
|---|---|
| `ss` | Début de session |
| `se` | Fin de session |
| `si` | Impression de message in-app |
| `sbc` | Clic sur bouton de message in-app |
| `cci` | Impression de Content Card |
| `ccc` | Clic sur Content Card |
| `ccd` | Content Card rejetée |
| `lr` | Localisation enregistrée |
{: .reset-td-br-1 .reset-td-br-2 aria-label="Abréviations courantes des événements" }
## Résolution des problèmes {#troubleshooting}
### Quand un utilisateur peut-il avoir 0 session enregistrée sur son profil ? {#when-might-a-user-have-0-sessions-recorded-against-their-profile}
Un profil utilisateur peut afficher 0 session lorsque vous importez l'utilisateur via la REST API ([`/users/track`](https://www.braze.com/docs/fr/fr/api/endpoints/user_data/post_user_track/)) ou par importation CSV sans les champs **First session** ou **Last session**. Les sessions sont enregistrées lorsque les utilisateurs interagissent avec votre application via le SDK. Pour plus de détails, consultez [Le profil utilisateur a 0 session](https://www.braze.com/docs/fr/fr/developer_guide/analytics/tracking_sessions/#user-profile-has-0-sessions).
### Divergences de données utilisateur lors de l'utilisation simultanée du SDK et de la REST API {#user-data-discrepancies-when-using-the-sdk-and-rest-api-together}
Lorsque vous utilisez le SDK et la REST API en même temps, des conditions de concurrence peuvent entraîner des divergences de données. Après avoir appelé `changeUser()`, laissez le SDK vider les données en attente avant d'effectuer des appels critiques à la REST API, évitez de regrouper les mises à jour sensibles au temps et envisagez d'ajouter un court délai entre les requêtes SDK et API. Pour le comportement de `changeUser()`, consultez [Fonctionnement de changeUser()](https://www.braze.com/docs/fr/fr/developer_guide/analytics/setting_user_ids/#how-changeuser-works).
### Les données n'atteignent pas Braze {#data-not-reaching-braze}
Si les données n'atteignent pas Braze, confirmez que votre pare-feu autorise le trafic sortant vers les endpoints de l'API Braze et les fournisseurs de réseau de diffusion de contenu. Exécutez un test MTR et utilisez [Fastly Debug](https://www.fastly-debug.com/) pendant que le problème se produit. Pour la mise en liste d'autorisation et la résolution des problèmes de connectivité, consultez [Problèmes de connectivité réseau de l'API](https://www.braze.com/docs/fr/fr/api/network_connectivity_issues/).
# Limites de débit du SDK Braze
Source: /docs/fr/developer_guide/sdk_integration/rate_limits/index.md
# Limites de débit du SDK Braze {#braze-sdk-rate-limits}
> Découvrez la limite de débit intelligente côté client du SDK Braze, qui optimise l'autonomie de la batterie, réduit l'utilisation de la bande passante et garantit une distribution fiable des données.
## Comprendre les limites de débit du SDK {#understanding-sdk-rate-limits}
La limite de débit du SDK Braze utilise les fonctionnalités suivantes pour optimiser les performances, minimiser la consommation de batterie, réduire l'utilisation des données et garantir une distribution fiable des données :
### Traitement asynchrone {#asynchronous-processing}
Le SDK Braze utilise un algorithme de type « token bucket » pour établir la limite de débit. Cette approche permet des pics d'activité tout en maintenant un contrôle du débit à long terme. Au lieu de traiter les requêtes dans une file d'attente stricte, le token bucket fonctionne de manière asynchrone :
- **Génération de jetons** : Les jetons sont réapprovisionnés à un rythme régulier dans le compartiment.
- **Traitement des requêtes** : Tout appel SDK qui arrive lorsqu'un jeton est disponible est traité immédiatement, indépendamment du moment où les autres appels sont arrivés.
- **Aucun ordre strict** : Les requêtes ne sont pas mises en attente ; plusieurs appels peuvent entrer en concurrence pour le prochain jeton disponible.
- **Gestion des rafales** : De courtes périodes d'activité intense sont autorisées si un nombre suffisant de jetons est disponible au moment des requêtes.
- **Contrôle du débit** : Le débit à long terme est limité par le taux de réapprovisionnement régulier des jetons.
Ce flux asynchrone permet au SDK de réagir rapidement à la capacité réseau disponible tout en maintenant des niveaux de trafic globaux prévisibles.
### Limitation adaptative du débit {#adaptive-rate-limiting}
Le SDK Braze peut ajuster les limites de débit en temps réel afin de protéger l'infrastructure réseau et de maintenir des performances optimales. Cette approche :
- **Empêche la surcharge** : Ajuste les limites afin d'éviter la congestion du réseau.
- **Optimise les performances** : Assure le bon fonctionnement du SDK dans diverses conditions.
- **Réagit aux conditions** : S'adapte en fonction du réseau actuel et des habitudes d'utilisation.
**Note:**
Étant donné que les limites s'adaptent en temps réel, les tailles exactes des compartiments et les valeurs statiques ne sont pas fournies. Elles peuvent varier en fonction des conditions du réseau et de l'utilisation.
### Optimisations réseau {#networking-optimizations}
Le SDK Braze intègre plusieurs comportements visant à améliorer l'efficacité, réduire la consommation de batterie et gérer les conditions réseau variables :
- **Regroupement automatique** : Met les événements en file d'attente et les envoie par lots de manière efficace.
- **Comportement adapté au réseau** : Ajuste les fréquences d'envoi en fonction de la qualité de la connexion.
- **Optimisation de la batterie** : Réduit au minimum les réveils radio et les appels réseau.
- **Dégradation gracieuse** : Maintient les fonctionnalités même lorsque les conditions réseau sont défavorables.
- **Gestion arrière-plan/premier plan** : Optimise le comportement en fonction du cycle de vie de l'application.
## Bonnes pratiques {#best-practices}
Suivez ces bonnes pratiques pour éviter les problèmes liés aux limites de débit :
| À faire | À éviter |
| --- | --- |
| Suivre les actions significatives des utilisateurs et les jalons importants | Suivre chaque interaction mineure ou événement de l'interface utilisateur |
| Actualiser le contenu uniquement lorsque c'est nécessaire | Actualiser le contenu à chaque action de l'utilisateur (comme les événements de défilement) |
| Laisser le SDK gérer automatiquement le traitement par lots | Forcer la transmission immédiate des données (sauf en cas d'absolue nécessité) |
| Se concentrer sur les événements qui apportent une valeur ajoutée à l'analyse | Appeler les méthodes du SDK rapidement les unes après les autres sans tenir compte de la fréquence |
{: .reset-td-br-1 .reset-td-br-2 aria-label="Bonnes pratiques" }
## Obtenir de l'aide {#getting-help}
Si vous rencontrez des problèmes liés à la limite de débit du SDK, examinez les méthodes réseau suivantes :
- `requestImmediateDataFlush()`
- `requestContentCardsRefresh()`
- `refreshFeatureFlags()`
- `logCustomEvent()`
- `logPurchase()`
Lorsque vous contactez l'[Assistance Braze](https://www.braze.com/docs/fr/fr/user_guide/administer/personal/braze_support/), incluez les informations suivantes pour chacune des méthodes réseau du SDK que vous utilisez :
```plaintext
Method name:
Frequency:
[Describe how often this is called, e.g., at every app launch, once per session]
Trigger/context:
[Describe what causes it to be called, e.g., button click, scroll event]
Code snippet:
[Paste the exact code where this method is called, one snippet for each time it is called]
Patterns in user flow that may cause bursts or excessive calls:
[Describe here]
```
# Intégrer Braze aux applications ChatGPT
Source: /docs/fr/developer_guide/sdk_integration/chatgpt_apps/index.md
# Intégrer Braze aux applications ChatGPT {#integrate-braze-with-chatgpt-apps}
> Ce guide explique comment intégrer Braze aux applications ChatGPT afin de permettre l'analyse et la journalisation des événements dans les applications basées sur l'intelligence artificielle.
{: style="float:right;max-width:30%;border:none;" }
## Aperçu {#overview}
Les applications ChatGPT offrent une plateforme performante pour créer des applications conversationnelles basées sur l'intelligence artificielle. En intégrant Braze à votre application ChatGPT, vous pouvez continuer à contrôler vos données first-party à l'ère de l'intelligence artificielle, notamment en ce qui concerne :
- Le suivi de l'engagement et du comportement des utilisateurs au sein de votre application ChatGPT (par exemple, en identifiant les questions ou les fonctionnalités de chat que vos clients utilisent).
- La segmentation et le reciblage des campagnes Braze en fonction des modèles d'interaction basés sur l'intelligence artificielle (par exemple, en envoyant des e-mails aux utilisateurs qui ont utilisé le chat plus de trois fois par semaine).
### Principaux avantages {#key-benefits}
- **Maîtrisez le parcours client :** Lorsque les utilisateurs interagissent avec votre marque via ChatGPT, vous conservez une visibilité sur leur comportement, leurs préférences et leurs habitudes d'engagement. Ces données sont directement transférées vers les profils utilisateurs Braze, et non pas uniquement vers les analyses de la plateforme d'intelligence artificielle.
- **Reciblage multiplateforme :** Suivez les interactions des utilisateurs dans votre application ChatGPT et reciblez-les sur vos canaux propriétaires (e-mail, SMS, notifications push, messages in-app) avec des campagnes personnalisées basées sur leurs habitudes d'utilisation de l'intelligence artificielle.
- **Renvoyez du contenu promotionnel 1:1 dans les conversations ChatGPT :** Diffusez des [messages in-app](https://www.braze.com/docs/fr/fr/user_guide/channels/in_app_messages/) Braze, des [Content Cards](https://www.braze.com/docs/fr/fr/user_guide/channels/content_cards/) et bien plus encore directement dans votre expérience ChatGPT à l'aide des composants d'interface utilisateur conversationnelle personnalisés que votre équipe a créés pour votre application.
- **Attribution du chiffre d'affaires :** Suivez les achats et les conversions provenant des interactions avec l'application ChatGPT.
## Conditions préalables {#prerequisites}
Avant d'intégrer Braze à votre application ChatGPT, vous devez disposer des éléments suivants :
- Une nouvelle application web et une clé API dans votre espace de travail Braze
- Une [application ChatGPT](https://openai.com/index/introducing-apps-in-chatgpt/) créée sur la plateforme OpenAI ([application exemple OpenAI](https://github.com/openai/openai-apps-sdk-examples))
# ChatGPT app integration
## Setup
### Step 1: Get the Braze integration file
Copy the `braze.js` file from our [ChatGPT apps integration repository](https://github.com/braze-inc/chatgpt-apps-braze-integration/blob/main/src/braze/braze.ts) to your project. This file contains all the necessary Braze SDK configuration and helper functions.
### Step 2: Install dependencies
Install our Web SDK for Braze's most up-to-date set of features:
**For client-side integration:**
```bash
npm install @braze/web-sdk
```
## Implementation
There are two ways to integrate Braze with your ChatGPT app depending on your use case:
### Client-side integration (custom widgets)
**Tip:**
**Recommended Approach:** This method enables rich messaging experiences and real-time user interaction tracking within your ChatGPT app widgets.
For displaying Braze messaging and tracking user interactions within your custom ChatGPT app widgets, use the Web SDK integration. A full messaging example can be found in our sample repository [here](https://github.com/braze-inc/chatgpt-apps-braze-integration/tree/main/src/inbox).
#### Configure widget metadata
Add the following metadata to your MCP server file to allow Braze domains, ensuring to update the CDN domain based on [your region](https://www.braze.com/docs/fr/fr/developer_guide/platforms/web/content_security_policy):
```javascript
"openai/widgetCSP": {
connect_domains: ["https://YOUR-SDK-ENDPOINT"],
resource_domains: [
"https://appboy-images.com",
"https://braze-images.com",
"https://cdn.braze.eu",
"https://use.fontawesome.com"
],
}
```
Replace `YOUR-SDK-ENDPOINT` with your actual Braze SDK endpoint.
#### Set up the useBraze hook
```javascript
import { useBraze } from "./utils/braze";
function YourWidget() {
const braze = useBraze({
apiKey: "your-braze-api-key",
baseUrl: "your-braze-endpoint.braze.com",
});
useEffect(() => {
if (!braze.isInitialized) {
return;
}
// Set user identity
braze.changeUser("user-id-123");
// Log widget interactions
braze.logCustomEvent("viewed_pizzaz_list");
}, [braze.isInitialized]);
return (
// Your widget JSX
);
}
```
#### Display Braze Content Cards
```javascript
const [cards, setCards] = useState([]);
useEffect(() => {
// Get cached content cards
setCards(braze.getCachedContentCards()?.cards ?? []);
// Subscribe to content card updates
braze.subscribeToContentCardsUpdates((contentCards) => {
setCards(contentCards.cards);
});
// Open session
braze.openSession();
return () => {
braze.removeAllSubscriptions();
}
}, []);
```
#### Track widget events
```javascript
// Track user interactions within your widget
const handleButtonClick = () => {
braze.logCustomEvent("widget_button_clicked", {
button_type: "save_list",
widget_name: "pizza_list"
});
};
const handleItemInteraction = (itemId) => {
braze.logCustomEvent("item_interacted", {
item_id: itemId,
interaction_type: "view_details"
});
};
```
### Server-side integration (MCP server)
If you also need a server-side integration for messaging functionality on your MCP server, contact `mcp-product@braze.com`. For tracking events and purchases from your MCP server, use our [REST API](https://www.braze.com/docs/fr/fr/api/home).
# À propos de la gestion des versions du SDK de Braze
Source: /docs/fr/developer_guide/sdk_integration/version_management/index.md
# À propos de la gestion des versions {#about-version-management}
> Découvrez la gestion des versions du SDK de Braze, afin que votre application puisse bénéficier des dernières fonctionnalités et améliorations de qualité. Étant donné que les anciennes versions du SDK peuvent ne pas recevoir les derniers correctifs, corrections de bogues ou l'assistance la plus récente, nous vous recommandons de toujours maintenir votre SDK à jour dans le cadre de votre cycle de développement continu.
## Recommandations en matière de versions {#versioning-recommendations}
Tous les SDK de Braze respectent la [spécification de versionnement sémantique (SemVer)](https://semver.org/). Pour un numéro de version `MAJOR.MINOR.PATCH`, voici nos recommandations :
| Version | À propos de cette version | Recommandation |
|-------|------------------|--------------|
| `PATCH` | Les mises à jour sont toujours non cassantes et comprennent d'importantes corrections de bogues. Elles sont toujours sûres à appliquer. | Vous devriez toujours essayer de mettre à jour immédiatement vers la dernière version de correctif de votre version majeure et mineure actuelle. |
| `MINOR` | Les mises à jour sont toujours non cassantes et comprennent de nouvelles fonctionnalités. Elles ne nécessiteront jamais de modification du code de votre application. | Bien qu'il ne soit pas nécessaire de le faire immédiatement, vous devriez mettre à jour vers la dernière version mineure de votre version majeure actuelle dès que possible.
| `MAJOR` | Les mises à jour sont des changements cassants qui peuvent nécessiter des modifications du code de votre application. | Comme cela peut nécessiter des modifications de code, mettez à jour vers la dernière version majeure dans un délai qui convient le mieux à votre équipe. |
{: .reset-td-br-1 .reset-td-br-2 .reset-td-br-3 aria-label="Recommandations en matière de versions" }
**Note:**
Il arrive que de nouvelles mises à jour des systèmes d'exploitation Android ou Apple nécessitent des modifications du SDK de Braze. Pour que votre application reste compatible avec les téléphones plus récents, il est important de maintenir votre SDK à jour.
## Recevoir des notifications pour les nouvelles versions {#getting-notified-of-new-releases}
Pour recevoir des notifications automatiques lorsqu'une nouvelle version du SDK est publiée, vous pouvez surveiller le dépôt GitHub de n'importe quel SDK de Braze :
1. Accédez au dépôt GitHub du SDK (par exemple, [braze-android-sdk](https://github.com/braze-inc/braze-android-sdk), [braze-swift-sdk](https://github.com/braze-inc/braze-swift-sdk) ou [braze-web-sdk](https://github.com/braze-inc/braze-web-sdk)).
2. Cliquez sur **Watch** dans le coin supérieur droit.
3. Cliquez sur **Custom**, puis sélectionnez **Releases** et cliquez sur **Apply**.
Vous recevrez une notification GitHub (ainsi qu'un e-mail, selon vos [paramètres de notification](https://github.com/settings/notifications)) chaque fois qu'une nouvelle version est publiée. Pour la liste complète des dépôts SDK, consultez [Références, dépôts et exemples d'applications](https://www.braze.com/docs/fr/fr/developer_guide/references/).
## À propos des problèmes connus {#about-known-issues}
Afin de garantir que nos changements ne cassent pas vos pipelines de build, **nous ne modifions ni ne supprimons jamais une version après sa publication sur un système de distribution**—même si cette version présente des problèmes connus.
Dans ce cas, nous documentons le problème dans le [journal des modifications du SDK de Braze](https://www.braze.com/docs/fr/fr/developer_guide/changelogs/), puis nous publions un nouveau correctif pour les versions majeures ou mineures concernées dès que possible.
# Guide de mise à niveau vers Android 13
Source: /docs/fr/developer_guide/platforms/android/android_13/index.md
# Upgrading to Android 13
> This guide describes relevant changes introduced in Android 13 (2022) and the required upgrade steps for your Braze Android SDK integration.
Refer to the [Android 13 developer documentation](https://developer.android.com/about/versions/13) for a full migration guide.
## Android 13 Braze SDK
To prepare for Android 13, please upgrade your Braze SDK to the [latest version (v21.0.0+)](https://github.com/braze-inc/braze-android-sdk/blob/master/CHANGELOG.md#2300). Doing so will give you access to our new ["no-code" push primer feature](https://www.braze.com/docs/fr/fr/user_guide/message_building_by_channel/push/best_practices/push_primer_messages/).
## Changes in Android 13
### Push permission {#push-permission}
Android 13 introduces a [major change](https://developer.android.com/about/versions/13/changes/notification-permission) in how users manage apps that send push notifications. In Android 13, apps are required to obtain permission before push notifications can be shown.
{: style="float:right;max-width:430px;width:50%;margin-left:15px;border:0"}
This new permission follows a similar pattern to iOS and Web push, where you only have one attempt to obtain permission. If a user chooses `Don't Allow` or dismisses the prompt, your app cannot ask for permission again.
Note that apps are granted an [exemption](https://developer.android.com/about/versions/13/changes/notification-permission#eligibility) for users who previously had push notifications enabled prior to updating to Android 13. These users [will remain eligible](https://developer.android.com/about/versions/13/changes/notification-permission#existing-apps) to receive push when they update to Android 13 without having to request permission.
#### Permission prompt timing {#push-permission-timing}
**Targeting Android 13**
Apps targeting Android 13 can control when to request permission and show the native push prompt.
If your user upgrades from Android 12 to 13, your app was previously installed, and you were already sending push, the system automatically pre-grants the new notification permission to all eligible apps. In other words, these apps can continue to send notifications to users, and users don't see a runtime permission prompt.
For more details on this see Android's Developer Documentation for [effects on updates to existing apps](https://developer.android.com/about/versions/13/changes/notification-permission#existing-apps).
**Targeting Android 12 or earlier**
If your app does not yet target Android 13, then a new user on Android 13 installs your app, they will automatically see a push permission prompt when your app creates its first notification channel (via `notificationManager.createNotificationChannel`). Users who already have your app installed and then upgrade to Android 13 are never shown a prompt and are automatically granted push permission.
**Note:**
Braze SDK v23.0.0 automatically creates a default notification channel if one does not already exist when a push notification is received. If you don't target Android 13, this will cause the push permission prompt to be shown, which is required to show the notification.
## Preparing for Android 13 {#next-steps}
It is strongly recommended that your app targets Android 13 in order to control when users are prompted for push permission.
This will allow you to optimize your [push opt-in rates](https://www.braze.com/resources/articles/android-13-developer-preview-push-opt-ins-arrive-for-android-apps) by prompting users at more appropriate times and will lead to a better user experience in how and when your app asks for push permission.
To start using our new ["no-code" push primer feature](https://www.braze.com/docs/fr/fr/user_guide/message_building_by_channel/push/best_practices/push_primer_messages/), upgrade your Android SDK to the [latest version (v23.0.0+)](https://github.com/braze-inc/braze-android-sdk/blob/master/CHANGELOG.md#2300).
# Mise à jour vers iOS 18
Source: /docs/fr/developer_guide/platforms/swift/ios_18/index.md
# Mise à jour vers iOS 18 {#upgrading-to-ios-18}
> Vous souhaitez savoir comment Braze se prépare à la prochaine version d'iOS ? Cet article résume nos informations sur la version iOS 18 pour vous aider à créer une expérience fluide pour vous et vos utilisateurs.
La [WWDC](https://developer.apple.com/wwdc24/) d'Apple a eu lieu du 9 au 11 juin 2024. Découvrez leurs annonces dans notre [article de blog](https://www.braze.com/resources/articles/wwdc-announcements-bring-apple-intelligence-rcs-and-more-to-ios-18), ou poursuivez votre lecture pour savoir comment tirer parti d'iOS 18 avec Braze.
## Changements dans iOS 18 {#changes-in-ios-18}
### Activités en direct sur l'Apple Watch {#live-activities-on-apple-watch}
Les [activités en direct](https://www.braze.com/docs/fr/fr/developer_guide/push_notifications/live_notifications/?sdktab=swift) seront prises en charge sur watchOS 11. Aucune configuration supplémentaire n'est nécessaire. Apple offre toutefois la possibilité de personnaliser l'interface de la montre.
### Apple Vision Pro
Le Vision Pro est désormais disponible en Chine, au Japon, à Singapour, en Australie, au Canada, en France, en Allemagne et au Royaume-Uni. Consultez notre blog pour voir comment [Braze prend en charge visionOS](https://www.braze.com/resources/articles/building-braze-a-new-era-of-customer-engagement-braze-announces-visionos-support).
### Notifications de l'iPhone sur macOS {#iphone-notifications-on-macos}
La nouvelle fonctionnalité de [mise en miroir de l'iPhone](https://www.apple.com/newsroom/2024/06/macos-sequoia-takes-productivity-and-intelligence-on-mac-to-new-heights/) d'Apple permet aux utilisateurs de recevoir les notifications de l'iPhone sur leurs appareils macOS. Gardez à l'esprit que certains types de médias, tels que les images Push Story et les GIF, ne sont pas pris en charge, car ils ne peuvent pas être affichés sous forme de notification macOS.
### Apple Intelligence
[Apple Intelligence](https://developer.apple.com/documentation/Updates/Apple-Intelligence) est désormais disponible pour les appareils fonctionnant sous iOS 18.1 et versions ultérieures.
En tant qu'utilisateur de Braze, la nouvelle fonctionnalité la plus importante à connaître est celle des [résumés de notifications](https://support.apple.com/en-us/108781), qui utilise le traitement sur l'appareil pour regrouper et générer automatiquement des résumés textuels pour les notifications push associées envoyées depuis une même application. Les utilisateurs finaux peuvent appuyer pour développer un résumé et voir chaque notification push telle qu'elle a été envoyée à l'origine.
En raison de la manière dont ces résumés sont générés, vous n'aurez aucun contrôle sur leur comportement spécifique ni sur le texte généré. Toutefois, cela n'aura pas d'incidence sur les fonctionnalités d'analyse ou de reporting, telles que le suivi des clics sur les notifications push.

# Support de visionOS
Source: /docs/fr/developer_guide/platforms/swift/visionos/index.md
# Support de visionOS
> À partir de la version [8.0.0 du SDK Braze Swift](https://github.com/braze-inc/braze-swift-sdk/blob/main/CHANGELOG.md#800), vous pouvez utiliser Braze avec [visionOS](https://developer.apple.com/visionos/), la plateforme de calcul spatial d'Apple pour l'Apple Vision Pro. Pour connaître un exemple d'application visionOS utilisant Braze, voir [Exemples d'applications](https://www.braze.com/docs/fr/fr/developer_guide/references/?tab=swift).
## Fonctionnalités entièrement prises en charge
La plupart des fonctionnalités disponibles sur iOS sont également disponibles sur visionOS, notamment :
- Analyse/analytique (sessions, événements personnalisés, achats, etc.)
- Envoi de messages in-app (modèles de données et interface utilisateur)
- Cartes de contenu (modèles de données et interface utilisateur)
- Notifications push (visibles par l'utilisateur grâce à des boutons d'action et à des notifications silencieuses)
- Indicateurs de fonctionnalité
- Analyse des localisations
## Fonctionnalités partiellement prises en charge
Certaines fonctionnalités ne sont que partiellement prises en charge sur visionOS, mais Apple devrait y remédier à l'avenir :
- Rich Push Notifications
- Les images sont prises en charge.
- Les GIF et les vidéos affichent la vignette de prévisualisation, mais ne peuvent pas être lus.
- La lecture audio n'est pas prise en charge.
- Contenu push
- Le défilement et la sélection de la page "Push Story" sont pris en charge.
- La navigation entre les pages de Push Story à l'aide de **Next** n'est pas prise en charge.
## Fonctions non prises en charge
- La surveillance des géorepérages n'est pas prise en charge. Apple n'a pas mis à disposition sous visionOS les API de localisation de base pour la surveillance des régions.
- Les activités en ligne/instantanées ne sont pas prises en charge. Actuellement, ActivityKit n'est disponible que sur iOS et iPadOS.
# Guide de mise à jour SDK iOS 14
Source: /docs/fr/developer_guide/platforms/swift/_archived_updates/ios_14/index.md
# Guide de mise à jour SDK iOS 14 {#ios-14-sdk-upgrade-guide}
> Ce guide décrit les modifications liées à Braze introduites dans iOS 14 et les étapes de mise à niveau requises pour votre intégration SDK Braze pour iOS. Pour obtenir une liste complète des nouvelles mises à jour d'iOS 14, consultez la [page iOS 14](https://www.apple.com/ios/ios-14/) d'Apple.
**Tip:**
À partir d'iOS 14.5, la collecte d'**IDFA** et [certains partages de données](https://developer.apple.com/app-store/user-privacy-and-data-use/#permission-to-track) nécessiteront la nouvelle invite de permission du framework [AppTrackingTransparency](https://developer.apple.com/documentation/apptrackingtransparency) ([en savoir plus](#idfa)).
#### Résumé des changements majeurs d'iOS 14 {#summary-of-ios-14-breaking-changes}
- Les applications ciblant iOS 14 / Xcode 12 doivent utiliser notre [version officielle d'iOS 14](https://github.com/Appboy/appboy-ios-sdk/releases/tag/3.27.0).
- Les géorepérages [ne sont plus pris en charge par iOS](https://developer.apple.com/documentation/corelocation/cllocationmanager/3600215-accuracyauthorization) pour les utilisateurs qui choisissent la nouvelle autorisation de _localisation approximative_.
- L'utilisation des fonctionnalités de ciblage « Dernière localisation connue » nécessite une mise à niveau vers le SDK Braze pour iOS v3.26.1+ pour la compatibilité avec l'autorisation de _localisation approximative_. Notez que si vous utilisez Xcode 12, vous devrez passer au moins à la version v3.27.0.
- À partir d'iOS 14.5, la collecte d'IDFA et [certains partages de données](https://developer.apple.com/app-store/user-privacy-and-data-use/#permission-to-track) nécessitent la nouvelle invite de permission du framework [AppTrackingTransparency](https://developer.apple.com/documentation/apptrackingtransparency).
- Si vous utilisez le champ « Ad Tracking Enabled » pour le ciblage de Campaign ou l'analyse, vous devrez passer à Xcode 12 et utiliser le nouveau framework AppTrackingTransparency pour signaler le statut d'abonnement des utilisateurs.
## Résumé de la mise à jour {#upgrade-summary}
| Si votre application utilise : | Recommandation de mise à jour | Description |
|------|--------|---|
| Xcode 12 | **Mise à jour vers le SDK iOS v3.27 ou version ultérieure** | Les clients utilisant Xcode 12 doivent utiliser la version v3.27.0+ pour la compatibilité. Si vous rencontrez des problèmes ou si vous avez des questions concernant notre compatibilité avec iOS 14, ouvrez un nouveau [ticket sur GitHub](https://github.com/Appboy/appboy-ios-sdk/issues). |
| Localisation la plus récente | **Mise à jour vers le SDK iOS v3.26.1 ou version ultérieure** | Si vous utilisez la fonctionnalité de ciblage de la localisation la plus récente et que vous utilisez toujours Xcode 11, vous devez passer au moins au SDK iOS v3.26.1 qui prend en charge la nouvelle fonctionnalité de _localisation approximative_. Les anciens SDK ne pourront pas collecter de manière fiable la localisation lorsqu'un utilisateur passe à iOS 14 _et_ choisit la localisation approximative.
Même si votre application ne cible pas iOS 14, il se peut que vos utilisateurs passent à iOS 14 et commencent à utiliser la nouvelle option de précision de la localisation. Les applications qui ne passent pas à la version v3.26.1+ du SDK iOS ne pourront pas collecter de manière fiable les attributs de localisation lorsque les utilisateurs fournissent leur _localisation approximative_ sur les appareils iOS 14. |
| ID de suivi publicitaire IDFA | **Une mise à jour vers Xcode 12 et le SDK iOS v3.27 peut être nécessaire** | En 2021, Apple commencera à exiger une invite d'autorisation pour la collecte de l'IDFA. À ce moment-là, les applications devront être mises à niveau vers Xcode 12 et utiliser le nouveau framework `AppTrackingTransparency` afin de continuer à collecter l'IDFA. Si vous transmettez l'IDFA au SDK Braze, vous devrez également passer à la version v3.27.0+ à ce moment-là.
Les applications qui n'utilisent pas les nouvelles API d'iOS 14 ne pourront pas collecter l'IDFA, et collecteront à la place un ID vierge (`00000000-0000-0000-0000-000000000000`) après qu'Apple aura commencé à appliquer ce changement en 2021. Pour savoir si cela s'applique ou non à votre application, consultez les [détails sur l'IDFA](#idfa). |
{: .reset-td-br-1 .reset-td-br-2 .reset-td-br-3 aria-label="Upgrade summary" }
## Changements de comportement iOS 14 {#ios-14-behavior-changes}
### Autorisation de localisation approximative {#approximate-location-permission}
{: style="float:right;max-width:45%;margin-left:15px;"}
#### Aperçu {#overview}
Lors de la demande d'autorisation de localisation, les utilisateurs auront désormais le choix entre fournir leur _localisation précise_ (comportement précédent), ou la nouvelle _localisation approximative_. La localisation approximative renvoie un rayon plus large dans lequel l'utilisateur se trouve, au lieu de ses coordonnées exactes.
#### Géorepérages {#geofences}
Les géorepérages [ne sont plus pris en charge par iOS](https://developer.apple.com/documentation/corelocation/cllocationmanager/3600215-accuracyauthorization) pour les utilisateurs qui choisissent la nouvelle autorisation de _localisation approximative_. Bien qu'aucune mise à jour ne soit nécessaire pour votre intégration SDK Braze, vous devrez peut-être ajuster votre [stratégie de marketing basé sur la localisation](https://www.braze.com/blog/geofencing-geo-targeting-beaconing-when-to-use/) pour les Campaigns qui s'appuient sur les géorepérages.
#### Ciblage de localisation {#location-tracking}
Pour continuer à collecter la _dernière localisation connue_ des utilisateurs lorsque la _localisation approximative_ est accordée, votre application devra être mise à niveau vers au moins la v3.26.1 du SDK iOS de Braze. Gardez à l'esprit que la localisation sera moins précise et que, d'après nos tests, elle peut dépasser 12 000 mètres (plus de 7 miles). Lorsque vous utilisez les options de ciblage de la _dernière localisation connue_ dans le tableau de bord de Braze, veillez à augmenter le rayon de la localisation pour tenir compte des nouvelles _localisations approximatives_ (nous recommandons un rayon d'au moins 1 mile/1,6 km).
Les applications qui ne mettent pas à niveau le SDK Braze pour iOS vers au moins la version v3.26.1 ne pourront plus utiliser le suivi de la localisation lorsque la _localisation approximative_ est accordée sur les appareils iOS 14.
Les utilisateurs qui ont déjà autorisé l'accès à la localisation continueront à fournir leur _localisation précise_ après la mise à niveau.
Notez que si vous utilisez Xcode 12, vous devrez passer au moins à la version v3.27.0.
Pour plus d'informations sur la localisation approximative, consultez la vidéo WWDC d'Apple sur [les nouveautés en matière de localisation](https://developer.apple.com/videos/play/wwdc2020/10660/).
### Transparence du suivi des applications et IDFA {#idfa}
#### Aperçu
L'IDFA (Identifier for Advertisers) est un identifiant fourni par Apple pour une utilisation avec des partenaires publicitaires et d'attribution pour le suivi inter-appareils, et est lié à l'identifiant Apple d'une personne.
À partir d'iOS 14.5, une nouvelle invite d'autorisation (lancée par le nouveau framework `AppTrackingTransparency`) doit être affichée pour recueillir le consentement explicite de l'utilisateur pour l'IDFA. Cette invite d'autorisation pour « vous suivre via les applications et les sites web appartenant à d'autres sociétés » sera demandée de la même manière que lorsque vous invitez les utilisateurs à partager leur localisation.
Si un utilisateur n'accepte pas l'invite, ou si vous ne procédez pas à la mise à niveau vers le framework `AppTrackingTransparency` de Xcode 12, alors une valeur IDFA vide (`00000000-0000-0000-0000-000000000000`) sera renvoyée, et votre application ne sera pas autorisée à inviter à nouveau l'utilisateur.
**Important:**
Ces mises à jour de l'IDFA prendront effet après que les utilisateurs finaux auront mis à jour leur appareil vers iOS 14.5. Assurez-vous que votre application utilise le nouveau `AppTransparencyFramework` avec Xcode 12 si vous prévoyez de recueillir l'IDFA.
#### Modifications apportées au recueil de l'IDFA par Braze {#changes-to-braze-idfa-collection}
{: style="float:right;max-width:25%;margin-left:15px;border:0"}
1. Braze continuera à autoriser les applications à fournir la valeur IDFA d'un utilisateur _au_ SDK de Braze.
2. La macro de compilation `ABK_ENABLE_IDFA_COLLECTION`, qui compilait de manière conditionnelle le recueil automatique facultatif de l'IDFA, ne fonctionnera plus dans iOS 14 et a été supprimée dans la version 3.27.0.
3. Si vous utilisez le champ « Ad Tracking Enabled » pour le ciblage de Campaign ou l'analyse, vous devrez passer à Xcode 12 et utiliser le nouveau framework AppTrackingTransparency pour signaler le statut d'abonnement de vos utilisateurs. La raison de cette modification est que dans iOS 14, l'ancien champ [`advertisingTrackingEnabled`](https://developer.apple.com/documentation/adsupport/asidentifiermanager/1614148-advertisingtrackingenabled) renverra toujours No.
4. Si votre application a utilisé l'IDFA ou l'IDFV comme ID externe Braze, nous vous recommandons vivement de délaisser ces identifiants au profit d'un UUID. Pour plus d'informations sur la migration des ID externes, consultez nos [endpoints d'API de migration des ID externes](https://www.braze.com/docs/fr/fr/api/endpoints/user_data/external_id_migration/).
Pour en savoir plus, consultez les [mises à jour de la protection de la vie privée](https://developer.apple.com/app-store/user-privacy-and-data-use/) d'Apple et le nouveau [framework de transparence du suivi des applications](https://developer.apple.com/documentation/apptrackingtransparency).
### Autorisation push {#push-provisional-auth}
**Important:**
Aucune modification de l'autorisation push provisoire n'est incluse dans iOS 14. Dans une version bêta antérieure d'iOS 14, Apple a introduit une modification qui a depuis été rétablie au comportement antérieur.
## Nouvelles fonctionnalités iOS 14 {#ios-14-new-features}
### Présentation de la confidentialité et de la collecte de données de l'application {#app-privacy}
Depuis le 8 décembre 2020, toutes les soumissions à l'App Store nécessitent des étapes supplémentaires pour adhérer aux [nouvelles normes d'Apple en matière de confidentialité des applications](https://developer.apple.com/app-store/app-privacy-details/).
#### Questionnaire sur le portail développeur d'Apple {#apple-developer-portal-questionnaire}
Sur le _portail des développeurs Apple_ :
* Il vous sera demandé de remplir un questionnaire pour décrire comment votre application ou des partenaires tiers collectent des données.
* Le questionnaire doit toujours être à jour avec votre version la plus récente dans l'App Store.
* Le questionnaire peut être mis à jour même sans nouvelle soumission d'application.
* Vous devrez coller un lien vers l'URL de la politique de confidentialité de votre application.
Lorsque vous remplissez votre questionnaire, consultez votre équipe juridique et réfléchissez à la manière dont votre utilisation de Braze dans les domaines suivants peut affecter vos exigences de divulgation.
#### Collecte de données par défaut de Braze {#braze-default-data-collection}
**Identifiants** - Un identifiant d'appareil anonyme est toujours collecté par le SDK Braze. Ce paramètre est actuellement défini sur l'IDFV (identifiant du fournisseur).
**Données d'utilisation** - Il peut s'agir des données de session de Braze, ainsi que de toute collecte d'événements ou d'attributs que vous utilisez pour mesurer l'interaction avec le produit.
#### Collecte de données facultative {#optional-data-collection}
Données que vous pouvez éventuellement collecter via votre utilisation de Braze :
**Localisation** - La localisation approximative et la localisation précise peuvent être collectées de manière facultative par le SDK Braze. Ces fonctionnalités sont désactivées par défaut.
**Coordonnées** - Il peut s'agir d'événements et d'attributs liés à l'identité de l'utilisateur.
**Achats** - Il peut s'agir d'événements et d'achats enregistrés au nom de l'utilisateur.
**Important:**
Notez qu'il ne s'agit pas d'une liste exhaustive. Si vous collectez manuellement d'autres informations sur vos utilisateurs dans Braze qui s'appliquent à d'autres catégories du questionnaire sur la confidentialité de l'application, vous devrez également les divulguer.
Pour en savoir plus sur cette fonctionnalité, consultez la page [Confidentialité et utilisation des données](https://developer.apple.com/app-store/user-privacy-and-data-use/) d'Apple.
# Guide de mise à niveau SDK iOS 15
Source: /docs/fr/developer_guide/platforms/swift/_archived_updates/ios_15/index.md
# Guide de mise à niveau SDK iOS 15 {#ios-15-sdk-upgrade-guide}
> Ce guide décrit les modifications introduites dans iOS 15 (WWDC21) et les étapes de mise à niveau requises pour votre intégration SDK Braze pour iOS. Pour obtenir la liste complète des nouvelles mises à jour d'iOS 15, consultez les [notes de publication iOS 15](https://developer.apple.com/documentation/ios-ipados-release-notes/ios-ipados-15-release-notes) d'Apple.
## Changements de transparence dans les navigations de l'interface utilisateur {#transparency-changes-to-ui-navigations}
Dans le cadre de nos tests annuels des versions bêta d'iOS, nous avons identifié une modification apportée par Apple qui fait que certaines barres de navigation de l'interface utilisateur apparaissent transparentes au lieu d'opaques. Cela sera visible sur iOS 15 lors de l'utilisation de l'interface utilisateur par défaut de Braze pour les Content Cards, ou lorsque les liens profonds web sont ouverts à l'intérieur de votre application au lieu d'une application de navigateur séparée.
Pour éviter ce changement visuel dans iOS 15, nous vous recommandons vivement de mettre à jour vers le [SDK iOS Braze v4.3.2](https://github.com/Appboy/appboy-ios-sdk/releases/tag/4.3.2) dès que possible, avant que les utilisateurs ne commencent à mettre à jour leur téléphone vers le nouveau système d'exploitation iOS 15.
## Nouveaux paramètres de notification {#notification-settings}
iOS 15 a introduit de nouvelles fonctionnalités de notification pour aider les utilisateurs à rester concentrés et à éviter de fréquentes interruptions tout au long de la journée. Nous sommes ravis d'offrir une prise en charge de ces nouvelles fonctionnalités. Ces fonctionnalités ne nécessitent aucune mise à niveau supplémentaire du SDK et ne seront appliquées qu'aux utilisateurs d'appareils iOS 15.
### Modes de concentration {#focus-mode}
Les utilisateurs d'iOS 15 peuvent désormais créer des « modes de concentration », des profils personnalisés utilisés pour déterminer les notifications qu'ils souhaitent voir franchir le mode de concentration et s'afficher en évidence.
{: style="float:right;max-width:25%;margin-left:15px;border:0"}
### Niveaux d'interruption {#interruption-levels}
Dans iOS 15, les notifications push peuvent être envoyées avec l'un des quatre niveaux d'interruption :
* **Passif** (nouveau) — Pas de son, pas de vibration, pas de réveil de l'écran, pas de dépassement des paramètres de concentration.
* **Actif** (par défaut) — Permet le son, la vibration, le réveil de l'écran, sans dépassement des paramètres de concentration.
* **Urgent** (nouveau) — Permet le son, la vibration, le réveil de l'écran, peut franchir les contrôles système si autorisé.
* **Critique** — Permet le son, la vibration, le réveil de l'écran, peut franchir les contrôles système et contourner le commutateur de sonnerie.
Consultez les [options de notification iOS](https://www.braze.com/docs/fr/fr/user_guide/message_building_by_channel/push/ios/notification_options/#interruption-level) pour en savoir plus sur la manière de définir cette option dans les notifications push iOS.
### Résumé des notifications {#notification-summary}
{: style="float:right;max-width:25%;margin-left:15px;border:0"}
Dans iOS 15, les utilisateurs peuvent (facultativement) choisir certaines heures de la journée pour recevoir un résumé des notifications. Les notifications qui ne requièrent pas une attention immédiate (comme celles envoyées en mode « passif » ou lorsque l'utilisateur est en mode de concentration) seront regroupées pour éviter les interruptions constantes tout au long de la journée.
Pour chaque notification que vous envoyez, vous serez bientôt en mesure de spécifier un « score de pertinence » pour contrôler quelle notification doit apparaître en haut du résumé.
Consultez les [options de notification iOS](https://www.braze.com/docs/fr/fr/user_guide/message_building_by_channel/push/ios/notification_options/#relevance-score) pour en savoir plus sur la manière de définir le « score de pertinence » d'une notification.
## Boutons de localisation {#location-buttons}
iOS 15 introduit un nouveau moyen pratique pour les utilisateurs d'accorder temporairement l'accès à la localisation au sein d'une application.
Le nouveau bouton de localisation s'appuie sur l'autorisation existante « Autoriser une fois » sans solliciter à plusieurs reprises les utilisateurs qui cliquent plusieurs fois dans la même session.
Pour plus d'informations, regardez la vidéo d'Apple [Meet the Location Button](https://developer.apple.com/videos/play/wwdc2021/10102/) diffusée lors de la Conférence mondiale des développeurs (WWDC) de cette année.
**Tip:**
Cette fonctionnalité vous donne une chance supplémentaire d'inviter les utilisateurs à accorder leur autorisation ! Les utilisateurs ayant précédemment refusé les autorisations de localisation avant iOS 15 verront une invite lorsqu'ils cliqueront sur le bouton de localisation, comme une dernière opportunité de réinitialiser l'autorisation depuis l'état refusé.
### Utilisation des boutons de localisation avec Braze {#using-location-buttons-with-braze}
Aucune intégration supplémentaire n'est requise lors de l'utilisation des boutons de localisation avec Braze. Votre application doit continuer à transmettre la localisation d'un utilisateur (une fois qu'il a accordé l'autorisation) comme d'habitude.
Selon Apple, pour les utilisateurs qui ont déjà partagé l'accès à la localisation en arrière-plan, l'option « Lorsque l'app est active » continuera à accorder ce niveau d'autorisation après la mise à niveau vers iOS 15.
## Apple Mail {#mail}
Cette année, Apple a annoncé de nombreuses mises à jour concernant le suivi des e-mails et la confidentialité. Pour plus d'informations, consultez notre [article de blog](https://www.braze.com/resources/articles/9-ways-email-marketers-can-respond-to-apples-mail-privacy-protection-feature).
## Localisation de l'adresse IP dans Safari {#safari-ip-address-location}
Dans iOS 15, les utilisateurs pourront configurer Safari pour anonymiser ou généraliser la localisation déterminée à partir de leurs adresses IP. Gardez cela à l'esprit lorsque vous utilisez un ciblage ou une segmentation basé sur la localisation.
# Guide de mise à niveau iOS 16
Source: /docs/fr/developer_guide/platforms/swift/_archived_updates/ios_16/index.md
# Guide de mise à jour du SDK iOS 16 {#ios-16-sdk-upgrade-guide}
> Ce guide décrit les modifications pertinentes introduites dans iOS 16 (2022) et leur impact sur votre intégration SDK Braze pour iOS. Consultez les [notes de version d'iOS 16](https://developer.apple.com/documentation/ios-ipados-release-notes/ios-ipados-16-release-notes) pour un guide complet de migration.
## Modifications dans iOS 16 {#changes-in-ios-16}
### Notifications push Web Safari {#safari-web-push}
Apple a annoncé deux changements concernant sa fonctionnalité de notification push Web.
#### Notifications push Web sur ordinateur de bureau (macOS) {#macos-push}
Auparavant, Apple prenait en charge les notifications push sur macOS (ordinateur de bureau) en utilisant ses propres API push Safari.
À partir de macOS Ventura (sorti le 24 octobre 2022), [Safari a ajouté la prise en charge](https://webkit.org/blog/12824/news-from-wwdc-webkit-features-in-safari-16-beta/#web-push-for-macos) des API de notification push Web en plus des notifications push Safari. Il s'agit d'une norme d'API multi-navigateurs existante utilisée par d'autres navigateurs populaires.
Si vous envoyez déjà des notifications push Web pour Safari via Braze, aucune modification n'est nécessaire.
#### Notifications push Web sur appareil mobile (iOS et iPadOS) {#ios-push}
Auparavant, Safari sur iPhone et iPad ne prenait pas en charge la réception de notifications push.
En 2023, Apple ajoutera la prise en charge des notifications push Web sur les appareils iPhone et iPad via Safari.
Braze prendra en charge ces nouvelles notifications push Web pour iOS et iPadOS sans nécessiter de modifications ou de mises à niveau supplémentaires.
## Préparation pour iOS 16 {#next-steps}
Bien que vous n'ayez pas besoin de mettre à jour votre SDK Braze pour iOS afin de prendre en charge iOS 16, voici deux autres mises à jour intéressantes :
1. Braze a lancé un [nouveau SDK Swift](https://github.com/braze-inc/braze-swift-sdk). Il offre de meilleures performances, de nouvelles fonctionnalités et de nombreuses améliorations.
2. Notre SDK Braze Swift prend en charge une nouvelle [fonctionnalité de « push primer » sans code](https://www.braze.com/docs/fr/fr/user_guide/channels/push/best_practices/push_primer_messages/) !
# Guide de mise à jour iOS 17
Source: /docs/fr/developer_guide/platforms/swift/_archived_updates/ios_17/index.md
# Guide de mise à jour d'iOS 17
> Vous souhaitez savoir comment Braze se prépare à la prochaine version d’iOS ? Cet article résume nos informations sur la version 17 d'iOS pour vous aider à créer une expérience fluide pour vous et pour vos utilisateurs.
## Compatibilité iOS 17 et Xcode 15
Le SDK Swift et le SDK Objective-C de Braze sont tous deux rétrocompatibles avec Xcode 14 et Xcode 15, et ils sont compatibles avec les appareils iOS 17.
## Changements dans iOS 17
### Suivi des liens et dépouillement des paramètres UTM
L'un des changements importants d'iOS 17 est le blocage des paramètres UTM dans Safari. Les paramètres UTM sont des morceaux de code ajoutés aux URL, qui sont fréquemment utilisés dans les campagnes de communication pour mesurer l'efficacité des e-mails, des SMS et d'autres canaux d'envoi de messages.
Ce changement n'a pas d'incidence sur le suivi des clics dans les e-mails de Braze et sur les envois de raccourcis de liens par SMS.
### Transparence du suivi des applications
Apple a annoncé sa volonté d'étendre le champ d'application de la [transparence du suivi publicitaire (ATT)](https://support.apple.com/en-us/HT212025), qui permet aux utilisateurs de contrôler si une application peut accéder à leur activité sur des applications et des sites web appartenant à d'autres entreprises. iOS 17 contient deux fonctionnalités ATT clés : les manifestes de confidentialité et la signature de code.
#### Manifeste de confidentialité
Apple exige désormais un fichier de manifeste de confidentialité qui décrit la raison pour laquelle votre application et les SDK tiers collectent des données, ainsi que leurs méthodes de collecte de données. À partir d'iOS 17.2, Apple bloquera tous les endpoints de suivi déclarés dans votre application jusqu'à ce que l'utilisateur final accepte l'invite ATT.
Braze a publié notre propre manifeste de confidentialité, ainsi que de nouvelles API flexibles qui redirigent automatiquement les données de suivi déclarées vers des points de terminaison `-tracking` dédiés. Pour plus d'informations, consultez le [manifeste de confidentialité de Braze](https://www.braze.com/docs/fr/fr/developer_guide/analytics/managing_data_collection/?sdktab=swift#swift_privacy-manifest).
#### Signature du code
La signature de code permet aux développeurs qui utilisent un SDK tiers dans leur application de confirmer que le même développeur l'a signé comme les versions précédentes dans Xcode.
### SDK de Braze et protection de la vie privée
Apple a également annoncé la publication d’une liste de SDK tiers considérés comme « ayant un impact sur la vie privée » à la fin de l'année 2023. Ces SDK devraient avoir un impact particulièrement important sur la vie privée des utilisateurs d'Apple.
Contrairement aux SDK de suivi traditionnels qui sont conçus pour surveiller les utilisateurs sur plusieurs sites Web et applications, le SDK de Braze se concentre sur l'envoi de données first-party et les expériences des utilisateurs.
Bien que nous ne nous attendions pas à ce que le SDK de Braze soit inclus dans cette liste, nous avons l'intention de suivre cette situation de près et de publier toutes les mises à jour nécessaires.
# Intégration des extensions de navigateur pour le Web
Source: /docs/fr/developer_guide/platforms/web/browser_extensions/index.md
# Extension de navigateur {#browser-extension}
> Cet article décrit comment utiliser le SDK Braze pour le Web dans vos extensions de navigateur (Google Chrome, Firefox).
Intégrez le SDK Braze pour le Web au sein de votre extension de navigateur pour collecter des données d'analyse et afficher des messages enrichis aux utilisateurs. Cela comprend les **extensions Google Chrome** et les **modules complémentaires Firefox**.
## Ce qui est pris en charge {#whats-supported}
En général, comme les extensions sont composées de HTML et de JavaScript, vous pouvez utiliser Braze pour ce qui suit :
* **Analyses** : Capturez des événements personnalisés, des attributs et identifiez même les utilisateurs récurrents au sein de votre extension. Utilisez ces caractéristiques de profil pour alimenter la communication cross-canal.
* **Messages in-app** : Déclenchez des messages in-app lorsque les utilisateurs agissent au sein de votre extension, en utilisant notre messagerie HTML native ou personnalisée.
* **Content Cards** : Ajoutez un flux de cartes natives à votre extension pour l'onboarding ou le contenu promotionnel.
* **Notification push Web** : Envoyez des notifications en temps opportun, même lorsque votre page Web n'est pas actuellement ouverte.
## Ce qui n'est pas pris en charge {#whats-not-supported}
* Les service workers ne sont pas pris en charge par le SDK Braze pour le Web, mais cette fonctionnalité est envisagée pour une future version.
## Types d'extensions {#extension-types}
Braze peut être inclus dans les parties suivantes de votre extension :
| Partie | Détails | Ce qui est pris en charge |
|--------|-------|------|
| Page contextuelle | La page [Popup](https://developer.mozilla.org/en-US/docs/Mozilla/Add-ons/WebExtensions/user_interface/Popups) est une boîte de dialogue qui peut être affichée aux utilisateurs lorsqu'ils cliquent sur l'icône de votre extension dans la barre d'outils du navigateur. | Analyses, messages in-app et Content Cards |
| Scripts d'arrière-plan | Les [scripts d'arrière-plan](https://developer.chrome.com/extensions/background_pages) (Manifest v2 uniquement) permettent à votre extension d'inspecter et d'interagir avec la navigation de l'utilisateur ou de modifier les pages Web (par exemple, comment les bloqueurs de publicité détectent et modifient le contenu des pages). | Analyses, messages in-app et Content Cards.
Les scripts d'arrière-plan ne sont pas visibles des utilisateurs, donc en ce qui concerne l'envoi de messages, vous devez communiquer à l'aide des onglets du navigateur ou de votre page contextuelle lors de l'affichage des messages. |
| Pages d'options | La [page d'options](https://developer.mozilla.org/en-US/docs/Mozilla/Add-ons/WebExtensions/user_interface/Options_pages) permet à vos utilisateurs de basculer les paramètres de votre extension. Il s'agit d'une page HTML autonome qui ouvre un nouvel onglet. | Analyses, messages in-app et Content Cards |
{: .reset-td-br-1 .reset-td-br-2, .reset-td-br-3 aria-label="Extension types" }
## Autorisations {#permissions}
Aucune autorisation supplémentaire n'est requise dans votre `manifest.json` lors de l'intégration du SDK Braze (`braze.min.js`) en tant que fichier local associé à votre extension.
Toutefois, si vous utilisez [Google Tag Manager](https://www.braze.com/docs/fr/fr/developer_guide/platform_integration_guides/web/google_tag_manager/), si vous faites référence au SDK Braze à partir d'une URL externe, ou si vous avez défini une politique de sécurité du contenu stricte pour votre extension, vous devrez ajuster le paramètre [`content_security_policy`](https://developer.chrome.com/extensions/contentSecurityPolicy) dans votre `manifest.json` pour autoriser les sources de scripts distantes.
## Démarrage {#getting-started}
**Tip:**
Avant de commencer, assurez-vous d'avoir lu le [guide de configuration initiale du SDK](https://www.braze.com/docs/fr/fr/developer_guide/sdk_integration/?sdktab=web) pour le Web afin d'en savoir plus sur notre intégration JavaScript en général.
Vous pouvez également mettre en signet la [référence du SDK JavaScript](https://js.appboycdn.com/web-sdk/latest/doc/modules/braze.html) pour obtenir tous les détails sur les différentes méthodes et options de configuration du SDK.
Pour intégrer le SDK Braze pour le Web, vous devez d'abord télécharger une copie de la dernière bibliothèque JavaScript. Cela peut se faire en utilisant NPM ou en le téléchargeant directement depuis le [réseau de diffusion de contenu de Braze](https://js.appboycdn.com/web-sdk/latest/braze.min.js).
Sinon, si vous préférez utiliser [Google Tag Manager](https://www.braze.com/docs/fr/fr/developer_guide/platform_integration_guides/web/google_tag_manager/) ou une copie hébergée à l'extérieur du SDK Braze, gardez à l'esprit que le chargement de ressources externes nécessite d'ajuster le paramètre [`content_security_policy`](https://developer.chrome.com/extensions/contentSecurityPolicy) dans votre `manifest.json`.
Une fois téléchargé, assurez-vous de copier le fichier `braze.min.js` dans le répertoire de votre extension.
### Fenêtres contextuelles d'extension {#popup}
Pour ajouter Braze à une fenêtre contextuelle d'extension, référencez le fichier JavaScript local dans votre `popup.html`, comme vous le feriez sur un site Web classique. Si vous utilisez Google Tag Manager, vous pouvez ajouter Braze en utilisant nos [modèles Google Tag Manager](https://www.braze.com/docs/fr/fr/developer_guide/platform_integration_guides/web/google_tag_manager/).
```html
popup.html
```
### Script d'arrière-plan (Manifest v2 uniquement) {#background-script}
Pour utiliser Braze dans le script d'arrière-plan de votre extension, ajoutez la bibliothèque Braze à votre `manifest.json` dans le tableau `background.scripts`. La variable globale `braze` sera alors disponible dans le contexte de votre script d'arrière-plan.
```json
{
"manifest_version": 2,
"background": {
"scripts": [
"relative/path/to/braze.min.js",
"background.js"
]
}
}
```
### Page d'options {#options-page}
Si vous utilisez une page d'options (via les propriétés de manifeste `options` ou `options_ui`), vous pouvez inclure Braze comme vous le feriez dans les [instructions `popup.html`](#popup).
## Initialisation {#initialization}
Une fois le SDK inclus, vous pouvez initialiser la bibliothèque comme d'habitude.
Étant donné que les cookies ne sont pas pris en charge dans les extensions de navigateur, vous pouvez les désactiver en initialisant avec `noCookies: true`.
```javascript
braze.initialize("YOUR-API-KEY-HERE", {
baseUrl: "YOUR-API-ENDPOINT",
enableLogging: true,
noCookies: true
});
```
Pour plus d'informations sur les options d'initialisation prises en charge, consultez la [référence du SDK Web](https://js.appboycdn.com/web-sdk/latest/doc/modules/braze.html#initialize).
## Notification push {#push}
Les boîtes de dialogue contextuelles d'extension ne permettent pas de demander des notifications push (elles ne disposent pas de barre d'URL dans la navigation). Pour vous enregistrer et demander une autorisation de notification push dans la boîte de dialogue contextuelle d'une extension, vous devrez utiliser un contournement par un domaine alternatif, tel que décrit dans [Domaine alternatif de notification push](https://www.braze.com/docs/fr/fr/developer_guide/platform_integration_guides/web/push_notifications/alternate_push_domain).
# En-têtes de la politique de sécurité du contenu pour le Web
Source: /docs/fr/developer_guide/platforms/web/content_security_policy/index.md
# En-têtes de la politique de sécurité du contenu {#content-security-policy-headers}
> La politique de sécurité du contenu (Content-Security-Policy) renforce la sécurité en limitant la manière et l'endroit où le contenu peut être chargé sur votre site web. Cet article de référence explique quels en-têtes de la politique de sécurité du contenu sont nécessaires avec le SDK Web.
**Important:**
Cet article est destiné aux développeurs travaillant sur des sites web qui appliquent des règles CSP et s'intègrent à Braze. Il ne constitue pas un guide sur la manière dont vous devez aborder la sécurité.
**Note:**
This guide uses code samples from the Braze Web SDK 4.0.0+. To upgrade to the latest Web SDK version, see [SDK Upgrade Guide](https://github.com/braze-inc/braze-web-sdk/blob/master/UPGRADE_GUIDE.md).
## Attributs nonce {#nonce}
Si vous utilisez une valeur `nonce` dans vos directives `script-src` ou `style-src`, transmettez cette valeur à l'option d'initialisation `contentSecurityNonce` pour la propager aux scripts et styles nouvellement créés par le SDK :
```javascript
import * as braze from "@braze/web-sdk";
braze.initialize(apiKey, {
baseUrl: baseUrl,
contentSecurityNonce: "YOUR-NONCE-HERE", // assumes a "nonce-YOUR-NONCE-HERE" CSP value
});
```
## Directives {#directives}
### `connect-src` {#connect-src}
**Warning:**
Votre URL doit correspondre à l'[endpoint du SDK API](https://www.braze.com/docs/fr/fr/user_guide/administer/personal/sdk_endpoints/) de l'option d'initialisation `baseUrl` que vous avez choisie.
| URL | Information |
|---|-----------|
| `connect-src https://sdk.iad-01.braze.com` | Permet au SDK de communiquer avec les API de Braze. Modifiez cette URL pour qu'elle corresponde à l'[endpoint du SDK API](https://www.braze.com/docs/fr/fr/user_guide/administer/personal/sdk_endpoints/) de l'option d'initialisation `baseUrl` que vous avez choisie. |
{: .reset-td-br-1 .reset-td-br-2 aria-label="connect-src #connect-src" }
### `script-src` {#script-src}
| URL | Information |
|---|-----------|
| `script-src https://js.appboycdn.com` | Requis lors de l'utilisation de l'intégration hébergée par le réseau de diffusion de contenu. |
| `script-src 'unsafe-eval'` | Requis lors de l'utilisation de l'extrait de code d'intégration qui contient une référence à `appboyQueue`. Pour éviter d'utiliser cette directive, [intégrez le SDK à l'aide de NPM](https://www.braze.com/docs/fr/fr/developer_guide/platform_integration_guides/web/initial_sdk_setup/?tab=package%20manager). |
| `script-src 'nonce-...'` ou `script-src 'unsafe-inline'` | Requis pour certains messages in-app, tels que le HTML personnalisé. |
{: .reset-td-br-1 .reset-td-br-2 aria-label="script-src #script-src" }
### `img-src` {#img-src}
| URL | Information |
|---|-----------|
| `img-src: appboy-images.com braze-images.com cdn.braze.eu` | Requis lors de l'utilisation d'images hébergées par le réseau de diffusion de contenu de Braze. Les noms d'hôte peuvent varier en fonction du cluster du tableau de bord.
**Important :** Si vous utilisez des polices personnalisées, vous devez également inclure `font-src`. |
{: .reset-td-br-1 .reset-td-br-2 aria-label="img-src #img-src" }
## Font Awesome {#font-awesome}
Pour désactiver l'inclusion automatique de Font Awesome, utilisez l'option d'initialisation `doNotLoadFontAwesome` :
```javascript
import * as braze from "@braze/web-sdk";
braze.initialize(apiKey, {
baseUrl: baseUrl,
doNotLoadFontAwesome: true,
});
```
Si vous choisissez d'utiliser Font Awesome, les directives CSP suivantes sont requises :
- `font-src https://use.fontawesome.com`
- `style-src https://use.fontawesome.com`
- `style-src 'nonce-...'` ou `style-src 'unsafe-inline'`
# Accessibilité
Source: /docs/fr/developer_guide/platforms/web/accessibility/index.md
# Accessibilité {#accessibility}
> Cet article présente un aperçu de la manière dont Braze prend en charge l'accessibilité au sein de votre intégration.
Le SDK Web Braze est conforme aux normes définies par les [directives d'accessibilité du contenu Web (WCAG 2.1)](https://www.w3.org/TR/WCAG21/). Nous maintenons un [score Lighthouse de 100/100](https://developer.chrome.com/docs/lighthouse/accessibility/scoring) pour les Content Cards et les messages in-app sur toutes nos nouvelles versions afin de respecter notre norme d'accessibilité.
## Conditions préalables {#prerequisites}
La version minimale du SDK conforme à la norme WCAG 2.1 est proche de la version 3.4.0. Cependant, nous recommandons de procéder à une mise à niveau vers la version 6.0.0 au minimum afin de bénéficier des corrections majeures apportées aux balises d'image.
### Corrections notables en matière d'accessibilité {#notable-accessibility-fixes}
| Version | Type | Principaux changements |
|---------|------|-------------|
| **6.0.0** | **Majeur** | Images en tant que balises ``, champs `imageAltText` ou `language`, améliorations générales de l'accessibilité de l'interface utilisateur |
| **3.5.0** | Mineur | Améliorations de l'accessibilité du texte défilable |
| **3.4.0** | Correctif | Correction du rôle `article` des Content Cards |
| **3.2.0** | Mineur | Cibles tactiles minimales de 45x45 px pour les boutons |
| **3.1.2** | Mineur | Texte alternatif par défaut pour les images |
| **2.4.1** | **Majeur** | HTML sémantique (`h1` ou `button`), attributs ARIA, navigation au clavier, gestion du focus |
| **2.0.5** | Mineur | Gestion du focus, navigation au clavier, étiquettes |
{: .reset-td-br-1, .reset-td-br-2 aria-label="Notable accessibility fixes" }
## Fonctionnalités d'accessibilité prises en charge {#supported-accessibility-features}
Nous prenons en charge les fonctionnalités suivantes pour les Content Cards et les messages in-app :
- Rôles et étiquettes ARIA
- Prise en charge de la navigation au clavier
- Gestion du focus
- Annonces du lecteur d'écran
- Prise en charge du texte alternatif pour les images
## Directives d'accessibilité pour les intégrations SDK {#accessibility-guidelines-for-sdk-integrations}
Consultez [Créer des messages accessibles dans Braze](https://www.braze.com/docs/fr/fr/user_guide/messaging/messaging_fundamentals/accessibility/) pour obtenir des directives générales en matière d'accessibilité. Ce guide fournit des conseils et des bonnes pratiques pour optimiser l'accessibilité lors de l'intégration du SDK Web Braze dans votre application web.
### Content Cards
#### Définition d'une hauteur maximale {#setting-a-maximum-height}
Afin d'éviter que les Content Cards n'occupent trop d'espace vertical et d'améliorer l'accessibilité, vous pouvez définir une hauteur maximale pour le conteneur du flux, comme dans l'exemple suivant :
```css
/* Limit the height of the Content Cards feed */
.ab-feed {
max-height: 600px; /* Adjust to your needs */
overflow-y: auto;
}
/* For inline feeds (non-sidebar), you may want to limit individual cards */
.ab-card {
max-height: 400px; /* Optional: limit individual card height */
overflow: hidden;
}
```
#### Considérations relatives à la fenêtre d'affichage {#viewport-considerations}
Pour les Content Cards affichées en ligne, tenez compte des contraintes de la fenêtre d'affichage, comme dans cet exemple.
```css
/* Limit feed height on mobile to prevent covering too much screen */
@media (max-width: 768px) {
body > .ab-feed {
max-height: 80vh; /* Leave space for other content */
}
}
```
### Messages in-app {#in-app-messages}
**Warning:**
Ne placez pas d'informations importantes dans les messages in-app de type slide up, car ils ne sont pas accessibles aux lecteurs d'écran.
### Considérations relatives aux appareils mobiles {#mobile-considerations}
#### Conception réactive {#responsive-design}
Le SDK comprend des points d'arrêt réactifs. Vérifiez que vos personnalisations s'adaptent à toutes les tailles d'écran, comme dans l'exemple suivant :
```css
/* Mobile-specific accessibility considerations */
@media (max-width: 768px) {
/* Ensure readable font sizes */
.ab-feed {
font-size: 14px; /* Minimum 14px for mobile readability */
}
/* Ensure sufficient touch targets */
.ab-card {
padding: 16px; /* Adequate padding for touch */
}
}
```
### Tests d'accessibilité {#testing-accessibility}
#### Liste de contrôle pour les tests manuels {#manual-test-checklist}
Testez manuellement l'accessibilité en effectuant les tâches suivantes :
- Naviguez dans les Content Cards et les messages in-app à l'aide du clavier uniquement (Tab, Entrée, Espace)
- Testez avec un lecteur d'écran (NVDA, JAWS, VoiceOver)
- Vérifiez que toutes les images disposent d'un texte alternatif
- Vérifiez les rapports de contraste des couleurs (utilisez des outils tels que WebAIM Contrast Checker)
- Testez sur les appareils mobiles avec écran tactile
- Vérifiez que les indicateurs de focus sont visibles
- Testez le piégeage du focus des messages dans les fenêtres modales
- Vérifiez que tous les éléments interactifs sont accessibles au clavier
### Problèmes courants d'accessibilité {#common-accessibility-issues}
Pour éviter les problèmes courants d'accessibilité, suivez ces recommandations :
1. **Conservez les styles de focus :** les indicateurs de focus du SDK sont essentiels pour les utilisateurs de clavier.
2. **N'utilisez `display: none` que sur des éléments non interactifs :** utilisez `visibility: hidden` ou `opacity: 0` pour masquer les éléments interactifs.
3. **Ne remplacez pas les attributs ARIA :** le SDK définit les rôles et les étiquettes ARIA appropriés.
4. **Utilisez les attributs `tabindex` :** ils contrôlent l'ordre de navigation au clavier.
5. **Fournissez un défilement si vous définissez `overflow: hidden` :** vérifiez que le contenu défilable reste accessible.
6. **N'interférez pas avec les gestionnaires de clavier intégrés :** vérifiez que la navigation au clavier existante fonctionne correctement.
# Prise en charge de la TV connectée pour le SDK Web Braze
Source: /docs/fr/developer_guide/platforms/web/smart_tvs/index.md
# Prise en charge de la TV connectée
> Le SDK Web de Braze vous permet de collecter des analyses et d'afficher des messages in-app enrichis et des messages de carte de contenu aux utilisateurs de TV connectée, notamment les [téléviseurs Samsung Tizen](https://developer.samsung.com/smarttv/develop/specifications/tv-model-groups.html) et les [téléviseurs LG (webOS)](https://webostv.developer.lge.com/discover). Cet article explique comment utiliser le SDK Web de Braze pour l’intégrer aux TV connectées.
**Tip:**
Pour une référence technique complète, consultez notre [documentation JavaScript](https://js.appboycdn.com/web-sdk/latest/doc/modules/braze.html) ou nos [exemples d'applications](https://github.com/Appboy/smart-tv-sample-apps) pour voir le SDK Web fonctionner sur un téléviseur.
## Prerequisites
Before you can use this feature, you'll need to [integrate the Web Braze SDK](https://www.braze.com/docs/fr/fr/developer_guide/sdk_integration/?sdktab=web).
## Configuration du SDK de Braze Web
Deux changements sont nécessaires lors de l’intégration avec les TV connectées :
1. Lorsque vous téléchargez ou importez le SDK Web, assurez-vous d’utiliser le paquet « de base » (disponible à l'adresse `https://js.appboycdn.com/web-sdk/x.y/braze.core.min.js`, où `x.y` est la version souhaitée). Nous recommandons d’utiliser la version CDN de notre SDK Web, en effet la version NPM est rédigée en modules ES natifs alors que la version CDN est transpilée jusqu’à ES5. Si vous préférez utiliser la [version NPM](https://www.npmjs.com/package/@braze/web-sdk), assurez-vous d'utiliser un bundler tel que webpack qui supprimera le code inutilisé et que le code est transpilé jusqu'à ES5.
2. Lors de l’initialisation du SDK pour le Web, vous devez définir les options d’initialisation `disablePushTokenMaintenance` et `manageServiceWorkerExternally` sur `true`.
## Analyse
Toutes ces méthodes d’analyse du SDK pour le Web peuvent être utilisées sur les TV connectées. Pour obtenir un guide complet sur le suivi des événements personnalisés, des attributs personnalisés et plus encore, veuillez consulter [Analytics](https://www.braze.com/docs/fr/fr/developer_guide/analytics/tracking_sessions/?tab=web).
## Messages in-app et cartes de contenu
Le SDK Web de Braze prend en charge à la fois [les messages in-app](https://www.braze.com/docs/fr/fr/developer_guide/in_app_messages/?sdktab=web) et les [cartes de contenu](https://www.braze.com/docs/fr/fr/developer_guide/content_cards/?sdktab=web) sur les téléviseurs intelligents. Notez que vous devez utiliser le [SDK Web « de base »](https://www.npmjs.com/package/@braze/web-sdk) car le rendu des messages in-app et des cartes de contenu n'est pas pris en charge par l’affichage de notre interface utilisateur standard et doit être personnalisé par votre application pour s'intégrer à l'expérience de votre application TV.
Pour plus d'informations sur la manière dont votre TV connectée peut recevoir et afficher des messages in-app, voir [Déclencher des messages.](https://www.braze.com/docs/fr/fr/developer_guide/in_app_messages/triggering_messages/?tab=web)
# Intégrations TV et OTT pour Braze
Source: /docs/fr/developer_guide/platforms/tv_and_ott/index.md
# Intégrations TV et OTT {#tv-and-ott-integrations}
> À mesure que la technologie évolue vers de nouvelles plateformes et de nouveaux appareils, votre communication peut suivre le mouvement avec Braze ! Braze propose différents canaux d'engagement pour un certain nombre de systèmes d'exploitation télévisuels et de méthodes de diffusion de contenu Over-the-Top (OTT).
## Plateformes et fonctionnalités {#platforms-and-features}
Voici la liste des fonctionnalités et canaux de communication pris en charge aujourd'hui.
Plateformes et fonctionnalités
Type d'appareil
Données et analyses
Messages in-app
Content Cards
Notifications push
Canvas
Indicateurs de fonctionnalité
Bannières
Amazon Fire TV
Kindle Fire
Android TV
LG TV (webOS)
S.O.
Samsung Tizen TV
S.O.
Roku
S.O.
Apple TV OS
Apple Vision Pro
- = Pris en charge
- = Prise en charge partielle
- = Non pris en charge par Braze
- S.O. = Non pris en charge par la plateforme OTT
## Guides d'intégration {#integration-guides}
### Amazon Fire TV {#fire-tv}
Utilisez le SDK Fire OS de Braze pour l'intégration avec les appareils Amazon Fire TV.
Les fonctionnalités comprennent :
- Collecte de données et d'analyses pour l'engagement cross-canal
- Notifications push (connues sous le nom de [« Heads Up Notifications »](https://developer.amazon.com/docs/fire-tv/notifications.html#headsup))
- La priorité doit être définie sur « HIGH » pour qu'elles apparaissent. Toutes les notifications apparaissent dans le menu des paramètres Fire TV.
- Content Cards
- Indicateurs de fonctionnalité
- Messages in-app
- Pour afficher les messages HTML dans des environnements non tactiles tels que les téléviseurs, définissez `com.braze.configuration.BrazeConfig.Builder.setIsTouchModeRequiredForHtmlInAppMessages` sur `false` (disponible à partir du [SDK Android v23.1.0](https://github.com/braze-inc/braze-android-sdk/blob/master/CHANGELOG.md#2310))
- Bannières
- Utilisez les [emplacements de bannières](https://www.braze.com/docs/fr/fr/developer_guide/banners/placements/) pour intégrer des messages directement dans votre application Fire TV.
Pour plus d'informations, consultez le [guide d'intégration Fire OS](https://www.braze.com/docs/fr/fr/developer_guide/sdk_integration/?sdktab=android).
### Kindle Fire {#kindle-fire}
Utilisez le SDK Fire OS de Braze pour l'intégration avec les appareils Amazon Kindle Fire.
Les fonctionnalités comprennent :
- Collecte de données et d'analyses pour l'engagement cross-canal
- Notifications push
- Content Cards
- Indicateurs de fonctionnalité
- Messages in-app
- Bannières
- Utilisez les [emplacements de bannières](https://www.braze.com/docs/fr/fr/developer_guide/banners/placements/) pour intégrer des messages directement dans votre Kindle Fire.
Pour plus d'informations, consultez le [guide d'intégration Fire OS](https://www.braze.com/docs/fr/fr/developer_guide/sdk_integration/?sdktab=android).
### Android TV {#android-tv}
Utilisez le SDK Android de Braze pour l'intégration avec les appareils Android TV.
Les fonctionnalités comprennent :
- Collecte de données et d'analyses pour l'engagement cross-canal
- Content Cards
- Indicateurs de fonctionnalité
- Messages in-app
- Pour afficher les messages HTML dans des environnements non tactiles tels que les téléviseurs, définissez `com.braze.configuration.BrazeConfig.Builder.setIsTouchModeRequiredForHtmlInAppMessages` sur `false` (disponible à partir du [SDK Android v23.1.0](https://github.com/braze-inc/braze-android-sdk/blob/master/CHANGELOG.md#2310))
- * Notifications push (intégration manuelle requise)
- Les notifications push ne sont pas prises en charge nativement sur Android TV. Pour en savoir plus, consultez les [directives de conception](https://designguidelines.withgoogle.com/android-tv/patterns/notifications.html) de Google. Vous pouvez toutefois **procéder à une intégration manuelle de l'interface utilisateur des notifications push pour y parvenir**. Consultez notre [documentation](https://www.braze.com/docs/fr/fr/developer_guide/push_notifications/?sdktab=android%20tv) pour savoir comment procéder.
- Bannières
- Utilisez les [emplacements de bannières](https://www.braze.com/docs/fr/fr/developer_guide/banners/placements/) pour intégrer des messages directement dans votre application Android TV.
Pour plus d'informations, consultez le [guide d'intégration du SDK Android](https://www.braze.com/docs/fr/fr/developer_guide/sdk_integration/?sdktab=android).
**Note:**
Veillez à créer une nouvelle application Android dans le tableau de bord pour votre intégration Android OTT.
### LG webOS {#lg-webos}
Utilisez le SDK Web de Braze pour l'intégration avec les [téléviseurs LG webOS](https://webostv.developer.lge.com/discover).
Les fonctionnalités comprennent :
- Collecte de données et d'analyses pour l'engagement cross-canal
- Content Cards (via l'[interface utilisateur Headless](#custom-ui))
- Indicateurs de fonctionnalité
- Messages in-app (via l'[interface utilisateur Headless](#custom-ui))
- Bannières
- Utilisez les [emplacements de bannières](https://www.braze.com/docs/fr/fr/developer_guide/banners/placements/) pour intégrer des messages directement dans votre application webOS.
Pour plus d'informations, consultez le [guide d'intégration TV connectée Web](https://www.braze.com/docs/fr/fr/developer_guide/platforms/web/smart_tvs/).
### Samsung Tizen {#tizen}
Utilisez le SDK Web de Braze pour l'intégration avec les [téléviseurs Samsung Tizen](https://developer.samsung.com/smarttv/develop/specifications/tv-model-groups.html).
Les fonctionnalités comprennent :
- Collecte de données et d'analyses pour l'engagement cross-canal
- Content Cards (via l'[interface utilisateur Headless](#custom-ui))
- Indicateurs de fonctionnalité
- Messages in-app (via l'[interface utilisateur Headless](#custom-ui))
- Bannières
- Utilisez les [emplacements de bannières](https://www.braze.com/docs/fr/fr/developer_guide/banners/placements/) pour intégrer des messages directement dans votre application Tizen.
Pour plus d'informations, consultez le [guide d'intégration TV connectée Web](https://www.braze.com/docs/fr/fr/developer_guide/platforms/web/smart_tvs/).
### Roku {#roku}
Utilisez le SDK Roku de Braze pour l'intégration avec les [téléviseurs Roku](https://developer.roku.com/docs/developer-program/getting-started/roku-dev-prog.md).
Les fonctionnalités comprennent :
- Collecte de données et d'analyses pour l'engagement cross-canal
- Messages in-app (via l'[interface utilisateur Headless](#custom-ui))
- Les webviews ne sont pas prises en charge par la plateforme Roku. Par conséquent, les messages in-app HTML ne sont pas pris en charge.
- Indicateurs de fonctionnalité
Pour plus d'informations, consultez le [guide d'intégration Roku](https://www.braze.com/docs/fr/fr/developer_guide/in_app_messages/?sdktab=roku).
### Apple TV OS {#tvos}
Utilisez le SDK Swift de Braze pour l'intégration avec tvOS. Gardez à l'esprit que le SDK Swift n'inclut aucune interface utilisateur ou vue par défaut pour tvOS ; vous devrez donc implémenter les vôtres.
Les fonctionnalités comprennent :
- Collecte de données et d'analyses pour l'engagement cross-canal
- Content Cards (via l'[interface utilisateur Headless](#custom-ui))
- Indicateurs de fonctionnalité
- Messages in-app (via l'[interface utilisateur Headless](#custom-ui))
- Les webviews ne sont pas prises en charge par la plateforme tvOS. Par conséquent, les messages in-app HTML ne sont pas pris en charge.
- Consultez notre [exemple d'application](https://github.com/braze-inc/braze-swift-sdk/tree/main/Examples#inappmessages-custom-ui) pour en savoir plus sur l'utilisation d'une interface utilisateur Headless pour un envoi de messages personnalisé sur tvOS.
- Notifications push silencieuses et mise à jour des badges
- Bannières
- Utilisez les [emplacements de bannières](https://www.braze.com/docs/fr/fr/developer_guide/banners/placements/) pour intégrer des messages directement dans votre application tvOS.
Pour plus d'informations, consultez le [guide d'intégration du SDK Swift pour iOS](https://github.com/braze-inc/braze-swift-sdk).
**Note:**
Pour éviter d'afficher des messages in-app mobiles à vos utilisateurs TV, veillez à configurer soit le [ciblage des applications](#app-targeting), soit des paires clé-valeur pour filtrer les messages. Par exemple, n'affichez les messages tvOS que s'ils contiennent une paire clé-valeur spéciale `tv = true`.
### Apple Vision Pro {#vision-pro}
Utilisez le SDK Swift de Braze pour l'intégration avec visionOS. La plupart des fonctionnalités disponibles sur iOS sont également disponibles sur visionOS, notamment :
- Analyses (sessions, événements personnalisés, achats, etc.)
- Messages in-app (modèles de données et interface utilisateur)
- Content Cards (modèles de données et interface utilisateur)
- Notifications push (visibles par l'utilisateur avec boutons d'action et notifications silencieuses)
- Indicateurs de fonctionnalité
- Analyse de localisation
- Bannières
- Utilisez les [emplacements de bannières](https://www.braze.com/docs/fr/fr/developer_guide/banners/placements/) pour intégrer des messages directement dans votre application visionOS.
Pour plus d'informations, consultez le [guide d'intégration du SDK Swift pour iOS](https://github.com/braze-inc/braze-swift-sdk).
**Important:**
Certaines fonctionnalités iOS sont partiellement prises en charge ou non prises en charge. Pour obtenir la liste complète, consultez la [prise en charge de visionOS](https://www.braze.com/docs/fr/fr/developer_guide/platform_integration_guides/swift/visionos/).
## Ciblage des applications {#app-targeting}
Pour cibler les applications OTT avec vos messages, nous vous recommandons de créer un segment spécifique à votre application OTT.

## Interface utilisateur Headless {#custom-ui}
**Important:**
Les plateformes qui prennent en charge les messages in-app ou les Content Cards via une interface utilisateur Headless **n'incluent pas** d'interface utilisateur ou de vues par défaut. Créez votre propre interface utilisateur personnalisée (par exemple pour les messages in-app), puis utilisez les modèles de données fournis par le SDK pour alimenter ces interfaces.
Avec l'interface utilisateur Headless, Braze fournit un modèle de données, tel que du JSON, que votre application peut lire et utiliser au sein d'une interface contrôlée par votre application. Ces données contiennent les champs configurés dans le tableau de bord (titre, corps, texte du bouton, couleurs, etc.) que votre application peut lire et afficher en conséquence. Pour plus d'informations sur la gestion personnalisée des messages, consultez les ressources suivantes :
**SDK Android**
- [Personnalisation des messages in-app](https://www.braze.com/docs/fr/fr/developer_guide/in_app_messages/customization/?sdktab=android#android_setting-custom-manager-listeners)
- [Personnalisation des Content Cards](https://www.braze.com/docs/fr/fr/developer_guide/content_cards/customizing_cards/style/)
**SDK Swift**
- [Personnalisation des messages in-app](https://braze-inc.github.io/braze-swift-sdk/documentation/brazekit/brazeinappmessagepresenter/)
- [Exemple d'application Headless UI](https://github.com/braze-inc/braze-swift-sdk/tree/main/Examples#inappmessages-custom-ui)
- [Personnalisation des Content Cards](https://braze-inc.github.io/braze-swift-sdk/documentation/brazekit/braze/contentcards-swift.class/)
**SDK Web**
- [Personnalisation des messages in-app](https://www.braze.com/docs/fr/fr/developer_guide/in_app_messages/triggering_messages/?tab=web)
- [Personnalisation des Content Cards](https://www.braze.com/docs/fr/fr/developer_guide/content_cards/customizing_cards/style/)
# Aperçu de l’intégration pour iOS
Source: /docs/fr/developer_guide/platforms/legacy_sdks/ios/initial_sdk_setup/overview/index.md
**Warning:**
[AppboyKit](https://github.com/Appboy/appboy-ios-sdk) (also known as the Objective-C SDK) is no longer supported and has been replaced by the [Swift SDK](https://www.braze.com/docs/fr/fr/developer_guide/sdk_integration/?sdktab=swift). It will no longer receive new features, bug fixes, security updates, or technical support—however, messaging and analytics will continue to function as normal. To learn more, see [Introducing the New Braze Swift SDK](https://www.braze.com/resources/articles/introducing-the-new-braze-swift-sdk).
L’installation du SDK Braze pour iOS vous offrira des fonctionnalités d’analyse de base (gestion de session) et des messages in-app de base. Vous devez davantage personnaliser votre intégration pour plus de canaux et de fonctionnalités.
Le SDK Braze pour iOS peut être installé ou mis à jour à l’aide des champs Cocoapods, Carthage, Gestionnaire de paquets Swift ou d’une intégration manuelle.
De plus, le SDK Braze pour iOS prend en charge les applications RubyMotion.
**Important:**
Le SDK iOS ajoutera 1 à 2 Mo au fichier IPA de l'application, en plus d'un fichier APP, et 30 Mo pour le framework.
Après avoir effectué l’intégration en utilisant l’une des options citées, après avoir suivi les étapes pour [réaliser l’intégration](https://www.braze.com/docs/fr/fr/developer_guide/platforms/legacy_sdks/ios/initial_sdk_setup/completing_integration/) et après avoir activé d’autres personnalisations SDK (facultatif), passez à l’intégration, à l’activation et à la personnalisation d’autres canaux et fonctionnalités pour répondre aux besoins de vos futures campagnes.
# Intégration de Carthage pour iOS
Source: /docs/fr/developer_guide/platforms/legacy_sdks/ios/initial_sdk_setup/installation_methods/carthage_integration/index.md
**Warning:**
[AppboyKit](https://github.com/Appboy/appboy-ios-sdk) (also known as the Objective-C SDK) is no longer supported and has been replaced by the [Swift SDK](https://www.braze.com/docs/fr/fr/developer_guide/sdk_integration/?sdktab=swift). It will no longer receive new features, bug fixes, security updates, or technical support—however, messaging and analytics will continue to function as normal. To learn more, see [Introducing the New Braze Swift SDK](https://www.braze.com/resources/articles/introducing-the-new-braze-swift-sdk).
# Intégration de Carthage
## Importer le SDK
À partir de la version `4.4.0`, le SDK Braze prend en charge XCFrameworks lors de l’intégration via Carthage. Pour importer le SDK complet, incluez ces lignes dans votre `Cartfile` :
```
binary "https://raw.githubusercontent.com/Appboy/appboy-ios-sdk/master/appboy_ios_sdk.json"
github "SDWebImage/SDWebImage"
```
Consultez le [Guide de démarrage rapide de Carthage](https://github.com/Carthage/Carthage#quick-start) pour plus d'instructions sur l'importation du SDK.
Lors de la migration à partir d'une version antérieure à `4.4.0`, suivez le [Guide de migration de Carthage pour XCFrameworks](https://github.com/Carthage/Carthage#migrating-a-project-from-framework-bundles-to-xcframeworks).
**Note:**
Pour plus de détails sur la syntaxe du `Cartfile` ou des fonctionnalités telles que le verrouillage de version, consultez la [documentation de Carthage](https://github.com/Carthage/Carthage/blob/master/Documentation/Artifacts.md#cartfile).
Pour l'utilisation spécifique à la plateforme de Carthage, consultez leur [guide de l'utilisateur](https://github.com/Carthage/Carthage#if-youre-building-for-ios-tvos-or-watchos).
### Versions précédentes
Pour les versions `3.24.0` à `4.3.4`, incluez les éléments suivants dans votre `Cartfile` :
```
binary "https://raw.githubusercontent.com/Appboy/appboy-ios-sdk/master/appboy_ios_sdk_full.json"
```
Pour importer des versions antérieures à `3.24.0`, incluez les éléments suivants dans votre `Cartfile` :
```
github "Appboy/Appboy-iOS-SDK" ""
```
Assurez-vous de remplacer `` par la [version appropriée](https://github.com/Appboy/appboy-ios-sdk/releases) du SDK iOS de Braze au format "x.y.z".
## Étapes suivantes
Suivez les instructions pour [compléter l'intégration](https://www.braze.com/docs/fr/fr/developer_guide/platforms/legacy_sdks/ios/initial_sdk_setup/completing_integration/).
## Intégration principale uniquement
Si vous souhaitez utiliser le SDK Core sans composants ou dépendances de l’interface utilisateur, installez la version principale de l’infrastructure Carthage de Braze en incluant la ligne suivante dans votre `Cartfile` :
```
binary "https://raw.githubusercontent.com/Appboy/appboy-ios-sdk/master/appboy_ios_sdk_core.json"
```
# Intégration de CocoaPods pour iOS
Source: /docs/fr/developer_guide/platforms/legacy_sdks/ios/initial_sdk_setup/installation_methods/cocoapods/index.md
**Warning:**
[AppboyKit](https://github.com/Appboy/appboy-ios-sdk) (also known as the Objective-C SDK) is no longer supported and has been replaced by the [Swift SDK](https://www.braze.com/docs/fr/fr/developer_guide/sdk_integration/?sdktab=swift). It will no longer receive new features, bug fixes, security updates, or technical support—however, messaging and analytics will continue to function as normal. To learn more, see [Introducing the New Braze Swift SDK](https://www.braze.com/resources/articles/introducing-the-new-braze-swift-sdk).
# Intégration de CocoaPods {#cocoapods-integration}
## Étape 1 : Installer CocoaPods {#step-1-install-cocoapods}
L'installation du SDK iOS via [CocoaPods](http://cocoapods.org/) automatise la majeure partie du processus d'installation à votre place. Avant de lancer ce processus, assurez-vous d'utiliser [Ruby 2.0.0](https://www.ruby-lang.org/en/installation/) ou une version ultérieure. Ne vous inquiétez pas, il n'est pas nécessaire de connaître la syntaxe Ruby pour installer ce SDK.
Exécutez la commande suivante pour démarrer :
```bash
$ sudo gem install cocoapods
```
Si vous rencontrez des problèmes avec CocoaPods, consultez le [guide de résolution des problèmes](http://guides.cocoapods.org/using/troubleshooting.html) de CocoaPods.
**Note:**
Si vous êtes invité à écraser l'exécutable `rake`, consultez les instructions de [démarrage](http://guides.cocoapods.org/using/getting-started.html) sur CocoaPods.org pour plus de détails.
## Étape 2 : Construire le Podfile {#step-2-constructing-the-podfile}
Maintenant que vous avez installé le CocoaPods Ruby Gem, vous devez créer un fichier dans votre répertoire de projet Xcode nommé `Podfile`.
Ajoutez la ligne suivante à votre Podfile :
```
target 'YourAppTarget' do
pod 'Appboy-iOS-SDK'
end
```
Nous vous suggérons de versionner Braze afin que les mises à jour du pod récupèrent automatiquement tout ce qui est inférieur à une mise à jour mineure de version. Cela ressemble à `pod 'Appboy-iOS-SDK' ~> Major.Minor.Build`. Si vous souhaitez intégrer automatiquement la dernière version du SDK Braze, même avec des modifications majeures, vous pouvez utiliser `pod 'Appboy-iOS-SDK'` dans votre Podfile.
#### Sous-spécifications {#subspecs}
Nous recommandons aux intégrateurs d'importer notre SDK complet. Cependant, si vous êtes certain de n'intégrer qu'une fonctionnalité Braze spécifique, vous pouvez importer uniquement la sous-spécification d'interface utilisateur souhaitée plutôt que le SDK complet.
| Sous-spécification | Détails |
| ------- | ------- |
| `pod 'Appboy-iOS-SDK/InAppMessage'` | La sous-spécification `InAppMessage` contient l'interface utilisateur des messages in-app de Braze et le SDK Core. |
| `pod 'Appboy-iOS-SDK/ContentCards'` | La sous-spécification `ContentCards` contient l'interface utilisateur des Content Cards de Braze et le SDK Core. |
| `pod 'Appboy-iOS-SDK/NewsFeed'` | La sous-spécification `NewsFeed` contient le SDK Core de Braze. |
| `pod 'Appboy-iOS-SDK/Core'` | La sous-spécification `Core` prend en charge l'analytique, comme les événements personnalisés et les attributs. |
{: .ws-td-nw-1 aria-label="Subspecs" }
## Étape 3 : Installer le SDK Braze {#step-3-installing-the-braze-sdk}
Pour installer le SDK Braze via CocoaPods, accédez au répertoire de votre projet d'application Xcode dans votre terminal et exécutez la commande suivante :
```
pod install
```
À ce stade, vous devriez pouvoir ouvrir le nouvel espace de travail du projet Xcode créé par CocoaPods. Assurez-vous d'utiliser cet espace de travail Xcode au lieu de votre projet Xcode.

## Étapes suivantes {#next-steps}
Suivez les instructions pour [terminer l'intégration](https://www.braze.com/docs/fr/fr/developer_guide/platforms/legacy_sdks/ios/initial_sdk_setup/completing_integration/).
## Mettre à jour le SDK Braze via CocoaPods {#updating-the-braze-sdk-via-cocoapods}
Pour mettre à jour un CocoaPod, il vous suffit d'exécuter la commande suivante dans votre répertoire de projet :
```
pod update
```
# Intégration du Gestionnaire de paquets Swift pour iOS
Source: /docs/fr/developer_guide/platforms/legacy_sdks/ios/initial_sdk_setup/installation_methods/swift_package_manager/index.md
**Warning:**
[AppboyKit](https://github.com/Appboy/appboy-ios-sdk) (also known as the Objective-C SDK) is no longer supported and has been replaced by the [Swift SDK](https://www.braze.com/docs/fr/fr/developer_guide/sdk_integration/?sdktab=swift). It will no longer receive new features, bug fixes, security updates, or technical support—however, messaging and analytics will continue to function as normal. To learn more, see [Introducing the New Braze Swift SDK](https://www.braze.com/resources/articles/introducing-the-new-braze-swift-sdk).
# Intégration du Gestionnaire de paquets Swift
L’installation du SDK iOS via le [Gestionnaire de paquets Swift (SPM)](https://swift.org/package-manager/) permet d’automatiser la majeure partie du processus d’installation. Avant de commencer ce processus, assurez-vous que vous utilisez Xcode 12 ou supérieur.
**Note:**
tvOS n’est pas disponible actuellement via le gestionnaire de paquets Swift.
## Étape 1 : Ajouter la dépendance à votre projet
### Importer la version SDK
Ouvrez votre projet et naviguez vers les paramètres de votre projet. Sélectionnez l'onglet **Paquets Swift** et cliquez sur le bouton d'ajout sous la liste des paquets.

Lors de l’importation de la version SDK `3.33.1` ou ultérieure, saisissez l’URL de notre référentiel SDK iOS (`https://github.com/braze-inc/braze-ios-sdk`) dans le champ de texte et cliquez sur **Suivant**.
Pour les versions de `3.29.0` à `3.32.0`, utilisez l’URL `https://github.com/Appboy/Appboy-ios-sdk`.

Dans l'écran suivant, sélectionnez la version du SDK et cliquez sur **Suivant**. Les versions `3.29.0` et suivantes sont compatibles avec le gestionnaire de paquets Swift.

### Sélectionner les paquets
Sélectionnez la formule qui correspond le mieux à vos besoins et cliquez sur **Terminer**. Assurez-vous de sélectionner `AppboyKit` ou `AppboyUI`. L’inclusion des deux paquets peut entraîner un comportement indésirable :
- `AppboyUI`
- Convient mieux si vous prévoyez d’utiliser des composants d’interface utilisateur fournis par Braze.
- Inclut automatiquement `AppboyKit`.
- `AppboyKit`
- Convient mieux si vous n’avez pas besoin d’utiliser les composants de l’interface utilisateur fournis par Braze (par ex., cartes de contenu, messages in-app, etc.).
- `AppboyPushStory`
- Incluez ce paquet si vous avez intégré Push Stories dans votre application. Cela est pris en charge à partir de la version `3.31.0`.
- Dans le menu déroulant `Add to Target`, sélectionnez votre cible `ContentExtension` plutôt que de la cible de votre application principale.

## Étape 2 : Configuration de votre projet
Naviguez ensuite jusqu’aux **paramètres de création** de votre projet et ajoutez l’indicateur `-ObjC` au paramètre **Autres indicateurs de lien**. Cet indicateur doit être ajouté et toutes les [erreurs](https://developer.apple.com/library/archive/qa/qa1490/_index.html) résolues pour pouvoir mieux intégrer le SDK.

**Note:**
Si vous n’ajoutez pas l’indicateur `-ObjC`, des parties de l’API pourront manquer et le comportement ne sera pas défini. Vous pouvez rencontrer des erreurs inattendues telles qu’un « sélecteur non reconnu envoyé à la classe », des pannes de l’application et d’autres problèmes.
## Étape 3 : Modification du schéma de la cible
**Important:**
Si vous utilisez Xcode 12.5 ou une version plus récente, ignorez cette étape.
Si vous utilisez Xcode 12.4 ou une version antérieure, modifiez le schéma de la cible, y compris le paquet Appboy (élément de menu **Produit > Schéma > Modifier le schéma**) :
1. Développez le menu **Créer** et sélectionnez **Post-actions**. Appuyez sur le bouton plus (+) et sélectionnez **Nouvelle action de script d'exécution**.
2. Dans le menu déroulant **Fournir des paramètres de création à partir de**, sélectionnez la cible de votre application.
3. Copiez ce script dans le champ ouvert :
```sh
# iOS
bash "$BUILT_PRODUCTS_DIR/Appboy_iOS_SDK_AppboyKit.bundle/Appboy.bundle/appboy-spm-cleanup.sh"
# macOS (if applicable)
bash "$BUILT_PRODUCTS_DIR/Appboy_iOS_SDK_AppboyKit.bundle/Contents/Resources/Appboy.bundle/appboy-spm-cleanup.sh"
```

## Étapes suivantes
Suivez les instructions pour [terminer l'intégration](https://www.braze.com/docs/fr/fr/developer_guide/platforms/legacy_sdks/ios/initial_sdk_setup/completing_integration/).
# Options d’intégration manuelle pour iOS
Source: /docs/fr/developer_guide/platforms/legacy_sdks/ios/initial_sdk_setup/installation_methods/manual_integration_options/index.md
**Warning:**
[AppboyKit](https://github.com/Appboy/appboy-ios-sdk) (also known as the Objective-C SDK) is no longer supported and has been replaced by the [Swift SDK](https://www.braze.com/docs/fr/fr/developer_guide/sdk_integration/?sdktab=swift). It will no longer receive new features, bug fixes, security updates, or technical support—however, messaging and analytics will continue to function as normal. To learn more, see [Introducing the New Braze Swift SDK](https://www.braze.com/resources/articles/introducing-the-new-braze-swift-sdk).
# Intégration manuelle
**Tip:**
Nous vous recommandons vivement d’implémenter le SDK via un gestionnaire de paquets tel que [Gestionnaire de paquets swift](../swift_package_manager/), [CocoaPods](../cocoapods/) ou [Carthage](../carthage_integration/). Cela vous fera gagner beaucoup de temps et automatisera une grande partie du processus. Cependant, si vous ne parvenez pas à le faire, vous pouvez terminer l’intégration manuellement en suivant les instructions.
## Étape 1 : Téléchargement du SDK Braze
### Option 1 : XCFramework dynamique
1. Téléchargez `Appboy_iOS_SDK.xcframework.zip` depuis la [page de publication](https://github.com/appboy/appboy-ios-sdk/releases) et extrayez le fichier.
2. Dans Xcode, faites glisser et déposez `.xcframework` dans votre projet.
3. Sous l'onglet **Général** du projet, sélectionnez **Intégrer le signe & ** pour `Appboy_iOS_SDK.xcframework`.
### Option 2 : XCFramework statique pour l’intégration statique
1. Téléchargez `Appboy_iOS_SDK.zip` à partir de la [page de version](https://github.com/appboy/appboy-ios-sdk/releases).
2. Dans Xcode, à partir du navigateur de projet, sélectionnez le projet ou le groupe de destination pour Braze
3. Naviguez vers **Fichier > Ajouter des fichiers > Project_Name**.
4. Ajoutez les dossiers `AppboyKit` et `AppboyUI` de votre projet en tant que groupe.
- Assurez-vous que l'option **Copier les éléments dans le dossier du groupe de destination** est sélectionnée si vous effectuez l'intégration pour la première fois. Développez **Options** dans le sélecteur de fichiers pour sélectionner **Copier les éléments si nécessaire** et **Créer des groupes**.
- Supprimer les répertoires `AppboyKit/include` et `AppboyUI/include`.
5. (Facultatif) Si l’un des éléments suivants s’applique à vous :
- Vous souhaitez uniquement bénéficier des fonctionnalités d'analyse de base du SDK et n'utilisez aucune fonctionnalité de l'interface utilisateur (par exemple, les messages in-app ou les cartes de contenu).
- Vous disposez d'une interface utilisateur personnalisée pour les fonctionnalités de Braze UI et gérez vous-même le téléchargement des images.
Vous pouvez utiliser la version principale du SDK en supprimant le fichier `ABKSDWebImageProxy.m` et `Appboy.bundle`. Cela supprimera la dépendance du framework `SDWebImage` et toutes les ressources liées à l'interface utilisateur (par exemple, les fichiers Nib, les images, les fichiers de localisation) du SDK.
**Warning:**
Si vous essayez d'utiliser la version principale du SDK sans les fonctionnalités de l’IU de Braze, les messages in-app ne s'afficheront pas. Si vous essayez d'afficher l'interface utilisateur des cartes de contenu de Braze avec la version de base, vous risquez d'obtenir des résultats imprévisibles.
## Étape 2 : Ajouter les bibliothèques iOS requises
1. Cliquez sur la cible de votre projet (en utilisant la navigation de gauche), et sélectionnez l'onglet **Phases de création**.
2. Cliquez sur le bouton sous **Lien binaire avec les bibliothèques**.
3. Dans le menu, sélectionnez `SystemConfiguration.framework`.
4. Marquez cette bibliothèque comme requise à l’aide du menu déroulant à côté de `SystemConfiguration.framework`.
5. Répétez l'opération pour ajouter chacun des frameworks suivants à votre projet, en les marquant comme « requis ».
- `QuartzCore.framework`
- `libz.tbd`
- `CoreImage.framework`
- `CoreText.framework`
- `WebKit.framework`
6. Ajoutez les infrastructures suivantes et marquez-les comme facultatif :
- `CoreTelephony.framework`
7. Sélectionnez l'onglet **Build Settings (Paramètres de création)**. Dans la section **Liaison**, localisez le paramètre **Autres indicateurs de lien** et ajoutez l’indicateur `-ObjC`.
8. Le cadre `SDWebImage` est nécessaire pour les cartes de contenu et les messages in-app pour fonctionner correctement. `SDWebImage` est utilisé pour télécharger et afficher l’image, y compris les GIF. Si vous avez l’intention d’utiliser les cartes de contenu ou les messages in-app, suivez les étapes d’intégration SDWebImage.
### Intégration de SDWebImage
Pour installer `SDWebImage`, suivez les [instructions](https://github.com/SDWebImage/SDWebImage/wiki/Installation-Guide#build-sdwebimage-as-xcframework), puis faites glisser et déposez le `XCFramework` créé dans votre projet.
### Suivi facultatif de la localisation
1. Ajouter le `CoreLocation.framework` pour activer le suivi de la localisation.
2. Vous devez autoriser la localisation de vos utilisateurs à l’aide de `CLLocationManager` dans votre application.
## Étape 3 : Objective-C bridging header
**Note:**
Si votre projet utilise uniquement Objective-C, ignorez cette étape.
Si votre projet utilise Swift, vous aurez besoin d’un fichier d’en-tête de pont.
Si vous n'avez pas de fichier d'en-tête de pontage, créez-en un et nommez-le `your-product-module-name-Bridging-Header.h` en choisissant **Fichier > Nouveau > Fichier > (iOS ou OS X) > Source > Fichier d'en-tête.** Ajoutez ensuite la ligne de code suivante au haut de votre fichier d’en-tête de pont :
```
#import "AppboyKit.h"
```
Dans les **paramètres de création** de votre projet, ajoutez le chemin relatif de votre fichier d’en-tête au paramètre de création `Objective-C Bridging Header` sous `Swift Compiler - Code Generation`.
## Étapes suivantes
Suivez les instructions pour [terminer l'intégration](https://www.braze.com/docs/fr/fr/developer_guide/platforms/legacy_sdks/ios/initial_sdk_setup/completing_integration/).
# Terminer l'intégration du SDK iOS
Source: /docs/fr/developer_guide/platforms/legacy_sdks/ios/initial_sdk_setup/completing_integration/index.md
**Warning:**
[AppboyKit](https://github.com/Appboy/appboy-ios-sdk) (also known as the Objective-C SDK) is no longer supported and has been replaced by the [Swift SDK](https://www.braze.com/docs/fr/fr/developer_guide/sdk_integration/?sdktab=swift). It will no longer receive new features, bug fixes, security updates, or technical support—however, messaging and analytics will continue to function as normal. To learn more, see [Introducing the New Braze Swift SDK](https://www.braze.com/resources/articles/introducing-the-new-braze-swift-sdk).
# Terminer l'intégration {#complete-the-integration}
Avant de suivre ces étapes, assurez-vous d'avoir intégré le SDK en utilisant [Carthage](https://www.braze.com/docs/fr/fr/developer_guide/platforms/legacy_sdks/ios/initial_sdk_setup/installation_methods/carthage_integration/), [CocoaPods](https://www.braze.com/docs/fr/fr/developer_guide/platforms/legacy_sdks/ios/initial_sdk_setup/installation_methods/cocoapods/), le [gestionnaire de paquets swift](https://www.braze.com/docs/fr/fr/developer_guide/platforms/legacy_sdks/ios/initial_sdk_setup/installation_methods/swift_package_manager/) ou une intégration [manuelle](https://www.braze.com/docs/fr/fr/developer_guide/platforms/legacy_sdks/ios/initial_sdk_setup/installation_methods/manual_integration_options/).
## Étape 1 : Mettre à jour le délégué de votre application {#step-1-update-your-app-delegate}
Si vous intégrez le SDK Braze avec CocoaPods, Carthage ou avec une [intégration manuelle dynamique](https://www.braze.com/docs/fr/fr/developer_guide/platforms/legacy_sdks/ios/initial_sdk_setup/installation_methods/manual_integration_options/), ajoutez la ligne de code suivante à votre fichier `AppDelegate.m` :
```objc
#import "Appboy-iOS-SDK/AppboyKit.h"
```
Si vous procédez à une intégration avec le gestionnaire de paquets swift ou à une [intégration manuelle statique](https://www.braze.com/docs/fr/fr/developer_guide/platforms/legacy_sdks/ios/initial_sdk_setup/installation_methods/manual_integration_options/), utilisez cette ligne à la place :
```objc
#import "AppboyKit.h"
```
Ensuite, dans votre fichier `AppDelegate.m`, ajoutez l'extrait de code suivant dans votre méthode `application:didFinishLaunchingWithOptions:` :
```objc
[Appboy startWithApiKey:@"YOUR-APP-IDENTIFIER-API-KEY"
inApplication:application
withLaunchOptions:launchOptions];
```
Mettez à jour `YOUR-APP-IDENTIFIER-API-KEY` avec la valeur correcte depuis votre page **Gérer les paramètres**. Consultez notre [documentation sur l'API](https://www.braze.com/docs/fr/fr/api/api_key/#the-app-identifier-api-key) pour savoir où trouver la clé API de votre identifiant d'application.
Si vous intégrez le SDK Braze avec CocoaPods, Carthage ou avec une [intégration manuelle dynamique](https://www.braze.com/docs/fr/fr/developer_guide/platforms/legacy_sdks/ios/initial_sdk_setup/installation_methods/manual_integration_options/), ajoutez la ligne de code suivante à votre fichier `AppDelegate.swift` :
```swift
import Appboy_iOS_SDK
```
Si vous procédez à une intégration avec le gestionnaire de paquets swift ou à une [intégration manuelle statique](https://www.braze.com/docs/fr/fr/developer_guide/platforms/legacy_sdks/ios/initial_sdk_setup/installation_methods/manual_integration_options/), utilisez cette ligne à la place :
```swift
import AppboyKit
```
Reportez-vous à la [documentation des développeurs Apple](https://developer.apple.com/library/ios/documentation/swift/conceptual/buildingcocoaapps/MixandMatch.html) pour plus d'informations sur l'utilisation du code Objective-C dans les projets Swift.
Ensuite, dans `AppDelegate.swift`, ajoutez l'extrait de code suivant à votre méthode `application(application: UIApplication, didFinishLaunchingWithOptions launchOptions: [NSObject: AnyObject]?) -> Bool` :
```swift
Appboy.start(withApiKey: "YOUR-APP-IDENTIFIER-API-KEY", in:application, withLaunchOptions:launchOptions)
```
Mettez à jour `YOUR-APP-IDENTIFIER-API-KEY` avec la valeur correcte depuis votre page **Gérer les paramètres**. Consultez notre [documentation sur l'API](https://www.braze.com/docs/fr/fr/api/api_key/#the-app-identifier-api-key) pour savoir où trouver la clé API de votre identifiant d'application.
**Note:**
Le singleton `sharedInstance` sera nul avant que `startWithApiKey:` ne soit appelé, car il s'agit d'une condition préalable à l'utilisation de toute fonctionnalité de Braze.
**Warning:**
Assurez-vous d'initialiser Braze dans le fil principal de votre application. L'initialisation asynchrone peut entraîner un dysfonctionnement.
## Étape 2 : Spécifier votre cluster de données {#step-2-specify-your-data-cluster}
**Note:**
Notez que depuis décembre 2019, les endpoints personnalisés ne sont plus fournis. Si vous disposez d'un endpoint personnalisé préexistant, vous pouvez continuer à l'utiliser. Pour plus de détails, consultez notre liste d'endpoints disponibles.
### Configuration de l'endpoint à la compilation (recommandée) {#compile-time-endpoint-configuration-recommended}
Si vous disposez d'un endpoint personnalisé préexistant :
- À partir du SDK Braze pour iOS v3.0.2, vous pouvez définir un endpoint personnalisé à l'aide du fichier `Info.plist`. Ajoutez le dictionnaire `Braze` à votre fichier `Info.plist`. À l'intérieur du dictionnaire `Braze`, ajoutez la sous-entrée de chaîne de caractères `Endpoint` et définissez la valeur sur l'autorité de l'URL de votre endpoint personnalisé (par exemple, `sdk.iad-01.braze.com`, et non `https://sdk.iad-01.braze.com`). Notez qu'avant le SDK Braze pour iOS v4.0.2, la clé de dictionnaire `Appboy` doit être utilisée à la place de `Braze`.
Votre conseiller Braze devrait déjà vous avoir indiqué l'[endpoint correct](https://www.braze.com/docs/fr/fr/user_guide/administer/personal/sdk_endpoints/).
### Configuration de l'endpoint à l'exécution {#runtime-endpoint-configuration}
Si vous disposez d'un endpoint personnalisé préexistant :
- À partir du SDK Braze pour iOS v3.17.0+, vous pouvez remplacer votre endpoint via `ABKEndpointKey` à l'intérieur du paramètre `appboyOptions` transmis à `startWithApiKey:inApplication:withLaunchOptions:withAppboyOptions:`. Définissez la valeur sur l'autorité de l'URL de votre endpoint personnalisé (par exemple, `sdk.iad-01.braze.com`, et non `https://sdk.iad-01.braze.com`).
## Intégration SDK terminée {#sdk-integration-complete}
Braze devrait maintenant collecter des données depuis votre application et votre intégration de base devrait être terminée. Consultez les articles suivants pour activer le [suivi des événements personnalisés](https://www.braze.com/docs/fr/fr/developer_guide/analytics/logging_events/?tab=swift), l'[envoi de messages push](https://www.braze.com/docs/fr/fr/developer_guide/platforms/legacy_sdks/ios/push_notifications/integration/) et la suite complète des fonctionnalités de Braze.
## Personnaliser Braze au démarrage {#customizing-braze-on-startup}
Si vous souhaitez personnaliser Braze au démarrage, vous pouvez utiliser la méthode d'initialisation `startWithApiKey:inApplication:withLaunchOptions:withAppboyOptions:` et transmettre un `NSDictionary` facultatif de clés de démarrage Braze.
Dans votre fichier `AppDelegate.m`, au sein de votre méthode `application:didFinishLaunchingWithOptions:`, ajoutez la méthode Braze suivante :
```objc
[Appboy startWithApiKey:@"YOUR-APP-IDENTIFIER-API-KEY"
inApplication:application
withLaunchOptions:launchOptions
withAppboyOptions:appboyOptions];
```
Notez que cette méthode remplace la méthode d'initialisation `startWithApiKey:inApplication:withLaunchOptions:`.
Dans `AppDelegate.swift`, au sein de votre méthode `application(application: UIApplication, didFinishLaunchingWithOptions launchOptions: [NSObject: AnyObject]?) -> Bool`, ajoutez la méthode Braze suivante, où `appboyOptions` est un `Dictionary` de valeurs de configuration de démarrage :
```swift
Appboy.start(withApiKey: "YOUR-APP-IDENTIFIER-API-KEY",
in:application,
withLaunchOptions:launchOptions,
withAppboyOptions:appboyOptions)
```
Notez que cette méthode remplace la méthode d'initialisation `startWithApiKey:inApplication:withLaunchOptions:`.
Cette méthode est appelée avec les paramètres suivants :
- `YOUR-APP-IDENTIFIER-API-KEY` – Votre clé API d'[identifiant d'application](https://www.braze.com/docs/fr/fr/api/api_key/#the-app-identifier-api-key) depuis le tableau de bord de Braze.
- `application` – L'application actuelle.
- `launchOptions` – Les options `NSDictionary` que vous obtenez de `application:didFinishLaunchingWithOptions:`.
- `appboyOptions` – Un `NSDictionary` facultatif avec les valeurs de configuration de démarrage de Braze.
Consultez [Appboy.h](https://github.com/braze-inc/braze-ios-sdk/blob/master/AppboyKit/include/Appboy.h) pour obtenir la liste des clés de démarrage de Braze.
## Appboy.sharedInstance() et la nullabilité Swift {#appboysharedinstance-and-swift-nullability}
Contrairement à la pratique courante, le singleton `Appboy.sharedInstance()` est facultatif. Cela s'explique par le fait que `sharedInstance` est `nil` avant l'appel de `startWithApiKey:`, et qu'il existe des implémentations non standard mais valides dans lesquelles une initialisation retardée peut être utilisée.
Si vous appelez `startWithApiKey:` dans votre délégué `didFinishLaunchingWithOptions:` avant tout accès au `sharedInstance` d'Appboy (l'implémentation standard), vous pouvez utiliser le chaînage optionnel, comme `Appboy.sharedInstance()?.changeUser("testUser")`, pour éviter des vérifications fastidieuses. Le comportement sera identique à celui d'une implémentation Objective-C qui supposait un `sharedInstance` non nul.
## Ressources complémentaires {#additional-resources}
Une [documentation complète sur les classes iOS](http://appboy.github.io/appboy-ios-sdk/docs/annotated.html) est disponible pour fournir des conseils supplémentaires sur toutes les méthodes du SDK.
# Autres personnalisations du SDK pour iOS
Source: /docs/fr/developer_guide/platforms/legacy_sdks/ios/initial_sdk_setup/other_sdk_customizations/index.md
**Warning:**
[AppboyKit](https://github.com/Appboy/appboy-ios-sdk) (also known as the Objective-C SDK) is no longer supported and has been replaced by the [Swift SDK](https://www.braze.com/docs/fr/fr/developer_guide/sdk_integration/?sdktab=swift). It will no longer receive new features, bug fixes, security updates, or technical support—however, messaging and analytics will continue to function as normal. To learn more, see [Introducing the New Braze Swift SDK](https://www.braze.com/resources/articles/introducing-the-new-braze-swift-sdk).
# Autres personnalisations du SDK {#other-sdk-customizations}
## Niveau de journalisation de Braze {#braze-log-level}
Le niveau de journalisation par défaut du SDK Braze pour iOS est minimal, soit `8` dans le tableau suivant. Ce niveau supprime la majeure partie de la journalisation afin qu'aucune information sensible ne soit consignée dans une application publiée en production.
Consultez la liste suivante des niveaux de journalisation disponibles :
### Niveaux de journalisation {#log-levels}
| Niveau | Description |
|----------|-------------|
| 0 | Prolixe. Toutes les informations de journalisation seront consignées dans la console iOS. |
| 1 | Débogage. Les informations de débogage et de niveau supérieur seront consignées dans la console iOS. |
| 2 | Avertissement. Les informations d'avertissement et de niveau supérieur seront consignées dans la console iOS. |
| 4 | Erreur. Les informations d'erreur et de niveau supérieur seront consignées dans la console iOS. |
| 8 | Minimal. Les informations minimales seront consignées dans la console iOS. Paramètre par défaut du SDK. |
{: .reset-td-br-1 .reset-td-br-2 aria-label="Niveaux de journalisation" }
### Journalisation prolixe {#verbose-logging}
Vous pouvez configurer le niveau de journalisation sur n'importe quelle valeur disponible. Cependant, définir le niveau de journalisation sur prolixe, soit `0`, peut s'avérer très utile pour déboguer les problèmes liés à votre intégration. Ce niveau est uniquement destiné aux environnements de développement et ne doit pas être activé dans une application publiée. La journalisation prolixe n'enverra aucune information supplémentaire ou nouvelle sur l'utilisateur à Braze.
### Réglage du niveau de journalisation {#setting-log-level}
Le niveau de journalisation peut être défini soit au moment de la compilation, soit au moment de l'exécution :
Ajoutez un dictionnaire nommé `Braze` à votre fichier `Info.plist`. À l'intérieur du dictionnaire `Braze`, ajoutez la sous-entrée de type chaîne de caractères `LogLevel` et définissez la valeur sur `0`.
**Note:**
Avant le SDK Braze pour iOS v4.0.2, la clé de dictionnaire `Appboy` doit être utilisée à la place de `Braze`.
Exemple de contenu `Info.plist` :
```
BrazeLogLevel0
```
Ajoutez `ABKLogLevelKey` dans le paramètre `appboyOptions` transmis à `startWithApiKey:inApplication:withLaunchOptions:withAppboyOptions:`. Définissez sa valeur sur l'entier `0`.
```objc
NSMutableDictionary *appboyOptions = [NSMutableDictionary dictionary];
appboyOptions[ABKLogLevelKey] = @(0);
[Appboy startWithApiKey:@"YOUR-API-KEY"
inApplication:application
withLaunchOptions:launchOptions
withAppboyOptions:appboyOptions];
```
```swift
let appboyOptions: [AnyHashable: Any] = [
ABKLogLevelKey : 0
]
Appboy.start(withApiKey: "YOUR-API-KEY", in:application, withLaunchOptions:launchOptions, withAppboyOptions:appboyOptions)
```
**Note:**
Le niveau de journalisation ne peut être défini au moment de l'exécution qu'avec le SDK Braze pour iOS v4.4.0 ou version ultérieure. Si vous utilisez une version antérieure du SDK, définissez plutôt le niveau de journalisation au moment de la compilation.
## Collecte IDFV facultative - Swift {#optional-idfv-collection-swift}
Dans les versions antérieures du SDK Swift iOS de Braze, le champ IDFV (identifiant du fournisseur) était automatiquement collecté en tant qu'ID d'appareil de l'utilisateur.
À partir du SDK Swift v5.7.0, le champ IDFV peut être désactivé de manière facultative et Braze générera à la place un UUID aléatoire en tant qu'ID d'appareil. Pour plus d'informations, reportez-vous à la section [Collecte de l'IDFV](https://www.braze.com/docs/fr/fr/developer_guide/analytics/managing_data_collection/?sdktab=swift).
## Collecte IDFA facultative {#optional-idfa-collection}
La collecte IDFA est facultative dans le SDK Braze et désactivée par défaut. La collecte IDFA n'est requise dans Braze que si vous avez l'intention d'utiliser nos [intégrations d'attribution d'installation](https://www.braze.com/docs/fr/fr/partners/message_orchestration/attribution/adjust/). Si vous choisissez de stocker votre IDFA, nous le stockerons gratuitement, afin que vous puissiez profiter de ces options dès leur disponibilité sans travail de développement supplémentaire.
Par conséquent, nous vous recommandons de continuer à collecter l'IDFA si vous remplissez l'un des critères suivants :
- Vous attribuez l'installation de l'application à une publicité déjà diffusée
- Vous attribuez une action dans l'application à une publicité déjà diffusée
### iOS 14.5 AppTrackingTransparency
Apple exige que les utilisateurs donnent leur consentement via une invite d'autorisation pour collecter l'IDFA.
Pour collecter l'IDFA, outre l'implémentation de notre protocole `ABKIDFADelegate`, votre application devra demander l'autorisation de l'utilisateur en utilisant le `ATTrackingManager` d'Apple dans le cadre de transparence du suivi des applications. Pour plus d'informations, reportez-vous à l'article d'Apple sur la [protection de la vie privée des utilisateurs](https://developer.apple.com/app-store/user-privacy-and-data-use/).
L'invite d'autorisation de transparence du suivi des applications nécessite une entrée `Info.plist` pour expliquer votre utilisation de l'identifiant :
```
NSUserTrackingUsageDescriptionTo retarget ads and build a global profile to better serve you things you would like.
```
### Implémentation de la collecte IDFA {#implementing-idfa-collection}
Suivez ces étapes pour implémenter la collecte IDFA :
##### Étape 1 : Implémenter ABKIDFADelegate {#step-1-implement-abkidfadelegate}
Créez une classe conforme au protocole [`ABKIDFADelegate`](https://github.com/Appboy/appboy-ios-sdk/blob/master/AppboyKit/include/ABKIDFADelegate.h) :
```objc
#import "IDFADelegate.h"
#import
#import
@implementation IDFADelegate
- (NSString *)advertisingIdentifierString {
return [[[ASIdentifierManager sharedManager] advertisingIdentifier] UUIDString];
}
- (BOOL)isAdvertisingTrackingEnabledOrATTAuthorized {
if (@available(iOS 14, *)) {
return [ATTrackingManager trackingAuthorizationStatus] == ATTrackingManagerAuthorizationStatusAuthorized;
}
return [[ASIdentifierManager sharedManager] isAdvertisingTrackingEnabled];
}
@end
```
```swift
import Appboy_iOS_SDK
import AdSupport
import AppTrackingTransparency
class IDFADelegate: NSObject, ABKIDFADelegate {
func advertisingIdentifierString() -> String {
return ASIdentifierManager.shared().advertisingIdentifier.uuidString
}
func isAdvertisingTrackingEnabledOrATTAuthorized() -> Bool {
if #available(iOS 14, *) {
return ATTrackingManager.trackingAuthorizationStatus == ATTrackingManager.AuthorizationStatus.authorized
}
return ASIdentifierManager.shared().isAdvertisingTrackingEnabled
}
}
```
##### Étape 2 : Définir le délégué lors de l'initialisation de Braze {#step-2-set-the-delegate-during-braze-initialization}
Dans le dictionnaire `appboyOptions` transmis à `startWithApiKey:inApplication:withAppboyOptions:`, définissez la clé `ABKIDFADelegateKey` sur une instance de votre classe conforme à `ABKIDFADelegate`.
## Taille approximative du SDK iOS {#ios-sdk-size}
La taille approximative du fichier du framework du SDK iOS est de 30 Mo, et la taille approximative du .ipa (ajout au fichier de l'application) est comprise entre 1 Mo et 2 Mo.
Braze mesure la taille de son SDK iOS en observant l'effet du SDK sur la taille du `.ipa`, conformément aux [recommandations d'Apple sur le dimensionnement des applications](https://developer.apple.com/library/content/qa/qa1795/_index.html). Si vous calculez l'ajout de taille du SDK iOS à votre application, nous vous recommandons de suivre [Obtenir un rapport sur la taille de l'application](https://developer.apple.com/library/content/qa/qa1795/_index.html) pour comparer la différence de taille de votre `.ipa` avant et après l'intégration du SDK Braze pour iOS. Lorsque vous comparez les tailles à partir du rapport d'amincissement des applications, nous vous recommandons également d'examiner les tailles d'applications pour les fichiers `.ipa` allégés, car les fichiers `.ipa` universels seront plus volumineux que les binaires téléchargés depuis l'App Store et installés sur les appareils des utilisateurs.
**Note:**
Si vous intégrez via CocoaPods avec `use_frameworks!`, définissez `Enable Bitcode = NO` dans les paramètres de compilation de la cible pour obtenir des tailles précises.
# Guide d’intégration SDK de Braze pour iOS (facultatif)
Source: /docs/fr/developer_guide/platforms/legacy_sdks/ios/initial_sdk_setup/ios_sdk_integration/index.md
**Warning:**
[AppboyKit](https://github.com/Appboy/appboy-ios-sdk) (also known as the Objective-C SDK) is no longer supported and has been replaced by the [Swift SDK](https://www.braze.com/docs/fr/fr/developer_guide/sdk_integration/?sdktab=swift). It will no longer receive new features, bug fixes, security updates, or technical support—however, messaging and analytics will continue to function as normal. To learn more, see [Introducing the New Braze Swift SDK](https://www.braze.com/resources/articles/introducing-the-new-braze-swift-sdk).
# Guide d’intégration SDK de Braze pour iOS
> Ce guide d’intégration iOS facultatif vous guide étape par étape sur les meilleures pratiques de configuration lors de la première intégration du SDK iOS et de ses principaux composants dans votre application. Ce guide vous aidera à créer un fichier d’aide `BrazeManager.swift` qui dédoublera toutes les dépendances sur le SDK Braze pour iOS du reste de votre code de production, ce qui entraînera une `import AppboyUI` dans toute votre application. Cette approche limite les problèmes liés aux importations excessives de SDK, ce qui facilite le suivi, le débogage et la modification du code.
**Important:**
Ce guide suppose que vous avez déjà [ajouté le SDK](https://www.braze.com/docs/fr/fr/developer_guide/platforms/legacy_sdks/ios/initial_sdk_setup/overview/) à votre projet Xcode.
## Présentation de l’intégration
Les étapes suivantes vous aident à créer un fichier d’aide `BrazeManager` qui sera appelé par votre code de production. Ce fichier d’aide traitera de toutes les dépendances liées au Braze en ajoutant diverses extensions pour les sujets d’intégration suivants répertoriés. Chaque sujet inclura des étapes de tabulation horizontale et des extraits de code à la fois en Swift et en Objective-C. Notez que les étapes de la carte de contenu et du message in-app ne sont pas nécessaires à l'intégration si vous ne prévoyez pas d'utiliser ces canaux dans votre application.
- [Créer BrazeManager.swift](#create-brazemanagerswift)
- [Initialiser le SDK](#initialize-the-sdk)
- [Notifications push](#push-notifications)
- [Accéder aux variables et méthodes utilisateur](#access-user-variables-and-methods)
- [Enregistrer les analyses](#log-analytics)
- [Messages in-app (facultatif)](#in-app-messages)
- [Cartes de contenu (facultatif)](#content-cards)
- [Étapes suivantes](#next-steps)
### Créer BrazeManager.swift
##### Créer BrazeManager.swift
Pour créer votre fichier `BrazeManager.swift`, créez un nouveau fichier Swift nommé _BrazeManager_ à ajouter à votre projet dans votre emplacement souhaité. Ensuite, remplacez `import Foundation` par `import AppboyUI` pour le SPM (`import Appboy_iOS_SDK` pour CocoaPods), puis créez une classe `BrazeManager` qui servira à héberger toutes les méthodes et variables liées à Braze. `Appboy_iOS_SDK`
**Note:**
- `BrazeManager` est un `NSObject` et non une structure, c’est pourquoi il est conforme aux délégués ABK, comme `ABKInAppMessageUIDelegate`.
- La classe `BrazeManager` est une classe singleton par conception, de sorte qu'une seule instance de cette classe sera utilisée. Ceci est fait pour fournir un point d’accès unifié à l’objet.
1. Ajoutez une variable statique nommée _shared_ qui initialise la classe `BrazeManager`. Il est garanti que cela sera mollement lancé qu’une seule fois.
2. Ensuite, ajoutez une variable constante privée nommée _apiKey_ et définissez-la comme clé-valeur API de votre espace de travail dans le tableau de bord de Braze.
3. Ajoutez une variable calculée privée nommée _appboyOptions_ qui stockera les valeurs de configuration pour le SDK. Elle sera vide pour l’instant.
```swift
class BrazeManager: NSObject {
// 1
static let shared = BrazeManager()
// 2
private let apikey = "YOUR-API-KEY"
// 3
private var appboyOptions: [String:Any] {
return [:]
}
}
```
```objc
@implementation BrazeManager
// 1
+ (instancetype)shared {
static BrazeManager *shared = nil;
static dispatch_once_t onceToken;
dispatch_once(&onceToken, ^{
shared = [[BrazeManager alloc] init];
// Do any other initialisation stuff here
});
return shared;
}
// 2
- (NSString *)apiKey {
return @"YOUR-API-KEY";
}
// 3
- (NSDictionary *)appboyOptions {
return [NSDictionary dictionary];
}
```
### Initialiser le SDK
##### Initialiser le SDK à partir de BrazeManager.swift
Ensuite, vous devez initialiser le SDK. Ce guide suppose que vous avez déjà [ajouté le SDK](https://www.braze.com/docs/fr/fr/developer_guide/platforms/legacy_sdks/ios/initial_sdk_setup/overview/) à votre projet Xcode. Vous devez également avoir défini le [point d'endpoint de votre SDK pour l'espace de travail](https://www.braze.com/docs/fr/fr/developer_guide/platform_integration_guides/ios/initial_sdk_setup/completing_integration/#step-2-specify-your-data-cluster) et [`LogLevel`](https://www.braze.com/docs/fr/fr/developer_guide/platform_integration_guides/ios/initial_sdk_setup/other_sdk_customizations/#braze-log-level) dans votre fichier `Info.plist` ou dans `appboyOptions`.
Ajouter la méthode `didFinishLaunchingWithOptions` à partir du fichier `AppDelegate.swift` sans type de retour dans votre fichier `BrazeManager.swift`. En créant une méthode similaire dans le fichier `BrazeManager.swift`, il n’y aura pas de déclaration `import AppboyUI` dans votre fichier `AppDelegate.swift`.
Ensuite, initialisez le SDK en utilisant vos variables nouvellement déclarées `apiKey` et `appboyOptions`.
**Important:**
L’initialisation doit être effectuée dans le thread principal.
```swift
func application(_ application: UIApplication, didFinishLaunchingWithOptions launchOptions: [UIApplication.LaunchOptionsKey: Any]?) {
Appboy.start(withApiKey: apikey, in: application, withLaunchOptions: launchOptions, withAppboyOptions: appboyOptions)
}
```
```objc
- (void)application:(UIApplication *)application didFinishLaunchingWithOptions:(NSDictionary *)launchOptions {
[Appboy startWithApiKey:[self apiKey] inApplication:application withLaunchOptions:launchOptions withAppboyOptions:[self appboyOptions]];
}
```
##### Gérer l’initialisation Appboy dans l’AppDelegate.swift
Ensuite, revenez au fichier `AppDelegate.swift` et ajoutez l’extrait de code suivant dans la méthode `didFinishLaunchingWithOptions` AppDelegate pour gérer l’initialisation Appboy du fichier d’aide `BrazeManager.swift`. N’oubliez pas qu’il n’est pas nécessaire d’ajouter une déclaration `import AppboyUI` dans le `AppDelegate.swift`.
```swift
func application(
_ application: UIApplication,
didFinishLaunchingWithOptions launchOptions: [UIApplication.LaunchOptionsKey: Any]?
) -> Bool {
// Override point for customization after application launch
BrazeManager.shared.application(application, didFinishLaunchingWithOptions: launchOptions)
return true
}
```
```objc
- (BOOL)application:(UIApplication *)application didFinishLaunchingWithOptions:(NSDictionary *)launchOptions {
// Override point for customization after application launch
[[BrazeManager shared] application:application didFinishLaunchingWithOptions:launchOptions];
return YES;
}
```
**Checkpoint:**
Procédez à la compilation de votre code et exécutez votre application.
À ce stade, le SDK devrait être en place et opérationnel. Dans votre tableau de bord, veillez à ce que les sessions soient enregistrées avant de poursuivre l’opération.
### Notifications push
##### Ajouter un certificat de notification push
Accédez à votre espace de travail existant dans le tableau de bord de Braze. Sous **Paramètres de notification push**, téléchargez votre fichier de certificat push dans votre tableau de bord de Braze et enregistrez-le.
{: style="max-width:60%;"}
**Important:**
Ne manquez pas le point de contrôle dédié à la fin de cette étape !
##### Inscrivez-vous aux notifications push
Ensuite, inscrivez-vous aux notifications push. Ce guide part du principe que vous avez [correctement configuré vos informations d'identification push](https://www.braze.com/docs/fr/fr/developer_guide/platforms/legacy_sdks/ios/push_notifications/integration/) dans votre portail de développement Apple et dans votre projet Xcode.
Le code d’enregistrement des notifications push sera ajouté dans la méthode `didFinishLaunching...` dans le fichier `BrazeManager.swift`. Votre code d’initialisation devrait ressembler à ceci :
1. Configurez le contenu pour demander l’autorisation d’interagir avec l’utilisateur. Ces options sont présentées à titre d’exemple.
2. Demandez une autorisation pour envoyer les notifications push de vos utilisateurs. La réponse de l’utilisateur à autoriser ou refuser les notifications push est suivie dans la variable `granted`.
3. Transférer les résultats d’autorisation de notification push à Braze après que l’utilisateur interagit avec l’invite de notification.
4. Lancer le processus d’inscription avec des APN ; cela devrait être fait dans le fil principal. Si l’enregistrement réussit, l’application appelle la méthode `AppDelegate` de l’objet `didRegisterForRemoteNotificationsWithDeviceToken`.
```swift
func application(_ application: UIApplication, didFinishLaunchingWithOptions launchOptions:[UIApplication.LaunchOptionsKey:Any]?) {
Appboy.start(withAPIKey: apikey, in: application, withLaunchOptions: launchOptions, withAppboyOptions: appboyOptions)
// 1
let options: UNAuthorizationOptions = [.alert, .sound, .badge]
// 2
UNUserNotificationCenter.current().requestAuthorization(option: options) { (granted, error) in
// 3
Appboy.sharedInstance()?.pushAuthorization(fromUserNotificationCenter: granted)
}
// 4
UIApplications.shared.registerForRemoteNotificiations()
}
```
```objc
- (void)application:(UIApplication *)application didFinishLaunchingWithOptions:(NSDictionary *)launchOptions {
[Appboy startWithApiKey:[self apiKey] inApplication:application withLaunchOptions:launchOptions withAppboyOptions:[self appboyOptions]];
// 1
UNAuthorizationOptions options = (UNAuthorizationOptionSound | UNAuthorizationOptionAlert | UNAuthorizationOptionBadge);
// 2
[[UNUserNotificationCenter currentNotificationCenter] requestAuthorizationWithOptions:options completionHandler:^(BOOL granted, NSError * _Nullable error) {
// 3
[[Appboy sharedInstance] pushAuthorizationFromUserNotificationCenter:granted];
}];
// 4
[[UIApplication sharedApplication] registerForRemoteNotifications];
}
```
**Checkpoint:**
Procédez à la compilation de votre code et exécutez votre application.
- Dans votre application, confirmez que vous êtes invité à envoyer des notifications push avant de poursuivre l’opération.
- Si vous n’êtes pas invité, essayez de supprimer et de réinstaller l’application pour vous assurer que l’invite de notification push n’a pas été affichée précédemment.
Confirmez que vous êtes invité à envoyer des notifications push avant de poursuivre l’opération.
##### Transférer les méthodes de notification push
Ensuite, transférez les méthodes de notifications push système de `AppDelegate.swift` vers `BrazeManager.swift` à manipuler par le SDK Braze pour iOS.
###### Étape 1 : Créer une extension pour le code de notification push
Créez une extension pour votre code de notification push dans votre fichier `BrazeManager.swift` de sorte qu’il puisse être lu de manière plus organisée dans le cadre de l’objectif du fichier d’aide, comme :
1. Suivre le modèle de non-inclusion d’une déclaration `import AppboyUI` dans votre `AppDelegate`, nous allons gérer les méthodes de notification push dans le fichier `BrazeManager.swift`. Les jetons d'appareil de l’utilisateur devront être transmis à Braze depuis la méthode `didRegisterForRemote...`. Cette méthode est requise pour mettre en œuvre des notifications push silencieuses. Ensuite, ajoutez la même méthode à partir de `AppDelegate` dans votre classe `BrazeManager`.
2. Ajoutez la ligne suivante à l’intérieur de la méthode pour enregistrer le jeton d'appareil dans Braze. Ceci est nécessaire pour que Braze associe le jeton à l’appareil actuel.
```swift
// MARK - Push Notifications
extension BrazeManager {
// 1
func application(
_ application: UIApplication,
didRegisterForRemoteNotificationsWithDeviceToken deviceToken: Data
) {
// 2
Appboy.sharedInstance().?registerDeviceToken(deviceToken)
}
}
```
```objc
// MARK - Push Notifications
// 1
- (void)application:(UIApplication *)application didRegisterForRemoteNotificationsWithDeviceToken:(NSData *)deviceToken {
// 2
[[Appboy sharedInstance] registerDeviceToken:deviceToken];
}
```
###### Étape 2 : Support des notifications à distance
Dans l'onglet **Capacités& de** **signature**, veuillez ajouter la prise en charge **des modes d'arrière-plan** et sélectionner **Notifications à distance** pour commencer à prendre en charge les notifications push à distance provenant de Braze.

###### Étape 3 : Gestion des notifications à distance
Le SDK Braze peut gérer les notifications push à distance provenant de Braze. Transférer les notifications à distance à Braze ; le SDK ignorera automatiquement les notifications push qui ne proviennent pas de Braze. Ajoutez la méthode suivante à votre fichier `BrazeManager.swift` dans l’extension de notification push.
```swift
func application(
_ application: UIApplication,
didReceiveRemoteNotification userInfo: [AnyHashable : Any],
fetchCompletionHandler completionHandler: @escaping (UIBackgroundFetchResult) -> Void
) {
Appboy.sharedInstance()?.register(
application,
didReceiveRemoteNotification: userInfo,
fetchCompletionHandler: completionHandler
)
}
```
```objc
- (void)application:(UIApplication *)application didReceiveRemoteNotification:(NSDictionary *)userInfo fetchCompletionHandler:(void (^)(UIBackgroundFetchResult))completionHandler {
[[Appboy sharedInstance] registerApplication:application didReceiveRemoteNotification:userInfo fetchCompletionHandler:completionHandler];
}
```
###### Étape 4 : Transmettre les réponses à la notification
Le SDK Braze peut gérer la réponse des notifications push provenant de Braze. Transférer la réponse des notifications à Braze ; le SDK ignore automatiquement les réponses des notifications push qui ne proviennent pas de Braze. Ajoutez la méthode suivante à votre fichier `BrazeManager.swift` :
```swift
func userNotificationCenter(
_ center: UNUserNotificationCenter,
didReceive response: UNNotificationResponse,
withCompletionHandler completionHandler: @escaping () -> Void
) {
Appboy.sharedInstance()?.userNotificationCenter(
center,
didReceive: response,
withCompletionHandler: completionHandler
)
}
```
```objc
- (void)userNotificationCenter:(UNUserNotificationCenter *)center
didReceiveNotificationResponse:(UNNotificationResponse *)response
withCompletionHandler:(void (^)(void))completionHandler {
[[Appboy sharedInstance] userNotificationCenter:center
didReceiveNotificationResponse:response
withCompletionHandler:completionHandler];
}
```
**Checkpoint:**
Procédez à la compilation de votre code et exécutez votre application.
Essayez de vous envoyer une notification push du tableau de bord de Braze et d’observer que les analyses sont enregistrées à partir des notifications push avant de poursuivre l’opération.
### Accéder aux variables et méthodes utilisateur
##### Créer des variables et des méthodes utilisateur
Ensuite, vous souhaiterez un accès facile aux variables et aux méthodes `ABKUser`. Créez une extension pour votre code de notification push dans votre fichier `BrazeManager.swift` de sorte qu’il puisse être lu de manière plus organisée dans le cadre de l’objectif du fichier d’aide, comme :
1. Un objet `ABKUser` représente un utilisateur connu ou anonyme dans votre application iOS. Ajoutez une variable calculée pour récupérer le `ABKUser` ; cette variable sera réutilisée pour récupérer des variables concernant l’utilisateur.
2. Interrogez la variable utilisateur pour accéder facilement au `userId`. Parmi les autres variables, le `ABKUser` est responsable de (`firstName`, `lastName`, `phone`, `homeCity`, etc.)
3. Définir l’utilisateur en utilisant `changeUser()` avec un `userId` correspondant.
```swift
// MARK: - User
extension BrazeManager {
// 1
var user: ABKUser? {
return Appboy.sharedInstance()?.user
}
// 2
var userId: String? {
return user?.userID
}
// 3
func changeUser(_ userId: String) {
Appboy.sharedInstance()?.changeUser(userId)
}
}
```
```objc
// MARK: - User
// 1
- (ABKUser *)user {
return [[Appboy sharedInstance] user];
}
// 2
- (NSString *)userId {
return [self user].userID;
}
// 3
- (void)changeUser:(NSString *)userId {
[[Appboy sharedInstance] changeUser:userId];
}
```
**Checkpoint:**
Procédez à la compilation de votre code et exécutez votre application.
Essayez d’identifier les utilisateurs à partir d’une connexion/inscription réussie. Assurez-vous de bien comprendre ce qui est et ce qui n’est pas un identifiant utilisateur approprié.
Dans votre tableau de bord, veillez à ce que l’identifiant utilisateur soit connecté avant de poursuivre l’opération.
### Enregistrer les analyses
##### Créer une méthode d’événement personnalisé de journal
En vous basant sur la méthode `logCustomEvent` SDK Braze suivante, créez une méthode de correspondance.
**Méthode de référence `logCustomEvent` de Braze**
C’est par conception parce que seul le fichier `BrazeManager.swift` peut accéder directement aux méthodes SDK Braze pour iOS. Par conséquent, en créant une méthode de correspondance, le résultat est le même et se fait sans avoir besoin de dépendances directes sur le SDK Braze pour iOS dans votre code de production.
```
open func logCustomEvent(_ eventName: String, withProperties properties: [AnyHashable : Any]?)
```
**Méthode de correspondance**
Consignez les événements personnalisés de l’objet `Appboy` dans Braze. `Properties` est un paramètre facultatif avec une valeur par défaut de zéro. Les événements personnalisés n’ont pas besoin d’avoir des propriétés, mais doivent avoir un nom.
```swift
func logCustomEvent(_ eventName: String, withProperties properties: [AnyHashable: Any]? = nil) {
Appboy.sharedInstance()?.logCustomEvent(eventName, withProperties: properties)
}
```
```objc
- (void)logCustomEvent:(NSString *)eventName withProperties:(nullable NSDictionary *)properties {
[[Appboy sharedInstance] logCustomEvent:eventName withProperties:properties];
}
```
##### Créer une méthode d’attributs personnalisés de journal
Le SDK peut enregistrer plusieurs types comme attributs personnalisés. Il n’est pas nécessaire de créer des méthodes d’aide pour chaque type de valeur pouvant être défini. À la place, exposez qu’une seule méthode permettant de filtrer jusqu’à la valeur appropriée.
```
- (BOOL)setCustomAttributeWithKey:(NSString *)key andBOOLValue:(BOOL)value;
- (BOOL)setCustomAttributeWithKey:(NSString *)key andIntegerValue:(NSIntenger)value;
- (BOOL)setCustomAttributeWithKey:(NSString *)key andDoubleValue:(double)value;
- (BOOL)setCustomAttributeWithKey:(NSString *)key andStringValue:(NSString *)value;
- (BOOL)setCustomAttributeWithKey:(NSString *)key andDateValue:(NSDate *)value;
```
Les attributs personnalisés sont enregistrés depuis l’objet `ABKUser`.
Créez **une méthode** pouvant englober tous les types disponibles pouvant être définis pour un attribut. Ajoutez cette méthode dans votre fichier `BrazeManager.swift` dans l’extension analytique. On peut y parvenir en filtrant les types d’attributs personnalisés valides et en appelant la méthode associée au type correspondant.
- Le paramètre `value` est un type générique qui correspond au protocole `Equatable`. Cela est explicitement fait, donc si le type n’est pas ce que le SDK de Braze iOS prévoit, il y aura une erreur de compilation.
- Les paramètres `key` et `value` sont des paramètres facultatifs qui seront conditionnellement désencapsulés dans la méthode. Ce n’est qu’un moyen de s’assurer que des valeurs non nulles sont transmises au SDK Braze pour iOS.
```swift
func setCustomAttributeWithKey(_ key: String?, andValue value: T?) {
guard let key = key, let value = value else { return }
switch value.self {
case let value as Date:
user?.setCustomAttributeWithKey(key, andDateValue: value)
case let value as Bool:
user?.setCustomAttributeWithKey(key, andBOOLValue: value)
case let value as String:
user?.setCustomAttributeWithKey(key, andStringValue: value)
case let value as Double:
user?.setCustomAttributeWithKey(key, andDoubleValue: value)
case let value as Int:
user?.setCustomAttributeWithKey(key, andIntegerValue: value)
default:
return
}
}
```
```objc
- (void)setCustomAttributeWith:(NSString *)key andValue:(id)value {
if ([value isKindOfClass:[NSDate class]]) {
[[self user] setCustomAttributeWithKey:key andDateValue:value];
} else if ([value isKindOfClass:[NSString class]]) {
[[self user] setCustomAttributeWithKey:key andStringValue:value];
} else if ([value isKindOfClass:[NSNumber class]]) {
if (strcmp([value objCType], @encode(double)) == 0) {
[[self user] setCustomAttributeWithKey:key andDoubleValue:[value doubleValue]];
} else if (strcmp([value objCType], @encode(int)) == 0) {
[[self user] setCustomAttributeWithKey:key andIntegerValue:[value integerValue]];
} else if ([value boolValue]) {
[[self user] setCustomAttributeWithKey:key andBOOLValue:[value boolValue]];
}
}
}
```
##### Créez une méthode de journalisation des achats
Puis, en vous basant sur la méthode `logPurchase` SDK Braze suivante, créez une méthode de correspondance.
**Méthode de référence `logPurchase` de Braze**
C’est par conception parce que seul le fichier `BrazeManager.swift` peut accéder directement aux méthodes SDK Braze pour iOS. Par conséquent, en créant une méthode de correspondance, le résultat est le même et se fait sans avoir besoin de dépendances directes sur le SDK Braze pour iOS dans votre code de production.
```
open func logPurchase(_ productIdentifier: String, inCurrency currency: String, atPrice price: NSDecimalNumber, withoutQuantity quantity: UInt)
```
**Méthode de correspondance**
Enregistrez les achats depuis l’objet `Appboy` dans Braze. Le SDK a plusieurs méthodes pour enregistrer les achats, et ce n’est qu’un exemple. Cette méthode gère également la création des objets `NSDecimal` et `UInt`. La façon dont vous voulez gérer cette partie dépend de vous, un seul exemple est fourni.
```swift
func logPurchase(_ productIdentifier: String, inCurrency currency: String, atPrice price:
String, withQuantity quantity: Int) {
Appboy.sharedInstance()?.logPurchase(productIdentifier, inCurrency: currency, atPrice: NSDecimalNumber(string: price), withQuantity: UInt(quantity))
}
```
```objc
- (void)logPurchase:(NSString *)productIdentifier inCurrency:(nonnull NSString *)currencyCode atPrice:(nonnull NSDecimalNumber *)price withQuantity:(NSUInteger)quantity {
[[Appboy sharedInstance] logPurchase:productIdentifier inCurrency:currencyCode atPrice:price withQuantity:quantity];
}
```
**Checkpoint:**
Procédez à la compilation de votre code et exécutez votre application.
Essayez d’enregistrer des événements personnalisés.
Dans votre tableau de bord, veillez à ce que les événements personnalisés soient connectés avant de poursuivre l’opération.
### in-app Messages
**Important:**
La section suivante du message in-app n'est pas nécessaire pour l'intégration si vous ne prévoyez pas d'utiliser ce canal dans votre application.
##### Conforme à ABKinAppMessageUIDelegate
Ensuite, activez votre code de fichier `BrazeManager.swift` pour se conformer à `ABKInAppMessageUIDelegate` afin de gérer directement les méthodes associées.
Le code de conformité au délégué sera ajouté dans les méthodes `didFinishLaunching...` au fichier `BrazeManager.swift`. Votre code d’initialisation devrait ressembler à ceci :
```swift
func application(_ application: UIApplication, didFinishLaunchingWithOptions launchOptions: [UIApplication.LaunchOptionsKey: Any]?) {
Appboy.start(withApiKey: apiKey, in: application, withLaunchOptions: launchOptions, withAppboyOptions: appboyOptions)
let options: UNAuthorizationOptions = [.alert, .sound, .badge]
UNUserNotificationCenter.current().requestAuthorization(options: options) { (granted, error) in
Appboy.sharedInstance()?.pushAuthorization(fromUserNotificationCenter: granted)
}
UIApplication.shared.registerForRemoteNotifications()
Appboy.sharedInstance()?.inAppMessageController.inAppMessageUIController?.setInAppMessageUIDelegate?(self)
}
```
```objc
- (void)application:(UIApplication *)application didFinishLaunchingWithOptions:(NSDictionary *)launchOptions {
[Appboy startWithApiKey:[self apiKey] inApplication:application withLaunchOptions:launchOptions withAppboyOptions:[self appboyOptions]];
UNAuthorizationOptions options = (UNAuthorizationOptionSound | UNAuthorizationOptionAlert | UNAuthorizationOptionBadge);
[[UNUserNotificationCenter currentNotificationCenter] requestAuthorizationWithOptions:options completionHandler:^(BOOL granted, NSError * _Nullable error) {
[[Appboy sharedInstance] pushAuthorizationFromUserNotificationCenter:granted];
}];
[[UIApplication sharedApplication] registerForRemoteNotifications];
[[Appboy sharedInstance].inAppMessageController.inAppMessageUIController setInAppMessageUIDelegate:self];
}
```
##### Ajoutez des méthodes de délégation
Ensuite, créez une extension qui correspond à la `ABKInAppMessageUIDelegate`.
Ajoutez la section d’analyse de l’extrait de code suivant. Notez que l’objet `BrazeManager.swift` est défini comme délégué ; ce sera l’endroit où le fichier `BrazeManager.swift` traite toutes les méthodes `ABKInAppMessageUIDelegate`.
**Important:**
Le `ABKInAppMessageUIDelegate` n’est pas fourni avec les méthodes requises, mais en voici un exemple.
```swift
// MARK: - ABKInAppMessage UI Delegate
extension AppboyManager: ABKInAppMessageUIDelegate{
func inAppMessageViewControllerWith(_ inAppMessage: ABKInAppMessage) -> ABKInAppMessageViewController {
switch inAppMessage {
case is ABKInAppMessageSlideup:
return ABKInAppMessageSlideupViewController(inAppMessage: inAppMessage)
case is ABKInAppMessageModal:
return ABKInAppMessageModalViewController(inAppMessage: inAppMessage)
case is ABKInAppMessageFull:
return ABKInAppMessageFullViewController(inAppMessage: inAppMessage)
case is ABKInAppMessageHTML:
return ABKInAppMessageHTMLViewController(inAppMessage: inAppMessage)
default:
return ABKInAppMessageViewController(inAppMessage: inAppMessage)
}
```
```objc
// MARK: - ABKInAppMessage UI Delegate
- (ABKInAppMessageViewController *)inAppMessageViewControllerWithInAppMessage:(ABKInAppMessage *)inAppMessage {
if ([inAppMessage isKindOfClass:[ABKInAppMessageSlideup class]]) {
return [[ABKInAppMessageSlideupViewController alloc] initWithInAppMessage:inAppMessage];
} else if ([inAppMessage isKindOfClass:[ABKInAppMessageModal class]]) {
return [[ABKInAppMessageModalViewController alloc] initWithInAppMessage:inAppMessage];
} else if ([inAppMessage isKindOfClass:[ABKInAppMessageFull class]]) {
return [[ABKInAppMessageFullViewController alloc] initWithInAppMessage:inAppMessage];
} else if ([inAppMessage isKindOfClass:[ABKInAppMessageHTML class]]) {
return [[ABKInAppMessageHTMLViewController alloc] initWithInAppMessage:inAppMessage];
}
return nil;
}
```
**Checkpoint:**
Procédez à la compilation de votre code et exécutez votre application.
Essayez de vous envoyer un message in-app.
Dans le fichier `BrazeManager.swift`, définissez un point de rupture au début de la méthode `ABKInAppMessageUIDelegate` en exemple. Envoyez-vous un message in-app et confirmez que le point de rupture est atteint avant de poursuivre.
### Cartes de contenu
**Important:**
La section suivante de la carte de contenu n'est pas nécessaire pour l'intégration si vous ne prévoyez pas d'utiliser ce canal dans votre application.
##### Créez des variables et des méthodes de carte de contenu
Activez votre code de production pour afficher le contrôleur de visualisation des cartes de contenu sans besoin de déclarations `import AppboyUI` inutiles.
Créez une extension pour votre code de notification push dans votre fichier `BrazeManager.swift` de sorte qu’il puisse être lu de manière plus organisée dans le cadre de l’objectif du fichier d’aide, comme :
1. Afficher le `ABKContentCardsTableViewController`. Un `navigationController` facultatif est le seul paramètre nécessaire pour présenter ou forcer notre contrôleur de visualisation.
2. Initialiser un `ABKContentCardsTableViewController` et modifiez le titre en option. Vous devez également ajouter le contrôleur de visualisation initialisé à la pile de navigation.
```swift
// MARK: - Content Cards
extension BrazeManager {
// 1
func displayContentCards(navigationController: UINavigationController?) {
// 2
let contentCardsVc = ABKContentCardsTableViewController()
contentCardsVc.title = "Content Cards"
navigationController?.pushViewController(contentCardsVc, animated: true)
}
}
```
```objc
// MARK: - Content Cards
// 1
- (void)displayContentCards:(UINavigationController *)navigationController {
// 2
ABKContentCardsTableViewController *contentCardsVc = [[ABKContentCardsTableViewController alloc] init];
contentCardsVc.title = @"Content Cards";
[navigationController pushViewController:contentCardsVc animated:YES];
}
```
**Checkpoint:**
Procédez à la compilation de votre code et exécutez votre application.
Essayez d’afficher le `ABKContentCardsTableViewController` dans votre application avant de poursuivre.
## Étapes suivantes
Félicitations ! Vous avez terminé ce guide d’intégration des meilleures pratiques ! Vous trouverez un exemple de fichier d'aide `BrazeManager` sur [GitHub](https://github.com/braze-inc/braze-growth-shares-ios-demo-app/blob/master/Braze-Demo/BrazeManager.swift).
Maintenant que vous avez dissocié toutes les dépendances du SDK Braze pour iOS du reste de votre code de production, consultez certains de nos guides d’implémentation avancés facultatifs :
- [Guide de mise en œuvre des notifications push avancées](https://www.braze.com/docs/fr/fr/developer_guide/platforms/legacy_sdks/ios/push_notifications/implementation_guide/)
- [Guide de mise en œuvre des messages in-app avancés](https://www.braze.com/docs/fr/fr/developer_guide/platforms/legacy_sdks/ios/in-app_messaging/implementation_guide/)
- [Guide d’implémentation de la carte de contenu avancée](https://www.braze.com/docs/fr/fr/developer_guide/platforms/legacy_sdks/ios/content_cards/implementation_guide/)
# Intégration Push pour iOS
Source: /docs/fr/developer_guide/platforms/legacy_sdks/ios/push_notifications/integration/index.md
**Warning:**
[AppboyKit](https://github.com/Appboy/appboy-ios-sdk) (also known as the Objective-C SDK) is no longer supported and has been replaced by the [Swift SDK](https://www.braze.com/docs/fr/fr/developer_guide/sdk_integration/?sdktab=swift). It will no longer receive new features, bug fixes, security updates, or technical support—however, messaging and analytics will continue to function as normal. To learn more, see [Introducing the New Braze Swift SDK](https://www.braze.com/resources/articles/introducing-the-new-braze-swift-sdk).
# Intégration des notifications push {#push-integration}
## Étape 1 : Téléchargez votre jeton APNs {#step-1-upload-your-apns-token}
Before you can send an iOS push notification using Braze, you need to upload your `.p8` push notification file, as described in [Apple's developer documentation](https://developer.apple.com/documentation/usernotifications/establishing-a-token-based-connection-to-apns):
1. In your Apple developer account, go to [**Certificates, Identifiers & Profiles**](https://developer.apple.com/account/ios/certificate).
2. Under **Keys**, select **All** and click the add button (+) in the upper-right corner.
3. Under **Key Description**, enter a unique name for the signing key.
4. Under **Key Services**, select the **Apple Push Notification service (APNs)** checkbox, then click **Continue**. Click **Confirm**.
5. Note the key ID. Click **Download** to generate and download the key. Make sure to save the downloaded file in a secure place, as you cannot download this more than once.
6. In Braze, go to **Settings** > **App Settings** and upload the `.p8` file under **Apple Push Certificate**. You can upload either your development or production push certificate. To test push notifications after your app is live in the App Store, its recommended to set up a separate workspace for the development version of your app.
7. When prompted, enter your app's [bundle ID](https://developer.apple.com/documentation/foundation/nsbundle/1418023-bundleidentifier), [key ID](https://developer.apple.com/help/account/manage-keys/get-a-key-identifier/), and [team ID](https://developer.apple.com/help/account/manage-your-team/locate-your-team-id). You'll also need to specify whether to send notifications to your app's development or production environment, which is defined by its provisioning profile.
8. When you're finished, select **Save**.
## Étape 2 : Activer les fonctionnalités de notification push {#step-2-enable-push-capabilities}
Dans les paramètres de votre projet, assurez-vous que sous l'onglet **Capabilities**, votre fonctionnalité **Push Notifications** est activée.

Si vous disposez de certificats push distincts pour le développement et la production, veillez à décocher la case **Automatically manage signing** dans l'onglet **General**. Cela vous permettra de choisir différents profils de provisionnement pour chaque configuration de build, car la fonctionnalité de signature de code automatique de Xcode ne gère que la signature de développement.

## Étape 3 : S'inscrire aux notifications push {#step-3-register-for-push-notifications}
L'exemple de code approprié doit être inclus dans la méthode de délégation `application:didFinishLaunchingWithOptions:` de votre application pour que l'appareil de vos utilisateurs s'enregistre auprès des APNs. Assurez-vous d'appeler tout le code d'intégration push dans le thread principal de votre application.
Braze fournit également des catégories push par défaut pour la prise en charge des boutons d'action push, qui doivent être ajoutées manuellement à votre code d'enregistrement push. Reportez-vous aux [boutons d'action push](https://www.braze.com/docs/fr/fr/developer_guide/platforms/legacy_sdks/ios/push_notifications/customization/action_buttons/) pour connaître les étapes d'intégration supplémentaires.
**Warning:**
Si vous avez mis en place une invite push personnalisée comme décrit dans nos [bonnes pratiques push](https://www.braze.com/docs/fr/fr/developer_guide/platforms/legacy_sdks/ios/push_notifications/troubleshooting/), assurez-vous d'appeler le code suivant **à chaque exécution de l'application** après que l'utilisateur a accordé les autorisations push à votre application. **Les applications doivent se réenregistrer auprès des APNs, car [les jetons d'appareils peuvent changer de manière arbitraire](https://developer.apple.com/library/ios/documentation/iPhone/Conceptual/iPhoneOSProgrammingGuide/BackgroundExecution/BackgroundExecution.html).**
### Utilisation du framework UserNotification (iOS 10+) {#using-usernotification-framework-ios-10}
Si vous utilisez le framework `UserNotifications` (recommandé) introduit dans iOS 10, ajoutez le code suivant à la méthode `application:didFinishLaunchingWithOptions:` de votre délégué d'application.
**Important:**
L'exemple de code suivant inclut l'intégration pour l'authentification push provisoire (lignes 5 et 6). Si vous ne prévoyez pas d'utiliser l'autorisation provisoire dans votre application, vous pouvez supprimer les lignes de code qui ajoutent `UNAuthorizationOptionProvisional` aux options `requestAuthorization`. Consultez les [options de notification iOS](https://www.braze.com/docs/fr/fr/user_guide/channels/push/platform_specific_resources/ios/notification_options/) pour en savoir plus sur l'authentification push provisoire.
```objc
if (floor(NSFoundationVersionNumber) > NSFoundationVersionNumber_iOS_9_x_Max) {
UNUserNotificationCenter *center = [UNUserNotificationCenter currentNotificationCenter];
center.delegate = self;
UNAuthorizationOptions options = UNAuthorizationOptionAlert | UNAuthorizationOptionSound | UNAuthorizationOptionBadge;
if (@available(iOS 12.0, *)) {
options = options | UNAuthorizationOptionProvisional;
}
[center requestAuthorizationWithOptions:options
completionHandler:^(BOOL granted, NSError * _Nullable error) {
[[Appboy sharedInstance] pushAuthorizationFromUserNotificationCenter:granted];
}];
[[UIApplication sharedApplication] registerForRemoteNotifications];
} else {
UIUserNotificationSettings *settings = [UIUserNotificationSettings settingsForTypes:(UIUserNotificationTypeBadge | UIUserNotificationTypeAlert | UIUserNotificationTypeSound) categories:nil];
[[UIApplication sharedApplication] registerForRemoteNotifications];
[[UIApplication sharedApplication] registerUserNotificationSettings:settings];
}
```
```swift
if #available(iOS 10, *) {
let center = UNUserNotificationCenter.current()
center.delegate = self as? UNUserNotificationCenterDelegate
var options: UNAuthorizationOptions = [.alert, .sound, .badge]
if #available(iOS 12.0, *) {
options = UNAuthorizationOptions(rawValue: options.rawValue | UNAuthorizationOptions.provisional.rawValue)
}
center.requestAuthorization(options: options) { (granted, error) in
Appboy.sharedInstance()?.pushAuthorization(fromUserNotificationCenter: granted)
}
UIApplication.shared.registerForRemoteNotifications()
} else {
let types : UIUserNotificationType = [.alert, .badge, .sound]
let setting : UIUserNotificationSettings = UIUserNotificationSettings(types:types, categories:nil)
UIApplication.shared.registerUserNotificationSettings(setting)
UIApplication.shared.registerForRemoteNotifications()
}
```
**Warning:**
Vous devez attribuer votre objet délégué à l'aide de `center.delegate = self` de manière synchrone avant que votre application ne termine son lancement, de préférence dans `application:didFinishLaunchingWithOptions:`. Sans cela, votre application risque de ne pas recevoir les notifications push entrantes. Consultez la documentation Apple [`UNUserNotificationCenterDelegate`](https://developer.apple.com/documentation/usernotifications/unusernotificationcenterdelegate) pour en savoir plus.
### Sans le framework UserNotifications {#without-usernotifications-framework}
Si vous n'utilisez pas le framework `UserNotifications`, ajoutez le code suivant à la méthode `application:didFinishLaunchingWithOptions:` de votre délégué d'application :
```objc
UIUserNotificationSettings *settings = [UIUserNotificationSettings settingsForTypes:(UIUserNotificationTypeBadge | UIUserNotificationTypeAlert | UIUserNotificationTypeSound) categories:nil];
[[UIApplication sharedApplication] registerForRemoteNotifications];
[[UIApplication sharedApplication] registerUserNotificationSettings:settings];
```
```swift
let types : UIUserNotificationType = UIUserNotificationType.Badge | UIUserNotificationType.Sound | UIUserNotificationType.Alert
var setting : UIUserNotificationSettings = UIUserNotificationSettings(forTypes: types, categories: nil)
UIApplication.shared.registerUserNotificationSettings(setting)
UIApplication.shared.registerForRemoteNotifications()
```
## Étape 4 : Enregistrer les jetons push avec Braze {#step-4-register-push-tokens-with-braze}
Une fois l'enregistrement APNs terminé, la méthode suivante doit être modifiée pour transmettre le `deviceToken` résultant à Braze afin que l'utilisateur soit activé pour les notifications push :
Ajoutez le code suivant à votre méthode `application:didRegisterForRemoteNotificationsWithDeviceToken:` :
```objc
[[Appboy sharedInstance] registerDeviceToken:deviceToken];
```
Ajoutez le code suivant à la méthode `application(_:didRegisterForRemoteNotificationsWithDeviceToken:)` de votre application :
```swift
Appboy.sharedInstance()?.registerDeviceToken(deviceToken)
```
**Important:**
La méthode de délégation `application:didRegisterForRemoteNotificationsWithDeviceToken:` est appelée à chaque fois après l'appel de `[[UIApplication sharedApplication] registerForRemoteNotifications]`. Si vous migrez vers Braze depuis un autre service de notifications push et que l'appareil de votre utilisateur est déjà enregistré auprès des APNs, cette méthode collectera les jetons à partir des enregistrements existants lors du prochain appel, et les utilisateurs n'auront pas à se réabonner aux notifications push.
## Étape 5 : Activer la gestion des notifications push {#step-5-enable-push-handling}
Le code suivant transmet les notifications push reçues à Braze et est nécessaire pour la journalisation des analyses push et la gestion des liens. Assurez-vous d'appeler tout le code d'intégration push dans le thread principal de votre application.
### iOS 10+
Lors du développement pour iOS 10+, nous vous recommandons d'intégrer le framework `UserNotifications` et de procéder comme suit :
Ajoutez le code suivant à la méthode `application:didReceiveRemoteNotification:fetchCompletionHandler:` de votre application :
```objc
[[Appboy sharedInstance] registerApplication:application
didReceiveRemoteNotification:userInfo
fetchCompletionHandler:completionHandler];
```
Puis ajoutez le code suivant à la méthode `(void)userNotificationCenter:didReceiveNotificationResponse:withCompletionHandler:` de votre application :
```objc
[[Appboy sharedInstance] userNotificationCenter:center
didReceiveNotificationResponse:response
withCompletionHandler:completionHandler];
```
**Gestion des notifications push au premier plan**
Pour afficher une notification push lorsque l'application est au premier plan, implémentez `userNotificationCenter:willPresentNotification:withCompletionHandler:` :
```objc
- (void)userNotificationCenter:(UNUserNotificationCenter *)center
willPresentNotification:(UNNotification *)notification
withCompletionHandler:(void (^)(UNNotificationPresentationOptions options))completionHandler {
if (@available(iOS 14.0, *)) {
completionHandler(UNNotificationPresentationOptionList | UNNotificationPresentationOptionBanner);
} else {
completionHandler(UNNotificationPresentationOptionAlert);
}
}
```
Si l'utilisateur clique sur la notification au premier plan, le délégué push iOS 10 `userNotificationCenter:didReceiveNotificationResponse:withCompletionHandler:` sera appelé, et Braze enregistrera un événement de clic push.
Ajoutez le code suivant à la méthode `application(_:didReceiveRemoteNotification:fetchCompletionHandler:)` de votre application :
```swift
Appboy.sharedInstance()?.register(application,
didReceiveRemoteNotification: userInfo,
fetchCompletionHandler: completionHandler)
```
Puis ajoutez le code suivant à la méthode `userNotificationCenter(_:didReceive:withCompletionHandler:)` de votre application :
```swift
Appboy.sharedInstance()?.userNotificationCenter(center,
didReceive: response,
withCompletionHandler: completionHandler)
```
**Gestion des notifications push au premier plan**
Pour afficher une notification push lorsque l'application est au premier plan, implémentez `userNotificationCenter(_:willPresent:withCompletionHandler:)` :
```swift
func userNotificationCenter(_ center: UNUserNotificationCenter,
willPresent notification: UNNotification,
withCompletionHandler completionHandler: @escaping (UNNotificationPresentationOptions) -> Void) {
if #available(iOS 14.0, *) {
completionHandler([.list, .banner]);
} else {
completionHandler([.alert]);
}
}
```
Si l'utilisateur clique sur la notification au premier plan, le délégué push iOS 10 `userNotificationCenter(_:didReceive:withCompletionHandler:)` sera appelé, et Braze enregistrera un événement de clic push.
### Pré-iOS 10 {#pre-ios-10}
iOS 10 a modifié le comportement de sorte que `application:didReceiveRemoteNotification:fetchCompletionHandler:` n'est plus appelé lorsqu'un utilisateur clique sur une notification push. Pour cette raison, si vous ne mettez pas à jour votre build pour iOS 10+ et n'utilisez pas le framework `UserNotifications`, vous devez appeler Braze depuis les deux anciens délégués, ce qui constitue une rupture par rapport à notre intégration précédente.
Pour les applications développées avec des SDK < iOS 10, utilisez les instructions suivantes :
Pour activer le suivi d'ouverture sur les notifications push, ajoutez le code suivant à la méthode `application:didReceiveRemoteNotification:fetchCompletionHandler:` de votre application :
```objc
[[Appboy sharedInstance] registerApplication:application
didReceiveRemoteNotification:userInfo
fetchCompletionHandler:completionHandler];
```
Pour prendre en charge les analyses push sur iOS 10, vous devez également ajouter le code suivant à la méthode de délégation `application:didReceiveRemoteNotification:` de votre application :
```objc
[[Appboy sharedInstance] registerApplication:application
didReceiveRemoteNotification:userInfo];
```
Pour activer le suivi d'ouverture sur les notifications push, ajoutez le code suivant à la méthode `application(_:didReceiveRemoteNotification:fetchCompletionHandler:)` de votre application :
```swift
Appboy.sharedInstance()?.register(application,
didReceiveRemoteNotification: userInfo,
fetchCompletionHandler: completionHandler)
```
Pour prendre en charge les analyses push sur iOS 10, vous devez également ajouter le code suivant à la méthode de délégation `application(_:didReceiveRemoteNotification:)` de votre application :
```swift
Appboy.sharedInstance()?.register(application,
didReceiveRemoteNotification: userInfo)
```
## Étape 6 : Liens profonds {#step-6-deep-linking}
La création de liens profonds depuis une notification push vers l'application est gérée automatiquement via notre documentation d'intégration push standard. Si vous souhaitez en savoir plus sur l'ajout de liens profonds vers des emplacements spécifiques dans votre application, consultez nos [cas d'utilisation avancés](https://www.braze.com/docs/fr/fr/developer_guide/platform_integration_guides/ios/advanced_use_cases/linking/#linking-implementation).
## Étape 7 : Tests unitaires (facultatif) {#step-7-unit-tests-optional}
Pour ajouter une couverture de test aux étapes d'intégration que vous venez de suivre, implémentez les [tests unitaires push](https://www.braze.com/docs/fr/fr/developer_guide/platforms/legacy_sdks/ios/push_notifications/unit_tests/).
# Personnalisation des notifications push iOS
Source: /docs/fr/developer_guide/platforms/legacy_sdks/ios/push_notifications/customization/index.md
# Boutons d’action push pour iOS
Source: /docs/fr/developer_guide/platforms/legacy_sdks/ios/push_notifications/customization/action_buttons/index.md
**Warning:**
[AppboyKit](https://github.com/Appboy/appboy-ios-sdk) (also known as the Objective-C SDK) is no longer supported and has been replaced by the [Swift SDK](https://www.braze.com/docs/fr/fr/developer_guide/sdk_integration/?sdktab=swift). It will no longer receive new features, bug fixes, security updates, or technical support—however, messaging and analytics will continue to function as normal. To learn more, see [Introducing the New Braze Swift SDK](https://www.braze.com/resources/articles/introducing-the-new-braze-swift-sdk).
# Boutons d’action {#push-action-buttons-integration}
Le SDK Braze pour iOS prend en charge les catégories de notifications push par défaut, y compris la prise en charge de la gestion d’URL pour chaque bouton d’action push. Actuellement, les catégories par défaut ont quatre ensembles de boutons d’action push : `Accept`/`Decline`, `Yes`/`No`, `Confirm`/`Cancel`, et `More`.

Pour enregistrer nos catégories push par défaut, suivez les instructions d'intégration :
## Étape 1 : Ajoutez les catégories de notifications push par défaut de Braze
Utilisez le code suivant pour vous inscrire à nos catégories push par défaut lorsque vous [vous inscrivez à push :](https://www.braze.com/docs/fr/fr/developer_guide/platform_integration_guides/ios/push_notifications/integration/#step-4-register-push-tokens-with-braze)
```objc
// For UserNotification.framework (iOS 10+ only)
NSSet *appboyCategories = [ABKPushUtils getAppboyUNNotificationCategorySet];
[[UNUserNotificationCenter currentNotificationCenter] setNotificationCategories:appboyCategories];
// For UIUserNotificationSettings (before iOS 10)
NSSet *appboyCategories = [ABKPushUtils getAppboyUIUserNotificationCategorySet];
UIUserNotificationSettings *settings = [UIUserNotificationSettings settingsForTypes:UIUserNotificationTypeBadge
categories:appboyCategories];
[[UIApplication sharedApplication] registerUserNotificationSettings:settings];
```
```swift
// For UserNotification.framework (iOS 10+ only)
let appboyCategories = ABKPushUtils.getAppboyUNNotificationCategorySet()
UNUserNotificationCenter.current().setNotificationCategories(appboyCategories)
// For UIUserNotificationSettings (before iOS 10)
let appboyCategories = ABKPushUtils.getAppboyUIUserNotificationCategorySet()
let settings = UIUserNotificationSettings.init(types: .badge, categories: appboyCategories)
UIApplication.shared.registerUserNotificationSettings(settings)
```
Cliquer sur les boutons d’action push avec le mode d’activation en arrière-plan ne fera que rejeter la notification et n’ouvrira pas l’application. Lorsque l’utilisateur ouvrira à nouveau l’application, l’analyse de clics de bouton pour ces actions sera transmise au serveur.
Si vous souhaitez créer vos propres catégories de notifications personnalisées, consultez la [personnalisation des boutons d'action](https://www.braze.com/docs/fr/fr/developer_guide/platform_integration_guides/ios/push_notifications/customization/action_buttons/#push-category-customization).
## Étape 2 : Activer la gestion interactive des notifications push
Si vous utilisez le cadre `UNNotification` et que vous avez mis en œuvre des [délégués](https://www.braze.com/docs/fr/fr/developer_guide/platform_integration_guides/ios/push_notifications/integration/#step-5-enable-push-handling) Braze, cette méthode devrait déjà être intégrée.
Pour activer la gestion de notre bouton d'action push, y compris l'analyse des clics et le routage des URL, ajoutez le code suivant à la méthode de délégation de votre application `(void)userNotificationCenter:didReceiveNotificationResponse:withCompletionHandler:` :
```objc
[[Appboy sharedInstance] userNotificationCenter:center
didReceiveNotificationResponse:response
withCompletionHandler:completionHandler];
```
```swift
Appboy.sharedInstance()?.userNotificationCenter(center,
didReceive: response,
withCompletionHandler: completionHandler)
```
Si vous n'utilisez pas UNNotification Framework, vous devrez ajouter le code suivant au site `application:handleActionWithIdentifier:forRemoteNotification:completionHandler:` de votre application pour activer la gestion de nos boutons d'action push :
```objc
[[Appboy sharedInstance] getActionWithIdentifier:identifier
forRemoteNotification:userInfo
completionHandler:completionHandler];
```
```swift
Appboy.sharedInstance()?.getActionWithIdentifier(identifier,
forRemoteNotification: userInfo,,
completionHandler: completionHandler)
```
**Important:**
Nous recommandons fortement aux personnes utilisant `handleActionWithIdentifier` de commencer à utiliser l’infrastructure `UNNotification`. Nous recommandons cette solution en raison de la dépréciation de l'option [`handleActionWithIdentifier`](https://developer.apple.com/documentation/uikit/uiapplicationdelegate/1623068-application?language=objc).
## Personnalisation de la catégorie de notifications push
En plus de fournir un ensemble de [catégories de push par défaut](https://www.braze.com/docs/fr/fr/developer_guide/platforms/legacy_sdks/ios/push_notifications/customization/action_buttons/), Braze prend en charge les catégories et actions de notification personnalisées. Après avoir enregistré des catégories dans votre application, vous pouvez utiliser le tableau de bord de Braze pour envoyer des catégories de notification à vos utilisateurs.
Si vous n'utilisez pas le cadre `UserNotifications`, consultez la documentation sur les [catégories alternatives.](https://developer.apple.com/documentation/usernotifications/unnotificationcategory)
Ces catégories peuvent ensuite être affectées aux notifications push via notre tableau de bord pour déclencher les configurations des boutons d’action de votre conception. Voici un exemple qui tire parti du `LIKE_CATEGORY` affiché sur l’appareil :

# Sons de notification Push personnalisés pour iOS
Source: /docs/fr/developer_guide/platforms/legacy_sdks/ios/push_notifications/customization/custom_sounds/index.md
**Warning:**
[AppboyKit](https://github.com/Appboy/appboy-ios-sdk) (also known as the Objective-C SDK) is no longer supported and has been replaced by the [Swift SDK](https://www.braze.com/docs/fr/fr/developer_guide/sdk_integration/?sdktab=swift). It will no longer receive new features, bug fixes, security updates, or technical support—however, messaging and analytics will continue to function as normal. To learn more, see [Introducing the New Braze Swift SDK](https://www.braze.com/resources/articles/introducing-the-new-braze-swift-sdk).
# Sons personnalisés
## Étape 1 : Héberger les sons dans l’application
Les sons des notifications push personnalisées doivent être hébergés localement dans le lot principal de l’application client. Les formats de données audio suivants sont acceptés :
- Linear PCM
- MA4
- µLaw
- aLaw
Vous pouvez regrouper les données audio dans un fichier AIFF, WAV ou CAF. Dans Xcode, ajoutez le fichier audio à votre projet comme ressource non localisée du lot d’applications.
Vous pouvez utiliser l’outil afconvert pour convertir les sons. Par exemple, pour convertir le système PCM linéaire 16 bits Submarine.aiff en audio IMA4 dans un fichier CAF, utilisez la commande suivante dans le terminal :
```bash
afconvert /System/Library/Sounds/Submarine.aiff ~/Desktop/sub.caf -d ima4 -f caff -v
```
Vous pouvez inspecter un son pour déterminer son format de données en l'ouvrant dans QuickTime Player et en choisissant **Afficher l'inspecteur de film** dans le menu **Film**.
Les sons personnalisés doivent durer moins de 30 secondes lorsqu’ils sont joués. Si un son personnalisé dépasse cette limite, le son système par défaut est joué à la place.
## Étape 2 : Fournir au tableau de bord une URL de protocole pour le son
Votre son doit être hébergé localement dans l’application. Vous devez spécifier une URL de protocole qui dirige vers l'emplacement du fichier audio dans l'application dans le champ **Sound** du compositeur de notification. Spécifier « par défaut » dans ce champ jouera le son de notification par défaut sur l’appareil. Cela peut être spécifié via notre[ API de messagerie](https://www.braze.com/docs/fr/fr/api/endpoints/messaging/) ou notre tableau de bord sous **Paramètres** dans le compositeur de notifications push, comme illustré dans la capture d'écran suivante :

Si le fichier son spécifié n’existe pas ou si le mot-clé « default » est saisi, Braze utilisera le son d’alerte par défaut du appareil. En dehors de notre tableau de bord, le son peut également être configuré via notre [API d’envoi de messages](https://www.braze.com/docs/fr/fr/api/endpoints/messaging/). Pour plus d'informations, consultez la documentation du développeur Apple concernant [la préparation de sons d'alerte personnalisés](https://developer.apple.com/library/content/documentation/NetworkingInternet/Conceptual/RemoteNotificationsPG/SupportingNotificationsinYourApp.html).
# Notifications push enrichies pour iOS
Source: /docs/fr/developer_guide/platforms/legacy_sdks/ios/push_notifications/customization/rich_notifications/index.md
**Warning:**
[AppboyKit](https://github.com/Appboy/appboy-ios-sdk) (also known as the Objective-C SDK) is no longer supported and has been replaced by the [Swift SDK](https://www.braze.com/docs/fr/fr/developer_guide/sdk_integration/?sdktab=swift). It will no longer receive new features, bug fixes, security updates, or technical support—however, messaging and analytics will continue to function as normal. To learn more, see [Introducing the New Braze Swift SDK](https://www.braze.com/resources/articles/introducing-the-new-braze-swift-sdk).
# Notifications enrichies iOS 10
iOS 10 offre la possibilité d’envoyer des notifications push avec des images, des GIF et des vidéos. Pour activer cette fonctionnalité, les clients doivent créer un `Service Extension`, un nouveau type d’extension qui permet la modification d’une charge utile de notification push avant qu’elle ne soit affichée.
## Création d’une extension de service
Pour créer un [`Notification Service Extension`](https://developer.apple.com/reference/usernotifications/unnotificationserviceextension), accédez à **Fichier > Nouveau > Cible** dans Xcode et sélectionnez **Extension de service de notification**.
{: style="max-width:90%"}
Assurez-vous que l'option **Embed In Application (Intégrer dans l'application** ) est activée pour intégrer l'extension dans votre application.
## Configuration de l’extension de service
Une `Notification Service Extension` est son propre binaire fourni avec votre application. Elle doit être configurée dans le [portail des développeurs Apple](https://developer.apple.com) avec son propre ID d'application et son propre profil de provisionnement.
L’ID de lot `Notification Service Extension` doit être différent de l’ID de lot de la cible de votre application principale. Par exemple, si l’ID de lot de votre application est `com.company.appname`, vous pouvez utiliser `com.company.appname.AppNameServiceExtension` pour votre extension de service.
### Configuration de l’extension de service pour travailler avec Braze
Braze envoie une charge utile de pièce jointe dans la charge utile APN sous la clé `ab` que nous utilisons pour configurer, télécharger et afficher du contenu enrichi. Par exemple :
```json
{
"ab" :
{
...
"att" :
{
"url" : "http://mysite.com/myimage.jpg",
"type" : "jpg"
}
},
"aps" :
{
...
}
}
```
Les valeurs de charges utiles pertinentes sont les suivantes :
```objc
// The Braze dictionary key
static NSString *const AppboyAPNSDictionaryKey = @"ab";
// The attachment dictionary
static NSString *const AppboyAPNSDictionaryAttachmentKey = @"att";
// The attachment URL
static NSString *const AppboyAPNSDictionaryAttachmentURLKey = @"url";
// The type of the attachment - a suffix for the file you save
static NSString *const AppboyAPNSDictionaryAttachmentTypeKey = @"type";
```
Pour afficher manuellement la notification push avec une charge utile Braze, téléchargez le contenu de la valeur `AppboyAPNSDictionaryAttachmentURLKey`, enregistrez-le comme fichier avec le type de fichier stocké sous `AppboyAPNSDictionaryAttachmentTypeKey` et ajoutez-le aux pièces jointes de notification.
### Exemple de code
Vous pouvez écrire l’extension de service dans Objective-C ou Swift.
Pour utiliser notre exemple de code Objective-C, remplacez le contenu de votre `Notification Service Extension` cible généré automatiquement `NotificationService.m` par le contenu de l'Appboy [`NotificationService.m`](https://github.com/Appboy/appboy-ios-sdk/blob/master/Example/StopwatchNotificationService/NotificationService.m).
Pour utiliser notre exemple de code Swift, remplacez le contenu de votre `Notification Service Extension` cible généré automatiquement `NotificationService.swift` par le contenu de l'Appboy [`NotificationService.swift`](https://github.com/Appboy/appboy-ios-sdk/blob/master/HelloSwift/HelloSwiftNotificationExtension/NotificationService.swift).
## Créer une notification enrichie dans votre tableau de bord
Pour créer une notification enrichie dans votre tableau de bord de Braze, créez une notification push iOS, mettez en pièce jointe une image ou GIF, ou indiquez une URL qui héberge une image, GIF ou vidéo. Notez que les ressources sont téléchargées à la réception des notifications push, vous devez donc prévoir des pics importants et synchrones de demandes si vous hébergez votre contenu.
Reportez-vous à [`unnotificationattachment`](https://developer.apple.com/reference/usernotifications/unnotificationattachment) pour obtenir la liste des types et tailles de fichiers pris en charge.
# Compte des badges de notification Push pour iOS
Source: /docs/fr/developer_guide/platforms/legacy_sdks/ios/push_notifications/customization/badges/index.md
**Warning:**
[AppboyKit](https://github.com/Appboy/appboy-ios-sdk) (also known as the Objective-C SDK) is no longer supported and has been replaced by the [Swift SDK](https://www.braze.com/docs/fr/fr/developer_guide/sdk_integration/?sdktab=swift). It will no longer receive new features, bug fixes, security updates, or technical support—however, messaging and analytics will continue to function as normal. To learn more, see [Introducing the New Braze Swift SDK](https://www.braze.com/resources/articles/introducing-the-new-braze-swift-sdk).
# Badges
Vous pouvez spécifier le nombre de badges souhaité lorsque vous composez une notification push via le tableau de bord Braze. Vous pouvez également mettre à jour manuellement le nombre de vos badges via la propriété [`applicationIconBadgeNumber`](https://developer.apple.com/library/ios/documentation/UIKit/Reference/UIApplication_Class/index.html#//apple_ref/occ/instp/UIApplication/applicationIconBadgeNumber) de votre application ou la [charge utile de notification à distance](https://developer.apple.com/library/content/documentation/NetworkingInternet/Conceptual/RemoteNotificationsPG/CreatingtheNotificationPayload.html#//apple_ref/doc/uid/TP40008194-CH10-SW1). Braze efface également le nombre de badges lorsqu’une notification Braze est reçue pendant que l’application est au premier plan.
Si vous n’avez pas planifié une stratégie pour effacer les badges dans le cadre du fonctionnement normal de l’application ou en envoyant des notifications push qui effacent le badge, vous devez effacer le badge lorsque l’application devient active en ajoutant le code suivant à la méthode de délégation`applicationDidBecomeActive:` de votre application :
```objc
// For iOS 16.0+
UNUserNotificationCenter *center = [UNUserNotificationCenter currentNotificationCenter];
[center setBadgeCount:0 withCompletionHandler:^(NSError * _Nullable error) {
if (error != nil) {
// Handle errors
}
}];
// Prior to iOS 16. Deprecated in iOS 17+.
[UIApplication sharedApplication].applicationIconBadgeNumber = 0;
```
```swift
// For iOS 16.0+
let center = UNUserNotificationCenter.current()
do {
try await center.setBadgeCount(0)
} catch {
// Handle errors
}
// Prior to iOS 16. Deprecated in iOS 17+.
UIApplication.shared.applicationIconBadgeNumber = 0
```
Notez que définir le numéro de badge sur 0 effacera également les notifications dans le centre de notification. Ainsi, même si vous ne définissez pas de numéro de badge dans les charges utiles des notifications push, vous pouvez toujours définir le numéro de badge sur 0 pour supprimer la ou les notifications push dans le centre de notification après que les utilisateurs ont cliqué sur la notification.
# Ignorer les notifications push internes Braze pour iOS
Source: /docs/fr/developer_guide/platforms/legacy_sdks/ios/push_notifications/customization/ignoring_internal_push/index.md
**Warning:**
[AppboyKit](https://github.com/Appboy/appboy-ios-sdk) (also known as the Objective-C SDK) is no longer supported and has been replaced by the [Swift SDK](https://www.braze.com/docs/fr/fr/developer_guide/sdk_integration/?sdktab=swift). It will no longer receive new features, bug fixes, security updates, or technical support—however, messaging and analytics will continue to function as normal. To learn more, see [Introducing the New Braze Swift SDK](https://www.braze.com/resources/articles/introducing-the-new-braze-swift-sdk).
# Ignorer les notifications push internes de Braze
Braze utilise des notifications push silencieuses pour l’implémentation interne de certaines fonctions avancées. Pour la plupart des intégrations, cela ne nécessite aucune modification du côté de votre application. Toutefois, si vous intégrez une fonctionnalité de Braze qui repose sur des notifications push internes (par exemple, le suivi de désinstallation ou les géorepérages), vous pouvez mettre à jour votre application pour ignorer nos push internes.
Si votre application effectue des actions automatiques lors du lancement d'une application ou d'un push en arrière-plan, vous devriez envisager de filtrer cette activité afin qu'elle ne soit pas déclenchée par des notifications push internes. Par exemple, si vous avez une logique qui appelle vos serveurs pour un nouveau contenu à chaque poussée en arrière-plan ou au lancement d'une application, vous ne voudrez probablement pas que nos poussées internes déclenchent cela, car cela entraînerait un trafic réseau inutile. De plus, étant donné que Braze envoie certains types de notifications push internes à tous les utilisateurs à peu près au même moment, le fait de ne pas bloquer les appels réseau au lancement de notifications push internes pourrait entraîner une charge importante du serveur.
## Vérifier votre application pour les actions automatiques
Vous devez vérifier votre demande d’actions automatiques dans les endroits suivants et mettre à jour votre code pour ignorer nos notifications push internes :
1. **Récepteurs de notifications push.** Les notifications push en arrière-plan vont appeler `application:didReceiveRemoteNotification:fetchCompletionHandler:` sur le `UIApplicationDelegate`.
2. **Délégué d'application.** Les notifications push en arrière-plan peuvent lancer les applications [suspendues](https://developer.apple.com/library/ios/documentation/iPhone/Conceptual/iPhoneOSProgrammingGuide/TheAppLifeCycle/TheAppLifeCycle.html#//apple_ref/doc/uid/TP40007072-CH2-SW3) en arrière-plan, déclenchant les méthodes `application:willFinishLaunchingWithOptions:` et `application:didFinishLaunchingWithOptions:` sur votre `UIApplicationDelegate`. Vous pouvez vérifier le `launchOptions` de ces méthodes pour déterminer si l’application a été lancée à partir d’une notification push en arrière-plan.
## Utilisation des méthodes utilitaires de poussée interne de Braze
Vous pouvez utiliser les méthodes de l’utilitaire dans `ABKPushUtils` pour vérifier si votre application a été reçue ou a été lancée par une notification push interne de Braze. `isAppboyInternalRemoteNotification:` reviendra `YES` sur toutes les notifications push internes de Braze, alors que `isUninstallTrackingRemoteNotification:` et `isGeofencesSyncRemoteNotification:` reviendra `YES` pour le suivi de désinstallation et les notifications de synchronisation de géorepérage, respectivement. Pour connaître les déclarations de méthodes, reportez-vous à [`ABKPushUtils.h`](https://github.com/Appboy/appboy-ios-sdk/blob/master/AppboyKit/include/ABKPushUtils.h).
## Exemple d’implémentation {#internal-push-implementation-example}
```objc
- (BOOL)application:(UIApplication *)application didFinishLaunchingWithOptions:(NSDictionary *)launchOptions {
NSDictionary *pushDictionary = launchOptions[UIApplicationLaunchOptionsRemoteNotificationKey];
BOOL launchedFromAppboyInternalPush = pushDictionary && [ABKPushUtils isAppboyInternalRemoteNotification:pushDictionary];
if (!launchedFromAppboyInternalPush) {
// ... Gated logic here (such as pinging your server to download content) ...
}
}
```
```objc
- (void)application:(UIApplication *)application didReceiveRemoteNotification:(NSDictionary *)userInfo fetchCompletionHandler:(void (^)(UIBackgroundFetchResult result))completionHandler {
if (![ABKPushUtils isAppboyInternalRemoteNotification:userInfo]) {
// ... Gated logic here (such as pinging server for content) ...
}
}
```
```swift
func application(_ application: UIApplication, didFinishLaunchingWithOptions launchOptions: [UIApplicationLaunchOptionsKey : Any]? = nil) -> Bool {
let pushDictionary = launchOptions?[UIApplicationLaunchOptionsKey.remoteNotification] as? NSDictionary as? [AnyHashable : Any] ?? [:]
let launchedFromAppboyInternalPush = ABKPushUtils.isAppboyInternalRemoteNotification(pushDictionary)
if (!launchedFromAppboyInternalPush) {
// ... Gated logic here (such as pinging your server to download content) ...
}
}
```
```swift
func application(_ application: UIApplication,
didReceiveRemoteNotification userInfo: [AnyHashable : Any],
fetchCompletionHandler completionHandler: @escaping (UIBackgroundFetchResult) -> Void) {
if (!ABKPushUtils.isAppboyInternalRemoteNotification(userInfo)) {
// ... Gated logic here (such as pinging server for content) ...
}
}
```
# Paramètres avancés de notification push
Source: /docs/fr/developer_guide/platforms/legacy_sdks/ios/push_notifications/customization/advanced_settings/index.md
**Warning:**
[AppboyKit](https://github.com/Appboy/appboy-ios-sdk) (also known as the Objective-C SDK) is no longer supported and has been replaced by the [Swift SDK](https://www.braze.com/docs/fr/fr/developer_guide/sdk_integration/?sdktab=swift). It will no longer receive new features, bug fixes, security updates, or technical support—however, messaging and analytics will continue to function as normal. To learn more, see [Introducing the New Braze Swift SDK](https://www.braze.com/resources/articles/introducing-the-new-braze-swift-sdk).
# Paramètres avancés {#advanced-settings}
Lors de la création d'une campagne push, à l'étape de composition, sélectionnez **Settings** pour afficher les paramètres avancés disponibles.

## Extraire des données à partir des paires clé-valeur de notifications push {#extracting-data-from-push-key-value-pairs}
Braze vous permet d'envoyer des paires clé-valeur définies de manière personnalisée sous forme de chaînes de caractères, appelées `extras`, avec une notification push à votre application. Ces extras peuvent être définis via le tableau de bord ou l'API et seront disponibles en tant que paires clé-valeur dans le dictionnaire `notification` transmis à vos implémentations de délégué de notification push.
## Options d'alerte {#alert-options}
Cochez la case **Alert Options** pour voir une liste déroulante de valeurs clés disponibles pour ajuster l'apparence de la notification sur les appareils.
## Ajouter un indicateur de contenu disponible {#adding-content-available-flag}
Cochez la case **Add Content-Available Flag** pour indiquer aux appareils de télécharger le nouveau contenu en arrière-plan. Le plus souvent, vous pouvez cocher cette case si vous souhaitez envoyer des [notifications silencieuses](https://www.braze.com/docs/fr/fr/developer_guide/platforms/legacy_sdks/ios/push_notifications/silent_push_notifications/).
## Ajouter un indicateur de contenu mutable {#adding-mutable-content-flag}
Cochez la case **Add Mutable-Content Flag** pour activer les personnalisations avancées du récepteur sur les appareils équipés d'iOS 10+. Cet indicateur sera automatiquement envoyé lors de la composition d'une [notification enrichie](https://www.braze.com/docs/fr/fr/developer_guide/platforms/legacy_sdks/ios/push_notifications/customization/rich_notifications/), quelle que soit la valeur de cette case à cocher.
## Mettre à jour le nombre de badges de l'application {#update-app-badge-count}
Saisissez le nombre souhaité pour mettre à jour votre compteur de badges, ou utilisez la syntaxe Liquid pour définir vos conditions personnalisées. Vous pouvez également mettre à jour manuellement votre compteur de badges par l'intermédiaire de la propriété `applicationIconBadgeNumber` de votre application ou du payload de notification push. Pour en savoir plus, consultez notre article dédié au [nombre de badges](https://www.braze.com/docs/fr/fr/developer_guide/platforms/legacy_sdks/ios/push_notifications/customization/badges/).
## Sons {#sounds}
Vous pouvez entrer ici un chemin d'accès à un fichier audio dans votre bundle d'application afin de spécifier un son à lire lorsque la notification push est reçue. Si le fichier audio spécifié n'existe pas ou si le mot-clé « default » est saisi, Braze utilisera le son d'alerte par défaut de l'appareil. Pour plus d'informations sur la personnalisation, consultez notre article dédié aux [sons personnalisés](https://www.braze.com/docs/fr/fr/developer_guide/platforms/legacy_sdks/ios/push_notifications/customization/custom_sounds/).
## ID de réduction {#collapse-id}
Spécifiez un ID de réduction pour fusionner les notifications similaires. Si vous envoyez plusieurs notifications avec le même ID de réduction, l'appareil n'affichera que la notification la plus récente. Reportez-vous à la documentation d'Apple sur les [notifications fusionnées](https://developer.apple.com/library/content/documentation/NetworkingInternet/Conceptual/RemoteNotificationsPG/APNSOverview.html#//apple_ref/doc/uid/TP40008194-CH8-SW1).
## Expiration {#expiry}
Cochez la case **Expiry** pour définir une durée d'expiration pour votre message. Si l'appareil d'un utilisateur perd sa connexion, Braze continuera d'essayer d'envoyer le message jusqu'à l'heure spécifiée. Si cette option n'est pas définie, la plateforme applique par défaut un délai d'expiration de 30 jours. Notez que les notifications push qui expirent avant d'être distribuées ne sont pas considérées comme ayant échoué et ne seront pas enregistrées comme un rebond.
# Notifications push silencieuses pour iOS
Source: /docs/fr/developer_guide/platforms/legacy_sdks/ios/push_notifications/silent_push_notifications/index.md
**Warning:**
[AppboyKit](https://github.com/Appboy/appboy-ios-sdk) (also known as the Objective-C SDK) is no longer supported and has been replaced by the [Swift SDK](https://www.braze.com/docs/fr/fr/developer_guide/sdk_integration/?sdktab=swift). It will no longer receive new features, bug fixes, security updates, or technical support—however, messaging and analytics will continue to function as normal. To learn more, see [Introducing the New Braze Swift SDK](https://www.braze.com/resources/articles/introducing-the-new-braze-swift-sdk).
# Notifications push silencieuses {#silent-push-notifications}
Les notifications push vous permettent d'informer votre application lorsque des événements importants se produisent. Vous pouvez envoyer une notification push lorsque vous avez de nouveaux messages instantanés à livrer, des alertes d'actualité à envoyer ou le dernier épisode de l'émission télévisée préférée de votre utilisateur prêt à être téléchargé pour un visionnage hors ligne. Les notifications push peuvent également être silencieuses, ne contenir aucun message d'alerte ni son, et être utilisées uniquement pour mettre à jour l'interface de votre application ou déclencher des tâches en arrière-plan.
Les notifications push sont idéales pour le contenu sporadique mais immédiatement important, lorsque le délai entre les récupérations en arrière-plan peut ne pas être acceptable. Les notifications push peuvent également être beaucoup plus efficaces que la récupération en arrière-plan, car votre application ne démarre que si nécessaire.
Les notifications push sont limitées en débit, alors n'hésitez pas à en envoyer autant que votre application en a besoin. iOS et les serveurs APNs contrôleront la fréquence de livraison, et vous n'aurez pas de problèmes si vous en envoyez trop. Si vos notifications push sont limitées, elles peuvent être retardées jusqu'à la prochaine fois que l'appareil envoie un paquet keep-alive ou reçoit une autre notification.
## Envoi de notifications push silencieuses {#sending-silent-push-notifications}
Pour envoyer une notification push silencieuse, définissez l'indicateur `content-available` sur `1` dans le payload d'une notification push. Lors de l'envoi d'une notification push silencieuse, vous pouvez également inclure certaines données dans le payload de la notification, afin que votre application puisse référencer l'événement. Cela pourrait vous éviter quelques requêtes réseau et augmenter la réactivité de votre application.
**Warning:**
Il n'est pas recommandé d'attacher à la fois un titre et un corps avec `content-available=1`, car cela peut entraîner un comportement indéfini. Pour qu'une notification soit vraiment silencieuse, excluez à la fois le titre et le corps lorsque vous définissez l'indicateur `content-available` sur `1.` Pour plus de détails, reportez-vous à la [documentation officielle d'Apple sur les mises à jour en arrière-plan](https://developer.apple.com/documentation/usernotifications/setting_up_a_remote_notification_server/pushing_background_updates_to_your_app).
L'indicateur `content-available` peut être défini dans le tableau de bord de Braze ainsi que dans notre [objet Apple push](https://www.braze.com/docs/fr/fr/api/objects_filters/messaging/apple_object/) dans l'[API d'envoi de messages](https://www.braze.com/docs/fr/fr/api/endpoints/messaging/).

## Utiliser des notifications push silencieuses pour déclencher des tâches en arrière-plan {#use-silent-push-notifications-to-trigger-background-work}
Les notifications push silencieuses peuvent faire sortir votre application d'un état « Suspended » ou « Not Running » pour mettre le contenu à jour ou exécuter certaines tâches sans en avertir vos utilisateurs.
Pour utiliser des notifications push silencieuses afin de déclencher des tâches en arrière-plan, configurez l'indicateur `content-available` en suivant les instructions précédentes, sans message ni son. Configurez le mode d'arrière-plan de votre application pour activer `remote notifications` dans l'onglet **Capabilities** des paramètres de votre projet. Une notification à distance est simplement une notification push normale avec l'indicateur `content-available` activé.

L'activation du mode arrière-plan pour les notifications à distance est nécessaire pour le [suivi des désinstallations](https://www.braze.com/docs/fr/fr/developer_guide/analytics/tracking_uninstalls/?sdktab=swift).
Même avec le mode arrière-plan des notifications à distance activé, le système ne lancera pas votre application en arrière-plan si l'utilisateur a quitté l'application de manière forcée. L'utilisateur doit explicitement lancer l'application ou redémarrer l'appareil avant que l'application ne puisse être automatiquement lancée en arrière-plan par le système.
Pour plus d'informations, reportez-vous à la documentation sur l'[envoi de mises à jour en arrière-plan](https://developer.apple.com/documentation/usernotifications/setting_up_a_remote_notification_server/pushing_background_updates_to_your_app?language=objc) et à [`application:didReceiveRemoteNotification:fetchCompletionHandler:`](https://developer.apple.com/library/ios/documentation/UIKit/Reference/UIApplicationDelegate_Protocol/index.html#//apple_ref/occ/intfm/UIApplicationDelegate/application:didReceiveRemoteNotification:fetchCompletionHandler:).
## Limitations des notifications silencieuses iOS {#ios-silent-notifications-limitations}
Le système d'exploitation iOS peut bloquer les notifications pour certaines fonctionnalités. Notez que si vous rencontrez des difficultés avec ces fonctionnalités, le blocage des notifications silencieuses d'iOS peut en être la cause.
Braze possède plusieurs fonctionnalités qui reposent sur les notifications push silencieuses iOS :
| Fonctionnalité | Expérience utilisateur |
|---|---|
| Suivi des désinstallations | L'utilisateur reçoit une notification push silencieuse et nocturne de suivi de désinstallation. |
| Géorepérages | Synchronisation silencieuse des géorepérages du serveur vers l'appareil. |
{: .reset-td-br-1 .reset-td-br-2 role="presentation" }
Reportez-vous à la documentation d'Apple sur les [méthodes d'instance](https://developer.apple.com/documentation/uikit/uiapplicationdelegate/1623013-application) et les [notifications non reçues](https://developer.apple.com/library/content/technotes/tn2265/_index.html#//apple_ref/doc/uid/DTS40010376-CH1-TNTAG23) pour plus de détails.
[8]:https://developer.apple.com/library/content/technotes/tn2265/_index.html#//apple_ref/doc/uid/DTS40010376-CH1-TNTAG23
# Premières notifications push pour iOS
Source: /docs/fr/developer_guide/platforms/legacy_sdks/ios/push_notifications/push_primer/index.md
**Warning:**
[AppboyKit](https://github.com/Appboy/appboy-ios-sdk) (also known as the Objective-C SDK) is no longer supported and has been replaced by the [Swift SDK](https://www.braze.com/docs/fr/fr/developer_guide/sdk_integration/?sdktab=swift). It will no longer receive new features, bug fixes, security updates, or technical support—however, messaging and analytics will continue to function as normal. To learn more, see [Introducing the New Braze Swift SDK](https://www.braze.com/resources/articles/introducing-the-new-braze-swift-sdk).
# Intégration de premières notifications push
Les campagnes de premières notifications push encouragent vos utilisateurs à activer les notifications push sur leur appareil pour votre application. Obtenir la permission des utilisateurs d’envoyer des messages directement sur leurs appareils peut être complexe, mais nos guides peuvent vous aider ! Ce guide montre les étapes que les développeurs doivent suivre pour intégrer les planifications de notifications push.
## Étape 1 : Ajouter un extrait de code dans le fichier AppDelegate.m
Ajoutez la ligne de code suivante à votre fichier `AppDelegate.m` à la place de l’intégration standard :
```objc
- (BOOL)application:(UIApplication *)application didFinishLaunchingWithOptions:(NSDictionary *)launchOptions {
...
if (@available(iOS 10.0, *)) {
UNUserNotificationCenter *center = [UNUserNotificationCenter currentNotificationCenter];
[center getNotificationSettingsWithCompletionHandler:^(UNNotificationSettings * _Nonnull settings) {
if (settings.authorizationStatus != UNAuthorizationStatusNotDetermined) {
// authorization has already been requested, need to follow usual steps
[center requestAuthorizationWithOptions:(UNAuthorizationOptionAlert | UNAuthorizationOptionSound | UNAuthorizationOptionBadge) completionHandler:^(BOOL granted, NSError * _Nullable error) {
[[Appboy sharedInstance] pushAuthorizationFromUserNotificationCenter:granted];
}];
center.delegate = self;
[center setNotificationCategories:[ABKPushUtils getAppboyUNNotificationCategorySet]];
[[UIApplication sharedApplication] registerForRemoteNotifications];
}
}];
} else {
UIApplication *sharedApplication = [UIApplication sharedApplication];
UIUserNotificationSettings *notificationSettings = [sharedApplication currentUserNotificationSettings];
if (notificationSettings.types) {
UIUserNotificationSettings *settings = [UIUserNotificationSettings settingsForTypes:(UIUserNotificationTypeBadge | UIUserNotificationTypeAlert | UIUserNotificationTypeSound) categories:[ABKPushUtils getAppboyUIUserNotificationCategorySet]];
[sharedApplication registerUserNotificationSettings:settings];
[sharedApplication registerForRemoteNotifications];
}
}
```
```swift
if #available(iOS 10, *) {
let center = UNUserNotificationCenter.current()
center.getNotificationSettings(completionHandler: { (settings) in
if settings.authorizationStatus != .notDetermined {
// authorization has already been requested, need to follow usual steps
center.requestAuthorization(options: [.alert, .sound, .badge]) { (granted, error) in
Appboy.sharedInstance()?.pushAuthorization(fromUserNotificationCenter: granted)
}
center.delegate = self as? UNUserNotificationCenterDelegate
center.setNotificationCategories(ABKPushUtils.getAppboyUNNotificationCategorySet())
UIApplication.shared.registerForRemoteNotifications()
}
})
} else {
let notificationSettiings = UIApplication.shared.currentUserNotificationSettings
if notificationSettiings?.types != nil {
let setting = UIUserNotificationSettings(types: [.alert, .badge, .sound], categories:nil)
UIApplication.shared.registerUserNotificationSettings(setting)
UIApplication.shared.registerForRemoteNotifications()
}
}
```
## Étape 2 : Ajouter un vérificateur d'événements personnalisé au fichier AppDelegate.m
L’extrait de code suivant vérifie si un événement personnalisé doit être déclenché. Ajoutez la ligne de code suivante à votre `AppDelegate.m` :
```objc
if (@available(iOS 10.0, *)) {
UNUserNotificationCenter *center = [UNUserNotificationCenter currentNotificationCenter];
[center getNotificationSettingsWithCompletionHandler:^(UNNotificationSettings * _Nonnull settings) {
if (settings.authorizationStatus == UNAuthorizationStatusNotDetermined) {
// ...
// fire custom event
// ...
}
}];
} else {
UIUserNotificationSettings *notificationSettings = [[UIApplication sharedApplication] currentUserNotificationSettings];
if (!notificationSettings.types) {
// …
// fire custom event
// ...
}
}
```
```swift
if #available(iOS 10, *) {
let center = UNUserNotificationCenter.current()
center.getNotificationSettings(completionHandler: { (settings) in
if settings.authorizationStatus == .notDetermined {
// ...
// fire custom event
// ...
}
})
} else {
let notificationSettiings = UIApplication.shared.currentUserNotificationSettings
if notificationSettiings?.types != nil {
// ...
// fire custom event
// ...
}
}
```
## Étape 3 : Configurer un gestionnaire de liens profonds
Placez l’extrait de code suivant à l’intérieur du code de gestion de votre lien ciblé. Vous devez uniquement exécuter ce code de lien profond pour amorcer les notifications push dans le message in-app.
Consultez [Personnalisation de la gestion des liens](https://www.braze.com/docs/fr/fr/developer_guide/platform_integration_guides/ios/advanced_use_cases/linking/#linking-handling-customization) pour plus d’informations sur les liens profonds.
```objc
// ...
// check that this deep link relates to the push prompt
// ...
if (@available(iOS 10.0, *)) {
UNUserNotificationCenter *center = [UNUserNotificationCenter currentNotificationCenter];
[center requestAuthorizationWithOptions:(UNAuthorizationOptionAlert | UNAuthorizationOptionSound | UNAuthorizationOptionBadge) completionHandler:^(BOOL granted, NSError * _Nullable error) {
[[Appboy sharedInstance] pushAuthorizationFromUserNotificationCenter:granted];
}];
center.delegate = self;
[center setNotificationCategories:[ABKPushUtils getAppboyUNNotificationCategorySet]];
[[UIApplication sharedApplication] registerForRemoteNotifications];
} else {
UIUserNotificationSettings *settings = [UIUserNotificationSettings settingsForTypes:(UIUserNotificationTypeBadge | UIUserNotificationTypeAlert | UIUserNotificationTypeSound) categories:[ABKPushUtils getAppboyUIUserNotificationCategorySet]];
UIApplication *sharedApplication = [UIApplication sharedApplication];
[sharedApplication registerUserNotificationSettings:settings];
[sharedApplication registerForRemoteNotifications];
}
```
```swift
// ...
// check that this deep link relates to the push prompt
// ...
if #available(iOS 10, *) {
let center = UNUserNotificationCenter.current()
center.delegate = self as? UNUserNotificationCenterDelegate
center.requestAuthorization(options: [.alert, .sound, .badge]) { (granted, error) in
Appboy.sharedInstance()?.pushAuthorization(fromUserNotificationCenter: granted)
}
UIApplication.shared.registerForRemoteNotifications()
} else {
let setting = UIUserNotificationSettings(types: [.alert, .badge, .sound], categories:nil)
UIApplication.shared.registerUserNotificationSettings(setting)
UIApplication.shared.registerForRemoteNotifications()
}
```
# Push Stories pour iOS
Source: /docs/fr/developer_guide/platforms/legacy_sdks/ios/push_notifications/push_story/index.md
**Warning:**
[AppboyKit](https://github.com/Appboy/appboy-ios-sdk) (also known as the Objective-C SDK) is no longer supported and has been replaced by the [Swift SDK](https://www.braze.com/docs/fr/fr/developer_guide/sdk_integration/?sdktab=swift). It will no longer receive new features, bug fixes, security updates, or technical support—however, messaging and analytics will continue to function as normal. To learn more, see [Introducing the New Braze Swift SDK](https://www.braze.com/resources/articles/introducing-the-new-braze-swift-sdk).
# Configurer une Push Story
La fonction Push Story nécessite l’infrastructure `UNNotification` et iOS 10. Cette fonctionnalité est uniquement disponible à partir du SDK iOS version 3.2.1.
## Étape 1 : Activer les notifications push dans votre application
Suivez l'[intégration de la notification push](https://www.braze.com/docs/fr/fr/developer_guide/platforms/legacy_sdks/ios/push_notifications/integration/) pour activer le push dans votre app.
## Étape 2 : Ajout de la cible de l’extension de contenu de notification
Dans votre projet d’application, sélectionnez **Fichier > Nouveau > Cible...**, ajoutez une nouvelle cible `Notification Content Extension` et activez-la.

Xcode doit générer une nouvelle cible pour vous et créer des fichiers automatiquement pour vous, notamment :
- `NotificationViewController.h`
- `NotificationViewController.m`
- `MainInterface.storyboard`
- `NotificationViewController.swift`
- `MainInterface.storyboard`
## Étape 3 : Activer les fonctionnalités
La fonctionnalité Push Story nécessite le mode arrière-plan dans la section **Capacités** de l'objectif principal de l'application. Après avoir activé les modes d’arrière-plan, sélectionnez **Récupérer en arrière-plan** et **Notifications à distance**.

### Ajouter un groupe d'applications
Vous devez également ajouter `Capability App Groups`. Si vous n’avez pas de groupe d'applications dans votre application, sélectionnez la **capacité** de la cible de l’application principale, activez les `App Groups` et cliquez sur le bouton **+**. Utilisez l’ID de l’ensemble de votre application pour créer le groupe d'applications. Par exemple, si l’ID de l’ensemble de votre application est `com.company.appname`, vous pouvez nommer votre groupe d'applications `group.com.company.appname.xyz`. Vous devez activer le `App Groups` pour les cibles d’extension de contenu et de l’application principale.
**Important:**
Dans ce contexte, `App Groups` se réfère aux [droits des groupes d'applications](https://developer.apple.com/documentation/bundleresources/entitlements/com_apple_security_application-groups) d’Apple et non à votre ID d'espace de travail (anciennement groupe d'applications) de Braze.
Si vous n'ajoutez pas votre application à un groupe d'applications, votre application risque de ne pas remplir certains champs de la charge utile de push et ne fonctionnera pas complètement comme prévu.
## Étape 4 : Ajouter l’infrastructure Push Story à votre application
Après avoir suivi le [Guide d’intégration du gestionnaire de paquets Swift](https://www.braze.com/docs/fr/fr/developer_guide/platforms/legacy_sdks/ios/initial_sdk_setup/installation_methods/swift_package_manager/), ajoutez `AppboyPushStory` à votre `Notification Content Extension` :


Ajoutez la ligne suivante à votre Podfile :
```ruby
target 'YourContentExtensionTarget' do
pod 'Appboy-Push-Story'
end
```
Après avoir mis à jour le Podfile, naviguez jusqu’au répertoire de votre projet d’application Xcode dans votre terminal et exécutez `pod install`.
Téléchargez la dernière version de `AppboyPushStory.zip` depuis la [page GitHub](https://github.com/Appboy/appboy-ios-sdk/releases), décompressez-la et ajoutez les fichiers suivants à l’`Notification Content Extension` de votre projet :
- `Resources/ABKPageView.nib`
- `AppboyPushStory.xcframework`

**Important:**
Assurez-vous que **Ne pas intégrer** est sélectionné pour **AppboyPushStory.xcframework** dans la colonne **Intégrer**.
Ajoutez l’indicateur `-ObjC` à l'`Notification Content Extension` de votre projet dans **Paramètres de création > Autres indicateurs de lien**.
## Étape 5 : Mise à jour de votre contrôleur de visualisation de notification
Dans votre `NotificationViewController.h`, ajoutez les lignes suivantes pour ajouter de nouvelles propriétés et importer les fichiers d’en-tête :
```objc
#import
```
```objc
@property (nonatomic) IBOutlet ABKStoriesView *storiesView;
@property (nonatomic) ABKStoriesViewDataSource *dataSource;
```
Dans votre `NotificationViewController.m`, supprimez l’implémentation par défaut et ajouter le code suivant :
```objc
@implementation NotificationViewController
- (void)didReceiveNotification:(UNNotification *)notification {
self.dataSource = [[ABKStoriesViewDataSource alloc] initWithNotification:notification
storiesView:self.storiesView
appGroup:@"YOUR-APP-GROUP-IDENTIFIER"];
}
- (void)didReceiveNotificationResponse:(UNNotificationResponse *)response
completionHandler:(void (^)(UNNotificationContentExtensionResponseOption option))completion {
UNNotificationContentExtensionResponseOption option = [self.dataSource didReceiveNotificationResponse:response];
completion(option);
}
- (void)viewWillDisappear:(BOOL)animated {
[self.dataSource viewWillDisappear];
[super viewWillDisappear:animated];
}
@end
```
Dans votre `NotificationViewController.swift`, ajoutez la ligne suivante pour importer les fichiers d’en-tête :
```swift
import AppboyPushStory
```
Puis, supprimez l’implémentation par défaut et ajoutez le code suivant :
```swift
class NotificationViewController: UIViewController, UNNotificationContentExtension {
@IBOutlet weak var storiesView: ABKStoriesView!
var dataSource: ABKStoriesViewDataSource?
func didReceive(_ notification: UNNotification) {
dataSource = ABKStoriesViewDataSource(notification: notification, storiesView: storiesView, appGroup: "YOUR-APP-GROUP-IDENTIFIER")
}
func didReceive(_ response: UNNotificationResponse, completionHandler completion: @escaping (UNNotificationContentExtensionResponseOption) -> Void) {
if dataSource != nil {
let option: UNNotificationContentExtensionResponseOption = dataSource!.didReceive(response)
completion(option)
}
}
override func viewWillDisappear(_ animated: Bool) {
dataSource?.viewWillDisappear()
super.viewWillDisappear(animated)
}
}
```
## Étape 6 : Définissez le storyboard d’extension de contenu de notification
Ouvrez le storyboard `Notification Content Extension` et placez un nouveau `UIView` dans le contrôleur de visualisation de notification. Renommez la classe par `ABKStoriesView`. Faites en sorte que la largeur et la hauteur de la vue correspondent à la vue principale du contrôleur de visualisation de notification.


Ensuite, liez le contrôleur de visualisation de notification IBOutlet `storiesView` au `ABKStoriesView` ajouté.

## Étape 7 : Définissez la plist d’extension de contenu de notification
Ouvrez le fichier `Info.plist` de `Notification Content Extension` et ajoutez et modifiez les clés suivantes dans `NSExtension \ NSExtensionAttributes` :
`UNNotificationExtensionCategory` = `ab_cat_push_story_v2` (type `String`)
`UNNotificationExtensionDefaultContentHidden` = `YES` (type `Boolean`)
`UNNotificationExtensionInitialContentSizeRatio` = `0.65` (type `Number`)

## Étape 8 : Mise à jour de l’intégration Braze dans votre application principale
##### Option 1 : Exécution
Dans le dictionnaire `appboyOptions` utilisé pour configurer votre instance Braze, ajoutez une entrée `ABKPushStoryAppGroupKey` et définissez la valeur de l'identifiant API de votre espace de travail.
```objc
NSMutableDictionary *appboyOptions = [NSMutableDictionary dictionary];
appboyOptions[ABKPushStoryAppGroupKey] = @"YOUR-APP-GROUP-IDENTIFIER";
[Appboy startWithApiKey:@"YOUR-API-KEY"
inApplication:application
withLaunchOptions:launchOptions
withAppboyOptions:appboyOptions];
```
```swift
let appboyOptions: [AnyHashable: Any] = [
ABKPushStoryAppGroupKey : "YOUR-APP-GROUP-IDENTIFIER"
]
Appboy.start(withApiKey: "YOUR-API-KEY", in:application, withLaunchOptions:launchOptions, withAppboyOptions:appboyOptions)
```
##### Option 2 : Info.plist
Alternativement, pour configurer l'espace de travail Push Story à partir de votre fichier `Info.plist`, ajoutez un dictionnaire nommé `Braze` à votre fichier `Info.plist`. Dans le dictionnaire `Braze`, ajoutez une sous-entrée `PushStoryAppGroup` de type chaîne de caractères et définissez la valeur de l'identifiant de votre espace de travail. Notez qu’avant le SDK Braze pour iOS v4.0.2, la clé du dictionnaire `Appboy` doit être utilisée à la place de `Braze`.
## Étapes suivantes
Reportez-vous ensuite aux étapes relatives à l'intégration des [boutons d'action](https://www.braze.com/docs/fr/fr/developer_guide/platforms/legacy_sdks/ios/push_notifications/customization/action_buttons/), qui est nécessaire pour que les boutons s'affichent dans un message Push Story.
# Implémentation avancée des notifications push pour iOS (facultatif)
Source: /docs/fr/developer_guide/platforms/legacy_sdks/ios/push_notifications/implementation_guide/index.md
**Warning:**
[AppboyKit](https://github.com/Appboy/appboy-ios-sdk) (also known as the Objective-C SDK) is no longer supported and has been replaced by the [Swift SDK](https://www.braze.com/docs/fr/fr/developer_guide/sdk_integration/?sdktab=swift). It will no longer receive new features, bug fixes, security updates, or technical support—however, messaging and analytics will continue to function as normal. To learn more, see [Introducing the New Braze Swift SDK](https://www.braze.com/resources/articles/introducing-the-new-braze-swift-sdk).
**Important:**
Vous recherchez le guide d'intégration de base du développeur de notifications push ? Vous le trouverez [ici](https://www.braze.com/docs/fr/fr/developer_guide/platforms/legacy_sdks/ios/push_notifications/integration/).
# Guide d'implémentation des notifications push {#push-notification-implementation-guide}
> Ce guide d'implémentation avancé et facultatif traite des moyens d'exploiter les extensions d'application de contenu de notification push pour tirer le meilleur parti de vos messages push. Il contient trois cas d'utilisation personnalisés créés par notre équipe, les extraits de code l'accompagnant et des directives concernant l'enregistrement des analyses. Visitez notre dépôt de démonstrations Braze [ici](https://github.com/braze-inc/braze-growth-shares-ios-demo-app) ! Notez que ce guide d'implémentation est centré autour d'une implémentation Swift, mais les extraits de code Objective-C sont fournis aux personnes intéressées.
## Extensions d'application de contenu de notification {#notification-content-app-extensions}
{: style="max-width:65%;border:0;margin-top:10px"}
Les notifications push, en apparence standard sur différentes plateformes, offrent de très nombreuses options de personnalisation, au-delà de ce qui est normalement implémenté dans l'interface utilisateur par défaut. Lorsqu'une notification push est étendue, les extensions de notification de contenu permettent un affichage personnalisé de la notification push agrandie.
Les notifications push peuvent être étendues de trois manières différentes : - Un appui long sur la bannière de notification push - Faire glisser vers le bas sur la bannière de notification push - Faire glisser la bannière vers la gauche et sélectionner « Afficher »
Ces vues personnalisées offrent des moyens astucieux d'engager les clients en vous permettant d'afficher de nombreux types de contenu différents, y compris des notifications interactives, des notifications incluant des données utilisateur, et même des messages push qui peuvent recueillir des informations telles que les numéros de téléphone et l'e-mail. Bien que la mise en œuvre du push de cette manière puisse être peu familière à certains, l'une de nos fonctionnalités bien connues chez Braze, les [Push Stories](https://www.braze.com/docs/fr/fr/user_guide/channels/push/create_a_push_message/push_stories/), sont un excellent exemple de ce à quoi peut ressembler une vue personnalisée pour une extension d'application de contenu de notification !
#### Conditions requises {#requirements}
{: style="float:right;max-width:50%;margin-left:10px; border:0;margin-top:10px"}
- [Les notifications push](https://www.braze.com/docs/fr/fr/developer_guide/platforms/legacy_sdks/ios/push_notifications/integration/) intégrées avec succès dans votre application
- iOS 10 ou supérieur
- Les fichiers suivants générés par Xcode en fonction de votre langage de programmation :
Swift
- `NotificationViewController.swift`
- `MainInterface.storyboard`
Objective-C
- `NotificationViewController.h`
- `NotificationViewController.m`
- `MainInterface.storyboard`
### Configuration de catégorie personnalisée {#custom-category-configuration}
Pour configurer un affichage personnalisé dans le tableau de bord, vous devez activer les boutons de notification et saisir votre catégorie personnalisée. La catégorie iOS personnalisée pré-enregistrée que vous fournissez est ensuite vérifiée par rapport à `UNNotificationExtensionCategory` dans le `.plist` de votre cible d'extension de contenu de notification. La valeur donnée ici doit correspondre à ce qui est défini dans le tableau de bord de Braze.
{: style="max-width:75%;border:0;margin-top:10px"}
{: style="max-width:75%;border:0;margin-top:10px"}
**Tip:**
Étant donné que les notifications push avec des extensions de contenu ne sont pas toujours apparentes, il est recommandé d'inclure un appel à l'action pour inciter vos utilisateurs à développer leurs notifications push.
## Cas d'utilisation et guide d'implémentation {#use-case-and-implementation-walkthrough}
Trois types d'extensions d'application de contenu de notification push sont fournis. Chaque type comporte une présentation conceptuelle, des cas d'utilisation potentiels et un aperçu de la façon dont les variables de notification push peuvent se présenter et être utilisées dans le tableau de bord de Braze :
- [Notification push interactive](#interactive-push-notification)
- [Notifications push personnalisées](#personalized-push-notifications)
- [Notifications push de recueil d'informations](#information-capture-push-notification)
### Notification push interactive {#interactive-push-notification}
Les notifications push peuvent répondre aux actions de l'utilisateur dans une extension de contenu. Pour les utilisateurs exécutant iOS 12 ou une version ultérieure, cela signifie que vous pouvez transformer vos messages push en notifications push entièrement interactives ! Cette interactivité offre de nombreuses possibilités pour impliquer vos utilisateurs au travers de vos notifications. L'exemple suivant montre une notification push dans laquelle les utilisateurs peuvent participer à un jeu de correspondance une fois la notification étendue.
{: style="border:0"}
#### Configuration du tableau de bord {#dashboard-configuration}
Pour configurer une vue personnalisée dans le tableau de bord, dans les paramètres du bouton de notification, entrez la catégorie spécifique que vous souhaitez afficher. Ensuite, dans le `.plist` de votre extension de contenu de notification, vous devez également définir la catégorie personnalisée dans l'attribut `UNNotificationExtensionCategory`. La valeur donnée ici doit correspondre à ce qui est défini dans le tableau de bord de Braze. Enfin, pour activer les interactions utilisateur dans une notification push, définissez la clé `UNNotificationExtensionInteractionEnabled` sur true.
{: style="float:right;max-width:45%;"}
{: style="max-width:50%;"}
#### Autres cas d'utilisation {#other-use-cases}
Les extensions de contenu de notifications push sont une option intéressante pour introduire de l'interactivité dans vos promotions et vos applications. Certains exemples incluent un jeu auquel les utilisateurs peuvent jouer, une roue pour gagner des réductions ou un bouton « J'aime » pour enregistrer une annonce ou une chanson.
##### Prêt à enregistrer les analyses ? {#ready-to-log-analytics}
Consultez la [section suivante](#logging-analytics) pour mieux comprendre à quoi doit ressembler le flux de données.
### Notifications push personnalisées {#personalized-push-notifications}
{: style="float:right;max-width:40%;margin-left:15px;border:0"}
Les notifications push peuvent afficher des informations spécifiques à l'utilisateur dans une extension de contenu. L'exemple à droite montre une notification push après qu'un utilisateur a terminé une tâche spécifique (cours d'apprentissage Braze) et est maintenant encouragé à développer cette notification pour vérifier sa progression. Les informations fournies ici sont spécifiques à l'utilisateur et peuvent être déclenchées à la fin d'une session ou après une action spécifique de l'utilisateur en tirant parti d'un déclencheur API.
#### Configuration du tableau de bord {#dashboard-configuration}
Pour configurer un push personnalisé dans le tableau de bord, vous devez enregistrer la catégorie spécifique que vous souhaitez voir s'afficher, puis, dans les paires clé-valeur à l'aide de Liquid standard, définir les attributs utilisateur appropriés que vous souhaitez voir apparaître dans le message. Ces vues peuvent être personnalisées sur la base des attributs utilisateur spécifiques d'un profil utilisateur donné.
{: style="max-width:60%;"}
#### Gérer les paires clé-valeur {#handling-key-value-pairs}
La méthode suivante, `didReceive`, est appelée lorsque l'extension de contenu a reçu une notification. Elle est disponible dans le `NotificationViewController`. Les paires clé-valeur fournies dans le tableau de bord sont représentées dans le code par l'utilisation d'un dictionnaire `userInfo`.
**Analyser des paires clé-valeur à partir de notifications push**
``` swift
func didReceive(_ notification: UNNotification) {
let userInfo = notification.request.content.userInfo
guard let value = userInfo["YOUR-KEY-VALUE-PAIR"] as? String,
let otherValue = userInfo["YOUR-OTHER-KEY-VALUE-PAIR"] as? String,
else { fatalError("Key-Value Pairs are incorrect.")}
...
}
```
```objc
- (void)didReceiveNotification:(nonnull UNNotification *)notification {
NSDictionary *userInfo = notification.request.content.userInfo;
if (userInfo[@"YOUR-KEY-VALUE-PAIR"] && userInfo[@"YOUR-OTHER-KEY-VALUE-PAIR"]) {
...
} else {
[NSException raise:NSGenericException format:@"Key-Value Pairs are incorrect"];
}
}
```
#### Autres cas d'utilisation {#other-use-cases}
Les idées d'extensions de contenu push basées sur la progression et axées sur l'utilisateur sont infinies. Certains exemples incluent l'ajout de l'option de partage de votre progression sur différentes plateformes, l'expression de réalisations débloquées, de cartes de fidélité ou même de listes de contrôle d'onboarding.
##### Prêt à enregistrer les analyses ? {#ready-to-log-analytics}
Consultez la [section suivante](#logging-analytics) pour mieux comprendre à quoi doit ressembler le flux de données.
### Notification push de recueil d'informations {#information-capture-push-notification}
Les notifications push peuvent capturer des informations utilisateur à l'intérieur d'une extension de contenu, ce qui vous permet de repousser les limites de ce qui est possible avec une notification push. En examinant le flux suivant, la vue est en mesure de répondre aux changements d'état. Ces composants de changement d'état sont représentés dans chaque image.
1. L'utilisateur reçoit une notification push.
2. La notification push est ouverte et invite l'utilisateur à communiquer des informations.
3. Des informations sont fournies et, si elles sont valides, le bouton d'enregistrement s'affiche.
3. La vue de confirmation s'affiche et la notification push est rejetée.
Notez que les informations demandées ici peuvent être très variables, comme le recueil de numéros de SMS par exemple, et ne doivent pas forcément être en relation avec l'e-mail.
#### Configuration du tableau de bord {#dashboard-configuration}
Pour configurer une notification push de capture d'informations dans le tableau de bord, vous devez enregistrer et définir votre catégorie personnalisée et fournir les paires clé-valeur nécessaires. Comme illustré dans l'exemple, vous pouvez également inclure une image dans votre notification push. Pour ce faire, vous devez intégrer les [notifications riches](https://www.braze.com/docs/fr/fr/developer_guide/platforms/legacy_sdks/ios/push_notifications/customization/rich_notifications/), définir le style de notification de votre campagne sur Notification riche et inclure une image push riche.

#### Gérer les actions des boutons {#handling-button-actions}
Chaque bouton d'action est identifié de manière unique. Le code vérifie si votre identifiant de réponse est égal à `actionIdentifier`, et, si c'est le cas, sait que l'utilisateur a cliqué sur le bouton d'action.
**Gestion des réponses aux boutons d'action des notifications push**
``` swift
func didReceive(_ response: UNNotificationResponse, completionHandler completion: @escaping (UNNotificationContentExtensionResponseOption) -> Void) {
if response.actionIdentifier == "YOUR-REGISTER-IDENTIFIER" {
// do something
} else {
// do something else
}
}
```
```objc
- (void)didReceiveNotificationResponse:(UNNotificationResponse *)response completionHandler:(void (^)(UNNotificationContentExtensionResponseOption))completion {
if ([response.actionIdentifier isEqualToString:@"YOUR-REGISTER-IDENTIFIER"]) {
completion(UNNotificationContentExtensionResponseOptionDismiss);
} else {
completion(UNNotificationContentExtensionResponseOptionDoNotDismiss);
}
}
```
##### Rejet des notifications push {#dismissing-pushes}
Les notifications push peuvent être automatiquement rejetées en appuyant sur un bouton d'action. Il existe trois options de rejet des notifications push prédéfinies recommandées :
1. `completion(.dismiss)` - Rejette la notification
2. `completion(.doNotDismiss)` - La notification reste ouverte
3. `completion(.dismissAndForward)` - La notification push est rejetée et l'utilisateur est redirigé vers l'application.
#### Autres cas d'utilisation {#other-use-cases}
Demander la contribution des utilisateurs via des notifications push est une formidable opportunité dont de nombreuses entreprises ne profitent pas. Dans ces messages push, vous pouvez non seulement demander des informations de base comme le nom, l'adresse e-mail ou le numéro, mais vous pouvez également inviter les utilisateurs à compléter un profil utilisateur s'il ne l'est pas déjà, ou même à soumettre des commentaires.
##### Prêt à enregistrer les analyses ? {#ready-to-log-analytics}
Consultez la [section suivante](#logging-analytics) pour mieux comprendre à quoi doit ressembler le flux de données.
## Enregistrer les analyses {#logging-analytics}
### Enregistrer avec l'API Braze (recommandé) {#logging-with-the-braze-api-recommended}
L'enregistrement des analyses peut uniquement se faire en temps réel avec l'aide du serveur du client qui utilise notre [endpoint `/users/track`](https://www.braze.com/docs/fr/fr/api/endpoints/user_data/post_user_track/). Pour enregistrer les analyses, envoyez la valeur `braze_id` dans le champ des paires clé-valeur (comme indiqué dans la capture d'écran suivante) pour identifier le profil utilisateur à mettre à jour.
{: style="max-width:80%;"}
### Enregistrement manuel {#logging-manually}
L'enregistrement manuel nécessite la configuration préalable des groupes d'applications dans Xcode, puis la création, l'enregistrement et la récupération des analyses. Cela nécessitera un travail de développement personnalisé de votre côté. Les extraits de code suivants vous aideront à résoudre ce problème.
Il est également important de noter que les analyses ne seront pas envoyées à Braze tant que l'application mobile n'aura pas été lancée par la suite. Cela signifie que, selon vos paramètres de rejet, il existe souvent une période indéterminée entre le moment où une notification push est rejetée et le moment où l'application mobile est lancée et les analyses sont récupérées. Bien que cette période tampon n'affecte pas tous les cas d'utilisation, les utilisateurs doivent prendre en compte l'impact et, si nécessaire, ajuster leur parcours utilisateur pour inclure l'ouverture de l'application afin de résoudre ce problème.

#### Étape 1 : Configurer les groupes d'applications dans Xcode {#step-1-configure-app-groups-within-xcode}
Ajoutez une capacité `App Groups`. Si vous n'avez pas de groupe d'applications dans votre application, allez dans la capacité de la cible de l'application principale, activez `App Groups`, et cliquez sur le bouton « + ». Utilisez l'ID de l'ensemble de votre application pour créer le groupe d'applications. Par exemple, si l'ID de l'ensemble de votre application est `com.company.appname`, vous pouvez nommer votre groupe d'applications `group.com.company.appname.xyz`. Assurez-vous que les `App Groups` sont activés pour la cible de votre application principale et la cible de l'extension de contenu.

#### Étape 2 : Intégrer les extraits de code {#step-2-integrate-code-snippets}
Les extraits de code suivants sont une référence utile sur la façon d'enregistrer et d'envoyer des événements personnalisés, des attributs personnalisés et des attributs utilisateur. Ce guide s'exprimera en termes de `UserDefaults`, mais la représentation du code sera sous la forme d'un fichier d'aide `RemoteStorage`. Il existe également des fichiers auxiliaires supplémentaires `UserAttributes` et `EventName Dictionary` utilisés lors de l'envoi et de l'enregistrement des attributs utilisateur. Tous les fichiers d'aide sont disponibles à la fin de ce guide.
##### Enregistrement des événements personnalisés {#saving-custom-events}
Pour enregistrer des événements personnalisés, vous devez créer les analyses à partir de zéro. Pour ce faire, créez un dictionnaire, renseignez-le avec des métadonnées et enregistrez les données via l'utilisation d'un fichier d'aide.
1. Initialiser un dictionnaire avec des métadonnées d'événement
2. Initialiser `userDefaults` pour récupérer et stocker les données d'événements
3. Si un tableau existe déjà, ajoutez-y de nouvelles données et enregistrez
4. S'il n'y a pas de tableau existant, enregistrez le nouveau tableau dans `userDefaults`
``` swift
func saveCustomEvent(with properties: [String: Any]? = nil) {
// 1
let customEventDictionary = Dictionary(eventName: "YOUR-EVENT-NAME", properties: properties)
// 2
let remoteStorage = RemoteStorage(storageType: .suite)
// 3
if var pendingEvents = remoteStorage.retrieve(forKey: .pendingCustomEvents) as? [[String: Any]] {
pendingEvents.append(contentsOf: [customEventDictionary])
remoteStorage.store(pendingEvents, forKey: .pendingCustomEvents)
} else {
// 4
remoteStorage.store([customEventDictionary], forKey: .pendingCustomEvents)
}
}
```
```objc
- (void)saveCustomEvent:(NSDictionary *)properties {
// 1
NSDictionary *customEventDictionary = [[NSDictionary alloc] initWithEventName:@"YOUR-EVENT-NAME" properties:properties];
// 2
RemoteStorage *remoteStorage = [[RemoteStorage alloc] initWithStorageType:StorageTypeSuite];
NSMutableArray *pendingEvents = [[remoteStorage retrieveForKey:RemoteStorageKeyPendingCustomEvents] mutableCopy];
// 3
if (pendingEvents) {
[pendingEvents addObject:customEventDictionary];
[remoteStorage store:pendingEvents forKey:RemoteStorageKeyPendingCustomAttributes];
} else {
// 4
[remoteStorage store:@[ customEventDictionary ] forKey:RemoteStorageKeyPendingCustomAttributes];
}
}
```
##### Envoi d'événements personnalisés à Braze {#sending-custom-events-to-braze}
Une fois le SDK initialisé, c'est le bon moment pour consigner toutes les analyses enregistrées à partir d'une extension d'application de contenu de notification. Pour ce faire, vous pouvez parcourir tous les événements en attente, vérifier la clé « Event Name », définir les valeurs appropriées dans Braze, puis effacer le stockage pour la prochaine fois que cette fonction sera nécessaire.
1. Parcourir le tableau d'événements en attente
2. Parcourir chaque paire clé-valeur dans le dictionnaire `pendingEvents`
3. Vérifier explicitement la clé « Event Name » afin de définir la valeur en conséquence
4. Toutes les autres paires clé-valeur seront ajoutées au dictionnaire `properties`
5. Consigner l'événement personnalisé individuel
6. Supprimer tous les événements en attente du stockage
``` swift
func logPendingCustomEventsIfNecessary() {
let remoteStorage = RemoteStorage(storageType: .suite)
guard let pendingEvents = remoteStorage.retrieve(forKey: .pendingCustomEvents) as? [[String: Any]] else { return }
// 1
for event in pendingEvents {
var eventName: String?
var properties: [AnyHashable: Any] = [:]
// 2
for (key, value) in event {
if key == PushNotificationKey.eventName.rawValue {
// 3
if let eventNameValue = value as? String {
eventName = eventNameValue
} else {
print("Invalid type for event_name key")
}
} else {
// 4
properties[key] = value
}
}
// 5
if let eventName = eventName {
logCustomEvent(eventName, withProperties: properties)
}
}
// 6
remoteStorage.removeObject(forKey: .pendingCustomEvents)
}
```
```objc
- (void)logPendingEventsIfNecessary {
RemoteStorage *remoteStorage = [[RemoteStorage alloc] initWithStorageType:StorageTypeSuite];
NSArray *pendingEvents = [remoteStorage retrieveForKey:RemoteStorageKeyPendingCustomEvents];
// 1
for (NSDictionary *event in pendingEvents) {
NSString *eventName = nil;
NSMutableDictionary *properties = [NSMutableDictionary dictionary];
// 2
for (NSString* key in event) {
if ([key isEqualToString:@"event_name"]) {
// 3
if ([[event objectForKey:key] isKindOfClass:[NSString class]]) {
eventName = [event objectForKey:key];
} else {
NSLog(@"Invalid type for event_name key");
}
} else {
// 4
properties[key] = event[key];
}
}
// 5
if (eventName != nil) {
[[Appboy sharednstance] logCustomEvent:eventName withProperties:properties];
}
}
// 6
[remoteStorage removeObjectForKey:RemoteStorageKeyPendingCustomEvents];
}
```
##### Enregistrer des attributs personnalisés {#saving-custom-attributes}
Pour enregistrer des attributs personnalisés, vous devez créer les analyses à partir de zéro. Pour ce faire, créez un dictionnaire, renseignez-le avec des métadonnées et enregistrez les données via l'utilisation d'un fichier d'aide.
1. Initialiser un dictionnaire avec des métadonnées d'attribut
2. Initialiser `userDefaults` pour récupérer et stocker les données d'attributs
3. Si un tableau existe déjà, ajoutez-y de nouvelles données et enregistrez
4. S'il n'y a pas de tableau existant, enregistrez le nouveau tableau dans `userDefaults`
``` swift
func saveCustomAttribute() {
// 1
let customAttributeDictionary: [String: Any] = ["YOUR-CUSTOM-ATTRIBUTE-KEY": "YOUR-CUSTOM-ATTRIBUTE-VALUE"]
// 2
let remoteStorage = RemoteStorage(storageType: .suite)
// 3
if var pendingAttributes = remoteStorage.retrieve(forKey: .pendingCustomAttributes) as? [[String: Any]] {
pendingAttributes.append(contentsOf: [customAttributeDictionary])
remoteStorage.store(pendingAttributes, forKey: .pendingCustomAttributes)
} else {
// 4
remoteStorage.store([customAttributeDictionary], forKey: .pendingCustomAttributes)
}
}
```
``` objc
- (void)saveCustomAttribute {
// 1
NSDictionary *customAttributeDictionary = @{ @"YOUR-CUSTOM-ATTRIBUTE-KEY": @"YOUR-CUSTOM-ATTRIBUTE-VALUE" };
// 2
RemoteStorage *remoteStorage = [[RemoteStorage alloc] initWithStorageType:StorageTypeSuite];
NSMutableArray *pendingAttributes = [[remoteStorage retrieveForKey:RemoteStorageKeyPendingCustomAttributes] mutableCopy];
// 3
if (pendingAttributes) {
[pendingAttributes addObject:customAttributeDictionary];
[remoteStorage store:pendingAttributes forKey:RemoteStorageKeyPendingCustomAttributes];
} else {
// 4
[remoteStorage store:@[ customAttributeDictionary ] forKey:RemoteStorageKeyPendingCustomAttributes];
}
}
```
##### Envoyer des attributs personnalisés à Braze {#sending-custom-attributes-to-braze}
Une fois le SDK initialisé, c'est le bon moment pour consigner toutes les analyses enregistrées à partir d'une extension d'application de contenu de notification. Pour ce faire, vous pouvez parcourir tous les attributs en attente, définir l'attribut personnalisé approprié dans Braze, puis effacer le stockage pour la prochaine fois que cette fonction sera nécessaire.
1. Parcourir le tableau d'attributs en attente
2. Parcourir chaque paire clé-valeur dans le dictionnaire `pendingAttributes`
3. Enregistrer l'attribut personnalisé individuel avec la clé et la valeur correspondantes
4. Supprimer tous les attributs en attente du stockage
``` swift
func logPendingCustomAttributesIfNecessary() {
let remoteStorage = RemoteStorage(storageType: .suite)
guard let pendingAttributes = remoteStorage.retrieve(forKey: .pendingCustomAttributes) as? [[String: Any]] else { return }
// 1
pendingAttributes.forEach { setCustomAttributesWith(keysAndValues: $0) }
// 4
remoteStorage.removeObject(forKey: .pendingCustomAttributes)
}
func setCustomAttributesWith(keysAndValues: [String: Any]) {
// 2
for (key, value) in keysAndValues {
// 3
if let value = value as? [String] {
setCustomAttributeArrayWithKey(key, andValue: value)
} else {
setCustomAttributeWithKey(key, andValue: value)
}
}
}
```
```objc
- (void)logPendingCustomAttributesIfNecessary {
RemoteStorage *remoteStorage = [[RemoteStorage alloc] initWithStorageType:StorageTypeSuite];
NSArray *pendingAttributes = [remoteStorage retrieveForKey:RemoteStorageKeyPendingCustomAttributes];
// 1
for (NSDictionary *attribute in pendingAttributes) {
[self setCustomAttributeWith:attribute];
}
// 4
[remoteStorage removeObjectForKey:RemoteStorageKeyPendingCustomAttributes];
}
- (void)setCustomAttributeWith:(NSDictionary *)keysAndValues {
// 2
for (NSString *key in keysAndValues) {
// 3
[self setCustomAttributeWith:key andValue:[keysAndValues objectForKey:key]];
}
}
```
##### Enregistrer des attributs utilisateur {#saving-user-attributes}
Lors de l'enregistrement des attributs utilisateur, il est recommandé de créer un objet personnalisé pour déterminer le type d'attribut en cours de mise à jour (`email`, `first_name`, `phone_number`, etc.). L'objet doit être compatible avec le stockage/la récupération depuis `UserDefaults`. Consultez le fichier d'aide `UserAttribute` pour un exemple de la manière d'y parvenir.
1. Initialiser un objet `UserAttribute` encodé avec le type correspondant
2. Initialiser `userDefaults` pour récupérer et stocker les données d'événements
3. Si un tableau existe déjà, ajoutez-y de nouvelles données et enregistrez
4. S'il n'y a pas de tableau existant, enregistrez le nouveau tableau dans `userDefaults`
``` swift
func saveUserAttribute() {
// 1
guard let data = try? PropertyListEncoder().encode(UserAttribute.userAttributeType("USER-ATTRIBUTE-VALUE")) else { return }
// 2
let remoteStorage = RemoteStorage(storageType: .suite)
// 3
if var pendingAttributes = remoteStorage.retrieve(forKey: .pendingUserAttributes) as? [Data] {
pendingAttributes.append(contentsOf: [data])
remoteStorage.store(pendingAttributes, forKey: .pendingUserAttributes)
} else {
// 4
remoteStorage.store([data], forKey: .pendingUserAttributes)
}
}
```
```objc
- (void)saveUserAttribute {
// 1
UserAttribute *userAttribute = [[UserAttribute alloc] initWithUserField:@"USER-ATTRIBUTE-VALUE" attributeType:UserAttributeTypeEmail];
NSError *error;
NSData *data = [NSKeyedArchiver archivedDataWithRootObject:userAttribute requiringSecureCoding:YES error:&error];
if (error != nil) {
// log error
}
// 2
RemoteStorage *remoteStorage = [[RemoteStorage alloc] initWithStorageType:StorageTypeSuite];
NSMutableArray *pendingAttributes = [[remoteStorage retrieveForKey:RemoteStorageKeyPendingUserAttributes] mutableCopy];
// 3
if (pendingAttributes) {
[pendingAttributes addObject:data];
[remoteStorage store:pendingAttributes forKey:RemoteStorageKeyPendingUserAttributes];
} else {
// 4
[remoteStorage store:@[data] forKey:RemoteStorageKeyPendingUserAttributes];
}
}
```
##### Envoyer des attributs utilisateur à Braze {#sending-user-attributes-to-braze}
Une fois le SDK initialisé, c'est le bon moment pour consigner toutes les analyses enregistrées à partir d'une extension d'application de contenu de notification. Pour ce faire, vous pouvez parcourir tous les attributs en attente, définir l'attribut personnalisé approprié dans Braze, puis effacer le stockage pour la prochaine fois que cette fonction sera nécessaire.
1. Parcourir le tableau de données `pendingAttributes`
2. Initialiser un objet `UserAttribute` encodé à partir des données d'attribut
3. Définir un champ utilisateur spécifique basé sur le type d'attribut utilisateur (e-mail)
4. Supprimer tous les attributs utilisateur en attente du stockage
``` swift
func logPendingUserAttributesIfNecessary() {
let remoteStorage = RemoteStorage(storageType: .suite)
guard let pendingAttributes = remoteStorage.retrieve(forKey: .pendingUserAttributes) as? [Data] else { return }
// 1
for attributeData in pendingAttributes {
// 2
guard let userAttribute = try? PropertyListDecoder().decode(UserAttribute.self, from: attributeData) else { continue }
// 3
switch userAttribute {
case .email(let email):
user?.email = email
}
}
// 4
remoteStorage.removeObject(forKey: .pendingUserAttributes)
}
```
```objc
- (void)logPendingUserAttributesIfNecessary {
RemoteStorage *remoteStorage = [[RemoteStorage alloc] initWithStorageType:StorageTypeSuite];
NSArray *pendingAttributes = [remoteStorage retrieveForKey:RemoteStorageKeyPendingUserAttributes];
// 1
for (NSData *attributeData in pendingAttributes) {
NSError *error;
// 2
UserAttribute *userAttribute = [NSKeyedUnarchiver unarchivedObjectOfClass:[UserAttribute class] fromData:attributeData error:&error];
if (error != nil) {
// log error
}
// 3
if (userAttribute) {
switch (userAttribute.attributeType) {
case UserAttributeTypeEmail:
[self user].email = userAttribute.userField;
break;
}
}
}
// 4
[remoteStorage removeObjectForKey:RemoteStorageKeyPendingUserAttributes];
}
```
##### Fichiers d'aide {#helper-files}
**Fichier d'aide RemoteStorage**
```swift
enum RemoteStorageKey: String, CaseIterable {
// MARK: - Notification Content Extension Analytics
case pendingCustomEvents = "pending_custom_events"
case pendingCustomAttributes = "pending_custom_attributes"
case pendingUserAttributes = "pending_user_attributes"
}
enum RemoteStorageType {
case standard
case suite
}
class RemoteStorage: NSObject {
private var storageType: RemoteStorageType = .standard
private lazy var defaults: UserDefaults = {
switch storageType {
case .standard:
return .standard
case .suite:
return UserDefaults(suiteName: "YOUR-DOMAIN-IDENTIFIER")!
}
}()
init(storageType: RemoteStorageType = .standard) {
self.storageType = storageType
}
func store(_ value: Any, forKey key: RemoteStorageKey) {
defaults.set(value, forKey: key.rawValue)
}
func retrieve(forKey key: RemoteStorageKey) -> Any? {
return defaults.object(forKey: key.rawValue)
}
func removeObject(forKey key: RemoteStorageKey) {
defaults.removeObject(forKey: key.rawValue)
}
func resetStorageKeys() {
for key in RemoteStorageKey.allCases {
defaults.removeObject(forKey: key.rawValue)
}
}
}
```
```objc
@interface RemoteStorage ()
@property (nonatomic) StorageType storageType;
@property (nonatomic, strong) NSUserDefaults *defaults;
@end
@implementation RemoteStorage
- (id)initWithStorageType:(StorageType)storageType {
if (self = [super init]) {
self.storageType = storageType;
}
return self;
}
- (void)store:(id)value forKey:(RemoteStorageKey)key {
[[self defaults] setValue:value forKey:[self rawValueForKey:key]];
}
- (id)retrieveForKey:(RemoteStorageKey)key {
return [[self defaults] objectForKey:[self rawValueForKey:key]];
}
- (void)removeObjectForKey:(RemoteStorageKey)key {
[[self defaults] removeObjectForKey:[self rawValueForKey:key]];
}
- (void)resetStorageKeys {
[[self defaults] removeObjectForKey:[self rawValueForKey:RemoteStorageKeyPendingCustomEvents]];
[[self defaults] removeObjectForKey:[self rawValueForKey:RemoteStorageKeyPendingCustomAttributes]];
[[self defaults] removeObjectForKey:[self rawValueForKey:RemoteStorageKeyPendingUserAttributes]];
}
- (NSUserDefaults *)defaults {
if (!self.defaults) {
switch (self.storageType) {
case StorageTypeStandard:
return [NSUserDefaults standardUserDefaults];
break;
case StorageTypeSuite:
return [[NSUserDefaults alloc] initWithSuiteName:@"YOUR-DOMAIN-IDENTIFIER"];
}
} else {
return self.defaults;
}
}
- (NSString*)rawValueForKey:(RemoteStorageKey)remoteStorageKey {
switch(remoteStorageKey) {
case RemoteStorageKeyPendingCustomEvents:
return @"pending_custom_events";
case RemoteStorageKeyPendingCustomAttributes:
return @"pending_custom_attributes";
case RemoteStorageKeyPendingUserAttributes:
return @"pending_user_attributes";
default:
[NSException raise:NSGenericException format:@"Unexpected FormatType."];
}
}
```
**Fichier d'aide UserAttribute**
```swift
enum UserAttribute: Hashable {
case email(String?)
}
// MARK: - Codable
extension UserAttribute: Codable {
private enum CodingKeys: String, CodingKey {
case email
}
func encode(to encoder: Encoder) throws {
var values = encoder.container(keyedBy: CodingKeys.self)
switch self {
case .email(let email):
try values.encode(email, forKey: .email)
}
}
init(from decoder: Decoder) throws {
let values = try decoder.container(keyedBy: CodingKeys.self)
let email = try values.decode(String.self, forKey: .email)
self = .email(email)
}
}
```
```objc
@implementation UserAttribute
- (id)initWithUserField:(NSString *)userField attributeType:(UserAttributeType)attributeType {
if (self = [super init]) {
self.userField = userField;
self.attributeType = attributeType;
}
return self;
}
- (void)encodeWithCoder:(NSCoder *)encoder {
[encoder encodeObject:self.userField forKey:@"userField"];
[encoder encodeInteger:self.attributeType forKey:@"attributeType"];
}
- (id)initWithCoder:(NSCoder *)decoder {
if (self = [super init]) {
self.userField = [decoder decodeObjectForKey:@"userField"];
NSInteger attributeRawValue = [decoder decodeIntegerForKey:@"attributeType"];
self.attributeType = (UserAttributeType) attributeRawValue;
}
return self;
}
@end
```
**Fichier d'aide EventName Dictionary**
```swift
extension Dictionary where Key == String, Value == Any {
init(eventName: String, properties: [String: Any]? = nil) {
self.init()
self[PushNotificationKey.eventName.rawValue] = eventName
if let properties = properties {
for (key, value) in properties {
self[key] = value
}
}
}
}
```
```objc
@implementation NSDictionary (Helper)
- (id)initWithEventName:(NSString *)eventName properties:(NSDictionary *)properties {
self = [self init];
if (self) {
dict[@"event_name"] = eventName;
for(id key in properties) {
dict[key] = properties[key];
}
}
return self;
}
@end
```
# Test de notification Push pour iOS
Source: /docs/fr/developer_guide/platforms/legacy_sdks/ios/push_notifications/testing/index.md
**Warning:**
[AppboyKit](https://github.com/Appboy/appboy-ios-sdk) (also known as the Objective-C SDK) is no longer supported and has been replaced by the [Swift SDK](https://www.braze.com/docs/fr/fr/developer_guide/sdk_integration/?sdktab=swift). It will no longer receive new features, bug fixes, security updates, or technical support—however, messaging and analytics will continue to function as normal. To learn more, see [Introducing the New Braze Swift SDK](https://www.braze.com/resources/articles/introducing-the-new-braze-swift-sdk).
# Tester {#push-testing}
Si vous souhaitez tester des notifications push et in-app à l’aide de la ligne de commande, vous pouvez envoyer une seule notification par le terminal via cURL et [l’API d’envoi de messages](https://www.braze.com/docs/fr/fr/api/endpoints/messaging/). Vous devrez remplacer les champs suivants par les valeurs correctes pour votre cas de test :
Champs obligatoires :
- `YOUR-API-KEY-HERE` - disponible dans **Réglages** > **Clés API**. Assurez-vous que la clé est autorisée à envoyer des messages via l’endpoint de l’API REST `/messages/send`.
- `EXTERNAL_USER_ID` - disponible sur la page **Recherche d'utilisateurs.**
- `REST_API_ENDPOINT_URL` - répertoriés sur le site Braze [Instances](https://www.braze.com/docs/fr/fr/api/basics/#endpoints. Assurez-vous que l'utilisation de l'endpoint correspond à l'instance de Braze sur laquelle se trouve votre espace de travail.
Champs facultatifs :
- `YOUR_KEY1` (facultatif)
- `YOUR_VALUE1` (facultatif)
```bash
curl -X POST -H "Content-Type: application/json" -H "Authorization: Bearer YOUR-API-KEY-HERE" -d '{
"external_user_ids":["EXTERNAL_USER_ID"],
"messages": {
"apple_push": {
"alert":"Test push",
"extra": {
"YOUR_KEY1":"YOUR_VALUE1"
}
}
}
}' https://{REST_API_ENDPOINT_URL}/messages/send
```
# Tests de l’unité de notification Push pour iOS
Source: /docs/fr/developer_guide/platforms/legacy_sdks/ios/push_notifications/unit_tests/index.md
**Warning:**
[AppboyKit](https://github.com/Appboy/appboy-ios-sdk) (also known as the Objective-C SDK) is no longer supported and has been replaced by the [Swift SDK](https://www.braze.com/docs/fr/fr/developer_guide/sdk_integration/?sdktab=swift). It will no longer receive new features, bug fixes, security updates, or technical support—however, messaging and analytics will continue to function as normal. To learn more, see [Introducing the New Braze Swift SDK](https://www.braze.com/resources/articles/introducing-the-new-braze-swift-sdk).
# Tests unitaires {#unit-tests}
Ce guide facultatif décrit comment mettre en œuvre quelques tests unitaires qui vérifieront si votre app delegate suit correctement les étapes décrites dans nos [instructions d'intégration push.](https://www.braze.com/docs/fr/fr/developer_guide/platforms/legacy_sdks/ios/push_notifications/integration/)
Si tous les tests sont réussis, généralement, cela signifie que la partie basée sur le code de votre configuration de notification push est fonctionnelle. Si un test échoue, cela peut signifier que vous n'avez pas suivi correctement une étape, ou cela peut résulter d'une personnalisation valide qui ne s'aligne pas précisément sur nos instructions par défaut.
Dans tous les cas, cette approche peut être utile pour vérifier que vous avez suivi les étapes d’intégration et pour aider à surveiller les éventuelles régressions.
## Étape 1 : Création d’une cible de tests d’unités
Ignorez cette étape si votre projet d’application en Xcode contient déjà un lot de tests d’unité.
Dans votre projet d’application, sélectionnez **Fichier > Nouveau > Cible** et ajoutez un nouveau « Unit Testing Bundle » (lot de tests d’unité). Ce lot peut utiliser Objective-C ou Swift et peut porter n’importe quel nom. Définissez la « Target to be Tested » (cible à tester) vers la cible de votre application principale.
## Étape 2 : Ajoutez le SDK Braze à vos tests d’unité
En utilisant la même méthode que celle utilisée initialement pour [installer le SDK de Braze](https://www.braze.com/docs/fr/fr/developer_guide/platforms/legacy_sdks/ios/initial_sdk_setup/overview/), assurez-vous que la même installation du SDK est également disponible pour votre cible de tests unitaires. Par exemple, en utilisant CocoaPods :
```
target 'YourAppTarget' do
pod 'Appboy-iOS-SDK'
target 'YourAppTargetTests' do
inherit! :search_paths
end
end
```
## Étape 3 : Ajoutez OCMock à vos tests d’unité
Ajoutez [OCMock](https://ocmock.org/) à votre cible de test via CocoaPods, Carthage ou sa bibliothèque statique. Par exemple, en utilisant CocoaPods :
```
target 'YourAppTarget' do
pod 'Appboy-iOS-SDK'
target 'YourAppTargetTests' do
inherit! :search_paths
pod 'OCMock'
end
end
```
## Étape 4 : Terminez la mise en place des bibliothèques ajoutées
Terminez l’installation du SDK Braze et d’OCMock. Par exemple, en utilisant CocoaPods, naviguez dans le répertoire de votre projet d'application Xcode dans votre terminal et exécutez la commande suivante :
```
pod install
```
À ce stade, vous devriez pouvoir ouvrir l’espace de travail du projet Xcode créé par CocoaPods.
## Étape 5 : Ajouter des tests de notification push
Créez un nouveau fichier Objectif-C dans votre cible de tests d’unité.
Si la cible des tests d’unité est dans Swift, Xcode peut demander : « Souhaitez-vous configurer un en-tête de pontage Objectif-C ? » L'en-tête de transition étant facultatif, vous pouvez cliquer sur **Ne pas créer** et exécuter ces tests unitaires avec succès.
Ajoutez le contenu des [`AppboyPushUnitTests.m`](https://github.com/Appboy/appboy-ios-sdk/blob/master/HelloSwift/HelloSwiftTests/AppboyPushUnitTests.m) de l'exemple d’application HelloSwift au nouveau fichier.
## Étape 6 : Exécuter la suite de test
Exécutez les tests d’unité de votre application. Il peut s’agir d’une étape de vérification unique, ou vous pouvez l’inclure indéfiniment dans votre suite de tests pour vous aider à détecter toute régression.
# Résolution des problèmes de notification push pour iOS
Source: /docs/fr/developer_guide/platforms/legacy_sdks/ios/push_notifications/troubleshooting/index.md
**Warning:**
[AppboyKit](https://github.com/Appboy/appboy-ios-sdk) (also known as the Objective-C SDK) is no longer supported and has been replaced by the [Swift SDK](https://www.braze.com/docs/fr/fr/developer_guide/sdk_integration/?sdktab=swift). It will no longer receive new features, bug fixes, security updates, or technical support—however, messaging and analytics will continue to function as normal. To learn more, see [Introducing the New Braze Swift SDK](https://www.braze.com/resources/articles/introducing-the-new-braze-swift-sdk).
# Résolution des problèmes {#push-troubleshooting}
## Comprendre le flux de travail Braze/APNs {#understanding-the-brazeapns-workflow}
Le service Apple Push Notification (APNs) est l'infrastructure d'Apple pour l'envoi de notifications push aux applications iOS et OS X. Voici la structure simplifiée de la manière dont les notifications push sont activées pour les appareils de vos utilisateurs et la façon dont Braze peut leur envoyer des notifications push :
1. Vous configurez le certificat push et le profil de provisionnement
2. Les appareils s'enregistrent auprès des APNs et fournissent à Braze des jetons de notification push
3. Vous lancez une Campaign push Braze
4. Braze supprime les jetons non valides
#### Étape 1 : Configurer le certificat push et le profil de provisionnement {#step-1-configuring-the-push-certificate-and-provisioning-profile}
Lors du développement de votre application, vous devez créer un certificat SSL pour activer les notifications push. Ce certificat sera inclus dans le profil de provisionnement avec lequel votre application est créée et devra également être téléchargé sur le tableau de bord de Braze. Le certificat permet à Braze de communiquer aux APNs que nous sommes autorisés à envoyer des notifications push en votre nom.
Il existe deux types de [profils de provisionnement](https://developer.apple.com/library/content/documentation/IDEs/Conceptual/AppDistributionGuide/MaintainingProfiles/MaintainingProfiles.html) et de certificats : le développement et la distribution. Nous vous recommandons d'utiliser uniquement des profils et des certificats de distribution pour éviter toute confusion. Si vous choisissez d'utiliser différents profils et certificats pour le développement et la distribution, assurez-vous que le certificat téléchargé sur le tableau de bord correspond au profil de provisionnement que vous utilisez actuellement.
**Warning:**
Ne modifiez pas l'environnement du certificat push (développement par rapport à la production). Modifier le certificat push pour un environnement incorrect peut entraîner la suppression accidentelle du jeton de notification push de vos utilisateurs, les rendant inaccessibles par notification push.
#### Étape 2 : Les appareils s'enregistrent auprès des APNs et fournissent à Braze des jetons de notification push {#step-2-devices-register-for-apns-and-provide-braze-with-push-tokens}
Lorsque les utilisateurs ouvrent votre application, ils sont invités à accepter les notifications push. S'ils acceptent cette invite, les APNs génèrent un jeton de notification push pour cet appareil particulier. Le SDK iOS enverra immédiatement et de manière asynchrone le jeton push pour les applications utilisant la [politique de vidage automatique](https://www.braze.com/docs/fr/fr/developer_guide/platform_integration_guides/ios/advanced_use_cases/fine_network_traffic_control/#automatic-request-processing) par défaut. Une fois qu'un jeton push est associé à un utilisateur, celui-ci apparaîtra comme « Push Registered » dans le tableau de bord sur son profil utilisateur sous l'onglet **Engagement** et sera éligible pour recevoir des notifications push des Campaigns Braze.
**Note:**
À partir de Xcode 14, vous pouvez tester les notifications push à distance sur un simulateur iOS.
#### Étape 3 : Lancer une Campaign push Braze {#step-3-launching-a-braze-push-campaign}
Lorsqu'une Campaign push est lancée, Braze effectue des requêtes auprès des APNs pour délivrer votre message. Braze utilise le certificat push SSL téléchargé dans le tableau de bord pour authentifier et vérifier que nous sommes autorisés à envoyer des notifications push aux jetons de notification push fournis. Si un appareil est en ligne, la notification devrait être reçue peu de temps après l'envoi de la campagne. Notez que Braze fixe à 30 jours la [date d'expiration](https://developer.apple.com/documentation/usernotifications/setting_up_a_remote_notification_server/sending_notification_requests_to_apns#2947607) par défaut des APNs pour les notifications.
#### Étape 4 : Supprimer les jetons non valides {#step-4-removing-invalid-tokens}
Si les [APNs](https://developer.apple.com/library/content/documentation/NetworkingInternet/Conceptual/RemoteNotificationsPG/APNSOverview.html#//apple_ref/doc/uid/TP40008194-CH8-SW1) nous informent que l'un des jetons push auxquels nous avons tenté d'envoyer un message n'est pas valide, nous supprimons ces jetons des profils utilisateurs auxquels ils étaient associés.
## Utiliser les journaux d'erreur de notification push {#utilizing-the-push-error-logs}
Braze fournit un journal des erreurs de notification push dans le **Journal d'activité des messages**. Ce journal d'erreurs fournit de nombreux avertissements qui peuvent être très utiles pour identifier les raisons pour lesquelles vos campagnes ne fonctionnent pas comme prévu. Cliquer sur un message d'erreur vous redirigera vers la documentation pertinente pour vous aider à résoudre un incident particulier.

Les erreurs courantes que vous pouvez voir ici comprennent des notifications spécifiques à l'utilisateur, telles que [« Received Unregistered Sending to Push Token »](#received-unregistered-sending).
En outre, Braze fournit également un journal des modifications push sur le profil utilisateur, sous l'onglet **Engagement**. Ce journal des modifications donne un aperçu du comportement d'enregistrement des notifications push, comme l'invalidation des jetons, les erreurs d'enregistrement push, les jetons déplacés vers de nouveaux utilisateurs, etc.
{: style="max-width:50%;" }
## Problèmes d'enregistrement de notifications push {#push-registration-issues}
Pour ajouter une vérification à la logique d'enregistrement push de votre application, mettez en place des [tests unitaires de push](https://www.braze.com/docs/fr/fr/developer_guide/platforms/legacy_sdks/ios/push_notifications/unit_tests/).
#### Pas d'invite d'enregistrement push {#no-push-registration-prompt}
Si l'application ne vous invite pas à vous inscrire aux notifications push, il y a probablement un problème avec votre intégration d'inscription push. Assurez-vous d'avoir suivi notre [documentation](https://www.braze.com/docs/fr/fr/developer_guide/platforms/legacy_sdks/ios/push_notifications/integration/) et d'avoir correctement intégré notre enregistrement push. Vous pouvez également définir des points d'arrêt dans votre code pour vous assurer que le code d'inscription aux notifications push est en cours d'exécution.
#### Aucun utilisateur « push registered » affiché dans le tableau de bord {#no-push-registered-users-showing-in-the-dashboard}
- Vérifiez que votre application vous invite à autoriser les notifications push. En général, cette invite apparaît lors de votre première ouverture de l'application, mais elle peut être programmée pour apparaître ailleurs. Si elle n'apparaît pas là où elle le devrait, le problème est probablement la configuration de base des capacités de notification push de votre application.
- Vérifiez que les étapes de l'[intégration push](https://www.braze.com/docs/fr/fr/developer_guide/platforms/legacy_sdks/ios/push_notifications/integration/) ont été effectuées avec succès.
- Vérifiez que le profil de provisionnement avec lequel votre application a été créée inclut les autorisations pour les notifications push. Assurez-vous de télécharger tous les profils de provisionnement disponibles depuis votre compte développeur Apple. Pour confirmer cela, procédez comme suit :
1. Dans Xcode, accédez à **Preferences > Accounts** (ou utilisez le raccourci clavier Command+,).
2. Sélectionnez l'identifiant Apple que vous utilisez pour votre compte développeur et cliquez sur **View Details**.
3. Sur la page suivante, cliquez sur ** Refresh** et confirmez que vous téléchargez tous les profils de provisionnement disponibles.
- Vérifiez que vous avez [correctement activé la fonctionnalité push](https://www.braze.com/docs/fr/fr/developer_guide/platform_integration_guides/ios/push_notifications/integration/#step-2-enable-push-capabilities) dans votre application.
- Vérifiez que votre profil de provisionnement push correspond à l'environnement dans lequel vous effectuez des tests. Les certificats universels peuvent être configurés dans le tableau de bord de Braze pour envoyer vers l'environnement de développement ou de production APNs. L'utilisation d'un certificat de développement pour une application de production ou d'un certificat de production pour une application de développement ne fonctionnera pas.
- Vérifiez que vous appelez bien notre méthode `registerPushToken` en définissant un point d'arrêt dans votre code.
- Vérifiez que vous êtes sur un appareil (les notifications push ne fonctionnent pas sur un simulateur) et que vous disposez d'une bonne connectivité réseau.
## Appareils ne recevant pas de notifications push {#devices-not-receiving-push-notifications}
#### Utilisateurs qui ne sont plus « push registered » après l'envoi d'une notification push {#users-no-longer-push-registered-after-sending-a-push-notification}
Ceci indique probablement que l'utilisateur avait un jeton de notification push non valide. Cela peut se produire pour plusieurs raisons :
##### Incohérence entre le tableau de bord et le certificat de l'application {#dashboard-and-app-certificate-mismatch}
Si le certificat push que vous avez téléchargé dans le tableau de bord n'est pas le même que celui du profil de provisionnement avec lequel votre application a été créée, les APNs rejetteront le jeton. Vérifiez que vous avez téléchargé le bon certificat et effectué une autre session dans l'application avant de tenter une autre notification de test.
##### Désinstallations {#uninstalls}
Si un utilisateur a désinstallé votre application, son jeton de notification push sera invalide et supprimé lors du prochain envoi.
##### Régénération de votre profil de provisionnement {#regenerating-your-provisioning-profile}
En dernier recours, repartir de zéro et créer un tout nouveau profil de provisionnement peut éliminer les erreurs de configuration résultant de l'utilisation simultanée de plusieurs environnements, profils et applications. Il existe de nombreuses « pièces mobiles » dans la configuration des notifications push pour les applications iOS, il est donc parfois préférable de recommencer depuis le début. Cela permettra également d'isoler le problème si vous devez poursuivre la résolution des problèmes.
#### Utilisateurs encore « push registered » après l'envoi d'une notification push {#users-still-push-registered-after-sending-a-push-notification}
##### Application au premier plan {#app-is-foregrounded}
Sur les versions iOS qui n'intègrent pas les notifications push via le framework `UserNotifications`, si l'application est au premier plan lorsque le message push est reçu, il ne s'affichera pas. Vous devez mettre l'application en arrière-plan sur vos appareils de test avant d'envoyer des messages de test.
##### Notification de test planifiée de manière incorrecte {#test-notification-scheduled-incorrectly}
Vérifiez la planification que vous avez définie pour votre message de test. S'il est réglé sur la distribution par fuseau horaire local ou sur le [timing intelligent](https://www.braze.com/docs/fr/fr/user_guide/brazeai/intelligence_suite/intelligent_timing/), il se peut que vous n'ayez pas encore reçu le message (ou que l'application ait été au premier plan au moment de sa réception).
#### L'utilisateur n'est pas « push registered » pour l'application testée {#user-not-push-registered-for-the-app-being-tested}
Vérifiez le profil utilisateur de l'utilisateur auquel vous essayez d'envoyer un message de test. Sous l'onglet **Engagement**, il devrait y avoir une liste d'« applications poussables ». Vérifiez que l'application à laquelle vous essayez d'envoyer des messages de test figure dans cette liste. Les utilisateurs apparaîtront comme « Push Registered » s'ils ont un jeton push pour n'importe quelle application dans votre espace de travail, ce qui pourrait donc être un faux positif.
Ce qui suit indiquerait un problème avec l'inscription aux notifications push ou que le jeton de l'utilisateur a été renvoyé à Braze comme invalide par les APNs après avoir été envoyé :
{: style="max-width:50%"}
## Les messages push ne sont pas envoyés {#push-messages-not-sending}
Pour résoudre les problèmes liés aux notifications push qui ne sont pas envoyées, reportez-vous à la section [Résolution des problèmes push](https://www.braze.com/docs/fr/fr/user_guide/channels/push/troubleshooting/).
## Erreurs du journal d'activité des messages {#message-activity-log-errors}
#### Réception d'un envoi non enregistré au jeton de notification push {#received-unregistered-sending}
- Assurez-vous que le jeton push envoyé à Braze depuis la méthode `[[Appboy sharedInstance] registerPushToken:]` est valide. Vous pouvez consulter le **Journal d'activité des messages** pour voir le jeton de notification push. Il devrait ressembler à quelque chose comme `6e407a9be8d07f0cdeb9e724733a89445f57a89ec890d63867c482a483506fa6`, une longue chaîne de caractères contenant un mélange de lettres et de chiffres. Si votre jeton push semble différent, vérifiez votre [code](https://www.braze.com/docs/fr/fr/developer_guide/platform_integration_guides/ios/push_notifications/integration/#step-4-register-push-tokens-with-braze) d'envoi des jetons push à Braze.
- Vérifiez que votre profil de provisionnement push correspond à l'environnement dans lequel vous effectuez des tests. Les certificats universels peuvent être configurés dans le tableau de bord de Braze pour envoyer vers l'environnement de développement ou de production APNs. L'utilisation d'un certificat de développement pour une application de production ou d'un certificat de production pour une application de développement ne fonctionnera pas.
- Vérifiez que le jeton push que vous avez téléchargé sur Braze correspond au profil de provisionnement que vous avez utilisé pour créer l'application à partir de laquelle vous avez envoyé le jeton push.
#### Jeton d'appareil non destiné à la rubrique {#device-token-not-for-topic}
Cette erreur indique que le certificat push et l'ID de lot (bundle ID) de votre application ne correspondent pas. Vérifiez que le certificat push que vous avez téléchargé sur Braze correspond au profil de provisionnement utilisé pour créer l'application à partir de laquelle le jeton push a été envoyé.
#### BadDeviceToken lors de l'envoi au jeton de notification push {#baddevicetoken-sending-to-push-token}
Le `BadDeviceToken` est un code d'erreur APNs et ne provient pas de Braze. Cette réponse peut être renvoyée pour plusieurs raisons, notamment :
- L'application a reçu un jeton push qui n'était pas valide pour les informations d'identification téléchargées sur le tableau de bord.
- La fonctionnalité push a été désactivée pour cet espace de travail.
- L'utilisateur s'est désinscrit des notifications push.
- L'application a été désinstallée.
- Apple a actualisé le jeton push, ce qui a invalidé l'ancien jeton.
- L'application a été conçue pour un environnement de production, mais les informations d'identification push téléchargées sur Braze sont définies pour un environnement de développement (ou l'inverse).
## Problèmes après la réception de la notification push {#issues-after-push-delivery}
Pour ajouter une vérification à la gestion push de votre application, mettez en place des [tests unitaires de push](https://www.braze.com/docs/fr/fr/developer_guide/platforms/legacy_sdks/ios/push_notifications/unit_tests/).
#### Les clics sur les notifications push ne sont pas enregistrés {#push-clicks-not-logged}
- Si cela ne se produit que sur iOS 10, assurez-vous d'avoir suivi les étapes d'intégration push pour [iOS 10](https://www.braze.com/docs/fr/fr/developer_guide/platform_integration_guides/ios/push_notifications/integration/#step-5-enable-push-handling).
- Braze ne gère pas les notifications push reçues silencieusement au premier plan (par exemple, le comportement par défaut des notifications push au premier plan avant le framework `UserNotifications`). Cela signifie que les liens ne seront pas ouverts et que les clics sur les notifications push ne seront pas enregistrés. Si votre application n'a pas encore intégré le framework `UserNotifications`, Braze ne traitera pas les notifications push lorsque l'état de l'application est `UIApplicationStateActive`. Vous devez vous assurer que votre application ne retarde pas les appels à nos [méthodes de gestion push](https://www.braze.com/docs/fr/fr/developer_guide/platform_integration_guides/ios/push_notifications/integration/#step-5-enable-push-handling) ; dans le cas contraire, le SDK iOS peut considérer les notifications push comme des événements push silencieux de premier plan et ne pas les traiter.
#### Les liens web issus des clics sur les notifications push ne s'ouvrent pas {#web-links-from-push-clicks-not-opening}
iOS 9+ nécessite que les liens soient conformes à ATS pour être ouverts dans les vues web. Assurez-vous que vos liens web utilisent HTTPS. Pour plus d'informations, reportez-vous à notre article sur la [conformité ATS](https://www.braze.com/docs/fr/fr/developer_guide/platform_integration_guides/ios/advanced_use_cases/linking/#app-transport-security-ats).
#### Les liens profonds issus des clics sur les notifications push ne s'ouvrent pas {#deep-links-from-push-clicks-not-opening}
La plupart du code qui gère les liens profonds gère également les ouvertures push. Tout d'abord, assurez-vous que les ouvertures de notifications push sont enregistrées. Si ce n'est pas le cas, [corrigez ce problème](#push-clicks-not-logged) (car la correction corrige souvent la gestion des liens).
Si les ouvertures sont enregistrées, vérifiez s'il s'agit d'un problème avec le lien profond en général ou avec la gestion des clics push sur les liens profonds. Pour ce faire, testez si un lien profond depuis un clic sur un message in-app fonctionne.
#### Peu ou pas d'ouvertures directes {#few-or-no-direct-opens}
Si au moins un utilisateur ouvre votre notification push iOS, mais que peu ou pas d'_ouvertures directes_ sont enregistrées dans Braze, il se peut qu'il y ait un problème avec votre [intégration SDK](https://www.braze.com/docs/fr/fr/developer_guide/platforms/legacy_sdks/ios/initial_sdk_setup/overview/). Gardez à l'esprit que les _ouvertures directes_ ne sont pas enregistrées pour les envois de test ou les notifications push silencieuses.
- Assurez-vous que les messages ne sont pas envoyés en tant que [notifications push silencieuses](https://www.braze.com/docs/fr/fr/developer_guide/platform_integration_guides/swift/push_notifications/silent_push_notifications/#sending-silent-push-notifications). Le message doit comporter du texte dans le titre ou le corps pour ne pas être considéré comme silencieux.
- Vérifiez à nouveau les étapes suivantes du [guide d'intégration push](https://www.braze.com/docs/fr/fr/developer_guide/platforms/legacy_sdks/ios/push_notifications/integration/) :
- [S'inscrire aux notifications push](https://www.braze.com/docs/fr/fr/developer_guide/platform_integration_guides/swift/push_notifications/integration/#step-1-register-for-push-notifications-with-apns) : À chaque lancement de l'application, de préférence dans `application:didFinishLaunchingWithOptions:`, le code de l'étape 3 doit être exécuté. La propriété delegate de `UNUserNotificationCenter.current()` doit être assignée à un objet qui implémente `UNUserNotificationCenterDelegate` et contient la méthode `(void)userNotificationCenter:didReceiveNotificationResponse:withCompletionHandler:`.
- [Activer la gestion push](https://www.braze.com/docs/fr/fr/developer_guide/platform_integration_guides/legacy_sdks/ios/push_notifications/integration/#step-5-enable-push-handling) : Vérifiez que la méthode `(void)userNotificationCenter:didReceiveNotificationResponse:withCompletionHandler:` a été implémentée.
# Aperçu des messages in-app pour iOS
Source: /docs/fr/developer_guide/platforms/legacy_sdks/ios/in-app_messaging/overview/index.md
**Warning:**
[AppboyKit](https://github.com/Appboy/appboy-ios-sdk) (also known as the Objective-C SDK) is no longer supported and has been replaced by the [Swift SDK](https://www.braze.com/docs/fr/fr/developer_guide/sdk_integration/?sdktab=swift). It will no longer receive new features, bug fixes, security updates, or technical support—however, messaging and analytics will continue to function as normal. To learn more, see [Introducing the New Braze Swift SDK](https://www.braze.com/resources/articles/introducing-the-new-braze-swift-sdk).
# Messages in-app {#in-app-messages}
Les [messages in-app](https://www.braze.com/docs/fr/fr/user_guide/channels/in_app_messages/) vous permettent d'envoyer du contenu à votre utilisateur sans interrompre sa journée avec une notification push. Des messages in-app personnalisés et adaptés améliorent l'expérience utilisateur et aident votre audience à tirer le meilleur parti de votre application. Grâce à un choix varié de mises en page et d'outils de personnalisation, les messages in-app favorisent un engagement inédit de vos utilisateurs.
Consultez nos [études de cas](https://www.braze.com/customers) pour voir des exemples de messages in-app.
## Types de messages in-app {#in-app-message-types}
Braze propose actuellement les types de messages in-app par défaut suivants :
- `Slideup`
- `Modal`
- `Full`
- `HTML Full`
Chaque type de message in-app est hautement personnalisable en termes de contenu, d'images, d'icônes, d'actions de clic, d'analyse, d'affichage et de distribution.
Tous les messages in-app sont des sous-classes de `ABKInAppMessage`, qui définit le comportement et les caractéristiques de base pour tous les messages in-app. Les structures de classe de message in-app sont les suivantes :

**Important:**
Par défaut, les messages in-app sont activés après avoir terminé l'intégration SDK standard, y compris la prise en charge des GIF.
Notez que l'intégration de `SDWebImage` est requise si vous prévoyez d'utiliser notre interface utilisateur Braze pour afficher des images dans les messages in-app iOS ou les Content Cards.
### Comportements attendus par types de messages {#expected-behaviors-by-message-types}
Voilà à quoi ressemble l'ouverture de nos types de messages in-app par défaut pour vos utilisateurs.
Les messages in-app [`Slideup`](https://appboy.github.io/appboy-ios-sdk/docs/interface_a_b_k_in_app_message_slideup.html) sont ainsi nommés parce qu'ils « glissent vers le haut » ou « glissent vers le bas » depuis le haut ou le bas de l'écran. Ils recouvrent une petite partie de l'écran et offrent une fonctionnalité de messagerie efficace et non intrusive.
{: style="border:0px;"}
Les messages in-app [`Modal`](https://appboy.github.io/appboy-ios-sdk/docs/interface_a_b_k_in_app_message_modal.html) apparaissent au centre de l'écran et sont encadrés par un panneau translucide. Utiles pour les messages plus critiques, ils peuvent être équipés de deux boutons avec actions de clic et suivi analytique.
{: style="border:0px;"}
Les messages in-app [`Full`](https://appboy.github.io/appboy-ios-sdk/docs/interface_a_b_k_in_app_message_full.html) sont utiles pour maximiser le contenu et l'impact de votre communication avec les utilisateurs. La moitié supérieure d'un message in-app `full` contient une image, et la moitié inférieure affiche le texte et jusqu'à deux boutons avec actions de clic et suivi analytique.
{: style="border:0px;"}
Les messages in-app [`HTML Full`](https://appboy.github.io/appboy-ios-sdk/docs/interface_a_b_k_in_app_message_h_t_m_l_full.html) sont utiles pour créer un contenu utilisateur entièrement personnalisé. Le contenu des messages in-app HTML complets défini par l'utilisateur est affiché dans un `WKWebView` et peut éventuellement contenir d'autres contenus enrichis, tels que des images et des polices, permettant un contrôle total de l'apparence et de la fonctionnalité du message.
Les messages in-app iOS prennent en charge une interface JavaScript `brazeBridge` pour appeler des méthodes sur le SDK Braze pour le Web depuis votre HTML. Pour plus de détails, consultez nos [bonnes pratiques](https://www.braze.com/docs/fr/fr/user_guide/channels/in_app_messages/best_practices/).
L'exemple suivant montre un message in-app HTML complet paginé :

Le contenu complet du message in-app est affiché dans un `WKWebView` et peut éventuellement contenir d'autres contenus enrichis, comme des images et des polices, permettant un contrôle total de l'apparence et des fonctionnalités du message. Notez que nous ne prenons actuellement pas en charge l'affichage de messages in-app HTML personnalisés dans un iFrame sur les plateformes iOS et Android.
**Note:**
À partir de la version 3.19.0 du SDK iOS, les méthodes JavaScript suivantes ne sont pas opérationnelles dans les messages in-app HTML : `alert`, `confirm`, `prompt`.
# Personnalisation des messages in-app iOS
Source: /docs/fr/developer_guide/platforms/legacy_sdks/ios/in-app_messaging/customization/index.md
# Définir les délégués de messages in-app pour iOS
Source: /docs/fr/developer_guide/platforms/legacy_sdks/ios/in-app_messaging/customization/setting_delegates/index.md
**Warning:**
[AppboyKit](https://github.com/Appboy/appboy-ios-sdk) (also known as the Objective-C SDK) is no longer supported and has been replaced by the [Swift SDK](https://www.braze.com/docs/fr/fr/developer_guide/sdk_integration/?sdktab=swift). It will no longer receive new features, bug fixes, security updates, or technical support—however, messaging and analytics will continue to function as normal. To learn more, see [Introducing the New Braze Swift SDK](https://www.braze.com/resources/articles/introducing-the-new-braze-swift-sdk).
# Définir les délégués
Les affichages de messages In-app et les personnalisations de livraison peuvent être déterminés dans le code en définissant nos délégués facultatifs.
## Délégué de message in-app
Le délégué [`ABKInAppMessageUIDelegate`](https://github.com/Appboy/appboy-ios-sdk/blob/master/AppboyUI/ABKInAppMessage/ABKInAppMessageUIDelegate.h) peut être utilisé pour recevoir des envois de messages in-app déclenchés en vue d'un traitement ultérieur, pour recevoir des événements liés au cycle de vie de l'affichage et pour contrôler la synchronisation de l'affichage.
Définissez votre objet délégué `ABKInAppMessageUIDelegate` sur l’instance Braze en utilisant :
```objc
[[Appboy sharedInstance].inAppMessageController.inAppMessageUIController setInAppMessageUIDelegate:self];
```
```swift
Appboy.sharedInstance()?.inAppMessageController.inAppMessageUIController?.setInAppMessageUIDelegate?(self)
```
Consultez notre [exemple d'application d'](https://github.com/Appboy/appboy-ios-sdk/blob/master/Samples/InAppMessage/BrazeInAppMessageSample/BrazeInAppMessageSample/ViewController.m) envoi de messages in-app pour un exemple de mise en œuvre. Notez que si vous n’incluez pas la bibliothèque d’interface utilisateur de Braze dans votre projet (peu courant), ce délégué n’est pas disponible.
## Délégué principal de message in-app
Si vous n’incluez pas la bibliothèque d’interface utilisateur de Braze dans votre projet et que vous souhaitez recevoir des charges utiles de messages in-app déclenchés pour un traitement ultérieur ou un affichage personnalisé dans votre application, implémentez le protocole [`ABKInAppMessageControllerDelegate`](https://www.braze.com/docs/fr/fr/developer_guide/platforms/legacy_sdks/ios/in-app_messaging/customization/setting_delegates/).
Définissez votre objet délégué `ABKInAppMessageControllerDelegate` sur l’instance Braze en utilisant :
```objc
[Appboy sharedInstance].inAppMessageController.delegate = self;
```
```swift
Appboy.sharedInstance()?.inAppMessageController.delegate = self
```
Vous pouvez également définir votre délégué principal de message in-app au moment de l’initialisation via `appboyOptions` à l’aide de la clé `ABKInAppMessageControllerDelegateKey` :
```objc
[Appboy startWithApiKey:@"YOUR-API_KEY"
inApplication:application
withLaunchOptions:options
withAppboyOptions:@{ ABKInAppMessageControllerDelegateKey : self }];
```
```swift
Appboy.start(withApiKey: "YOUR-API-KEY",
in:application,
withLaunchOptions:launchOptions,
withAppboyOptions:[ ABKInAppMessageControllerDelegateKey : self ])
```
## Déclarations de méthode
Pour plus d’informations, voir les fichiers d’en-tête suivants :
- [`ABKInAppMessage.h`](https://github.com/Appboy/appboy-ios-sdk/blob/master/AppboyKit/include/ABKInAppMessage.h)
- [`ABKInAppMessageControllerDelegate.h`](https://github.com/Appboy/appboy-ios-sdk/blob/master/AppboyKit/include/ABKInAppMessageControllerDelegate.h)
## Exemples d’implémentation
Voir [`ViewController.m`](https://github.com/Appboy/appboy-ios-sdk/blob/master/Samples/InAppMessage/BrazeInAppMessageSample/BrazeInAppMessageSample/ViewController.m) dans l'exemple d’application de message in-app.
# Personnaliser l'orientation des messages in-app pour iOS
Source: /docs/fr/developer_guide/platforms/legacy_sdks/ios/in-app_messaging/customization/customizing_orientation/index.md
**Warning:**
[AppboyKit](https://github.com/Appboy/appboy-ios-sdk) (also known as the Objective-C SDK) is no longer supported and has been replaced by the [Swift SDK](https://www.braze.com/docs/fr/fr/developer_guide/sdk_integration/?sdktab=swift). It will no longer receive new features, bug fixes, security updates, or technical support—however, messaging and analytics will continue to function as normal. To learn more, see [Introducing the New Braze Swift SDK](https://www.braze.com/resources/articles/introducing-the-new-braze-swift-sdk).
# Personnaliser l'orientation
## Définir l’orientation pour tous les messages in-app
Pour définir une orientation fixe pour tous les messages in-app, vous pouvez définir la propriété `supportedOrientationMask` sur `ABKInAppMessageUIController`. Ajoutez le code suivant après l’appel de votre application à `startWithApiKey:inApplication:withLaunchOptions:` :
```objc
// Set fixed in-app message orientation to portrait.
// Use UIInterfaceOrientationMaskLandscape to display in-app messages in landscape
id inAppMessageUIController = [Appboy sharedInstance].inAppMessageController.inAppMessageUIController;
((ABKInAppMessageUIController *)inAppMessageUIController).supportedOrientationMask = UIInterfaceOrientationMaskPortrait;
```
```swift
// Set fixed in-app message orientation to portrait
// Use .landscape to display in-app messages in landscape
if let controller = Appboy.sharedInstance()?.inAppMessageController.inAppMessageUIController as? ABKInAppMessageUIController {
controller.supportedOrientationMask = .portrait
}
```
Ensuite, tous les messages in-app seront affichés dans l’orientation prise en charge, quelle que soit l’orientation de l’appareil. Notez que l’orientation de l’appareil doit également être prise en charge par la propriété `orientation` du message in-app à afficher.
## Définition de l’orientation par message in-app
Vous pouvez également définir l’orientation message par message. Pour ce faire, définissez un [délégué de message in-app](https://www.braze.com/docs/fr/fr/developer_guide/platforms/legacy_sdks/ios/in-app_messaging/customization/setting_delegates/). Ensuite, dans votre méthode de délégation `beforeInAppMessageDisplayed:`, définissez la propriété `orientation` sur le `ABKInAppMessage` :
```objc
// Set inAppMessage orientation to portrait
inAppMessage.orientation = ABKInAppMessageOrientationPortrait;
// Set inAppMessage orientation to landscape
inAppMessage.orientation = ABKInAppMessageOrientationLandscape;
```
```swift
// Set inAppMessage orientation to portrait
inAppMessage.orientation = ABKInAppMessageOrientation.portrait
// Set inAppMessage orientation to landscape
inAppMessage.orientation = ABKInAppMessageOrientation.landscape
```
Les messages in-app ne s’affichent pas si l’orientation de l’appareil ne correspond pas à la propriété `orientation` sur le message in-app.
**Note:**
Pour les iPads, les messages in-app apparaissent dans le style d’orientation préféré de l’utilisateur, quelle que soit l’orientation réelle de l’écran.
## Déclarations de méthode
Pour plus d’informations, voir le fichier d’en-tête suivant :
- [`ABKInAppMessage.h`](https://github.com/Appboy/appboy-ios-sdk/blob/master/AppboyKit/include/ABKInAppMessage.h)
# Personnaliser la gestion de l'affichage des messages in-app pour iOS
Source: /docs/fr/developer_guide/platforms/legacy_sdks/ios/in-app_messaging/customization/handling_in_app_display/index.md
**Warning:**
[AppboyKit](https://github.com/Appboy/appboy-ios-sdk) (also known as the Objective-C SDK) is no longer supported and has been replaced by the [Swift SDK](https://www.braze.com/docs/fr/fr/developer_guide/sdk_integration/?sdktab=swift). It will no longer receive new features, bug fixes, security updates, or technical support—however, messaging and analytics will continue to function as normal. To learn more, see [Introducing the New Braze Swift SDK](https://www.braze.com/resources/articles/introducing-the-new-braze-swift-sdk).
# Gestion personnalisée de l'affichage des messages in-app {#custom-handling-in-app-message-display}
Lorsque le [`ABKInAppMessageControllerDelegate`](https://github.com/Appboy/appboy-ios-sdk/blob/master/AppboyKit/include/ABKInAppMessageControllerDelegate.h) est défini, la méthode de délégation suivante sera appelée avant l'affichage des messages in-app :
```objc
- (ABKInAppMessageDisplayChoice) beforeInAppMessageDisplayed:(ABKInAppMessage *)inAppMessage;
```
```swift
func beforeInAppMessageDisplayed(inAppMessage: ABKInAppMessage!) -> ABKInAppMessageDisplayChoice
```
Si vous n'avez implémenté que [`ABKInAppMessageUIDelegate`](https://github.com/Appboy/appboy-ios-sdk/blob/master/AppboyUI/ABKInAppMessage/ABKInAppMessageUIDelegate.h), la méthode suivante du délégué d'interface utilisateur sera appelée à la place :
```objc
- (ABKInAppMessageDisplayChoice) beforeInAppMessageDisplayed:(ABKInAppMessage *)inAppMessage withKeyboardIsUp:(BOOL)keyboardIsUp;
```
```swift
func beforeInAppMessageDisplayed(inAppMessage: ABKInAppMessage!, withKeyboardIsUp keyboardIsUp: Bool) -> ABKInAppMessageDisplayChoice
```
Vous pouvez personnaliser la gestion des messages in-app en implémentant cette méthode de délégation et en renvoyant l'une des valeurs suivantes pour `ABKInAppMessageDisplayChoice` :
| `ABKInAppMessageDisplayChoice` | Comportement |
| -------------------------- | -------- |
| Objective-C : `ABKDisplayInAppMessageNow` Swift : `displayInAppMessageNow` | Le message sera affiché immédiatement. |
| Objective-C : `ABKDisplayInAppMessageLater` Swift : `displayInAppMessageLater` | Le message ne sera pas affiché et sera replacé en haut de la pile. |
| Objective-C : `ABKDiscardInAppMessage` Swift : `discardInAppMessage`| Le message sera supprimé et ne sera pas affiché. |
{: .reset-td-br-1 .reset-td-br-2 aria-label="Gestion personnalisée de l'affichage des messages in-app" }
Vous pouvez utiliser la méthode de délégation `beforeInAppMessageDisplayed:` pour ajouter une logique d'affichage des messages in-app, personnaliser les messages in-app avant que Braze ne les affiche, ou vous désengager complètement de la logique d'affichage et de l'interface utilisateur de Braze pour les messages in-app.
Consultez notre [exemple d'application](https://github.com/Appboy/appboy-ios-sdk/blob/master/Samples/InAppMessage/BrazeInAppMessageSample/BrazeInAppMessageSample/AppDelegate.m) pour un exemple de mise en œuvre.
## Remplacer les messages in-app avant l'affichage {#overriding-in-app-messages-before-display}
Si vous souhaitez modifier le comportement d'affichage des messages in-app, vous devez ajouter toute logique d'affichage nécessaire à votre méthode de délégation `beforeInAppMessageDisplayed:`. Par exemple, vous pouvez souhaiter afficher le message in-app depuis le haut de l'écran si le clavier est actuellement affiché, ou récupérer le modèle de données du message in-app et afficher le message in-app vous-même.
Si la campagne de messages in-app ne s'affiche pas lorsque la session a été lancée, assurez-vous que la logique d'affichage nécessaire a été ajoutée à votre méthode de délégation `beforeInAppMessageDisplayed:`. Cela permet à la campagne de messages in-app de s'afficher depuis le haut de l'écran même si le clavier est affiché.
## Désactivation du mode sombre {#disabling-dark-mode}
Pour empêcher les messages in-app d'adopter le style du mode sombre lorsque l'appareil de l'utilisateur a activé le mode sombre, utilisez la propriété [`ABKInAppMessage.enableDarkTheme`](https://appboy.github.io/appboy-ios-sdk/docs/interface_a_b_k_in_app_message.html#ae89df6090bed623099ab0ecc0a74ad5d). Depuis la méthode `ABKInAppMessageControllerDelegate.beforeInAppMessageDisplayed:` ou la méthode `ABKInAppMessageUIDelegate.beforeInAppMessageDisplayed:`, définissez la propriété `enableDarkTheme` du paramètre `inAppMessage` de la méthode sur `NO`.
```objc
// ABKInAppMessageControllerDelegate
- (ABKInAppMessageDisplayChoice)beforeInAppMessageDisplayed:(ABKInAppMessage *)inAppMessage {
...
inAppMessage.enableDarkTheme = NO;
...
return ABKDisplayInAppMessageNow;
}
// ABKInAppMessageUIDelegate
- (ABKInAppMessageDisplayChoice)beforeInAppMesssageDisplayed:(ABKInAppMessage *)inAppMessage
withKeyboardIsUp:(BOOL)keyboardIsUp {
...
inAppMessage.enableDarkTheme = NO;
...
return ABKDisplayInAppMessageNow;
}
```
```swift
// ABKInAppMessageControllerDelegate
func before(inAppMessageDisplayed inAppMessage: ABKInAppMessage) -> ABKInAppMessageDisplayChoice {
...
inAppMessage.enableDarkTheme = false
...
return ABKInAppMessageDisplayChoice.displayInAppMessageNow
}
// ABKInAppMessageUIDelegate
func before(inAppMessageDisplayed inAppMessage: ABKInAppMessage, withKeyboardIsUp keyboardIsUp: Bool) -> ABKInAppMessageDisplayChoice {
...
inAppMessage.enableDarkTheme = false
...
return ABKInAppMessageDisplayChoice.displayInAppMessageNow
}
```
## Masquer la barre d'état pendant l'affichage {#hiding-the-status-bar-during-display}
Pour les messages in-app `Full` et `HTML`, le SDK tentera par défaut de placer le message par-dessus la barre d'état. Cependant, dans certains cas, la barre d'état peut toujours apparaître au-dessus du message in-app. À partir de la version [3.21.1](https://github.com/Appboy/appboy-ios-sdk/blob/master/CHANGELOG.md#3211) du SDK iOS, vous pouvez forcer le masquage de la barre d'état lors de l'affichage des messages in-app `Full` et `HTML` en définissant `ABKInAppMessageHideStatusBarKey` sur `YES` dans les `appboyOptions` transmises à `startWithApiKey:`.
## Enregistrement des impressions et des clics {#logging-impressions-and-clicks}
L'enregistrement des impressions et des clics de messages in-app n'est pas automatique lorsque vous implémentez une gestion entièrement personnalisée (c.-à-d. que vous contournez l'affichage des messages in-app de Braze en renvoyant `ABKDiscardInAppMessage` dans votre `beforeInAppMessageDisplayed:`). Si vous choisissez de déployer votre propre interface utilisateur à l'aide de nos modèles de messages in-app, vous devez enregistrer les données analytiques à l'aide des méthodes suivantes sur la classe `ABKInAppMessage` :
```objc
// Registers that a user has viewed an in-app message with the Braze server.
- (void) logInAppMessageImpression;
// Registers that a user has clicked on an in-app message with the Braze server.
- (void) logInAppMessageClicked;
```
```swift
// Registers that a user has viewed an in-app message with the Braze server.
func logInAppMessageImpression()
// Registers that a user has clicked on an in-app message with the Braze server.
func logInAppMessageClicked()
```
De plus, vous devriez enregistrer les clics sur les boutons des sous-classes de `ABKInAppMessageImmersive` (*c.-à-d.*, messages in-app `Modal` et `Full`) :
```objc
// Logs button click analytics
- (void)logInAppMessageClickedWithButtonID:(NSInteger)buttonID;
```
```swift
// Logs button click analytics
func logInAppMessageClickedWithButtonID(buttonId: NSInteger)
```
## Déclarations de méthode {#method-declarations}
Pour plus d'informations, consultez les fichiers d'en-tête suivants :
- [`ABKInAppMessage.h`](https://github.com/Appboy/appboy-ios-sdk/blob/master/AppboyKit/include/ABKInAppMessage.h)
- [`ABKInAppMessageControllerDelegate.h`](https://github.com/Appboy/appboy-ios-sdk/blob/master/AppboyKit/include/ABKInAppMessageControllerDelegate.h)
## Exemples d'implémentation {#implementation-samples}
Voir l'exemple d'application de messages in-app [`AppDelegate.m`](https://github.com/Appboy/appboy-ios-sdk/blob/master/Samples/InAppMessage/BrazeInAppMessageSample/BrazeInAppMessageSample/AppDelegate.m).
# Personnaliser le comportement des messages in-app sur clic pour iOS
Source: /docs/fr/developer_guide/platforms/legacy_sdks/ios/in-app_messaging/customization/behavior_on_click/index.md
**Warning:**
[AppboyKit](https://github.com/Appboy/appboy-ios-sdk) (also known as the Objective-C SDK) is no longer supported and has been replaced by the [Swift SDK](https://www.braze.com/docs/fr/fr/developer_guide/sdk_integration/?sdktab=swift). It will no longer receive new features, bug fixes, security updates, or technical support—however, messaging and analytics will continue to function as normal. To learn more, see [Introducing the New Braze Swift SDK](https://www.braze.com/resources/articles/introducing-the-new-braze-swift-sdk).
# Personnaliser le comportement des messages in-app au clic {#customize-in-app-message-behavior-on-click}
La propriété `inAppMessageClickActionType` sur l'objet `ABKInAppMessage` définit le comportement de l'action après le clic sur le message in-app. Cette propriété est en lecture seule. Si vous souhaitez modifier le comportement au clic du message in-app, vous pouvez appeler la méthode suivante sur `ABKInAppMessage` :
```objc
[inAppMessage setInAppMessageClickAction:clickActionType withURI:uri];
```
```swift
inAppMessage.setInAppMessageClickAction(clickActionType: clickActionType, withURI: uri)
```
Le `inAppMessageClickActionType` peut être défini sur l'une des valeurs suivantes :
| `ABKInAppMessageClickActionType` | Comportement au clic |
| -------------------------- | -------- |
| `ABKInAppMessageRedirectToURI` | L'URI donné s'affiche lorsque l'on clique sur le message, et le message est fermé. Notez que le paramètre `uri` ne peut pas être nul. |
| `ABKInAppMessageNoneClickAction` | Le message sera fermé lorsque l'on clique dessus. Notez que le paramètre `uri` sera ignoré, et la propriété `uri` sur l'objet `ABKInAppMessage` sera définie sur nul. |
{: .reset-td-br-1 .reset-td-br-2 aria-label="Personnaliser le comportement des messages in-app au clic" }
**Important:**
Pour les messages in-app contenant des boutons, le `clickAction` du message sera également inclus dans le payload final si l'action de clic est ajoutée avant l'ajout du texte du bouton.
## Personnaliser les clics sur le corps du message in-app {#customizing-in-app-message-body-clicks}
La méthode de délégation [`ABKInAppMessageUIDelegate`](https://github.com/Appboy/appboy-ios-sdk/blob/master/AppboyUI/ABKInAppMessage/ABKInAppMessageUIDelegate.h) suivante est appelée lorsque l'on clique sur un message in-app :
```objc
- (BOOL) onInAppMessageClicked:(ABKInAppMessage *)inAppMessage;
```
```swift
func onInAppMessageClicked(inAppMessage: ABKInAppMessage!) -> Bool
```
## Personnaliser les clics sur les boutons du message in-app {#customizing-in-app-message-button-clicks}
Pour les clics sur les boutons de message in-app et les boutons de message in-app HTML (tels que les liens), [`ABKInAppMessageUIDelegate`](https://github.com/Appboy/appboy-ios-sdk/blob/master/AppboyUI/ABKInAppMessage/ABKInAppMessageUIDelegate.h) inclut les méthodes de délégation suivantes :
```objc
- (BOOL)onInAppMessageButtonClicked:(ABKInAppMessageImmersive *)inAppMessage
button:(ABKInAppMessageButton *)button;
- (BOOL)onInAppMessageHTMLButtonClicked:(ABKInAppMessageHTML *)inAppMessage
clickedURL:(nullable NSURL *)clickedURL
buttonID:(NSString *)buttonID;
```
```swift
func onInAppMessageButtonClicked(inAppMessage: ABKInAppMessageImmersive!,
button: ABKInAppMessageButton) -> Bool
func onInAppMessageHTMLButtonClicked(inAppMessage: ABKInAppMessageHTML!,
clickedURL: URL, buttonID: String) -> Bool
```
Chaque méthode renvoie une valeur `BOOL` pour indiquer si Braze doit continuer à exécuter l'action de clic.
Pour accéder au type d'action de clic d'un bouton dans une méthode de délégation, vous pouvez utiliser le code suivant :
```objc
if ([inAppMessage isKindOfClass:[ABKInAppMessageImmersive class]]) {
ABKInAppMessageImmersive *immersiveIAM = (ABKInAppMessageImmersive *)inAppMessage;
NSArray *buttons = immersiveIAM.buttons;
for (ABKInAppMessageButton *button in buttons) {
// Button action type is accessible via button.buttonClickActionType
}
}
```
```swift
if inAppMessage is ABKInAppMessageImmersive {
let immersiveIAM = inAppMessage as! ABKInAppMessageImmersive;
for button in inAppMessage.buttons as! [ABKInAppMessageButton]{
// Button action type is accessible via button.buttonClickActionType
}
}
```
Lorsqu'un message in-app comporte des boutons, les seules actions de clic exécutées sont celles du modèle `ABKInAppMessageButton`. Le corps du message in-app ne sera pas cliquable, même si le modèle `ABKInAppMessage` dispose de l'action de clic par défaut.
## Déclarations de méthode {#method-declarations}
Pour plus d'informations, consultez les fichiers d'en-tête suivants :
- [`ABKInAppMessage.h`](https://github.com/Appboy/appboy-ios-sdk/blob/master/AppboyKit/include/ABKInAppMessage.h)
# Personnaliser le déclenchement des messages in-app pour iOS
Source: /docs/fr/developer_guide/platforms/legacy_sdks/ios/in-app_messaging/customization/custom_triggering/index.md
**Warning:**
[AppboyKit](https://github.com/Appboy/appboy-ios-sdk) (also known as the Objective-C SDK) is no longer supported and has been replaced by the [Swift SDK](https://www.braze.com/docs/fr/fr/developer_guide/sdk_integration/?sdktab=swift). It will no longer receive new features, bug fixes, security updates, or technical support—however, messaging and analytics will continue to function as normal. To learn more, see [Introducing the New Braze Swift SDK](https://www.braze.com/resources/articles/introducing-the-new-braze-swift-sdk).
# Déclenchement personnalisé de messages in-app
Par défaut, les messages in-app sont déclenchés par des types d’événements enregistrés par le SDK. Si vous souhaitez déclencher des messages in-app par des événements envoyés par le serveur, vous pouvez également le faire.
Pour activer cette fonction, vous enverrez une notification push silencieuse à l’appareil, ce qui lui permet de consigner un événement basé sur un SDK. Cet événement SDK déclencherait ensuite le message in-app orienté utilisateur.
## Étape 1 : Gérer les paires clé-valeur et les notifications push silencieuses
Ajoutez le code suivant à la méthode `application(_:didReceiveRemoteNotification:fetchCompletionHandler:)` :
```objc
- (void)handleExtrasFromPush:(NSDictionary *)userInfo {
NSLog(@"A push was received.");
if (userInfo !=nil && userInfo[@"IS_SERVER_EVENT"] !=nil && userInfo[@"CAMPAIGN_NAME"]!=nil) {
[[Appboy sharedInstance] logCustomEvent:@"IAM Trigger" withProperties:@{@"campaign_name": userInfo[@"CAMPAIGN_NAME"]}];
}
};
```
```swift
func handleExtras(userInfo: [AnyHashable : Any]) {
NSLog("A push was received");
if userInfo != nil && (userInfo["IS_SERVER_EVENT"] as? String) != nil && (userInfo["CAMPAIGN_NAME"] as? String) != nil {
Appboy.sharedInstance()?.logCustomEvent("IAM Trigger", withProperties: ["campaign_name": userInfo["CAMPAIGN_NAME"]])
}
}
```
Lorsque la notification push silencieuse est reçue, un événement enregistré par le SDK « in-app message trigger » sera enregistré par rapport au profil utilisateur. Notez que ces messages in-app ne se déclencheront que si la notification push silencieuse est reçue pendant que l’application se trouve au premier plan.
## Étape 2 : Créer une campagne de notification push
Créer une campagne de notification push silencieuse déclenchée par l’événement envoyé par le serveur. Pour plus de détails sur la création d'une campagne de notification push silencieuse, reportez-vous aux [notifications push silencieuses](https://www.braze.com/docs/fr/fr/developer_guide/platforms/legacy_sdks/ios/push_notifications/silent_push_notifications/).

La campagne de notification push doit inclure des extras de paires clé-valeur, qui indiquent que cette campagne de notification push est envoyée pour enregistrer un événement personnalisé SDK. Cet événement sera utilisé pour déclencher le message in-app.

Le code de la méthode `application(_:didReceiveRemoteNotification:fetchCompletionHandler:)` vérifie la clé `IS_SERVER_EVENT` et enregistrera un événement personnalisé SDK s’il existe.
Vous pouvez modifier le nom de l’événement ou les propriétés d’événement en envoyant la valeur souhaitée dans les options de paires clé-valeur de la charge utile de notification push. Lors de la journalisation de l’événement personnalisé, ces extras peuvent être utilisés comme paramètre du nom de l’événement ou comme propriété de l’événement.
## Étape 3 : Créer une campagne de communication in-app
Créez votre campagne de messages in-app visibles par l’utilisateur dans le tableau de bord de Braze. Cette campagne doit avoir une livraison par événement et être déclenchée par l’événement personnalisé enregistré à partir de la méthode `application(_:didReceiveRemoteNotification:fetchCompletionHandler:)`.
Dans l’exemple suivant, le message in-app spécifique à déclencher a été configuré en envoyant la propriété de l’événement dans le cadre de la première notification push silencieuse.

En raison d’un message push utilisé pour enregistrer un événement personnalisé, Braze devra stocker un jeton de notification push pour chaque utilisateur afin de permettre cette solution. Pour les utilisateurs d’iOS et d’Android, Braze ne stocke un jeton qu’à partir du point où un utilisateur a reçu un notification push de l’OS. Avant cela, l’utilisateur ne sera pas joignable par notification push, et la solution précédente ne sera pas possible.
# Message in-app dans un contrôleur de visualisation personnalisée pour iOS
Source: /docs/fr/developer_guide/platforms/legacy_sdks/ios/in-app_messaging/customization/custom_view_controller/index.md
**Warning:**
[AppboyKit](https://github.com/Appboy/appboy-ios-sdk) (also known as the Objective-C SDK) is no longer supported and has been replaced by the [Swift SDK](https://www.braze.com/docs/fr/fr/developer_guide/sdk_integration/?sdktab=swift). It will no longer receive new features, bug fixes, security updates, or technical support—however, messaging and analytics will continue to function as normal. To learn more, see [Introducing the New Braze Swift SDK](https://www.braze.com/resources/articles/introducing-the-new-braze-swift-sdk).
# Afficher les messages in-app dans un contrôleur de visualisation personnalisée
Les messages in-app peuvent également être affichés dans un contrôleur de visualisation personnalisée, que vous transmettez à Braze. Braze animera le message personnalisé dans et hors de l’application et traitera l'analyse du message in-app. Le contrôleur de visualisation doit répondre aux exigences suivantes :
- Il doit s’agir d’une sous-classe ou d’une instance de `ABKInAppMessageViewController`.
- La vue du contrôleur de visualisation renvoyé doit être une instance de `ABKInAppMessageView` ou de sa sous-classe.
La méthode suivante de délégation de l’interface utilisateur est appelée chaque fois qu’un message in-app est proposé à `ABKInAppMessageViewController` pour permettre à l’application de transmettre un contrôleur de visualisation personnalisée à Braze pour l’affichage de messages in-app :
```objc
- (ABKInAppMessageViewController *)inAppMessageViewControllerWithInAppMessage:(ABKInAppMessage *)inAppMessage;
```
```swift
func inAppMessageViewControllerWithInAppMessage(inAppMessage: ABKInAppMessage!) -> ABKInAppMessageViewController!
```
Nos [contrôleurs d'envoi de messages in-app](https://github.com/Appboy/appboy-ios-sdk/tree/master/AppboyUI/ABKInAppMessage/ViewControllers) sont personnalisables. Vous pouvez utiliser des sous-classes ou des catégories pour personnaliser l’affichage ou le comportement des messages in-app.
## Déclarations de méthode
Pour plus d’informations, voir les fichiers d’en-tête suivants :
- [`ABKInAppMessage.h`](https://github.com/Appboy/appboy-ios-sdk/blob/master/AppboyKit/include/ABKInAppMessage.h)
## Exemples d’implémentation
Voir [`ViewController.m`](https://github.com/Appboy/appboy-ios-sdk/blob/master/Samples/InAppMessage/BrazeInAppMessageSample/BrazeInAppMessageSample/ViewController.m) et [`CustomInAppMessageViewController.m`](https://github.com/Appboy/appboy-ios-sdk/blob/master/Samples/InAppMessage/BrazeInAppMessageSample/BrazeInAppMessageSample/) dans l'exemple d’application de messages in-app.
# Rejet de message in-app modal pour iOS
Source: /docs/fr/developer_guide/platforms/legacy_sdks/ios/in-app_messaging/customization/modal_dismissal/index.md
**Warning:**
[AppboyKit](https://github.com/Appboy/appboy-ios-sdk) (also known as the Objective-C SDK) is no longer supported and has been replaced by the [Swift SDK](https://www.braze.com/docs/fr/fr/developer_guide/sdk_integration/?sdktab=swift). It will no longer receive new features, bug fixes, security updates, or technical support—however, messaging and analytics will continue to function as normal. To learn more, see [Introducing the New Braze Swift SDK](https://www.braze.com/resources/articles/introducing-the-new-braze-swift-sdk).
# Rejet modal par toucher extérieur {#dismiss-modal-on-outside-tap}
La valeur par défaut est `NO`. Ce paramètre détermine si le message in-app modal sera rejeté lorsque l'utilisateur touche à l'extérieur du message in-app.
Pour activer les rejets par toucher extérieur, ajoutez un dictionnaire nommé `Braze` à votre fichier `Info.plist`. À l'intérieur du dictionnaire `Braze`, ajoutez la sous-entrée booléenne `DismissModalOnOutsideTap` et définissez la valeur sur `YES`, comme indiqué dans l'extrait de code suivant. Notez qu'avant la version 4.0.2 du SDK Braze pour iOS, la clé de dictionnaire `Appboy` doit être utilisée à la place de `Braze`.
```
BrazeDismissModalOnOutsideTapYES
```
Vous pouvez également activer la fonctionnalité lors de l'exécution en définissant `ABKEnableDismissModalOnOutsideTapKey` sur `YES` dans `appboyOptions`.
| `DismissModalOnOutsideTap` | Description |
|----------|-------------|
| `YES` | Les messages in-app modaux seront rejetés par toucher extérieur. |
| `NO` | Par défaut, les messages in-app modaux ne seront pas rejetés par toucher extérieur. |
{: .reset-td-br-1 .reset-td-br-2 aria-label="Dismiss modal on outside tap" }
# Paires clé-valeur de message in-app pour iOS
Source: /docs/fr/developer_guide/platforms/legacy_sdks/ios/in-app_messaging/customization/key_value_pairs/index.md
**Warning:**
[AppboyKit](https://github.com/Appboy/appboy-ios-sdk) (also known as the Objective-C SDK) is no longer supported and has been replaced by the [Swift SDK](https://www.braze.com/docs/fr/fr/developer_guide/sdk_integration/?sdktab=swift). It will no longer receive new features, bug fixes, security updates, or technical support—however, messaging and analytics will continue to function as normal. To learn more, see [Introducing the New Braze Swift SDK](https://www.braze.com/resources/articles/introducing-the-new-braze-swift-sdk).
# Compléments de paires clé-valeur
Les objets `ABKInAppMessage` peuvent porter des paires clé-valeur comme `extras`. Ces éléments sont spécifiés sur le tableau de bord lors de la création d’une campagne. Les paires clé-valeur peuvent être utilisées pour envoyer des données avec un message in-app pour un traitement ultérieur par votre application.
# Livraison de messages in-app pour iOS
Source: /docs/fr/developer_guide/platforms/legacy_sdks/ios/in-app_messaging/in-app_message_delivery/index.md
**Warning:**
[AppboyKit](https://github.com/Appboy/appboy-ios-sdk) (also known as the Objective-C SDK) is no longer supported and has been replaced by the [Swift SDK](https://www.braze.com/docs/fr/fr/developer_guide/sdk_integration/?sdktab=swift). It will no longer receive new features, bug fixes, security updates, or technical support—however, messaging and analytics will continue to function as normal. To learn more, see [Introducing the New Braze Swift SDK](https://www.braze.com/resources/articles/introducing-the-new-braze-swift-sdk).
# Livraison de messages in-app
## Types de déclencheurs
Notre produit de messages in-app vous permet de déclencher un affichage de messages in-app suite à plusieurs types d’événements différents : `Any Purchase`, `Specific Purchase`, `Session Start`, `Custom Event` et `Push Click`. En outre, les déclencheurs `Specific Purchase` et `Custom Event` contiennent des filtres de propriétés robustes.
**Note:**
Les messages in-app déclenchés ne fonctionnent qu’avec des événements personnalisés enregistrés via le SDK de Braze. Les messages in-app peuvent être déclenchés via l’API ou les événements API (comme les événements d’achat). Si vous travaillez avec iOS, consultez notre article sur le [suivi des événements personnalisés](https://www.braze.com/docs/fr/fr/developer_guide/analytics/logging_events/?tab=swift) pour en savoir plus.
## Sémantiques de livraison
Tous les messages in-app qu’un utilisateur peut recevoir sont délivrés à l’appareil de l’utilisateur au démarrage de session. Si deux messages in-app sont déclenchés par un seul événement, le message in-app doté de la priorité la plus élevée est affiché. Pour plus d’informations sur la sémantique de début de session du SDK, consultez notre documentation sur le [cycle de vie des sessions](https://www.braze.com/docs/fr/fr/developer_guide/platform_integration_guides/ios/analytics/tracking_sessions/#session-lifecycle). Dès la livraison, le SDK capture à l’avance les actifs à mettre immédiatement à disponibilité au moment du déclenchement, réduisant ainsi la latence d’affichage.
Lorsqu’un événement déclencheur comporte plus d’un message in-app éligible associé, seul le message in-app avec la priorité la plus élevée sera livré.
Il peut y avoir une latence pour les messages in-app qui s’affichent immédiatement à la livraison (démarrage de la session et lors du clic d’une notification push) en raison des actifs ne faisant pas l’objet d’une capture à l’avance.
## Intervalle de temps minimum entre les déclencheurs
Par défaut, nous limitons le débit des messages in-app à une fois toutes les 30 secondes afin de favoriser une expérience utilisateur de qualité.
Vous pouvez remplacer cette valeur par la clé `ABKMinimumTriggerTimeIntervalKey` dans le paramètre `appboyOptions` transmis à `startWithApiKey:inApplication:withLaunchOptions:withAppboyOptions:`. Définissez `ABKMinimumTriggerTimeIntervalKey` sur la valeur d’entier souhaitée comme durée minimale en secondes entre les messages in-app :
```objc
// Sets the minimum trigger time interval to 5 seconds
[Appboy startWithApiKey:@"YOUR-API-KEY"
inApplication:application
withLaunchOptions:options
withAppboyOptions:@{ ABKMinimumTriggerTimeIntervalKey : @(5) }];
```
```swift
Appboy.start(withApiKey: "YOUR-API-KEY", in:application, withLaunchOptions:launchOptions, withAppboyOptions:[ABKMinimumTriggerTimeIntervalKey : 5])
```
## Absence de déclencheur correspondant
Lorsque Braze ne trouve pas de déclencheur correspondant à un événement particulier, il appelle la méthode [noMatchingTriggerForEvent:name:](https://appboy.github.io/appboy-ios-sdk/docs/protocol_a_b_k_in_app_message_controller_delegate-p.html#ab4d57b13c51545d487227945a37d4ab8) du [`ABKInAppMessageControllerDelegate`](https://appboy.github.io/appboy-ios-sdk/docs/protocol_a_b_k_in_app_message_controller_delegate-p.html). Implémentez cette méthode dans votre classe en adoptant le protocole de délégation pour gérer ce scénario.
## Livraison locale de messages in-app
### La pile de messages in-app
#### Affichage des messages in-app
Lorsqu’un utilisateur est éligible à la réception d’un message in-app, le `ABKInAppMessageController` recevra le dernier message in-app sur la pile de messages in-app. La pile ne conserve que les messages in-app stockés en mémoire et est effacée entre les lancements de l’application depuis le mode suspendu.
**Important:**
N’affichez pas les messages in-app lorsque le clavier est affiché à l’écran, car le rendu n’est pas défini dans ce cas.
#### Ajout de messages in-app à la pile
Les utilisateurs peuvent recevoir un message in-app dans les situations suivantes :
- Un événement déclencheur de message in-app est déclenché
- Événement de début de session
- L’application est ouverte à partir d’une notification push
Les messages in-app déclenchés sont placés sur la pile lorsque leur événement déclencheur est déclenché. Si plusieurs messages in-app sont dans la pile et en attente d’être affichés, Braze affichera le message in-app le plus récemment reçu (dernier entré, premier sorti).
#### Retour des messages in-app à la pile
Un message in-app déclenché peut être renvoyé à la pile dans les situations suivantes :
- Le message in-app est déclenché lorsque l’application est en arrière-plan.
- Un autre message in-app est actuellement visible.
- La [méthode de délégation de l’IU](https://www.braze.com/docs/fr/fr/developer_guide/platform_integration_guides/ios/in-app_messaging/customization/setting_delegates/#in-app-message-delegate) `beforeInAppMessageDisplayed:withKeyboardIsUp:` obsolète n’a pas été implémentée et le clavier est actuellement affiché.
- La [méthode de délégation](https://www.braze.com/docs/fr/fr/developer_guide/platform_integration_guides/ios/in-app_messaging/customization/setting_delegates/#core-in-app-message-delegate) `beforeInAppMessageDisplayed:` ou la [méthode de délégation de l’IU](https://www.braze.com/docs/fr/fr/developer_guide/platform_integration_guides/ios/in-app_messaging/customization/setting_delegates/#in-app-message-delegate) `beforeInAppMessageDisplayed:withKeyboardIsUp:` obsolète a renvoyé `ABKDisplayInAppMessageLater`.
#### Écarter les messages in-app
Un message in-app déclenché sera écarté dans les situations suivantes :
- La [méthode de délégation](https://www.braze.com/docs/fr/fr/developer_guide/platform_integration_guides/ios/in-app_messaging/customization/setting_delegates/#core-in-app-message-delegate) `beforeInAppMessageDisplayed:` ou la [méthode de délégation de l’IU](https://www.braze.com/docs/fr/fr/developer_guide/platform_integration_guides/ios/in-app_messaging/customization/setting_delegates/#in-app-message-delegate) `beforeInAppMessageDisplayed:withKeyboardIsUp:` obsolète a renvoyé `ABKDiscardInAppMessage`.
- L’actif (fichier image ou ZIP) du message in-app n’a pas pu être téléchargé.
- Le message in-app est prêt à être affiché, mais a dépassé le délai d’expiration.
- L’orientation du appareil ne correspond pas à l’orientation du message in-app déclenché.
- Le message in-app est un message in-app complet, mais n’a pas d’image.
- Le message in-app est un message in-app modal uniquement composé d’image, mais n’a pas d’image.
#### Mettre manuellement en file d’attente l’affichage des messages in-app
Si vous souhaitez afficher un message in-app à d’autres moments dans votre application, vous pouvez afficher manuellement le message in-app le plus haut sur la pile en employant la méthode suivante :
```objc
[[Appboy sharedInstance].inAppMessageController displayNextInAppMessage];
```
```swift
Appboy.sharedInstance()!.inAppMessageController.displayNextInAppMessage()
```
### Création et affichage de messages in-app en temps réel
Les messages in-app peuvent également être créés localement dans l’application et affichés via Braze. Ceci est particulièrement utile pour afficher les messages que vous souhaitez déclencher dans l’application en temps réel. Braze ne prend pas en charge les analyses des messages in-app créés localement.
```objc
ABKInAppMessageSlideup *customInAppMessage = [[ABKInAppMessageSlideup alloc] init];
customInAppMessage.message = @"YOUR_CUSTOM_SLIDEUP_MESSAGE";
customInAppMessage.duration = 2.5;
customInAppMessage.extras = @{@"key" : @"value"};
[[Appboy sharedInstance].inAppMessageController addInAppMessage:customInAppMessage];
```
```swift
let customInAppMessage = ABKInAppMessageSlideup.init()
customInAppMessage.message = "YOUR_CUSTOM_SLIDEUP_MESSAGE"
customInAppMessage.duration = 2.5
customInAppMessage.extras = ["key": "value"]
Appboy.sharedInstance()!.inAppMessageController.add(customInAppMessage)
```
# Invite d'évaluation personnalisée sur l'App Store
Source: /docs/fr/developer_guide/platforms/legacy_sdks/ios/in-app_messaging/custom_app_store_review_prompt/index.md
**Warning:**
[AppboyKit](https://github.com/Appboy/appboy-ios-sdk) (also known as the Objective-C SDK) is no longer supported and has been replaced by the [Swift SDK](https://www.braze.com/docs/fr/fr/developer_guide/sdk_integration/?sdktab=swift). It will no longer receive new features, bug fixes, security updates, or technical support—however, messaging and analytics will continue to function as normal. To learn more, see [Introducing the New Braze Swift SDK](https://www.braze.com/resources/articles/introducing-the-new-braze-swift-sdk).
# Invite d'évaluation personnalisée sur l'App Store {#custom-app-store-review-prompt}
**Note:**
Une fois que vous avez mis en œuvre cette invite, Braze cesse de suivre automatiquement les impressions, et vous devez enregistrer vos propres [analyses](https://www.braze.com/docs/fr/fr/developer_guide/platform_integration_guides/ios/in-app_messaging/customization/handing_in_app_display/#logging-impressions-and-clicks).
Créer une campagne pour demander aux utilisateurs un avis sur l'App Store est une utilisation courante des messages in-app.
Commencez par définir le [délégué de message in-app](#in-app-message-controller-delegate) dans votre application. Ensuite, implémentez la méthode de délégation suivante pour désactiver le message d'évaluation par défaut de l'App Store :
```objc
- (ABKInAppMessageDisplayChoice)beforeInAppMessageDisplayed:(ABKInAppMessage *)inAppMessage {
if (inAppMessage.extras != nil && inAppMessage.extras[@"Appstore Review"] != nil) {
[[UIApplication sharedApplication] openURL:inAppMessage.uri options:@{} completionHandler:nil];
return ABKDiscardInAppMessage;
} else {
return ABKDisplayInAppMessageNow;
}
}
```
```swift
func before(inAppMessageDisplayed inAppMessage: ABKInAppMessage) -> ABKInAppMessageDisplayChoice {
if inAppMessage.extras?["Appstore Review"] != nil && inAppMessage.uri != nil {
UIApplication.shared.open(inAppMessage.uri!, options: [:], completionHandler: nil)
return ABKInAppMessageDisplayChoice.discardInAppMessage
} else {
return ABKInAppMessageDisplayChoice.displayInAppMessageNow
}
}
```
Dans votre code de traitement des liens profonds, ajoutez le code suivant pour traiter le lien profond `{YOUR-APP-SCHEME}:appstore-review`. Notez que vous devrez importer `StoreKit` pour utiliser `SKStoreReviewController` :
```objc
- (BOOL)application:(UIApplication *)app openURL:(NSURL *)url options:(NSDictionary *)options {
NSString *urlString = url.absoluteString.stringByRemovingPercentEncoding;
if ([urlString isEqualToString:@"{YOUR-APP-SCHEME}:appstore-review"]) {
[SKStoreReviewController requestReview];
return YES;
}
// Other deep link handling code…
}
```
```swift
func application(_ app: UIApplication, open url: URL, options: [UIApplicationOpenURLOptionsKey : Any] = [:]) -> Bool {
let urlString = url.absoluteString.removingPercentEncoding
if (urlString == "{YOUR-APP-SCHEME}:appstore-review") {
SKStoreReviewController.requestReview()
return true;
}
// Other deep link handling code…
}
```
Créez ensuite une campagne de messages in-app avec les éléments suivants :
- La paire clé-valeur `"Appstore Review" : "true"`
- Le comportement au clic défini sur « Deep Link Into App », en utilisant le lien profond `{YOUR-APP-SCHEME}:appstore-review`.
**Tip:**
Apple limite les invites d'évaluation de l'App Store à un maximum de trois (3) fois par an pour chaque utilisateur. Votre campagne doit donc être [limitée en fréquence](https://www.braze.com/docs/fr/fr/user_guide/messaging/messaging_fundamentals/frequency_capping/) à trois fois par an et par utilisateur.
Les utilisateurs peuvent désactiver les invites d'évaluation de l'App Store. Par conséquent, votre invite d'évaluation personnalisée ne doit pas promettre qu'une invite d'évaluation native de l'App Store s'affichera, ni demander directement un avis.
# Guide d’implémentation des messages in-app pour iOS (facultatif)
Source: /docs/fr/developer_guide/platforms/legacy_sdks/ios/in-app_messaging/implementation_guide/index.md
**Warning:**
[AppboyKit](https://github.com/Appboy/appboy-ios-sdk) (also known as the Objective-C SDK) is no longer supported and has been replaced by the [Swift SDK](https://www.braze.com/docs/fr/fr/developer_guide/sdk_integration/?sdktab=swift). It will no longer receive new features, bug fixes, security updates, or technical support—however, messaging and analytics will continue to function as normal. To learn more, see [Introducing the New Braze Swift SDK](https://www.braze.com/resources/articles/introducing-the-new-braze-swift-sdk).
**Important:**
Vous recherchez le guide d’intégration de base du développeur de messages in-app ? Veuillez trouver [here](https://www.braze.com/docs/fr/fr/developer_guide/platforms/legacy_sdks/ios/in-app_messaging/overview/).
# Guide d’implémentation de la messagerie in-app
> Ce Guide d’implémentation avancé optionnel couvre les considérations du code des messages in-app, trois cas d’utilisation personnalisés créés par notre équipe et les extraits de code qui l’accompagnent. Visitez notre dépôt de démonstration Braze [ici](https://github.com/braze-inc/braze-growth-shares-ios-demo-app) ! Ce guide d’implémentation est centré sur une implémentation Swift, mais des extraits de code Objective-C sont fournis aux personnes intéressées. Vous recherchez des implémentations HTML ? Jetez un coup d'œil à notre [référentiel de modèles HTML](https://github.com/braze-inc/in-app-message-templates)!
## Considérations du code
Le guide suivant propose une intégration de développeur personnalisée facultative à utiliser en plus des messages in-app par défaut. Les contrôleurs de vue personnalisés sont inclus dans chaque cas d’utilisation, ils offrent des exemples pour étendre la fonctionnalité et personnaliser nativement l’apparence et la convivialité de vos messages in-app.
### Sous-classes ABKinAppMessage
L’extrait de code suivant est une méthode de délégation de l’interface utilisateur du SDK Braze qui détermine la vue de sous-classe avec laquelle vous souhaitez remplir votre message in-app. Nous couvrons une implémentation de base dans ce guide et montrons comment les sous-classes complètes, coulissantes et modales peuvent être implémentées de manière captivante. Notez que si vous souhaitez configurer votre contrôleur de visualisation personnalisée, vous devez configurer toutes les autres sous-classes de messages in-app. Après avoir bien compris les concepts derrière la sous-classe, consultez nos [cas d'utilisation](#sample-use-cases) pour commencer à implémenter des sous-classes de messagerie dans l'application.
**Sous-classes ABKinAppMessage**
```swift
extension AppboyManager: ABKInAppMessageUIDelegate {
func inAppMessageViewControllerWith(_ inAppMessage: ABKInAppMessage) -> ABKInAppMessageViewController {
switch inAppMessage {
case is ABKInAppMessageSlideup:
return slideupViewController(inAppMessage: inAppMessage) //Custom Method
case is ABKInAppMessageModal:
return modalViewController(inAppMessage: inAppMessage) //Custom Method
case is ABKInAppMessageFull:
return fullViewController(inAppMessage: inAppMessage) //Custom Method
case is ABKInAppMessageHTML:
return ABKInAppMessageHTMLViewController(inAppMessage: inAppMessage)
default:
return ABKInAppMessageViewController(inAppMessage: inAppMessage)
}
}
}
```
**Sous-classes ABKinAppMessage**
```objc
- (ABKInAppMessageViewController *)inAppMessageViewControllerWithInAppMessage:(ABKInAppMessage *)inAppMessage {
if ([inAppMessage isKindOfClass:[ABKInAppMessageSlideup class]]) {
return [self slideupViewControllerWithInAppMessage:inAppMessage]; //Custom Method
} else if ([inAppMessage isKindOfClass:[ABKInAppMessageModal class]]) {
return [self modalViewControllerWithInAppMessage:inAppMessage]; //Custom Method
} else if ([inAppMessage isKindOfClass:[ABKInAppMessageFull class]]) {
return [self fullViewControllerWithInAppMessage:inAppMessage]; //Custom Method
} else if ([inAppMessage isKindOfClass:[ABKInAppMessageHTML class]]) {
return [[ABKInAppMessageHTMLViewController alloc] initWithInAppMessage:inAppMessage];
} else {
return [[ABKInAppMessageViewController alloc] initWithInAppMessage:inAppMessage];
}
}
```
## Cas d’utilisation
Nous avons fourni trois cas d'utilisation ci-dessous. Chaque cas d’utilisation offre une explication détaillée, des extraits de code pertinents et un aperçu de la manière dont les messages in-app peuvent être examinés et utilisés dans le tableau de bord de Braze :
- [Message in-app personnalisé à glissement vers le haut](#custom-slide-up-in-app-message)
- [Message in-app modal personnalisé](#custom-modal-in-app-message)
- [Message in-app complet personnalisé](#custom-full-in-app-message)
### Message in-app personnalisé à glissement vers le haut
{: style="float:right;max-width:45%;margin-left:15px;border:0;"}
Lors de la création de votre message in-app à glissement vers le haut, vous remarquerez peut-être que vous ne pouvez pas modifier l’emplacement du message à l’aide des méthodes par défaut. Une telle modification est rendue possible en sous-classant le `ABKInAppMessageSlideupViewController` et en remplaçant la variable `offset` par votre propre variable personnalisée. L’image à droite montre un exemple de la façon dont cela peut être utilisé pour ajuster vos messages in-app à glissement vers le haut.
Visitez le [`SlideFromBottomViewController`](https://github.com/braze-inc/braze-growth-shares-ios-demo-app/blob/master/Braze-Demo/ViewController/In-App-Messages/SlideFromBottomViewController.swift) pour commencer.
#### Ajouter un comportement supplémentaire à notre interface utilisateur par défaut
**Mettre à jour la variable `offset`**
Mettre à jour la variable `offset` et définissez votre propre décalage pour répondre à vos besoins.
```swift
func setSlideConstraint() {
offset = 0
}
```
```swift
override var offset: CGFloat {
get {
return super.offset
}
set {
super.offset = newValue + adjustedOffset
}
}
```
**Version 3.34.0 or earlier**
**Mettre à jour la variable `slideConstraint`**
La variable publique `slideConstraint` provient de la super classe `ABKInAppMessageSlideupViewController`.
```swift
func setSlideConstraint() {
slideConstraint?.constant = bottomSpacing
}
```
```swift
private var bottomSpacing: CGFloat {
return AppboyManager.shared.activeApplicationViewController.topMostViewController().view.safeAreaInsets.bottom
}
```
Visitez le dépôt de démonstration Braze pour la fonction [`topMostViewController()`](https://github.com/braze-inc/braze-growth-shares-ios-demo-app/blob/master/Braze-Demo/Utils/UIViewController_Util.swift#L17).
**Mettre à jour la variable `offset`**
Mettre à jour la variable `offset` et définissez votre propre décalage pour répondre à vos besoins.
```objc
- (void)setOffset {
self.offset = 0;
}
```
```objc
- (CGFloat)offset {
return [super offset];
}
- (void)setOffset:(CGFloat)offset {
[super setOffset:offset + [self adjustedOffset]];
}
```
**Version 3.34.0 or earlier**
**Mettre à jour la variable `slideConstraint`**
La variable publique `slideConstraint` provient de la super classe `ABKInAppMessageSlideupViewController`.
```objc
- (void)self.setSlideConstraint:(NSLayoutConstraint *)slideConstraint {
slideConstraint.constant = bottomSpacing;
}
```
```objc
- (CGFloat)bottomSpacing {
return [AppboyManager shared].activeApplicationViewController.topMostViewController.view.safeAreaInsets.bottom;
}
```
**Remplacer et définir une contrainte personnalisée**
Remplacez `beforeMoveInAppMessageViewOnScreen()` et définissez votre propre valeur de contrainte personnalisée pour répondre à vos besoins. La valeur originale est définie dans la superclasse.
```swift
override func beforeMoveInAppMessageViewOnScreen() {
super.beforeMoveInAppMessageViewOnScreen()
setOffset()
}
```
**Version 3.34.0 or earlier**
```swift
override func beforeMoveInAppMessageViewOnScreen() {
setSlideConstraint()
}
```
**Remplacer et définir une contrainte personnalisée**
Remplacez `beforeMoveInAppMessageViewOnScreen()` et définissez votre propre valeur de contrainte personnalisée pour répondre à vos besoins. La valeur originale est définie dans la superclasse.
```objc
- (void)beforeMoveInAppMessageViewOnScreen {
[super beforeMoveInAppMessageViewOnScreen];
[self setOffset];
}
```
**Version 3.34.0 or earlier**
```objc
- (void)beforeMoveInAppMessageViewOnScreen {
[self setSlideConstraint:self.slideConstraint];
}
```
**Modifier la contrainte pour l'orientation de l'appareil**
Ajustez la valeur respective dans `viewWillTransition()`, car la sous-classe assume la responsabilité de maintenir la contrainte synchronisée lors des changements de mise en page.
### Message in-app modal personnalisé
{: style="float:right;max-width:23%;margin-left:15px;border:0;"}
Un `ABKInAppMessageModalViewController` peut être sous-classé pour tirer parti de `UIPickerView` offrant des moyens attrayants de collecter de précieux attributs d’utilisateur. Le message in-app modal personnalisé vous permet d’utiliser le contenu connecté ou toute liste disponible pour afficher et recueillir des attributs à partir d’une liste dynamique d’éléments.
Vous pouvez interjeter vos propres vues dans des messages in-app sous-classés. Cet exemple illustre comment un `UIPickerView` peut être utilisé pour étendre la fonctionnalité d’un `ABKModalInAppMessageViewController`.
Visitez le [ModalPickerViewController](https://github.com/braze-inc/braze-growth-shares-ios-demo-app/blob/master/Braze-Demo/ViewController/In-App-Messages/ModalPickerViewController/ModalPickerViewController.swift) pour commencer.
#### Configuration du tableau de bord
Pour configurer un message in-app modal dans le tableau de bord, vous devez fournir une liste d’éléments formatés comme une chaîne séparée par des virgules. Dans notre exemple, nous utilisons le contenu connecté pour extraire une liste de noms d’équipes JSON et les formater en conséquence.

Dans les paires clé-valeur, fournissez un `attribute_key` ; cette clé, ainsi que la valeur sélectionnée par l’utilisateur, seront enregistrées dans son profil d’utilisateur en tant qu’attribut personnalisé. Votre logique d’affichage personnalisé doit gérer les attributs utilisateur envoyés à Braze.
Le dictionnaire `extras` dans l’objet `ABKInAppMessage` vous permet de rechercher une clé `view_type` (le cas échéant) qui signale la vue correcte à afficher. Il est important de noter que les messages in-app sont configurés par message, de sorte que les vues modales personnalisées et par défaut puissent fonctionner harmonieusement.
{: style="max-width:65%;"}
**Utilisation de `view_type` pour le comportement d'affichage de l'interface utilisateur**
Interroger le dictionnaire `extras` pour votre `view_type` pour charger le contrôleur de visualisation sous-classé souhaité.
```swift
func modalViewController(inAppMessage: ABKInAppMessage) -> ABKInAppMessageModalViewController {
switch inAppMessage.extras?[InAppMessageKey.viewType.rawValue] as? String {
case InAppMessageViewType.picker.rawValue:
return ModalPickerViewController(inAppMessage: inAppMessage)
default:
return ABKInAppMessageModalViewController(inAppMessage: inAppMessage)
}
}
```
**Utilisation de `view_type` pour le comportement d'affichage de l'interface utilisateur**
Interroger le dictionnaire `extras` pour votre `view_type` pour charger le contrôleur de visualisation sous-classé souhaité.
```objc
- (ABKInAppMessageModalViewController *)modalViewControllerWithInAppMessage:(ABKInAppMessage *)inAppMessage {
InAppMessageData *inAppMessageData = [[InAppMessageData alloc] init];
NSString *key = [inAppMessageData rawValueForInAppMessageKey:InAppMessageKeyViewType];
NSString *viewType = [inAppMessageData rawValueForInAppMessageViewType:InAppMessageViewTypePicker];
if ([inAppMessage.extras objectForKey:key] && [inAppMessage.extras[key] isEqualToString:viewType]) {
return [[ModalViewController alloc] initWithInAppMessage:inAppMessage];
} else {
return [[ABKInAppMessageModalViewController alloc] initWithInAppMessage:inAppMessage];
}
}
```
**Remplacer et fournir une vue personnalisée**
Remplacez `loadView()` et définissez votre propre affichage personnalisé pour répondre à vos besoins.
```swift
override var nibname: String{
return "ModalPickerViewController"
}
override func loadView() {
Bundle.main.loadNibNamed(nibName, owner: self, options: nil)
}
```
**Remplacer et fournir une vue personnalisée**
Remplacez `loadView()` et définissez votre propre affichage personnalisé pour répondre à vos besoins.
```objc
- (void)loadView {
NSString *nibName = @"ModalPickerViewController";
[[NSBundle mainBundle] loadNibNamed:nibName owner:self options:nil];
}
```
**Formater les variables pour une liste dynamique**
Avant de recharger les composants `UIPickerView`, la variable de message `inAppMessage` sort sous forme de _chaîne de caractères_. Ce message doit être formaté comme un ensemble d’éléments à afficher correctement. Par exemple, cela peut être effectué en utilisant [`components(separatedBy: ", ")`](https://developer.apple.com/documentation/foundation/nsstring/1413214-components).
```swift
override func viewDidLoad() {
super.viewDidLoad()
items = inAppMessage.message.separatedByCommaSpaceValue
pickerView.reloadAllComponents()
}
```
**Formater les variables pour PickerView**
Avant de recharger les composants `UIPickerView`, la variable de message `inAppMessage` sort sous forme de _chaîne de caractères_. Ce message doit être formaté comme un ensemble d’éléments à afficher correctement. Par exemple, cela peut être effectué en utilisant [`componentsSeparatedByString`](https://developer.apple.com/documentation/foundation/nsstring/1413214-componentsseparatedbystring?language=objc).
```objc
- (void)viewDidLoad {
[super viewDidLoad];
self.items = [[NSArray alloc] initWithArray:[self.inAppMessage.message componentsSeparatedByString:@", "]];
[self.pickerView reloadAllComponents];
}
```
**Attribuer un attribut personnalisé**
À l’aide de la sous-classe, après qu’un utilisateur appuie sur Envoyer, transmettez l’attribut avec sa valeur sélectionnée correspondante à Braze.
```swift
@IBAction func primaryButtonTapped(_ sender: Any) {
guard let item = selectedItem, !item.isEmpty, let attributeKey = inAppMessage.extras?[InAppMessageKey.attributeKey.rawValue] as? String else { return }
AppboyManager.shared.setCustomAttributeWithKey(attributeKey, andStringValue: item)
}
```
**Attribuer un attribut personnalisé**
À l’aide de la sous-classe, après qu’un utilisateur appuie sur Envoyer, transmettez l’attribut avec sa valeur sélectionnée correspondante à Braze.
```objc
- (IBAction)primaryButtonTapped:(id)sender {
InAppMessageData *inAppMessageData = [[InAppMessageData alloc] init];
NSString *key = [inAppMessageData rawValueForInAppMessageKey:InAppMessageKeyAttributeKey];
if (self.selectedItem.length > 0 && [self.inAppMessage.extras objectForKey:key]) {
[[AppboyManager shared] setCustomAttributeWithKey:self.inAppMessage.extras[key] andStringValue:self.selectedItem];
}
}
```
**Tip:**
Intéressé par l’utilisation de nos messages in-app modaux personnalisés pour partager des vidéos sur FaceTime ? Consultez notre [guide d’implémentation](https://www.braze.com/docs/fr/fr/developer_guide/platforms/legacy_sdks/ios/in-app_messaging/implementation_guide/shareplay/) des messages in-app SharePlay.
### Message in-app complet personnalisé
{: style="float:right;max-width:23%;margin-left:15px;border:0;"}
Utilisez des messages in-app complets personnalisés pour créer des invites interactives et conviviales pour recueillir de précieuses données client. L’exemple à droite montre une implémentation du message in-app personnalisé complet réinventée comme un primer push interactif avec des préférences de notification.
Visitez le [`FullListViewController`](https://github.com/braze-inc/braze-growth-shares-ios-demo-app/blob/master/Braze-Demo/ViewController/In-App-Messages/FullListViewController/FullListViewController.swift) pour commencer.
#### Configuration du tableau de bord
Pour configurer un message in-app complet dans le tableau de bord, vous devez fournir une liste de vos balises formatées en tant que chaîne séparée par des virgules.
Dans les paires clé-valeur, fournissez un `attribute_key` ; cette clé, ainsi que la valeur sélectionnée par l’utilisateur, seront enregistrées dans son profil d’utilisateur en tant qu’attribut personnalisé. Votre logique d’affichage personnalisé doit gérer les attributs utilisateur envoyés à Braze.
{: style="max-width:65%;"}
#### Interception des touches de message in-app
{: style="float:right;max-width:30%;margin-left:10px;border:0"}
L’interception des touchés de message in-app est essentielle pour que les boutons du message in-app personnalisé complet fonctionnent correctement. Par défaut, le `ABKInAppMessageImmersive` ajoute un outil de reconnaissance des gestes tactiles au message, afin que les utilisateurs puissent ignorer les messages sans boutons.. En ajoutant un `UISwitch` ou un bouton à la hiérarchie de la vue`UITableViewCell`, les touches sont maintenant gérées par notre affichage personnalisé. À partir d’iOS 6, les boutons et autres commandes ont la priorité lors de l’utilisation de reconnaissances de gestes, ce qui permet à notre message in-app personnalisé de fonctionner comme il se doit.
# Guide d'implémentation des messages in-app SharePlay
Source: /docs/fr/developer_guide/platforms/legacy_sdks/ios/in-app_messaging/implementation_guide/shareplay/index.md
**Warning:**
[AppboyKit](https://github.com/Appboy/appboy-ios-sdk) (also known as the Objective-C SDK) is no longer supported and has been replaced by the [Swift SDK](https://www.braze.com/docs/fr/fr/developer_guide/sdk_integration/?sdktab=swift). It will no longer receive new features, bug fixes, security updates, or technical support—however, messaging and analytics will continue to function as normal. To learn more, see [Introducing the New Braze Swift SDK](https://www.braze.com/resources/articles/introducing-the-new-braze-swift-sdk).
# Guide d'implémentation des messages in-app SharePlay {#shareplay-in-app-message-implementation-guide}
> SharePlay est une fonctionnalité qui permet aux utilisateurs iOS 15 FaceTime de bénéficier d'une expérience multimédia partagée sur leurs appareils, offrant une synchronisation audio et vidéo en temps réel. SharePlay est un excellent moyen pour les utilisateurs de partager du contenu avec leurs amis et leur famille, offrant aux clients Braze une possibilité supplémentaire pour le contenu vidéo et des opportunités de présenter votre application à de nouveaux utilisateurs.
{: style="border:0;margin-top:10px;"}
## Aperçu {#overview}
Le nouveau framework `GroupActivities` publié par Apple dans le cadre de la mise à jour iOS 15 vous permet de tirer parti de FaceTime en intégrant SharePlay dans vos applications à l'aide des messages in-app Braze.
{: style="float:right;max-width:30%;margin-left:15px;margin-top:10px;"}
Lorsque les utilisateurs lancent une vidéo SharePlay dans un appel FaceTime, un bouton « Open » (Ouvrir) apparaît en haut de l'écran de tout le monde. Une fois ouvert, l'audio et la vidéo sont synchronisés sur tous les appareils compatibles, ce qui permet aux utilisateurs de regarder des vidéos ensemble en temps réel. Les personnes qui n'ont pas téléchargé l'application seront redirigées vers l'App Store.
**Lecture multimédia synchronisée**
Avec la lecture multimédia synchronisée, si une personne met en pause la vidéo SharePlay, elle sera mise en pause sur tous les appareils.
{: style="border:0"}
## Intégration {#integration}
Le message in-app utilisé dans cette intégration est un contrôleur de vue modal de message in-app sous-classé. Un guide de configuration est disponible dans le [guide d'implémentation](https://www.braze.com/docs/fr/fr/developer_guide/platforms/legacy_sdks/ios/in-app_messaging/implementation_guide/) du cas d'utilisation avancé des messages in-app iOS. Avant de procéder à l'intégration, assurez-vous d'ajouter le droit `GroupActivities` à votre projet Xcode.
**Important:**
Nous vous recommandons d'ouvrir la [documentation Apple SharePlay](https://developer.apple.com/documentation/avfoundation/media_playback_and_selection/supporting_coordinated_media_playback) côte à côte avec ce guide pour réaliser l'intégration.
### Étape 1 : Remplacer et charger le XIB {#step-1-overriding-and-loading-xib}
```swift
override var nibName: String {
return "ModalVideoViewController"
}
/// Overriding loadView() from ABKInAppMessageModalViewController to provide our own view for the in-app message
override func loadView() {
Bundle.main.loadNibNamed(nibName, owner: self, options: nil)
}
```
### Étape 2 : Configurer AVPlayer pour les messages in-app {#step-2-configure-avplayer-for-in-app-messages}
Les messages in-app peuvent lire des vidéos nativement avec un travail de développement léger. Vous avez ainsi accès à toutes les fonctionnalités d'`AVPlayerVideoController`, comme SharePlay. Le message in-app utilisé pour cet exemple est un `ABKInAppMessageModalViewController` sous-classé qui dispose d'une vue personnalisée pour intégrer un lecteur vidéo natif.
```swift
func configureVideoPlayer() {
guard let urlString = inAppMessage.extras?["video_url"] as? String,
let url = URL(string: urlString) else { return }
let videoTitle = inAppMessage.extras?["video_title"] as? String
mediaItem = MediaItem(title: videoTitle ?? "Video Content", url: url)
let asset = AVAsset(url: url)
let playerItem = AVPlayerItem(asset: asset)
player.replaceCurrentItem(with: playerItem)
playerViewController.player = player
addChild(playerViewController)
videoPlayerContainer.addSubview(playerViewController.view)
playerViewController.didMove(toParent: self)
}
```
#### Configuration du tableau de bord {#dashboard-configuration}
**Paires clé-valeur** : Le fichier vidéo doit être défini dans les paires clé-valeur du message in-app et ne peut pas être attaché à l'élément multimédia lui-même. Vous pouvez également ajouter une vérification de validité d'URL dans `beforeInAppMessageDisplayed` comme garde-fou avant d'afficher le contenu.
**Déclenchement** : Le message in-app doit être éligible pour tous les utilisateurs avec la rééligibilité activée. Pour cela, définissez deux déclencheurs : un déclencheur par défaut pour lancer le message et un autre pour le lancer lorsqu'il est initié depuis SharePlay. Les utilisateurs ne disposant pas d'iOS 15 ne pourront voir les messages que localement.
**Important:**
Tenez compte de tous les autres messages in-app déclenchés au démarrage de la session qui pourraient entrer en conflit les uns avec les autres.
### Étape 3 : Créer une activité de visionnage en groupe {#step-3-create-group-watching-activity}
Créez un objet conforme au protocole `GroupActivity`. L'objet constituera les métadonnées de la `GroupSession` partagée tout au long du cycle de vie SharePlay.
```swift
struct MediaItem: Hashable, Codable {
let title: String
let url: URL
}
@available(iOS 15, *)
struct MediaItemActivity: GroupActivity {
static let activityIdentifier = "com.book-demo.GroupWatching"
let mediaItem: MediaItem
var metadata: GroupActivityMetadata {
var metadata = GroupActivityMetadata()
metadata.type = .watchTogether
metadata.title = mediaItem.title
metadata.fallbackURL = mediaItem.url
return metadata
}
}
```
#### Préparer la lecture {#prepare-to-play}
Lorsque vous préparez la lecture de l'élément multimédia, chaque activité de groupe possède trois états pour `prepareForActivation()` :
- `.activationDisabled` — visionnage individuel
- `.activationPreferred` — visionnage partagé
- `.cancelled` — ignorer et gérer de manière élégante
Lorsque l'état revient en tant que `activationPreferred`, c'est votre signal pour activer le reste du cycle de vie de l'activité de groupe.
{: style="border:0;"}
### Étape 4 : Lancer le message in-app depuis l'API SharePlay {#step-4-launch-in-app-message-from-shareplay-api}
L'API `GroupActivities` détermine si une vidéo est présente. Si c'est le cas, vous devez déclencher l'événement personnalisé pour lancer votre message in-app compatible SharePlay. Le `CoordinationManager` est responsable des changements d'état de SharePlay, par exemple lorsque le ou les utilisateurs quittent ou rejoignent l'appel.
```swift
private var subscriptions = Set()
private var selectedMediaItem: MediaItem? {
didSet {
// Ensure the UI selection always represents the currently playing media.
guard let _ = selectedMediaItem else { return }
if !BrazeManager.shared.inAppMessageCurrentlyVisible {
BrazeManager.shared.logCustomEvent("SharePlay Event")
}
}
}
private func launchVideoPlayerIfNecessary() {
CoordinationManager.shared.$enqueuedMediaItem
.receive(on: DispatchQueue.main)
.compactMap { $0 }
.assign(to: \.selectedMediaItem, on: self)
.store(in: &subscriptions)
}
```
### Étape 5 : Quitter une session de groupe lors de la fermeture du message in-app {#step-5-leaving-a-group-session-on-in-app-message-dismissal}
Lorsque le message in-app est fermé, c'est le moment approprié pour quitter la session SharePlay et abandonner l'objet de session.
```swift
override func viewDidDisappear(_ animated: Bool) {
super.viewDidDisappear(animated)
groupSession?.leave()
CoordinationManager.shared.leave()
}
class CoordinationManager() {
...
// Published values that the player, and other UI items, observe.
@Published var enqueuedMediaItem: MediaItem?
@Published var groupSession: GroupSession?
// Clear activity when the user leaves
func leave() {
groupSession = nil
enqueuedMediaItem = nil
}
...
}
```
### Configurer la visibilité du bouton SharePlay {#configure-shareplay-button-visibility}
Il est recommandé de masquer ou d'afficher dynamiquement tout indicateur SharePlay. Utilisez la variable `isEligibleForGroupSession` pour observer si l'utilisateur est actuellement en appel FaceTime ou non. S'il est en appel FaceTime, un bouton doit être visible pour partager la vidéo sur les appareils compatibles dans le chat. La première fois que l'utilisateur lance SharePlay, une invite apparaîtra sur l'appareil d'origine pour sélectionner les options. Une invite ultérieure apparaîtra ensuite sur les appareils des autres utilisateurs pour accéder au contenu partagé.
```swift
private var isEligibleForSharePlay: Bool = false {
didSet {
sharePlayButton.isHidden = !isEligibleForSharePlay
}
}
override func viewDidLoad() {
super.viewDidLoad()
// SharePlay button eligibility
groupStateObserver.$isEligibleForGroupSession
.receive(on: DispatchQueue.main)
.assign(to: \.isEligibleForSharePlay, on: self)
.store(in: &subscriptions)
}
```
# Résolution des problèmes de messagerie in-app pour iOS
Source: /docs/fr/developer_guide/platforms/legacy_sdks/ios/in-app_messaging/troubleshooting/index.md
**Warning:**
[AppboyKit](https://github.com/Appboy/appboy-ios-sdk) (also known as the Objective-C SDK) is no longer supported and has been replaced by the [Swift SDK](https://www.braze.com/docs/fr/fr/developer_guide/sdk_integration/?sdktab=swift). It will no longer receive new features, bug fixes, security updates, or technical support—however, messaging and analytics will continue to function as normal. To learn more, see [Introducing the New Braze Swift SDK](https://www.braze.com/resources/articles/introducing-the-new-braze-swift-sdk).
# Résolution des problèmes des messages in-app {#troubleshoot-in-app-messages}
## Impressions
#### Les impressions ou les analyses de clics ne sont pas enregistrées {#impression-or-click-analytics-arent-being-logged}
Si vous avez défini un délégué de message in-app pour gérer manuellement l'affichage des messages ou les actions de clic, vous devrez enregistrer manuellement les clics et les impressions sur le message in-app.
#### Les impressions sont inférieures à la valeur attendue {#impressions-are-lower-than-expected}
Les déclencheurs mettent du temps à se synchroniser avec l'appareil au démarrage de la session, il peut donc y avoir une condition de concurrence si les utilisateurs enregistrent un événement ou un achat juste après avoir démarré une session. Une solution possible consisterait à modifier la campagne pour qu'elle se déclenche au démarrage de la session, puis à segmenter en fonction de l'événement ou de l'achat souhaité. Notez que cela enverrait le message in-app au prochain démarrage de session après que l'événement s'est produit.
## Le message in-app attendu ne s'est pas affiché {#expected-in-app-message-did-not-display}
La plupart des problèmes liés aux messages in-app peuvent être répartis en deux catégories principales : la distribution et l'affichage. Pour déterminer pourquoi un message in-app attendu ne s'est pas affiché sur votre appareil, vous devez d'abord vous assurer que le [message in-app a bien été distribué à l'appareil](#troubleshooting-in-app-message-delivery), puis [résoudre le problème d'affichage du message](#troubleshooting-in-app-message-display).
### Distribution des messages in-app {#troubleshooting-in-app-message-delivery}
Le SDK demande les messages in-app aux serveurs Braze au démarrage de la session. Pour vérifier si les messages in-app sont distribués à votre appareil, vous devez vous assurer que les messages in-app sont à la fois demandés par le SDK et renvoyés par les serveurs Braze.
#### Vérifier si les messages sont demandés et renvoyés {#check-if-messages-are-requested-and-returned}
1. Ajoutez-vous en tant qu'[utilisateur test](https://www.braze.com/docs/fr/fr/user_guide/administrative/app_settings/developer_console/internal_groups_tab/#adding-test-users) sur le tableau de bord.
2. Configurez une campagne de messages in-app ciblée pour votre utilisateur.
3. Assurez-vous qu'une nouvelle session se produit dans votre application.
4. Utilisez le [journal des événements utilisateurs](https://www.braze.com/docs/fr/fr/user_guide/administrative/app_settings/developer_console/event_user_log_tab/#event-user-log-tab) pour vérifier que votre appareil demande des messages in-app au démarrage de la session. Recherchez la requête SDK associée à l'événement de démarrage de session de votre utilisateur test.
- Si votre application était censée demander des messages in-app déclenchés, vous devriez voir `trigger` dans le champ **Requested Responses** sous **Response Data**.
- Si votre application était censée demander des messages in-app originaux, vous devriez voir `in_app` dans le champ **Requested Responses** sous **Response Data**.
5. Utilisez le [journal des événements utilisateurs](https://www.braze.com/docs/fr/fr/user_guide/administrative/app_settings/developer_console/event_user_log_tab/#event-user-log-tab) pour vérifier si les messages in-app appropriés sont renvoyés dans les données de réponse. 
#### Résoudre les problèmes de messages non demandés {#troubleshoot-messages-not-being-requested}
Si vos messages in-app ne sont pas demandés, il est possible que votre application ne suive pas correctement les sessions, car les messages in-app sont actualisés au démarrage de la session. Assurez-vous également que votre application démarre réellement une session en fonction de la sémantique du délai d'expiration de session de votre application :

### Résoudre les problèmes de messages non renvoyés {#troubleshoot-messages-not-being-returned}
Si les messages in-app ne sont pas renvoyés, vous rencontrez probablement un problème de ciblage de campagne :
- Votre segment ne contient pas votre utilisateur.
- Vérifiez l'onglet [**Engagement**](https://www.braze.com/docs/fr/fr/user_guide/audience/manage_audience/user_profiles/#engagement-tab) de votre utilisateur pour vous assurer que le segment approprié apparaît sous **Segments**.
- Votre utilisateur a déjà reçu le message in-app et n'était pas rééligible pour le recevoir à nouveau.
- Vérifiez les [paramètres de rééligibilité de la campagne](https://www.braze.com/docs/fr/fr/user_guide/engagement_tools/campaigns/building_campaigns/delivery_types/reeligibility/) dans l'étape **Réception/distribution** du **Campaign Composer** et assurez-vous que les paramètres de rééligibilité correspondent à votre configuration de test.
- Votre utilisateur a atteint la limite de fréquence pour la campagne.
- Vérifiez les [paramètres de limite de fréquence](https://www.braze.com/docs/fr/fr/user_guide/engagement_tools/campaigns/building_campaigns/rate-limiting/#frequency-capping) de la campagne et assurez-vous qu'ils correspondent à votre configuration de test.
- Si un groupe de contrôle a été créé pour la campagne, votre utilisateur peut être tombé dans le groupe de contrôle.
- Vous pouvez vérifier si cela s'est produit en créant un segment avec un filtre de variante de campagne reçue, où la variante de campagne est définie sur **Contrôle**, et en vérifiant si votre utilisateur est tombé dans ce segment.
- Lors de la création de campagnes à des fins de test d'intégration, veillez à désactiver l'ajout d'un groupe de contrôle.
### Affichage des messages in-app {#troubleshooting-in-app-message-display}
Si votre application demande et reçoit avec succès des messages in-app, mais qu'ils ne s'affichent pas, une logique côté appareil peut empêcher l'affichage :
- Les messages in-app déclenchés sont soumis à une limitation de débit basée sur l'[intervalle de temps minimum entre les déclenchements](https://www.braze.com/docs/fr/fr/developer_guide/platform_integration_guides/ios/in-app_messaging/in-app_message_delivery/#minimum-time-interval-between-triggers), qui est de 30 secondes par défaut.
- Si vous avez défini un délégué pour personnaliser la gestion des messages in-app, vérifiez votre délégué pour vous assurer qu'il n'affecte pas l'affichage des messages in-app.
- Les échecs de téléchargement d'images empêcheront l'affichage des messages in-app contenant des images. Les téléchargements d'images échoueront systématiquement si le framework `SDWebImage` n'est pas intégré correctement. Vérifiez les journaux de votre appareil pour vous assurer que les téléchargements d'images n'échouent pas.
- Si l'orientation de l'appareil ne correspondait pas à l'orientation spécifiée par le message in-app, le message in-app ne s'affichera pas. Assurez-vous que votre appareil est dans la bonne orientation.
# Intégration du contrôleur de vue Content Cards pour iOS
Source: /docs/fr/developer_guide/platforms/legacy_sdks/ios/content_cards/integration/index.md
**Warning:**
[AppboyKit](https://github.com/Appboy/appboy-ios-sdk) (also known as the Objective-C SDK) is no longer supported and has been replaced by the [Swift SDK](https://www.braze.com/docs/fr/fr/developer_guide/sdk_integration/?sdktab=swift). It will no longer receive new features, bug fixes, security updates, or technical support—however, messaging and analytics will continue to function as normal. To learn more, see [Introducing the New Braze Swift SDK](https://www.braze.com/resources/articles/introducing-the-new-braze-swift-sdk).
# Intégration des Content Cards {#content-card-integration}
## Modèle de données des Content Cards {#content-cards-data-model}
Le modèle de données des Content Cards est disponible dans le SDK iOS.
### Obtenir les données {#getting-the-data}
Pour accéder au modèle de données des Content Cards, abonnez-vous aux événements de mise à jour des Content Cards :
```objc
// Subscribe to Content Cards updates
// Note: you should remove the observer where appropriate
[[NSNotificationCenter defaultCenter] addObserver:self
selector:@selector(contentCardsUpdated:)
name:ABKContentCardsProcessedNotification
object:nil];
```
```objc
// Called when Content Cards are refreshed (via `requestContentCardsRefresh`)
- (void)contentCardsUpdated:(NSNotification *)notification {
BOOL updateIsSuccessful = [notification.userInfo[ABKContentCardsProcessedIsSuccessfulKey] boolValue];
if (updateIsSuccessful) {
// get the cards using [[Appboy sharedInstance].contentCardsController getContentCards];
}
}
```
```swift
// Subscribe to content card updates
// Note: you should remove the observer where appropriate
NotificationCenter.default.addObserver(self, selector:
#selector(contentCardsUpdated),
name:NSNotification.Name.ABKContentCardsProcessed, object: nil)
```
```swift
// Called when the Content Cards are refreshed (via `requestContentCardsRefresh`)
@objc private func contentCardsUpdated(_ notification: Notification) {
if let updateIsSuccessful = notification.userInfo?[ABKContentCardsProcessedIsSuccessfulKey] as? Bool {
if (updateIsSuccessful) {
// get the cards using Appboy.sharedInstance()?.contentCardsController.contentCards
}
}
}
```
Si vous souhaitez modifier les données de la carte après qu'elles ont été envoyées par Braze, nous vous recommandons de stocker localement une copie complète des données de la carte, de mettre les données à jour et de les afficher vous-même. Les cartes sont accessibles via [`ABKContentCardsController`](https://appboy.github.io/appboy-ios-sdk/docs/interface_a_b_k_content_cards_controller.html).
## Modèle de carte de contenu {#content-card-model}
Braze propose trois types de Content Cards : bannière, image légendée et classique. Chaque type hérite des propriétés communes d'une classe `ABKContentCard` de base et possède les propriétés supplémentaires suivantes.
### Propriétés du modèle de carte de contenu de base — ABKContentCard {#base-content-card-model-properties-abkcontentcard}
| Propriété | Description |
|---|---|
| `idString` | (Lecture seule) L'ID de la carte défini par Braze. |
| `viewed` | Cette propriété indique si l'utilisateur a vu la carte ou non. |
| `created` | (Lecture seule) Cette propriété est l'horodatage unix de la date de création de la carte par Braze. |
| `expiresAt` | (Lecture seule) Cette propriété est l'horodatage unix de la date d'expiration de la carte. |
| `dismissible` | Cette propriété indique si l'utilisateur peut fermer la carte. |
| `pinned` | Cette propriété indique si la carte a été définie comme « épinglée » dans le tableau de bord. |
| `dismissed` | Cette propriété indique si l'utilisateur a fermé la carte. |
| `url` | L'URL qui sera ouverte après un clic sur la carte. Il peut s'agir d'une URL HTTP(S) ou d'une URL de protocole. |
| `openURLInWebView` | Cette propriété détermine si l'URL sera ouverte dans l'application ou dans un navigateur web externe. |
| `extras` | Un `NSDictionary` facultatif de valeurs `NSString`. |
{: .reset-td-br-1 .reset-td-br-2 aria-label="Base Content Card model properties - ABKContentCard" }
### Propriétés de la carte de contenu de type bannière — ABKBannerContentCard {#banner-content-card-properties-abkbannercontentcard}
| Propriété | Description |
|---|---|
| `image` | Cette propriété est l'URL de l'image de la carte. |
| `imageAspectRatio` | Cette propriété est le rapport hauteur/largeur de l'image de la carte et sert d'indication avant que le chargement de l'image ne soit terminé. Notez que cette propriété peut ne pas être fournie dans certaines circonstances. |
{: .reset-td-br-1 .reset-td-br-2 aria-label="Banner Content Card properties - ABKBannerContentCard" }
### Propriétés de la carte de contenu avec image légendée — ABKCaptionedImageCard {#captioned-image-content-card-properties-abkcaptionedimagecard}
| Propriété | Description |
|---|---|
| `image` | Cette propriété est l'URL de l'image de la carte. |
| `imageAspectRatio` | Cette propriété est le rapport hauteur/largeur de l'image de la carte. |
| `title` | Le texte du titre de la carte. |
| `cardDescription` | Le texte du corps de la carte. |
| `domain` | Le texte du lien pour l'URL de la propriété, par exemple @"blog.braze.com". Il peut être affiché dans l'interface de la carte pour indiquer l'action et la direction du clic sur la carte. |
{: .reset-td-br-1 .reset-td-br-2 aria-label="Captioned image Content Card properties - ABKCaptionedImageCard" }
### Propriétés de la carte de contenu classique — ABKClassicContentCard {#classic-content-card-properties-abkclassiccontentcard}
| Propriété | Description |
|---|---|
| `image` | (Facultatif) Cette propriété est l'URL de l'image de la carte. |
| `title` | Le texte du titre de la carte. |
| `cardDescription` | Le texte du corps de la carte. |
| `domain` | Le texte du lien pour l'URL de la propriété, par exemple @"blog.braze.com". Il peut être affiché dans l'interface de la carte pour indiquer l'action et la direction du clic sur la carte. |
{: .reset-td-br-1 .reset-td-br-2 aria-label="Classic Content Card properties - ABKClassicContentCard" }
## Méthodes de carte {#card-methods}
| Méthode | Description |
|---|---|
| `logContentCardImpression` | Enregistrer manuellement une impression sur Braze pour une carte particulière. |
| `logContentCardClicked` | Enregistrer manuellement un clic sur Braze pour une carte particulière. Le SDK n'enregistre un clic de carte que lorsque la carte possède la propriété `url` avec une valeur valide. |
| `logContentCardDismissed` | Enregistrer manuellement une fermeture sur Braze pour une carte particulière. Le SDK n'enregistre une fermeture de carte que si la propriété `dismissed` de la carte n'est pas déjà définie sur `true`. |
| `isControlCard` | Déterminer si une carte est la carte de contrôle pour un test A/B. |
{: .reset-td-br-1 .reset-td-br-2 aria-label="Card methods" }
Pour plus de détails, reportez-vous à la [documentation de référence de classe](https://appboy.github.io/appboy-ios-sdk/docs/interface_a_b_k_content_card.html).
## Intégration du contrôleur de vue des Content Cards {#content-cards-view-controller-integration}
Les Content Cards peuvent être intégrées avec deux contextes de contrôleur de vue : navigation ou modal.
### Contexte de navigation {#navigation-context}
Exemple d'ajout d'une instance `ABKContentCardsTableViewController` dans un contrôleur de navigation :
```objc
ABKContentCardsTableViewController *contentCards = [[ABKContentCardsTableViewController alloc] init];
contentCards.title = @"Content Cards Title";
contentCards.disableUnreadIndicator = YES;
[self.navigationController pushViewController:contentCards animated:YES];
```
```swift
let contentCards = ABKContentCardsTableViewController()
contentCards.title = "Content Cards Title"
contentCards.disableUnreadIndicator = true
navigationController?.pushViewController(contentCards, animated: true)
```
**Note:**
Pour personnaliser le titre de la barre de navigation, définissez la propriété de titre du `navigationItem` de l'instance `ABKContentCardsTableViewController`.
### Contexte modal {#modal-context}
Cette fenêtre modale est utilisée pour présenter le contrôleur de vue dans une vue modale, avec une barre de navigation en haut et un bouton **Done** sur le côté de la barre.
```objc
ABKContentCardsViewController *contentCards = [[ABKContentCardsViewController alloc] init];
contentCards.contentCardsViewController.title = @"Content Cards Title";
contentCards.contentCardsViewController.disableUnreadIndicator = YES;
[self.navigationController presentViewController:contentCards animated:YES completion:nil];
```
```swift
let contentCards = ABKContentCardsViewController()
contentCards.contentCardsViewController.title = "Content Cards Title"
contentCards.contentCardsViewController.disableUnreadIndicator = true
self.present(contentCards, animated: true, completion: nil)
```
Pour des exemples de contrôleurs de vue, consultez notre [exemple d'application Content Cards](https://github.com/Appboy/appboy-ios-sdk/tree/master/Samples/ContentCards/BrazeContentCardsSampleApp).
**Note:**
Pour personnaliser l'en-tête, définissez la propriété de titre du `navigationItem` appartenant à l'instance `ABKContentCardsTableViewController` intégrée dans l'instance parente `ABKContentCardsViewController`.
# Personnalisation de carte de contenu iOS
Source: /docs/fr/developer_guide/platforms/legacy_sdks/ios/content_cards/customization/index.md
# Style de carte de contenu personnalisé pour iOS
Source: /docs/fr/developer_guide/platforms/legacy_sdks/ios/content_cards/customization/custom_styling/index.md
**Warning:**
[AppboyKit](https://github.com/Appboy/appboy-ios-sdk) (also known as the Objective-C SDK) is no longer supported and has been replaced by the [Swift SDK](https://www.braze.com/docs/fr/fr/developer_guide/sdk_integration/?sdktab=swift). It will no longer receive new features, bug fixes, security updates, or technical support—however, messaging and analytics will continue to function as normal. To learn more, see [Introducing the New Braze Swift SDK](https://www.braze.com/resources/articles/introducing-the-new-braze-swift-sdk).
# Style personnalisé
## Remplacer les images par défaut
**Important:**
L’intégration de `SDWebImage` est requise si vous prévoyez d’utiliser notre interface utilisateur Braze pour afficher des images dans les messages in-app iOS ou les cartes de contenu.
Braze permet aux clients de remplacer les images par défaut existantes par leurs propres images personnalisées. Pour y parvenir, créez un nouveau fichier `png` avec l’image personnalisée et ajoutez-la à l’ensemble d’images de l’application. Renommez ensuite le fichier avec le nom de l’image pour remplacer l’image par défaut de notre bibliothèque. Assurez-vous également de télécharger les versions `@2x` et `@3x` des images pour permettre différentes tailles de téléphone. Les images pouvant être remplacées dans les cartes de contenu incluent :
- Image de marque substitutive : `appboy_cc_noimage_lrg`
- Image d’icône épinglée : `appboy_cc_icon_pinned`
Étant donné que les cartes de contenu ont une taille maximale de 2 Ko pour le contenu que vous saisissez dans le tableau de bord (y compris le texte des messages, les URL d’images, les liens et toutes les paires clé-valeur), vérifiez la taille avant d’envoyer. Dépasser ce montant empêchera la carte d’être envoyée.
**Important:**
La modification des images par défaut n'est actuellement pas prise en charge dans notre intégration .NET MAUI iOS.
## Désactivation du mode sombre
Pour empêcher l'interface utilisateur de la carte de contenu d'adopter un style de thème sombre lorsque l'appareil de l'utilisateur a activé le mode sombre, définissez la propriété `ABKContentCardsTableViewController.enableDarkTheme`. Vous pouvez accéder à la propriété `enableDarkTheme` directement sur une instance `ABKContentCardsTableViewController` ou via la propriété `ABKContentCardsViewController.contentCardsViewController` pour mieux répondre à votre propre interface utilisateur.
```objc
// Accessing enableDarkTheme via ABKContentCardsViewController.contentCardsViewController.
- (IBAction)presentModalContentCards:(id)sender {
ABKContentCardsViewController *contentCardsVC = [ABKContentCardsViewController new];
contentCardsVC.contentCardsViewController.enableDarkTheme = NO;
...
[self.navigationController presentViewController:contentCardsVC animated:YES completion:nil];
}
// Accessing enableDarkTheme directly.
- (IBAction)presentNavigationContentCards:(id)sender {
ABKContentCardsTableViewController *contentCardsTableVC = [[ABKContentCardsTableViewController alloc] init];
contentCardsTableVC.enableDarkTheme = NO;
...
[self.navigationController pushViewController:contentCardsTableVC animated:YES];
}
```
```swift
// Accessing enableDarkTheme via ABKContentCardsViewController.contentCardsViewController.
@IBAction func presentModalContentCards(_ sender: Any) {
let contentCardsVC = ABKContentCardsViewController()
contentCardsVC.contentCardsViewController.enableDarkTheme = false
...
self.navigationController?.present(contentCardsVC, animated: true, completion: nil)
}
// Accessing enableDarkTheme directly.
@IBAction func presentNavigationContentCards(_ sender: Any) {
let contentCardsTableVC = ABKContentCardsTableViewController()
contentCardsTableVC.enableDarkTheme = false
...
self.navigationController?.present(contentCardsTableVC, animated: true, completion: nil)
}
```
# Personnalisation du flux de cartes de contenu pour iOS
Source: /docs/fr/developer_guide/platforms/legacy_sdks/ios/content_cards/customization/customizing_feed/index.md
**Warning:**
[AppboyKit](https://github.com/Appboy/appboy-ios-sdk) (also known as the Objective-C SDK) is no longer supported and has been replaced by the [Swift SDK](https://www.braze.com/docs/fr/fr/developer_guide/sdk_integration/?sdktab=swift). It will no longer receive new features, bug fixes, security updates, or technical support—however, messaging and analytics will continue to function as normal. To learn more, see [Introducing the New Braze Swift SDK](https://www.braze.com/resources/articles/introducing-the-new-braze-swift-sdk).
# Personnaliser le flux des cartes de contenu
Vous pouvez créer votre propre interface de cartes de contenu en étendant le `ABKContentCardsTableViewController` pour personnaliser tous les éléments de l’interface utilisateur et le comportement des cartes de contenu. Les cellules de la carte de contenu peuvent également être sous-classées puis utilisées par programmation ou en introduisant un storyboard personnalisé qui enregistre les nouvelles classes. Consultez l'[exemple d'application](https://github.com/Appboy/appboy-ios-sdk/tree/master/Samples/ContentCards/BrazeContentCardsSampleApp) Cartes de contenu pour un exemple complet.
Il est également important de déterminer si vous devez utiliser une stratégie de sous-classement plutôt qu'un contrôleur de vue entièrement personnalisé et vous [abonner aux mises à jour de données](https://www.braze.com/docs/fr/fr/developer_guide/platforms/legacy_sdks/ios/content_cards/integration/). Par exemple, si vous sous-classez le `ABKContentCardsTableViewController`, vous pouvez utiliser la méthode [`populateContentCards`](#overriding-populated-content-cards) pour filtrer et commander des cartes (recommandé). Cependant, si vous utilisez une personnalisation complète du contrôleur de visualisation, vous disposez d’un plus grand contrôle sur le comportement de la carte, comme l’affichage dans un carrousel ou l’ajout d’éléments interactifs, mais vous devez ensuite compter sur un observateur pour implémenter la logique de tri et de filtrage. Vous devez également implémenter les méthodes d'analyse respectives pour enregistrer correctement les impressions, les événements de rejet et les clics.
## Personnalisation de l’interface utilisateur
Les extraits de code suivants montrent comment styliser et modifier les cartes de contenu pour répondre à vos besoins d’interface utilisateur à l’aide des méthodes fournies par le SDK. Ces méthodes vous permettent de personnaliser tous les aspects de l’interface utilisateur de la carte de contenu, y compris les polices personnalisées, les composants de couleur personnalisés, le texte personnalisé, etc.
Il existe deux manières distinctes de personnaliser l’interface utilisateur de la carte de contenu :
- Méthode dynamique : Mettre à jour l’interface utilisateur carte par carte
- Méthode statique : mettre à jour l’interface utilisateur sur toutes les cartes
### Interface utilisateur dynamique
La méthode `applyCard` de la carte de contenu peut référencer l’objet de carte et lui transmettre les paires clé-valeur qui seront utilisées pour mettre à jour l’IU :
```objc
- (void)applyCard:(ABKCaptionedImageContentCard *)captionedImageCard {
[super applyCard:captionedImageCard];
if ([card.extras objectForKey:ContentCardKeyBackgroundColorValue]) {
NSString *backgroundColor = [card.extras objectForKey:ContentCardKeyBackgroundColor];
if ([backgroundColor colorValue]) {
self.rootView.backgroundColor = [backgroundColor colorValue];
} else {
self.rootView.backgroundColor = [UIColor lightGray];
}
} else {
self.rootView.backgroundColor = [UIColor lightGray];
}
}
```
```swift
override func apply(_ captionedImageCard: ABKCaptionedImageContentCard!) {
super.apply(captionedImageCard)
if let backgroundColor = card.extras?[ContentCardKey.backgroundColor.rawValue] as? String,
let backgroundColorValue = backgroundColor.colorValue() {
rootView.backgroundColor = backgroundColorValue
} else {
rootView.backgroundColor = .lightGray
}
}
```
### Interface utilisateur statique
La méthode `setUpUI` peut affecter des valeurs aux composants statiques de la carte de contenu sur toutes les cartes :
```objc
#import "CustomClassicContentCardCell.h"
@implementation CustomClassicContentCardCell
- (void)setUpUI {
[super setUpUI];
self.rootView.backgroundColor = [UIColor lightGrayColor];
self.rootView.layer.borderColor = [UIColor purpleColor].CGColor;
self.unviewedLineView.backgroundColor = [UIColor redColor];
self.titleLabel.font = [UIFont italicSystemFontOfSize:20];
}
```
```swift
override func setUpUI() {
super.setUpUI()
rootView.backgroundColor = .lightGray
rootView.layer.borderColor = UIColor.purple.cgColor
unviewedLineViewColor = .red
titleLabel.font = .italicSystemFont(ofSize: 20)
}
```
## Fournir des interfaces personnalisées
Des interfaces personnalisées peuvent être fournies en enregistrant des classes personnalisées pour tous les types de cartes souhaités.
{: style="max-width:35%;margin-left:15px;"}
{: style="max-width:25%;margin-left:15px;"}
{: style="max-width:18%;margin-left:15px;"}
Braze propose trois types de modèles de cartes de contenu : (bannière, image légendée et classique). Sinon, si vous souhaitez fournir vos propres interfaces personnalisées, référez-vous aux extraits de code suivants :
```objc
- (void)registerTableViewCellClasses {
[super registerTableViewCellClasses];
// Replace the default class registrations with custom classes for these two types of cards
[self.tableView registerClass:[CustomCaptionedImageContentCardCell class] forCellReuseIdentifier:@"ABKCaptionedImageContentCardCell"];
[self.tableView registerClass:[CustomClassicContentCardCell class] forCellReuseIdentifier:@"ABKClassicCardCell"];
}
```
```swift
override func registerTableViewCellClasses() {
super.registerTableViewCellClasses()
// Replace the default class registrations with custom classes
tableView.register(CustomCaptionedImageContentCardCell.self, forCellReuseIdentifier: "ABKCaptionedImageContentCardCell")
tableView.register(CustomBannerContentCardCell.self, forCellReuseIdentifier: "ABKBannerContentCardCell")
tableView.register(CustomClassicImageContentCardCell.self, forCellReuseIdentifier: "ABKClassicImageCardCell")
tableView.register(CustomClassicContentCardCell.self, forCellReuseIdentifier: "ABKClassicCardCell")
}
```
## Remplacer des cartes de contenu remplies
Les cartes de contenu peuvent être modifiées de façon programmatique à l’aide de la méthode `populateContentCards` :
```objc
- (void)populateContentCards {
NSMutableArray *cards = [NSMutableArray arrayWithArray:[Appboy.sharedInstance.contentCardsController getContentCards]];
for (ABKContentCard *card in cards) {
// Replaces the card description for all Classic Content Cards
if ([card isKindOfClass:[ABKClassicContentCard class]]) {
((ABKClassicContentCard *)card).cardDescription = @"Custom Feed Override title [classic cards only]!";
}
}
super.cards = cards;
}
```
```swift
override func populateContentCards() {
guard let cards = Appboy.sharedInstance()?.contentCardsController.contentCards else { return }
for card in cards {
// Replaces the card description for all Classic Content Cards
if let classicCard = card as? ABKClassicContentCard {
classicCard.cardDescription = "Custom Feed Override title [classic cards only]!"
}
}
super.cards = (cards as NSArray).mutableCopy() as? NSMutableArray
}
```
# Gérer manuellement les clics sur les cartes de contenu pour iOS
Source: /docs/fr/developer_guide/platforms/legacy_sdks/ios/content_cards/customization/handling_clicks_manually/index.md
**Warning:**
[AppboyKit](https://github.com/Appboy/appboy-ios-sdk) (also known as the Objective-C SDK) is no longer supported and has been replaced by the [Swift SDK](https://www.braze.com/docs/fr/fr/developer_guide/sdk_integration/?sdktab=swift). It will no longer receive new features, bug fixes, security updates, or technical support—however, messaging and analytics will continue to function as normal. To learn more, see [Introducing the New Braze Swift SDK](https://www.braze.com/resources/articles/introducing-the-new-braze-swift-sdk).
# Gérer les clics manuellement
Vous pouvez gérer manuellement les clics sur les cartes de contenu en implémentant le protocole [`ABKContentCardsTableViewControllerDelegate`](https://appboy.github.io/appboy-ios-sdk/docs/protocol_a_b_k_content_cards_table_view_controller_delegate-p.html) et en définissant votre objet délégué comme la propriété `delegate` du `ABKContentCardsTableViewController`. Reportez-vous à l'exemple d'application [Content Cards](https://github.com/Appboy/appboy-ios-sdk/tree/master/Samples/ContentCards/BrazeContentCardsSampleApp) pour un exemple.
```objc
contentCardsTableViewController.delegate = delegate;
// Methods to implement in delegate
- (BOOL)contentCardTableViewController:(ABKContentCardsTableViewController *)viewController
shouldHandleCardClick:(NSURL *)url {
if ([[url.host lowercaseString] isEqualToString:@"my-domain.com"]) {
// Custom handle link here
NSLog(@"Manually handling Content Card click with URL %@", url.absoluteString);
return NO;
}
// Let the Braze SDK handle the click action
return YES;
}
- (void)contentCardTableViewController:(ABKContentCardsTableViewController *)viewController
didHandleCardClick:(NSURL *)url {
NSLog(@"Braze SDK handled Content Card click with URL %@", url.absoluteString);
}
```
```swift
contentCardsTableViewController.delegate = delegate
// Methods to implement in delegate
func contentCardTableViewController(_ viewController: ABKContentCardsTableViewController!,
shouldHandleCardClick url: URL!) -> Bool {
if (url.host?.lowercased() == "my-domain.com") {
// Custom handle link here
NSLog("Manually handling Content Card click with URL %@", url.absoluteString)
return false
}
// Let the Braze SDK handle the click action
return true
}
func contentCardTableViewController(_ viewController: ABKContentCardsTableViewController!,
didHandleCardClick url: URL!) {
NSLog("Braze SDK handled Content Card click with URL %@", url.absoluteString)
}
```
**Important:**
Si vous remplacez la méthode `handleCardClick:` dans `ABKContentCardsTableViewController`, ces méthodes de délégation ne peuvent pas être employées.
# Indicateurs de messages non lus et lus de carte de contenu pour iOS
Source: /docs/fr/developer_guide/platforms/legacy_sdks/ios/content_cards/customization/read_unread_indicators/index.md
**Warning:**
[AppboyKit](https://github.com/Appboy/appboy-ios-sdk) (also known as the Objective-C SDK) is no longer supported and has been replaced by the [Swift SDK](https://www.braze.com/docs/fr/fr/developer_guide/sdk_integration/?sdktab=swift). It will no longer receive new features, bug fixes, security updates, or technical support—however, messaging and analytics will continue to function as normal. To learn more, see [Introducing the New Braze Swift SDK](https://www.braze.com/resources/articles/introducing-the-new-braze-swift-sdk).
# Indicateurs de messages non lus et lus
## Désactivation de l'indicateur de messages non lus
{: style="max-width:80%"}
Vous pouvez désactiver la ligne bleue au bas de la carte, qui indique si celle-ci a été visualisée ou non, en définissant la propriété `disableUnviewedIndicator` dans `ABKContentCardsTableViewController` sur `YES`.
## Personnalisation de l'indicateur de messages non lus
L'indicateur de messages non lus est accessible via la propriété `unviewedLineView` de la classe `ABKBaseContentCardCell`. Si vous utilisez les implémentations `UITableViewCell`, vous devez accéder à la propriété avant que la cellule ne soit dessinée.
Par exemple, pour définir la couleur de l'indicateur de messages non lus en rouge :
```objc
((ABKBaseContentCardCell *)cell).unviewedLineView.backgroundColor = [UIColor redColor];
```
```swift
(card as? ABKBaseContentCardCell).unviewedLineView.backgroundColor = UIColor.red
```
# Badges de carte de contenu pour iOS
Source: /docs/fr/developer_guide/platforms/legacy_sdks/ios/content_cards/customization/badges/index.md
**Warning:**
[AppboyKit](https://github.com/Appboy/appboy-ios-sdk) (also known as the Objective-C SDK) is no longer supported and has been replaced by the [Swift SDK](https://www.braze.com/docs/fr/fr/developer_guide/sdk_integration/?sdktab=swift). It will no longer receive new features, bug fixes, security updates, or technical support—however, messaging and analytics will continue to function as normal. To learn more, see [Introducing the New Braze Swift SDK](https://www.braze.com/resources/articles/introducing-the-new-braze-swift-sdk).
# Badges
## Demander le décompte des cartes de contenu non lues
Si vous souhaitez afficher le nombre de cartes de contenu non lues de votre utilisateur, nous vous suggérons de demander un décompte des cartes et de le représenter par un badge. Les badges constituent un excellent moyen d’attirer l’attention sur le nouveau contenu en attente de vos utilisateurs dans les cartes de contenu. Si vous souhaitez ajouter un badge à vos cartes de contenu, le SDK de Braze fournit des méthodes permettant d’interroger les éléments suivants :
- Cartes de contenu non consultées pour l’utilisateur actuel
- Nombre total de cartes de contenu visibles pour l’utilisateur actuel
Les déclarations de méthodes suivantes dans [`ABKContentCardsController`](https://appboy.github.io/appboy-ios-sdk/docs/interface_a_b_k_content_cards_controller.html) décrivent cela en détail :
```objc
- (NSInteger)unviewedContentCardCount;
/*
This method returns the number of currently active Content Cards that have not been viewed.
A "view" happens when a card becomes visible in the Content Cards view. This differentiates between cards that are off-screen in the scrolling view and those which are on-screen; when a card scrolls onto the screen, it's counted as viewed.
Cards are counted as viewed only once -- if a card scrolls off the screen and back on, it's not re-counted.
Cards are counted only once, even if they appear in multiple Content Cards views or across multiple devices.
*/
- (NSInteger)contentCardCount;
/*
This method returns the total number of currently active Content Cards. Cards are counted only once even if they appear in multiple Content Cards views.
*/
```
## Affichage du nombre de cartes de contenu non consultées sur le nombre de badges d’application
En plus de servir de rappels de notification push pour une application, les badges peuvent également être utilisés pour indiquer des éléments non consultés dans le flux de cartes de contenu de l’utilisateur. La mise à jour du nombre de badges en fonction des mises à jour des cartes de contenu non consultées peut être utile pour attirer les utilisateurs vers votre application et augmenter les sessions.
Cette méthode enregistre le nombre de badges après la fermeture de l'application et la fin de la session de l'utilisateur final :
```objc
(void)applicationDidEnterBackground:(UIApplication *)application
```
Pour cette méthode, implémentez le code suivant, qui actualise activement le nombre de badges alors que l’utilisateur visualise les cartes pendant une session donnée :
```objc
[UIApplication sharedApplication].applicationIconBadgeNumber = [[Appboy sharedInstance].contentCardsController unviewedContentCardCount];
```
```swift
func applicationDidEnterBackground(_ application: UIApplication)
```
Pour cette méthode, implémentez le code suivant, qui actualise activement le nombre de badges alors que l’utilisateur visualise les cartes pendant une session donnée :
```swift
UIApplication.shared.applicationIconBadgeNumber =
Appboy.sharedInstance()?.contentCardsController.unviewedContentCardCount() ?? 0
```
Pour plus d'informations, consultez le [fichier d'en-tête](https://github.com/Appboy/appboy-ios-sdk/blob/master/AppboyKit/include/Appboy.h) `Appboy.h`.
# Vue Carrousel de carte de contenu pour iOS
Source: /docs/fr/developer_guide/platforms/legacy_sdks/ios/content_cards/customization/use_cases/carousel_view/index.md
**Warning:**
[AppboyKit](https://github.com/Appboy/appboy-ios-sdk) (also known as the Objective-C SDK) is no longer supported and has been replaced by the [Swift SDK](https://www.braze.com/docs/fr/fr/developer_guide/sdk_integration/?sdktab=swift). It will no longer receive new features, bug fixes, security updates, or technical support—however, messaging and analytics will continue to function as normal. To learn more, see [Introducing the New Braze Swift SDK](https://www.braze.com/resources/articles/introducing-the-new-braze-swift-sdk).
# Cas d’utilisation : Vue carrousel
{: style="max-width:35%;float:right;margin-left:15px;border:none;"}
Cette section couvre l’implémentation d’un flux de carrousel multi-cartes dans lequel un utilisateur peut faire glisser horizontalement pour afficher des cartes en vedette supplémentaires. Pour intégrer une vue carrousel, vous devrez utiliser une carte de contenu entièrement personnalisée - la phase d'exécution de l ['approche "crawl, walk, run" (ramper, marcher, courir).](https://www.braze.com/docs/fr/fr/user_guide/message_building_by_channel/content_cards/customize/#customization-approaches)
Avec cette approche, vous n'utiliserez pas les vues et la logique par défaut de Braze, mais afficherez les cartes de contenu de manière totalement personnalisée en utilisant vos propres vues alimentées par les données des modèles Braze.
En termes de niveau d’effort de développement, les différences clés entre l’implémentation de base et celle du carrousel comprennent :
- Créer vos propres vues
- Enregistrer les indicateurs des performances de contenu
- Introduire une logique additionnelle côté client pour dicter combien et quelles cartes afficher dans le carrousel
## Mise en œuvre
### Étape 1 : Créer un contrôleur de visualisation personnalisé
Pour créer le carrousel de cartes de contenu, créez votre propre contrôleur de vue personnalisé (tel que `UICollectionViewController`) et [abonnez-vous aux mises à jour des données](https://www.braze.com/docs/fr/fr/developer_guide/platform_integration_guides/legacy_sdks/ios/content_cards/integration/#getting-the-data). Notez que vous ne pourrez ni étendre ni sous-classer notre `ABKContentCardTableViewController` par défaut, car il est uniquement capable de gérer nos types de cartes de contenu par défaut.
### Étape 2 : Mettre en œuvre les analyses
Lors de la création d’un contrôleur de vue entièrement personnalisé, les impressions, les clics et les rejets de cartes de contenu ne sont pas automatiquement enregistrés. Vous devez mettre en œuvre les méthodes d'analyse correspondantes pour vous assurer que les impressions, les événements de renvoi et les clics sont correctement enregistrés dans les analyses du tableau de bord de Braze.
Pour plus d'informations sur les méthodes d'analyse, reportez-vous aux [méthodes de carte](https://www.braze.com/docs/fr/fr/developer_guide/platform_integration_guides/legacy_sdks/ios/content_cards/integration/#card-methods).
**Note:**
La même page détaille également les différentes propriétés héritées de notre classe de modèle de carte de contenu générique, que vous pouvez trouver utile pendant l’implémentation de votre vue.
### Étape 3 : Créer un observateur de carte de contenu
Créez un [observateur de cartes](https://www.braze.com/docs/fr/fr/developer_guide/platform_integration_guides/ios/content_cards/multiple_feeds/#step-2-set-up-a-content-card-listener) de contenu chargé de gérer l'arrivée des cartes de contenu et mettez en œuvre une logique conditionnelle pour afficher un nombre spécifique de cartes dans le carrousel à tout moment. Par défaut, les cartes de contenu sont triées par date de création (la plus récente en premier) et un utilisateur voit toutes les cartes auxquelles il est éligible.
Cela dit, vous pouvez commander et appliquer une logique d’affichage supplémentaire de différentes manières. Par exemple, vous pouvez sélectionner les cinq premiers objets de carte de contenu du tableau ou introduire des paires clé-valeur (la propriété `extras` dans le modèle de données) pour concevoir une logique conditionnelle.
Si vous implémentez un carrousel comme flux secondaire de cartes de contenu, reportez-vous à la section [Utilisation de plusieurs flux de cartes de contenu](https://www.braze.com/docs/fr/fr/developer_guide/platforms/legacy_sdks/ios/content_cards/multiple_feeds/) pour vous assurer que vous triez les cartes dans le flux approprié en fonction des paires clé-valeur.
**Important:**
Il est important de veiller à ce que vos équipes de marketing et de développement se coordonnent sur les paires clé-valeur qui seront utilisées (par exemple, `feed_type = brand_homepage`), car toutes les paires clé-valeur saisies par les marketeurs dans le tableau de bord de Braze doivent correspondre exactement aux paires clé-valeur que les développeurs créent dans la logique de l'application.
Pour obtenir la documentation pour développeurs spécifique à iOS sur la classe, les méthodes et les attributs des cartes de contenu, reportez-vous à la [référence de la classe `ABKContentCard`](https://appboy.github.io/appboy-ios-sdk/docs/interface_a_b_k_content_card.html) pour iOS.
## Considérations
- En utilisant des vues entièrement personnalisées, vous ne pourrez pas étendre ou sous-classer les méthodes utilisées dans `ABKContentCardsController`. Vous devrez à la place intégrer les méthodes et les propriétés du modèle de données vous-même.
- La logique et l’implémentation de la vue carrousel ne sont pas un type par défaut de carte de contenu dans Braze. Par conséquent la logique d’obtention du cas d’usage doit être fournie et prise en charge par votre équipe de développement.
- Vous devrez implémenter la logique côté client pour afficher un nombre spécifique de cartes dans le carrousel à tout moment.
# Veuillez actualiser le flux de la carte de contenu pour iOS.
Source: /docs/fr/developer_guide/platforms/legacy_sdks/ios/content_cards/refreshing_the_feed/index.md
**Warning:**
[AppboyKit](https://github.com/Appboy/appboy-ios-sdk) (also known as the Objective-C SDK) is no longer supported and has been replaced by the [Swift SDK](https://www.braze.com/docs/fr/fr/developer_guide/sdk_integration/?sdktab=swift). It will no longer receive new features, bug fixes, security updates, or technical support—however, messaging and analytics will continue to function as normal. To learn more, see [Introducing the New Braze Swift SDK](https://www.braze.com/resources/articles/introducing-the-new-braze-swift-sdk).
# Veuillez actualiser le flux.
## Rafraîchir les cartes de contenu
Vous pouvez demander manuellement à Braze d’actualiser les cartes de contenu de l’utilisateur à l’aide de la méthode `requestContentCardsRefresh:` dans l’interface `Appboy` :
```objc
[[Appboy sharedInstance] requestContentCardsRefresh];
```
```swift
Appboy.sharedInstance()?.requestContentCardsRefresh()
```
Pour plus d'informations, voir le `Appboy.h` [fichier d'en-tête](https://github.com/Appboy/appboy-ios-sdk/blob/master/AppboyKit/include/Appboy.h).
# Utilisation de plusieurs flux de cartes de contenu pour iOS
Source: /docs/fr/developer_guide/platforms/legacy_sdks/ios/content_cards/multiple_feeds/index.md
**Warning:**
[AppboyKit](https://github.com/Appboy/appboy-ios-sdk) (also known as the Objective-C SDK) is no longer supported and has been replaced by the [Swift SDK](https://www.braze.com/docs/fr/fr/developer_guide/sdk_integration/?sdktab=swift). It will no longer receive new features, bug fixes, security updates, or technical support—however, messaging and analytics will continue to function as normal. To learn more, see [Introducing the New Braze Swift SDK](https://www.braze.com/resources/articles/introducing-the-new-braze-swift-sdk).
# Utilisation de plusieurs flux de carte de contenu
Les cartes de contenu peuvent être filtrées sur l’application pour afficher uniquement des cartes spécifiques, ce qui vous permet d’avoir plusieurs flux de carte de contenu pour différents cas d’usage (comme avoir un flux transactionnel ou un flux marketing).
La documentation suivante montre un exemple d’implémentation qui peut être modifié pour correspondre à votre intégration spécifique.
## Étape 1 : Définir des paires clé-valeur sur les cartes
Lors de la création d’une campagne de carte de contenu, les données de paires clé-valeur peuvent être définies pour chaque carte. Notre logique de filtrage utilisera les données de cette paire clé-valeur pour catégoriser les cartes.
Pour cet exemple, nous allons définir une paire clé-valeur avec la clé `feed_type` qui désignera dans quel flux la carte de contenu doit s’afficher. La valeur sera ce qu’est votre flux personnalisé, comme dans `Transactional`, `Marketing` etc.
## Étape 2 : Configurer un auditeur de carte de contenu
Utilisez l’extrait de code suivant pour ajouter un observateur à l’écoute des mises à jour de la carte de contenu.
```objc
[[NSNotificationCenter defaultCenter] addObserver:self
selector:@selector(contentCardsUpdatedNotificationReceived:)
name:ABKContentCardsProcessedNotification
object:nil];
```
```swift
NotificationCenter.default.addObserver(self, selector:
#selector(contentCardsUpdated),
name:NSNotification.Name.ABKContentCardsProcessed, object: nil)
```
Ajoutez les méthodes suivantes pour répondre aux mises à jour de l’observateur et filtrer les cartes retournées par type.
La première méthode, `contentCardsUpdatedNotificationReceived:`, gère les mises à jour de l’observateur. Il appelle la deuxième méthode, `getCardsForFeedType:`, avec le type de flux souhaité, dans ce cas, `Transactional`.
```objc
- (void)contentCardsUpdatedNotificationReceived:(NSNotification *)notification {
BOOL updateIsSuccessful = [notification.userInfo[ABKContentCardsProcessedIsSuccessfulKey] boolValue];
if (updateIsSuccessful) {
// Get an array containing only cards that have the "Transactional" feed type set in their extras.
NSArray *filteredArray = [self getCardsForFeedType:@"Transactional"];
NSLog(@"Got filtered array of length: %lu", [filteredArray count]);
// Pass filteredArray to your UI layer for display.
}
}
- (NSArray *)getCardsForFeedType:(NSString *)type {
NSArray *cards = [Appboy.sharedInstance.contentCardsController getContentCards];
NSArray *filteredArray = [cards filteredArrayUsingPredicate:[NSPredicate predicateWithBlock:^BOOL(ABKContentCard * card, NSDictionary *bindings) {
NSDictionary *extras = [card extras];
if (extras != nil && [extras objectForKey:@"feed_type"] != nil && [[extras objectForKey:@"feed_type"] isEqualToString:type]) {
NSLog(@"Got card: %@ ", card.idString);
return YES;
}
return NO;
}]];
return filteredArray;
}
```
```swift
@objc private func contentCardsUpdatedNotificationReceived(notification: NSNotification) {
guard let updateSuccessful = notification.userInfo?[ABKContentCardsProcessedIsSuccessfulKey] as? Bool else { return }
if updateSuccessful {
// Get an array containing only cards that have the "Transactional" feed type set in their extras.
let filteredArray = getCards(forFeedType: "Transactional")
NSLog("Got filtered array of length: %@",filteredArray?.count ?? 0)
// Pass filteredArray to your UI layer for display.
}
}
func getCards(forFeedType type: String) -> [ABKContentCard]? {
guard let allCards = Appboy.sharedInstance()?.contentCardsController.contentCards as? [ABKContentCard] else { return nil }
// return filtered cards
return allCards.filter {
if $0.extras?["feed_type"] as? String == type {
NSLog("%@","Got card: \($0.idString)")
return true
} else {
return false
}
}
}
```
# Guide d'implémentation des Content Cards pour iOS (facultatif)
Source: /docs/fr/developer_guide/platforms/legacy_sdks/ios/content_cards/implementation_guide/index.md
**Warning:**
[AppboyKit](https://github.com/Appboy/appboy-ios-sdk) (also known as the Objective-C SDK) is no longer supported and has been replaced by the [Swift SDK](https://www.braze.com/docs/fr/fr/developer_guide/sdk_integration/?sdktab=swift). It will no longer receive new features, bug fixes, security updates, or technical support—however, messaging and analytics will continue to function as normal. To learn more, see [Introducing the New Braze Swift SDK](https://www.braze.com/resources/articles/introducing-the-new-braze-swift-sdk).
**Important:**
Vous recherchez le guide d'intégration de base du développeur des Content Cards ? Retrouvez-le [ici](https://www.braze.com/docs/fr/fr/developer_guide/platforms/legacy_sdks/ios/content_cards/integration/).
# Guide d'implémentation des Content Cards {#content-card-implementation-guide}
> Ce guide d'implémentation avancé et optionnel couvre les considérations du code des Content Cards, trois cas d'utilisation personnalisés créés par notre équipe, les extraits de code l'accompagnant et les directives sur l'enregistrement des impressions, des clics et des rejets. Visitez notre dépôt de démonstrations Braze [ici](https://github.com/braze-inc/braze-growth-shares-ios-demo-app) ! Notez que ce guide d'implémentation est centré autour d'une implémentation Swift, mais les extraits de code Objective-C sont fournis aux personnes intéressées.
## Considérations du code {#code-considerations}
### Les Content Cards comme objets personnalisés {#content-cards-as-custom-objects}
Tout comme l'ajout d'un booster à une fusée, vos propres objets personnalisés peuvent être étendus pour fonctionner comme des Content Cards. Les surfaces d'API limitées telles que celles-ci offrent la flexibilité de travailler avec différents backends de données de manière interchangeable. Cela peut être fait en respectant le protocole `ContentCardable` et en implémentant l'initialiseur (comme indiqué dans les extraits de code suivants) et, via l'utilisation de la structure `ContentCardData`, qui vous permet d'accéder aux données `ABKContentCard`. La charge utile `ABKContentCard` sera utilisée pour initialiser la structure `ContentCardData` et l'objet personnalisé lui-même, le tout depuis un type `Dictionary` via l'initialiseur fourni avec le protocole.
L'initialiseur comprend également un enum `ContentCardClassType`. Cet enum sert à décider quel objet initialiser. Grâce à l'utilisation de paires clé-valeur dans le tableau de bord de Braze, vous pouvez définir une clé `class_type` explicite qui sera utilisée pour déterminer l'objet à initialiser. Ces paires clé-valeur pour les Content Cards apparaissent dans la variable `extras` sur le `ABKContentCard`. Un autre composant essentiel de l'initialiseur est le paramètre du dictionnaire `metaData`. Les `metaData` incluent tout, du `ABKContentCard` analysé en une série de clés et de valeurs. Une fois les cartes concernées analysées et converties en vos objets personnalisés, l'application est prête à commencer à travailler avec elles comme si elles étaient instanciées à partir de JSON ou de toute autre source.
Une fois que vous aurez acquis une solide compréhension de ces considérations du code, consultez nos [cas d'utilisation](#sample-use-cases) pour commencer à mettre en œuvre vos objets personnalisés.
**Protocole ContentCardable**
Un objet `ContentCardData` représentant les données `ABKContentCard` avec un enum `ContentCardClassType`. Un initialiseur utilisé pour instancier des objets personnalisés avec les métadonnées `ABKContentCard`.
```swift
protocol ContentCardable {
var contentCardData: ContentCardData? { get }
init?(metaData: [ContentCardKey: Any], classType contentCardClassType: ContentCardClassType)
}
extension ContentCardable {
var isContentCard: Bool {
return contentCardData != nil
}
func logContentCardClicked() {
BrazeManager.shared.logContentCardClicked(idString: contentCardData?.contentCardId)
}
func logContentCardDismissed() {
BrazeManager.shared.logContentCardDismissed(idString: contentCardData?.contentCardId)
}
func logContentCardImpression() {
BrazeManager.shared.logContentCardImpression(idString: contentCardData?.contentCardId)
}
}
```
**Structure de données Content Card**
`ContentCardData` représente les valeurs analysées d'un `ABKContentCard`.
```swift
struct ContentCardData: Hashable {
let contentCardId: String
let contentCardClassType: ContentCardClassType
let createdAt: Double
let isDismissable: Bool
...
// other Content Card properties such as expiresAt, pinned, etc.
}
extension ContentCardData: Equatable {
static func ==(lhs: ContentCardData, rhs: ContentCardData) -> Bool {
return lhs.contentCardId == rhs.contentCardId
}
}
```
**Protocole ContentCardable**
Un objet `ContentCardData` représentant les données `ABKContentCard` avec un enum `ContentCardClassType`, un initialiseur utilisé pour instancier des objets personnalisés avec les métadonnées `ABKContentCard`.
```objc
@protocol ContentCardable
@property (nonatomic, strong) ContentCardData *contentCardData;
- (instancetype __nullable)initWithMetaData:(NSDictionary *)metaData
classType:(enum ContentCardClassType)classType;
- (BOOL)isContentCard;
- (void)logContentCardImpression;
- (void)logContentCardClicked;
- (void)logContentCardDismissed;
@end
```
**Structure de données Content Card**
`ContentCardData` représente les valeurs analysées d'un `ABKContentCard`.
```objc
@interface ContentCardData : NSObject
+ (ContentCardClassType)contentCardClassTypeForString:(NSString *)rawValue;
- (instancetype)initWithIdString:(NSString *)idString
classType:(ContentCardClassType)classType
createdAt:(double)createdAt isDismissible:(BOOL)isDismissible;
@property (nonatomic, readonly) NSString *contentCardId;
@property (nonatomic) ContentCardClassType classType;
@property (nonatomic, readonly) double *createdAt;
@property (nonatomic, readonly) BOOL isDismissible;
...
// other Content Card properties such as expiresAt, pinned, etc.
@end
```
**Initialiseur d'objet personnalisé**
Les métadonnées d'un `ABKContentCard` sont utilisées pour renseigner les variables de votre objet. Les paires clé-valeur définies dans le tableau de bord de Braze sont représentées dans le dictionnaire « extras ».
```swift
extension CustomObject: ContentCardable {
init?(metaData: [ContentCardKey: Any], classType contentCardClassType: ContentCardClassType) {
guard let idString = metaData[.idString] as? String,
let createdAt = metaData[.created] as? Double,
let isDismissable = metaData[.dismissable] as? Bool,
let extras = metaData[.extras] as? [AnyHashable: Any],
else { return nil }
let contentCardData = ContentCardData(contentCardId: idString, contentCardClassType: contentCardClassType, createdAt: createdAt, isDismissable: isDismissable)
let customObjectProperty = extras["YOUR-CUSTOM-OBJECT-PROPERTY"] as? String
self.init(contentCardData: contentCardData, property: customObjectProperty)
}
}
```
**Identifier les types**
L'enum `ContentCardClassType` représente la valeur `class_type` dans le tableau de bord de Braze. Cette valeur est également utilisée comme identifiant de filtre pour afficher les Content Cards à différents endroits.
```swift
enum ContentCardClassType: Hashable {
case yourValue
case yourOtherValue
...
case none
init(rawType: String?) {
switch rawType?.lowercased() {
case "your_value": // these values much match the value set in the Braze dashboard
self = .yourValue
case "your_other_value": // these values much match the value set in the Braze dashboard
self = .yourOtherValue
...
default:
self = .none
}
}
}
```
**Initialiseur d'objet personnalisé**
Les métadonnées d'un `ABKContentCard` sont utilisées pour renseigner les variables de votre objet. Les paires clé-valeur définies dans le tableau de bord de Braze sont représentées dans le dictionnaire « extras ».
```objc
- (id _Nullable)initWithMetaData:(nonnull NSDictionary *)metaData classType:(enum ContentCardClassType)classType {
self = [super init];
if (self) {
if ([metaData objectForKey:ContentCardKeyIdString] && [metaData objectForKey:ContentCardKeyCreated] && [metaData objectForKey:ContentCardKeyDismissible] && [metaData objectForKey:ContentCardKeyExtras]) {
NSDictionary *extras = metaData[ContentCardKeyExtras];
NSString *idString = metaData[ContentCardKeyIdString];
double createdAt = [metaData[ContentCardKeyCreated] doubleValue];
BOOL isDismissible = metaData[ContentCardKeyDismissible];
if ([extras objectForKey: @"YOUR-CUSTOM-PROPERTY")
_customObjectProperty = extras[@"YOUR-CUSTOM-OBJECT-PROPERTY"];
self.contentCardData = [[ContentCardData alloc] initWithIdString:idString classType:classType createdAt:createdAt isDismissible:isDismissible];
return self;
}
}
return nil;
}
```
**Identifier les types**
L'enum `ContentCardClassType` représente la valeur `class_type` dans le tableau de bord de Braze. Cette valeur est également utilisée comme identifiant de filtre pour afficher les Content Cards à différents endroits.
```objc
typedef NS_ENUM(NSInteger, ContentCardClassType) {
ContentCardClassTypeNone = 0,
ContentCardClassTypeYourValue,
ContentCardClassTypeYourOtherValue,
...
};
+ (NSArray *)contentCardClassTypeArray {
return @[ @"", @"your_value", @"your_other_value" ];
}
+ (ContentCardClassType)contentCardClassTypeForString:(NSString*)rawValue {
if ([[self contentCardClassTypeArray] indexOfObject:rawValue] == NSNotFound) {
return ContentCardClassTypeNone;
} else {
NSInteger value = [[self contentCardClassTypeArray] indexOfObject:rawValue];
return (ContentCardClassType) value;
}
}
```
**Demander des Content Cards**
Tant que l'observateur est toujours conservé en mémoire, le rappel de notification du SDK Braze peut être attendu.
```swift
func loadContentCards() {
BrazeManager.shared.addObserverForContentCards(observer: self, selector: #selector(contentCardsUpdated))
BrazeManager.shared.requestContentCardsRefresh()
}
```
**Gestion du rappel SDK des Content Cards**
Transmettez le rappel de notification au fichier auxiliaire pour analyser les données de la charge utile de votre ou vos objets personnalisés.
```swift
@objc func contentCardsUpdated(_ notification: Notification) {
guard let contentCards = BrazeManager.shared.handleContentCardsUpdated(notification, for: [.yourValue]) as? [CustomObject],!contentCards.isEmpty else { return }
// do something with your array of custom objects
}
```
**Travailler avec les Content Cards**
Le `class_type` est transmis comme filtre pour ne renvoyer que les Content Cards qui ont un `class_type` correspondant.
```swift
func handleContentCardsUpdated(_ notification: Notification, for classTypes: [ContentCardClassType]) -> [ContentCardable] {
guard let updateIsSuccessful = notification.userInfo?[ABKContentCardsProcessedIsSuccessfulKey] as? Bool, updateIsSuccessful, let cards = contentCards else { return [] }
return convertContentCards(cards, for: classTypes)
}
```
**Demander des Content Cards**
Tant que l'observateur est toujours conservé en mémoire, le rappel de notification du SDK Braze peut être attendu.
```objc
- (void)loadContentCards {
[[BrazeManager shared] addObserverForContentCards:self selector:@selector(contentCardsUpdated:)];
[[BrazeManager shared] requestContentCardsRefresh];
}
```
**Gestion du rappel SDK des Content Cards**
Transmettez le rappel de notification au fichier auxiliaire pour analyser les données de la charge utile de votre ou vos objets personnalisés.
```objc
- (void)contentCardsUpdated:(NSNotification *)notification {
NSArray *classTypes = @[@(ContentCardClassTypeYourValue)];
NSArray *contentCards = [[BrazeManager shared] handleContentCardsUpdated:notification forClassTypes:classTypes];
// do something with your array of custom objects
}
```
**Travailler avec les Content Cards**
Le `class_type` est transmis comme filtre pour ne renvoyer que les Content Cards qui ont un `class_type` correspondant.
```objc
- (NSArray *)handleContentCardsUpdated:(NSNotification *)notification forClassType:(ContentCardClassType)classType {
BOOL updateIsSuccessful = [notification.userInfo[ABKContentCardsProcessedIsSuccessfulKey] boolValue];
if (updateIsSuccessful) {
return [self convertContentCards:self.contentCards forClassType:classType];
} else {
return @[];
}
}
```
**Travailler avec les données de la charge utile**
Parcourt le tableau de Content Cards et n'analyse que les cartes avec un `class_type` correspondant. La charge utile d'une ABKContentCard est analysée dans un `Dictionary`.
```swift
func convertContentCards(_ cards: [ABKContentCard], for classTypes: [ContentCardClassType]) -> [ContentCardable] {
var contentCardables: [ContentCardable] = []
for card in cards {
let classTypeString = card.extras?[ContentCardKey.classType.rawValue] as? String
let classType = ContentCardClassType(rawType: classTypeString)
guard classTypes.contains(classType) else { continue }
var metaData: [ContentCardKey: Any] = [:]
switch card {
case let banner as ABKBannerContentCard:
metaData[.image] = banner.image
case let captioned as ABKCaptionedImageContentCard:
metaData[.title] = captioned.title
metaData[.cardDescription] = captioned.cardDescription
metaData[.image] = captioned.image
case let classic as ABKClassicContentCard:
metaData[.title] = classic.title
metaData[.cardDescription] = classic.cardDescription
default:
break
}
metaData[.idString] = card.idString
metaData[.created] = card.created
metaData[.dismissible] = card.dismissible
metaData[.urlString] = card.urlString
metaData[.extras] = card.extras
...
// other Content Card properties such as expiresAt, pinned, etc.
if let contentCardable = contentCardable(with: metaData, for: classType) {
contentCardables.append(contentCardable)
}
}
return contentCardables
}
```
**Initialisation de vos objets personnalisés à partir des données de la charge utile des Content Cards**
Le `class_type` est utilisé pour déterminer lequel de vos objets personnalisés sera initialisé à partir des données de la charge utile.
```swift
func contentCardable(with metaData: [ContentCardKey: Any], for classType: ContentCardClassType) -> ContentCardable? {
switch classType {
case .yourValue:
return CustomObject(metaData: metaData, classType: classType)
case .yourOtherValue:
return OtherCustomObject(metaData: metaData, classType: classType)
...
default:
return nil
}
}
```
**Travailler avec les données de la charge utile**
Parcourt le tableau de Content Cards et n'analyse que les cartes avec un `class_type` correspondant. La charge utile d'une ABKContentCard est analysée dans un `Dictionary`.
```objc
- (NSArray *)convertContentCards:(NSArray *)cards forClassType:(ContentCardClassType)classType {
NSMutableArray *contentCardables = [[NSMutableArray alloc] init]; for (ABKContentCard *card in cards) {
NSString *classTypeString = [card.extras objectForKey:ContentCardKeyClassType];
ContentCardClassType cardClassType = [ContentCardData contentCardClassTypeForString: classTypeString];
if (cardClassType != classType) { continue; }
NSMutableDictionary *metaData = [[NSMutableDictionary alloc] init];
if ([card isKindOfClass:[ABKBannerContentCard class]]) {
ABKBannerContentCard *banner = (ABKBannerContentCard *)card;
metaData[ContentCardKeyImage] = banner.image;
} else if ([card isKindOfClass:[ABKCaptionedImageContentCard class]]) {
ABKCaptionedImageContentCard *captioned = (ABKCaptionedImageContentCard *)card;
metaData[ContentCardKeyTitle] = captioned.title;
metaData[ContentCardKeyCardDescription] = captioned.cardDescription;
metaData[ContentCardKeyImage] = captioned.image;
} else if ([card isKindOfClass:[ABKClassicContentCard class]]) {
ABKClassicContentCard *classic = (ABKClassicContentCard *)card;
metaData[ContentCardKeyCardDescription] = classic.title;
metaData[ContentCardKeyImage] = classic.image;
}
metaData[ContentCardKeyIdString] = card.idString;
metaData[ContentCardKeyCreated] = [NSNumber numberWithDouble:card.created];
metaData[ContentCardKeyDismissible] = [NSNumber numberWithBool:card.dismissible];
metaData[ContentCardKeyUrlString] = card.urlString;
metaData[ContentCardKeyExtras] = card.extras;
...
// other Content Card properties such as expiresAt, pinned, etc.
id contentCardable = [self contentCardableWithMetaData:metaData forClassType:classType];
if (contentCardable) {
[contentCardables addObject:contentCardable];
}
}
return contentCardables;
}
```
**Initialisation de vos objets personnalisés à partir des données de la charge utile des Content Cards**
Le `class_type` est utilisé pour déterminer lequel de vos objets personnalisés sera initialisé à partir des données de la charge utile.
```obj-c
- (id)contentCardableWithMetaData:(NSDictionary *)metaData forClassType:(ContentCardClassType)classType {
switch (classType) {
case ContentCardClassTypeYourValue:
return [[CustomObject alloc] initWithMetaData:metaData classType:classType];
case ContentCardClassTypeYourOtherValue:
return nil;
...
default:
return nil;
}
}
```
## Cas d'utilisation {#sample-use-cases}
Vous trouverez ci-dessous trois cas d'utilisation. Chaque cas d'utilisation offre une explication détaillée, des extraits de code pertinents et un aperçu de la façon dont les variables des Content Cards peuvent être rassemblées et utilisées dans le tableau de bord de Braze :
- [Content Cards en tant que contenu supplémentaire](#content-cards-as-supplemental-content)
- [Content Cards dans un centre de messages](#content-cards-in-a-message-center)
- [Content Cards interactives](#interactive-content-cards)
### Content Cards en tant que contenu supplémentaire {#content-cards-as-supplemental-content}
{: style="float:right;max-width:25%;margin-left:15px;border:0;"}
Vous pouvez intégrer de façon fluide les Content Cards dans un flux existant, ce qui permet de charger simultanément les données de plusieurs flux. Cela crée une expérience cohésive et harmonieuse avec les Content Cards de Braze et le contenu du flux existant.
L'exemple à droite montre un `UICollectionView` avec une liste hybride d'éléments renseignés par les données locales et les Content Cards alimentées par Braze. Avec cette méthode, les Content Cards ne peuvent pas être différenciées du contenu existant.
#### Configuration du tableau de bord {#dashboard-configuration}
Cette Content Card est livrée par une Campaign déclenchée par API avec des paires clé-valeur déclenchées par API. Cette option est idéale pour les Campaigns où les valeurs de la carte dépendent de facteurs externes pour déterminer le contenu à afficher à l'utilisateur. Notez que `class_type` doit être connu au moment de la configuration.
{: style="max-width:60%;"}
##### Prêt à enregistrer les analyses ? {#ready-to-log-analytics}
Consultez la [section suivante](#logging-impressions-clicks-and-dismissals) pour mieux comprendre à quoi doit ressembler le flux de données.
### Content Cards dans un centre de messages {#content-cards-in-a-message-center}
Les Content Cards peuvent être utilisées dans un format de centre de messages dans lequel chaque message est sa propre carte. Chaque message du centre de messages est rempli via une charge utile de Content Card et chaque carte contient des paires clé-valeur supplémentaires qui alimentent l'interface ou l'expérience utilisateur lors du clic. Dans l'exemple suivant, un message vous dirige vers une vue personnalisée arbitraire, tandis qu'un autre ouvre une vue web qui affiche du HTML personnalisé.
{: style="border:0;"}{: style="max-width:80%;border:0"}
#### Configuration du tableau de bord {#dashboard-configuration}
Pour les types de messages suivants, la paire clé-valeur `class_type` doit être ajoutée à la configuration de votre tableau de bord. Les valeurs assignées ici sont arbitraires, mais doivent pouvoir être distinguées entre types de classe. Ces paires clé-valeur sont les identifiants clés que l'application examine lorsqu'elle décide où aller lorsque l'utilisateur clique sur un message abrégé de la boîte de réception.
Les paires clé-valeur pour ce cas d'utilisation comprennent :
- `message_header` défini comme `Full Page`
- `class_type` défini comme `message_full_page`
{: style="max-width:60%;"}
Les paires clé-valeur pour ce cas d'utilisation comprennent :
- `message_header` défini comme `HTML`
- `class_type` défini comme `message_webview`
- `message_title`
Ce message recherche également une paire clé-valeur HTML, mais si vous travaillez avec un domaine web, une paire clé-valeur URL est également valide.
{: style="max-width:60%;"}
#### Explication supplémentaire {#further-explanation}
La logique du centre de messages est dirigée par le `contentCardClassType` qui est fourni par les paires clé-valeur de Braze. En utilisant la méthode `addContentCardToView`, vous pouvez à la fois filtrer et identifier ces types de classe.
**Utilisation de `class_type` pour le comportement au clic**
Lorsqu'un message est cliqué, le `ContentCardClassType` gère la façon dont l'écran suivant doit être rempli.
```swift
func addContentCardToView(with message: Message) {
switch message.contentCardData?.contentCardClassType {
case .message(.fullPage):
loadContentCardFullPageView(with: message as! FullPageMessage)
case .message(.webView):
loadContentCardWebView(with: message as! WebViewMessage)
default:
break
}
}
```
**Utilisation de `class_type` pour le comportement au clic**
Lorsqu'un message est cliqué, le `ContentCardClassType` gère la façon dont l'écran suivant doit être rempli.
```objc
- (void)addContentCardToView:(Message *)message {
switch (message.contentCardData.classType) {
case ContentCardClassTypeMessageFullPage:
[self loadContentCardFullPageView:(FullPageMessage *)message];
break;
case ContentCardClassTypeMessageWebview:
[self loadContentCardWebView:(WebViewMessage *)message];
break;
default:
break;
}
}
```
##### Prêt à enregistrer les analyses ? {#ready-to-log-analytics}
Consultez la [section suivante](#logging-impressions-clicks-and-dismissals) pour mieux comprendre à quoi doit ressembler le flux de données.
{: style="border:0;"}{: style="float:right;max-width:45%;border:0;margin-left:15px;"}
### Content Cards interactives {#interactive-content-cards}
Les Content Cards peuvent être utilisées pour créer des expériences dynamiques et interactives pour vos utilisateurs. Dans l'exemple à droite, une fenêtre contextuelle de Content Card apparaît au moment du paiement, fournissant aux utilisateurs des promotions de dernière minute.
Des cartes bien placées comme celles-ci constituent un excellent moyen d'encourager les utilisateurs à entreprendre des actions spécifiques.
#### Configuration du tableau de bord {#dashboard-configuration}
La configuration du tableau de bord pour les Content Cards interactives est simple. Les paires clé-valeur pour ce cas d'utilisation comprennent un `discount_percentage` défini comme montant de remise souhaité et un `class_type` défini comme `coupon_code`. Ces paires clé-valeur déterminent la façon dont les Content Cards spécifiques à un type sont filtrées et affichées sur l'écran de paiement.
{: style="max-width:70%;"}
##### Prêt à enregistrer les analyses ? {#ready-to-log-analytics}
Consultez la [section suivante](#logging-impressions-clicks-and-dismissals) pour mieux comprendre à quoi doit ressembler le flux de données.
## Personnalisation du mode sombre {#dark-mode-customization}
Par défaut, les vues des Content Cards s'adaptent automatiquement aux changements de mode sombre de l'appareil grâce à un ensemble de couleurs thématiques.
Ce comportement peut être modifié comme indiqué dans notre [guide des styles personnalisés](https://www.braze.com/docs/fr/fr/developer_guide/platform_integration_guides/ios/content_cards/customization/custom_styling/#disabling-dark-mode).
## Enregistrer les impressions, les clics et les rejets {#logging-impressions-clicks-and-dismissals}
Après avoir étendu vos objets personnalisés pour qu'ils fonctionnent comme des Content Cards, l'enregistrement d'indicateurs précieux tels que les impressions, les clics et les rejets est rapide. Pour ce faire, vous pouvez utiliser un protocole `ContentCardable` qui référence et fournit des données à un fichier auxiliaire qui sera enregistré par le SDK Braze.
#### Composants d'implémentation
{#implementation-components}
**Enregistrer les analyses**
Les méthodes de journalisation peuvent être appelées directement à partir d'objets conformes au protocole `ContentCardable`.
```swift
customObject.logContentCardImpression()
customObject.logContentCardClicked()
customObject.logContentCardDismissed()
```
**Récupérer la `ABKContentCard`**
Le `idString` transmis à partir de votre objet personnalisé est utilisé pour identifier la Content Card associée afin d'enregistrer les analyses.
```swift
extension BrazeManager {
func logContentCardImpression(idString: String?) {
guard let contentCard = getContentCard(forString: idString) else { return }
contentCard.logContentCardImpression()
}
private func getContentCard(forString idString: String?) -> ABKContentCard? {
return contentCards?.first(where: { $0.idString == idString })
}
}
```
**Enregistrer les analyses**
Les méthodes de journalisation peuvent être appelées directement à partir d'objets conformes au protocole `ContentCardable`.
```objc
[customObject logContentCardImpression];
[customObject logContentCardClicked];
[customObject logContentCardDismissed];
```
**Récupérer la `ABKContentCard`**
Le `idString` transmis à partir de votre objet personnalisé est utilisé pour identifier la Content Card associée afin d'enregistrer les analyses.
```objc
- (void)logContentCardImpression:(NSString *)idString {
ABKContentCard *contentCard = [self getContentCard:idString];
[contentCard logContentCardImpression];
}
- (ABKContentCard *)getContentCard:(NSString *)idString {
NSPredicate *predicate = [NSPredicate predicateWithFormat:@"self.idString == %@", idString];
NSArray *filteredArray = [self.contentCards filteredArrayUsingPredicate:predicate];
return filteredArray.firstObject;
}
```
**Important:**
Pour une Content Card de variante de contrôle, un objet personnalisé doit toujours être instancié et la logique de l'interface graphique doit définir la vue correspondante de l'objet comme masquée. L'objet peut ensuite enregistrer une impression pour informer notre analytique du moment où l'utilisateur aurait vu la carte de contrôle.
## Fichiers d'aide {#helper-files}
**Fichier d'aide ContentCardKey**
```swift
enum ContentCardKey: String {
case idString
case created
case classType = "class_type"
case dismissible
case extras
...
}
```
```objc
static NSString *const ContentCardKeyIdString = @"idString";
static NSString *const ContentCardKeyCreated = @"created";
static NSString *const ContentCardKeyClassType = @"class_type";
static NSString *const ContentCardKeyDismissible = @"dismissible";
static NSString *const ContentCardKeyExtras = @"extras";
...
```
# Sessions de suivi pour iOS
Source: /docs/fr/developer_guide/platforms/legacy_sdks/ios/analytics/tracking_sessions/index.md
**Warning:**
[AppboyKit](https://github.com/Appboy/appboy-ios-sdk) (also known as the Objective-C SDK) is no longer supported and has been replaced by the [Swift SDK](https://www.braze.com/docs/fr/fr/developer_guide/sdk_integration/?sdktab=swift). It will no longer receive new features, bug fixes, security updates, or technical support—however, messaging and analytics will continue to function as normal. To learn more, see [Introducing the New Braze Swift SDK](https://www.braze.com/resources/articles/introducing-the-new-braze-swift-sdk).
# Suivre une session pour iOS
Le SDK Braze rapporte les données de session utilisées par le tableau de bord de Braze pour calculer l’engagement des utilisateurs et d’autres analyses essentielles à une meilleure connaissance de vos utilisateurs. Notre SDK génère des points de données « démarrage de session » et « fin de session » qui comptent pour la longueur de session et le comptage de sessions visibles dans le tableau de bord de Braze en fonction des sémantiques de session suivantes.
## Cycle de vie de la session
Une session est lancée lorsque vous appelez `[[Appboy sharedInstance]` `startWithApiKey:inApplication:withLaunchOptions:withAppboyOptions]`, après quoi les sessions commencent par défaut lorsque la notification `UIApplicationWillEnterForegroundNotification` est déclenchée (par exemple, lorsque l'application entre au premier plan) et se terminent lorsque l'application quitte le premier plan (par exemple, lorsque la notification `UIApplicationDidEnterBackgroundNotification` est déclenchée ou lorsque l'application meurt).
**Note:**
Si vous devez forcer une nouvelle session, vous pouvez le faire en changeant d’utilisateur.
## Personnaliser la libération sur temporisation de session
À partir de la version 3.14.1 du SDK iOS de Braze, vous pouvez définir le délai d'expiration de la session à l'aide du fichier Info.plist. Ajouter le dictionnaire `Braze` à votre fichier `Info.plist`. À l’intérieur du dictionnaire `Braze`, ajoutez la de sous-entrée numérique `SessionTimeout` et définissez la valeur sur votre délai d’expiration de session personnalisé. Notez qu’avant le SDK Braze pour iOS v4.0.2, la clé du dictionnaire `Appboy` doit être utilisée à la place de `Braze`.
Vous pouvez également attribuer à la clé `ABKSessionTimeoutKey` la valeur entière souhaitée dans votre objet `appboyOptions` transmis à [`startWithApiKey`](https://appboy.github.io/appboy-ios-sdk/docs/interface_appboy.html#afd911d60dfe7e5361afbfb364f5d20f9).
```objc
// Sets the session timeout to 60 seconds
[Appboy startWithApiKey:@"YOUR-API_KEY"
inApplication:application
withLaunchOptions:options
withAppboyOptions:@{ ABKSessionTimeoutKey : @(60) }];
```
```swift
// Sets the session timeout to 60 seconds
Appboy.start(withApiKey: "YOUR-API-KEY",
in:application,
withLaunchOptions:launchOptions,
withAppboyOptions:[ ABKSessionTimeoutKey : 60 ])
```
Si vous avez défini un délai de libération sur temporisation de session, les sémantiques de session s’étendent à toute cette temporisation personnalisée.
**Note:**
La valeur minimale pour `sessionTimeoutInSeconds` est de 1 seconde. La valeur par défaut est 10 secondes.
## Tester le suivi de session
Pour détecter les sessions via votre utilisateur, trouvez votre utilisateur sur le tableau de bord et naviguez vers **App Usage** sur le profil utilisateur. Vous pouvez confirmer que le suivi de session fonctionne en vérifiant que la métrique « session » augmente lorsque vous vous y attendez.

# Définir les ID d’utilisateur pour iOS
Source: /docs/fr/developer_guide/platforms/legacy_sdks/ios/analytics/setting_user_ids/index.md
**Warning:**
[AppboyKit](https://github.com/Appboy/appboy-ios-sdk) (also known as the Objective-C SDK) is no longer supported and has been replaced by the [Swift SDK](https://www.braze.com/docs/fr/fr/developer_guide/sdk_integration/?sdktab=swift). It will no longer receive new features, bug fixes, security updates, or technical support—however, messaging and analytics will continue to function as normal. To learn more, see [Introducing the New Braze Swift SDK](https://www.braze.com/resources/articles/introducing-the-new-braze-swift-sdk).
# Définir les ID d’utilisateur pour iOS
User IDs should be set for each of your users. These should be unchanging and accessible when a user opens the app. Naming your user IDs correctly from the start is one of the most **crucial** steps when setting up user IDs. We strongly suggest using the Braze standard of UUIDs and GUIDs (detailed below). We also strongly recommend providing this identifier as it will allow you to:
- Track your users across devices and platforms, improving the quality of your behavioral and demographic data.
- Import data about your users using our [user data API](https://www.braze.com/docs/fr/fr/developer_guide/rest_api/user_data/#user-data).
- Target specific users with our [messaging API](https://www.braze.com/docs/fr/fr/api/endpoints/messaging/) for both general and transactional messages.
**Note:**
If such an identifier is not available, Braze will assign a unique identifier to your users, but you will lack the capabilities listed for user IDs. You should avoid setting user IDs for users for whom you lack a unique identifier that is tied to them as an individual. Passing a device identifier offers no benefit versus the automatic anonymous user tracking Braze offers by default.
**Warning:**
If you want to include an identifiable value as your user ID, for additional security, we **strongly recommend** adding our [SDK authentication](https://www.braze.com/docs/fr/fr/developer_guide/authentication/) feature to prevent user impersonation.
## Convention de dénomination des ID utilisateurs suggérée
At Braze, we **strongly recommend** naming user IDs, also referred to as external IDs, in a [UUIDs and GUIDs](https://en.wikipedia.org/wiki/Universally_unique_identifier) format. UUIDs and GUIDs are universally unique identifiers that consist of a 128-bit number used to identify information in computer systems. This means that these UUIDs are long, random and well distributed. If you choose a different method in which to name your user IDs, they must also be long, random and well distributed. It is also important to note, that user IDs are **case sensitive**. For example, "Abcdef" is a different user from "abcdef".
If you find your user IDs include names, email addresses, timestamps, or incrementors, we suggest using a new naming method that is more secure so that your user IDs are not as easy to guess or impersonate. If you choose to include this in your user IDs, we **strongly recommend** adding our [SDK authentication](https://www.braze.com/docs/fr/fr/developer_guide/authentication/) feature to prevent user impersonation.
Providing this information to others may allow people outside your organization to glean information on how your user IDs are structured, opening up your organization to potentially malicious updates or removal of information. Choosing the correct naming convention from the start is one of the most important steps in setting up user IDs. However, a migration is possible using our [external ID migration endpoint](https://www.braze.com/docs/fr/fr/api/endpoints/user_data/external_id_migration/).
| User ID Naming |
| Recommended | Not Recommended |
| ------------ | ----------- |
| 123e4567-e89b-12d3-a456-836199333115 | JonDoe829525552 |
| 8c0b3728-7fa7-4c68-a32e-12de1d3ed2d5 | Anna@email.com |
| f0a9b506-3c5b-4d86-b16a-94fc4fc3f7b0 | CompanyName-1-2-19 |
| 2d9e96a1-8f15-4eaf-bf7b-eb8c34e25962 | jon-doe-1-2-19 |
{: .reset-td-br-1 .reset-td-br-2 aria-label="Table" }
## Attribuer un ID utilisateur
Vous devez effectuer l’appel suivant dès que l’utilisateur est identifié (généralement après la connexion) pour définir l’ID utilisateur :
```objc
[[Appboy sharedInstance] changeUser:@"YOUR_USER_ID_STRING"];
```
```swift
Appboy.sharedInstance()?.changeUser("YOUR_USER_ID")
```
**Warning:**
**N’appelez pas `changeUser()` lorsqu’un utilisateur se déconnecte. `changeUser()` ne doit être appelé que lorsque l’utilisateur se connecte à l’application.** Définir [`changeUser()`](https://appboy.github.io/appboy-ios-sdk/docs/interface_appboy.html#ac8b369b40e15860b0ec18c0f4b46ac69%20%22changeuser%22) sur une valeur par défaut statique associera TOUTES les activités de l'utilisateur avec cet « utilisateur » par défaut jusqu'à ce qu’il se connecte à nouveau.
N’oubliez pas d’employer cette méthode dans le fil principal de votre application. L’utilisation asynchrone de la méthode peut entraîner un comportement non défini.
En outre, nous vous déconseillons de modifier l'ID de l'utilisateur lorsqu'il se déconnecte, car cela vous empêche de cibler l'utilisateur précédemment connecté avec des campagnes de réengagement. Si vous envisagez plusieurs utilisateurs sur le même appareil, mais que vous souhaitez n’en cibler qu’un seul lorsque votre application est déconnectée, nous vous recommandons de suivre séparément l’ID utilisateur que vous souhaitez cibler lorsqu’il est déconnecté et de revenir à cet utilisateur. ID dans le cadre du processus de déconnexion de votre application.
## Meilleures pratiques et remarques sur l’intégration de l’ID utilisateur
### Automatic preservation of anonymous user history
| Identification Context | Preservation Behavior |
| ---------------------- | -------------------------- |
| User **has not** been previously identified | Anonymous history **is merged** with user profile upon identification. |
| User **has been** previously identified in-app or via API | Anonymous history **is not merged** with user profile upon identification. |
{: .reset-td-br-1 .reset-td-br-2 aria-label="Automatic preservation of anonymous user history" }
Refer to [Identified user profiles](https://www.braze.com/docs/fr/fr/user_guide/data_and_analytics/user_data_collection/user_profile_lifecycle/#identified-user-profiles) for more information on what occurs when you identify anonymous users.
### Additional notes and best practices
Note the following:
- If your app is used by multiple people, you can assign each user a unique identifier to track them.
- After a user ID has been set, you cannot revert that user to an anonymous profile.
- Do not change the user ID when a user logs out as this can separate the device from the user profile.
- As a result, you won't be able to target the previously logged out user with re-engagement messages. If you anticipate multiple users on the same device, but only want to target one of them when your app is in a logged-out state, we recommend separately keeping track of the user ID you want to target while logged out and switching back to that user ID as part of your app's logout process. By default, only the last user that was logged in will receive push notifications from your app.
- Switching from one identified user to another is a relatively costly operation.
- When you request the user switch, the current session for the previous user is automatically closed and a new session is started. Braze will automatically make a data refresh request for in-app messages and other Braze resources for the new user.
**Tip:**
If you opt to use a hash of a unique identifier as your user ID, be sure that you're normalizing the input to your hashing function. For example, if you're going to use a hash of an email address, confirm that you're stripping leading and trailing whitespace from the input, and taking localization into account.
## Alias d’utilisateurs
A [user alias](https://www.braze.com/docs/fr/fr/user_guide/data_and_analytics/user_data_collection/user_profile_lifecycle/#user-aliases) serves as an alternative unique user identifier. You can use aliases to identify users along different dimensions than your core user ID:
* Set a consistent identifier for analytics that will follow a given user both before and after they have logged in to a mobile app or website.
* Add the identifiers used by a third-party vendor to your company users in order to more easily reconcile your data externally.
Each alias consists of two parts: a name for the identifier itself, and a label indicating the type of alias. Users can have multiple aliases with different labels, but only one name per label.
For more information on setting user aliases against a user profile, refer to [User aliases](https://www.braze.com/docs/fr/fr/user_guide/data_and_analytics/user_data_collection/user_profile_lifecycle/#user-aliases).
# Suivi des événements personnalisés pour iOS
Source: /docs/fr/developer_guide/platforms/legacy_sdks/ios/analytics/tracking_custom_events/index.md
**Warning:**
[AppboyKit](https://github.com/Appboy/appboy-ios-sdk) (also known as the Objective-C SDK) is no longer supported and has been replaced by the [Swift SDK](https://www.braze.com/docs/fr/fr/developer_guide/sdk_integration/?sdktab=swift). It will no longer receive new features, bug fixes, security updates, or technical support—however, messaging and analytics will continue to function as normal. To learn more, see [Introducing the New Braze Swift SDK](https://www.braze.com/resources/articles/introducing-the-new-braze-swift-sdk).
# Suivre les événements personnalisés pour iOS {#track-custom-events-for-ios}
Vous pouvez enregistrer des événements personnalisés dans Braze pour en savoir plus sur les modèles d'utilisation de votre application et segmenter vos utilisateurs en fonction de leurs actions sur le tableau de bord.
Avant la mise en œuvre, n'oubliez pas de consulter les exemples d'options de segmentation offertes par les événements personnalisés, les attributs personnalisés et les événements d'achat dans nos [bonnes pratiques](https://www.braze.com/docs/fr/fr/developer_guide/platform_wide/analytics_overview/#user-data-collection), ainsi que nos notes sur les [conventions d'appellation des événements](https://www.braze.com/docs/fr/fr/user_guide/data/activation/events/event_naming_conventions/).
## Ajouter un événement personnalisé {#adding-a-custom-event}
```objc
[[Appboy sharedInstance] logCustomEvent:@"YOUR_EVENT_NAME"];
```
```swift
Appboy.sharedInstance()?.logCustomEvent("YOUR_EVENT_NAME")
```
### Ajouter des propriétés {#adding-properties}
Vous pouvez ajouter des métadonnées sur les événements personnalisés en transmettant un `NSDictionary` renseigné avec des valeurs `NSNumber`, `NSString` ou `NSDate`.
```objc
[[Appboy sharedInstance] logCustomEvent:@"YOUR-EVENT-NAME"
withProperties:@{
@"you": @"can",
@"pass": @(NO),
@"orNumbers": @42,
@"orDates": [NSDate date],
@"or": @[@"any", @"array", @"here"],
@"andEven": @{
@"deeply": @[@"nested", @"json"]
}
}];
```
```swift
Appboy.sharedInstance()?.logCustomEvent(
"YOUR-EVENT-NAME",
withProperties: [
"you": "can",
"pass": false,
"orNumbers": 42,
"orDates": Date(),
"or": ["any", "array", "here"],
"andEven": [
"deeply": ["nested", "json"]
]
]
)
```
Pour plus d'informations, reportez-vous à notre [documentation sur les classes](http://appboy.github.io/appboy-ios-sdk/docs/interface_appboy.html#a4f0051d73d85cb37f63c232248124c79).
### Clés réservées {#event-reserved-keys}
Les clés suivantes sont réservées et ne peuvent pas être utilisées comme propriétés d'événement personnalisé :
- `time`
- `event_name`
## Ressources complémentaires {#additional-resources}
- Consultez la déclaration de la méthode dans le [fichier](https://github.com/Appboy/appboy-ios-sdk/blob/master/AppboyKit/include/Appboy.h) `Appboy.h`.
- Pour plus d'informations, reportez-vous à la documentation [`logCustomEvent`](http://appboy.github.io/appboy-ios-sdk/docs/interface_appboy.html#ad80c39e8c96482a77562a5b1a1d387aa).
# Définir des attributs personnalisés pour iOS
Source: /docs/fr/developer_guide/platforms/legacy_sdks/ios/analytics/setting_custom_attributes/index.md
**Warning:**
[AppboyKit](https://github.com/Appboy/appboy-ios-sdk) (also known as the Objective-C SDK) is no longer supported and has been replaced by the [Swift SDK](https://www.braze.com/docs/fr/fr/developer_guide/sdk_integration/?sdktab=swift). It will no longer receive new features, bug fixes, security updates, or technical support—however, messaging and analytics will continue to function as normal. To learn more, see [Introducing the New Braze Swift SDK](https://www.braze.com/resources/articles/introducing-the-new-braze-swift-sdk).
# Définir des attributs personnalisés pour iOS {#set-custom-attributes-for-ios}
Braze fournit des méthodes pour assigner des attributs aux utilisateurs. Vous pourrez ensuite filtrer et segmenter vos utilisateurs en fonction de ces attributs depuis le tableau de bord.
Avant de procéder à l'implémentation, pensez à consulter les exemples d'options de segmentation offertes par les événements personnalisés, les attributs personnalisés et les événements d'achat dans nos [bonnes pratiques](https://www.braze.com/docs/fr/fr/developer_guide/platform_wide/analytics_overview/#user-data-collection), ainsi que nos notes sur les [conventions de nommage des événements](https://www.braze.com/docs/fr/fr/user_guide/data/activation/events/event_naming_conventions/).
## Affecter des attributs utilisateur par défaut {#assigning-default-user-attributes}
Pour attribuer des attributs utilisateur, vous devez définir le champ approprié sur l'objet partagé `ABKUser`.
Voici un exemple de définition de l'attribut de prénom :
```objc
[Appboy sharedInstance].user.firstName = @"first_name";
```
```swift
Appboy.sharedInstance()?.user.firstName = "first_name"
```
Les attributs suivants doivent être définis sur l'objet `ABKUser` :
- `firstName`
- `lastName`
- `email`
- `dateOfBirth`
- `country`
- `language`
- `homeCity`
- `phone`
- `userID`
- `gender`
## Affecter des attributs utilisateur personnalisés {#assigning-custom-user-attributes}
Au-delà des attributs utilisateur par défaut, Braze vous permet de définir des attributs personnalisés avec plusieurs types de données. Consultez notre documentation sur la [collecte de données utilisateur](https://www.braze.com/docs/fr/fr/developer_guide/analytics/) pour en savoir plus sur les options de segmentation offertes par chacun de ces attributs.
### Attribut personnalisé avec une valeur de chaîne de caractères {#custom-attribute-with-a-string-value}
```objc
[[Appboy sharedInstance].user setCustomAttributeWithKey:@"your_attribute_key" andStringValue:"your_attribute_value"];
```
```swift
Appboy.sharedInstance()?.user.setCustomAttributeWithKey("your_attribute_key", andStringValue: "your_attribute_value")
```
### Attribut personnalisé avec une valeur entière {#custom-attribute-with-an-integer-value}
```objc
[[Appboy sharedInstance].user setCustomAttributeWithKey:@"your_attribute_key" andIntegerValue:yourIntegerValue];
```
```swift
Appboy.sharedInstance()?.user.setCustomAttributeWithKey("your_attribute_key", andIntegerValue: yourIntegerValue)
```
### Attribut personnalisé avec une valeur double {#custom-attribute-with-a-double-value}
Braze traite les valeurs `float` et `double` de la même manière dans sa base de données.
```objc
[[Appboy sharedInstance].user setCustomAttributeWithKey:@"your_attribute_key" andDoubleValue:yourDoubleValue];
```
```swift
Appboy.sharedInstance()?.user.setCustomAttributeWithKey("your_attribute_key", andDoubleValue: yourDoubleValue)
```
### Attribut personnalisé avec une valeur booléenne {#custom-attribute-with-a-boolean-value}
```objc
[[Appboy sharedInstance].user setCustomAttributeWithKey:@"your_attribute_key" andBOOLValue:yourBOOLValue];
```
```swift
Appboy.sharedInstance()?.user.setCustomAttributeWithKey("your_attribute_key", andBOOLValue: yourBoolValue)
```
### Attribut personnalisé avec une valeur de date {#custom-attribute-with-a-date-value}
Les dates transmises à Braze avec cette méthode doivent être au format [ISO 8601](http://en.wikipedia.org/wiki/ISO_8601) (par ex. `2013-07-16T19:20:30+01:00`) ou au format `yyyy-MM-dd'T'HH:mm:ss:SSSZ` (`2016-12-14T13:32:31.601-0800`).
```objc
[[Appboy sharedInstance].user setCustomAttributeWithKey:@"your_attribute_key" andDateValue:yourDateValue];
```
```swift
Appboy.sharedInstance()?.user.setCustomAttributeWithKey("your_attribute_key", andDateValue:yourDateValue)
```
### Attribut personnalisé avec une valeur de tableau {#custom-attribute-with-an-array-value}
Le nombre maximum d'éléments par défaut dans un tableau est de 500. Vous pouvez modifier le nombre maximum d'éléments dans le tableau de bord de Braze, sous **Paramètres des données** > **Attributs personnalisés**. Les tableaux dépassant le nombre maximum d'éléments sont tronqués pour ne conserver que le nombre maximum d'éléments.
```objc
// Setting a custom attribute with an array value
[[Appboy sharedInstance].user setCustomAttributeArrayWithKey:@"array_name" array:@[@"value1", @"value2"]];
// Adding to a custom attribute with an array value
[[Appboy sharedInstance].user addToCustomAttributeArrayWithKey:@"array_name" value:@"value3"];
// Removing a value from an array type custom attribute
[[Appboy sharedInstance].user removeFromCustomAttributeArrayWithKey:@"array_name" value:@"value2"];
// Removing an entire array and key
[[Appboy sharedInstance].user setCustomAttributeArrayWithKey:@"array_name" array:nil];
```
```swift
// Setting a custom attribute with an array value
Appboy.sharedInstance()?.user.setCustomAttributeArrayWithKey("array_name", array: ["value1", "value2"])
// Adding to a custom attribute with an array value
Appboy.sharedInstance()?.user.addToCustomAttributeArrayWithKey("array_name", value: "value3")
// Removing a value from an array type custom attribute
Appboy.sharedInstance()?.user.removeFromCustomAttributeArrayWithKey("array_name", value: "value2")
```
### Réinitialiser un attribut personnalisé {#unsetting-a-custom-attribute}
Il est également possible de réinitialiser un attribut personnalisé à l'aide de la méthode suivante :
```objc
[[Appboy sharedInstance].user unsetCustomAttributeWithKey:@"your_attribute_key"];
```
```swift
Appboy.sharedInstance()?.user.unsetCustomAttributeWithKey("your_attribute_key")
```
### Incrémenter ou décrémenter des attributs personnalisés {#incrementingdecrementing-custom-attributes}
Ce code illustre l'incrémentation d'un attribut personnalisé. Vous pouvez incrémenter la valeur d'un attribut personnalisé avec n'importe quel entier positif ou négatif, ou valeur longue :
```objc
[[Appboy sharedInstance].user incrementCustomUserAttribute:@"your_attribute_key" by:incrementIntegerValue];
```
```swift
Appboy.sharedInstance()?.user.incrementCustomUserAttribute("your_attribute_key", by: incrementIntegerValue)
```
### Définir un attribut personnalisé via la REST API {#setting-a-custom-attribute-via-the-rest-api}
Vous pouvez également utiliser notre REST API pour définir les attributs utilisateur. Reportez-vous à la [documentation de l'API utilisateur](https://www.braze.com/docs/fr/fr/developer_guide/rest_api/user_data/#user-data) pour plus de détails.
### Limites de valeur des attributs personnalisés {#custom-attribute-value-limits}
Les valeurs d'attribut personnalisé ont une longueur maximale de 255 caractères ; les valeurs plus longues seront tronquées.
#### Informations supplémentaires {#additional-information}
- Vous trouverez plus de détails dans le fichier [`ABKUser.h`](https://github.com/Appboy/appboy-ios-sdk/blob/master/AppboyKit/include/Appboy.h).
- Reportez-vous à la [documentation `ABKUser`](http://appboy.github.io/appboy-ios-sdk/docs/interface_a_b_k_user.html) pour plus d'informations.
## Configuration des abonnements utilisateur {#setting-up-user-subscriptions}
Pour configurer un abonnement pour vos utilisateurs (par e-mail ou notification push), appelez respectivement les fonctions `setEmailNotificationSubscriptionType` ou `setPushNotificationSubscriptionType`. Ces deux fonctions prennent le type enum `ABKNotificationSubscriptionType` comme argument. Ce type comporte trois états :
| État de l'abonnement | Définition |
| ------------------- | ---------- |
| `ABKOptedin` | Abonné, avec consentement explicite |
| `ABKSubscribed` | Abonné, sans consentement explicite |
| `ABKUnsubscribed` | Désabonné ou refus explicite |
{: .reset-td-br-1 .reset-td-br-2 aria-label="Configuration des abonnements utilisateur" }
Les utilisateurs qui autorisent une application à leur envoyer des notifications push ont par défaut le statut `ABKOptedin`, car iOS exige un consentement explicite.
Les utilisateurs sont automatiquement définis sur `ABKSubscribed` dès la réception d'une adresse e-mail valide. Nous vous recommandons toutefois de mettre en place un processus d'abonnement explicite et de définir cette valeur sur `OptedIn` dès réception du consentement explicite de votre utilisateur. Reportez-vous à [Gérer les abonnements des utilisateurs](https://www.braze.com/docs/fr/fr/user_guide/channels/email/subscriptions/) pour plus de détails.
### Définir les abonnements par e-mail {#setting-email-subscriptions}
```objc
[[Appboy sharedInstance].user setEmailNotificationSubscriptionType: ABKNotificationSubscriptionType]
```
```swift
Appboy.sharedInstance()?.user.setEmailNotificationSubscriptionType(ABKNotificationSubscriptionType)
```
### Définir les abonnements aux notifications push {#setting-push-notification-subscriptions}
```objc
[[Appboy sharedInstance].user setPushNotificationSubscriptionType: ABKNotificationSubscriptionType]
```
```swift
Appboy.sharedInstance()?.user.setPushNotificationSubscriptionType(ABKNotificationSubscriptionType)
```
Reportez-vous à [Gérer les abonnements des utilisateurs](https://www.braze.com/docs/fr/fr/user_guide/channels/email/subscriptions/) pour plus de détails.
# Enregistrer les achats pour iOS
Source: /docs/fr/developer_guide/platforms/legacy_sdks/ios/analytics/logging_purchases/index.md
**Warning:**
[AppboyKit](https://github.com/Appboy/appboy-ios-sdk) (also known as the Objective-C SDK) is no longer supported and has been replaced by the [Swift SDK](https://www.braze.com/docs/fr/fr/developer_guide/sdk_integration/?sdktab=swift). It will no longer receive new features, bug fixes, security updates, or technical support—however, messaging and analytics will continue to function as normal. To learn more, see [Introducing the New Braze Swift SDK](https://www.braze.com/resources/articles/introducing-the-new-braze-swift-sdk).
# Enregistrer les achats pour iOS {#log-purchases-for-ios}
Enregistrez les achats in-app afin de pouvoir suivre vos chiffres d'affaires au fil du temps et selon les différentes sources, tout en segmentant vos utilisateurs par leur valeur vie client.
Braze prend en charge les achats dans plusieurs devises. Les achats que vous effectuez dans une devise autre qu'USD seront affichés dans le tableau de bord en USD en fonction du taux de change à la date à laquelle ils ont été enregistrés.
Avant la mise en œuvre, assurez-vous de consulter des exemples des options de segmentation offertes par les événements personnalisés, les attributs personnalisés et les événements d'achat dans nos [meilleures pratiques](https://www.braze.com/docs/fr/fr/developer_guide/platform_wide/analytics_overview/#user-data-collection), ainsi que nos notes sur les [conventions de nommage des événements](https://www.braze.com/docs/fr/fr/user_guide/data/activation/events/event_naming_conventions/).
## Suivi des achats et des chiffres d'affaires {#tracking-purchases-and-revenue}
Pour utiliser cette fonctionnalité, ajoutez cet appel de méthode après un achat réussi dans votre application :
```objc
[[Appboy sharedInstance] logPurchase:@"your product ID"
inCurrency:@"USD"
atPrice:[[[NSDecimalNumber alloc] initWithString:@"0.99"] autorelease]];
```
```swift
Appboy.sharedInstance()?.logPurchase("your product ID", inCurrency: "USD", atPrice: NSDecimalNumber(string: "0.99"))
```
- Les symboles de devise pris en charge sont les suivants : USD, CAD, EUR, GBP, JPY, AUD, CHF, NOK, MXN, NZD, CNY, RUB, TRY, INR, IDR, ILS, SAR, ZAR, AED, SEK, HKD, SPD, DKK, etc.
- Tout autre symbole de devise fourni générera un avertissement enregistré et aucune autre action ne sera effectuée par le SDK.
- L'ID de produit peut comporter un maximum de 255 caractères.
- Notez que si l'identifiant du produit est vide, l'achat ne sera pas enregistré dans Braze.
### Ajouter des propriétés {#properties-purchases}
Vous pouvez ajouter des métadonnées sur les achats en passant soit un [tableau de propriétés d'événement](https://www.braze.com/docs/fr/fr/user_guide/data_and_analytics/custom_data/custom_events/#nested-objects), soit un `NSDictionary` rempli avec des valeurs de `NSNumber`, `NSString` ou `NSDate`.
Consultez la [documentation de la classe iOS](http://appboy.github.io/appboy-ios-sdk/docs/interface_appboy.html#aaca4b885a8f61ac9fad3936b091448cc) pour plus de détails.
### Ajout d'une quantité {#adding-quantity}
Vous pouvez ajouter une quantité à vos achats si les clients effectuent le même achat plusieurs fois au cours d'une même commande. Pour ce faire, transmettez un `NSUInteger` pour la quantité.
* La quantité saisie doit être comprise entre [0, 100] pour que le SDK puisse enregistrer un achat.
* Les méthodes sans entrée de quantité auront une valeur de quantité égale à 1 par défaut.
* Les méthodes avec une entrée de quantité n'ont pas de valeur par défaut et **doivent** recevoir une entrée de quantité pour que le SDK puisse enregistrer un achat.
Reportez-vous à la [documentation de la classe iOS](http://appboy.github.io/appboy-ios-sdk/docs/interface_appboy.html#ab50403068be47c0acba9943583e259fa) pour plus de détails.
```objc
[[Appboy sharedInstance] logPurchase:@"your product ID"
inCurrency:@"USD"
atPrice:[[[NSDecimalNumber alloc] initWithString:@"0.99"] autorelease]
withProperties:@{@"key1":"value1"}];
```
```swift
Appboy.sharedInstance()?.logPurchase("your product ID", inCurrency: "USD", atPrice: NSDecimalNumber(string: "0.99"), withProperties: ["key1":"value1"])
```
**Tip:**
Si vous transmettez une valeur de 10 USD et une quantité de 3, cela s'enregistrera dans le profil de l'utilisateur comme trois achats de 10 dollars pour un total de 30 dollars.
### Enregistrer les achats au niveau de la commande {#log-purchases-at-the-order-level}
Si vous souhaitez enregistrer les achats au niveau de la commande plutôt qu'au niveau du produit, vous pouvez utiliser le nom de la commande ou la catégorie de commande comme `product_id`. Pour en savoir plus, reportez-vous aux [spécifications de l'objet d'achat](https://www.braze.com/docs/fr/fr/api/objects_filters/purchase_object/#product-id-naming-conventions).
### Clés réservées {#reserved-keys}
Les clés suivantes sont réservées et ne peuvent pas être utilisées comme propriétés d'achat :
- `time`
- `product_id`
- `quantity`
- `event_name`
- `price`
- `currency`
### REST API
Vous pouvez également utiliser notre REST API pour enregistrer les achats. Reportez-vous à la [documentation de l'API utilisateur](https://www.braze.com/docs/fr/fr/developer_guide/rest_api/user_data/#user-data) pour plus de détails.
# Suivi de la localisation pour iOS
Source: /docs/fr/developer_guide/platforms/legacy_sdks/ios/analytics/location_tracking/index.md
**Warning:**
[AppboyKit](https://github.com/Appboy/appboy-ios-sdk) (also known as the Objective-C SDK) is no longer supported and has been replaced by the [Swift SDK](https://www.braze.com/docs/fr/fr/developer_guide/sdk_integration/?sdktab=swift). It will no longer receive new features, bug fixes, security updates, or technical support—however, messaging and analytics will continue to function as normal. To learn more, see [Introducing the New Braze Swift SDK](https://www.braze.com/resources/articles/introducing-the-new-braze-swift-sdk).
# Suivi de la localisation pour iOS
Par défaut, Braze désactive le suivi de la localisation. Nous autorisons le suivi de la localisation après que l’application hôte a choisi le suivi de la localisation et obtenu l’autorisation de l’utilisateur. Si les utilisateurs ont opté pour le suivi de la localisation, Braze enregistrera une localisation unique pour chaque utilisateur au démarrage de la session.
**Important:**
Pour que le suivi de la localisation fonctionne de manière fiable dans iOS 14 pour les utilisateurs ayant octroyé une autorisation de localisation approximative, vous devez mettre à jour votre version SDK vers au moins `3.26.1`.
## Activer le suivi automatique de la localisation
À partir du SDK Braze pour iOS `v3.17.0`, le suivi de la localisation est désactivé par défaut. Vous pouvez activer le suivi automatique des localisations à l’aide du fichier `Info.plist`. Ajouter le dictionnaire `Braze` à votre fichier `Info.plist`. À l’intérieur du dictionnaire `Braze`, ajoutez la sous-entrée booléenne `EnableAutomaticLocationCollection` et réglez la valeur sur `YES`. Notez qu’avant le SDK Braze pour iOS v4.0.2, la clé du dictionnaire `Appboy` doit être utilisée à la place de `Braze`.
Vous pouvez également activer le suivi automatique de l'emplacement au démarrage de l'application via la méthode [`startWithApiKey:inApplication:withLaunchOptions:withAppboyOptions`](https://appboy.github.io/appboy-ios-sdk/docs/interface_appboy.html#aa9f1bd9e4a5c082133dd9cc344108b24). Dans le dictionnaire `appboyOptions`, paramétrez `ABKEnableAutomaticLocationCollectionKey` sur `YES`. Par exemple :
```objc
[Appboy startWithApiKey:@"YOUR-API_KEY"
inApplication:application
withLaunchOptions:options
withAppboyOptions:@{ ABKEnableAutomaticLocationCollectionKey : @(YES) }];
```
```swift
Appboy.start(withApiKey: "YOUR-API-KEY",
in:application,
withLaunchOptions:launchOptions,
withAppboyOptions:[ ABKEnableAutomaticLocationCollectionKey : true ])
```
### Transfert des données de localisation vers Braze
Les deux méthodes suivantes peuvent être utilisées pour définir manuellement la dernière localisation connue de l’utilisateur.
```objc
[[Appboy sharedInstance].user setLastKnownLocationWithLatitude:latitude
longitude:longitude
horizontalAccuracy:horizontalAccuracy];
```
```objc
[[Appboy sharedInstance].user setLastKnownLocationWithLatitude:latitude
longitude:longitude
horizontalAccuracy:horizontalAccuracy
altitude:altitude
verticalAccuracy:verticalAccuracy];
```
```swift
Appboy.sharedInstance()?.user.setLastKnownLocationWithLatitude(latitude: latitude, longitude: longitude, horizontalAccuracy: horizontalAccuracy)
```
```swift
Appboy.sharedInstance()?.user.setLastKnownLocationWithLatitude(latitude: latitude, longitude: longitude, horizontalAccuracy: horizontalAccuracy, altitude: altitude, verticalAccuracy: verticalAccuracy)
```
Pour plus d'informations, reportez-vous à [`ABKUser.h`](https://github.com/Appboy/appboy-ios-sdk/blob/master/AppboyKit/include/ABKUser.h).
# Suivi des désinstallations pour iOS
Source: /docs/fr/developer_guide/platforms/legacy_sdks/ios/analytics/uninstall_tracking/index.md
**Warning:**
[AppboyKit](https://github.com/Appboy/appboy-ios-sdk) (also known as the Objective-C SDK) is no longer supported and has been replaced by the [Swift SDK](https://www.braze.com/docs/fr/fr/developer_guide/sdk_integration/?sdktab=swift). It will no longer receive new features, bug fixes, security updates, or technical support—however, messaging and analytics will continue to function as normal. To learn more, see [Introducing the New Braze Swift SDK](https://www.braze.com/resources/articles/introducing-the-new-braze-swift-sdk).
# Suivi des désinstallations pour iOS {#uninstall-tracking-for-ios}
> Cet article explique comment configurer le suivi des désinstallations pour votre application iOS, et comment effectuer des tests pour que votre application ne prenne pas d'actions automatiques indésirables à la réception d'une notification push de suivi des désinstallations de Braze.
Le suivi des désinstallations utilise des notifications push en arrière-plan avec un indicateur Braze dans le payload. Pour plus d'informations, consultez le [suivi des désinstallations](https://www.braze.com/docs/fr/fr/user_guide/data_and_analytics/tracking/uninstall_tracking/#uninstall-tracking) dans notre guide de l'utilisateur.
## Étape 1 : Activer les notifications push en arrière-plan {#step-1-enabling-background-push}
Assurez-vous d'avoir activé l'option **Remote notifications** dans la section **Background Modes** de l'onglet **Capabilities** de votre projet Xcode. Reportez-vous à notre documentation sur les [notifications push silencieuses](https://www.braze.com/docs/fr/fr/developer_guide/platforms/legacy_sdks/ios/push_notifications/silent_push_notifications/) pour plus de détails.
## Étape 2 : Vérifier les notifications push en arrière-plan de Braze {#step-2-checking-for-braze-background-push}
Braze utilise des notifications push en arrière-plan pour collecter les données analytiques de suivi des désinstallations. Veillez à ce que votre application [ne prenne aucune mesure indésirable](https://www.braze.com/docs/fr/fr/developer_guide/platforms/legacy_sdks/ios/push_notifications/customization/ignoring_internal_push/) à la réception de nos notifications de suivi des désinstallations.
## Étape 3 : Tester depuis le tableau de bord {#step-3-test-from-the-dashboard}
Ensuite, envoyez-vous une notification push de test depuis le tableau de bord. Cette notification push de test ne mettra pas à jour votre profil utilisateur.
1. Sur la page **Campaigns**, créez une campagne de notification push et sélectionnez **iOS push** comme plateforme.
2. Sur la page **Settings**, ajoutez la clé `appboy_uninstall_tracking` avec la valeur correspondante `true` et cochez **Add Content-Available Flag**.
3. Utilisez la page **Preview** pour vous envoyer une notification push de test de suivi des désinstallations.
4. Vérifiez que votre application n'effectue pas d'actions automatiques indésirables à la réception de la notification push.
**Important:**
Ces étapes de test servent de substitut à l'envoi d'une notification push de suivi des désinstallations depuis Braze. Si vous avez activé le comptage des badges, un numéro de badge sera envoyé avec la notification push de test, mais les notifications push de suivi des désinstallations de Braze ne définiront pas de numéro de badge sur votre application.
## Étape 4 : Activer le suivi des désinstallations {#step-4-enable-uninstall-tracking}
Suivez les instructions pour [activer le suivi des désinstallations](https://www.braze.com/docs/fr/fr/user_guide/data_and_analytics/tracking/uninstall_tracking/#uninstall-tracking).
# Désactiver le suivi SDK pour iOS
Source: /docs/fr/developer_guide/platforms/legacy_sdks/ios/analytics/disabling_tracking/index.md
**Warning:**
[AppboyKit](https://github.com/Appboy/appboy-ios-sdk) (also known as the Objective-C SDK) is no longer supported and has been replaced by the [Swift SDK](https://www.braze.com/docs/fr/fr/developer_guide/sdk_integration/?sdktab=swift). It will no longer receive new features, bug fixes, security updates, or technical support—however, messaging and analytics will continue to function as normal. To learn more, see [Introducing the New Braze Swift SDK](https://www.braze.com/resources/articles/introducing-the-new-braze-swift-sdk).
# Désactiver la collecte de données pour iOS
Pour se conformer aux réglementations sur la confidentialité des données, l'activité de suivi des données sur le SDK iOS peut être entièrement arrêtée à l’aide de la méthode [`disableSDK`](http://appboy.github.io/appboy-ios-sdk/docs/interface_appboy.html#a8d3b78a98420713d8590ed63c9172733). Cette méthode entraînera l’annulation de toutes les connexions réseau, et le SDK Braze ne transmettra aucune donnée à nos serveurs. Si vous souhaitez reprendre le recueil des données ultérieurement, vous pouvez utiliser la méthode [`requestEnableSDKOnNextAppRun`](http://appboy.github.io/appboy-ios-sdk/docs/interface_appboy.html#a781078a40a3db0de64ac82dcae3b595b) plus tard pour reprendre la collecte des données.
En outre, vous pouvez utiliser la méthode [`wipeDataAndDisableForAppRun`](http://appboy.github.io/appboy-ios-sdk/docs/interface_appboy.html#ac8d580f60ec0608cd91240a8a3aa23a3) pour effacer entièrement toutes les données côté client stockées sur l’appareil.
À moins qu’un utilisateur ne désinstalle toutes les applications d’un fournisseur sur un appareil donné, le prochain SDK Braze ainsi que l’application s’exécutant après l’utilisation de `wipeDataAndDisableForAppRun()` entraînera la réidentification de notre serveur par l’utilisateur via son identifiant d'appareil (IDFV). Afin de supprimer complètement toutes les données utilisateur, vous devez combiner un appel à `wipeDataAndDisableForAppRun` avec une demande de suppression des données sur le serveur via l'API [REST](https://www.braze.com/docs/fr/fr/developer_guide/rest_api/user_data/#user-delete-endpoint) de Braze.
## SDK iOS v5.7.0 et ultérieurs
Pour les appareils utilisant le SDK iOS v5.7.0 ou version ultérieure, lorsque [vous désactivez la collecte IDFV](https://www.braze.com/docs/fr/fr/developer_guide/platform_integration_guides/legacy_sdks/ios/initial_sdk_setup/other_sdk_customizations/#optional-idfv-collection---swift/), l’appel de [`wipeData`](https://braze-inc.github.io/braze-swift-sdk/documentation/brazekit/braze/wipedata()) n'entraînera pas la ré-identification de cet utilisateur par notre serveur via son identifiant d’appareil (IDFV).
# Création de liens profonds pour iOS
Source: /docs/fr/developer_guide/platforms/legacy_sdks/ios/advanced_use_cases/linking/index.md
**Warning:**
[AppboyKit](https://github.com/Appboy/appboy-ios-sdk) (also known as the Objective-C SDK) is no longer supported and has been replaced by the [Swift SDK](https://www.braze.com/docs/fr/fr/developer_guide/sdk_integration/?sdktab=swift). It will no longer receive new features, bug fixes, security updates, or technical support—however, messaging and analytics will continue to function as normal. To learn more, see [Introducing the New Braze Swift SDK](https://www.braze.com/resources/articles/introducing-the-new-braze-swift-sdk).
# Création de liens profonds pour iOS {#deep-linking-for-ios}
Pour obtenir des informations de base sur les liens profonds, consultez notre [article du Guide de l'utilisateur](https://www.braze.com/docs/fr/fr/user_guide/messaging/design_and_edit/personalize/actions_and_media_urls/#what-is-deep-linking). Si vous souhaitez implémenter des liens profonds pour la première fois dans votre application Braze, les étapes ci-dessous vous aideront à démarrer.
## Étape 1 : Enregistrer un schéma {#step-1-register-a-scheme}
Vous devez déclarer un schéma personnalisé dans le fichier `Info.plist`. La structure de navigation est définie par un ensemble de dictionnaires. Chacun de ces dictionnaires contient un tableau de chaînes de caractères.
Utilisez Xcode pour modifier votre fichier `Info.plist` :
1. Ajoutez une nouvelle clé, `URL types`. Xcode en fera automatiquement un tableau contenant un dictionnaire appelé `Item 0`.
2. Dans `Item 0`, ajoutez une clé `URL identifier`. Définissez la valeur sur votre schéma personnalisé.
3. Dans `Item 0`, ajoutez une clé `URL Schemes`. Ce sera automatiquement un tableau contenant une chaîne `Item 0`.
4. Définissez `URL Schemes` >> `Item 0` sur votre schéma personnalisé.
Sinon, si vous souhaitez modifier votre fichier `Info.plist` directement, vous pouvez suivre cette spécification :
```html
CFBundleURLTypesCFBundleURLName{YOUR.SCHEME}CFBundleURLSchemes{YOUR.SCHEME}
```
## Étape 2 : Ajouter le schéma personnalisé à la liste autorisée (iOS 9+) {#step-2-allowlist-the-custom-scheme-ios-9}
À partir d'iOS 9, les applications doivent disposer d'une liste autorisée de schémas personnalisés que l'application est autorisée à ouvrir. Toute tentative d'appel de schémas en dehors de cette liste entraînera l'enregistrement d'une erreur dans les journaux de l'appareil, et le lien profond ne s'ouvrira pas. Voici un exemple de cette erreur :
```
: -canOpenURL: failed for URL: "yourapp://deeplink" – error: "This app is not allowed to query for scheme yourapp"
```
Par exemple, si un message in-app doit ouvrir l'application Facebook lorsqu'il est touché, l'application doit avoir le schéma personnalisé Facebook (`fb`) dans la liste autorisée. Sinon, le système rejettera le lien profond. Les liens profonds qui dirigent vers une page ou une vue au sein de votre propre application nécessitent toujours que le schéma personnalisé de votre application soit répertorié dans le `Info.plist` de votre application.
Vous devez ajouter tous les schémas dont l'application a besoin pour créer des liens profonds dans une liste autorisée dans le `Info.plist` de votre application avec la clé `LSApplicationQueriesSchemes`. Par exemple :
```html
LSApplicationQueriesSchemesmyappfacebooktwitter
```
Pour plus d'informations, consultez la [documentation d'Apple](https://developer.apple.com/library/content/documentation/General/Reference/InfoPlistKeyReference/Articles/LaunchServicesKeys.html#//apple_ref/doc/uid/TP40009250-SW14) sur la clé `LSApplicationQueriesSchemes`.
## Étape 3 : Implémenter un gestionnaire {#step-3-implement-a-handler}
Après l'activation de votre application, iOS appellera la méthode [`application:openURL:options:`](https://developer.apple.com/reference/uikit/uiapplicationdelegate/1623112-application?language=objc). L'argument important est l'objet [NSURL](https://developer.apple.com/library/ios/DOCUMENTATION/Cocoa/Reference/Foundation/Classes/NSURL_Class/Reference/Reference.html#//apple_ref/doc/c_ref/NSURL).
```objc
- (BOOL)application:(UIApplication *)app openURL:(NSURL *)url options:(NSDictionary *)options {
NSString *path = [url path];
NSString *query = [url query];
// Here you should insert code to take some action based upon the path and query.
return YES;
}
```
```swift
func application(_ app: UIApplication, open url: URL, options: [UIApplication.OpenURLOptionsKey : Any] = [:]) -> Bool {
let path = url.path
let query = url.query
// Here you should insert code to take some action based upon the path and query.
return true
}
```

# Liens universels {#universal-links}
Pour utiliser des liens universels, assurez-vous d'avoir ajouté un domaine enregistré aux capacités de votre application et d'avoir téléchargé un fichier `apple-app-site-association`. Implémentez ensuite la méthode `application:continueUserActivity:restorationHandler:` dans votre `AppDelegate`. Par exemple :
```objc
- (BOOL)application:(UIApplication *)application
continueUserActivity:(NSUserActivity *)userActivity
restorationHandler:(void (^)(NSArray *restorableObjects))restorationHandler {
if ([userActivity.activityType isEqualToString:NSUserActivityTypeBrowsingWeb]) {
NSURL *url = userActivity.webpageURL;
// Handle url
}
return YES;
}
```
```swift
func application(_ application: UIApplication, continue userActivity: NSUserActivity, restorationHandler: @escaping ([UIUserActivityRestoring]?) -> Void) -> Bool {
if (userActivity.activityType == NSUserActivityTypeBrowsingWeb) {
let url = userActivity.webpageURL
// Handle url
}
return true
}
```
Consultez la [documentation d'Apple](https://developer.apple.com/library/content/documentation/General/Conceptual/AppSearch/UniversalLinks.html) pour plus d'informations.
**Note:**
L'intégration par défaut des liens universels n'est pas compatible avec les notifications push ni les messages in-app de Braze. Consultez la section [personnalisation de la gestion des liens](#linking-handling-customization) pour gérer les liens universels au sein de votre application. Sinon, nous vous recommandons d'utiliser des [liens profonds basés sur des schémas](#step-1-registering-a-scheme) avec les notifications push et les messages in-app.
## App Transport Security (ATS)
iOS 9 a introduit un changement majeur affectant les URL web intégrées dans les messages in-app et les notifications push.
### Prérequis ATS {#ats-requirements}
Extrait de la [documentation d'Apple](https://developer.apple.com/library/prerelease/ios/releasenotes/General/WhatsNewIniOS/Articles/iOS9.html#//apple_ref/doc/uid/TP40016198-SW14) : « App Transport Security est une fonctionnalité qui améliore la sécurité des connexions entre une application et des services web. Cette fonctionnalité consiste en des exigences de connexion par défaut conformes aux meilleures pratiques en matière de connexions sécurisées. Les applications peuvent remplacer ce comportement par défaut et désactiver la sécurité du transport. »
L'ATS est appliqué par défaut sur iOS 9+. Il nécessite que toutes les connexions utilisent HTTPS et soient chiffrées à l'aide de TLS 1.2 avec confidentialité de transmission. Pour plus d'informations, consultez la section [Exigences pour la connexion à l'aide de l'ATS](https://developer.apple.com/library/ios/documentation/General/Reference/InfoPlistKeyReference/Articles/CocoaKeys.html#//apple_ref/doc/uid/TP40009251-SW35). Toutes les images servies par Braze aux appareils finaux sont gérées par un réseau de diffusion de contenu (« CDN ») qui prend en charge TLS 1.2 et est compatible avec ATS.
Sauf si elles sont spécifiées comme exceptions dans le `Info.plist` de votre application, les connexions qui ne respectent pas ces exigences échoueront avec des erreurs ressemblant à ceci :
```
CFNetwork SSLHandshake failed (-9801)
Error Domain=NSURLErrorDomain Code=-1200 "An SSL error has occurred, and a secure connection to the server cannot be made."
```
```
NSURLSession/NSURLConnection HTTP load failed (kCFStreamErrorDomainSSL, -9802)
```
La conformité ATS est appliquée aux liens ouverts dans l'application mobile (notre gestion par défaut des liens cliqués) et ne s'applique pas aux sites ouverts à l'extérieur via un navigateur web.
### Gestion des exigences ATS {#handling-ats-requirements}
Vous pouvez gérer l'ATS de l'une des trois manières suivantes :
#### Confirmer que tous les liens sont conformes à l'ATS (recommandé) {#confirm-all-links-are-ats-compliant-recommended}
Votre intégration Braze peut satisfaire aux exigences de l'ATS en veillant à ce que tous les liens existants vers lesquels vous dirigez les utilisateurs (via des campagnes de messages in-app et de notifications push) respectent les exigences de l'ATS. Bien qu'il existe des moyens de contourner les restrictions ATS, nous vous recommandons de vérifier que toutes les URL liées sont conformes à l'ATS. Compte tenu de l'importance croissante accordée par Apple à la sécurité des applications, il n'est pas garanti que les approches suivantes pour autoriser les exceptions ATS soient prises en charge par Apple.
Un outil SSL peut vous aider à identifier les problèmes de sécurité du serveur web. Ce [test de serveur SSL](https://www.ssllabs.com/ssltest/index.html) de Qualys, Inc. fournit un élément spécifiquement dédié à la conformité Apple ATS 9 et iOS 9.
#### Désactiver partiellement l'ATS {#partially-disable-ats}
Vous pouvez autoriser un sous-ensemble de liens avec certains domaines ou schémas à être traités comme des exceptions aux règles ATS. Votre intégration Braze satisfera aux exigences ATS si chaque lien que vous utilisez dans un canal de communication Braze est soit conforme à l'ATS, soit géré par une exception.
Pour ajouter un domaine comme exception de l'ATS, ajoutez l'élément suivant au fichier `Info.plist` de votre application :
```html
NSAppTransportSecurityNSAllowsArbitraryLoadsNSExceptionDomainsexample.comNSExceptionAllowsInsecureHTTPLoadsNSIncludesSubdomains
```
Pour plus d'informations, consultez l'article d'Apple sur les [clés de sécurité pour le transport d'applications](https://developer.apple.com/library/ios/documentation/General/Reference/InfoPlistKeyReference/Articles/CocoaKeys.html#//apple_ref/doc/uid/TP40009251-SW33).
#### Désactiver complètement l'ATS {#disable-ats-entirely}
Vous pouvez désactiver complètement l'ATS. Notez que cette pratique n'est pas recommandée, en raison à la fois de la perte des protections de sécurité et de la compatibilité future avec iOS. Pour désactiver l'ATS, insérez les éléments suivants dans le fichier `Info.plist` de votre application :
```html
NSAppTransportSecurityNSAllowsArbitraryLoads
```
Consultez [Shipping an App With App Transport Security](http://timekl.com/blog/2015/08/21/shipping-an-app-with-app-transport-security/?utm_campaign=iOS+Dev+Weekly&utm_medium=email&utm_source=iOS_Dev_Weekly_Issue_213) pour plus d'informations sur le débogage des échecs ATS.
## Encodage d'URL {#url-encoding}
À partir du SDK Braze pour iOS v2.21.0, le SDK encode les liens en pourcentage pour créer des `NSURL` valides. Tous les caractères de lien qui ne sont pas autorisés dans une URL correctement formée, tels que les caractères Unicode, seront échappés en pourcentage.
Pour décoder un lien encodé, utilisez la méthode `NSString` [`stringByRemovingPercentEncoding`](https://developer.apple.com/library/ios/documentation/Cocoa/Reference/Foundation/Classes/NSString_Class/index.html#//apple_ref/occ/instm/NSString/stringByRemovingPercentEncoding). Notez que vous devez également renvoyer `YES` dans le `ABKURLDelegate` et qu'un appel à l'action est nécessaire pour déclencher la gestion de l'URL par l'application. Par exemple :
```objc
- (BOOL)application:(UIApplication *)application openURL:(NSURL *)url options:(NSDictionary *)options {
NSString *urlString = url.absoluteString.stringByRemovingPercentEncoding;
// Handle urlString
return YES;
}
```
```swift
func application(_ app: UIApplication, open url: URL, options: [UIApplication.OpenURLOptionsKey : Any] = [:]) -> Bool {
let urlString = url.absoluteString.removingPercentEncoding
// Handle urlString
return true
}
```
## Personnalisation {#linking-customization}
### Personnalisation de la WebView par défaut {#default-webview-customization}
La classe personnalisable `ABKModalWebViewController` affiche les URL web ouvertes par le SDK, généralement lorsque l'option « Ouvrir l'URL web dans l'application » est sélectionnée pour un lien profond web.
Vous pouvez déclarer une catégorie ou modifier directement la classe `ABKModalWebViewController` pour appliquer la personnalisation à la vue web. Consultez le fichier [.h](https://github.com/Appboy/appboy-ios-sdk/blob/master/AppboyKit/include/ABKModalWebViewController.h) et le fichier [.m](https://github.com/Appboy/appboy-ios-sdk/blob/master/AppboyKit/ABKModalWebViewController.m) de la classe pour plus de détails.
### Personnalisation de la gestion des liens {#linking-handling-customization}
Le protocole `ABKURLDelegate` peut être utilisé pour personnaliser la gestion des URL telles que les liens profonds, les URL web et les liens universels. Pour définir le délégué lors de l'initialisation de Braze, passez un objet délégué à `ABKURLDelegateKey` dans les `appboyOptions` de [`startWithApiKey:inApplication:withAppboyOptions:`](https://appboy.github.io/appboy-ios-sdk/docs/interface_appboy.html#aa9f1bd9e4a5c082133dd9cc344108b24). Braze appellera ensuite l'implémentation de votre délégué `handleAppboyURL:fromChannel:withExtras:` avant de gérer les URI.
#### Exemple d'intégration : ABKURLDelegate {#integration-example-abkurldelegate}
```objc
- (BOOL)handleAppboyURL:(NSURL *)url fromChannel:(ABKChannel)channel withExtras:(NSDictionary *)extras {
if ([[url.host lowercaseString] isEqualToString:@"MY-DOMAIN.com"]) {
// Custom handle link here
return YES;
}
// Let Braze handle links otherwise
return NO;
}
```
```swift
func handleAppboyURL(_ url: URL?, from channel: ABKChannel, withExtras extras: [AnyHashable : Any]?) -> Bool {
if (url.host == "MY-DOMAIN.com") {
// Custom handle link here
return true;
}
// Let Braze handle links otherwise
return false;
}
```
**Important:**
Lorsque `handleAppboyURL:fromChannel:withExtras:` renvoie `YES`, Braze considère que votre application gère l'URL et ne l'ouvrira pas. Si vous gérez des liens universels, vous devez explicitement router l'URL vers le gestionnaire de liens universels de votre application, par exemple en appelant vous-même `application:continueUserActivity:restorationHandler:`. Renvoyer `YES` sans gérer l'URL entraînera la fermeture du message in-app ou de la carte de contenu sans action visible.
Renvoyez `NO` si vous souhaitez que Braze gère l'URL avec son comportement par défaut.
Pour plus d'informations, consultez [`ABKURLDelegate.h`](https://github.com/Appboy/appboy-ios-sdk/blob/master/AppboyKit/include/ABKURLDelegate.h).
## Cas d'utilisation fréquents {#frequent-use-cases}
### Création de liens profonds vers les paramètres d'application {#deep-linking-to-app-settings}
iOS peut diriger les utilisateurs de votre application vers sa page dans l'application Réglages d'iOS. Vous pouvez tirer parti de `UIApplicationOpenSettingsURLString` pour créer des liens profonds vers les paramètres depuis les notifications push et les messages in-app.
1. Tout d'abord, assurez-vous que votre application est configurée pour les [liens profonds basés sur des schémas](#deep-links) ou les [liens universels](#universal-links).
2. Choisissez un URI pour le lien profond vers la page **Paramètres** (par exemple, `myapp://settings` ou `https://www.braze.com/settings`).
3. Si vous utilisez des liens profonds basés sur un schéma personnalisé, ajoutez le code suivant à votre méthode `application:openURL:options:` :
```objc
- (BOOL)application:(UIApplication *)app
openURL:(NSURL *)url
options:(NSDictionary *)options {
NSString *path = [url path];
if ([path isEqualToString:@"settings"]) {
NSURL *settingsURL = [NSURL URLWithString:UIApplicationOpenSettingsURLString];
[[UIApplication sharedApplication] openURL:settingsURL];
}
return YES;
}
```
```swift
func application(_ app: UIApplication, open url: URL, options: [UIApplicationOpenURLOptionsKey : Any] = [:]) -> Bool {
let path = url.path
if (path == "settings") {
UIApplication.shared.openURL(URL(string:UIApplicationOpenSettingsURLString)!)
}
return true
}
```
# Contrôle fin du trafic réseau pour iOS
Source: /docs/fr/developer_guide/platforms/legacy_sdks/ios/advanced_use_cases/fine_network_traffic_control/index.md
**Warning:**
[AppboyKit](https://github.com/Appboy/appboy-ios-sdk) (also known as the Objective-C SDK) is no longer supported and has been replaced by the [Swift SDK](https://www.braze.com/docs/fr/fr/developer_guide/sdk_integration/?sdktab=swift). It will no longer receive new features, bug fixes, security updates, or technical support—however, messaging and analytics will continue to function as normal. To learn more, see [Introducing the New Braze Swift SDK](https://www.braze.com/resources/articles/introducing-the-new-braze-swift-sdk).
# Contrôle fin du trafic réseau
## Demander des politiques de traitement
Braze permet à l’utilisateur de contrôler le trafic réseau à l’aide des protocoles suivants :
### Traitement automatique des demandes
***Valeur de l’enum `ABKRequestProcessingPolicy` : `ABKAutomaticRequestProcessing`***
- Il s’agit de la valeur de **politique de demande par défaut**.
- Le SDK Braze gérera automatiquement toutes les communications du serveur, y compris :
- Suppression des données d’événements personnalisés et d’attributs sur les serveurs de Braze
- Mise à jour des cartes de contenu et des géorepérages
- Demander de nouveaux messages in-app
- Des requêtes immédiates au serveur sont effectuées lorsque des données orientées vers l'utilisateur sont nécessaires pour les fonctionnalités de Braze, telles que les messages in-app.
- Pour minimiser la charge serveur, Braze effectue des purges périodiques des nouvelles données utilisateur au bout de quelques secondes.
Les données peuvent être transférées manuellement vers les serveurs de Braze à tout moment en utilisant la méthode suivante :
```objc
[[Appboy sharedInstance] flushDataAndProcessRequestQueue];
```
```swift
Appboy.sharedInstance()?.flushDataAndProcessRequestQueue()
```
### Traitement manuel des demandes
***Valeur de l’enum `ABKRequestProcessingPolicy` : `ABKManualRequestProcessing`***
- Ce protocole est le même que le traitement automatique des requêtes sauf :
- Les attributs personnalisés et les données d’événements personnalisés ne sont pas automatiquement purgés du serveur tout au long de la session utilisateur.
- Braze effectuera toujours des requêtes réseau automatiques pour les fonctionnalités internes, telles que la demande de messages in-app, la création de modèles Liquid dans les messages in-app, le Géorepérages et le suivi de la localisation. Pour plus de détails, consultez la déclaration `ABKRequestProcessingPolicy` dans [`Appboy.h`](https://github.com/Appboy/appboy-ios-sdk/blob/master/AppboyKit/include/Appboy.h). Lorsque ces demandes internes sont effectuées, les attributs personnalisés stockés localement et les données d’événements personnalisés peuvent être purgés vers le serveur Braze, selon le type de demande.
Les données peuvent être transférées manuellement vers les serveurs de Braze à tout moment en utilisant la méthode suivante :
```objc
[[Appboy sharedInstance] flushDataAndProcessRequestQueue];
```
```swift
Appboy.sharedInstance()?.flushDataAndProcessRequestQueue()
```
## Définition de la politique de traitement des demandes
### Définir la politique de demande au démarrage
Ces politiques peuvent être définies au démarrage de l’application à partir de la méthode [`startWithApiKey:inApplication:withLaunchOptions:withAppboyOptions`](https://appboy.github.io/appboy-ios-sdk/docs/interface_appboy.html#aa9f1bd9e4a5c082133dd9cc344108b24). Dans le dictionnaire `appboyOptions`, définissez `ABKRequestProcessingPolicyOptionKey` comme indiqué dans l’extrait de code suivant :
```objc
NSDictionary *appboyOptions = @{
// Other entries
ABKRequestProcessingPolicyOptionKey : @(ABKAutomaticRequestProcessing)
};
```
```swift
let appboyOptions: [AnyHashable: Any] = [
// Other entries
ABKRequestProcessingPolicyOptionKey: ABKRequestProcessingPolicy.automaticRequestProcessing.rawValue
]
```
### Définir la politique de demande au moment de l’exécution
La politique de traitement de demande peut également être définie pendant l’exécution via la propriété `requestProcessingPolicy` sur `Appboy` :
```objc
// Sets the request processing policy to automatic (the default value)
[Appboy sharedInstance].requestProcessingPolicy = ABKAutomaticRequestProcessing;
```
```swift
// Sets the request processing policy to automatic (the default value)
Appboy.sharedInstance()?.requestProcessingPolicy = ABKRequestProcessingPolicy.automaticRequestProcessing
```
## Arrêt manuel de la communication serveur à la volée
Si, à tout moment, une communication serveur « à la volée » doit être interrompue, vous devez employer la méthode suivante :
```objc
[[Appboy sharedInstance] shutdownServerCommunication];
```
```swift
Appboy.sharedInstance()?.shutdownServerCommunication();
```
Après avoir employé cette méthode, vous devez réinitialiser le mode de traitement de demande sur automatique. C’est pourquoi nous vous recommandons de ne l’utiliser que si le système d’exploitation vous oblige à arrêter les tâches d’arrière-plan ou quelque chose de similaire.
# Localisation pour iOS
Source: /docs/fr/developer_guide/platforms/legacy_sdks/ios/advanced_use_cases/localization/index.md
**Warning:**
[AppboyKit](https://github.com/Appboy/appboy-ios-sdk) (also known as the Objective-C SDK) is no longer supported and has been replaced by the [Swift SDK](https://www.braze.com/docs/fr/fr/developer_guide/sdk_integration/?sdktab=swift). It will no longer receive new features, bug fixes, security updates, or technical support—however, messaging and analytics will continue to function as normal. To learn more, see [Introducing the New Braze Swift SDK](https://www.braze.com/resources/articles/introducing-the-new-braze-swift-sdk).
# Localisation {#localization}
La localisation est prise en charge au sein du SDK Braze pour iOS. En plus de l'anglais, Braze prend en charge plusieurs langues pour les messages SDK inclus par défaut. Il s'agit des messages par défaut affichés dans les applications intégrées à Braze, comme ceux qui apparaissent en cas de problèmes de connectivité (par exemple, « Impossible d'établir la connexion réseau. Veuillez réessayer plus tard. »). Si la langue du téléphone est définie sur l'une des langues prises en charge, toutes les chaînes de caractères Braze par défaut déclenchées dans une application intégrée apparaîtront automatiquement dans cette langue.
Si vous recherchez une liste complète des langues prises en charge que vous pouvez attribuer à vos utilisateurs dans leurs profils, consultez notre [liste des langues des utilisateurs](https://www.braze.com/docs/fr/fr/user_guide/data/unification/user_data/language_codes/).
## Langues prises en charge {#languages-supported}
- Arabe
- Birman
- Catalan
- Chinois
- Tchèque
- Danois
- Néerlandais
- Anglais
- Espéranto
- Estonien
- Éwé
- Philippin
- Finlandais
- Français
- Géorgien
- Allemand
- Grec
- Hébreu
- Hindi
- Hongrois
- Indonésien
- Irlandais
- Italien
- Japonais
- Coréen
- Malais
- Norvégien
- Nynorsk
- Polonais
- Portugais
- Russe
- Espagnol
- Suédois
- Thaïlandais
- Ukrainien
- Vietnamien
Pour plus d'informations, consultez notre article sur la [localisation Apple](https://developer.apple.com/library/ios/documentation/CoreFoundation/Reference/CFLocaleRef/), ainsi que la [liste des langues standard de LOC](http://www.loc.gov/standards/iso639-2/php/English_list.php).
# Intégration de balise pour iOS
Source: /docs/fr/developer_guide/platforms/legacy_sdks/ios/advanced_use_cases/beacon_integration/index.md
**Warning:**
[AppboyKit](https://github.com/Appboy/appboy-ios-sdk) (also known as the Objective-C SDK) is no longer supported and has been replaced by the [Swift SDK](https://www.braze.com/docs/fr/fr/developer_guide/sdk_integration/?sdktab=swift). It will no longer receive new features, bug fixes, security updates, or technical support—however, messaging and analytics will continue to function as normal. To learn more, see [Introducing the New Braze Swift SDK](https://www.braze.com/resources/articles/introducing-the-new-braze-swift-sdk).
# Intégration de balise {#beacon-integration}
Nous allons découvrir ici comment intégrer des types spécifiques de balises avec Braze pour permettre la segmentation et l'envoi de messages.
## Balises Infillion {#infillion-beacons}
Une fois vos balises Infillion configurées et intégrées à votre application, vous pouvez enregistrer des événements personnalisés tels que le début ou la fin d'une visite, ou l'observation d'une balise. Vous pouvez également enregistrer des propriétés pour ces événements, comme le nom du lieu ou la durée de présence.
Pour enregistrer un événement personnalisé lorsqu'un utilisateur accède à un lieu, saisissez ce code dans la méthode `didBeginVisit` :
```objc
[[Appboy sharedInstance] logCustomEvent:@"Entered %@", visit.place.name];
[[Appboy sharedInstance] flushDataAndProcessRequestQueue];
```
```swift
Appboy.sharedInstance()?.logCustomEvent("Entered %@", visit.place.name)
Appboy.sharedInstance()?.flushDataAndProcessRequestQueue()
```
La méthode `flushDataAndProcessRequestQueue` garantit que votre événement est enregistré même si l'application est en arrière-plan. Le même processus peut être implémenté pour le départ d'un emplacement. Notez que cela créera et incrémentera un événement personnalisé unique pour chaque nouveau lieu visité par l'utilisateur. Si vous prévoyez de créer plus de 50 lieux, nous vous recommandons de créer un événement personnalisé générique « Place Entered » et d'inclure le nom du lieu comme propriété d'événement.
# Localisations et géorepérages pour iOS
Source: /docs/fr/developer_guide/platforms/legacy_sdks/ios/advanced_use_cases/locations_and_geofences/index.md
**Warning:**
[AppboyKit](https://github.com/Appboy/appboy-ios-sdk) (also known as the Objective-C SDK) is no longer supported and has been replaced by the [Swift SDK](https://www.braze.com/docs/fr/fr/developer_guide/sdk_integration/?sdktab=swift). It will no longer receive new features, bug fixes, security updates, or technical support—however, messaging and analytics will continue to function as normal. To learn more, see [Introducing the New Braze Swift SDK](https://www.braze.com/resources/articles/introducing-the-new-braze-swift-sdk).
# Fonctions de localisation et de géorepérage
Pour prendre en charge les géorepérages pour iOS :
1. Votre intégration doit prendre en charge les notifications push en arrière-plan.
2. Les géorepérages Braze [doivent être activés](https://www.braze.com/docs/fr/fr/developer_guide/platform_integration_guides/swift/analytics/location_tracking/#enabling-automatic-location-tracking) via le SDK, soit implicitement en activant la collecte des données de localisation, soit explicitement en activant la collecte des géorepérages. Ils ne sont pas activés par défaut.
**Important:**
Depuis iOS 14, les géorepérages ne fonctionnent pas de manière fiable pour les utilisateurs qui choisissent de donner leur autorisation de localisation approximative.
## Étape 1 : Activer les notifications push en arrière-plan
Pour exploiter pleinement notre stratégie de synchronisation par géorepérage, vous devez activer les [notifications push en arrière-plan](https://www.braze.com/docs/fr/fr/developer_guide/platform_integration_guides/ios/push_notifications/silent_push_notifications/#use-silent-remote-notifications-to-trigger-background-work) en plus de réaliser l'intégration push standard.
## Étape 2 : Activer les géorepérages
Par défaut, les géorepérages sont activés en fonction de l'activation ou non de la collecte automatique des emplacements. Vous pouvez activer les géorepérages à l'aide du fichier `Info.plist`. Ajoutez le dictionnaire `Braze` à votre fichier `Info.plist`. À l'intérieur du dictionnaire `Braze`, ajoutez la sous-entrée de valeur booléenne `EnableGeofences` et définissez la valeur sur `YES`. Notez qu'avant la version v4.0.2 du SDK Braze pour iOS, la clé de dictionnaire `Appboy` doit être utilisée à la place de `Braze`.
Vous pouvez également activer les géorepérages au démarrage de l'application à l'aide de la méthode [`startWithApiKey:inApplication:withLaunchOptions:withAppboyOptions`](https://appboy.github.io/appboy-ios-sdk/docs/interface_appboy.html#aa9f1bd9e4a5c082133dd9cc344108b24). Dans le dictionnaire `appboyOptions`, définissez `ABKEnableGeofencesKey` sur `YES`. Par exemple :
```objc
[Appboy startWithApiKey:@"YOUR-API_KEY"
inApplication:application
withLaunchOptions:options
withAppboyOptions:@{ ABKEnableGeofencesKey : @(YES) }];
```
```swift
Appboy.start(withApiKey: "YOUR-API-KEY",
in:application,
withLaunchOptions:launchOptions,
withAppboyOptions:[ ABKEnableGeofencesKey : true ])
```
## Étape 3 : Vérifier les notifications push en arrière-plan de Braze
Braze synchronise les géorepérages vers les appareils à l'aide de notifications push en arrière-plan. Suivez l'article de [personnalisation iOS](https://www.braze.com/docs/fr/fr/developer_guide/platforms/legacy_sdks/ios/push_notifications/customization/ignoring_internal_push/) pour vous assurer que votre application n'effectue aucune action indésirable lors de la réception des notifications de synchronisation de géorepérage de Braze.
## Étape 4 : Ajouter NSLocationAlwaysUsageDescription à votre Info.plist
Ajoutez les clés `NSLocationAlwaysUsageDescription` et `NSLocationAlwaysAndWhenInUseUsageDescription` à votre `info.plist` avec une valeur de type `String` contenant une description de la raison pour laquelle votre application doit suivre la localisation. Les deux clés sont requises à partir d'iOS 11.
Cette description s'affichera lorsque l'invite de localisation du système demandera l'autorisation. Elle devrait expliquer clairement à vos utilisateurs les avantages du suivi de la localisation.
## Étape 5 : Demander l'autorisation de l'utilisateur
La fonctionnalité de géorepérage n'est opérationnelle que lorsque l'autorisation de localisation `Always` est accordée.
Pour demander l'autorisation de localisation `Always`, utilisez le code suivant :
```objc
CLLocationManager *locationManager = [[CLLocationManager alloc] init];
[locationManager requestAlwaysAuthorization];
```
```swift
var locationManager = CLLocationManager()
locationManager.requestAlwaysAuthorization()
```
## Étape 6 : Activer les géorepérages sur le tableau de bord
iOS autorise le stockage de 20 géorepérages au maximum pour une application donnée. L'utilisation des localisations occupera une partie de ces 20 emplacements de géorepérage disponibles. Pour éviter toute perturbation accidentelle ou indésirable d'autres fonctionnalités liées au géorepérage dans votre application, les géorepérages de localisation doivent être activés pour chaque application individuellement sur le tableau de bord.
Pour que les localisations fonctionnent correctement, vous devez également vérifier que votre application n'utilise pas tous les emplacements de géorepérage disponibles.
### Activer les géorepérages depuis la page des localisations :

### Activer les géorepérages depuis la page des paramètres :

## Désactiver les requêtes de géorepérage automatiques
À partir de la version 3.21.3 du SDK iOS, vous pouvez désactiver les demandes automatiques de géorepérage. Pour cela, utilisez le fichier `Info.plist`. Ajoutez le dictionnaire `Braze` à votre fichier `Info.plist`. À l'intérieur du dictionnaire `Braze`, ajoutez la sous-entrée de valeur booléenne `DisableAutomaticGeofenceRequests` et définissez la valeur sur `YES`.
Vous pouvez également désactiver les demandes automatiques de géorepérage au démarrage de l'application via la méthode [`startWithApiKey:inApplication:withLaunchOptions:withAppboyOptions`](https://appboy.github.io/appboy-ios-sdk/docs/interface_appboy.html#aa9f1bd9e4a5c082133dd9cc344108b24). Dans le dictionnaire `appboyOptions`, définissez `ABKDisableAutomaticGeofenceRequestsKey` sur `YES`. Par exemple :
```objc
[Appboy startWithApiKey:@"YOUR-API_KEY"
inApplication:application
withLaunchOptions:options
withAppboyOptions:@{ ABKDisableAutomaticGeofenceRequestsKey : @(YES) }];
```
```swift
Appboy.start(withApiKey: "YOUR-API-KEY",
in:application,
withLaunchOptions:launchOptions,
withAppboyOptions:[ ABKDisableAutomaticGeofenceRequestsKey : true ])
```
Si vous choisissez d'utiliser cette option, vous devrez demander manuellement les géorepérages pour que la fonctionnalité soit opérationnelle.
## Demander manuellement des géorepérages
Lorsque le SDK Braze demande au backend les géorepérages à surveiller, il transmet la localisation actuelle de l'utilisateur et reçoit les géorepérages jugés les plus pertinents en fonction de la localisation signalée. Il y a une limite de débit d'une actualisation de géorepérage par session.
Pour contrôler la localisation transmise par le SDK afin de recevoir les géorepérages les plus pertinents, à partir de la version 3.21.3 du SDK iOS, vous pouvez demander manuellement des géorepérages en fournissant la latitude et la longitude d'un emplacement. Il est recommandé de désactiver les demandes automatiques de géorepérage lors de l'utilisation de cette méthode. Pour ce faire, utilisez le code suivant :
```objc
[[Appboy sharedInstance] requestGeofencesWithLongitude:longitude
latitude:latitude];
```
```swift
Appboy.sharedInstance()?.requestGeofences(withLongitude: longitude, latitude: latitude)
```
# Google Tag Manager pour iOS
Source: /docs/fr/developer_guide/platforms/legacy_sdks/ios/advanced_use_cases/google_tag_manager/index.md
**Warning:**
[AppboyKit](https://github.com/Appboy/appboy-ios-sdk) (also known as the Objective-C SDK) is no longer supported and has been replaced by the [Swift SDK](https://www.braze.com/docs/fr/fr/developer_guide/sdk_integration/?sdktab=swift). It will no longer receive new features, bug fixes, security updates, or technical support—however, messaging and analytics will continue to function as normal. To learn more, see [Introducing the New Braze Swift SDK](https://www.braze.com/resources/articles/introducing-the-new-braze-swift-sdk).
# Google Tag Manager pour iOS
## Initialisation du SDK {#initializing-ios-google-tag-provider}
Le SDK iOS de Braze peut être initialisé et contrôlé par des tags configurés dans [Google Tag Manager.](https://tagmanager.google.com/)
Avant d'utiliser Google Tag Manager, veillez à suivre notre [configuration initiale du SDK](https://www.braze.com/docs/fr/fr/developer_guide/platforms/legacy_sdks/ios/initial_sdk_setup/overview/).
## Configuration de votre Google Tag Manager {#configuring-ios-google-tag-manager}
Dans cet exemple, nous allons prétendre que nous sommes une application de streaming de musique qui veut enregistrer différents événements pendant que les utilisateurs écoutent des chansons. Grâce au Google Tag Manager pour iOS, nous pouvons contrôler lequel de nos fournisseurs tiers reçoit cet événement et créer des balises spécifiques à Braze.
### Événements personnalisés
Les événements personnalisés sont enregistrés avec `actionType` réglé sur `logEvent`. Le fournisseur de balises personnalisées de Braze, dans notre exemple, attend que le nom de l’événement personnalisé soit défini à l’aide de `eventName`.
Pour commencer, créez un déclencheur qui recherche un « nom de l’événement » qui équivaut à `played song`

Ensuite, créez une nouvelle balise (« Appel de fonction ») et saisissez le chemin de classe de votre [fournisseur de balises personnalisées](#adding-ios-google-tag-provider) décrit plus loin dans cet article.
Cette balise sera déclenchée lorsque vous enregistrez l’événement `played song` que nous venons de créer.
Dans notre exemple de paramètres personnalisés de notre balise (paires clé-valeur), nous avons défini `eventName` vers `played song` qui sera le nom de l’événement personnalisé enregistré sur Braze.
**Important:**
Lorsque vous envoyez un événement personnalisé, définissez `actionType` vers `logEvent` et de définir une valeur pour `eventName` comme illustré dans l’exemple suivant.
Le fournisseur de balises personnalisées dans notre exemple utilisera ces clés pour déterminer les mesures à prendre et le nom de l’événement à envoyer à Braze lorsqu’il reçoit des données de Google Tag Manager.

Vous pouvez également inclure des arguments de paires clé-valeur supplémentaires à la balise, qui seront envoyés en tant que propriétés d’événement personnalisé à Braze. `eventName` et `actionType` ne seront pas ignorés pour les propriétés d’événement personnalisé. Dans l’exemple de balise suivant, nous allons transmettre `genre` qui a été défini à l’aide d’une variable de balise dans Google Tag Manager issue de l’événement personnalisé que nous avons enregistré dans notre application.
La propriété de l’événement `genre` est envoyée à l'outil Google Tag Manager en tant que variable « Firebase - paramètre de l’événement » étant donné que Google Tag Manager pour iOS utilise Firebase comme couche de données.

Enfin, lorsqu’un utilisateur joue une chanson dans notre application, nous allons enregistrer un événement via Firebase et Google Tag Manager en utilisant le nom d’événement d’analytique Firebase qui correspond au nom de déclencheur de notre balise, `played song` :
```obj-c
NSDictionary *parameters = @{@"genre" : @"pop",
@"number of times listened" : @42};
[FIRAnalytics logEventWithName:@"played song" parameters:parameters];
```
### Enregistrer des attributs personnalisés
Les attributs personnalisés sont définis via un `actionType` réglé sur `customAttribute`. Le fournisseur de balises personnalisées Braze attend de la clé-valeur d’attribut personnalisée qu’elle soit définie via `customAttributeKey` et `customAttributeValue` :
```obj-c
NSDictionary *parameters = @{@"customAttributeKey" : @"favorite song",
@"customAttributeValue" : @"Private Eyes"};
[FIRAnalytics logEventWithName:@"customAttribute" parameters:parameters];
```
### Appeler changeUser
Les appels vers `changeUser()` sont réalisés via un `actionType` réglé sur `changeUser`. Le fournisseur de balises personnalisées Braze attend que l’ID utilisateur Braze soit réglé via une paire clé-valeur `externalUserId` dans votre balise :
```obj-c
NSDictionary *parameters = @{@"externalUserId" : userId};
[FIRAnalytics logEventWithName:@"changeUser" parameters:parameters];
```
## Fournisseur de balises personnalisées du Braze SDK {#adding-ios-google-tag-provider}
Une fois les tags et les déclencheurs configurés, vous devrez également mettre en œuvre Google Tag Manager dans votre application iOS, ce que vous trouverez dans la [documentation de](https://developers.google.com/tag-manager/ios/v5/) Google.
Une fois que l'outil Google Tag Manager est installé dans votre application, ajoutez un fournisseur de balises personnalisées pour appeler les méthodes du SDK Braze en fonction des balises que vous avez configurées dans Google Tag Manager.
Veillez à noter le "chemin de classe" du fichier - c'est ce que vous indiquerez lorsque vous configurerez une étiquette dans la console du [gestionnaire Google.](https://tagmanager.google.com/)
Cet exemple montre l’une des nombreuses façons de structurer votre fournisseur de balises personnalisées dans laquelle nous déterminons quelle méthode du SDK Braze doit être appelée en fonction de la paire clé-valeur `actionType` envoyée à partir de la balise GTM.
Les `actionType` que nous avons pris en charge dans notre exemple sont `logEvent`, `customAttribute` et `changeUser`, mais vous pouvez modifier la manière dont votre fournisseur de balises gère les données de Google Tag Manager.
Ajoutez le code suivant à votre fichier `BrazeGTMTagManager.h` :
```obj-c
@import Firebase;
@import GoogleTagManager;
@interface BrazeGTMTagManager : NSObject
@end
```
Et ajoutez le code suivant à votre fichier `BrazeGTMTagManager.m` :
```obj-c
#import
#import "BrazeGTMTagManager.h"
#import "Appboy-iOS-SDK/AppboyKit.h"
static NSString *const ActionTypeKey = @"actionType";
// Custom Events
static NSString *const LogEventActionType = @"logEvent";
static NSString *const LogEventEventName = @"eventName";
// Custom Attributes
static NSString *const CustomAttributeActionType = @"customAttribute";
static NSString *const CustomAttributeKey = @"customAttributeKey";
static NSString *const CustomAttributeValueKey = @"customAttributeValue";
// Change User
static NSString *const ChangeUserActionType = @"changeUser";
static NSString *const ChangeUserExternalUserId = @"externalUserId";
@implementation BrazeGTMTagManager
- (NSObject *)executeWithParameters:(NSDictionary *)parameters {
NSMutableDictionary *mutableParameters = [parameters mutableCopy];
NSString *actionType = mutableParameters[ActionTypeKey];
if (!actionType) {
NSLog(@"There is no Braze action type key in this call. Doing nothing.", nil);
return nil;
}
[mutableParameters removeObjectForKey:ActionTypeKey];
if ([actionType isEqualToString:LogEventActionType]) {
[self logEvent:mutableParameters];
} else if ([actionType isEqualToString:CustomAttributeActionType]) {
[self logCustomAttribute:mutableParameters];
} else if ([actionType isEqualToString:ChangeUserActionType]) {
[self changeUser:mutableParameters];
} else {
NSLog(@"Invalid action type. Doing nothing.");
}
return nil;
}
- (void)logEvent:(NSMutableDictionary *)parameters {
NSString *eventName = parameters[LogEventEventName];
[parameters removeObjectForKey:LogEventEventName];
[[Appboy sharedInstance] logCustomEvent:eventName withProperties:parameters];
}
- (void)logCustomAttribute:(NSMutableDictionary *)parameters {
NSString *customAttributeKey = parameters[CustomAttributeKey];
id customAttributeValue = parameters[CustomAttributeValueKey];
if ([customAttributeValue isKindOfClass:[NSString class]]) {
[[Appboy sharedInstance].user setCustomAttributeWithKey:customAttributeKey
andStringValue:customAttributeValue];
} else if ([customAttributeValue isKindOfClass:[NSDate class]]) {
[[Appboy sharedInstance].user setCustomAttributeWithKey:customAttributeKey
andDateValue:customAttributeValue];
} else if ([customAttributeValue isKindOfClass:[NSNumber class]]) {
if (strcmp([customAttributeValue objCType], [@(YES) objCType]) == 0) {
[[Appboy sharedInstance].user setCustomAttributeWithKey:customAttributeKey
andBOOLValue:[(NSNumber *)customAttributeValue boolValue]];
} else if (strcmp([customAttributeValue objCType], @encode(short)) == 0 ||
strcmp([customAttributeValue objCType], @encode(int)) == 0 ||
strcmp([customAttributeValue objCType], @encode(long)) == 0) {
[[Appboy sharedInstance].user setCustomAttributeWithKey:customAttributeKey
andIntegerValue:[(NSNumber *)customAttributeValue integerValue]];
} else if (strcmp([customAttributeValue objCType], @encode(float)) == 0 ||
strcmp([customAttributeValue objCType], @encode(double)) == 0) {
[[Appboy sharedInstance].user setCustomAttributeWithKey:customAttributeKey
andDoubleValue:[(NSNumber *)customAttributeValue doubleValue]];
} else {
NSLog(@"Could not map NSNumber value to Appboy custom attribute:%@", customAttributeValue);
}
} else if ([customAttributeValue isKindOfClass:[NSArray class]]) {
[[Appboy sharedInstance].user setCustomAttributeArrayWithKey:customAttributeKey
array:customAttributeValue];
}
}
- (void)changeUser:(NSMutableDictionary *)parameters {
NSString *userId = parameters[ChangeUserExternalUserId];
[[Appboy sharedInstance] changeUser:userId];
}
@end
```
# Stockage pour iOS
Source: /docs/fr/developer_guide/platforms/legacy_sdks/ios/storage/index.md
**Warning:**
[AppboyKit](https://github.com/Appboy/appboy-ios-sdk) (also known as the Objective-C SDK) is no longer supported and has been replaced by the [Swift SDK](https://www.braze.com/docs/fr/fr/developer_guide/sdk_integration/?sdktab=swift). It will no longer receive new features, bug fixes, security updates, or technical support—however, messaging and analytics will continue to function as normal. To learn more, see [Introducing the New Braze Swift SDK](https://www.braze.com/resources/articles/introducing-the-new-braze-swift-sdk).
# Stockage {#storage}
Cet article décrit les différentes propriétés au niveau de l'appareil capturées lors de l'utilisation du SDK Braze pour iOS.
## Propriétés de l'appareil {#device-properties}
Par défaut, Braze collecte les propriétés suivantes [au niveau de l'appareil](https://github.com/Appboy/appboy-ios-sdk/blob/16e893f2677af7de905b927505d4101c6fb2091d/AppboyKit/headers/AppboyKitLibrary/Appboy.h#L181) pour permettre la personnalisation des messages en fonction de l'appareil, de la langue et du fuseau horaire :
* Résolution de l'appareil
* Opérateur mobile
* Paramètres régionaux de l'appareil
* Modèle de l'appareil
* Version du système d'exploitation de l'appareil
* IDFV (facultatif avec [iOS SDK v5.7.0+](https://github.com/braze-inc/braze-swift-sdk))
* Notifications push activées
* Fuseau horaire de l'appareil
* État de l'autorisation des notifications push
* Suivi publicitaire activé
**Note:**
Le SDK Braze ne collecte pas automatiquement l'IDFA. Les applications peuvent éventuellement transmettre l'IDFA à Braze en implémentant notre protocole `ABKIDFADelegate`. Les applications doivent obtenir le consentement explicite de l'utilisateur final au suivi via le framework App Tracking Transparency avant de transmettre l'IDFA à Braze.
Les champs configurables de l'appareil sont définis dans l'enum [`ABKDeviceOptions`](https://github.com/Appboy/appboy-ios-sdk/blob/4390e9eac8401bccdb81b053fa54eb87b1f6fcaa/Appboy-tvOS-SDK/AppboyTVOSKit.framework/Headers/Appboy.h#L179). Pour désactiver ou spécifier le champ de l'appareil que vous souhaitez autoriser, affectez le `OR` au niveau du bit des champs souhaités à [`ABKDeviceAllowlistKey`](https://github.com/Appboy/appboy-ios-sdk/blob/fed071000722673754da288cace15c1ff8aca432/AppboyKit/include/Appboy.h#L148) dans `appboyOptions` de `startWithApiKey:inApplication:withAppboyOptions:`.
Par exemple, pour spécifier que le fuseau horaire et les paramètres régionaux doivent être autorisés, définissez :
```
appboyOptions[ABKDeviceAllowlistKey] = @(ABKDeviceOptionTimezone | ABKDeviceOptionLocale);
```
Par défaut, tous les champs sont activés. Notez que sans certaines propriétés, toutes les fonctionnalités ne fonctionneront pas correctement. Par exemple, la distribution selon le fuseau horaire local ne fonctionnera pas sans le fuseau horaire.
Pour en savoir plus sur les propriétés de l'appareil collectées automatiquement, consultez notre article sur la [collecte de données du SDK](https://www.braze.com/docs/fr/fr/user_guide/data/unification/user_data/sdk_data_collection/).
# Exemples d'applications pour iOS
Source: /docs/fr/developer_guide/platforms/legacy_sdks/ios/sample_apps/index.md
**Warning:**
[AppboyKit](https://github.com/Appboy/appboy-ios-sdk) (also known as the Objective-C SDK) is no longer supported and has been replaced by the [Swift SDK](https://www.braze.com/docs/fr/fr/developer_guide/sdk_integration/?sdktab=swift). It will no longer receive new features, bug fixes, security updates, or technical support—however, messaging and analytics will continue to function as normal. To learn more, see [Introducing the New Braze Swift SDK](https://www.braze.com/resources/articles/introducing-the-new-braze-swift-sdk).
# Exemples d'applications {#sample-apps}
Les SDK de Braze sont tous accompagnés d'exemples d'applications dans le référentiel pour vous faciliter la tâche. Chacune de ces applications est entièrement modulable afin que vous puissiez tester les fonctionnalités de Braze et les implémenter dans vos propres applications. Tester le comportement dans votre propre application par rapport au comportement attendu et aux chemins de code des exemples d'applications est un excellent moyen de déboguer les problèmes que vous pourriez rencontrer.
## Créer les applications de test {#building-test-applications}
Plusieurs applications de test sont disponibles dans le [dépôt GitHub du SDK iOS](https://github.com/appboy/appboy-ios-sdk). Suivez ces instructions pour créer et exécuter nos applications de test.
1. Créez un nouvel [espace de travail](https://www.braze.com/docs/fr/fr/developer_guide/platform_wide/app_group_configuration/#creating-your-app-group-in-my-apps) et notez la clé API d'identification de l'application.
2. Placez votre clé API dans le champ approprié du fichier `AppDelegate.m`.
Les notifications push pour l'application de test iOS nécessitent une configuration supplémentaire. Consultez notre [intégration push iOS](https://www.braze.com/docs/fr/fr/developer_guide/platforms/legacy_sdks/ios/push_notifications/integration/) pour plus de détails.
# Journal des modifications pour SDK iOS
Source: /docs/fr/developer_guide/platforms/legacy_sdks/ios/changelog/swift_changelog/index.md
**Warning:**
[AppboyKit](https://github.com/Appboy/appboy-ios-sdk) (also known as the Objective-C SDK) is no longer supported and has been replaced by the [Swift SDK](https://www.braze.com/docs/fr/fr/developer_guide/sdk_integration/?sdktab=swift). It will no longer receive new features, bug fixes, security updates, or technical support—however, messaging and analytics will continue to function as normal. To learn more, see [Introducing the New Braze Swift SDK](https://www.braze.com/resources/articles/introducing-the-new-braze-swift-sdk).
# Journal des modifications SDK iOS
16.0.0
Breaking
Updates to Content Cards behavior and reliability
braze.contentCards.cards is now immediately updated after a card is marked as viewed, dismissed, or clicked via its context.
Previously, these mutations were only visible in braze.contentCards.cards after the next server sync.
Disabling Content Cards via Braze.Configuration now immediately clears braze.contentCards.cards and notifies subscribeToUpdates subscribers with an empty list.
Previously, braze.contentCards.cards retained its last value and subscribers were not notified.
Added
Adds Braze.FeatureFlags.getAllFeatureFlags(_:) — an asynchronous, callback-based getter that delivers cached feature flags on the main thread without blocking the calling thread.
15.2.0
Added
Adds optional subtotalValue, tax, and shipping fields to Braze.Ecommerce.OrderPlacedEvent, all Braze.Ecommerce.CartUpdated variants (Replace / Add / Remove), and Braze.Ecommerce.CheckoutStartedEvent.
Available in Objective-C on BRZEcommerceOrderPlacedEvent, BRZEcommerceCartUpdatedEvent, and BRZEcommerceCheckoutStartedEvent.
Fixed
Fixes a video player configuration error for embedded YouTube videos in HTML in-app messages.
15.1.0
Added
Adds dismiss() to Braze.Banner.Context and dismiss(using:) to Braze.Banner to dismiss a banner when using a custom UI.
Recommended to use Braze.Banner.Context.dismiss.
Both methods must be called from the main thread.
Calling either method fires the onDismiss callback on any registered BrazeBannerPlacement for that placement ID.
Available in Objective-C as -[BRZBannerContext dismiss] and -[BRZBanner dismissUsing:].
Adds example implementations for building a custom UI with banners.
Adds Braze.ContentCards.getCachedContentCards(_:), Braze.ContentCards.getUnviewedCards(_:), and Braze.ContentCards.getLastUpdate(_:) — asynchronous, callback-based getters that deliver on the main thread.
Fixed
Fixes a bug in the default Content Cards UI that would prevent image loading if multiple cards contained the same remote image URL. (#176)
If multiple cards contained the same image URL, only the first card to finish loading would display the image, whereas all others would indefinitely display the loading spinner.
15.0.1
Fixed
Improves the stability of the SDK’s internal state management, resolving a crash that would occur under low memory conditions.
getBanner now returns the cached banner immediately even when the SDK is rate limited.
15.0.0
Breaking
Banners: onDismiss now receives Braze/BannerDismissalEvent instead of Braze/Banner.
Raises the Xcode version to 26.0 (17A324).
Raises the minimum Mac Catalyst deployment target from iOS 13 (macOS 10.15 Catalina) to iOS 16 (macOS 13 Ventura).
Mac Catalyst users on macOS 12 Monterey or earlier are no longer supported.
Removes the ability to control whether the SDK prevents showing in-app messages to different users in certain edge cases.
Removes the option to configure through Braze.Configuration.preventInAppMessageDisplayForDifferentUser.
The SDK will now always behave as if this configuration option were set to true.
Updates the Braze.WebViewBridge.ScriptMessageHandler and Braze.WebViewBridge.SchemeHandler init to have non-optional channel parameter.
Added
Logs configuration validation messages when Braze.Configuration.devicePropertyAllowList omits pushEnabled or pushAuthStatus.
Both are required for push token registration and for push notifications to behave correctly.
Adds the following API: Braze.logEcommerceEvent(_:)
Adds Objective-C compatible APIs:
-[Braze logEcommerceProductViewed:]
-[Braze logEcommerceCartUpdated:]
-[Braze logEcommerceCheckoutStarted:]
-[Braze logEcommerceOrderPlaced:]
Fixed
Fixes a rare race condition where the app would become unresponsive when calling changeUser or wipeData while an HTML in-app message or banner was in the middle of displaying.
14.2.1
Fixed
Improves the reliability of resuming the SDK’s tracking of Live Activities when there are multiple active activity types.
This improves the tracking of Live Activities when relaunching the app after it has been terminated.
Fixes a compilation issue introduced in 14.2.0 on Mac Catalyst targets caused by ActivityKit imports.
14.2.0
Added
Adds methods to observe all key events and errors in the ActivityKit API, enabling observation of real-time state and error events from the SDK’s Live Activity lifecycle.
Adds Braze.LiveActivities.UpdateEvent, a new enum covering activity and token lifecycle events (e.g. started, active, dismissed, stale, ended, contentUpdated, pushTokenUpdated) as well as Braze SDK operation events (trackingStarted, trackingResumed, pushTokenFlushed).
Adds Braze.LiveActivities.ErrorEvent, a new enum covering observation failures, token registration failures (with isTransient for retry logic), activityNotFound, and invalidPushTokenTag.
Adds subscribeToStateUpdates(_:) and subscribeToErrors(_:) methods on Braze.LiveActivities to register callbacks for the above events. Both return a Braze.Cancellable to remove the subscription.
Improves reliability of Live Activity push token updates during app background and foreground transitions, including cold start scenarios where push-to-start activities may not have received token updates.
Content cards now filter out invalid cards so users can still view remaining valid cards.
Previously, if any of the cards were invalid in the content card sync, the entire sync would be dropped and no cards would be added.
This update brings parity with the behavior on Android and Web.
Improves the robustness of the SDK’s internal state management.
This release includes an internal refactor intended to make SDK behavior more consistent. No external API changes.
Adds error logging for Banners operations, providing actionable diagnostics for persistence failures and invalid banner states.
Fixed
Improves robustness around push notification and deep link handling during delayed SDK initialization.
Fixes an issue where Braze.FeatureFlags.subscribeToUpdates would not trigger the update closure upon all refresh completions.
All refresh completions, regardless of a success or error result, will now trigger the update closure. This change brings parity with the Android and Web SDKs.
Previously, the update closure would not always trigger upon the completion of a refresh request, depending on whether the cached data had previously been reported.
14.0.4
Fixed
Fixes an issue where the configuration of push notification automation would be dropped upon every other re-initialization of the Braze instance.
14.0.3
Fixed
Push Stories now filter out invalid pages so users can still navigate through remaining valid pages.
14.0.2
Fixed
Fixes the SwiftUI implementation of BannerView to update Banner contents in-place whenever a refresh has succeeded.
Re-exposes the public initializer of BrazeInAppMessageUI.HtmlView as a designated init instead of a convenience init, which was introduced in version 14.0.0
This allows subclasses of HtmlView to access the public initializer.
Improves robustness of internal SDK logic around dictionary access to prevent potential crashes.
14.0.1
Fixed
Resolves an issue where the handling of universal links defaulted to the UIApplicationDelegate implementation instead of the UISceneDelegate implementation when the app was not in foreground.
This would occur even if there was no UIApplicationDelegate implementation, resulting in dropped universal link handling under such scenarios.
Fixes a memory leak where base64-encoded tracking IDs in in-app messages would accumulate on background threads.
Resolves an issue where in-app messages were not dismissed when the user is changed, resulting in the user seeing incorrect content.
This change also adds changeUser dismissal reason for in-app messages.
14.0.0
Breaking
Removes News Feed.
This fully removes all UI elements, data models, and actions associated with News Feed.
Added
Remote configuration now automatically refetches after SDK upgrades, keeping server defaults in sync and improving reliability after version changes.
Fixed
Resolves an issue where long text in in-app message buttons would wrap to multiple lines.
These messages will now match the dashboard preview behavior of truncating long text.
Push Stories now fail gracefully when receiving null/empty deeplink values.
Previously, an invalid deeplink would cause the Push Story’s content to appear blank.
StoryPage safely trims and percent-encodes deeplink strings, dropping invalid values instead of throwing an error.
StoryView only scrolls when pages exist, preventing the “Next” action from crashing when the carousel is empty.
HTML in-app messages now reuse cached payloads to mitigate app hangs that occur in rare situations during presentation.
Templated in-app messages with delayed presentation will now request templated values only after completion of the delay.
This ensures that templated values are most up-to-date with the display of the message.
Previously, the request for templated values would occur at trigger time, prior to the delay.
13.3.0
Added
Improves reliability when sending the push token and push authorization status to the backend.
This change ensures that push authorization status changes will be flushed immediately as soon as they are read.
13.2.1
Fixed
Resolves an issue where an accumulation of Banners pending requests could cause the host application to hang at app startup.
This fix performs additional cleanup to any existing requests that were accumulated from previous versions, so you do not need to do any manual cleanup.
13.2.0
Added
Adds support for compilation with Xcode 26.0 and its corresponding operating system runtimes on all platforms supported by the Braze Swift SDK.
13.1.0
Added
Adds support for Banner properties via new public methods on Braze.Banner instances.
banner.stringProperty(key:) for accessing String properties.
banner.numberProperty(key:) for accessing Double properties.
banner.timestampProperty(key:) for accessing Int Unix millisecond timestamp properties.
banner.booleanProperty(key:) for accessing Bool properties.
banner.imageProperty(key:) for accessing image URL properties as Strings.
banner.jsonProperty(key:) for accessing JSON properties as [String:Any] dictionaries.
banner.jsonProperty<T: Decodable>(key:type:decoder:) for accessing JSON properties as values of any custom Decodable type.
The default client-side rate limiting values for Banners refresh has been increased. For more information on SDK rate limiting, please refer to the Braze Developer Guide
Fixed
Improves the behavior of VoiceOver for assets that are missing an imageAltText for Content Card and In-App Message campaigns created via the Traditional editor.
These assets will no longer be selectable or narrated by VoiceOver. Previously, the asset would be selectable and VoiceOver would read gibberish.
Drag-and-drop campaigns are not affected by this issue.
Campaigns created using the Traditional editor should always have the Alt text field populated for accessible users.
13.0.0
Breaking
Extends the functionality of BrazeSDKAuthDelegate.braze(_:sdkAuthenticationFailedWithError:) to be triggered for “Optional” authentication errors.
The delegate method BrazeSDKAuthDelegate.braze(_:sdkAuthenticationFailedWithError:) will now be triggered for both “Required” and “Optional” authentication errors.
If you want to only handle “Required” SDK authentication errors, add a check ensuring that BrazeSDKAuthError.optional is false inside your implementation of this delegate method.
Fixes the usage of Braze.Configuration.sdkAuthentication to take effect when enabled.
Previously, the value of this configuration was not consumed by the SDK and the token was always attached to requests if it was present.
Now, the SDK will only attach the SDK authentication token to outgoing network requests when this configuration is enabled.
The setters for all properties of Braze.FeatureFlag and all properties of Braze.Banner have been made private. The properties of these classes are now read-only.
Removes the banner.id property, which was deprecated in version 11.4.0.
Instead, use banner.trackingId to read a banner’s campaign tracking ID.
Added
Adds the boolean field optional to BrazeSDKAuthError to indicate if it is an optional authentication error.
12.1.0
Added
Adds optional imageAltText and language fields to UI classes and structs associated with Content Card and In-App Message campaigns for improved accessibility.
The imageAltText field contains the image accessibility alt text (if any) for the image or icon in a given campaign. The SDK’s default UI will use this field to inform how VoiceOver narrates the image portion of a campaign
The optional language field is a BCP 47 tag. If it is present, VoiceOver will use the corresponding language narrator when reading the campaign. Otherwise, the user system default settings will be used.
These are the classes and structs with imageAltText and language:
Braze.ContentCard.ClassicImage
Braze.ContentCard.ImageOnly
Braze.ContentCard.CaptionedImage
Braze.ContentCardRaw (BRZContentCardRaw in Objective-C)
Braze.InAppMessage.Slideup
Braze.InAppMessage.Modal
Braze.InAppMessage.ModalImage
Braze.InAppMessage.Full
Braze.InAppMessage.FullImage
Braze.InAppMessageRaw (BRZInAppMessageRaw in Objective-C)
Braze.ContentCard.Classic has the language field only
Full support will be added to the main repository closer to the public release of Xcode 26.
For any compatibility issues discovered while using the Xcode 26 Beta, submit a GitHub issue on the main repository.
12.0.3
Fixed
Fixes the Banner rendering incompatibility with iOS 18.5+ while maintaining the correct URL redirect behavior.
Banners can now successfully render on iOS 18.5+ without compromising click action functionality.
See the changelog entries for versions 12.0.1 and 12.0.2 for further details.
12.0.2
⚠️ Important: This version has a known issue preventing Banners from rendering on iOS 18.5+.
Fixed
Reverts Banners to the behavior found in versions 12.0.0 and prior.
Banners remain unusable on iOS 18.5+. A future release will address this issue.
12.0.1
⚠️ Important: This version has a known issue in Drag-and-Drop in-app messages and Banners, preventing certain URLs from redirecting properly. Update to a newer version if you are using this feature.
Fixed
Fixes an issue where setting configuration.forwardUniversalLinks = true would not properly forward universal links to the system APIs in some cases.
The SDK now verifies that the system APIs are implemented (either in your UIApplicationDelegate or SceneDelegate) before forwarding the universal link.
When multiple implementations are found, the SDK favors the SceneDelegate implementation over the UIApplicationDelegate implementation.
Fixes an issue when configuring Braze.Configuration.Push.Automation.authorizationOptions with the .provisional option.
Previously, the .provisional option was also applied for push primer in-app messages. This resulted in no push notification permission prompt being shown to the user.
With this change, push primer in-app messages will request push notification permissions using only the .alert, .badge, and .sound options, ensuring that the system prompt is presented to the user.
Fixes an incompatibility with iOS 18.5 where Banners would not render.
Previously, the Banner view would be added to the view hierarchy with a height of 0 but never successfully load the HTML content.
Banner views will no longer trigger superfluous about:blank URLs upon initial load.
12.0.0
Breaking
The distributed static XCFrameworks now include their resources directly instead of relying on external resources bundles.
When manually integrating the static XCFrameworks, you must select the Embed & Sign option for each XCFramework in the Frameworks, Libraries, and Embedded Content section of your target’s General settings.
No changes are required for Swift Package Manager or CocoaPods integrations.
Fixed
Fixes an App Store validation issue where Braze’s libraries privacy manifests would fail to be detected when integrating the SDK as static XCFrameworks.
Fixes BrazeKitCompatABKContentCard.expiresAt to return the correct expiration date.
Previously, ABKContentCard.expiresAt would always return 0.
Fixes an issue where the Braze.FeatureFlags.subscribeToUpdates(_:) update closure was being called immediately after calling changeUser(userId:) instead of waiting for the next feature flags sync result.
Fixes an issue where Braze.ContentCards.subscribeToUpdates(_:) would not call the update closure whenever a sync occurred without any changes in the Content Cards data.
Previously, the update closure would only be called when the sync resulted in a change.
Fixes the Braze.User.set(dateOfBirth:) method to report dates using the Gregorian calendar instead of the device’s current calendar setting.
Previously, the SDK would override input dates and formats if the device’s calendar settings were non-Gregorian.
With this change, you will still need to ensure that dates provided to set(dateOfBirth:) are generated with the Gregorian calendar, but the Braze SDK will no longer override their formats inadvertently.
Enhances the braze.wipeData() function to send a final update to all registered channel subscribers, notifying them of the data wipe.
This update ensures that any UI components utilizing the channel’s data are properly dismissed and cleaned up.
For instance, if an in-app message is currently displaying as braze.wipeData() is called, the message will be removed from display.
Fixes braze.user.id not resetting to nil after calling braze.wipeData().
Internally, the user identifier was properly reset, but the public braze.user.id property was not updated to reflect this change.
Added
Adds the BrazeInAppMessagePresenter.dismiss(reason:) optional protocol method.
This method enables the SDK to inform the in-app message presenter when an in-app message should be dismissed due to an internal SDK state change.
Currently, this method is triggered only by calling braze.wipeData().
BrazeInAppMessageUI implements this optional method and dismisses the in-app message when triggered.
Adds dSYM files to the dynamic and mergeable variants of the Braze SDK XCFrameworks.
This addresses an App Store submission validation warning when using Xcode 16.0 or later.
Fixed
The SDK Debugger tool will now capture logs even when Braze.configuration.logger.level is .disabled and no SDK logging occurs locally.
This aligns the Braze Swift SDK Debugger Tool behavior with that of the Debugger Tool on the Braze Android SDK.
Sets the default background of BannerUIView to be transparent.
Renames the VisibilityTracker.displayLinkTick method to VisibilityTracker.brazeDisplayLinkTick in BrazeUI to avoid potential naming conflicts with private system methods.
11.8.0
Added
Network requests made by the SDK to the Braze Live Activities /push_token_tag endpoint will now be retried in the case of a request failure.
Expands customizability options of custom endpoints passed when initializing a Braze instance.
You can now specify a base path to be used for SDK network requests (i.e. “example.com/mockServer”).
http schemes are now supported for use by custom endpoints (i.e. http://example.com). Previously, only https schemes were supported.
Fixed
Fixes an issue where in-app messages would not always be triggered when sending Braze requests to the tracking endpoint. This occurred when both of the following conditions are true:
The Braze.Configuration.Api.trackingPropertyAllowList did not include the .everything type.
All other Braze.Configuration.TrackingProperty types were manually listed in the trackingPropertyAllowList.
Improves the rendering behavior of Banner Cards embedded in a scroll view on hybrid development frameworks.
Fixes the Banner Card view to prevent drag gestures from exposing the background of the HTML content.
Fixes an issue on the Braze web view bridge where numeric values of 1 or 0 would be incorrectly reported as true or false, respectively.
11.7.0
Added
Adds the ability for a banner container to resize when the banner content changes height.
11.6.1
Fixed
Improves the reliability of collecting Live Activity push-to-start tokens on calling registerPushToStart:
Push-to-start tokens will now flush to the server immediately as soon as they are retrieved.
Push-to-start tokens will now be read immediately from the pushToStartToken property as soon as registerPushToStart is called, in addition to the existing behavior where an observable is set up to monitor new tokens.
Resolves issues with the SDK’s internal state for devices that were previously affected after restoring from another device’s iCloud or iTunes backup.
Previously, these devices would incorrectly inherit the device ID from the original device.
With this update, the SDK now generates a unique device ID for each restored device, ensuring proper identification and functionality.
This update follows up on the 11.6.0 fix, which prevented the issue from occurring on future backups.
11.6.0
Fixed
Fixes the behavior in the Braze-provided UI for Banner Cards where content would not automatically be cleared from the UI when changing to a user that was not eligible for that campaign.
Changes the behavior of Braze.Banners.subscribeToUpdates(_:) to match behavior of the corresponding API on the Braze Android SDK.
Upon calling Braze.Banners.subscribeToUpdates(_:), the update handler closure will only be called if a banners sync has succeeded during the current user session.
Previously, calling Braze.Banners.subscribeToUpdates(_:) would always result in the update handler being called one time immediately.
Upon successfully completing a banners sync, Braze.Banners.subscribeToUpdates(_:) will call its registered update handler even if the sync result is identical to the last successful sync.
Changes the behavior of Braze.Banners.bannersStream to match behavior of the corresponding API on the Braze Android SDK.
Braze.Banners.bannersStream will now only emit an update immediately upon access if a banners sync has succeeded during the current user session.
Previously, accessing Braze.Banners.bannersStream would always emit one update immediately.
Upon successfully completing a banners sync, Braze.Banners.bannersStream will emit an update even if the sync result is identical to the last successful sync.
JavaScript bridge methods expecting number arguments now also accept string representations of numbers.
This change aligns the behavior of the Swift SDK with the behavior of the Web SDK.
Added
Adds an optional method removeBannerContent to the BrazeBannerPlacement protocol.
Locally persisted Braze SDK data will no longer transfer during OS backups. This resolves an issue introduced in 6.2.0.
11.5.0
Fixed
Braze.banners.getBanner(for:_:) now successfully returns a cached Banner object for the requested placement ID as long as a Banner Cards sync has ever succeeded for the current user.
Previously, it would log a warning and pass nil to the completion handler if a Banner Cards sync had not been completed for the current user during the current session specifically.
This change aligns behavior with the Android SDK.
Fixes an issue where images with the "JPEG" image type would sometimes not display in Push Stories.
Fixes an issue where an in-app message in a Braze-provided UI can be displayed for an ineligible user under rare conditions.
This may occur if the in-app message was in the process of being displayed in the UI at the same time that the user was changed to a different user.
Added
Adds Braze.User.id to access the current user identifier synchronously.
Deprecates Braze.User.id() async and Braze.User.id(queue:completion:) in favor of Braze.User.id.
These methods will be removed fully in a future update.
Adds the optional parameter userIDMatchBehavior to the initializers of Braze.InAppMessageRaw.Context. This determines the behavior in the UI when the current identified user is different from the one that triggered the in-app message.
The default for Braze-provided UIs (.enforce) will enforce that the user ID matches the user ID that triggered the in-app message. If there is a mismatch, the in-app message will not be displayed.
For custom UIs, the default is .ignore and a mismatch will still display the in-app message.
11.4.0
Fixed
Fixes an issue where the SDK could hang during initialization if previous sessions generated a large number of geofence refreshes. This hang could sometimes lead to a crash by blocking the main thread for an extended period.
Fixes an issue where the triggering of in-app messages could be delayed in cases where requests for updated in-app message triggers are also delayed due to rate limiting.
Adds additional safeguards to ensure that ongoing network requests are dropped when changing users mid-flight.
Added
When Content Cards, Feature Flags, or Banner Cards go from enabled to disabled, the stored data is removed from cache.
Fixes the Objective-C Braze.delegate declaration to be weak like the Swift variant.
Added
Braze.prepareForDelayedInitialization now takes an optional parameter analyticsBehavior: PushEnqueueBehavior.
Braze uses this value to determine whether any Braze push payloads received before initialization should be processed once initialization is complete.
PushEnqueueBehavior.queue will enqueue received push payloads to be processed upon initialization. This option is selected by default.
PushEnqueueBehavior.drop will drop received push payloads, ignoring them.
Adds configuration properties to customize the lineSpacing, maxLineHeight, minLineHeight, and lineHeightMultiple for the header and message texts in full and modal in-app messages.
Updates BrazeContentCardUI.ViewController.Attributes.defaults to be a var to allow directly editing the property for convenience.
11.1.1
Fixed
Fixes an issue introduced in 11.0.0 where the push subscription status would be sent to the backend with an inaccurate value at startup, causing an unexpected subscription state. The SDK now sends up the accurate subscription status at each startup.
11.1.0
⚠️ Important: This version has a known issue related to push subscription status. Upgrade to version 11.1.1 instead.
Fixed
Fixes an issue introduced in 11.0.0 where the push token status would not always be reported in all circumstances.
Fixes a display bug where an in-app message would appear truncated after certain keyboard dismissal scenarios.
Fixes a reference cycle in Braze.NewsFeedCard.Context that could prevent the card from being deallocated.
Added
Adds a public initializer for Braze.Notifications.Payload.
11.0.1
Fixed
Fixes an issue introduced in 11.0.0 where the push subscription status would be sent to the backend with an inaccurate value at startup, causing an unexpected subscription state. The SDK now sends up the accurate subscription status at each startup.
11.0.0
⚠️ Important: This version has a known issue related to push subscription status. Upgrade to version 11.1.1 instead.
Relevant public Braze classes and data types now conform to the Sendable protocol and can be safely used across concurrency contexts.
Main thread-only APIs are now marked with the @MainActor attribute.
We recommend using Xcode 16.0 or later to take advantage of these features while minimizing the number of warnings generated by the compiler. Previous versions of Xcode may still be used, but some features may generate warnings.
When integrating push notification support manually, you may need to update the UNUserNotificationCenterDelegate conformance to use the @preconcurrency attribute to prevent warnings.
Applying the @preconcurrency attribute on protocol conformance is only available in Xcode 16.0 or later. Reference our sample integration code here.
As of Xcode 16.0, Apple has not yet audited the UNUserNotificationCenterDelegate protocol for Swift concurrency.
1
2
3
extensionAppDelegate:@preconcurrencyUNUserNotificationCenterDelegate{// Your existing implementation}
Updates the SDWebImage dependency in BrazeUICompat and sample apps to 5.19.7+ to support Swift 6 strict concurrency checking.
Fixed
Fixes the push authorization status reporting to display the proper push token status on the Dashboard when a user has not explicitly accepted or declined push permissions.
10.3.1
Fixed
Improves the reliability of sending updates to Live Activities that were launched via a push-to-start notification to an app in the terminated state.
10.3.0
Fixed
Fixes the in-app message orientation validation logic, which prevented certain device classes from displaying messages under certain orientation configurations.
Fixes the default behavior on full-screen in-app messages to display as modals only on tablet screen sizes.
Previously, full-screen messages would erroneously default to modal presentations on some larger phones.
Fixes a crash when dismissing a slideup in-app message before it has finished presenting.
Fixes an issue on iOS 18.0+ where the in-app message UI would persist on the screen when attempting to dismiss the message before it has finished presenting.
Updates custom attribute value, custom event, and purchase string validation to use a 255 character maximum instead of a 255 byte maximum.
Adds additional safeguards to Braze.Notifications.subscribeToUpdates to ensure the same Push notification can’t trigger the update closure multiple times.
10.2.0
Fixed
Updates the content card image background color to be clear.
Added
Adds support for an upcoming Braze SDK Debugging tool.
10.1.0
Fixed
Fixes an issue affecting the Objective-C variants of BrazeDelegate, BrazeContentCardUIViewControllerDelegate and BrazeInAppMessageUIDelegate.
When setting these delegates in Objective-C a second time, the delegate would end up being set to nil.
This issue has been resolved and the delegates can now be set multiple times without issue.
Added
Adds support for delayed SDK initialization, allowing you to create the Braze instance outside of application(_:didFinishLaunchingWithOptions:).
The SDK can now be initialized asynchronously, while conserving the ability to process incoming Braze push notifications.
The update closure will now be triggered by both “Push Opened” and “Push Received” events by default. Previously, it would only be triggered by “Push Opened” events.
To continue subscribing only to “Push Opened” events, pass in [.opened] for the parameter payloadTypes. Alternatively, implement your update closure to check that the type from the Braze.Notifications.Payload is .opened.
When receiving a push notification with content-available: true, the Braze.Notifications.Payload.type will now be .received instead of .opened.
Marks the following deprecated APIs as unavailable:
Removes the deprecated BrazeLocation class in favor of BrazeLocationProvider.
Fixed
Fixes a crash when handling a scheme-based deep link containing a registered applink domain (e.g. applinks:example.com with a deep link to app://example.com/path).
The following notifications will trigger this subscription:
Notifications received in the foreground
Notifications with the field content-available: true received in the foreground or background
The following notifications will not trigger this subscription:
Notifications received while terminated
Notifications received in the background without the field content-available: true
The new parameter payloadTypes will allow you to subscribe to “Push Opened” events, “Push Received” events, or both. If the parameter is omitted, it will subscribe to both by default.
If you are using manual push integration, you will need to first implement UNUserNotificationCenter.userNotificationCenter(_:willPresent:withCompletionHandler:), and make sure to call Braze.Notifications.handleForegroundNotification(notification:) within your implementation. Then, use subscribeToUpdates as noted above. See our guide on push notification integration for more info.
Fixes an issue where the Braze.FeatureFlag.subscribeToUpdates(_:) callback was not triggered at app launch when the cached feature flags matched the remote feature flags.
Fixes an issue in Objective-C projects where the return value of Braze.FeatureFlag.jsonProperty(key:) would incorrectly encode any entry value equal to null under certain conditions.
[String: Any] dictionaries returned by the Swift API will now drop null values.
NSDictionary objects returned by the Objective-C API will now encode null values as NSNull.
Customization of ViewAttributes via the attributes property is not available in the Objective-C version of PresentationContextRaw.
Adds Braze.FeatureFlag.jsonProperty(key:type:decoder:) to decode jsonobject type Feature Flag properties into custom Decodable types.
Deprecates the existing Feature Flag APIs, to be removed in a future version:
Braze.FeatureFlag.jsonStringProperty(key:) has been deprecated.
Braze.FeatureFlag.jsonObjectProperty(key:) has been deprecated in favor of Braze.FeatureFlag.jsonProperty(key:).
Fixed
Fixes an issue where the preferredOrientation on the presentation context of an in-app message would not be respected.
9.2.0
Added
Adds the openNewWindowLinksInBrowser configuration (default: false) to Braze.ModalContext.
Set this value in the braze(_:willPresentModalWithContext:) method of your BrazeDelegate to specify whether to launch the device browser to open web view hyperlinks that normally open a new tab or window.
Fixed
Fixes an issue with the automatic push integration feature that could cause the SDK not to send the device token to Braze.
Fixes an issue that prevented external links, which open in a new tab, from being activated in presented web views.
9.1.0
Added
Adds support for 3 new Feature Flag property types and various APIs for accessing them:
Braze.FeatureFlag.timestampProperty(key:) for accessing Int Unix millisecond timestamps.
Braze.FeatureFlag.imageProperty(key:) for accessing image URLs as Strings.
Braze.FeatureFlag.jsonObjectProperty(key:) for accessing JSONs as [String:Any] dictionaries.
Braze.FeatureFlag.jsonStringProperty(key:) for accessing JSONs as Strings.
Adds safeguards when reading the device model.
Fixed
Fixes the duplicate symbols compilation errors and runtime warnings that may occur under specific conditions when integrating BrazeKit and either BrazeNotificationService or BrazePushStory via CocoaPods.
9.0.0
Breaking
Removes the default privacy tracking domains from the BrazeKit privacy manifest.
If you are using the Braze data tracking features, you will need to manually add your tracking endpoint to your app-level privacy manifest.
Refer to the updated tutorial for integration guidance.
Removes the deprecated BrazeDelegate.braze(_:sdkAuthenticationFailedWithError) method in favor of BrazeSDKAuthDelegate.braze(_:sdkAuthenticationFailedWithError).
This method was originally deprecated in release 5.14.0.
Failing to switch to the new delegate method will not trigger a compiler error; instead, the BrazeDelegate.braze(_:sdkAuthenticationFailedWithError) method you define will simply not be called.
Fixed
Adds the missing NSPrivacyCollectedDataTypes key to the BrazePushStory privacy manifest.
8.4.0
Added
Expands Geofences behavior in the background while “When In Use” authorization is selected:
Adds the Braze.Location.Configuration.allowBackgroundGeofenceUpdates property to toggle whether geofences should be updated in the background.
When using this setting, verify that you have enabled the Location updates background mode.
Adds the Braze.Location.Configuration.distanceFilter property to configure the minimum distance sensitivity for triggering a location update.
Adds support for the message_extras Liquid tag for in-app messages.
8.3.0
Added
Adds early access for a third alternative repository which provides all Braze modules as mergeable XCFrameworks. For instructions on how to leverage it, refer to the repository README:
Adds a missing privacy manifest for BrazePushStory.
Fixes an invalid privacy manifest warning in BrazeLocation when submitting to the App Store as a dynamic XCFramework.
Fixes an issue where already enqueued in-app messages would not be removed from the stack after subsequent .reenqueue and .discard display actions.
Fixes an issue preventing retried requests from using an updated SDK authentication token until a new request was scheduled for processing.
Purchases, custom events, and nested custom user attributes can now include properties with values of any type conforming to BinaryInteger (Int64, UInt16, etc).
All values will be cast to Int before being logged.
This resolves an issue with a bugfix in 7.6.0.
8.2.1
Fixed
Fixes App Store validation issues when archiving with Xcode 15.3.
8.2.0
Added
Adds support for remotely starting Live Activities via push notifications.
Adds the following methods to the liveActivities module:
Adds public APIs to access BrazeKit, BrazeLocation and BrazeUI resources bundles:
Braze.Resources.bundle
BrazeLocationResources.bundle
BrazeUIResources.bundle
BrazeKit.overrideResourceBundle and BrazeUI.overrideResourceBundle have been deprecated in favor of BrazeKit.overrideResourcesBundle and BrazeUI.overrideResourcesBundle.
Re-enables visionOS sample apps requiring SDWebImage in Examples-CocoaPods.xcworkspace. SDWebImage for visionOS is now supported when using CocoaPods.
Updated SDWebImage dependency in BrazeUICompat to 5.19.0+.
Fixed
Fixes multiple issues on visionOS:
Sessions now properly start as expected.
The click behavior Open Web URL Inside App now properly opens the URL in a modal web view. Previously, the URL would always be opened using the default web browser.
[BrazeDelegate.braze(:willPresentModalWithContext:)](https://braze-inc.github.io/braze-swift-sdk/documentation/brazekit/brazedelegate/braze(:willpresentmodalwithcontext:)-1fj41) now has a default implementation.
Handling network requests and persisting data properly extend the lifetime of the application for processing.
Removes crash data from the BrazeKit privacy manifest. This data type is not collected by Braze.
8.0.0
⚠️ Warning
This release reports the SDK version as 7.7.0 instead of 8.0.0.
Breaking
Compiles the SDK using Xcode version 15.2 (15C500b).
This also raises the minimum deployment targets to iOS 12.0 and tvOS 12.0.
The BrazeLocation class is now marked as unavailable. It was previously deprecated in favor of BrazeLocationProvider in 5.8.1.
Added
Adds support for visionOS 1.0.
⚠️ Rich push notifications and Push Stories may not display as expected on visionOS 1.0. We are monitoring the latest versions for potential fixes.
⚠️ CocoaPods is not yet supported by SDWebImage for visionOS. visionOS sample apps requiring SDWebImage have been disabled in the Examples-CocoaPods.xcworkspace. Refer to the SwiftPM or manual integration Xcode project instead.
7.7.0
Added
Updates the prebuilt release assets to include the privacy manifest for manual integrations of SDWebImage.
Follow the manual integration guide to add the SDWebImage.bundle to your project for static XCFrameworks.
Enhances support for language localizations.
Introduces a localization for Azerbaijani strings.
Updates Ukrainian localization strings for accuracy.
Fixed
Fixes the default button placement for full in-app message views.
Fixes an issue where setting Braze.Configuration.Api.endpoint to a URL with invalid characters could cause a crash.
If the SDK is given an invalid endpoint, it will no longer attempt to make network requests and will instead log an error.
Fixes an issue preventing BrazeLocation from working correctly when using the dynamic XCFrameworks.
7.6.0
Added
Adds the Braze.InAppMessage.Data.isTestSend property, which indicates whether an in-app message was triggered as part of a test send.
Adds logic to separate Braze data into tracking and non-tracking requests.
Adds the following methods to set and edit the allow list for properties that will be used for tracking:
Braze.Configuration.Api.trackingPropertyAllowList: Set the initial allow list before initializing Braze.
Braze.updateTrackingAllowList(adding:removing:): Update the existing allow list during runtime.
For full usage details on these configurations, refer to our tutorial here.
Fixed
Adds safeguards to prevent a rare race condition occuring in the SDK network layer.
Prevents in-app message test sends from attempting re-display after being discarded by a custom in-app message UI delegate.
Fixes an issue in the default Braze in-app message UI where some messages were not being removed from the stack after display.
Fixes the compilation of BrazeKitCompat and BrazeUICompat in Objective-C++ projects.
Fixes an issue in BrazeUICompat where the header text in Full or Modal in-app messages would be duplicated in place of the body text under certain conditions.
Fixes the encoding of values of types Float, Int8, Int16, Int32, Int64, UInt, UInt8, UInt16, UInt32 and UInt64. Those types were previously not supported in custom events and purchase properties.
Fixes an issue preventing purchase events from being logged when the product identifier has a leading dollar sign.
Fixes an issue preventing custom attributes from being logged when the attribute key has a leading dollar sign.
7.5.0
Added
Adds privacy manifests for BrazeKit and BrazeLocation to describe Braze’s data collection policies. For more details, refer to Apple’s documentation on privacy manifests.
More fine-tuned configurations to manage your data collection practices will be made available in a future release.
Adds the optInWhenPushAuthorized configuration property to specify whether a user’s notification subscription state should automatically be set to optedIn when updating push permissions to authorized.
The WebKit Inspector developer tool is now enabled by default for all instances of BrazeInAppMessagesUI.HtmlView. It can be disabled by setting BrazeInAppMessagesUI.HtmlView.Attributes.allowInspector to false.
Fixed
Fixes an issue with the code signatures of XCFrameworks introduced in 7.1.0.
Fixes a crash on tvOS devices running versions below 16.0, caused by the absence of the UIApplication.openNotificationSettingsURLString symbol in those OS versions.
Fixes an issue where a content card would not display if the value under “Redirect to Web URL” was an empty string.
Fixes incorrect behavior in BrazeUI where tapping the body of a Full or Modal in-app message with buttons and an “Image Only” layout would dismiss that message and process the button’s click action.
Tapping the body will now be a no-op, bringing parity with other platforms.
7.4.0
Added
Adds two alternative repositories to support specialized integration options. For instructions on how to leverage them, refer to their respective READMEs:
In-App Message assets from URLs containing the query parameter cache=false will not be prefetched.
Additionally, when presented as a part of In-App Messages or Content Cards, those URLs will be fetched using the URLRequest.CachePolicy.reloadIgnoringLocalAndRemoteCacheData caching policy, which always requests a fresh version from the source and ignores any cached versions.
Fixed
Fixes XCFrameworks headers to use the #import syntax instead of @import for compatibility with Objective-C++ contexts.
Fixes the push token tag validation during Live Activity registration, accepting strings up to 256 bytes instead of 255 bytes.
Braze.ContentCards.unviewedCards no longer includes Control cards to bring parity with Android and Web.
Fixes an Objective-C metaclass crash that occurs when initializing a custom subclass of certain BrazeUI views.
7.3.0
Added
Adds support for Expo Notifications event listeners when using the automatic push integration.
Fixed
Fixes a rare concurrency issue that might result in duplicated events when logging large amount of events.
Fixes an issue where user.set(dateOfBirth:) was not setting the date of birth accurately due to variations in the device’s timezone.
7.2.0
Added
Exposes the BrazePushStory.NotificationViewController.didReceive methods for custom handling of push story notification events.
Fixed
Resolves an issue for in-app messages with buttons where tapping on the body would incorrectly execute the button’s click action.
Now, when you tap on the body of an in-app message with buttons, no event should occur.
Resolves a potential deadlock under rare circumstances in BrazeUI’s In-App messages presentation.
Refactors some text layout logic in BrazeUI into a new Braze.ModalTextView class.
Updates the behavior for Feature Flags methods.
FeatureFlags.featureFlag(id:) now returns nil for an ID that does not exist.
FeatureFlags.subscribeToUpdates(:) will trigger the callback when any refresh request completes with a success or failure.
The callback will also trigger immediately upon initial subscription if previously cached data exists from the current session.
Fixed
Fixes compiler warnings about Swift 6 when compiling BrazeUI while using Xcode 15.
Exposes public imports for ABKClassicImageContentCardCell.h and ABKControlTableViewCell.h for use in the BrazeUICompat layer.
Adds additional safeguards around invalid constraint values for BrazeInAppMessageUI.SlideupView.
Resolves a Content Cards feed UI issue displaying a placeholder image in Classic cards without an attached image.
Added
Adds the enableDarkTheme property to BrazeContentCardUI.ViewController.Attributes.
Set this field to false to prevent the Content Cards feed UI from adopting dark theme styling when the device is in dark mode.
This field is true by default.
6.6.2
Fixed
Fixes an issue preventing purchase events from being logged when the product identifier has a leading dollar sign ($).
Fixes an issue preventing custom attributes from being logged when the attribute key has a leading dollar sign ($).
6.6.1
Fixed
Fixes a crash in the geofences feature that could occur when the number of monitored regions exceeded the maximum count.
Fixes an issue introduced in 6.3.1 that would always update a user’s push subscription status to optedIn on app launch if push permissions were authorized on the device settings.
The SDK now will only send the subscription status at app launch if the device notification settings goes from denied to authorized.
Braze.ContentCard.logClick(using braze: Braze) will now log a click regardless of whether the ContentCard has a ClickAction.
This behavior differs from the default API Braze.ContentCard.Context.logClick(), which has the safeguard of requiring a ClickAction to log a click.
6.6.0
Fixed
Fixes an issue in HTML in-app messages where custom event and purchase properties would always convert values for 1 and 0 to become true and false, respectively.
These property values will now respect their original form in the HTML.
Prevents the default Braze UI from displaying in-app messages underneath the keyboard when Stage Manager is in use.
When enabled, the SDK will automatically implement the necessary system delegate methods for handling push notifications.
Compatibility with other push providers, whether first or third party, is maintained. The SDK will automatically handle only Braze push notifications, while original system delegate methods will be executed for all other push notifications.
Each automation step can be independently enabled or disabled. For example, configuration.push.automation.requestAuthorizationAtLaunch = false can be used to prevent the automatic request for push permissions at launch.
Adds the Braze.Configuration.forwardUniversalLinks configuration. When enabled, the SDK will redirect universal links from Braze campaigns to the appropriate system methods.
Fixes an issue preventing text fields from being selected in HTML IAMs for iOS 15.
Fixes an issue where the device model was inaccurately reported as iPad on macOS (Mac Catalyst and Designed for iPad configurations).
Fixes an issue where custom event and purchase properties would not accept an entry if its value was an empty string.
Fixes a crash that occurred in the default UI for Content Cards when encountering a zero-value aspect ratio.
Fixes an issue introduced in 6.0.0 where images in in-app messages would appear smaller than expected when using the compatibility UI (BrazeUICompat).
Added
Adds the unviewedCards convenience property to the Braze.ContentCards class to get the unviewed content cards for the current user.
6.3.1
Fixed
Fixes an issue where the previous user’s data would not be flushed after calling changeUser(userId:sdkAuthSignature:) when the SDK authentication feature is enabled.
A content card impression can now be logged once per session. Previously, the Braze-provided Content Cards UI would limit to a single impression per card at maximum, irrespective of sessions.
Fixes an issue that previously caused push notification URLs with percent-encoded characters to fail during decoding.
Fixes a behavior to automatically set a user’s push subscription state to optedIn after push permissions have explicitly been authorized via the Settings app.
Correctly hides shadows on in-app messages that are configured with a transparent background.
Fixes a rare crash occurring when deinitializing the Braze instance.
Added
Adds additional logging for network-related decoding errors.
6.3.0
Fixed
“Confirm” and “Cancel” notification categories now show the correct titles on the action buttons.
Added
Adds a new SDKMetadata option .reactnativenewarch for the React Native New Architecture.
Fixes a crash introduced in 6.0.0 when displaying an HTML in-app message using the BrazeUICompat module.
Removed a system call that is known to be slow on older versions of macOS. This resolves the SDK hanging during initialization on Mac Catalyst when running on affected macOS versions.
Added
Adds support for target attributes on anchor tags in HTML in-app messages (e.g. <a href="..." target="_blank"></a>).
Adding the target attribute to links will allow them to open in a new webview without dismissing the current in-app message.
This behavior can be disabled via the linkTargetSupport property of the BrazeInAppMessageUI.HtmlView.Attributes struct.
Fixes an issue that led to disproportionately large close buttons on in-app messages when the user has set a large font size in the device settings.
Fixes an issue that would lock the screen in a specific orientation after the dismissal of an in-app message customized to be presented in that orientation.
Renames User.setCustomAttributeArray(key: String, array: [String]?) to setCustomAttribute(…) to align it with other custom attribute setters, and adds “string” to the addTo and removeFrom attribute array methods to clarify which custom attributes they’re used for.
6.0.0
Breaking
The in-app message data models sent to BrazeInAppMessagePresenter.present(message:) now contain remote asset URLs. Previously, these data models would contain local asset URLs.
This change is only breaking in two situations:
When implementing a custom BrazeInAppMessagePresenter.
VoiceOver now correctly focuses on in-app message views when they are presented.
Fixes an issue causing in-app messages with re-eligibility disabled to display multiple times under certain conditions.
Fixes an issue where modal and full in-app message headers were truncated on devices running iOS versions lower than 16 when displaying non-ASCII characters.
The dynamic variant of BrazeUI.framework in the release artifact braze-swift-sdk-prebuilt.zip is now an actual dynamic framework. Previously, this specific framework was mistakenly distributed as a static framework.
Added
Adds the BrazeSDKAuthDelegate protocol as a separate protocol from BrazeDelegate, allowing for more flexible integrations.
Apps implementing BrazeDelegate.braze(_:sdkAuthenticationFailedWithError:) should migrate to use BrazeSDKAuthDelegate and remove the old implementation. The BrazeDelegate method will be removed in a future major release.
5.13.0
Fixed
Fixes an issue where the SDK would automatically track body clicks on non-legacy HTML in-app messages.
Added
Adds the synchronous deviceId property on the Braze instance.
deviceId(queue:completion:) is now deprecated.
deviceId() async is now deprecated.
Adds the automaticBodyClicks property to the HTML in-app message view attributes. This property can be used to enable automatic body clicks tracking on non-legacy HTML in-app messages.
This property is false by default.
This property is ignored for legacy HTML in-app messages.
Adds json() and decoding(json:) public methods to the Feature Flag model object for JSON encoding/decoding.
5.11.2
Fixed
Fixes a crash occurring when the SDK is configured with a flush interval of 0 and network connectivity is poor.
5.11.1
Fixed
Fixes an issue preventing the correct calculation of the delay when retrying failed requests. This led to a more aggressive retry schedule than intended.
Improves the performance of Live Activity tracking by de-duping push token tag requests.
Fixes an issue in logClick(using:) where it would incorrectly open the url field in addition to logging a click for metrics. It now only logs a click for metrics.
This applies to the associated APIs for content cards, in-app messages, and news feed cards.
It is still recommended to use the associated Context object to log interactions instead of these APIs.
Adds support for News Feed data models and analytics.
News Feed UI is not supported by the Swift SDK. See the migration guide for instructions on using the compatibility UI.
5.7.0
Fixed
Fixes an issue where modal image in-app messages would not respect the aspect ratio of the image when the height of the image is larger than its width.
Changed
Changes modal, modal image, full, and full image in-app message view attributes to use the ViewDimension type for their minWidth, maxWidth and maxHeight attributes.
The ViewDimension type enables providing different values for regular and large size-classes.
Added
Adds a configuration to use a randomly generated UUID instead of IDFV as the device ID: useUUIDAsDeviceId.
This configuration defaults to false. To opt in to this feature, set this value to true.
Enabling this value will only affect new devices. Existing devices will use the device identifier that was previously registered.
5.6.4
Fixed
Fixes an issue preventing the execution of BrazeDelegate methods when setting the delegate using Objective-C.
Fixes an issue where triggering an in-app message twice with the same event did not place the message on the in-app message stack under certain conditions.
Added
Adds the public id field to Braze.InAppMessage.Data.
Adds logImpression(using:) and logClick(buttonId:using:) to both in-app messages and content cards, and adds logDismissed(using:) to content cards.
It is recommended to continue using the associated Context to log impressions, clicks, and dismissals for the majority of use cases.
Adds Swift concurrency to support async/await versions of the following public methods. These methods can be used as alternatives to their corresponding counterparts that use completion handlers:
The applyAttributes() method for BrazeContentCardUI views now take the attributes explicitly as a parameter.
5.5.1
Fixed
Fixes an issue where content cards would not be properly removed when stopping a content card campaign on the dashboard and selecting the option Remove card after the next sync (e.g. session start).
5.5.0
Added
Adds support for host apps written in Objective-C.
Braze Objective-C types start either with BRZ or Braze, e.g.:
Renamed ClickAction.uri(_:useWebView:) to ClickAction.url(_:useWebView:).
5.4.0
Fixed
Fixes an issue where brazeBridge.logClick(button_id) would incorrectly accept invalid button_id values like "", [], or {}.
Added
Adds support for Braze Action Deeplink Click Actions.
5.3.2
Fixed
Fixes an issue preventing compilation when importing BrazeUI via SwiftPM in specific cases.
Lowers BrazeUI minimum deployment target to iOS 10.0.
5.3.1
Fixed
Fixes an HTML in-app message issue where clicking a link in an iFrame would launch a separate webview and close the message, instead of redirecting within the iFrame.
Fixes the rounding of In-App Message modal view top corners.
Fixes the display of modals and full screen in-app messages on iPads in landscape mode.
Added
Adds two Example schemes:
InAppMessage-Custom-UI:
Demonstrates how to implement your own custom In-App Message UI.
Available on iOS and tvOS.
ContentCards-Custom-UI:
Demonstrates how to implement your own custom Content Card UI.
# Journal des modifications pour SDK Objective-C iOS
Source: /docs/fr/developer_guide/platforms/legacy_sdks/ios/changelog/objc_changelog/index.md
**Warning:**
[AppboyKit](https://github.com/Appboy/appboy-ios-sdk) (also known as the Objective-C SDK) is no longer supported and has been replaced by the [Swift SDK](https://www.braze.com/docs/fr/fr/developer_guide/sdk_integration/?sdktab=swift). It will no longer receive new features, bug fixes, security updates, or technical support—however, messaging and analytics will continue to function as normal. To learn more, see [Introducing the New Braze Swift SDK](https://www.braze.com/resources/articles/introducing-the-new-braze-swift-sdk).
# Journal des modifications SDK Objective-C iOS
Improves resilience when triggering in-app messages with date property filters.
Added
Adds a new option ABKReenqueueInAppMessage to enum ABKInAppMessageDisplayChoice.
Return this option in beforeInAppMessageDisplayed: of an ABKInAppMessageControllerDelegate to ensure that an in-app message is not displayed and becomes eligible to trigger again.
This option will reset any trigger times and re-eligibility rules as if it was never triggered. It will not add the message to the in-app message stack.
4.5.4
Fixed
Improves reliability of custom event property type validation.
Fixes an issue where the status bar would not restore to its original state after a full in-app message was dismissed.
4.5.3
Fixed
Fixes a crash that occurs when receiving custom event properties of numeric types under certain conditions.
Fixes UI responsiveness warnings when requesting location authorization status.
4.5.2
Fixed
Improves reliability when validating trigger properties.
Improves the NSURLSessionConfiguration disk and memory cache capacities for file downloads. This change enables larger file downloads to be cached if needed.
4.5.1
Fixed
Improves eligibility checks around the minimum trigger timeout for in-app messages by now checking at trigger time in addition to display time.
Fixes an issue where purchases would not trigger certain templated in-app messages.
Added
Adds the delegate method noMatchingTriggerForEvent:name: to ABKInAppMessageControllerDelegate, which is called if no Braze in-app message was triggered for a given event.
4.5.0
Added
Adds support for Content Cards to evaluate Retry-After headers.
4.4.4
Fixed
Calling appboyBridge.closeMessage() or brazeBridge.closeMessage() from an HTML in-app message now correctly triggers ABKInAppMessageUIDelegate.onInAppMessageDismissed: when implemented.
Fixes an issue in 4.4.3 where the tvOS SDK incorrectly referenced an older SDK version.
4.4.3
Fixed
Fixes an issue introduced in 4.4.0 which prevented custom events or purchases with an empty dictionary of properties from being logged.
Improves handling of ABKInAppMessageWindow’s dismissal to promptly remove it from the view hierarchy.
Fixes the position of the pinned indicator for Captioned Image Content Cards when using the default UI.
Fixes an issue introduced in 4.3.2 and limited to users of Appboy-tvOS-SDK, which prevented custom events with properties or purchases with properties from being logged.
Added
Adds a padding property to ABKCaptionedImageContentCardCell to support modifying the default value.
4.4.2
Fixed
Fixes a bug for HTML in-app messages using the HTML Upload with Preview option to improve the reliability of in-app message display.
Fixes a bug preventing integration via Swift Package Manager in specific contexts.
Fixes an issue in the default Content Cards UI where the empty feed label was truncated if it was too large for the screen, for example due to accessibility or localization.
Fixes an issue where Slideup in-app messages would be automatically dismissed after multiple interaction with the app’s main window.
Changed
If changeUser:sdkAuthSignature: is called with the current user’s ID, but with a new and valid SDK Authentication signature, the new signature will be used.
Improves push tracking accuracy for apps making use of UISceneDelegate (UIKit) or Scene (SwiftUI).
4.4.1
Fixed
Fixes an issue in which input elements with type="date" in HTML in-app messages do not respond to some user interactions on iOS 14 and iOS 15.
Fixes ABKSdkMetadata availability when using the dynamic variant of the SDK.
Fixes an issue in which the default content cards UI’s empty feed label does not wrap properly when the device is using Larger Accessibility Sizes for its text size.
Changed
Changed ABKInAppMessageUIDelegate.inAppMessageViewControllerWithInAppMessage: to accept a nil return value.
Added
Adds support for the playsinline attribute on HTML <video> elements within webpages that are opened in the app by Braze.
Adds XCFramework support for the Core integration via Carthage. Please follow the Carthage migration guide when transitioning to the new artifact.
4.4.0
Breaking
Adds XCFramework support to Carthage. This allows projects integrated via Carthage to support Apple Silicon simulators and Mac Catalyst.
To continue using the original Full .framework file, include the Cartfile lines above but reference appboy_ios_sdk_full.json. Then, run carthage update.
For those using the Thin integration, use the same Cartfile above but exclude the line with SDWebImage.
The Core integration does not support XCFrameworks, and you can use the original .framework files as before.
Added
Adds a new attachment to the release called Appboy_iOS_SDK.xcframework.zip.
This artifact has the all-in-one XCFramework containing the full SDK code including all of the assets.
When importing this code manually, drag-and-drop the XCFramework into your project and select Embed & Sign. Then, add -ObjC under Build Settings > Other Linker Flags in your app’s target.
Adds localization support for the close button’s accessibility label in modal and full in-app messages.
Adds the ability to set the SDK’s log level at runtime by setting ABKLogLevelKey to an integer in appboyOptions. Descriptions of the available log levels can be found here.
Adds Appboy.addSdkMetadata: to allow self reporting of SDK Metadata fields via the ABKSdkMetadata enum.
4.3.4
This release requires Xcode 13.
Fixed
Fixes an issue in which the pinned indicator for a Banner Content Card would not display in the default Content Cards UI.
Fixes an issue which prevented custom events and purchases with properties larger than 50 KB to be properly discarded.
4.3.3
Fixed
Fixes a race-condition occasionally preventing HTML in-app messages with assets from being displayed from a test push.
Fixes an issue which prevented HTML in-app messages from opening sms:, mailto:, tel:, facetime: and facetime-audio: urls.
Previously, those urls would fail to open silently.
Fixes an issue where ABKContentCardsTableViewController was not displaying the “no update” label after the last card was deleted from the feed.
Added
Adds methods addToSubscriptionGroupWithGroupId: and removeFromSubscriptionGroupWithGroupId: to ABKUser to manage SMS/Email Subscription Groups.
Also adds appboyBridge.getUser().addToSubscriptionGroup(groupId) and appboyBridge.getUser().removeFromSubscriptionGroup(groupId) to the javascript interface for HTML in-app messages.
4.3.2
Fixed
Iframes embedded in an HTML in-app message are now displayed as part of the same in-app message. Previously, iframes would be loaded in a separate webview.
Added
Adds support for navigation bar transparency changes introduced in iOS 15. Apps using Braze default UIs for Content Cards, the News Feed, and the modal WebView should upgrade to this version as soon as possible ahead of iOS 15’s release.
4.3.1
Fixed
The sdkAuthenticationDelegate now works as expected when setting the property directly.
VoiceOver no longer reads content beneath the displayed in-app message.
Changed
The number of unviewed Content Cards in ABKContentCardsController’s unviewedContentCardCount now excludes control cards.
The default Content Cards UI now allows swipe-to-refresh gestures when empty.
Deprecates ABKInAppMessageController’s method displayNextInAppMessageWithDelegate: in favor of displayNextInAppMessage.
Added
Custom events and purchases now support nested properties.
In addition to integers, floats, booleans, dates, or strings, a JSON object can be provided containing dictionaries of arrays or nested dictionaries. All properties combined can be up to 50 KB in total length.
4.3.0
Breaking
Refined Content Cards UI public api changes introduced in 4.2.0.
Fixed
Fixes an issue introduced in 4.2.0 that caused Content Card type ABKClassicImageContentCardCell to crash on display when not using Storyboard.
4.2.0
⚠️ Known Issues
This release contains a known issue with the Content Cards default UI on iOS, where showing a “Classic” type card with an image causes a crash. If you are using the default Content Cards UI, do not upgrade to this version.
Breaking
Content Cards and News Feed are now more extensible!
Class level API methods have changed to instance methods to make subclassing easier, however getNavigationContentCardsViewController and getNavigationFeedViewController are left in as class methods for backwards compatibility.
Fixes an issue with Dynamic Type support introduced in 3.34.0 to be compatible with iOS 9.
Added
Adds support for new SDK Authentication feature.
Exposes window.brazeBridge in HTML in-app messages which replaces window.appboyBridge. appboyBridge is deprecated and will be removed in a future version of the SDK.
Changed
Makes in-app message window handling more resilient:
The in-app message window tries to display up to 10 times when another window competes for visibility. If the in-app message is not guaranteed visibility, it is dismissed and an error is logged.
Improves Appboy’s wipeDataAndDisableForAppRun and disableSDK to handle additional use cases.
Deprecates flushDataAndProcessRequestQueue in favor of requestImmediateDataFlush.
4.1.0
Breaking
ABKURLDelegate method handleAppboyURL:fromChannel:withExtras: is now invoked for all urls.
Previously, this delegate method was not invoked for urls opened in a WebView or the default browser when originating from the News Feed or Content Cards.
Removes ABKUIURLUtils method openURLWithSystem:fromChannel:. Use openURLWithSystem: as a replacement.
Fixed
Fixes a case where the ABKURLDelegate method handleAppboyURL:fromChannel:withExtras: was being called twice when opening a push notification with an url.
Changed
Deprecates ABKUnknownChannel.
4.0.2
Fixed
Fixes a double redirection bug in Push Stories when the app is in a terminated state and application:didReceiveRemoteNotification:fetchCompletionHandler: is not implemented.
Changed
Improves the Swift Package Manager bundle lookup to be more flexible.
Added
Adds support to use a dictionary named Braze instead of Appboy when adding customization in the Info.plist. After adding the Braze dictionary, please remove the previous Appboy dictionary.
4.0.1
Fixed
Sets CFBundleSupportedPlatforms in .plist files to the correct non-simulator value.
Removes the Dynamic Type support warnings.
4.0.0
Breaking
AppboyKit is now distributed as an XCFramework when integrating with Cocoapods. Cocoapods 1.10.0+ is required.
This removes the need for integrators to exclude the arm64 architecture when building for the simulator. Please undo any of the changes that may have been made when upgrading to 3.27.0 (Integrators will now be required to exclude …).
Fixed
Fixes the Swift Package Manager cleanup script to remove only the necessary files.
Added
Adds Mac Catalyst support for apps integrating with Cocoapods.
3.34.0
Breaking
Replaces ABKInAppMessageSlideupViewController’s slideConstraint by offset.
Added
Adds a new Github repo to optimize import speeds for applications integrating with Swift Package Manager.
To use this repo, follow these steps:
Remove the existing package in your application that points to the url: https://github.com/Appboy/Appboy-ios-sdk.
Add a new package using the new url: https://github.com/braze-inc/braze-ios-sdk.
Adds support for Right-to-Left languages in the News Feed.
Adds support for scaling fonts automatically with Dynamic Type for in-app messages and the News Feed.
Changed
Improves accessibility handling for modal and full in-app messages.
Improves Slideup in-app message animations.
3.33.1
Fixed
Fixes Swift Package Manager integration.
In Xcode, select File ▸ Swift Packages ▸ Update to Latest Package Versions to update.
Fixes Push Story integration via CocoaPods for applications that have use_frameworks! in their Podfile.
3.33.0
Breaking
Changed Push Story integration to use XCFrameworks for Cocoapods and manual integration. Applications currently integrating Push Stories via Cocoapods or manual integration must follow these steps when updating:
In your Notification Content Extension target:
Remove AppboyPushStory.framework from Frameworks and Libraries under the General tab.
In your application target:
Delete the Copy File build phase copying the AppboyPushStory.framework to the Frameworks destination.
Delete the Run Script build phase that starts with:
1
2
3
4
APP_PATH="${TARGET_BUILD_DIR}/${WRAPPER_NAME}"

find "$APP_PATH" -name 'AppboyPushStory.framework' -type d | while read -r FRAMEWORK
...
Fixes a double redirection bug in Push Stories when the app is in a terminated state and the UNUserNotificationCenter delegate is not the AppDelegate.
3.32.0
Added
Adds Mac Catalyst support for apps integrating with Swift Package Manager (SPM).
Please follow the instructions here to import the SDK with SPM. The SDK does not currently support Mac Catalyst when integrated through Cocoapods or Carthage.
Fixes the formatting of Full and Slideup in-app messages when displaying on iPhone 12 mini.
Changed
Improves Push Story click tracking handling.
3.31.1
Breaking
Removes the method getSDWebImageProxyClass from ABKUIUtils.
You can access the public class ABKSDWebImageProxy directly by importing ABKSDWebImageProxy.h.
Fixed
Fixes a bug in the Cocoapods integration that would lead to SDK localizations being embedded for languages not explicitly supported in the app.
Fixes a rare crash that would occur when no windows exist at UIWindowLevelNormal while an in-app message is being displayed and UIKit requests UI updates (orientation change, etc.).
Fixes a bug in modal in-app messages where some languages (such as Burmese) may have clipped text.
3.31.0
Breaking
For apps that have previously integrated through Swift Package Manager, please perform the following steps:
In the Xcode menu, click Product > Scheme > Edit Scheme...
Click the expand ▶️ next to Build and select Post-actions. Press + and select New Run Script Action.
In the dropdown next to Provide build settings from, select your app’s target.
If you are updating from 3.29.0 or 3.29.1, remove the Run Script Action previously specified in the 3.29.0 section of this changelog.
Added
Adds Push Stories support for apps integrating with Swift Package Manager.
In your app content extension’s target, under Build Settings > Other Linker Flags, add the -ObjC linker flag.
Changed
Updates the email validation on the SDK to be more lenient in favor of more accurate validation by the Braze backend. Valid emails with uncommon patterns or international characters that were previously rejected will now be accepted.
Deprecates ABKDeviceWhitelistKey in favor of ABKDeviceAllowlistKey.
Fixed
Fixes a bug in HTML in-app messages where some native WebKit UI elements could be unresponsive.
3.30.0
Breaking
Body click analytics will no longer automatically be collected for HTML in-app messages created using the HTML Upload with Preview option in the platform.
To continue to receive body click analytics, you must log body clicks explicitly from your message via Javascript using appboyBridge.logClick().
Fixed
Fixes a bug with Full in-app messages where the button positions did not match the preview on the Braze dashboard.
Fixes a bug where in-app messages would be displayed below the application window under specific conditions.
Apps that set up their window asynchronously at startup could accidentally hide the in-app message window if one was being displayed (e.g. as a result of clicking on a test in-app message notification).
Added
Adds support for custom endpoints with a scheme included (https, http, etc.). For example, http://localhost:3001 will no longer result in https://http://localhost:3001 as the resolved endpoint.
3.29.1
Added
Adds improved support for in-app message display on iPhone 12 models.
3.29.0
Added
Adds initial support for Swift Package Manager. There are 2 new packages that have been added: AppboyKit for the core SDK and AppboyUI for the full SDK (including UI elements), which correspond to the Appboy-iOS-SDK/Core and Appboy-iOS-SDK pods, respectively.
Note that tvOS support is not available via Swift Package Manager for this release. Push Stories is only available through a side-by-side integration with Cocoapods.
To add the package to your project follow these steps:
Select File > Swift Packages > Add Package Dependency.
In the search bar, enter https://github.com/Appboy/Appboy-ios-sdk.
Select one of AppboyKit or AppboyUI. Note that AppboyUI includes AppboyKit automatically.
In your app’s target, under Build Settings > Other Linker Flags, add the -ObjC linker flag.
In the Xcode menu, click Product > Scheme > Edit Scheme...
Click the expand ▶️ next to Build and select Post-actions. Press + and select New Run Script Action.
In the dropdown next to Provide build settings from, select your app’s target.
Removes userNotificationWasSentFromAppboy: and pushNotificationWasSentFromAppboy: on Appboy. Use isAppboyUserNotification: and isAppboyRemoteNotification: in ABKPushUtils instead.
Updates ABKURLDelegate’s method signature for handleAppboyURL:fromChannel:withExtras: to include nullability annotations required for proper Swift support.
Fixed
Fixes a race condition in Appboy method wipeDataAndDisableForAppRun where certain persisted fields would still be available immediately after calling the method. These fields now are removed synchronously.
Changed
Updated SDWebImage to use version 5.9.x.
3.27.0
Breaking
Adds support for iOS 14. Requires Xcode 12.
Removes the ABK_ENABLE_IDFA_COLLECTION preprocessor macro from the SDK.
Updates the ABKIDFADelegate protocol by renaming isAdvertisingTrackingEnabled to isAdvertisingTrackingEnabledOrATTAuthorized to reflect the addition of the AppTrackingTransparency framework in iOS 14.
If you use the Ad Tracking Enabled segment filter on the Braze dashboard or are implementing AppTrackingTransparency, you must update your integration to use AppTrackingTransparency to read the correct user status. Please see our sample app for implementation details.
If you do not use the Ad Tracking Enabled segment filter and are not implementing AppTrackingTransparency yet, your implementation of isAdvertisingTrackingEnabledOrATTAuthorized may temporarily continue to use isAdvertisingTrackingEnabled. However, the returned value will always be NO in iOS 14, regardless of actual IDFA availability.
Note that Apple announced that they will delay the enforcement of upcoming IDFA changes until early 2021. Please reference our iOS 14 upgrade guide for more details.
Updates the minimum required version of SDWebImage from 5.0 to 5.8.2.
Integrators will now be required to exclude the arm64 simulator slice in their entire project.
This is done automatically when integrating via Cocoapods.
For other cases:
If you are using xcconfig files to build your app, please set:
For iOS targets: EXCLUDED_ARCHS[sdk=iphonesimulator*] = arm64
For tvOS targets: EXCLUDED_ARCHS[sdk=appletvsimulator*] = arm64
If you are using the Xcode Build Settings panel, enable Build Active Architecture Only for the configuration you use to run your app on the simulator. (ONLY_ACTIVE_ARCH = YES)
3.26.1
Changed
Deprecates the compilation macro ABK_ENABLE_IDFA_COLLECTION in favor of the ABKIDFADelegate implementation.
ABK_ENABLE_IDFA_COLLECTION will not function properly in iOS 14. To continue collecting IDFA on iOS 14 devices, please upgrade to Xcode 12 and implement App Tracking Transparency and Braze’s ABKIDFADelegate (see the iOS 14 upgrade guide for more information).
Added
Adds improved support for iOS 14 Approximate Location tracking.
3.26.0
Breaking
Removed readonly property overrideApplicationStatusBarHiddenState in ABKInAppMessageViewController.h.
Fixed
Fixes an issue with in-app messages not respecting the application’s status bar style when View controller-based status bar appearance (UIViewControllerBasedStatusBarAppearance) is set to YES in the Info.plist.
Fixes an issue which can lead to text being cut off in Content Cards for specific iPhone models.
Fixes an issue preventing test Content Cards from displaying under specific conditions.
Changed
Added Binary Project Specification file for more efficient Carthage integration of the full SDK.
Update your Cartfile to use binary "https://raw.githubusercontent.com/Appboy/appboy-ios-sdk/master/appboy_ios_sdk_full.json"
Support for this integration method was added starting with version 3.24.0 of the SDK.
Added
Adds support for specifying PushStoryAppGroup in the Appboy dictionary in your app’s Info.plist. This Apple App Group will share the Braze Push Story information such as Campaign IDs between applications from a single Apple Developer account.
Adds appboyBridge.getUser().addAlias(alias, label) to the javascript interface for HTML in-app messages.
Adds the property overrideUserInterfaceStyle to ABKInAppMessage that allows forcing Light or Dark mode in the same way as Apple’s UIViewController.overrideUserInterfaceStyle.
Adds the ability to dismiss modal in-app messages when the user clicks outside of the in-app message.
This feature is disabled by default.
You can enable the feature by adding the Appboy dictionary to your Info.plist file. Inside the Appboy dictionary, add the DismissModalOnOutsideTap boolean subentry and set the value to YES.
You can also enable the feature at runtime by setting ABKEnableDismissModalOnOutsideTapKey to YES in appboyOptions.
3.25.0
Breaking
Removes the arm64e architecture when building with Cocoapods.
Removes the deprecated property appWindow from ABKInAppMessageWindowController.
3.24.2
Fixed
Fixes an issue with post-dismissal view hierarchy restoration for in-app messages under specific conditions.
Fixes an issue introduced in 3.24.0 breaking the SDK compatibility with Cocoapods.
3.24.0
Important This release is not compatible with Cocoapods. Do not upgrade to this version and upgrade to 3.24.1 and above instead.
Breaking
Renames ABKInAppMessageWindow’s catchClicksOutsideInAppMessage to handleAllTouchEvents.
Fixed
Fixes an issue where the unread indicator on a Content Card would persist even after being read.
Fixes an issue preventing long texts from displaying correctly in Full in-app messages.
Fixes an issue where appboyBridge would not work in an Ajax callback within HTML In-App Messages.
Changed
Changes the manual integration steps for versions 3.24.0 and newer. Please follow the updated integration steps here.
Added
Adds support for JavaScript functions window.alert(), window.confirm() and window.prompt() in HTML in-app messages.
Adds the ABKContentCardsTableViewControllerDelegate protocol to more intricately handle Content Card clicks using the methods contentCardTableViewController:shouldHandleCardClick: and contentCardTableViewController:didHandleCardClick:.
3.23.0
Fixed
Fixes an issue with regex based event property triggers not working as expected. Previously on iOS they had to match the entire string, now they will search for matches as expected.
Improves resiliency when handling multiple background requests.
Added
Adds support for upcoming HTML In-App Message templates.
Adds support for applications using scenes (UIWindowSceneDelegate). In-app messages are now properly displayed in that context.
3.22.0
Breaking
Removes the key ABKInAppMessageHideStatusBarKey from appboyOptions and the property forceHideStatusBar from ABKInAppMessageController. Full screen in-app messages are now always displayed with the status bar hidden.
Adds Dark Mode support to Content Cards. This feature is enabled by default and can be disabled by setting enableDarkTheme property to NO on ABKContentCardsTableViewController before the view controller is presented.
Fixed
Fixes an issue in HTML in-app messages where button clicks weren’t correctly being attributed for mailto: and tel: links.
Fixes an issue in HTML in-app messages where videos would be displayed underneath the in-app message when full screen playback was enabled. The in-app message UIWindow’s windowLevel is now set to UIWindowLevelNormal instead of being above UIWindowLevelStatusBar.
Fixes an issue in Content Cards where ABKURLDelegate was not being respected when opening links.
Added
Adds appboyBridge.logClick(id), appboyBridge.logClick() and appboyBridge.getUser().setCustomLocationAttribute(key, latitude, longitude) to the javascript interface for HTML in-app messages.
Adds Czech and Ukrainian language support for Braze UI elements.
Adds the ability to unset the current user’s email attribute by setting the email property of the current ABKUser instance to nil (e.g. [Appboy sharedInstance].user.email = nil;).
Adds Dark Mode support to Push Stories.
Adds the ability to set maximum width of Content Cards by using the maxContentCardWidth property of ABKContentCardsTableViewController.
3.21.3
Added
Adds an option to disable automatic geofence requests.
You can do this in the plist by adding the Appboy dictionary to your Info.plist file. Inside the Appboy dictionary, add the DisableAutomaticGeofenceRequests boolean subentry and set the value to YES.
You can also disable automatic geofence requests at runtime by setting ABKDisableAutomaticGeofenceRequestsKey to YES in appboyOptions.
Adds the method requestGeofencesWithLongitude:latitude: to Appboy.h. This method can be called whenever you explicitly want Braze to send a request for updated Geofences information. This call is rate limited to once per user session.
3.21.2
Fixed
Fixes an issue in HTML in-app messages where, during display, the viewport would shift down if the keyboard was opened but not shift back up when the keyboard was closed.
Fixes an issue introduced in 3.17.0 where the SDK would give precedence to the endpoint passed in Info.plist if given both an endpoint from the Info.plist and appboyOptions.
Added
Adds the ability to set a custom WKWebViewConfiguration for HTML in-app messages. You can set it using the method setCustomWKWebViewConfiguration in ABKInAppMessageUIDelegate.
Changed
Removes calls to deprecated APIs statusBarOrientation and statusBarFrame.
Un-deprecates the following push utility methods: isUninstallTrackingUserNotification:, isUninstallTrackingRemoteNotification:, isGeofencesSyncUserNotification:, isGeofencesSyncRemoteNotification:, and isPushStoryRemoteNotification: from ABKPushUtils. These APIs were originally deprecated in 3.16.0.
3.21.1
Fixed
Fixes an issue for Modal and Full in-app messages where the opacity value of the close X button was not being respected.
Changed
ABKContentCard.m will now log a click event when logContentCardClicked is called and no URL field is populated.
Added
Adds the ability to force the status bar to hide when a Full or HTML in-app message is being actively displayed. To opt in to this feature, set ABKInAppMessageHideStatusBarKey to YES in appboyOptions.
3.21.0
Breaking
Requires XCode 11.
Fixed
Fixes an issue in the animate-in behavior of HTML in-app messages that could cause a brief flicker before the message displayed on older devices and simulators.
Fixes an issue with Slideup in-app messages where they would cover part of the status bar when animating from the top on non-notched devices.
Fixes an issue introduced in 3.14.1 where boolean-typed event properties would be improperly cast to numbers.
Changed
Updates the logging format for debug, warn, and error ABKLogger messages to now print their log level.
Added
Adds support for the upcoming feature, in-app messages with Dark Mode support.
Dark Mode enabled messages must be created from the dashboard. Braze does not dynamically theme in-app messages for Dark Mode.
This feature is enabled by default for all new ABKInAppMessage instances. To prevent Braze from automatically applying a Dark Theme when the fields are available on Braze’s servers, set the enableDarkTheme flag on ABKInAppMessage to NO in the beforeInAppMessageDisplayed: method of your ABKInAppMessageControllerDelegate delegate implementation.
Adds the ability to reference the Braze iOS SDK API from Swift when using the Appboy-tvOS-SDK pod. Adding import AppboyTVOSKit to the top of your Swift file while using the Appboy-tvOS-SDK pod will give you equivalent behavior to adding import Appboy_iOS_SDK while using the Appboy-iOS-SDK pod.
Adds the populateContentCards: method and the cards property to ABKContentCardsTableViewController’s public interface. By setting the cards property from within populateContentCards:, you may manipulate ABKContentCard field data and/or control which ABKContentCard instances are displayed from the context of a custom ABKContentCardsTableViewController subclass.
3.20.4
Fixed
Fixed an issue with Content Cards where the header and description text fields would appear to be missing in Dark Mode.
Added
Adds a TEALIUM SDK flavor option.
3.20.3
Added
If Automatic Braze location collection is enabled, the SDK now submits a session start location request if location hasn’t already been sent up for the session after any affirmative location permission prompt. This also applies to the new “Allow Once” option in iOS 13.
3.20.2
Important If you are on Braze iOS SDK 3.19.0 or below, we recommend upgrading to this version immediately to ensure uninterrupted collection of new push tokens as users upgrade to iOS 13.
In application:didRegisterForRemoteNotificationsWithDeviceToken:, replace
If you are on Braze iOS SDK 3.19.0 or below and unable to upgrade, you must ensure your [Appboy registerPushToken] implementation does not rely on stringWithFormat or description for parsing the deviceToken passed in from application:didRegisterForRemoteNotificationsWithDeviceToken:. Please reach out to your Customer Success Manager for more information.
Important In Braze iOS SDK 3.19.0, we updated our HTML in-app message container from UIWebview to WKWebView, however, the initial releases have known issues displaying HTML in-app messages. If you are currently using 3.19.0, 3.20.0, or 3.20.1, you are strongly encouraged to upgrade if you make use of HTML in-app messages. Please see the following for more important information about the transition to WKWebView:
If you are utilizing customization for HTML in-app messages (such as customizing ABKInAppMessageHTMLFullViewController or ABKInAppMessageHTMLViewController), we strongly recommend testing to ensure your in-app messages continue to display correctly and interactions function as intended.
The following javascript methods are now no-ops: alert, confirm, prompt.
Deep links without schemes are no longer supported. Ensure that your in-app message deep links contain schemes.
Fixed
Fixes an issue introduced in 3.19.0 where HTML in-app messages would not register user clicks when the .xib failed to load.
Fixes an issue introduced in 3.19.0 where HTML in-app messages with select special characters and an assets zip would cause display irregularities.
Changed
Updates the WKWebView which displays HTML in-app messages with the following attributes:
suppressesIncrementalRendering is set to true
mediaTypesRequiringUserActionForPlayback is set to WKAudiovisualMediaTypeAll
Updates the background color of the WKWebView which displays HTML in-app messages from [[UIColor blackColor] colorWithAlphaComponent:.3] to [UIColor clearColor].
3.20.1
Important This release has known issues displaying HTML in-app messages. Do not upgrade to this version and upgrade to 3.20.2 and above instead. If you are using this version, you are strongly encouraged to upgrade to 3.20.2 or above if you make use of HTML in-app messages.
Fixed
Fixes an issue introduced in 3.19.0 which changed the background of HTML in-app messages to a non-transparent color.
Improves the robustness of push token collection code for iOS 13 introduced in 3.20.0.
3.20.0
Important This release has known issues displaying HTML in-app messages and a known issue with push token collection. Do not upgrade to this version and upgrade to 3.20.2 and above instead. If you are using this version, you are strongly encouraged to upgrade to 3.20.2 or above if you make use of HTML in-app messages.
Breaking
Introduced a signature change for push token collection methods:
Important This release has known issues displaying HTML in-app messages. Do not upgrade to this version and upgrade to 3.20.2 and above instead. If you are using this version, you are strongly encouraged to upgrade to 3.20.2 or above if you make use of HTML in-app messages.
Breaking
Replaces UIWebView with WKWebView for HTML in-app messages.
If you are utilizing customization for HTML in-app messages (such as customizing ABKInAppMessageHTMLFullViewController or ABKInAppMessageHTMLViewController), you must test to ensure your in-app messages continue to display correctly and interactions function as intended.
The following javascript methods are now no-ops: alert, confirm, prompt.
Deep links without schemes are no longer supported. Please ensure that your in-app message deep links contain schemes.
3.18.0
Breaking
Automatic Braze location collection is now disabled by default. If you choose to use our location collection, you must explicitly enable location collection.
You can do this in the plist by adding the Appboy dictionary to your Info.plist file. Inside the Appboy dictionary, add the EnableAutomaticLocationCollection boolean subentry and set the value to YES.
You can also enable location at runtime by setting ABKEnableAutomaticLocationCollectionKey to YES in appboyOptions.
Removes the Feedback feature from the SDK. The Feedback subspec and all Feedback methods on the SDK, including [[Appboy sharedInstance] submitFeedback] and [[Appboy sharedInstance] logFeedbackDisplayed], are removed.
Changed
Improves support for in-app messages on “notched” devices (for example, iPhone X, Pixel 3XL). Full-screen messages now expand to fill the entire screen of any phone, while covering the status bar.
Added
Adds the ability to enable Braze Geofences without enabling Braze location collection. You can set this in the plist by adding the Appboy dictionary to your Info.plist file. Inside the Appboy dictionary, add the EnableGeofences boolean subentry and set the value to YES to enable Braze Geofences. You can also enable geofences at runtime by setting ABKEnableGeofencesKey to YES in appboyOptions.
If this key is not set, it will default to the status of automatic location collection (see breaking change above).
Note that Braze Geofences will continue to work on existing integrations if location collection is enabled and this new configuration is not present. This new configuration is intended for integrations that want Braze Geofences, but not location collection enabled as well.
3.17.0
Breaking
Removes ABKAppboyEndpointDelegate.
You can now set the endpoint at runtime by setting the value of ABKEndpointKey in appboyOptions to your custom endpoint (ex. sdk.api.braze.eu) at initialization.
3.16.0
Important: If you are using ABKAppboyEndpointDelegate, you will need to replace dev.appboy.com with sdk.iad-01.braze.com in the getApiEndpoint method.
Breaking
Removes the methods: allowRequestWhenInUseLocationPermission and allowRequestAlwaysPermission from ABKLocationManager.
To request when in use location permission, use the following code:
The preprocessor macro ABK_DISABLE_LOCATION_SERVICES is no longer needed.
Important: Configuring geofences to request always location permissions remotely from the Braze dashboard is no longer supported. If you are using Geofences, you will need to ensure that your app requests always location permission from your users manually.
ABKAutomaticRequestProcessingExceptForDataFlush is deprecated. Users using ABKAutomaticRequestProcessingExceptForDataFlush should switch to ABKManualRequestProcessing, as the new behavior of ABKManualRequestProcessing is identical to the previous behavior of ABKAutomaticRequestProcessingExceptForDataFlush
Changed
Deprecates the push utility methods: isUninstallTrackingUserNotification:, isUninstallTrackingRemoteNotification:, isGeofencesSyncUserNotification:, isGeofencesSyncRemoteNotification:, and isPushStoryRemoteNotification: from ABKPushUtils. Please use the function isAppboyInternalRemoteNotification:.
Minor changes to the logic of ABKManualRequestProcessing. The original ABKManualRequestProcessing had specific exceptions and behaved more like ABKAutomaticRequestProcessingExceptForDataFlush in practice. As a result, the two policies have been merged into ABKManualRequestProcessing. Note that the new definition of ABKManualRequestProcessing is that periodic automatic data flushes are disabled. Other requests important to basic Braze functionality will still occur.
3.15.0
Important: If you are using ABKAppboyEndpointDelegate, you will need to replace dev.appboy.com with sdk.iad-01.braze.com in the getApiEndpoint method.
Breaking
Adds support for SDWebImage version 5.0.
Note that upgrading to SDWebImage 5.0 also removed the FLAnimatedImage transitive dependency from the SDK.
3.14.1
Important: If you are using ABKAppboyEndpointDelegate, you will need to replace dev.appboy.com with sdk.iad-01.braze.com in the getApiEndpoint method.
Changed
Changed in-app message trigger behavior to not perform trigger events until after any pending trigger sync requests to the server have finished.
Fixed
Fixed a serialization issue that could cause improper type conversions for certain decimal values.
Fixed a behavior introduced in 3.12.0 which caused in-app messages to not be considered triggered locally if ABKDiscardInAppMessage was returned by the host app in beforeInAppMessageDisplayed:.
Added
Added the ability to set the session timeout via the Info.plist.
Add the Appboy dictionary to your Info.plist file. Inside the Appboy Dictionary, add the SessionTimeout Number subentry and set the value to your session timeout.
Added the ability to disable location tracking via the Info.plist.
Add the Appboy dictionary to your Info.plist file. Inside the Appboy Dictionary, add the DisableAutomaticLocation Boolean subentry and set the value to YES.
Added dynamic cell resizing for Content Cards cells with templated images in our default Content Cards UI.
Added validation to the local filename’s canonical path during zip file extraction.
3.14.0
Important: If you are using ABKAppboyEndpointDelegate and plan to upgrade to 3.14.1, you will need to replace dev.appboy.com with sdk.iad-01.braze.com in the getApiEndpoint method.
Added
Improves the look and feel of In-App Messages to adhere to the latest UX and UI best practices. Changes affect font sizes, padding, and responsiveness across all message types. Now supports button border styling.
3.13.0
Breaking
Upgrades the delivery mechanism of Push Stories to allow delivery even after a user’s app has been force closed..
Required: Please change your integration to use ab_cat_push_story_v2 instead of ab_cat_push_story for the UNNotificationExtensionCategory in your content extension. See documentation for more details.
Changed
Improves in-app message triggering logic to fall back to lower priority messages when the Braze server aborts templating (e.g. from a Connected Content abort in the message body, or because the user is no longer in the correct Segment for the message).
Updates German translations to improve formatting.
3.12.0
Breaking
Drops support for iOS 8.
Adds support for the arm64e architecture when building with Cocoapods. Requires Xcode 10.1.
Fixed
Fixes bitcode support for the Push Story framework when using Xcode 10.
Cross-Promotion cards have also been removed as a card model and will thus no longer be returned.
3.11.0
Added
Adds the ability to set or remove custom location attributes for a specific user from within HTML IAMs.
Updates the SDK to report users who disable banner notifications but are still opted-in to push notifications as push enabled. Note this change does not affect provisionally authorized users on iOS 12, who were considered push enabled before this release regardless of their banner notification settings.
Adds Carthage Core support which allows for integration with the core Braze SDK without any UI components. To implement the core SDK, add binary "https://raw.githubusercontent.com/Appboy/appboy-ios-sdk/master/appboy_ios_sdk_core.json" to your Cartfile.
Changed
Deprecates the Feedback feature.
Fixed
Fixes an issue with the JS bridge when trying to set a custom attribute with the character ‘&’.
3.10.0
Added
Adds the ability to specify a whitelist for device fields that are collected by the Braze SDK.
Configurable device fields are defined in the ABKDeviceOptions enum.
To specify whitelisted device fields, assign the bitwise OR of desired fields to ABKDeviceWhitelistKey in the appboyOptions of startWithApiKey:inApplication:withAppboyOptions:.
For example, to specify timezone and locale collection to be whitelisted, set appboyOptions[ABKDeviceWhitelistKey] = @(ABKDeviceOptionTimezone | ABKDeviceOptionLocale);.
To turn off all fields, set appboyOptions[ABKDeviceWhitelistKey] = @(ABKDeviceOptionNone);.
By default, all fields are enabled.
Added the clicked property to ABKContentCard. Clicks made through [ABKContentCard logContentCardClicked] are now saved locally on the device.
Breaking
Removes ABKSignificantChangeCollectionEnabledOptionKey, ABKSignificantChangeCollectionDistanceFilterOptionKey, and ABKSignificantChangeCollectionTimeFilterOptionKey from the Appboy interface.
Removed
Removes the ability to optionally track locations in the background.
Fixed
Fixes an issue where Slideup and Full In-App Message content could be obscured by the notch on iPhone XR and iPhone XS Max.
3.9.0
Breaking
Adds support for iOS 12. Requires Xcode 10.
Fixed
Fixes minor issues with subclassing ABKInAppMessageModalViewController and News Feed request timeouts.
Thanks @datkinnguyen for your contribution.
3.8.4
Fixed
Fixes a regression introduced in version 3.8.3 that caused background tasks to extend beyond execution time.
3.8.3
Fixed
Fixes an issue where ABKContentCardsController unviewedContentCardCount would always return 0.
Changed
Updates the Content Cards UI with minor layout improvements.
3.8.2
Fixed
Fixes an issue with possible build failure when using Content Cards related to duplicate image names in Content Cards and News Feed pods. Please use this version if integrating Content Cards.
Changed
Updates the Content Cards UI with minor layout improvements.
3.8.1
Fixed
Important: Fixes an issue with Content Cards syncing. Note: As additional fixes were added in later versions, please use Braze iOS SDK version 3.8.2 or above if integrating Content Cards.
3.8.0
Added
In ABKUser class, addLocationCustomAttributeWithKey:latitude:longitude: and removeLocationCustomAttributeWithKey: methods are added to manage location custom attributes.
Introduces support for the upcoming Content Cards feature, which will eventually replace the existing News Feed feature and adds significant capability. This feature is currently in closed beta testing; if you’re interested in joining the beta, please reach out to your Customer Success Manager or Account Manager.
Changed
Status bar is not obscured when displaying a full screen in-app message.
3.7.1
Changed
Improves data handling immediately following a user change to bring behavioral parity with the Android and Web SDKs.
3.7.0
Breaking
In ABKInAppMessageUIControlling protocol, getCurrentDisplayChoiceForControlInAppMessage method is added to define whether the control in-app message impression should be logged now, later or discarded.
In ABKInAppMessageControllerDelegate protocol, beforeControlMessageImpressionLogged method is added to define whether the control in-app message impression should be logged now, later or discarded.
Added
CLLocationManager authorization requests can now be prevented from compiling by setting a Preprocessor flag ABK_DISABLE_LOCATION_SERVICES.
Fixed
Fixes an issue where in-app messages triggered on session start could potentially be templated with the old user’s attributes.
3.6.0
Breaking
In ABKSDWebImageProxy.h, renames removeImageForKey to removeSDWebImageForKey and clearCache to clearSDWebImageCache to avoid conflicts with internal Apple API. Important: We have received reports of sporadic App Store rejection stemming from Apple’s static checks mistaking our APIs for an invalid usage of the internal Apple API. We recommend new App Store submissions integrating the Braze iOS SDK ship with this version or above to decrease the likelihood of rejection.
Added
Exposes handleCardClick on ABKNewsFeedTableViewController.h to enable custom handling via subclassing.
Improves News Feed image handling on iPad.
3.5.1
Fixed
Fixes an issue with integrating the NewsFeed subspec in Swift projects via Cocoapods.
3.5.0
Breaking
Open sources the News Feed UI code and moves it into a new subspec named “NewsFeed”.
Manual integrators must now add the AppboyUI folder of this repository to their projects as a group, in addition to AppboyKit.
The “NewsFeed” subspec contains the Braze News Feed UI and the Core SDK. It does not include the Feedback or In-App Message UI.
The “UI” subspec contains all Braze UI and the Core SDK subpsec.
ABKFeedViewControllerDelegate was removed.
To integrate a navigation context News Feed, use the following code:
Removes NUI support for Feedback, In-App Messages, and the News Feed.
All customization can now be done by using categories or by extending our open sourced view controllers.
Removes deprecated ABKPushURIDelegate from the SDK. Use ABKURLDelegate instead.
3.4.0
Breaking
Adds preferredOrientation to ABKInAppMessageUIController and ABKInAppMessageWindowController.
Removes supportedOrientations from ABKInAppMessageUIController and ABKInAppMessageWindowController.
Renames supportedOrientationMasks to supportedOrientationMask in ABKInAppMessageUIController and ABKInAppMessageWindowController.
Fixed
Fixes an issue that caused GIFs to not animate on SDWebImage versions above or equal to 4.3.0
3.3.4
Added
Adds the ability to view verbose logs from the SDK for debugging.
To enable verbose logging, add a dictionary named Appboy to your Info.plist file. Inside the Appboy Dictionary, add the LogLevel String subentry and set the value to “0”.
3.3.3
Added
Adds wipeDataAndDisableForAppRun: on the Appboy interface to support wiping all customer data created by the Braze SDK.
Adds disableSDK: and requestEnableSDKOnNextAppRun: to the Appboy interface to disable and re-enable the Braze SDK.
Fixed
Fixes an issue where events setting custom attribute arrays to nil would persist on the SDK beyond their useful life.
3.3.2
Changed
Updates the SDK with internal, non-functional improvements.
3.3.1
Added
Adds Other, Unknown, Not Applicable, and Prefer not to Say options for user gender.
Adds umbrella header files AppboyFeedback.h and AppboyInAppMessage.h for the Feedback and InAppMessage subspecs.
Fixed
Fixes an issue where the method beforeInAppMessageDisplayed: in class ABKInAppMessageControllerDelegate is not called when the host app is using the Core subspec.
3.3.0
Breaking
Open sources the In-App Message UI code and moves it into a new subspec named “InAppMessage”.
Manual integrators must now add the AppboyUI folder of this repository to their projects as a group, in addition to AppboyKit.
The “InAppMessage” subspec contains the Braze In-App Message UI and the Core SDK. It does not include Feedback or the News Feed UI.
The “UI” subspec contains all Braze UI and the Core SDK subpsec.
The open-sourced In-App Message view controllers offer backward compatible NUI support, although we recommend using categories or subclassing the In-App Message view controllers for customization as the NUI library isn’t actively maintained any more. Support for NUI customization will be removed in a future release.
Most delegate customization methods are moved from ABKInAppMessageControllerDelegate to ABKInAppMessageUIDelegate.
Fixes an issue introduced in version 3.0.0 which caused detailed device model information to not be collected by the SDK.
Fixes an issue where Braze’s Carthage framework did not support simulators.
3.2.2
Fixed
Fixes an issue where Slideup and Full In-App Message content could be obscured by the notch on iPhone X.
3.2.1
Fixed
Fixes an issue where Push Story Framework did not support bitcode.
3.2.0
Added
Adds Push Stories, a new push type that uses UNNotificationContentExtension to display multiple images in a single notification.
This feature requires iOS 10 and above.
Fixed
Fixes an issue where tvOS SDK did not support bitcode.
3.1.1
Added
Adds a new property language to ABKUser to allow explicit control over the user’s language in the Braze dashboard. Note that this is separate and independent from the language settings on the user’s device.
Adds an Objective-C sample app for the Core subspec of the SDK. See Samples/Core/ObjCSample.
Fixed
Fixes a bug introduced in version 2.30 where crashes could occur if the SDK was directed to handle a custom scheme deep link inside a WebView.
Fixes a bug introduced in version 3.0 where new custom attributes were not being flushed if custom attributes had been previously flushed in the same foregrounded session.
Fixes a bug introduced in version 3.0 where previously flushed custom attributes were being re-sent.
Fixes an issue where slow image fetching blocked image-only modal in-app messages from displaying.
Adds the ability to set a custom API endpoint via the Info.plist.
Add the Appboy dictionary to your Info.plist file. Inside the Appboy Dictionary, add the Endpoint String subentry and set the value to your custom endpoint (e.g., sdk.api.braze.eu).
Fixed
Fixes an issue where changing the IDFA settings through a third party wrapper could cause a crash.
3.0.1
Fixed
Fixes an issue where calling incrementCustomUserAttribute: on ABKUser could cause a crash.
3.0.0
Breaking
Removes the deprecated foursquareAccessToken property from ABKUser. To associate a Foursquare access token with a user profile, use setCustomAttributeWithKey:andStringValue: instead.
Note: Braze iOS SDK version 3.0.0 will only support downgrading to iOS SDK version 2.31.0. Downgrading to versions prior to 2.31.0 may result in app crashes.
Added
Adds a major performance upgrade that reduces CPU usage, memory footprint, and network traffic.
2.31.0
Breaking
Open sources the Feedback view controllers and moves them into a new subspec “Feedback”.
The “Feedback” subspec has the Braze Feedback UI and the Core SDK. It will not include in-app messages or News Feed UI.
Removes the popover context for Feedback due to the deprecation of UIPopoverViewController in iOS.
Renames the ABKFeedbackViewControllerModalContext and ABKFeedbackViewControllerNavigationContext class to ABKModalFeedbackViewController and ABKNavigationFeedbackViewController.
The open-sourced Feedback view controllers offer backward compatible NUI support, although we recommend using categories or subclassing the Feedback view controllers for customization as NUI library isn’t actively maintained any more. See here for customization details.
Adds user aliasing capability. Aliases can be used in the API and dashboard to identify users in addition to their ID. See the addAlias:withLabel: method on ABKUser for more information.
Changed
Updates the AppboyKit.h to include all the public header files in the SDK.
2.30.0
Breaking
Open sources the ABKModalWebViewController class, which is used to display the web URLs from push or in-app message clicks.
Drops NUI customization support for the navigation bar and navigation bar button item on ABKModalWebViewController. To customize the UI, create an ABKModalWebViewController category and override the corresponding method(s) exposed.
Open sources the ABKNoConnectionLocalization class, which provides Braze’s default localized string for “No Connection” error.
You can customize the localization by adding Appboy.no-connection.message as the key in your Localizable.strings files.
Removes the Appboy.bundle from the Core subspec of the SDK.
If you use the Core subspec, the in-app messages will not display, and trying to display Braze’s News Feed and Feedback UI will lead to unpredictable behavior.
2.29.1
Added
Adds a new property buttonTextFont to ABKInAppMessageButton. It allows clients to set customized fonts on in-app message buttons before the in-app message is displayed.
Fixed
Makes class ABKInAppMessageWindowController.h public.
Fixes an issue where device information was not flushed for a new user when server requests were queued for two or more users.
Changed
Removes the warnings in ABKSDWebImageProxy.
2.29.0
Breaking
Drops support for iOS 7.
Removes the shouldOpenURIExternally field from ABKInAppMessage.
Requires XCode 8.3.
Changes the behavior of the onCardClicked:feedViewController: method in ABKFeedViewControllerDelegate to let Braze handle the card click action if the delegate method returns NO.
Previously, Braze would handle the card click action if onCardClicked:feedViewController: returned YES.
This change standardizes delegate behavior with ABKInAppMessageControllerDelegate and ABKURLDelegate.
Added
Adds the property openUrlInWebView to ABKInAppMessage, ABKInAppMessageButton and ABKCard. This property determines if the URL associated with the object will be opened in a UIWebView.
Adds a Javascript interface to HTML in-app messages with ability to log custom events, log purchases, set user attributes, navigate users, and close the message.
Adds an abDeepLink query field to HTML in-app messages, which defaults to false. To prevent the SDK from opening deep links in a UIWebView, specify abDeepLink=true in your link (e.g., https://www.braze.com?abDeepLink=true).
Adds the ABKURLDelegate protocol for customizing URL handling across channels. Set the ABKURLDelegate by passing a delegate object to the ABKURLDelegateKey in the appboyOptions of startWithApiKey:inApplication:withAppboyOptions:. See our Stopwatch sample application for a Universal Link implementation sample.
Adds the following utility methods to ABKPushUtils for detecting if a push notification was sent by Braze for internal feature purposes:
These methods can be used to ensure that your app does not take any undesired or unnecessary actions upon receiving Braze’s internal content-available notifications (e.g., pinging your server for content).
Changed
Deprecates ABKPushURIDelegate. If you were previously using ABKPushURIDelegate, use ABKURLDelegate instead.
Deprecates userNotificationWasSentFromAppboy: and pushNotificationWasSentFromAppboy: on Appboy. Use isAppboyUserNotification: and isAppboyRemoteNotification: on ABKPushUtils instead.
Deprecates shouldFetchTestTriggersFlagContainedInPayload: on ABKPushUtils.
2.28.0
Breaking:
Removes support for watchOS 1, including Braze WatchKit SDK and all public APIs for watchOS in Braze iOS SDK.
Added
Adds ABKSDWebImageProxy to access the SDWebImage framework. This will prevent the Core subspec of the SDK from calling any SDWebImage methods directly.
2.27.0
Breaking
Removes the following deprecated items: the bio field of ABKUser, the setIsSubscribedToEmails: method of ABKUser, and the getResourceEndpoint: method of the ABKAppboyEndpointDelegate protocol.
Added
Adds support for registering geofences and messaging on geofence events. Please reach out to success@braze.com for more information about this feature.
Adds Braze default push categories which can be fetched from ABKPushUtils.
To use the Braze default push categories, you need to manually add the Braze categories when you register for push. You can get the Braze categories from [ABKPushUtils getAppboyUNNotificationCategorySet] or [ABKPushUtils getAppboyUIUserNotificationCategorySet].
In this version, we add four sets of push action buttons: accept/decline, yes/no, confirm/cancel, more. These will be available as button sets on the dashboard when creating an iOS push campaign.
All Braze push action buttons support localization.
Adds support for web link and deep link handling of push action buttons.
Fixed
Fixes the issue where the combination of the Core subspec of the SDK and a non-supported version of SDWebImage framework can cause apps to crash.
HTML in-app messages now log body click analytics on all links that are not appboy://customEvent and do not include the abButtonId query field. Previously, no body click analytics were logged.
Removed
Removes deprecated method - (NSString *)getResourceEndpoint:(NSString *)appboyResourceEndpoint from ABKAppboyEndpointDelegate.
Removes deprecated property bio and deprecated method - (BOOL)setIsSubscribedToEmails:(BOOL)subscribed from ABKUser.
2.26.0
Breaking
Adds support for SDWebImage version 4.0.0 with GIF support. SDWebImage version 3.x will not be supported from this version on. Please make sure you are using the correct version of SDWebImage.framework. Note: SDWebImage 4.0.0 relies on FLAnimatedImage - users integrating in ways besides CocoaPods should ensure they link the FLAnimatedImage framework if they want GIF support.
Removes the url property from subclasses of ABKCard. This property has been renamed to urlString and moved onto the ABKCard superclass.
Added
Adds Cocoapods subspecs “Core” and “UI”.
The “UI” subspsec has the full feature set of the current SDK. This is the default subspec when no subspec is specified in the Podfile.
The “Core” subspec removes the SDWebImage framework dependency. This is for apps who do not use any Braze UI that leverages images (News Feed, in-app messages). If you use the “Core” subspec, in-app messages with images will not display, and the News Feed will render with plain white images.
Makes ABKThemableFeedNavigationBar.h and ABKNavigationBar.h public.
Adds ABKIDFADelegate protocol that can be used to create a delegate to pass Braze the IDFA in startWithApiKey: in the appboyOptions dictionary under the ABKIDFADelegateKey key. Alternative to existing ABKIdentifierForAdvertisingProvider compile flag solution.
Changed
Disables the -webkit-touch-callout property on HTML in-app messages. Long presses and 3D Touch on links will no longer display pop-ups with additional link information.
2.25.0
Added
Adds the ability to set the ABKInAppMessageControllerDelegate when the SDK starts by passing a delegate object to the ABKInAppMessageControllerDelegateKey in the appboyOptions of startWithApiKey:inApplication:withAppboyOptions:.
This is the recommended way to set the ABKInAppMessageControllerDelegate and circumvents a potential race condition where in-app messages can be shown before the delegate has been set.
Exposes the ABKFeedback object and adds a new method - (void)submitFeedback:(ABKFeedback *)feedback withCompletionHandler:(nullable void (^)(ABKFeedbackSentResult feedbackSentResult))completionHandler; in Appboy. The new method accepts a completion handler which receives an ABKFeedbackSentResult enum as feedback sending result.
The possible feedback sending results are: invalid feedback object(ABKInvalidFeedback), fail to send feedback(ABKNetworkIssue), and feedback sent successfully(ABKFeedbackSentSuccessfully).
Adds the utility method - (BOOL)userNotificationWasSentFromAppboy:(UNNotificationResponse *)response; to Appboy. This method is compatible with the UserNotifications framework and returns whether a push notification was sent from Braze’s server.
Those using - (BOOL)pushNotificationWasSentFromAppboy:(NSDictionary *)options; who have integrated the UserNotifications framework should use this method instead.
Fixed
Changes the ABKInAppMessageButton from a UIButton object to a pure data model class in NSObject.
This resolves the issue https://github.com/Appboy/appboy-ios-sdk/issues/97.
Changed
Adds more protection around triggered in-app message display.
2.24.5
Fixed
Fixes an issue where in-app messages triggered off of push clicks wouldn’t fire when the push click happened before the in-app message configuration was synced to the device.
Changed
Updates push registration to flush the token to the server immediately.
Improves the accessibility of in-app messages and news feed cards.
When in voiceOver mode, the SDK auto-focuses on in-app messages when they appear and resets focus on dismissal.
VoiceOver no longer reads Braze internal labels.
News feed cards are enhanced to be more accessible.
2.24.4
Added
Adds protection around in-app message UI code to avoid displaying in-app messages with corrupted images.
Fixed
Fixes the iOS version number in the deprecation warnings in Appboy.h.
2.24.3
Breaking
Update REQUIRED for apps using Braze SDK 2.24.0, 2.24.1 or 2.24.2 with UserNotifications.framework
Fixed
Fixes an issue where a user’s foreground push enabled status could erroneously be marked as disabled.
This issue can occur when opening the app from suspended mode. At that time, the foreground push enabled status was defaulted to disabled until the UserNotifications.framework returned the user’s push authorization status. If the user closed the app within a few seconds, the SDK would not flush the updated push status and the user would mistakenly be marked as “push disabled”.
This issue only affected apps using UserNotifications.framework to register for push notifications.
The updated code stores the push authorization status on disk to fix the issue.
Fixes an issue where triggered in-app messages with event property templating did not respect re-eligibility settings.
Changed
Updates the Podspecs for iOS and tvOS SDK.
Updates deprecation warnings to specify iOS version.
Updates the ABKFeedController with more generic nullability.
Disables all data detectors on HTML in-app messages. Phone numbers, web URLs, addresses and calendar events will no longer be automatically converted.
Disables scrolling bounces on HTML in-app messages.
2.24.2
Fixed
Fixes an issue where HTML in-app messages loaded JavaScript more than once.
Fixes the Appboy.inAppMessage.webview.done-button.title string in the French localization file, which was named incorrectly and wasn’t being found.
2.24.1
Added
Adds nullability annotation for the completionHandler in userNotificationCenter :didReceiveNotificationResponse:withCompletionHandler.
2.24.0
Breaking
Updates the SDK to require XCode 8.
iOS 10 changes behavior of application:didReceiveRemoteNotification:fetchCompletionHandler and subsequently breaks open tracking and deep link handling on most existing Braze iOS integrations. If you don’t currently implement application:didReceiveRemoteNotification: you need to modify your integration, and we recommend that all users update.
Added
Updates the iOS and tvOS SDKs to support iOS 10.
Adds a new method - (void)userNotificationCenter:(UNUserNotificationCenter *)center didReceiveNotificationResponse:(UNNotificationResponse *)response withCompletionHandler:(void (^)())completionHandler. This method supports the new delegate method for push notification handling in UserNotification framework.
Changed
Deprecates two push delegate methods:
- (void)registerApplication:(UIApplication *)application didReceiveRemoteNotification:(NSDictionary *)notification and
- (void)getActionWithIdentifier:(NSString *)identifier forRemoteNotification:(NSDictionary *)userInfo completionHandler:(nullable void (^)())completionHandler.
2.23.0
Added
Adds support for upgraded in-app messages including image-only messages, improved image sizing/cropping, text scrolling, text alignment, configurable orientation, and configurable frame color.
Adds support for in-app messages triggered on custom event properties, purchase properties, and in-app message clicks.
Adds support for templating event properties within in-app messages.
Removed
Removes the deprecated method logSocialShare from Appboy class.
2.22.1
Changed
Updates tvOS bitcode support, patching an error introduced by an Xcode bug.
2.22.0
Added
Adds tvOS support for logging analytics; adds sample applications for tvOS and TVML.
Adds Hebrew localization support.
2.21.0
Breaking
Drops support for iOS 6.
Added
Adds support for deep links with non-URL-encoded characters. The SDK will encode unencoded url strings to create valid deep link NSURLs.
Fixed
Fixes a bug where the background of a slideup in-app message remained transparent when configured with 100% opacity.
Changed
Updates the podspec SDWebImage dependency to fetch the latest version.
Replaces SDK usage of NSURLConnection with NSURLSession.
Updates the SDK to always call canOpenURL: before opening a deep link. After this change, the SDK will only direct deep links whose schemes are whitelisted.
Updates push registration to immediately, asynchronously send up the push token.
2.20.1
Fixed
Fixes an issue where in certain conditions NSUserDefault blocking would cause custom events logged in the main thread to result in UI freezing.
Changed
Implements an optimization in push handling to not prefetch the News Feed when a push arrives and the app is in the background.
2.20.0
Added
Adds Carthage support.
Fixed
Fixes a multithreading issue where logging custom events from different threads would sporadically cause errors.
Fixes the issue where a close button’s color on modal and full in-app messages didn’t respect the opacity value.
Fixes an issue where failure to download HTML in-app message assets mid-download resulted in display without assets.
Changed
Now the onInAppMessageHTMLButtonClicked:clickedURL:buttonID: delegate method will be called every time a URL is clicked. The method used to be only called when there was a button ID in the URL link.
Updates the feedback element to reject messages that contain only whitespace.
Updates remote push handling to call the completion handler passed in every time (a code path previously existed that would return without calling it).
Removed
Removes the delegate method onInAppMessageHTMLButtonClicked:buttonID: from ABKInAppMessageControllerDelegate protocol.
2.19.3
Added
Adds a new feature allowing manual control of deep link handling in push notications. To use this, add a ABKPushURIDelegate value for the ABKPushURIDelegate key in the appboyOptions dictionary of startWithApiKey:inApplication:inApplication:withAppboyOptions:. Also updates the ABKPushURIDelegate integration to be initialized through that integration point.
Adds guarding against a possible crash caused by a user’s offline state being corrupted and not including an active session when a network request
occurred.
Fixed
Fixes an issue where duplicate data could be recorded when a force quit or crash occurs after a network request completed successfully, but before any other activity (such as leaving the app, putting it to sleep, updating an attribute or firing some other event or purchase) occurred.
2.19.2
Added
Adds warning when messaging doesn’t succeed because SDWebImage is not integrated.
Fixed
Fixes a bug where users who went from being eligible for triggered messages to not being eligible for any triggered messages didn’t see their local triggers configuration get updated. This has already been fixed with a server-side update for affected versions; this update fixes the issue client-side.
Changed
Updates headers to be compatible with Swift 2.2.
2.19.1
Added
Adds sample code for a universal link in Stopwatch.
Fixed
Fixes the benign issue that caused the log message *** -[NSKeyedUnarchiver initForReadingWithData:]: data is NULL.
Fixes an issue where NULL campaign IDs in push messages (e.g. from a REST API push message without a specified campaign id) resulted in push-clicked triggers for triggered in-app messages not firing.
Fixes an issue where calling changeUser between identified users caused the read/unread state of the news feed cards of the old user to be set as the new user’s read/unread states.
Fixes an issue where a user attribute value that had been set to multiple different values created a state that would not let you set the original value again. The bug was introduced in version 2.17.1.
Changed
Analytics are now logged for in-app messages and in-app message buttons with ‘ABKInAppMessageNoneClickAction’ click actions. ABKInAppMessageNoneClickAction is set when an in-app message on the dashboard has a click action that only closes the in-app message; formerly this did not count as a click.
2.19.0
Added
Adds support for action-based, locally triggered in-app messages. In-app messages are now sent to the device at session start with associated trigger events. The SDK will display in-app messages in near real-time when the trigger event associated with a message occurs. Trigger events can be app opens, push opens, purchases, and custom events.
Changed
Deprecates the old system of requesting in-app message display, now collectively known as ‘original’ in-app messaging, where messages were limited to displaying at app start.
2.18.4
Fixed
Fixes a Cocoapods issue that emerged during the release of 2.8.13.
2.18.3
Changed
Makes an internal update to provide functionality for SDKs that embed this library.
2.18.2
Added
Adds warning logging if [Appboy sharedInstance] is called while in an uninitialized state.
Changed
Deprecates the delegate method getResourceEndpoint: in ABKAppboyEndpointDelegate. The SDK will no longer call this delegate method.
2.18.1
Fixed
Fixes the nullability annotation warnings in the public header files.
Changed
Updates HelloSwift sample app to adopt swift 2.0.
2.18
Added
Adds nullability annotations to all Braze public APIs.
Adds a new delegate method to support custom push URI handle. For more detail, please see ABKPushURIDelegate.h;
Changed
Updates to auto-dismiss the Braze web view when a user returns to the app after following a link out of the app from an Braze web view.
Removed
Removes the deprecated method requestSlideupRefresh from Braze class.
2.17.1
Fixed
Fixes a bug where in certain conditions the SDK would resend user attributes that had already synced with the server.
2.17
Added
Adds a new button clicked delegate method for HTML in-app message. The new delegate method also passes the URL of the clicked button.
Fixed
Fixes the crash caused by inserting a nil object into an NSDictionary when parsing an event object.
Changed
Makes the WebView background for HTML in-app messages transparent. Ensure HTML in-app messages you send to the device are created expecting a transparent background.
Applies the Braze endpoint delegate methods to in-app messages’ resource(zip and image) fetching.
Removed
Removes the Facebook button from Feedback page.
2.16.1
Added
Adds the ability to log a custom event from an HTML in-app message. To log a custom event from an HTML in-app message, navigate a user to a url of the form appboy://customEvent?name=customEventName&p1=v2, where the name URL parameter is the name of the event, and the remaining parameters are logged as String properties on the event.
Adds the support for customization of the background color of modal in-app messages.
Fixed
Fixes an issue where daylight savings changes were not reflected in the user profile timezone.
Changed
Enables users to input text into HTML in-app messages by allowing HTML in-app messages to be displayed with a keyboard on screen. For all other in-app messages, the in-app message will be dismissed when a keyboard is displayed.
2.16
Added
Adds HTML In-App Message types.
HTML In-App Messages consist of HTML and a url of a zipped archive of assets (e.g. images, css) to download locally which the HTML can reference. See InAppMessageUIViewController in our Stopwatch sample app for an example for the callbacks on the actions inside the WebView hosting the HTML In-App Message.
Changed
Deprecates the method - (void) logSocialShare:(ABKSocialNetwork)socialNetwork and enum ABKSocialNetwork in the Appboy class. If you use logSocialShare: to track user’s social account sharing, you can use logCustomEvent: instead.
Deprecates the property bio in the ABKUser class.
2.15.1
Fixed
Fixes the warning “full bitcode bundle could not be generated because XXX was built only with bitcode marker”.
2.15
Changed
Updates the SDK to support iOS 9. In iOS9, previous versions of the SDK: 1) did not have bitcode support, 2) had a minor UI issue in in-app messages where the slideup messages were not docked on the bottom of the screen if they had one line of text, 3) failed to localize for zh-HK and zh-TW.
2.14
Breaking
Migrates the SDK to ARC. If you are using our Apple Watch Extension and not using ARC, you must apply -fobjc-arc to the extension files.
Added
Adds configurable session timeout feature.
Adds feedbackViewControllerBeforeFeedbackSent method to the feedback delegate protocols, which can be used to modify the feedback message before it’s sent to Braze.
Adds a setAttributionData method to ABKUser that sets an ABKAttributionData object for the user. To be used with attribution provider SDKs when attribution events are fired.
2.13.2
Changed
Increases the number of supported currency codes from 22 to 171. All common currency codes are now supported. The full list of supported codes is available at Appboy.h.
2.13.1
Changed
Updates the isUninstallTrackingNotification method in ABKPushUtils to return the correct value.
2.13
Added
Adds an open-source Watch SDK to support data analytics on watchKit apps. You can use the Appboy-WatchKit SDK by downloading and adding the “Appboy-WatchKit” folder in your watchKit extension target. For more detail, please refer to ABWKUser.h and AppboyWatchKit.h.
Adds an opt-in location service that logs background location events; adds ABKLocationManager with methods for allowing Braze to request location permission on your behalf and logging the current location. More information on the background location capabilities will be made available when dashboard support is released.
Adds client side blocking of blacklisted attributes and events.
Adds ABKPushUtils with method + (BOOL) isUninstallTrackingNotification:(NSDictionary *)userInfo; that can be used to detect if a content-available push is from Braze uninstall tracking (and shouldn’t be acted upon).
Adds a new property expiresAt in class ABKCard. The property is the unix timestamp of the card’s expiration time. For more detail, please refer to ABKCard.h.
Changed
Stops collecting user’s Twitter data automatically. You can pass a user’s Twitter information to Braze by initialzing a ABKTwitterUser object with the twitter data, and setting it to [Appboy sharedInstance].user.twitterUser. For more information, please refer to ABKUser.h and ABKTwitterUser.h.
Stops logging foreground push as a push open as it is not delivered by the system.
Removed
Removes the feature of prompting a user to connect his/her social account. You can refer to the method promptUserToConnectTwitterAccountOnDeviceAndFetchAccountData in TwitterViewController.m to continue prompting the user to connect the Twitter account.
2.12.2
Fixed
Fixes the slideup in-app message display issue. When the host app sets the launch screen file, slideup in-app message from bottom sometimes didn’t dock at the bottom of the screen on iPhone 6 and iPhone 6 Plus.
2.12.1
Added
Adds font and font size customization to all in-app message’s header and message text through NUI. You can customize in-app message’s font by adding ABKInAppMessageSlideupMessageLabel, ABKInAppMessageeModalHeaderLabel,ABKInAppMessageModalMessageLabel, ABKInAppMessageFullHeaderLabel, ABKInAppMessageFullMessageLabel to your NUI nss style sheet.
Fixed
Fixes news feed issue where no news feed cards resulted in the loading spinner remaining on screen.
Changed
Cleans up the console logging in Class ABKIdentifierForAdvertisingProvider.
2.12.0
Fixed
Fixes the incorrect path runtime error for users who integrate our pod as a dynamic framework. For SDK versions before 2.12, when you integrate Braze with use_frameworks! in the Podfile, the library is integrated as a dynamic framework and the Appboy.bundle is stored in a different path.
Changed
Changes HelloSwift sample app to integrate Braze SDK as a dynamic framework.
Removed
Removes the subspecs from the podspec. This fixes the duplicate symbol error https://github.com/Appboy/appboy-ios-sdk/issues/24. If you are still using subspec like pod 'Appboy-iOS-SDK/AppboyKit' in your podfile, please make sure to change it to pod 'Appboy-iOS-SDK'.
2.11.3
Added
Adds the ability to send and retrieve extra key-value pairs via a News Feed card.
Adds the ability to define custom key-value properties on a custom event or purchase. Property keys are strings and values may be NSString, NSDate, or NSNumber objects.
Added the fix for an edge case when there are extra UIWindows at the time in-app message is going to display, the in-app message would have issue during dismissing.
2.11.2
Changed
Updates the serialize and deserialize methods for in-app message classes. This is for use by wrappers such as Braze’s Unity SDK for iOS.
2.11.1
Fixed
Fixes a UI issue in modal in-app messages displayed on iPads running iOS 6/7.
2.11
Added
Adds support for modal and full screen style in-app messages. Also adds support for including fontawesome icons and images with in-app messages, changing colors on in-app message UI elements, expanded customization options, and message resizing for tablets. Please visit our documentation for more information.
Changed
Updates the completionHandler signature in getActionWithIdentifier:forRemoteNotification:completionHandler: to match the comletionHandler passed by the system in method - (void) application:(UIApplication *)application handleActionWithIdentifier:(NSString *)identifier forRemoteNotification:(NSDictionary *)userInfo completionHandler:(void (^)())completionHandler.
2.10.2
Added
Adds the fix for an edge case when there are extra UIWindows at the time in-app message is going to display, the in-app message would have issue during dismissing.
2.10.1
Fixed
Fixes a bug which would cause the host app to crash when a deep link was launched from a push notification. In versions 2.10.0 and 2.9.4, if the host app used [[Appboy sharedInstance] registerApplication: didReceiveRemoteNotification:]; instead of [[Appboy sharedInstance] registerApplication: didReceiveRemoteNotification: fetchCompletionHandler:];, opening a push with a deep link would crash the host app in some circumstances.
2.10.0
Changed
Updates the minimum deployment targets of Braze iOS SDK to iOS 6.0. For apps supporting lower iOS versions, please continue to use 2.9.+ versions of the Braze SDK.
Stops collecting user’s Facebook data automatically. You can pass a user’s Facebook information to Braze by initializing a ABKFacebookUser object with the facebook data, and set it to [Appboy sharedInstance].user.facebookUser. For more information, please refer to ABKUser.h and ABKFacebookUser.h.
Removed
Removes Facebook SDK dependent builds. Now there is a single library - AppboyKit - and a single Pod without functional subspecs - Appboy-iOS-SDK (note we now have both the subspecs pointing at the same library). Please update your Podfile to pod 'Appboy-iOS-SDK if you are integrating Braze with Cocoapods.
Removes the feature of prompting a user to connect his/her Facebook account. You can refer to the method promptUserToConnectFacebookAccountOnDeviceAndFetchAccountData in FacebookViewController.m to continue prompting the user to connect the Facebook account.
2.9.6
Added
Adds the fix for an edge case when there are extra UIWindows at the time in-app message is going to display, the in-app message would have issue during dismissing.
2.9.5
Fixed
Fixes a bug which would cause the host app to crash when a deep link was launched from a push notification. In versions 2.9.4, if the host app used [[Appboy sharedInstance] registerApplication: didReceiveRemoteNotification:]; instead of [[Appboy sharedInstance] registerApplication: didReceiveRemoteNotification: fetchCompletionHandler:];, opening a push with a deep link would crash the host app in some circumstances.
2.9.4
Added
Adds a major performance upgrade that reduces CPU usage, memory footprint, and network traffic.
Adds 26 additional languages to localization support for Braze UI elements.
Adds support for deep linking from APNS push notification clicks.
Adds ability to customize the font of Feedback text using NUI with NUI class name ABKFeedbackTextView.
Fixed
Fixes the feedback page UI issues in iOS 8: when the device’s orientation is UIInterfaceOrientationPortraitUpsideDown, the contact info bar was off.
Fixes in-app messages to display correctly in landscape mode in iOS 8.
Changed
Updates the SDK to adopt the latest SDWebImage protocol methods.
Removed
Removes the “required” labels on the feedback page.
2.9.3
Added
Adds a new method - (void) registerApplication:(UIApplication *)application didReceiveRemoteNotification:(NSDictionary *)notification fetchCompletionHandler:(void (^)(UIBackgroundFetchResult))completionHandler to support push with background fetch. This method should be called in - (void) application:(UIApplication *)application didReceiveRemoteNotification:(NSDictionary *)userInfo fetchCompletionHandler:(void (^)(UIBackgroundFetchResult))completionHandler. For more details, please refer to Appboy.h.
Adds a HelloSwift sample app to demo how to use Braze in a swift app.
Adds a new NSString property “displayPrice” in ABKCrossPromotionCard to enable server side price localization.
Fixed
Fixes a bug of when sessions were being created when the app opened in the background.
Fixes a bug where requesting the news feed with a news feed open led to card impressions not updating until the next feed refresh.
2.9.2
Added
Adds the ability to turn off Braze’s automatic location collection by setting the ABKDisableAutomaticLocationCollectionKey boolean in AppboyOptions in startWithApiKey:inApplication:inApplication:withAppboyOptions:.
Adds the ability to send location tracking events to Braze manually using setLastKnownLocationWithLatitude:longitude:horizontalAccuracy: and setLastKnownLocationWithLatitude:longitude:horizontalAccuracy:altitude:verticalAccuracy: on the ABKUser. this is intended to be used with ABKDisableAutomaticLocationCollectionKey set to true in the AppboyOptions so that locations are only being recorded from a single source.
Fixed
Fixes a news feed bug: sometimes the spinner keeps spinning on the screen even after the news feed card image is displayed.
Changed
Updates sample app core location fetching code based on the changes in iOS 8.
2.9.1
Fixed
Fixes a news feed bug: When a user refreshed the news feed by swiping down, if the total number of cards in the feed was going to be reduced by the refresh, the app would crash.
2.9.0
Fixed
Fixes an App Store validation error introduced when the App Store started accepting submissions for iOS8. This was done by changing the packaging of the Braze framework to include a universal binary and a resource bundle (instead of combining them both together in a universal framework). Due to this change, Cocoapod integration is even more highly recommended than before to fully automate integration.
2.8.1
Added
Adds a new method - (void) getActionWithIdentifier:(NSString *)identifier forRemoteNotification:(NSDictionary *)userInfo to collect analytics data for push actions in iOS 8. It should be called in the UIApplication delegate method - (void) application:(UIApplication *)application handleActionWithIdentifier:(NSString *)identifier forRemoteNotification:(NSDictionary *)userInfo completionHandler:(void (^)())completionHandler. For more details, please refer to Appboy.h.
New Custom Attribute Data Type (Array): Braze now supports custom attributes which contain an array of string elements. In addition, we also provide methods for adding or removing an string element from an array type custom attribute. For more information, please refer to ABKUser.h.
Users can now pull down on the Braze Newsfeed to refresh the content on iOS version 6.0 or later.
Changed
Restricts product identifier string to 255 characters for method - (void) logPurchase:(NSString *)productIdentifier inCurrency:(NSString *)currencyCode atPrice:(NSDecimalNumber *)price and - (void) logPurchase:(NSString *)productIdentifier inCurrency:(NSString *)currencyCode atPrice:(NSDecimalNumber *)price withQuantity:(NSUInteger)quantity.
News feed card now can update the card height and display a full image based on the image ratio. Card image ratio used to be a fix number and images were aspect stretched to fit in the views.
The right and left margins in the news feed are now touchable areas for scrolling.
Card titles have been improved and will now truncate with “…” when they are more than 2 lines.
2.8
Breaking
Renames the class names of news feed cards to match the names on dashboard:
v2.8
v2.7
ABKBannerCard
ABKCardBanner
ABKCaptionedImageCard
ABKCardCaptionedMessage
ABKCrossPromotionCard
ABKCardCrossPromotionSmall
ABKClassicCard
ABKCardNews
ABKTextAnnouncementCard
ABKCardTextAnnouncement
Added
Adds email and push notification subscription types for a user. Subscription types are explicitly opted in, subscribed, and unsubscribed. The previous email boolean subscribe method has been deprecated.
Adds custom slideup orientation support. You can now ask the slideup to only support certain orientations. For more details on slideup custom orientation support, please refer to ABKSlideupController.h.
Adds quantity parameter as an option when logging purchase. The quanlity should be an unsigned interger greater than 0 and no larger than 100. For more information, please refer to Appboy.h.
Adds a class method in ABKCard to deserialize a given dictionary to a card. This is for use by wrappers such as Braze’s Unity SDK for iOS. Please refer to ABKCard.h for more information.
2.7
News Feed Update
Exposes raw card data in ABKFeedController
Developers can use the raw card data to creat custom user interfaces for the news feed. For more details on the card data, please refer to ABKFeedController.h.
Addes support for categories on cards and news feed view controllers.
Categories include Announcement, Advertising, Social, News and No Category. You can get cards of certain categories from ABKFeedController, or you can make ABKFeedViewController only display certain categories of cards.
Uses SDWebImage to handle images downloading and caching in the news feed, display a spinner while downloading images and show a default image when no image available.
Adds support for asynchronous image downloading in the news feed, asynchronous memory and disk image caching with automatic cache expiration handling.
Adds news feed view controller delegate to support custom handling of card clicks on news feed.
The app can customize click actions from the feed and display any card link in their own user interface.
Slideup Changes
Updates ABKSlideupControllerDelegate method onSlideupClicked to return a BOOL value to indicate if Braze should continue to execute the click action.
Stops logging slideup click when the slideup click action is ABKSlideupNoneClickAction.
Feedback Changes
Updates the ABKFeedbackViewControllerPopoverContext so now it should be used in all cases where the feedback page displayed in a popover, including the case that the feedback is push on a navigation controller in a popover.
Fixes the ABKFeedbackVIewControllerModalContext cancel button delegate issue.
Fixes the form sheet style ABKFeedbackViewControllerModalContext layout issue.
Other Changes
Adds API to request feed and slideup refresh.
Adds API to log news feed displayed and feedback displayed.
Allows updating analytics data even using customized news feed or feedback user interfaces.
Updates badge count policy to only update when app is foreground.
Adds clearTwitterDataWhenNoDataOfTwitterIdentifier to ABKUser, allowing developer to clear user data when a user disconnectes their twitter accounts.
Updates custom key and string value for custom attributes to automatically trim.
2.6.3
Changed
Updates the SDK to authenticate with the Twitter API using SSL.
2.6.2
Fixed
Fixes a news feed card click tracking issue.
Changed
Updates data flush time interval.
2.6.1
Fixed
Fixes a minor display problem that affected news items with no image or link for version 2.6.
2.6
Breaking
Braze iOS SDK now supports 64 bit as well. The minimum deployment targets that Braze iOS SDK supports is iOS 5.1.1.
The Braze iOS SDK will now allow function with 64-bit apps. This version of the SDK only supports iOS 5.1.1+. Legacy iOS apps should continue to use version 2.5 of the SDK.
You can install legacy versions of our SDK via CocoaPods by following changing the podfile to include something like the following example pod 'Appboy-iOS-SDK/AppboyKit', '~> 2.5'.
2.5.1
Fixed
Fixes a minor display problem that affected news items with no image or link for version 2.5.
2.5
Localization
Localization is now supported in version 2.5 of the Braze SDK. We have provided .string files for English, Simplified Chinese and Traditional Chinese. You can also optionally override our Braze’s default LocalizedAppboyUIString.strings right within your app’s Localizable.Strings file in much the same way you would do an override in CSS. To do so, copy the key and string pair into your Localizable.Strings file and edit the string as you so desire.
For your convenience our CocoaPod integrates the LocalizedAppboyUIString.strings files for the three aforementioned languages. If you do not wish to use one or more of these languages, you can feel free to delete these files from your project.
Slideup Upgrade
Braze version 2.5 provides a substantial upgrade to the slideup code and reorganization for better flexibility moving forward, but at the expense of a number of breaking changes. We’ve detailed the changes in this changelog and hope that you’ll love the added power, increased flexibility, and improved UI that the new Braze slideup provides. If you have any trouble with these changes, feel free to reach out to success@braze.com for help, but most migrations to the new code structure should be relatively painless.
New Slideup Controller
The property slideupController has been added to the Braze object. Please see ABKSlideupController.h for details.
The delegate property allows you to specify a delegate for the slideup.
This replaces slideupDelegate which has been removed.
The displayNextSlideupWithDelegate: method displays the next available slideup with the specified delegate.
This replaces provideSlideupToDelegate: which has been removed from Braze.
The slideupsRemainingOnStack method returns the number of slideups that are waiting locally to be displayed.
The addSlideup: method allows you to display a slideup object with custom content. This is useful in testing or if you want to use the Braze slideup’s UI/UX with another notification system that you are using.
Clicks and impressions of slideups added by this method will not be collected by Braze.
hideCurrentSlideup: method will remove any slideup currently on screen, with or without animation.
New Slideup Properties and Methods in ABKSlideup.h
The following properties and methods all belong to the ABKSlideup object. Please see ABKSlideup.h for more information.
New Properties
The extras property carries additional data within key value pairs that have been defined on the dashboard, just like a push notification. Braze does nothing with the extras property, any additional behavior is at your discretion.
The slideupAnchor property defines whether the slideup originates from the top or the bottom of the screen.
The slideupDismissType property controls whether the slideup will dismiss automatically after a period of time has lapsed, or if it will wait for interaction with the user before disappearing.
The slideup will be dismissed automatically after the number of seconds defined by the newly added duration property if the slideup’s slideupDismissType is ABKSlideupDismissAutomatically.
The slideupClickActionType property defines the action behavior after the slideup is clicked: displaying a news feed, redirect to a uri, or nothing but dismissing the slideup. This property is read only. If you want to change the slideup’s click behavior, you can call one of the following method: setSlideupClickActionToNewsFeed, setSlideupClickActionToUri: or setSlideupClickActionToNone.
The uri property defines the uri string that the slide up will open when the slideupClickActionType is ABKSlideupRedirectToURI. This is a read only property, you can call setSlideupClickActionToUri: to change it’s value.
New Methods
logSlideupImpression and logSlideupClicked have been added to allow you to report user interactions with the slideup in the case that you’ve fully customized the slideup experience and Braze is not handling the interactions.
setSlideupClickActionToNewsFeed, setSlideupClickActionToUri: and setSlideupClickActionToNone have been added to allow you to change the slideup’s click action behavior. setSlideupClickActionToUri: accepts a uri string as parameter and required the given uri string is valid.
Delegate Method Changes
All former Braze slideup delegate methods have been depreciated and removed. In their place Braze has added new slideup delegate methods within ABKSlideupControllerDelegate.h.
onSlideupReceived: is called when slideup objects are received from the Braze server.
beforeSlideupDisplayed:withKeyboardIsUp: is called before slideup objects are displayed, the return value determines whether the slideup will be displayed, queued or discarded.
slideupViewControllerWithSlideup: This delegate method allows you to specify custom view controllers in which your slideups will be displayed.
The custom view controller should be a subclass of ABKSlideupViewController.
Alternatively, it can also be an instance of ABKSlideupViewController.
The view of the returned view controller should be an instance of ABKSlideupView or its subclass.
For integration examples of a custom slideup view controller, see the CustomSlideupViewController class in Braze’s sample app Stopwatch.
onSlideupClicked: is called when a user clicks on a slideup. We recommend that you specify behavior on click via the dashboard, but you can additionally specify behavior on click by defining this delegate method.
onSlideupDismissed: is called whenever the slideup is dismissed regardless of whether the dismissal occurs automatically or via swipe. This method is not called if the user clicks on the slideup. If the user clicks or taps on the slideup, onSlideupClicked is called instead.
New Options on the Dashboard
Slideup behavior on click can now be set within the dashboard to open a modal news feed, open a URI within a modal, or do nothing.
The following properties can be set remotely from the Braze Dashboard:
extras
slideupAnchor
slideupDismissType
slideupClickActionType
uri
News Feed Changes
News feed items are now cached in offline storage, allowing the news feed to render even when no internet connectivity is available. Braze will still automatically try to pull down a new news feed when a session opens, even if an offline feed is available.
Each card now has a maximum height of no more than 2009 points to avoid any performance issues as recommended by iOS developer guidelines.
The entirety of captioned image cards are now clickable. Formerly, only the link itself was clickable.
When the news feed is brought to the foreground, it will now automatically check for new content if the cached version of the feed was received more than 60 seconds ago.
— The width of news feed cards as well as the minimum margin between any card and the left & right edges of the view controller can now be customized. These values can be set separately for both iPad and iPhone. This allows for a larger news feed to render on larger screen sizes. All card images will scale proportionally. Please see ABKFeedViewControllerContext.h and ABKFeedViewController.h for more information.
Other Changes
Various internal and news feed display optimizations.
2.4
IDFA Collection is now optional.
By default, IDFA collection is now disabled by the Braze SDK.
There will be no loss of continuity on user profiles or loss of functionality whatsoever as a result of this change.
If you’re using advertising elsewhere in the app or through our in-app news feed, we recommend continuing to collect the IDFA through Braze. You should be able to do so safely without fear of rejection from the iOS App Store.
The future availability of IDFAs will enable functionality like integrating with other third-party systems, including your own servers, and enabling re-targeting of existing users outside of Braze. If you continue to record them we will store IDFAs free of charge so you can take advantage of these options immediately when they are released without additional development work.
Necessary Project Changes
ABKIdentifierForAdvertisingProvider.m and ABKIdentifierForAdvertisingProvider.h must be added to your project regardless of whether or not you enable collection. This occurs automatically if you integrate/update via the CocoaPod.
Enabling Braze IDFA Collection
IDFA collection can be enabled via adding the following PreProcessor Macro to the Build Settings of your app:
ABK_ENABLE_IDFA_COLLECTION
2.3.1
The Braze SDK for iOS now has two versions, one for use with apps which incorporate the official Facebook SDK and one for those which do not. In November of 2013, the App Store Validation Process started generating warnings about the usage of isOpen and setActiveSession in the Braze SDK. These selectors were being sent to instances of classes in the Facebook SDK and are generally able to be used without generating warnings. However because of the way that the classes were initialized in Braze (a result of building a single Braze binary to fully support apps with and without the Facebook SDK), the App Store Validation Process started generating warnings the Facebook SDK methods share a name with private selectors elsewhere in iOS. Although none of our customers have been denied App Store approval yet, to protect against potential validation policy changes by Apple, Braze now provides two versions of its SDK, neither of which generate warnings. Going forward, the appboy-ios-sdk repository will provide both versions of the SDK in the folders ‘AppboySDK’ (as before) and ‘AppboySDKWithoutFacebookSupport’. The ‘AppboySDKWithoutFacebookSupport’ does not require the host app to include the Facebook SDK, but as a result does not include all of the Braze features for Facebook data fetching. More information is available here within the Braze documentation.
Fixed a bug that repeatedly updated the push token of some users unnecessarily.
The “Reporting an Issue?” box within the UI layout of the Feedback Page has been moved to the left side of the label away from the “Send” button. This change was made to reduce the number of misclicks of the “Send” button. The “Reporting an Issue?” label is now clickable as well.
Cross Promotion Cards for apps with long titles will now render appropriately in iOS5. Before the title would render abnormally large on these devices.
Fixed a bug where view recycling would cause incorrect card images to appear for newly rendered cards (until the image for that card finished downloading). Card images for newly rendered cards will now remain empty until the correct image is downloaded.
Internal changes to enable future support for a 64 bit library release.
Improvements to the Braze Sample App.
Internal code structure and performance improvements including the move of more offline caching to background tasks.
2.3
BREAKING CHANGE: The ABKSlideupControllerDelegate interface has been changed to work with ABKSlideup objects instead of simply the slideup message. This provides you with more control over the click actions and display of slideups and is also being made in anticipation of the augmentation of the ABKSlideup object with more data properties in future releases. To access the message previously sent to shouldDisplaySlideup, simply access the message property on the provided ABKSlideup argument.
displayNextAvailableSlideup has been deprecated and will be removed in the next minor release, it has been replaced by provideSlideupToDelegate, see Appboy.h documentation for more information.
provideSlideupToDelegate has been added to Braze to allow for more fine grained control over slideup display.
Fixes a bug where the slideupDelegate property getter on Braze would always return nil.
Changes the slideupDelegate property on Braze to be retained, instead of assigned.
2.2.1
Adds a startup option to appboyOptions to control the automatic capture of social network data. See the documentation on ABKSocialAccountAcquisitionPolicy in Appboy.h for more information.
Changes a table cell’s default background color to clear, from the white value that became default in iOS7.
Adds support for developer to send up image_url for user avatars, allowing for custom images to be included in user profiles on the dashboard.
2.2
Adds support for new banner and captioned image card types.
Adds support for submitting feedback programmatically through an Appboy.h method without using Braze feedback form. This allows you to create your own feedback form.
Fixes an issue where the the news feed’s web view would display “Connection Error” when a user came back into the app after a card had directed him or her to a protocol URL. Now when users come back from a redirected protocol URL, the feed is properly displayed.
Fixes an issue where the SDK might have incorrectly sent both read and write Facebook permissions at the same time, instead preferring to request only those read permissions that Braze is interested in and have already been requested by the incorporating app.
Fixes a corner case where card impressions could be miscounted when the feed view controller is the master view controller of a split view.
Makes cards truncate properly at two lines.
2.1.1
URGENT BUGFIX: This fixes an issue which exists in all previous versions of the v2 SDK which is causing crashes on the just release iPhone 5c and iPhone 5s. All users of v2 are recommended to upgrade the Braze SDK to 2.1.1 immediately and re-submit to the app store.
2.1.0
Adds support for iOS 7. You will need to use Xcode 5 to use this and future versions of the Braze iOS SDK.
Updates internal usage of NUI. If you’re using NUI, please ensure that you are at least using version 0.3.3 (the most up to date as of this writing is 0.3.4).
Removes support for iOS 4.3.
Optimizes news feed rendering for faster start up times and smoother scrolling of long feeds.
Removes the deprecated - (void) logPurchase:(NSString *)productId priceInCents:(NSUInteger)price method in favor of the new multi-currency tracking method. Conversion of old method calls is straightforward. [[Appboy sharedInstance] logPurchase:@"powerups" priceInCents:99]; should turn into [[Appboy sharedInstance] logPurchase:@"powerups" inCurrency:@"USD" atPrice:[[[NSDecimalNumber alloc] initWithFloat:.99f] autorelease]];
Any references to the delegate property of ABKFeedbackViewControllerModalContext should be updated to the new property name feedbackDelegate.
Following the removal of support for 4.3, removes SBJson parsing and uses built-in parsing added in iOS5 to improve performance and lower the SDK footprint.
2.0.4
Adds support for reporting purchases in multiple currencies. Also, changes the price reporting object type to NSDecimalNumber for consistency with StoreKit.
Adds additional space savings optimizations to image assets.
Minor fix to orientation change handling in the example app code.
2.0.3
Adds the ability to assign a Foursquare access token for each user. Doing so will cause the Braze backend to make Foursquare data available in user profiles on the dasbhard.
Adds more fine grained control options for Braze’s network activity. See Appboy.h for more information.
2.0.2
Fixes a bug where Braze might reopen a Facebook read session when a publish session already exists
2.0.1
UI Improvements
Fixed a bug when using the nav context feedback in a popover window that would cause the email bar to disappear
Updated news feed’s close button when opened from a slide up
Added a loading spinner on the feedback page when fetching email address from Facebook
Fixed the bug where the modal context feed page’s navigation bar would not adhere to NUI theming
Improved the look of the popover content feedback page
Enabled resizable webpages when clicking on to a web URL through a card
API updates
Updated custom user attribute setting methods to return a boolean value indicating if the setting is successful
Added methods for incrementing custom user attributes
Added support for device push tokens as NSData when registering the token to Braze
More detailed error messages logged in console
Removed the enable/disable Braze methods from Appboy.h
2.0
Initial release
# Configuration initiale du SDK pour macOS
Source: /docs/fr/developer_guide/platforms/legacy_sdks/macOS/initial_sdk_setup/index.md
**Warning:**
[AppboyKit](https://github.com/Appboy/appboy-ios-sdk) (also known as the Objective-C SDK) is no longer supported and has been replaced by the [Swift SDK](https://www.braze.com/docs/fr/fr/developer_guide/sdk_integration/?sdktab=swift). It will no longer receive new features, bug fixes, security updates, or technical support—however, messaging and analytics will continue to function as normal. To learn more, see [Introducing the New Braze Swift SDK](https://www.braze.com/resources/articles/introducing-the-new-braze-swift-sdk).
# Configuration initiale du SDK {#initial-sdk-setup}
> Cet article de référence explique comment installer le SDK Braze pour macOS.
À partir de la version [3.32.0](https://github.com/Appboy/appboy-ios-sdk/releases/tag/3.32.0), le SDK Braze prend en charge macOS pour les applications utilisant [Mac Catalyst](https://developer.apple.com/mac-catalyst/) lors de l'intégration via le gestionnaire de paquets swift. Actuellement, le SDK ne prend pas en charge Mac Catalyst lors de l'utilisation de CocoaPods ou de Carthage.
**Note:**
Pour créer votre application avec Mac Catalyst, consultez la documentation d'Apple.
Une fois que votre application prend en charge Catalyst, suivez [ces instructions pour utiliser le gestionnaire de paquets swift](https://www.braze.com/docs/fr/fr/developer_guide/platform_integration_guides/swift/sdk_integration/?tab=swift%20package%20manager/) pour importer le SDK Braze dans votre application.
## Fonctionnalités prises en charge {#supported-features}
Braze prend en charge les [notifications push](https://www.braze.com/docs/fr/fr/developer_guide/push_notifications/?sdktab=swift), les [Content Cards](https://www.braze.com/docs/fr/fr/developer_guide/platforms/swift/content_cards/#content-cards-data-model), les [messages in-app](https://www.braze.com/docs/fr/fr/developer_guide/analytics/tracking_location/?sdktab=swift) et la [collecte automatique de localisation](https://www.braze.com/docs/fr/fr/developer_guide/analytics/tracking_location/?sdktab=swift) lors de l'exécution sur Mac Catalyst.
Notez que Push Stories, le push riche et le géorepérage ne sont pas pris en charge sur macOS.
[1]:https://github.com/Appboy/appboy-ios-sdk/releases/tag/3.32.0
[2]:https://developer.apple.com/mac-catalyst/
# Configuration initiale du SDK pour tvOS
Source: /docs/fr/developer_guide/platforms/legacy_sdks/tvos/initial_sdk_setup/index.md
**Warning:**
[AppboyKit](https://github.com/Appboy/appboy-ios-sdk) (also known as the Objective-C SDK) is no longer supported and has been replaced by the [Swift SDK](https://www.braze.com/docs/fr/fr/developer_guide/sdk_integration/?sdktab=swift). It will no longer receive new features, bug fixes, security updates, or technical support—however, messaging and analytics will continue to function as normal. To learn more, see [Introducing the New Braze Swift SDK](https://www.braze.com/resources/articles/introducing-the-new-braze-swift-sdk).
# Configuration initiale du SDK {#initial-sdk-setup}
> Cet article de référence explique comment installer le SDK Braze pour tvOS. L'installation du SDK Braze vous fournira des fonctionnalités d'analyse de base.
**Note:**
Notre SDK tvOS prend actuellement en charge la fonctionnalité d'analyse. Pour ajouter une application tvOS dans votre tableau de bord, ouvrez un [ticket d'assistance](https://www.braze.com/docs/fr/fr/braze_support/).
Le SDK Braze pour tvOS doit être installé ou mis à jour à l'aide de [CocoaPods](http://cocoapods.org/), un gestionnaire de dépendances pour les projets Objective-C et Swift. CocoaPods offre une simplicité supplémentaire pour l'intégration et la mise à jour.
## Intégration CocoaPods du SDK tvOS {#tvos-sdk-cocoapods-integration}
### Étape 1 : Installer CocoaPods {#step-1-install-cocoapods}
L'installation du SDK via [CocoaPods](http://cocoapods.org/) pour tvOS permet d'automatiser la majeure partie du processus d'installation. Avant de commencer ce processus, assurez-vous que vous utilisez la [version Ruby 2.0.0](https://www.ruby-lang.org/en/installation/) ou une version ultérieure.
Exécutez la commande suivante pour démarrer :
```bash
$ sudo gem install cocoapods
```
- Si vous êtes invité à remplacer l'exécutable `rake`, reportez-vous à la rubrique [Getting Started](http://guides.cocoapods.org/using/getting-started.html) sur CocoaPods.org pour plus de détails.
- Si vous avez des problèmes concernant CocoaPods, consultez le [guide de résolution des problèmes de CocoaPods](http://guides.cocoapods.org/using/troubleshooting.html).
### Étape 2 : Construction du Podfile {#step-2-constructing-the-podfile}
Maintenant que vous avez installé le Ruby Gem CocoaPods, vous devez créer un fichier dans votre répertoire de projet Xcode nommé `Podfile`.
Ajoutez la ligne suivante à votre Podfile :
```
target 'YourAppTarget' do
pod 'Appboy-tvOS-SDK'
end
```
Nous vous suggérons de versionner Braze afin que les mises à jour du pod récupèrent automatiquement tout ce qui est inférieur à une mise à jour mineure de version. Cela ressemble à `pod 'Appboy-tvOS-SDK' ~> Major.Minor.Build`. Si vous souhaitez intégrer automatiquement la dernière version du SDK Braze, même avec des modifications majeures, vous pouvez utiliser `pod 'Appboy-tvOS-SDK'` dans votre Podfile.
### Étape 3 : Installer le SDK Braze {#step-3-installing-the-braze-sdk}
Pour installer le SDK Braze via CocoaPods, accédez au répertoire de votre projet d'application Xcode dans votre terminal et exécutez la commande suivante :
```
pod install
```
À ce stade, vous devriez pouvoir ouvrir le nouvel espace de travail du projet Xcode créé par CocoaPods. Assurez-vous d'utiliser cet espace de travail Xcode au lieu de votre projet Xcode.

### Étape 4 : Mettre à jour la délégation de votre application {#step-4-updating-your-app-delegate}
Ajoutez la ligne de code suivante à votre fichier `AppDelegate.m` :
```objc
#import
```
Dans votre fichier `AppDelegate.m`, ajoutez l'extrait de code suivant au sein de votre méthode `application:didFinishLaunchingWithOptions` :
```objc
[Appboy startWithApiKey:@"YOUR-API-KEY"
inApplication:application
withLaunchOptions:launchOptions];
```
Enfin, mettez à jour `YOUR-API-KEY` avec la valeur correcte à partir de votre page **Gérer les paramètres**.
Si vous intégrez le SDK Braze avec CocoaPods ou Carthage, ajoutez la ligne de code suivante à votre fichier `AppDelegate.swift` :
```swift
import AppboyTVOSKit
```
Pour plus d'informations sur l'utilisation du code Objective-C dans les projets Swift, consultez la [documentation du développeur Apple](https://developer.apple.com/library/ios/documentation/swift/conceptual/buildingcocoaapps/MixandMatch.html).
Dans `AppDelegate.swift`, ajoutez l'extrait de code suivant à votre `application(application: UIApplication, didFinishLaunchingWithOptions launchOptions: [NSObject: AnyObject]?) -> Bool` :
```swift
Appboy.start(withApiKey: "YOUR-API-KEY", in:application, withLaunchOptions:launchOptions)
```
Ensuite, mettez à jour `YOUR-API-KEY` avec la valeur correcte à partir de votre page **Gérer les paramètres**.
Notre singleton `sharedInstance` sera nul avant que `startWithApiKey:` ne soit appelé, car il s'agit d'une condition préalable à l'utilisation de toute fonctionnalité de Braze.
**Warning:**
Assurez-vous d'initialiser Braze dans le fil principal de votre application. L'initialisation asynchrone peut entraîner un dysfonctionnement.
### Étape 5 : Spécifier votre endpoint ou cluster de données personnalisé {#step-5-specify-your-custom-endpoint-or-data-cluster}
**Note:**
À partir de décembre 2019, les endpoints personnalisés ne sont plus fournis. Si vous disposez d'un endpoint personnalisé préexistant, vous pouvez continuer à l'utiliser. Pour plus de détails, consultez notre liste d'endpoints disponibles.
Votre conseiller Braze devrait déjà vous avoir informé de l'[endpoint correct](https://www.braze.com/docs/fr/fr/user_guide/administrative/access_braze/sdk_endpoints/).
#### Configuration de l'endpoint à la compilation (recommandée) {#compile-time-endpoint-configuration-recommended}
Si vous disposez d'un endpoint personnalisé préexistant :
- À partir du SDK Braze pour iOS v3.0.2, vous pouvez définir un endpoint personnalisé à l'aide du fichier `Info.plist`. Ajoutez le dictionnaire `Appboy` à votre fichier Info.plist. À l'intérieur du dictionnaire `Appboy`, ajoutez la sous-entrée de chaîne de caractères `Endpoint` et définissez la valeur sur l'autorité de votre URL d'endpoint personnalisé (par exemple, `sdk.iad-01.braze.com`, et non `https://sdk.iad-01.braze.com`).
#### Configuration de l'endpoint à l'exécution {#runtime-endpoint-configuration}
Si vous disposez d'un endpoint personnalisé préexistant :
- À partir du SDK Braze pour iOS v3.17.0+, vous pouvez remplacer votre endpoint via `ABKEndpointKey` à l'intérieur du paramètre `appboyOptions` transmis à `startWithApiKey:inApplication:withLaunchOptions:withAppboyOptions:`. Définissez la valeur sur l'autorité de votre URL d'endpoint personnalisé (par exemple, `sdk.iad-01.braze.com`, et non `https://sdk.iad-01.braze.com`).
**Note:**
La prise en charge de la configuration des endpoints à l'exécution à l'aide de `ABKAppboyEndpointDelegate` a été supprimée dans le SDK Braze pour iOS v3.17.0. Si vous utilisez déjà `ABKAppboyEndpointDelegate`, notez que dans les versions v3.14.1 à v3.16.0 du SDK Braze pour iOS, toute référence à `dev.appboy.com` dans votre méthode `getApiEndpoint()` doit être remplacée par une référence à `sdk.iad-01.braze.com`.
### Intégration SDK terminée {#sdk-integration-complete}
Braze devrait maintenant collecter des données depuis votre application et votre intégration de base devrait être terminée. Notez que lors de la compilation de votre application tvOS et de toute autre bibliothèque tierce, Bitcode doit être activé.
### Mettre à jour le SDK Braze via CocoaPods {#updating-the-braze-sdk-via-cocoapods}
Pour mettre à jour un CocoaPod, exécutez simplement les commandes suivantes dans votre répertoire de projet :
```
pod update
```
## Personnaliser Braze au démarrage {#customizing-braze-on-startup}
Si vous souhaitez personnaliser Braze au démarrage, vous pouvez utiliser la méthode d'initialisation Braze `startWithApiKey:inApplication:withLaunchOptions:withAppboyOptions` et transmettre un `NSDictionary` facultatif de clés de démarrage Braze.
Dans votre fichier `AppDelegate.m`, au sein de votre méthode `application:didFinishLaunchingWithOptions`, ajoutez la méthode Braze suivante :
```objc
[Appboy startWithApiKey:@"YOUR-API-KEY"
inApplication:application
withLaunchOptions:launchOptions
withAppboyOptions:appboyOptions];
```
Dans `AppDelegate.swift`, au sein de votre méthode `application(application: UIApplication, didFinishLaunchingWithOptions launchOptions: [NSObject: AnyObject]?) -> Bool`, ajoutez la méthode Braze suivante :
```swift
Appboy.start(withApiKey: "YOUR-API-KEY",
in:application,
withLaunchOptions:launchOptions,
withAppboyOptions:appboyOptions)
```
où `appboyOptions` est un `Dictionary` de valeurs de configuration de démarrage.
Cette méthode remplace la méthode d'initialisation `startWithApiKey:inApplication:withLaunchOptions:` et est appelée avec les paramètres suivants :
- `YOUR-API-KEY` : La clé API de votre application se trouve sous **Gérer les paramètres** dans le tableau de bord de Braze.
- `application` : L'application actuelle.
- `launchOptions` : Les options `NSDictionary` que vous obtenez de `application:didFinishLaunchingWithOptions:`.
- `appboyOptions` : Un `NSDictionary` facultatif avec les valeurs de configuration de démarrage de Braze.
Consultez [Appboy.h](https://github.com/Appboy/appboy-ios-sdk/blob/master/AppboyKit/include/Appboy.h) pour obtenir la liste des clés de démarrage de Braze.
## Appboy.sharedInstance() et la nullabilité Swift {#appboysharedinstance-and-swift-nullability}
Contrairement à la pratique courante, le singleton `Appboy.sharedInstance()` est facultatif. Cela est dû au fait que `sharedInstance` est `nil` avant l'appel de `startWithApiKey:`, et qu'il existe des implémentations non standard mais valides dans lesquelles une initialisation retardée peut être utilisée.
Si vous appelez `startWithApiKey:` dans votre délégation `didFinishLaunchingWithOptions:` avant tout accès au `sharedInstance` d'Appboy (l'implémentation standard), vous pouvez utiliser le chaînage optionnel, comme `Appboy.sharedInstance()?.changeUser("testUser")`, pour éviter des vérifications fastidieuses. Le comportement sera identique à celui d'une implémentation Objective-C qui supposait un `sharedInstance` non nul.
## Options d'intégration manuelle {#manual-integration-options}
Vous pouvez également intégrer notre SDK tvOS manuellement — il vous suffit de récupérer le Framework depuis notre [dépôt public](https://github.com/appboy/appboy-ios-sdk) et d'initialiser Braze comme indiqué dans les sections précédentes.
## Identification des utilisateurs et rapports d'analyse {#identifying-users-and-reporting-analytics}
Consultez notre [documentation iOS](https://www.braze.com/docs/fr/fr/developer_guide/analytics/setting_user_ids/?tab=swift) pour obtenir des informations sur la définition des ID utilisateur, la journalisation des événements personnalisés et la définition des attributs utilisateur. Nous vous recommandons également de vous familiariser avec nos [conventions de dénomination des événements](https://www.braze.com/docs/fr/fr/user_guide/data/activation/events/event_naming_conventions/).
# À propos des bannières
Source: /docs/fr/developer_guide/banners/index.md
# Banners
> With Banners, you can create personalized messaging for your users, all while extending the reach of your other channels, such as email or push notifications. You can embed Banners directly in your app or website, which lets you engage with users through an experience that feels natural.
## Prerequisites
Banners availability depends on your Braze package. Contact your account manager or customer success manager to get started.
Before you start, make sure you have [Banner placements](https://www.braze.com/docs/fr/fr/developer_guide/banners/placements/) created in your app or website.

## Why use Banners?
Banners allow marketing and product teams to personalize app or website content dynamically, reflecting real-time user eligibility and behavior. They persistently display messages inline, providing non-intrusive, contextually relevant experiences that can be refreshed at the start of a session or mid-session when your app or website explicitly requests it.
After Banners are integrated into an app or website, marketers can design and launch Banners using a simple drag-and-drop editor, eliminating the need for ongoing developer assistance, reducing complexity, and improving efficiency.
| Use case | Explanation |
| --- | --- |
| Announcements | Keep announcements like upcoming events or policy changes at the forefront of your app experience. |
| Personalizing offers | Show personalized promotions and incentives based on each user’s browsing history, cart content, subscription tier, and loyalty status. |
| Targeting new user engagement | Guide new users through onboarding flows and account setup. |
| Sales and promotions | Highlight featured content, trending products, and ongoing brand campaigns persistently and directly on your homepage without disrupting the user experience. |
{: .reset-td-br-1 .reset-td-br-2 aria-label="Why use Banners?" }
## Features
Features for Banners include:
- **Easy content building:** Create and preview your Banner using a visual, drag-and-drop editor with support for images, text, buttons, email capture forms, custom code, and more.
- **Flexible placements:** Define multiple locations within your application or website where Banners can appear, enabling precise targeting to specific contexts or user experiences.
- **Dynamic personalization:** Banners can only be refreshed at the start of a new session or mid-session if you explicitly request the refresh. Banners don't update automatically on a new session. If you don't request the refresh, the Banner won't update.
- **Native prioritization:** Set the display priority for when multiple Banners target the same placement, ensuring the right message reaches users at the right time.
- **Custom Code editor block:** Use the Custom Code editor block to add custom HTML for advanced customization or seamless integration with your existing web styles.
## About Banners {#about-banners}
### Placement IDs {#placement-id}
Banner placements are specific locations in your app or website [you create with the Braze SDK](https://www.braze.com/docs/fr/fr/developer_guide/banners/placements/) that designate where Banners can appear.
Common locations include the top of your homepage, product detail pages, and checkout flows. After placements are created, Banners can be [assigned in your Banner campaign](https://www.braze.com/docs/fr/fr/user_guide/channels/banners/create_a_banner/).
There is no fixed limit on the number of placements you can create per workspace, and you can create as many placement IDs as your experience requires. Each placement must be unique within a workspace. A single placement ID can be referenced by up to 25 active messages at the same time.
**Important:**
Avoid modifying placement IDs after launching a Banner campaign.
### Banner priority {#priority}
When multiple Banner messages reference the same placement ID, Banners are displayed in order of priority: high, medium, or low. By default, Banners are set to medium, but you can [manually set the priority](https://www.braze.com/docs/fr/fr/user_guide/channels/banners/create_a_banner/#set-banner-priority-optional) when you create or edit your Banner campaign.
If multiple Banners are set to the same priority, the newest Banner that the user is eligible for is displayed first.
### Placement requests {#requests}
When you [create placements in your app or website](https://www.braze.com/docs/fr/fr/developer_guide/banners/placements/#requestBannersRefresh), your app sends a request to Braze to fetch Banner messages for each placement.
- You can request up to **10 placements per refresh request**.
- For each placement, Braze returns the **highest-priority Banner** the user is eligible to receive.
- If more than 10 placements are requested in a refresh, only the first 10 are returned; the rest are dropped.
For example, an app might request three placements in a refresh request: `homepage_promo`, `cart_abandonment`, and `seasonal_offer`. Each request returns the most relevant Banner for that placement.
#### Rate limiting for refresh requests
If you're on older SDK versions (before Swift 13.1.0, Android 38.0.0, Web 6.1.0, React Native 17.0.0, and Flutter 15.0.0), only one refresh request is permitted per user session.
If you're on newer minimum SDK versions (Swift 13.1.0+, Android 38.0.0+, Web 6.1.0+, React Native 17.0.0+, and Flutter 15.0.0+), refresh requests are controlled by a token bucket algorithm to prevent excessive polling:
- Each user session begins with five refresh tokens.
- Tokens refill at a rate of one token every 180 seconds (3 minutes).
Each explicit call to `requestBannersRefresh` consumes one token. The automatic refresh that occurs at the start of a new session or when `changeUser` is called does not consume a token, as this refresh is a publishing of the last cached Banner for that user. If you attempt a refresh when no tokens are available, the SDK doesn't make the request and logs an error until a token refills. This is important for mid-session and event-triggered updates. To implement dynamic updates (for example, after a user completes an action on the same page), call the refresh method after the custom event is logged, but note the necessary delay for Braze to ingest and process the event before the user qualifies for a different Banner campaign.
### Message delivery
Banner messages are delivered to your app or website as HTML content, typically rendered inside an iframe. This ensures that your Banners render consistently across devices, and helps you keep their styles and scripts separate from the rest of your code.
Iframes allow for dynamic and personalized content updates that don't require changes to your codebase. Each iframe retrieves and displays the HTML for each user session using campaign targeting and personalization logic.
### Dimensions and sizing
Here's what you need to know about Banner dimensions and sizing:
- While the composer allows you to preview Banners in different dimensions, that information isn't saved or sent to the SDK.
- The HTML takes up the full width of the container it's rendered in.
- We recommend making a fixed dimension element and testing those dimensions in composer.
## Limitations
Each workspace can support up to 200 active Banner campaigns. If this limit is reached, you'll need to [archive or deactivate](https://www.braze.com/docs/fr/fr/user_guide/messaging/governance/statuses/#changing-the-status) an existing campaign before creating a new one.
Additionally, Banner messages do not support the following features:
- API-triggered and action-based campaigns
- Connected Content
- Promotional codes
- `catalog_items` using the [`:rerender` tag](https://www.braze.com/docs/fr/fr/user_guide/data/activation/catalogs/using_catalogs/#using-liquid)
## Next steps
- [Create Banner placements in your app or website](https://www.braze.com/docs/fr/fr/developer_guide/banners/placements/)
- [Create a Banner campaign in Braze](https://www.braze.com/docs/fr/fr/user_guide/channels/banners/create_a_banner/)
- [Tutorial: Displaying a Banner by Placement ID](https://www.braze.com/docs/fr/fr/developer_guide/banners/tutorial_displaying_banners)
**Tip:**
Want to help prioritize what's next? Contact [banners-feedback@braze.com](mailto:banners-feedback@braze.com).
# Gérer les emplacements de bannières pour le SDK Braze
Source: /docs/fr/developer_guide/banners/placements/index.md
# Gérer les emplacements de bannières {#manage-banner-placements}
> Découvrez comment créer et gérer les emplacements de bannières dans le SDK Braze, notamment comment accéder à leurs propriétés uniques et enregistrer les impressions. Pour plus d'informations générales, consultez [À propos des bannières](https://www.braze.com/docs/fr/fr/developer_guide/banners/).
## À propos des demandes de placement {#requests}
When you [create placements in your app or website](https://www.braze.com/docs/fr/fr/developer_guide/banners/placements/#requestBannersRefresh), your app sends a request to Braze to fetch Banner messages for each placement.
- You can request up to **10 placements per refresh request**.
- For each placement, Braze returns the **highest-priority Banner** the user is eligible to receive.
- If more than 10 placements are requested in a refresh, only the first 10 are returned; the rest are dropped.
For example, an app might request three placements in a refresh request: `homepage_promo`, `cart_abandonment`, and `seasonal_offer`. Each request returns the most relevant Banner for that placement.
#### Rate limiting for refresh requests
If you're on older SDK versions (before Swift 13.1.0, Android 38.0.0, Web 6.1.0, React Native 17.0.0, and Flutter 15.0.0), only one refresh request is permitted per user session.
If you're on newer minimum SDK versions (Swift 13.1.0+, Android 38.0.0+, Web 6.1.0+, React Native 17.0.0+, and Flutter 15.0.0+), refresh requests are controlled by a token bucket algorithm to prevent excessive polling:
- Each user session begins with five refresh tokens.
- Tokens refill at a rate of one token every 180 seconds (3 minutes).
Each explicit call to `requestBannersRefresh` consumes one token. The automatic refresh that occurs at the start of a new session or when `changeUser` is called does not consume a token, as this refresh is a publishing of the last cached Banner for that user. If you attempt a refresh when no tokens are available, the SDK doesn't make the request and logs an error until a token refills. This is important for mid-session and event-triggered updates. To implement dynamic updates (for example, after a user completes an action on the same page), call the refresh method after the custom event is logged, but note the necessary delay for Braze to ingest and process the event before the user qualifies for a different Banner campaign.
## Créer un placement {#create-a-placement}
### Conditions préalables {#prerequisites}
Voici les versions minimales du SDK requises pour créer des emplacements de bannières :
### Step 1: Create placements in Braze
If you haven't already, you'll need to create Banner placements in Braze that are used to define the locations in your app or site can display Banners. To create a placement, go to **Settings** > **Banners Placements**, then select **Create Placement**.

Give your placement a name and assign a **Placement ID**. Be sure you consult other teams before assigning an ID, as it'll be used throughout the card's lifecycle and shouldn't be changed later. For more information, see [Placement IDs].

### Étape 2 : Actualiser les placements dans votre application {#requestBannersRefresh}
Les placements peuvent être actualisés en appelant les méthodes d'actualisation décrites ci-dessous. Si `subscribeToBannersUpdates` est actif, le SDK republie automatiquement vos ID de placement mis en cache au début de chaque nouvelle session et lorsque vous appelez `changeUser`. Cette actualisation automatique ne consomme pas de jeton de limite de débit.
**Tip:**
Actualisez les placements dès que possible afin d'éviter tout retard dans le téléchargement ou l'affichage des bannières.
```javascript
import * as braze from "@braze/web-sdk";
braze.requestBannersRefresh(["global_banner", "navigation_square_banner"]);
```
```swift
AppDelegate.braze?.banners.requestRefresh(placementIds: ["global_banner", "navigation_square_banner"])
```
```java
ArrayList listOfBanners = new ArrayList<>();
listOfBanners.add("global_banner");
listOfBanners.add("navigation_square_banner");
Braze.getInstance(context).requestBannersRefresh(listOfBanners);
```
```kotlin
Braze.getInstance(context).requestBannersRefresh(listOf("global_banner", "navigation_square_banner"))
```
```javascript
Braze.requestBannersRefresh(["global_banner", "navigation_square_banner"]);
```
```csharp
This feature is not currently supported on Unity.
```
```javascript
This feature is not currently supported on Cordova.
```
```dart
braze.requestBannersRefresh(["global_banner", "navigation_square_banner"]);
```
```brightscript
This feature is not currently supported on Roku.
```
### Étape 3 : Écouter les mises à jour {#subscribeToBannersUpdates}
**Tip:**
Si vous insérez des bannières à l'aide des méthodes SDK décrites dans ce guide, tous les événements analytiques (tels que les impressions et les clics) seront gérés automatiquement, et les impressions ne seront enregistrées que lorsque la bannière sera visible.
Si vous utilisez du JavaScript vanilla avec le SDK Braze pour le Web, utilisez [`subscribeToBannersUpdates`](https://js.appboycdn.com/web-sdk/latest/doc/modules/braze.html#subscribetobannersupdates) pour écouter les mises à jour de placement, puis appelez [`requestBannersRefresh`](https://js.appboycdn.com/web-sdk/latest/doc/modules/braze.html#requestbannersrefresh) pour les récupérer.
```javascript
import * as braze from "@braze/web-sdk";
braze.subscribeToBannersUpdates((banners) => {
console.log("Banners were updated");
});
// always refresh after your subscriber function has been registered
braze.requestBannersRefresh(["global_banner", "navigation_square_banner"]);
```
Si vous utilisez React avec le SDK Braze pour le Web, configurez [`subscribeToBannersUpdates`](https://js.appboycdn.com/web-sdk/latest/doc/modules/braze.html#subscribetobannersupdates) à l'intérieur d'un hook `useEffect` et appelez [`requestBannersRefresh`](https://js.appboycdn.com/web-sdk/latest/doc/modules/braze.html#requestbannersrefresh) après avoir enregistré votre écouteur.
```typescript
import * as braze from "@braze/web-sdk";
useEffect(() => {
const subscriptionId = braze.subscribeToBannersUpdates((banners) => {
console.log("Banners were updated");
});
// always refresh after your subscriber function has been registered
braze.requestBannersRefresh(["global_banner", "navigation_square_banner"]);
// cleanup listeners
return () => {
braze.removeSubscription(subscriptionId);
}
}, []);
```
**Note:**
Votre écouteur de mise à jour de bannière reflète l'état en mémoire des bannières du SDK. Une seule mise à jour peut inclure des placements déjà mis en cache (par exemple, à partir d'une actualisation précédente, d'un autre écran ou d'un travail automatique du SDK), et pas uniquement les ID de placement de votre appel `requestRefresh` le plus récent. Si vous ne vous intéressez qu'à certains placements, vérifiez l'ID de placement de chaque bannière dans votre écouteur et ignorez les autres. Après avoir enregistré votre écouteur, appelez `requestRefresh` pour les placements que vous souhaitez synchroniser depuis Braze.
```swift
let placementIds = ["global_banner", "navigation_square_banner"]
let cancellable = brazeClient.braze()?.banners.subscribeToUpdates { banners in
banners.forEach { placementId, banner in
print("Received banner: \(banner) with placement ID: \(placementId)")
}
}
// Always refresh after your subscriber is registered
brazeClient.braze()?.banners.requestRefresh(placementIds: placementIds)
```
**Note:**
Votre écouteur de mise à jour de bannière reflète l'état en mémoire des bannières du SDK. Une seule mise à jour peut inclure des placements déjà mis en cache (par exemple, à partir d'une actualisation précédente, d'un autre écran ou d'un travail automatique du SDK), et pas uniquement les ID de placement de votre appel `requestBannersRefresh` le plus récent. Si vous ne vous intéressez qu'à certains placements, vérifiez l'ID de placement de chaque bannière dans votre écouteur et ignorez les autres. Après avoir enregistré votre écouteur, appelez `requestBannersRefresh` pour les placements que vous souhaitez synchroniser depuis Braze.
```java
ArrayList placementIds = new ArrayList<>();
placementIds.add("global_banner");
placementIds.add("navigation_square_banner");
Braze.getInstance(context).subscribeToBannersUpdates(banners -> {
for (Banner banner : banners.getBanners()) {
Log.d(TAG, "Received banner: " + banner.getPlacementId());
}
});
// Always refresh after your subscriber is registered
Braze.getInstance(context).requestBannersRefresh(placementIds);
```
```kotlin
val placementIds = listOf("global_banner", "navigation_square_banner")
Braze.getInstance(context).subscribeToBannersUpdates { update ->
for (banner in update.banners) {
Log.d(TAG, "Received banner: " + banner.placementId)
}
}
// Always refresh after your subscriber is registered
Braze.getInstance(context).requestBannersRefresh(placementIds)
```
```javascript
const bannerCardsSubscription = Braze.addListener(
Braze.Events.BANNER_CARDS_UPDATED,
(data) => {
const banners = data.banners;
console.log(
`Received ${banners.length} Banner Cards with placement IDs:`,
banners.map((banner) => banner.placementId)
);
}
);
```
```csharp
This feature is not currently supported on Unity.
```
```javascript
This feature is not currently supported on Cordova.
```
```dart
StreamSubscription bannerStreamSubscription = braze.subscribeToBanners((List banners) {
for (final banner in banners) {
print("Received banner: " + banner.toString());
}
});
```
```brightscript
This feature is not currently supported on Roku.
```
### Étape 4 : Insérer à l'aide de l'ID de placement {#insertBanner}
**Tip:**
Pour un tutoriel complet étape par étape, consultez [Afficher une bannière par ID de placement](https://www.braze.com/docs/fr/fr/developer_guide/banners/tutorial_displaying_banners/).
Créez un élément conteneur pour la bannière. Veillez à définir sa largeur et sa hauteur.
```html
```
Si vous utilisez du JavaScript vanilla avec le SDK Braze pour le Web, appelez la méthode [`insertBanner`](https://js.appboycdn.com/web-sdk/latest/doc/modules/braze.html#insertbanner) pour remplacer le HTML interne de l'élément conteneur.
```javascript
import * as braze from "@braze/web-sdk";
braze.initialize("sdk-api-key", {
baseUrl: "sdk-base-url",
allowUserSuppliedJavascript: true, // banners require you to opt-in to user-supplied javascript
});
braze.subscribeToBannersUpdates((banners) => {
// get this placement's banner. If it's `null` the user did not qualify for one.
const globalBanner = braze.getBanner("global_banner");
if (!globalBanner) {
return;
}
// choose where in the DOM you want to insert the banner HTML
const container = document.getElementById("global-banner-container");
// Insert the banner which replaces the innerHTML of that container
braze.insertBanner(globalBanner, container);
// Special handling if the user is part of a Control Variant
if (globalBanner.isControl) {
// hide or collapse the container
container.style.display = "none";
}
});
braze.requestBannersRefresh(["global_banner", "navigation_square_banner"]);
```
Si vous utilisez React avec le SDK Braze pour le Web, appelez la méthode [`insertBanner`](https://js.appboycdn.com/web-sdk/latest/doc/modules/braze.html#insertbanner) avec un `ref` pour remplacer le HTML interne de l'élément conteneur.
```tsx
import { useRef } from 'react';
import * as braze from "@braze/web-sdk";
export default function App() {
const bannerRef = useRef(null);
useEffect(() => {
const globalBanner = braze.getBanner("global_banner");
if (!globalBanner || globalBanner.isControl) {
// hide the container
} else {
// insert the banner to the container node
braze.insertBanner(globalBanner, bannerRef.current);
}
}, []);
return
}
```
**Tip:**
Pour suivre les impressions, veillez à appeler `insertBanner` pour `isControl`. Vous pouvez ensuite masquer ou réduire votre conteneur.
```swift
// To get access to the Banner model object:
let globalBanner: Braze.Banner?
AppDelegate.braze?.banners.getBanner(for: "global_banner", { banner in
self.globalBanner = banner
})
// UIKit implementation:
// If you simply want the Banner view, initialize a `UIView` with the placement ID:
if let braze = AppDelegate.braze {
let bannerUIView = BrazeBannerUI.BannerUIView(
placementId: "global_banner",
braze: braze,
// iOS does not perform automatic resizing or visibility changes.
// Use the `processContentUpdates` parameter to adjust the size and visibility of your Banner according to your use case.
processContentUpdates: { result in
switch result {
case .success(let updates):
if let height = updates.height {
// Adjust the visibility and/or height.
}
case .failure(let error):
// Handle the error.
}
}
)
}
// SwiftUI implementation:
// Similarly, if you want a Banner view in SwiftUI, use the corresponding `BannerView` initializer:
if let braze = AppDelegate.braze {
let bannerView = BrazeBannerUI.BannerView(
placementId: "global_banner",
braze: braze,
// iOS does not perform automatic resizing or visibility changes.
// Use the `processContentUpdates` parameter to adjust the size and visibility of your Banner according to your use case.
processContentUpdates: { result in
switch result {
case .success(let updates):
if let height = updates.height {
// Adjust the visibility and/or height according to your parent controller.
}
case .failure(let error):
// Handle the error.
}
}
)
}
```
Pour obtenir la bannière en code Java, utilisez :
```java
Banner globalBanner = Braze.getInstance(context).getBanner("global_banner");
```
Vous pouvez créer des bannières dans la disposition de vos vues Android en incluant ce XML :
```xml
```
Si vous utilisez Android Views, utilisez ce XML :
```xml
```
Pour utiliser Jetpack Compose, ajoutez l'artefact `com.braze:android-sdk-jetpack-compose` au module de votre application. Utilisez la même version que vos autres dépendances du SDK Braze pour Android. Ce module est distinct de `android-sdk-ui` et fournit le composable [`Banner`](https://braze-inc.github.io/braze-android-sdk/kdoc/braze-android-sdk/com.braze.jetpackcompose.banners/-banner.html) sous `com.braze.jetpackcompose.banners`.
**Note:**
Certaines bibliothèques d'interface Compose définissent leur propre composable `Banner`. Importez `com.braze.jetpackcompose.banners.Banner` explicitement pour appeler l'API de Braze.
```kotlin
import com.braze.jetpackcompose.banners.Banner
@Composable
fun myBannerSlot() {
Banner(placementId = "global_banner")
}
```
Vous pouvez éventuellement passer `heightCallback` pour recevoir la hauteur rendue en dp lorsque la taille de la bannière change. Pour référence, consultez la [KDoc pour `Banner`](https://braze-inc.github.io/braze-android-sdk/kdoc/braze-android-sdk/com.braze.jetpackcompose.banners/-banner.html).
Si vous n'ajoutez pas le module Jetpack Compose, encapsulez [`BannerView`](https://braze-inc.github.io/braze-android-sdk/kdoc/braze-android-sdk/com.braze.ui.banners/-banner-view/index.html) dans [`AndroidView`](https://developer.android.com/reference/kotlin/androidx/compose/ui/viewinterop/AndroidView) :
```kotlin
import android.view.ViewGroup
import androidx.compose.runtime.Composable
import androidx.compose.ui.viewinterop.AndroidView
import com.braze.ui.banners.BannerView
@Composable
fun myBannerSlot() {
AndroidView(
factory = { context ->
BannerView(context, "global_banner").apply {
layoutParams = ViewGroup.LayoutParams(
ViewGroup.LayoutParams.MATCH_PARENT,
ViewGroup.LayoutParams.WRAP_CONTENT
)
}
},
update = { it.placementId = "global_banner" }
)
}
```
Pour obtenir la bannière en Kotlin, utilisez :
```kotlin
val banner = Braze.getInstance(context).getBanner("global_banner")
```
Si vous utilisez la [nouvelle architecture de React Native](https://reactnative.dev/architecture/landing-page), vous devez enregistrer `BrazeBannerView` en tant que composant Fabric dans votre `AppDelegate.mm`.
```swift
#ifdef RCT_NEW_ARCH_ENABLED
/// Register the `BrazeBannerView` for use as a Fabric component.
- (NSDictionary> *)thirdPartyFabricComponents {
NSMutableDictionary * dictionary = [super thirdPartyFabricComponents].mutableCopy;
dictionary[@"BrazeBannerView"] = [BrazeBannerView class];
return dictionary;
}
#endif
```
Pour l'intégration la plus simple, ajoutez l'extrait de code JavaScript XML (JSX) suivant dans votre hiérarchie de vues, en fournissant uniquement l'ID de placement.
```javascript
```
Pour obtenir le modèle de données de la bannière dans React Native, ou pour vérifier la présence de ce placement dans le cache de votre utilisateur, utilisez :
```javascript
const banner = await Braze.getBanner("global_banner");
```
```csharp
This feature is not currently supported on Unity.
```
```javascript
This feature is not currently supported on Cordova.
```
Pour l'intégration la plus simple, ajoutez le widget suivant dans votre hiérarchie de vues, en fournissant uniquement l'ID de placement.
```dart
BrazeBannerView(
placementId: "global_banner",
),
To get the Banner's data model in Flutter, use:
```
Vous pouvez utiliser la méthode `getBanner` pour vérifier la présence de ce placement dans le cache de votre utilisateur.
```dart
braze.getBanner("global_banner").then((banner) {
if (banner == null) {
// Handle null cases.
} else {
print(banner.toString());
}
});
```
```brightscript
This feature is not currently supported on Roku.
```
### Étape 5 : Envoyer une bannière de test (facultatif) {#handling-test-cards}
Avant de lancer une campagne de bannières, vous pouvez [envoyer une bannière de test](https://www.braze.com/docs/fr/fr/user_guide/messaging/messaging_fundamentals/sending_test_messages/?tab=banners) pour vérifier votre intégration. Les bannières de test sont stockées dans un cache en mémoire distinct et ne persistent pas lors des redémarrages de l'application. Bien qu'aucune configuration supplémentaire ne soit nécessaire, votre appareil de test doit être capable de recevoir des notifications push au premier plan pour pouvoir afficher le test.
**Note:**
Les bannières de test fonctionnent comme toutes les autres bannières, sauf qu'elles sont supprimées lors de la session d'application suivante.
## Enregistrer les impressions {#log-impressions}
Braze enregistre automatiquement les impressions pour les bannières visibles lorsque vous utilisez les méthodes SDK pour insérer une bannière—il n'est donc pas nécessaire de suivre les impressions manuellement.
## Enregistrer les clics {#logging-clicks}
La méthode utilisée pour enregistrer les clics sur les bannières dépend de la manière dont votre bannière est affichée et de l'emplacement de votre gestionnaire de clics.
### Contenu standard de la bannière (automatique) {#standard-banner-content-automatic}
Si vous utilisez les méthodes SDK par défaut et prêtes à l'emploi pour insérer des bannières, et que votre bannière utilise des composants d'éditeur standard (images, boutons, texte), les clics sont suivis automatiquement. Le SDK associe des écouteurs de clics à ces éléments, et aucun code supplémentaire n'est nécessaire.
### Blocs de code personnalisés {#custom-code-blocks}
Si votre bannière utilise le bloc éditeur **Code personnalisé** dans le tableau de bord de Braze, vous devez utiliser `brazeBridge.logClick()` pour enregistrer les clics depuis ce HTML personnalisé. Cela s'applique même lorsque vous utilisez les méthodes SDK pour afficher la bannière, car le SDK ne peut pas associer automatiquement des écouteurs aux éléments de votre code personnalisé.
```html
```
Pour la référence complète, consultez [Code personnalisé et pont JavaScript pour les bannières](https://www.braze.com/docs/fr/fr/user_guide/channels/banners/create_a_banner/#custom-code). Le `brazeBridge` fournit une couche de communication entre le HTML interne de la bannière et le SDK Braze parent.
### Implémentations d'interface utilisateur personnalisées (headless) {#custom-ui-implementations-headless}
Si vous créez une interface utilisateur entièrement personnalisée à l'aide des [propriétés personnalisées](#custom-properties) de la bannière plutôt que d'afficher le HTML de la bannière, vous devez enregistrer manuellement les clics et les impressions depuis le code de votre application. Étant donné que le SDK n'effectue pas le rendu de la bannière, il n'a aucun moyen de suivre automatiquement les interactions avec vos éléments d'interface utilisateur personnalisés.
Pour les signatures de méthodes et tous les détails, consultez la [documentation de référence du SDK Braze](https://www.braze.com/docs/fr/fr/developer_guide/references/).
#### Enregistrer les impressions {#logging-impressions}
Appelez la méthode d'impression de bannière de la plateforme lorsque votre interface utilisateur personnalisée considère la bannière comme « vue ». Construisez une logique robuste pour déterminer ce qui constitue une impression afin d'éviter les événements en double — par exemple, enregistrez uniquement lorsque la bannière entre dans la zone visible (ou équivalent), et ne réenregistrez pas lorsque la même bannière revient dans la zone visible ou lorsque votre composant se re-rend sans un nouvel événement de vue.
```javascript
import * as braze from "@braze/web-sdk";
// Log impression when your custom UI considers the banner viewed (for example, once when it enters viewport)
const banner = braze.getBanner("placement_id_homepage_top");
if (banner) {
braze.logBannerImpressions([banner]);
}
```
[Référence du SDK Web](https://js.appboycdn.com/web-sdk/latest/doc/modules/braze.html#logbannerimpressions)
```kotlin
// Log impression when your custom UI considers the banner viewed (for example, once when it enters viewport)
Braze.getInstance(context).logBannerImpression("placement_id_homepage_top")
```
```java
// Log impression when your custom UI considers the banner viewed (for example, once when it enters viewport)
Braze.getInstance(context).logBannerImpression("placement_id_homepage_top");
```
[Référence du SDK Android](https://braze-inc.github.io/braze-android-sdk/kdoc/braze-android-sdk/com.braze/-i-braze/log-banner-impression.html)
```swift
// Retrieve a banner and log an impression on it (for example, once when it enters viewport)
braze.banners.getBanner(for: "placement_id_homepage_top") { banner in
banner?.context.logImpression()
}
```
[Référence du SDK Swift](https://braze-inc.github.io/braze-swift-sdk/documentation/brazekit/braze/banner/context-swift.class/logimpression())
```javascript
// Log impression when your custom UI considers the banner viewed (for example, once when it enters viewport)
Braze.logBannerImpression("placement_id_homepage_top");
```
Consultez le [dépôt du SDK React Native](https://github.com/braze-inc/braze-react-native-sdk) pour les dernières signatures de méthodes.
```dart
// Log impression when your custom UI considers the banner viewed (for example, once when it enters viewport)
braze.logBannerImpression("placement_id_homepage_top");
```
[Référence du SDK Flutter](https://pub.dev/documentation/braze_plugin/latest/braze_plugin/BrazePlugin/logBannerImpression.html)
#### Enregistrer les clics
Appelez la méthode de clic de bannière de la plateforme lorsque l'utilisateur appuie sur votre bannière personnalisée (ou sur un bouton spécifique). Passez le paramètre facultatif `buttonId` lorsque le clic concerne un bouton spécifique afin que les analyses puissent attribuer le clic correctement.
```javascript
import * as braze from "@braze/web-sdk";
// Log click
braze.logBannerClick("placement_id_homepage_top", buttonId); // buttonID is optional
```
[Référence du SDK Web](https://js.appboycdn.com/web-sdk/latest/doc/modules/braze.html#logbannerclick)
```kotlin
// Log click
Braze.getInstance(context).logBannerClick("placement_id_homepage_top", buttonId) // buttonID parameter can be null
```
```java
// Log click
Braze.getInstance(context).logBannerClick("placement_id_homepage_top", buttonId); // buttonID parameter can be null
```
[Référence du SDK Android](https://braze-inc.github.io/braze-android-sdk/kdoc/braze-android-sdk/com.braze/-i-braze/log-banner-click.html)
```swift
// Retrieve a banner and log a click on it
braze.banners.getBanner(for: "placement_id_homepage_top") { banner in
banner?.context.logClick(buttonId: buttonId) // buttonID is optional
}
```
[Référence du SDK Swift](https://braze-inc.github.io/braze-swift-sdk/documentation/brazekit/braze/banner/context-swift.class/logclick(buttonid:))
```javascript
// Log click
Braze.logBannerClick("placement_id_homepage_top", buttonId); // buttonID is optional
```
Consultez le [dépôt du SDK React Native](https://github.com/braze-inc/braze-react-native-sdk) pour les dernières signatures de méthodes.
```dart
// Log click
braze.logBannerClicked("placement_id_homepage_top", buttonId); // buttonID parameter can be null
```
[Référence du SDK Flutter](https://pub.dev/documentation/braze_plugin/latest/braze_plugin/BrazePlugin/logBannerClicked.html)
## Enregistrer les fermetures {#log-dismissals}
Les fermetures de bannières suppriment programmatiquement une bannière d'un placement lorsqu'un utilisateur la ferme activement. Une fois fermée, la bannière est masquée pour cet utilisateur. La prochaine fois que la liste des placements est actualisée, une nouvelle bannière est renvoyée si l'utilisateur est éligible.
### Conditions préalables
Voici les versions minimales du SDK requises pour enregistrer les fermetures de bannières :
### Intégrations {#integrations}
#### Intégrations de bannières standard (éditeur par glisser-déposer) {#standard-banner-integrations-drag-and-drop-editor}
Si votre bannière utilise l'éditeur par glisser-déposer et inclut un composant de bouton de fermeture, aucun code supplémentaire n'est nécessaire. Lorsqu'un utilisateur clique sur le bouton de fermeture, le message est masqué, déclenche une fermeture, puis enregistre un événement de fermeture pour les analyses.
#### Blocs de code personnalisés
Si votre bannière utilise le bloc éditeur **Code personnalisé**, vous pouvez déclencher une fermeture directement depuis le HTML de la bannière en utilisant `brazeBridge.closeMessage()`.
```html
```
### Enregistrer des analyses personnalisées lors de la fermeture d'une bannière {#log-custom-analytics-on-banner-dismissal}
Pour exécuter une logique supplémentaire, comme l'enregistrement d'analyses personnalisées lors de la fermeture d'une bannière, surchargez le rappel facultatif `onDismiss` sur votre vue de bannière. Par défaut, ce rappel est vide.
Le SDK Web ne dispose pas d'un rappel `onDismiss` dédié sur `insertBanner`. Utilisez plutôt `subscribeToBannersUpdates` pour détecter quand une bannière a été fermée en vérifiant si elle n'est plus présente dans la carte des bannières mise à jour.
```javascript
import * as braze from "@braze/web-sdk";
braze.subscribeToBannersUpdates((banners) => {
const globalBanner = banners["global_banner"];
if (!globalBanner) {
// The banner was dismissed or the user is no longer eligible.
// Run any custom analytics here.
console.log("Banner was dismissed");
return;
}
});
braze.requestBannersRefresh(["global_banner"]);
```
```typescript
import { useEffect } from "react";
import * as braze from "@braze/web-sdk";
useEffect(() => {
const subscriptionId = braze.subscribeToBannersUpdates((banners) => {
const globalBanner = banners["global_banner"];
if (!globalBanner) {
// The banner was dismissed or the user is no longer eligible.
// Run any custom analytics here.
console.log("Banner was dismissed");
return;
}
});
braze.requestBannersRefresh(["global_banner"]);
return () => {
braze.removeSubscription(subscriptionId);
};
}, []);
```
Définissez la propriété facultative [`onDismissCallback`](https://braze-inc.github.io/braze-android-sdk/kdoc/braze-android-sdk/com.braze.ui.banners/-banner-view/on-dismiss-callback.html) sur [`BannerView`](https://braze-inc.github.io/braze-android-sdk/kdoc/braze-android-sdk/com.braze.ui.banners/-banner-view/index.html).
```java
import android.util.Log;
import com.braze.ui.banners.BannerView;
import kotlin.Unit;
// After obtaining your BannerView instance (for example from XML via findViewById, or `new BannerView(context, "global_banner")`)
bannerView.setOnDismissCallback(() -> {
Log.d(TAG, "Successfully dismissed banner with placementId: " + bannerView.getPlacementId());
// Run any custom logic here, such as logging custom analytics
return Unit.INSTANCE;
});
```
```kotlin
import android.util.Log
import com.braze.ui.banners.BannerView
// After obtaining your BannerView instance (for example via findViewById or `BannerView(context, "global_banner")`)
bannerView.onDismissCallback = {
Log.d(TAG, "Successfully dismissed banner with placementId: ${bannerView.placementId}")
// Run any custom logic here, such as logging custom analytics
}
```
```swift
// After initializing your banner view instance using UIKit or SwiftUI
bannerView.onDismiss = { dismissedBanner in
print("Successfully dismissed banner with placementId: \(dismissedBanner.placementId)")
// Run any custom logic here, such as logging custom analytics
}
```
### Limite de stockage des fermetures en attente {#pending-dismissal-storage-cap}
Les événements de fermeture sont stockés localement en tant qu'entrées en attente jusqu'à ce qu'ils puissent être synchronisés avec le serveur Braze lors du prochain appel `requestBannersRefresh`.
**Warning:**
Dans de rares cas où un grand nombre de fermetures s'accumulent sans synchronisation réussie, les fermetures en attente les plus anciennes peuvent être supprimées. Si cela se produit, les bannières précédemment fermées peuvent réapparaître jusqu'à ce que la prochaine synchronisation réussie soit terminée. Pour minimiser ce risque, appelez `requestBannersRefresh` chaque fois que votre application retrouve une connectivité réseau.
## Dimensions et taille {#dimensions-and-sizing}
Voici ce que vous devez savoir sur les dimensions et la taille des bannières :
- Bien que le compositeur vous permette de prévisualiser les bannières dans différentes dimensions, cette information n'est pas enregistrée ni envoyée au SDK.
- Le HTML occupera toute la largeur du conteneur dans lequel il est affiché.
- Nous vous recommandons de créer un élément de dimension fixe et de tester ces dimensions dans le compositeur.
## Propriétés personnalisées {#custom-properties}
Vous pouvez utiliser les propriétés personnalisées de votre campagne de bannières pour récupérer des données clé-valeur via le SDK et modifier le comportement ou l'apparence de votre application. Par exemple, vous pourriez :
- Envoyer des métadonnées pour vos analyses ou intégrations tierces.
- Utiliser des métadonnées telles qu'un `timestamp` ou un objet JSON pour déclencher une logique conditionnelle.
- Contrôler le comportement d'une bannière en fonction des métadonnées incluses comme `ratio` ou `format`.
### Conditions préalables
Vous devez [ajouter des propriétés personnalisées](https://www.braze.com/docs/fr/fr/user_guide/channels/banners/create_a_banner/#custom-properties) à votre campagne de bannières. De plus, voici les versions minimales du SDK requises pour accéder aux propriétés personnalisées :
### Accéder aux propriétés personnalisées {#access-custom-properties}
Pour accéder aux propriétés personnalisées d'une bannière, utilisez l'une des méthodes suivantes en fonction du type de propriété défini dans le tableau de bord. Si la clé ne correspond pas à une propriété de ce type ou n'existe pas, la méthode renvoie `null`.
```javascript
// Returns the Banner instance
const banner = braze.getBanner("placement_id_homepage_top");
// banner may be undefined or null
if (banner) {
// Returns the string property
const stringProperty = banner.getStringProperty("color");
// Returns the boolean property
const booleanProperty = banner.getBooleanProperty("expanded");
// Returns the number property
const numberProperty = banner.getNumberProperty("height");
// Returns the timestamp property (as a number)
const timestampProperty = banner.getTimestampProperty("account_start");
// Returns the image URL property as a string of the URL
const imageProperty = banner.getImageProperty("homepage_icon");
// Returns the JSON object property
const jsonObjectProperty = banner.getJsonProperty("footer_settings");
}
```
```swift
// Passes the specified banner to the completion handler
AppDelegate.braze?.banners.getBanner(for: "placement_id_homepage_top") { banner in
// Returns the string property
let stringProperty: String? = banner.stringProperty(key: "color")
// Returns the boolean property
let booleanProperty: Bool? = banner.boolProperty(key: "expanded")
// Returns the number property as a double
let numberProperty: Double? = banner.numberProperty(key: "height")
// Returns the Unix UTC millisecond timestamp property as an integer
let timestampProperty: Int? = banner.timestampProperty(key: "account_start")
// Returns the image property as a String of the image URL
let imageProperty: String? = banner.imageProperty(key: "homepage_icon")
// Returns the JSON object property as a [String: Any] dictionary
let jsonObjectProperty: [String: Any]? = banner.jsonObjectProperty(key: "footer_settings")
}
```
```java
// Returns the Banner instance
Banner banner = Braze.getInstance(context).getBanner("placement_id_homepage_top");
// banner may be undefined or null
if (banner != null) {
// Returns the string property
String stringProperty = banner.getStringProperty("color");
// Returns the boolean property
Boolean booleanProperty = banner.getBooleanProperty("expanded");
// Returns the number property
Number numberProperty = banner.getNumberProperty("height");
// Returns the timestamp property (as a Long)
Long timestampProperty = banner.getTimestampProperty("account_start");
// Returns the image URL property as a String of the URL
String imageProperty = banner.getImageProperty("homepage_icon");
// Returns the JSON object property as a JSONObject
JSONObject jsonObjectProperty = banner.getJSONProperty("footer_settings");
}
```
```kotlin
// Returns the Banner instance
val banner: Banner = Braze.getInstance(context).getBanner("placement_id_homepage_top") ?: return
// Returns the string property
val stringProperty: String? = banner.getStringProperty("color")
// Returns the boolean property
val booleanProperty: Boolean? = banner.getBooleanProperty("expanded")
// Returns the number property
val numberProperty: Number? = banner.getNumberProperty("height")
// Returns the timestamp property (as a Long)
val timestampProperty: Long? = banner.getTimestampProperty("account_start")
// Returns the image URL property as a String of the URL
val imageProperty: String? = banner.getImageProperty("homepage_icon")
// Returns the JSON object property as a JSONObject
val jsonObjectProperty: JSONObject? = banner.getJSONProperty("footer_settings")
```
```javascript
// Get the Banner instance
const banner = await Braze.getBanner('placement_id_homepage_top');
if (!banner) return;
// Get the string property
const stringProperty = banner.getStringProperty('color');
// Get the boolean property
const booleanProperty = banner.getBooleanProperty('expanded');
// Get the number property
const numberProperty = banner.getNumberProperty('height');
// Get the timestamp property (as a number)
const timestampProperty = banner.getTimestampProperty('account_start');
// Get the image URL property as a string
const imageProperty = banner.getImageProperty('homepage_icon');
// Get the JSON object property
const jsonObjectProperty = banner.getJSONProperty('footer_settings');
```
```dart
// Fetch the banner asynchronously
_braze.getBanner(placementId).then(('placement_id_homepage_top') {
// Get the string property
final String? stringProperty = banner?.getStringProperty('color');
// Get the boolean property
final bool? booleanProperty = banner?.getBooleanProperty('expanded');
// Get the number property
final num? numberProperty = banner?.getNumberProperty('height');
// Get the timestamp property
final int? timestampProperty = banner?.getTimestampProperty('account_start');
// Get the image URL property
final String? imageProperty = banner?.getImageProperty('homepage_icon');
// Get the JSON object property
final Map? jsonObjectProperty = banner?.getJSONProperty('footer_settings');
// Use these properties as needed in your UI or logic
});
```
# Bannières de test
Source: /docs/fr/developer_guide/banners/testing/index.md
# Bannières de test {#test-banners}
> Découvrez comment tester votre message de bannière avant de lancer votre Campaign afin de vous assurer que tous les médias, le texte, la personnalisation et les attributs personnalisés s'affichent correctement. Pour plus d'informations générales, consultez la section [À propos des bannières](https://www.braze.com/docs/fr/fr/developer_guide/banners/).
## Conditions préalables {#prerequisites}
Avant de pouvoir tester les messages de bannière dans Braze, vous devez créer une [Campaign de bannière dans Braze](https://www.braze.com/docs/fr/fr/user_guide/channels/banners/create_a_banner/). Vérifiez également que l'emplacement que vous souhaitez tester est déjà [intégré dans votre application ou votre site web](https://www.braze.com/docs/fr/fr/developer_guide/banners/placements/).
Pour envoyer un test à des [groupes de test de contenu](https://www.braze.com/docs/fr/fr/user_guide/administrative/app_settings/developer_console/internal_groups_tab/#content-test-groups) ou à des utilisateurs individuels, les notifications push doivent être activées sur vos appareils de test et des jetons de notification push valides doivent être enregistrés pour l'utilisateur test avant l'envoi.
## Tester une bannière {#test-a-banner}
**Preview** to you preview your Banner or send a test message.
{: style="max-width:50%;"}
Keep in mind, your preview may not be identical to the final render on a user's device due to differences across hardware.
To send a test message, add either a content test group or one or more individual users as **Test Recipients**, then select **Send Test**. You'll be able to view your test message on the device for up to 5 minutes. You can then select **Copy preview link** to generate and copy a shareable preview link that shows what the banner will look like for a random user. The link will last for seven days before it needs to be regenerated.

While reviewing your test Banner, verify the following:
- Is your Banner campaign assigned to a placement?
- Do the images and media show up and act as expected on your targeted device types and screen sizes?
- Do your links and buttons direct the user to where they should go?
- Does the Liquid function as expected? Have you accounted for a default attribute value in the event that the Liquid returns no information?
- Is your copy clear, concise, and correct?
For more information, see [Send test messages](https://www.braze.com/docs/fr/fr/user_guide/messaging/messaging_fundamentals/sending_test_messages/).
# Analyse des bannières
Source: /docs/fr/developer_guide/banners/analytics/index.md
# Analyse des bannières
> Découvrez comment consulter les analyses/analytiques de vos bannières, notamment les détails de la campagne, les performances des messages et l'historique des performances. Pour plus d'informations générales, reportez-vous à la section [À propos des bannières](https://www.braze.com/docs/fr/fr/developer_guide/banners).
## Viewing analytics
Once you've launched your campaign, you can return to the details page for that campaign to view key metrics. Navigate to the **Campaigns** page and select your campaign to open the details page. For sent in Canvas, refer to [Canvas analytics](https://www.braze.com/docs/fr/fr/user_guide/engagement_tools/canvas/testing_canvases/measuring_and_testing_with_canvas_analytics/).
**Tip:**
Looking for definitions for the terms and metrics listed in your report? Refer to our
From the **Campaign Analytics** tab, you can view your reports in a series of panels. You may see more or less than those listed in the sections below, but each has its own useful purpose.
### Time range
By default, the time range for **Campaign Analytics** will display the last 90 days from the current time. This means that if the campaign was launched more than 90 days ago, the analytics will display as "0" for the given time range. To view all analytics for older campaigns, adjust the reporting time range.
### Campaign details
The **Campaign Details** panel shows a high-level overview of the entire performance for your
Review this panel to see overall metrics such as the number of messages sent to the number of recipients, the primary conversion rate, and the total revenue generated by this message. You can also review delivery, audience, and conversion settings from this page.
**Note:**
Analytics numbers in the dashboard and Snowflake may differ slightly. Braze measures numbers in the dashboard and records rows to Snowflake separately. Snowflake is the more precise data source, so if you see discrepancies between these sources, we recommend referring to Snowflake data.
#### Estimated Audience and Current Audience
Depending on how large your workspace is, the **Campaign Details** panel may label audience statistics **Estimated Audience** or **Current Audience**.
The following table summarizes what each label means.
| Footer label | When it is used |
| --- | --- |
| **Estimated Audience** | Braze does not run a full-database count by default. Audience size is estimated from a sample and extrapolated, similar to the **Reachable users** range in the segment builder. Margins of error are expected, especially for large workspaces or small segments as a share of the workspace. |
| **Current Audience** | Braze can compute the default statistic with a full scan of workspace profiles, so the displayed audience size is a current, unsampled count (still subject to channel reachability, subscription rules, and other targeting options). |
{: .reset-td-br-1 .reset-td-br-2 aria-label="Estimated Audience and Current Audience" }
For details on sampling behavior, **Calculate exact statistics**, and segmenting **Reachable users**, see [Measure segment size](https://www.braze.com/docs/fr/fr/user_guide/audience/segments/measuring_segment_size/).
#### Changes Since Last Viewed
The number of updates to the campaign from other members of your team is tracked by the *Changes Since Last Viewed* metric on the campaign overview page. Select **Changes Since Last Viewed** to view a changelog of updates to the campaign's name, schedule, tags, message, audience, approval status, or team access configuration. For each update, you can see who performed the update and when. You can use this changelog to audit changes to your campaign.
If you want to simplify your view, click **Add/Remove Columns** and clear any metrics as desired. By default, all metrics are displayed.
### Historical performance
The **Historical Performance** panel allows you to view the metrics from the **Message Performance** panel as a graph over time. Use the filters at the top of the panel to modify the stats and channels shown in the graph. The time range of this graph will always mirror the time range specified at the top of the page.
To get a day-by-day breakdown, click the hamburger menu and select **Download CSV** to receive a CSV export of the report.

### Conversion event details
The **Conversion Event Details** panel shows you the performance of your conversion events for your campaign. For more information, refer to [Conversion Events](https://www.braze.com/docs/fr/fr/user_guide/engagement_tools/campaigns/building_campaigns/conversion_events/#step-3-view-results).

### Conversion correlation
The **Conversion Correlation** panel gives you insight into what user attributes and behaviors help or hurt the outcomes you set for campaigns. For more information, refer to [Conversion correlation](https://www.braze.com/docs/fr/fr/user_guide/engagement_tools/testing/conversion_correlation/).

## Retention report
Retention reports show you the rates at which your users have performed a selected retention event over time periods in a specific campaign or Canvas. For more information, refer to [Retention reports](https://www.braze.com/docs/fr/fr/user_guide/analytics/reporting/retention_reports/).
## Funnel report
Funnel reporting offers a visual report that allows you to analyze the journeys your customers take after receiving a campaign or Canvas. If your campaign or Canvas uses a control group or multiple variants, you will be able to understand how the different variants have impacted the conversion funnel at a more granular level and optimize based on this data.
For more information, refer to [Funnel reports](https://www.braze.com/docs/fr/fr/user_guide/analytics/reporting/funnel_reports/).
# Migration des Content Cards vers les bannières
Source: /docs/fr/developer_guide/banners/migrating_from_content_cards/index.md
# Migration des Content Cards vers les bannières {#migrate-from-content-cards-to-banners}
> Ce guide vous accompagne dans la migration des Content Cards vers les bannières pour les cas d'utilisation d'envoi de messages de type bannière. Les bannières sont idéales pour les messages in-app persistants, intégrés dans vos applications et sur le Web, qui apparaissent à des emplacements spécifiques dans votre application.
## Pourquoi migrer vers les bannières ? {#why-migrate-to-banners}
- Si votre équipe d'ingénieurs crée ou maintient des Content Cards personnalisées, la migration vers les bannières peut réduire cet investissement continu. Les bannières permettent aux marketeurs de contrôler directement l'interface utilisateur, libérant ainsi les développeurs pour d'autres tâches.
- Si vous lancez de nouveaux messages sur la page d'accueil, des flux d'onboarding ou des annonces persistantes, commencez par les bannières plutôt que de créer des Content Cards. Vous bénéficierez d'une personnalisation en temps réel, sans expiration après 30 jours, sans limite de taille et avec une priorisation native dès le premier jour.
- Si vous contournez la limite d'expiration de 30 jours, gérez une logique de rééligibilité complexe ou êtes confronté à une personnalisation obsolète, les bannières résolvent ces problèmes de manière native.
Les bannières présentent plusieurs avantages par rapport aux Content Cards pour l'envoi de messages de type bannière :
### Production accélérée {#accelerated-production}
- **Réduction du soutien technique continu requis** : Les marketeurs peuvent créer des messages personnalisés à l'aide d'un éditeur par glisser-déposer et de code HTML personnalisé, sans avoir besoin de l'aide d'un développeur pour la personnalisation.
- **Options de personnalisation flexibles** : Concevez directement dans l'éditeur, utilisez le HTML ou exploitez les modèles de données existants avec des propriétés personnalisées.
### Une meilleure expérience utilisateur {#better-ux}
- **Mises à jour dynamiques du contenu** : Les bannières actualisent la logique Liquid et l'éligibilité à chaque actualisation, garantissant ainsi que les utilisateurs voient toujours le contenu le plus pertinent.
- **Prise en charge native des emplacements** : Les messages apparaissent dans des contextes spécifiques plutôt que dans un fil d'actualité, ce qui améliore la pertinence contextuelle.
- **Priorisation native** : Contrôle de l'ordre d'affichage sans logique personnalisée, facilitant la gestion de la hiérarchie des messages.
### Persistance {#persistence}
- **Aucune limite d'expiration** : Les campagnes de bannières n'ont pas de limite d'expiration de 30 jours comme les Content Cards, ce qui permet une véritable persistance des messages.
## Quand migrer {#when-to-migrate}
Envisagez la migration vers les bannières si vous utilisez les Content Cards pour :
- Des héros de page d'accueil, des promotions sur les pages produits, des offres à la caisse
- Des annonces de navigation persistantes ou des messages dans la barre latérale
- Des messages permanents diffusés pendant plus de 30 jours
- Des messages pour lesquels vous souhaitez une personnalisation et une éligibilité en temps réel
## Quand conserver les Content Cards {#when-to-keep-content-cards}
Continuez à utiliser les Content Cards si vous avez besoin de :
- **Expériences de fil d'actualité :** Tout cas d'utilisation impliquant plusieurs messages défilables ou une « boîte de réception » sous forme de cartes.
- **Fonctionnalités spécifiques :** Les messages qui nécessitent du contenu connecté ou des codes promotionnels, car les bannières ne les prennent pas en charge de manière native.
- **Livraison par événement :** Cas d'utilisation nécessitant strictement une réception déclenchée par API ou une livraison par événement. Bien que les bannières ne prennent pas en charge la réception déclenchée par API ou la livraison par événement, l'évaluation d'éligibilité en temps réel signifie que les utilisateurs sont instantanément qualifiés ou disqualifiés en fonction de leur appartenance à un Segment à chaque actualisation.
## Guide de migration {#migration-guide}
### Conditions préalables {#prerequisites}
Avant de procéder à la migration, assurez-vous que votre SDK Braze répond aux exigences minimales en matière de version :
### S'abonner aux mises à jour {#subscribe-to-updates}
#### Approche par Content Cards {#content-cards-approach}
```javascript
import * as braze from "@braze/web-sdk";
braze.subscribeToContentCardsUpdates((cards) => {
// Handle array of cards
cards.forEach(card => {
console.log("Card:", card.id);
});
});
```
```kotlin
Braze.getInstance(context).subscribeToContentCardsUpdates { cards ->
// Handle array of cards
cards.forEach { card ->
Log.d(TAG, "Card: ${card.id}")
}
}
```
```swift
braze.contentCards.subscribeToUpdates { cards in
// Handle array of cards
for card in cards {
print("Card: \(card.id)")
}
}
```
```javascript
Braze.addListener(Braze.Events.CONTENT_CARDS_UPDATED, (update) => {
const cards = update.cards;
// Handle array of cards
cards.forEach(card => {
console.log("Card:", card.id);
});
});
```
```dart
StreamSubscription contentCardsStreamSubscription = braze.subscribeToContentCards((List contentCards) {
// Handle array of cards
for (final card in contentCards) {
print("Card: ${card.id}");
}
});
```
#### Approche par bannières {#banners-approach}
```javascript
import * as braze from "@braze/web-sdk";
braze.subscribeToBannersUpdates((banners) => {
// Get banner for specific placement
const banner = braze.getBanner("sample_placement_id");
if (banner) {
console.log("Banner received for placement:", banner.placementId);
}
});
```
```kotlin
Braze.getInstance(context).subscribeToBannersUpdates { update ->
// Get banner for specific placement
val banner = Braze.getInstance(context).getBanner("sample_placement_id")
if (banner != null) {
Log.d(TAG, "Banner received for placement: ${banner.placementId}")
}
}
```
```swift
braze.banners.subscribeToUpdates { banners in
// Get banner for specific placement
braze.banners.getBanner(for: "sample_placement_id") { banner in
guard let banner = banner else { return }
print("Banner received for placement: \(banner.placementId)")
}
}
```
```javascript
Braze.addListener(Braze.Events.BANNER_CARDS_UPDATED, (data) => {
const banners = data.banners;
// Get banner for specific placement
Braze.getBanner("sample_placement_id").then(banner => {
if (banner) {
console.log("Banner received for placement:", banner.placementId);
}
});
});
```
```dart
StreamSubscription bannerStreamSubscription = braze.subscribeToBanners((List banners) {
// Get banner for specific placement
braze.getBanner("sample_placement_id").then((banner) {
if (banner != null) {
print("Banner received for placement: ${banner.placementId}");
}
});
});
```
### Afficher le contenu {#display-content}
**Note:**
Les Content Cards peuvent être rendues manuellement à l'aide d'une logique d'interface utilisateur personnalisée, tandis que les bannières ne peuvent être rendues qu'à l'aide des méthodes SDK prêtes à l'emploi.
#### Approche par Content Cards
```javascript
// Show default feed UI
braze.showContentCards(document.getElementById("feed"));
// Or manually render cards
const cards = braze.getCachedContentCards();
cards.forEach(card => {
// Custom rendering logic
if (card instanceof braze.ClassicCard) {
// Render classic card
}
});
```
```kotlin
// Using default fragment
val fragment = ContentCardsFragment()
supportFragmentManager.beginTransaction()
.replace(R.id.content_cards_container, fragment)
.commit()
// Or manually render cards
val cards = Braze.getInstance(context).getCachedContentCards()
cards.forEach { card ->
when (card) {
is ClassicCard -> {
// Render classic card
}
}
}
```
```swift
// Using default view controller
let contentCardsController = BrazeContentCardUI.ViewController(braze: braze)
navigationController?.pushViewController(contentCardsController, animated: true)
// Or manually render cards
let cards = braze.contentCards.cards
for card in cards {
switch card {
case let card as Braze.ContentCard.Classic:
// Render classic card
default:
break
}
}
```
```javascript
// Launch default feed
Braze.launchContentCards();
// Or manually render cards
const cards = await Braze.getContentCards();
cards.forEach(card => {
if (card.type === 'CLASSIC') {
// Render classic card
}
});
```
```dart
// Launch default feed
braze.launchContentCards();
// Or manually render cards
final cards = await braze.getContentCards();
for (final card in cards) {
if (card.type == 'CLASSIC') {
// Render classic card
}
}
```
#### Approche par bannières
```javascript
braze.subscribeToBannersUpdates((banners) => {
const banner = braze.getBanner("sample_placement_id");
if (!banner) {
return;
}
const container = document.getElementById("global-banner-container");
braze.insertBanner(banner, container);
if (banner.isControl) {
container.style.display = "none";
}
});
braze.requestBannersRefresh(["sample_placement_id"]);
```
```kotlin
// Using BannerView in XML
//
// Or programmatically
val bannerView = BannerView(context).apply {
placementId = "sample_placement_id"
}
container.addView(bannerView)
Braze.getInstance(context).requestBannersRefresh(listOf("sample_placement_id"))
```
```swift
// Using BannerUIView
let bannerView = BrazeBannerUI.BannerUIView(
placementId: "sample_placement_id",
braze: braze,
processContentUpdates: { result in
switch result {
case .success(let updates):
if let height = updates.height {
// Update height constraint
}
case .failure:
break
}
}
)
view.addSubview(bannerView)
braze.banners.requestBannersRefresh(placementIds: ["sample_placement_id"])
```
```javascript
// Using BrazeBannerView component
// Or get banner data
const banner = await Braze.getBanner("sample_placement_id");
if (banner) {
// Render custom banner UI
}
Braze.requestBannersRefresh(["sample_placement_id"]);
```
```dart
// Using BrazeBannerView widget
BrazeBannerView(
placementId: "sample_placement_id",
)
// Or get banner data
final banner = await braze.getBanner("sample_placement_id");
if (banner != null) {
// Render custom banner UI
}
braze.requestBannersRefresh(["sample_placement_id"]);
```
### Journalisation des analyses (implémentations personnalisées) {#log-analytics-custom-implementations}
**Note:**
Les Content Cards et les bannières effectuent automatiquement le suivi des analyses lorsqu'elles utilisent leurs composants d'interface utilisateur par défaut. Les exemples ci-dessous concernent des implémentations personnalisées dans lesquelles vous créez votre propre interface utilisateur.
#### Approche par Content Cards
```javascript
// Manual impression logging required for custom implementations
cards.forEach(card => {
braze.logContentCardImpressions([card]);
});
// Manual click logging required for custom implementations
card.logClick();
```
```kotlin
// Manual impression logging required for custom implementations
cards.forEach { card ->
card.logImpression()
}
// Manual click logging required for custom implementations
card.logClick()
```
```swift
// Manual impression logging required for custom implementations
for card in cards {
card.context?.logImpression()
}
// Manual click logging required for custom implementations
card.context?.logClick()
```
```javascript
// Manual impression logging required for custom implementations
cards.forEach(card => {
Braze.logContentCardImpression(card.id);
});
// Manual click logging required for custom implementations
Braze.logContentCardClicked(card.id);
```
```dart
// Manual impression logging required for custom implementations
for (final card in cards) {
braze.logContentCardImpression(card);
}
// Manual click logging required for custom implementations
braze.logContentCardClicked(card);
```
#### Approche par bannières
**Important:**
Les analyses sont automatiquement suivies lors de l'utilisation de `insertBanner()`. La journalisation manuelle ne doit pas être utilisée avec `insertBanner()`.
```javascript
// Analytics are automatically tracked when using insertBanner()
// Manual logging should not be used when using insertBanner()
// For custom implementations, use manual logging methods:
// Log impression
braze.logBannerImpressions([banner]);
// Log click (with optional buttonId)
braze.logBannerClick("sample_placement_id", buttonId);
```
**Important:**
Les analyses sont automatiquement suivies lorsque vous utilisez BannerView. La journalisation manuelle ne doit pas être utilisée avec BannerView.
```kotlin
// Analytics are automatically tracked when using BannerView
// Manual logging should not be used for default BannerView
// For custom implementations, use manual logging methods:
// Log impression
Braze.getInstance(context).logBannerImpression("sample_placement_id");
// Log click (with optional buttonId)
Braze.getInstance(context).logBannerClick("sample_placement_id", buttonId);
```
**Important:**
Les analyses sont automatiquement suivies lors de l'utilisation de BannerUIView. La journalisation manuelle ne doit pas être utilisée pour BannerUIView par défaut.
```swift
// Analytics are automatically tracked when using BannerUIView
// Manual logging should not be used for default BannerUIView
// For custom implementations, use manual logging methods:
// Get banner for specific placement
braze.banners.getBanner(for: "sample_placement_id") { banner in
guard let banner = banner else { return }
// Log impression
banner.context?.logImpression()
// Log click (with optional buttonId)
banner.context?.logClick(buttonId: buttonId)
}
// Control groups are automatically handled by BannerUIView
```
**Important:**
Les analyses sont automatiquement suivies lors de l'utilisation de BrazeBannerView. Aucune journalisation manuelle n'est nécessaire.
```javascript
// Analytics are automatically tracked when using BrazeBannerView
// No manual logging required
// Note: Manual logging methods for Banners are not yet supported in React Native
// Control groups are automatically handled by BrazeBannerView
```
**Important:**
Les analyses sont automatiquement suivies lors de l'utilisation de BrazeBannerView. Aucune journalisation manuelle n'est nécessaire.
```dart
// Analytics are automatically tracked when using BrazeBannerView
// No manual logging required
// Note: Manual logging methods for Banners are not yet supported in Flutter
// Control groups are automatically handled by BrazeBannerView
```
### Récupération des propriétés {#getting-properties}
#### Approche par Content Cards
```javascript
cards.forEach(card => {
console.log("Card id:", card.id, "Extras:", card.extras);
});
```
```kotlin
cards.forEach { card ->
Log.d(TAG, "Card id: ${card.id} Extras: ${card.extras}")
}
```
```swift
for card in cards {
print("Card id: \(card.id) Extras: \(card.extras)")
}
```
```javascript
cards.forEach(card => {
console.log("Card id:", card.id, "Extras:", card.extras);
});
```
```dart
for (final card in cards) {
print("Card id: ${card.id} Extras: ${card.extras}");
}
```
#### Approche par bannières
```javascript
const banner = braze.getBanner("sample_placement_id");
if (!banner) {
return;
}
console.log("Banner placement:", banner.placementId, "Properties:", banner.properties);
```
```kotlin
val banner = Braze.getInstance(context).getBanner("sample_placement_id")
if (banner != null) {
Log.d(TAG, "Banner placement: ${banner.placementId} Properties: ${banner.properties}")
}
```
```swift
braze.banners.getBanner(for: "sample_placement_id") { banner in
guard let banner = banner else { return }
print("Banner placement: \(banner.placementId) Properties: \(banner.properties)")
}
```
```javascript
const banner = await Braze.getBanner("sample_placement_id");
if (banner) {
console.log("Banner placement:", banner.placementId, "Properties:", banner.properties);
}
```
```dart
final banner = await braze.getBanner("sample_placement_id");
if (banner != null) {
print("Banner placement: ${banner.placementId} Properties: ${banner.properties}");
}
```
### Gestion des groupes de contrôle {#handling-control-groups}
#### Approche par Content Cards
```javascript
cards.forEach(card => {
if (card.isControl) {
// Logic for control cards ie. don't display but log analytics
} else {
// Logic for cards ie. render card
}
});
```
```kotlin
cards.forEach { card ->
if (card.isControl) {
// Logic for control cards ie. don't display but log analytics
} else {
// Logic for cards ie. render card
}
}
```
```swift
for card in cards {
if card.isControl {
// Logic for control cards ie. don't display but log analytics
} else {
// Logic for cards ie. render card
}
}
```
```javascript
cards.forEach(card => {
if (card.isControl) {
// Logic for control cards ie. don't display but log analytics
} else {
// Logic for cards ie. render card
}
});
```
```dart
for (final card in cards) {
if (card.isControl) {
// Logic for control cards ie. don't display but log analytics
} else {
// Logic for cards ie. render card
}
}
```
#### Approche par bannières
```javascript
braze.subscribeToBannersUpdates((banners) => {
const banner = braze.getBanner("sample_placement_id");
if (!banner) {
return;
}
const container = document.getElementById("global-banner-container");
// Always call insertBanner to track impression (including control)
braze.insertBanner(banner, container);
// Hide if control group
if (banner.isControl) {
container.style.display = "none";
}
});
```
```kotlin
// BannerView automatically handles control groups
// No additional code needed
val bannerView = BannerView(context).apply {
placementId = "sample_placement_id"
}
```
```swift
// BannerUIView automatically handles control groups
// No additional code needed
let bannerView = BrazeBannerUI.BannerUIView(
placementId: "sample_placement_id",
braze: braze
)
```
```javascript
// BrazeBannerView automatically handles control groups
// No additional code needed
```
```dart
// BrazeBannerView automatically handles control groups
// No additional code needed
BrazeBannerView(
placementId: "sample_placement_id",
)
```
## Limitations {#limitations}
Lors de la migration des Content Cards vers les bannières, tenez compte des limitations suivantes :
### Migration des messages déclenchés {#migrating-triggered-messages}
Les bannières ne prennent en charge que les campagnes avec planification. Pour migrer un message précédemment déclenché par API ou par événement, convertissez-le en ciblage basé sur un Segment :
- **Exemple :** Au lieu de déclencher une carte « Compléter le profil » via l'API, créez un Segment pour les utilisateurs inscrits au cours des 7 derniers jours mais n'ayant pas encore complété leur profil.
- **Éligibilité en temps réel :** Les utilisateurs sont instantanément qualifiés ou disqualifiés pour la bannière à chaque actualisation, en fonction de leur appartenance à un Segment.
### Différences de fonctionnalités {#feature-differences}
| Fonctionnalité | Content Cards | Bannières |
|---------|--------------|---------|
| **Structure du contenu** |
| Plusieurs cartes dans le flux | ✅ Pris en charge | ✅ Permet de créer plusieurs emplacements pour obtenir une implémentation de type carrousel. Une seule bannière est renvoyée par emplacement. |
| Emplacements multiples | S.O. | ✅ Prise en charge de plusieurs emplacements |
| Types de cartes (classique, avec légende, image uniquement) | ✅ Plusieurs types prédéfinis | ✅ Bannière HTML unique (plus flexible) |
| **Gestion du contenu** |
| Éditeur par glisser-déposer | ❌ Nécessite l'intervention d'un développeur pour la personnalisation | ✅ Les marketeurs peuvent créer/mettre à jour sans intervention technique |
| HTML/CSS personnalisé | ❌ Limité à la structure de la carte | ✅ Prise en charge complète HTML/CSS |
| Paires clé-valeur pour la personnalisation | ✅ Nécessaire pour une personnalisation avancée | ✅ Paires clé-valeur fortement typées appelées « propriétés » pour une personnalisation avancée |
| **Persistance et expiration** |
| Expiration de la carte | ✅ Pris en charge (limite de 30 jours) | ✅ Pris en charge (sans limite d'expiration) |
| Véritable persistance | ❌ Maximum de 30 jours | ✅ Persistance illimitée |
| **Affichage et ciblage** |
| Interface utilisateur du flux | ✅ Flux par défaut disponible | ❌ Basé uniquement sur l'emplacement |
| Placement contextuel | ❌ Basé sur le flux | ✅ Prise en charge native des emplacements |
| Priorisation native | ❌ Nécessite une logique personnalisée | ✅ Priorisation intégrée |
| **Interaction utilisateur** |
| Fermeture manuelle | ✅ Pris en charge | ❌ Non pris en charge |
| Cartes épinglées | ✅ Pris en charge | S.O. |
| **Analyse** |
| Analyses automatiques (interface utilisateur par défaut) | ✅ Pris en charge | ✅ Pris en charge |
| Tri par priorité | ❌ Non pris en charge | ✅ Pris en charge |
| **Mises à jour du contenu** |
| Actualisation du modèle Liquid | ❌ Une seule fois par carte lors de l'envoi/du lancement | ✅ Actualisé à chaque rafraîchissement |
| Actualisation de l'éligibilité | ❌ Une seule fois par carte lors de l'envoi/du lancement | ✅ Actualisé à chaque session |
{: .reset-td-br-1 .reset-td-br-2 .reset-td-br-3 aria-label="Différences de fonctionnalités" }
### Limites du produit {#product-limitations}
- Jusqu'à 25 messages actifs par emplacement.
- Jusqu'à 10 ID d'emplacement par demande d'actualisation ; les demandes au-delà de cette limite sont tronquées.
### Limitations du SDK {#sdk-limitations}
- Les bannières ne sont actuellement pas prises en charge sur les plateformes .NET MAUI (Xamarin), Cordova, Unity, Vega ou TV.
- Assurez-vous d'utiliser les versions minimales du SDK indiquées dans les conditions préalables.
## Articles connexes {#related-articles}
- [Emplacements des bannières](https://www.braze.com/docs/fr/fr/developer_guide/banners/placements/)
- [Tutoriel : Afficher une bannière par ID d'emplacement](https://www.braze.com/docs/fr/fr/developer_guide/banners/tutorial_displaying_banners/)
- [Analyse des bannières](https://www.braze.com/docs/fr/fr/developer_guide/banners/analytics/)
- [FAQ sur les bannières](https://www.braze.com/docs/fr/fr/developer_guide/banners/faq/)
# Tutoriel : Affichage d'une bannière par ID de placement
Source: /docs/fr/developer_guide/banners/tutorial_displaying_banners/index.md
# Tutoriel : Affichage d'une bannière par ID de placement
> Suivez l'exemple de code de ce tutoriel pour afficher les bannières à l'aide de leur ID de placement. Pour plus d'informations générales, voir [Bannières](https://www.braze.com/docs/fr/fr/developer_guide/banners/).
## Prerequisites
Before you can start this tutorial, verify that your Braze SDK meets the minimum version requirements:
## Displaying banners for the Web SDK
**Important:**
We're piloting this new tutorial format. [Tell us what you think](https://docs.google.com/forms/d/e/1FAIpQLSe_5uhWM7eXXk9F_gviO_pvA4rkYO3WA9B6tNJZ3TY91md5bw/viewform?usp=pp_url&entry.569173304=General+Feedback) — your feedback helps us improve future guides.
```js file=index.js
import * as braze from "@braze/web-sdk";
braze.initialize("YOUR-API-KEY", {
baseUrl: "YOUR-ENDPOINT",
enableLogging: true,
});
braze.subscribeToBannersUpdates((banners) => {
// Get this placement's banner. If it's `null`, the user did not qualify for any banners.
const globalBanner = braze.getBanner("global_banner");
if (!globalBanner) {
return;
}
const container = document.getElementById("global-banner-container");
braze.insertBanner(globalBanner, container);
if (globalBanner.isControl) {
// Hide or collapse the container
container.style.display = "none";
}
});
braze.requestBannersRefresh(["global_banner", "navigation_square_banner"]);
```
```html file=main.html
```
!!step
lines-index.js=5
#### 1. Enable debugging (optional)
To make troubleshooting easier while developing, consider enabling debugging.
!!step
lines-index.js=8-23
#### 2. Subscribe to Banner updates
Use `subscribeToBannersUpdates()` to register a handler that runs whenever a Banner is updated. Inside the handler, call `braze.getBanner("global_banner")` to get the latest placement.
!!step
lines-index.js=15-22
#### 3. Insert the Banner and handle control groups
Use `braze.insertBanner(banner, container)` to insert a Banner when it's returned. To ensure keep your layout clean, hide or collapse Banners that are apart of a control group (for example, when `isControl` is `true`).
!!step
lines-index.js=25
#### 4. Refresh your Banners
After initializing the SDK, call `requestBannersRefresh(["global_banner", ...])` to ensure that Banners are refreshed at the start of each session.
You can also call this function at any time to refresh Banner placements later.
!!step
lines-main.html=3
#### 5. Add a container for your Banner
In your HTML, add a new `
` element and give it a short, Banner-related `id`, such as `global-banner-container`. Braze will use this `
` to insert your Banner into the page.
## Prerequisites
Before you can start this tutorial, verify that your Braze SDK meets the minimum version requirements:
## Displaying banners for the Android SDK
**Important:**
We're piloting this new tutorial format. [Tell us what you think](https://docs.google.com/forms/d/e/1FAIpQLSe_5uhWM7eXXk9F_gviO_pvA4rkYO3WA9B6tNJZ3TY91md5bw/viewform?usp=pp_url&entry.569173304=General+Feedback) — your feedback helps us improve future guides.
```kotlin file=MainApplication.kt
import android.app.Application
import android.util.Log
import com.braze.Braze
import com.braze.configuration.BrazeConfig
import com.braze.support.BrazeLogger
public class MainApplication : Application() {
override fun onCreate() {
super.onCreate()
// Turn on verbose Braze logging
BrazeLogger.logLevel = Log.VERBOSE
// Configure Braze with your SDK key and endpoint
val config = BrazeConfig.Builder()
.setApiKey("YOUR-API-KEY")
.setCustomEndpoint("YOUR-ENDPOINT")
.build()
Braze.configure(this, config)
// Subscribe to Banner updates
Braze.getInstance(this)
.subscribeToBannersUpdates { update ->
for (banner in update.banners) {
Log.d("brazeBanners", "Received banner for placement: ${banner.placementId}")
// Add any custom banner logic you'd like
}
}
}
}
```
```kotlin file=MainActivity.kt
import android.os.Bundle
import androidx.activity.ComponentActivity
class MainActivity : ComponentActivity() {
override fun onCreate(savedInstanceState: Bundle?) {
super.onCreate(savedInstanceState)
// Inflate the XML layout
setContentView(R.layout.banners)
// Refresh placements
Braze.getInstance(this)
.requestBannersRefresh(
listOf("top-1")
)
}
}
```
```xml file=banners.xml
```
!!step
lines-MainApplication.kt=12
#### 1. Enable debugging (optional)
To make troubleshooting easier while developing, consider enabling debugging.
!!step
lines-MainApplication.kt=21-28
#### 2. Subscribe to Banner updates
Use `subscribeToBannersUpdates()` to register a handler that runs whenever a Banner is updated.
!!step
lines-MainActivity.kt=10-14
#### 3. Refresh your placements
After initializing the Braze SDK, call `requestBannersRefresh(["PLACEMENT_ID"])` to fetch the latest Banner content for that placement.
!!step
lines-banners.xml=15-19
#### 4. Define `BannerView` in your `banners.xml`
In `banners.xml`, declare a `` element with `app:placementId="PLACEMENT_ID"`. Braze will use this element to insert your Banner into your UI.
## Prerequisites
Before you can start this tutorial, verify that your Braze SDK meets the minimum version requirements:
## Displaying banners for the Swift SDK
**Important:**
We're piloting this new tutorial format. [Tell us what you think](https://docs.google.com/forms/d/e/1FAIpQLSe_5uhWM7eXXk9F_gviO_pvA4rkYO3WA9B6tNJZ3TY91md5bw/viewform?usp=pp_url&entry.569173304=General+Feedback) — your feedback helps us improve future guides.
```swift file=AppDelegate.swift
import UIKit
import BrazeKit
import BrazeUI
class AppDelegate: UIResponder, UIApplicationDelegate {
static var braze: Braze? = nil
func application(
_ application: UIApplication,
didFinishLaunchingWithOptions launchOptions: [UIApplication.LaunchOptionsKey: Any]?
) -> Bool {
// Braze configuration with your SDK API key and endpoint
let configuration = Braze.Configuration(apiKey: "YOUR-API-TOKEN", endpoint: "YOUR-ENDPOINT")
configuration.logger.level = .debug
// Initialize Braze SDK instance
AppDelegate.braze = Braze(configuration: configuration)
// Request a banners refresh
AppDelegate.braze?.banners.requestBannersRefresh(placementIds: ["top-1"])
return true
}
}
```
```swift file=SampleApp.swift
import SwiftUI
@main
struct SampleApp: App {
// Bind the AppDelegate into the SwiftUI lifecycle
@UIApplicationDelegateAdaptor(AppDelegate.self) var delegate
var body: some Scene {
WindowGroup {
ContentView()
}
}
}
```
```swift file=BannerViewController.swift
import UIKit
import BrazeKit
import BrazeUI
final class BannerViewController: UIViewController {
static let bannerPlacementID = "top-1"
var bannerHeightConstraints: NSLayoutConstraint?
lazy var contentView: UILabel = {
let contentView = UILabel()
contentView.text = "Your Content Here"
contentView.textAlignment = .center
contentView.translatesAutoresizingMaskIntoConstraints = false
return contentView
}()
lazy var bannerView: BrazeBannerUI.BannerUIView = {
var bannerView = BrazeBannerUI.BannerUIView(
placementId: BannerViewController.bannerPlacementID,
braze: AppDelegate.braze!,
processContentUpdates: { [weak self] result in
// Update layout properties when banner content has finished loading.
DispatchQueue.main.async {
guard let self else { return }
switch result {
case .success(let updates):
if let height = updates.height {
self.bannerView.isHidden = false
self.bannerHeightConstraint?.constant = min(height, 80)
}
case .failure(let error):
return
}
}
}
)
bannerView.translatesAutoresizingMaskIntoConstraints = false
bannerView.isHidden = true
return bannerView
}()
override func viewDidLoad() {
super.viewDidLoad()
self.view.addSubview(contentView)
self.view.addSubview(bannerView)
bannerHeightConstraint = bannerView.heightAnchor.constraint(equalToConstant: 0)
NSLayoutConstraint.activate([
contentView.topAnchor.constraint(equalTo: self.view.safeAreaLayoutGuide.topAnchor),
contentView.leadingAnchor.constraint(equalTo: self.view.safeAreaLayoutGuide.leadingAnchor),
contentView.trailingAnchor.constraint(equalTo: self.view.safeAreaLayoutGuide.trailingAnchor),
bannerView.topAnchor.constraint(equalTo: self.contentView.bottomAnchor),
bannerView.leadingAnchor.constraint(equalTo: self.view.safeAreaLayoutGuide.leadingAnchor),
bannerView.trailingAnchor.constraint(equalTo: self.view.safeAreaLayoutGuide.trailingAnchor),
bannerView.bottomAnchor.constraint(equalTo: self.view.safeAreaLayoutGuide.bottomAnchor),
bannerHeightConstraint!,
])
}
}
```
!!step
lines-AppDelegate.swift=14
#### 1. Enable debugging (optional)
To make troubleshooting easier while developing, consider enabling debugging.
!!step
lines-AppDelegate.swift=20
#### 2. Refresh your placements
After initializing the Braze SDK, `call requestBannersRefresh(placementIds: ["PLACEMENT_ID"])` to refresh Banner content at the start of each session.
!!step
lines-BannerViewController.swift=19-37
#### 3. Initialize the Banner and provide a callback
Create a `BrazeBannerUI.BannerUIView` instance with your Braze object and placement ID, and provide a `processContentUpdates` callback to unhide the Banner and update its height constraint based on the provided content height.
!!step
lines-BannerViewController.swift=38-40
#### 4. Enable Auto Layout constraints
Hide the Banner view by default, then disable autoresizing mask translation to enable Auto Layout constraints.
!!step
lines-BannerViewController.swift=43-58
#### 5. Anchor content and set height constraints
Anchor your main content to the top using Auto Layout, and place the Banner view directly below it. Pin the Banner’s leading, trailing, and bottom edges to the safe area, and set an initial height constraint of `0` that will be updated when content loads.
```swift file=AppDelegate.swift
import BrazeKit
import BrazeUI
class AppDelegate: UIResponder, UIApplicationDelegate {
static var braze: Braze? = nil
func application(
_ application: UIApplication,
didFinishLaunchingWithOptions launchOptions: [UIApplication.LaunchOptionsKey: Any]?
) -> Bool {
// Braze configuration with your SDK API key and endpoint
let configuration = Braze.Configuration(apiKey: "YOUR-API-TOKEN", endpoint: "YOUR-ENDPOINT")
configuration.logger.level = .debug
// Initialize Braze SDK instance
AppDelegate.braze = Braze(configuration: configuration)
// Request a banners refresh
AppDelegate.braze?.banners.requestBannersRefresh(placementIds: ["top-1"])
return true
}
}
```
```swift file=SampleApp.swift
import SwiftUI
@main
struct SampleApp: App {
// Bind the AppDelegate into the SwiftUI lifecycle
@UIApplicationDelegateAdaptor(AppDelegate.self) var delegate
var body: some Scene {
WindowGroup {
BannerSwiftUIView()
}
}
}
```
```swift file=BannerSwiftUIView.swift
import BrazeKit
import BrazeUI
import SwiftUI
@available(iOS 13.0, *)
struct BannerSwiftUIView: View {
static let bannerPlacementID = "top-1"
@State var hasBannerForPlacement: Bool = false
@State var contentHeight: CGFloat = 0
var body: some View {
VStack {
Text("Your Content Here")
.frame(maxWidth: .infinity, maxHeight: .infinity)
if let braze = AppDelegate.braze,
hasBannerForPlacement
{
BrazeBannerUI.BannerView(
placementId: BannerSwiftUIView.bannerPlacementID,
braze: braze,
processContentUpdates: { result in
switch result {
case .success(let updates):
if let height = updates.height {
self.contentHeight = height
}
case .failure:
return
}
}
)
.frame(height: min(contentHeight, 80))
}
}.onAppear {
AppDelegate.braze?.banners.getBanner(
for: BannerSwiftUIView.bannerPlacementID,
{ banner in
hasBannerForPlacement = banner != nil
}
)
}
}
}
```
!!step
lines-AppDelegate.swift=13
#### 1. Enable debugging (optional)
To make troubleshooting easier while developing, consider enabling debugging.
!!step
lines-AppDelegate.swift=19
#### 2. Refresh your placements
After initializing the Braze SDK, call `requestBannersRefresh(placementIds: ["PLACEMENT_ID"])` to refresh Banner content at the start of each session.
!!step
lines-BannerSwiftUIView.swift=1-46
#### 3. Create a view component
Create a reusable SwiftUI view component that displays available Banners and contains your main app content if needed.
!!step
lines-BannerSwiftUIView.swift=36-43
#### 4. Only display available Banners
Only attempt to show `BrazeBannerUI.BannerView` if the SDK is initialized and Banner content exists for that user. In `.onAppear`, call `getBanner(for:placementID)` to set the state of `hasBannerForPlacement`.
!!step
lines-BannerSwiftUIView.swift=17-32
#### 5. Only show `BannerView` after it loads
To avoid blank space in your UI, only show `BrazeBannerUI.BannerView` if a Banner is present and the SDK is initialized.
!!step
lines-BannerSwiftUIView.swift=23-32
#### 6. Dynamically update Banner height
Use the `processContentUpdates` callback to fetch the Banner’s content height as soon as it loads. Update your SwiftUI state (`contentHeight`) and apply a `.frame(height:)` constraint using the provided height.
!!step
lines-BannerSwiftUIView.swift=34
#### 7. Limit the Banner height
To ensure your Banner never exceeds the maximum height, apply a `.frame(height: min(contentHeight, 80))` modifier. This will keep your UI visually balanced regardless of the Banner's content.
# Bannières : Foire aux questions
Source: /docs/fr/developer_guide/banners/faq/index.md
# Frequently asked questions
> These are answers to frequently asked questions about Banners in Braze. For more general information, see [About Banners]().
## When do Banner updates appear for users?
Banners are refreshed with their latest data whenever you call the refresh method—there's no need to resend or update your Banner campaign.
## How many placements can I request in a session?
In a single refresh request, you can request a maximum of 10 placements. For each one you request, Braze will return the highest-priority Banner a user is eligible for. Additional requests will return an error.
For more information, see [Placement requests]().
## How many Banner campaigns can be active simultaneously?
Each workspace can support up to 200 active Banner campaigns. If this limit is reached, you'll need to [archive or deactivate](https://www.braze.com/docs/fr/fr/user_guide/engagement_tools/messaging_fundamentals/about_statuses/#changing-the-status) an existing campaign before creating a new one.
## For campaigns sharing a placement, which Banner is displayed first?
If a user qualifies for multiple Banner campaigns that share the same placement, the Banner with the highest priority will be displayed. For more information, see [Banner priority]().
## Can I use Banners in my existing Content Card feed?
Banners are different from Content Cards, meaning you can’t use Banners and Content Cards in the same feed. To replace existing Content Card feeds with Banners, you’ll need to [create placements in your app or website](https://www.braze.com/docs/fr/fr/developer_guide/banners/placements/).
## Can Banners include video?
The standard Banner composer supports images, text, and buttons. To include a video in a Banner, you could use a **Custom Code** block and render a video or embedded player in your app or website.
## Can I trigger a banner based on user actions?
While Banners do not support [action-based delivery](https://www.braze.com/docs/fr/fr/user_guide/engagement_tools/campaigns/building_campaigns/delivery_types/triggered_delivery), you can target users based on their past actions using segmentation and priority.
For example, to show a special Banner only to users who have completed a `purchase` event:
1. **Targeting:** In your campaign, target a segment of users who have performed the custom event `purchase` at least once.
2. **Priority:** If you have a general Banner for all users and this specific Banner for purchasers targeting the same placement, set the specific Banner's priority to **High** and the general Banner to **Medium** or **Low**.
When the user starts a new session or refreshes Banners after performing the action, Braze evaluates their eligibility. If they match the "Purchase" segment, the high-priority Banner will be displayed.
## Can users dismiss a Banner?
Yes. You can allow users to manually dismiss a Banner by turning on dismissal behavior in the Banner composer. See [Configure dismissal behavior](https://www.braze.com/docs/fr/fr/user_guide/channels/banners/create_a_banner/#dismiss-behavior) for details on turning on dismissal and customizing the dismiss button.
Users can manually dismiss Banners only if dismissal behavior is enabled. If dismissal isn't enabled, you can control Banner visibility by managing user segment eligibility. When a user no longer meets the targeting criteria for a Banner campaign, they won't see it again on their next session.
When a user dismisses a Banner, they're ineligible for that campaign by default. To let dismissed users see the Banner again, [configure re-eligibility](https://www.braze.com/docs/fr/fr/user_guide/channels/banners/create_a_banner/#re-eligibility) in the campaign's **Delivery Controls** step. Canvas Banner steps use Canvas re-entry settings to control re-eligibility instead.
For example, if you display a promotional Banner until a user makes a purchase, logging an event such as `purchase_completed` can remove that user from the targeted segment, effectively hiding the Banner in subsequent sessions.
## Can I export Banners campaign analytics using the Braze API?
Yes. You can use the [`/campaigns/data_series` endpoint](https://www.braze.com/docs/fr/fr/api/endpoints/export/campaigns/get_campaign_analytics/) to get data on how many Banner campaigns were viewed, clicked, or converted.
## When are users segmented?
Users are segmented at the beginning of the session. If a campaign's targeted segments depend on custom attributes, custom events, or other targeting attributes, they must be present on the user at the beginning of the session.
## How can I compose Banners to ensure the lowest latency?
The simpler the messaging in your Banner, the faster it will render. It’s best to test your Banner campaign against the expected latency for your use case. For example, be sure to test Liquid attributes like `catalog_items`.
## Are all Liquid tags supported?
No. However, most Liquid tags are supported for Banner messages, except for `catalog_items` that are re-rendered using the [`:rerender` tag](https://www.braze.com/docs/fr/fr/user_guide/data/activation/catalogs/using_catalogs/#using-liquid).
## Can I capture click events?
Yes. How click events are captured depends on how your Banner is rendered:
- **Standard editor components:** If your Banner uses standard editor components (images, buttons, text), clicks are tracked automatically when using the SDK's insertion methods.
- **Custom Code Blocks:** If you want to track clicks for elements within a Custom Code editor block, you must call `brazeBridge.logClick()` from within your custom HTML to track clicks. This applies even when using the SDK methods to insert and render the Banner. For the full reference, see [Custom code and JavaScript bridge for Banners](https://www.braze.com/docs/fr/fr/user_guide/message_building_by_channel/banners/custom_code/#javascript-bridge).
- **Custom UI (headless):** If you're building a fully custom UI using the Banner's custom properties instead of rendering the Banner HTML, call `logClick()` on the Banner object from your application code.
For more information, see [Logging clicks](https://www.braze.com/docs/fr/fr/developer_guide/banners/placements/#logging-clicks).
# Cartes de contenu dans le SDK de Braze
Source: /docs/fr/developer_guide/content_cards/index.md
# Cartes de contenu
> Découvrez les cartes de contenu pour le SDK de Braze, notamment les différents modèles de données et les propriétés spécifiques aux cartes disponibles pour votre application.
**Tip:**
Using Content Cards for banner-style messages? Try out [Banners](https://www.braze.com/docs/fr/fr/user_guide/message_building_by_channel/banners/)— perfect for inline, persistent in-app and web messages.
**Note:**
This guide uses code samples from the Braze Web SDK 4.0.0+. To upgrade to the latest Web SDK version, see [SDK Upgrade Guide](https://github.com/braze-inc/braze-web-sdk/blob/master/UPGRADE_GUIDE.md).
## Prerequisites
Before you can use Content Cards, you'll need to [integrate the Braze Web SDK](https://www.braze.com/docs/fr/fr/developer_guide/sdk_integration/?sdktab=web) into your app. However, no additional setup is required. To build your own UI instead, see [Content Card Customization Guide](https://www.braze.com/docs/fr/fr/developer_guide/content_cards/).
**Note:**
Some ad blockers and browser privacy extensions can block the Braze Web SDK script or related network requests, which can prevent Content Cards from loading. If you're using the CDN integration method, consider switching to the [NPM integration method](https://www.braze.com/docs/fr/fr/developer_guide/sdk_integration/?subtab=package%20manager&sdktab=web), which stores SDK libraries locally on your website and can avoid some ad-blocker-related issues.
## Standard feed UI
To use the included Content Cards UI, you'll need to specify where to show the feed on your website.
In this example, we have a `` in which we want to place the Content Cards feed. We'll use three buttons to hide, show, or toggle (hide or show based on its current state) the feed.
```html
```
When using the `toggleContentCards(parentNode, filterFunction)` and `showContentCards(parentNode, filterFunction)` methods, if no arguments are provided, all Content Cards will be shown in a fixed-position sidebar on the right-hand side of the page. Otherwise, the feed will be placed in the specified `parentNode` option.
|Parameters | Description |
|---|---|
|`parentNode` | The HTML node to render the Content Cards into. If the parent node already has a Braze Content Cards view as a direct descendant, the existing Content Cards will be replaced. For example, you should pass in `document.querySelector(".my-container")`.|
|`filterFunction` | A filter or sort function for cards displayed in this view. Invoked with the array of `Card` objects, sorted by `{pinned, date}`. Expected to return an array of sorted `Card` objects to render for this user. If omitted, all cards will be displayed. |
{: .reset-td-br-1 .reset-td-br-2 aria-label="Standard feed UI" }
[See the SDK reference docs](https://js.appboycdn.com/web-sdk/latest/doc/modules/braze.html#togglecontentcards) for more information on Content Card toggling.
## Testing Content Cards on the web
You can test your Content Cards integration using your browser's developer tools.
1. Create a Content Card campaign and target your test user.
2. Log in to the website that has your Web SDK integration.
3. Open your browser console. For Chrome, right-click the page, select **Inspect**, then select the **Console** tab.
4. Run these commands in the console:
- `window.braze.getCachedContentCards()`
- `window.braze.toggleContentCards()`
## Card types and properties
The Content Cards data model is available in the Web SDK and offers the following Content Card types: [ImageOnly](https://js.appboycdn.com/web-sdk/latest/doc/classes/braze.imageonly.html), [CaptionedImage](https://js.appboycdn.com/web-sdk/latest/doc/classes/braze.captionedimage.html), and [ClassicCard](https://js.appboycdn.com/web-sdk/latest/doc/classes/braze.classiccard.html). Each type inherits common properties from a base model [Card](https://js.appboycdn.com/web-sdk/latest/doc/classes/braze.card.html) and has the following additional properties.
**Tip:**
To log Content Card data, see [Logging analytics](https://www.braze.com/docs/fr/fr/developer_guide/content_cards/logging_analytics/).
### Base card model
All Content Cards have these shared properties:
|Property|Description|
|---|---|
| `expiresAt` | The UNIX timestamp of the card's expiration time.|
| `extras`| (Optional) Key-value pair data formatted as a string object with a value string. |
| `id` | (Optional) The id of the card. This will be reported back to Braze with events for analytics purposes. |
| `pinned` | This property reflects if the card was set up as "pinned" in the dashboard.|
| `updated` | The UNIX timestamp of when this card was last modified. |
| `viewed` | This property reflects whether the user viewed the card or not.|
| `isControl` | This property is `true` when a card is a "control" group within an A/B test.|
{: .reset-td-br-1 .reset-td-br-2 aria-label="Base card model" }
### Image only
[ImageOnly](https://js.appboycdn.com/web-sdk/latest/doc/classes/braze.imageonly.html) cards are clickable full-sized images.
|Property|Description|
|---|---|
| `aspectRatio` | The aspect ratio of the card's image and serves as a hint before image loading completes. Note that the property may not be supplied in certain circumstances. |
| `categories` | This property is purely for organization in your custom implementation; these categories can be set in the dashboard composer. |
| `clicked` | This property indicates whether this card has ever been clicked on this device. |
| `created` | The UNIX timestamp of the card's creation time from Braze. |
| `dismissed` | This property indicates if this card has been dismissed. |
| `dismissible` | This property reflects if the user can dismiss the card, removing it from view. |
| `imageUrl` | The URL of the card's image.|
| `linkText` | The display text for the URL. |
| `url` | The URL that will be opened after the card is clicked on. |
{: .reset-td-br-1 .reset-td-br-2 aria-label="Image only" }
### Captioned image
[CaptionedImage](https://js.appboycdn.com/web-sdk/latest/doc/classes/braze.captionedimage.html) cards are clickable, full-sized images with accompanying descriptive text.
|Property|Description|
|---|---|
| `aspectRatio` | The aspect ratio of the card's image and serves as a hint before image loading completes. Note that the property may not be supplied in certain circumstances. |
| `categories` | This property is purely for organization in your custom implementation; these categories can be set in the dashboard composer. |
| `clicked` | This property indicates whether this card has ever been clicked on this device. |
| `created` | The UNIX timestamp of the card's creation time from Braze. |
| `dismissed` | This property indicates if this card has been dismissed. |
| `dismissible` | This property reflects if the user can dismiss the card, removing it from view. |
| `imageUrl` | The URL of the card's image.|
| `linkText` | The display text for the URL. |
| `title` | The title text for this card. |
| `url` | The URL that will be opened after the card is clicked on. |
{: .reset-td-br-1 .reset-td-br-2 aria-label="Captioned image" }
### Classic
The [ClassicCard](https://js.appboycdn.com/web-sdk/latest/doc/classes/braze.classiccard.html) model can contain an image with no text or a text with image.
|Property|Description|
|---|---|
| `aspectRatio` | The aspect ratio of the card's image and serves as a hint before image loading completes. Note that the property may not be supplied in certain circumstances. |
| `categories` | This property is purely for organization in your custom implementation; these categories can be set in the dashboard composer. |
| `clicked` | This property indicates whether this card has ever been clicked on this device. |
| `created` | The UNIX timestamp of the card's creation time from Braze. |
| `description` | The body text for this card. |
| `dismissed` | This property indicates if this card has been dismissed. |
| `dismissible` | This property reflects if the user can dismiss the card, removing it from view. |
| `imageUrl` | The URL of the card's image.|
| `linkText` | The display text for the URL. |
| `title` | The title text for this card. |
| `url` | The URL that will be opened after the card is clicked on. |
{: .reset-td-br-1 .reset-td-br-2 aria-label="Classic" }
## Control group
If you use the default Content Cards feed, impressions and clicks will be automatically tracked.
If you use a custom integration for Content Cards, you need need [log impressions](https://www.braze.com/docs/fr/fr/developer_guide/content_cards/logging_analytics/) when a Control Card would have been seen. As part of this effort, make sure to handle Control cards when logging impressions in an A/B test. These cards are blank, and while they aren’t seen by users, you should still log impressions in order to compare how they perform against non-Control cards.
To determine if a Content Card is in the Control group for an A/B test, check the `card.isControl` property (Web SDK v4.5.0+) or check if the card is a `ControlCard` instance (`card instanceof braze.ControlCard`).
## Card methods
### Default feed methods
Use these methods when displaying Content Cards using the Braze default feed UI:
|Method | Description |
|---|---|
|[`showContentCards`](https://js.appboycdn.com/web-sdk/latest/doc/modules/braze.html#showcontentcards)| Displays the default Content Cards feed. Renders cards into a provided `parentNode` HTML element, or as a fixed-position sidebar on the right side of the page if no element is given. Accepts an optional `filterFunction` to sort or filter cards before display. |
|[`hideContentCards`](https://js.appboycdn.com/web-sdk/latest/doc/modules/braze.html#hidecontentcards)| Hides the default Content Cards feed if it is currently showing. |
|[`toggleContentCards`](https://js.appboycdn.com/web-sdk/latest/doc/modules/braze.html#togglecontentcards)| Shows the default Content Cards feed if it is hidden, or hides it if it is visible. If you need to display multiple Content Card feeds simultaneously, use `showContentCards` and `hideContentCards` instead. |
{: .reset-td-br-1 .reset-td-br-2 aria-label="Default feed methods" }
### Custom feed methods
Use these methods when building your own Content Card UI:
|Method | Description |
|---|---|
|[`subscribeToContentCardsUpdates`](https://js.appboycdn.com/web-sdk/latest/doc/modules/braze.html#subscribetocontentcardsupdates)| Registers a callback function that is invoked whenever Content Cards are updated for the current user, such as on session start. Use this as the primary way to receive card data for your custom feed. Must be called before `openSession()` to receive updates on the initial session. |
|[`getCachedContentCards`](https://js.appboycdn.com/web-sdk/latest/doc/modules/braze.html#getcachedcontentcards)| Returns all currently available cards from the most recent Content Cards refresh. Use this to immediately display cards on page load without waiting for a new server request, such as when the user returns to a page during an active session. |
|[`requestContentCardsRefresh`](https://js.appboycdn.com/web-sdk/latest/doc/modules/braze.html#requestcontentcardsrefresh)| Requests an immediate refresh of Content Cards from Braze servers. By default, cards refresh on session start and when the default feed is reopened. Use this to force a refresh at other times, such as after a specific user action. Be aware of [rate limits](https://www.braze.com/docs/fr/fr/developer_guide/content_cards/customizing_cards/feed/#rate-limit). |
|[`logContentCardImpressions`](https://js.appboycdn.com/web-sdk/latest/doc/modules/braze.html#logcontentcardimpressions)| Logs impression events for an array of cards. Call this when cards are rendered and visible to the user. Required for accurate campaign reporting when using a custom UI, as impressions are not tracked automatically outside the default feed. |
|[`logContentCardClick`](https://js.appboycdn.com/web-sdk/latest/doc/modules/braze.html#logcontentcardclick)| Logs a click event for a single card. Call this when a user interacts with a card in your custom UI. Required for accurate campaign reporting, as clicks are not tracked automatically outside the default feed. |
|[`handleBrazeAction`](https://js.appboycdn.com/web-sdk/latest/doc/modules/braze.html#handlebrazeaction)| Processes a card's URL and executes the configured on-click action, including Braze actions (`brazeActions://` URLs) and standard URL navigation. Call this in your card click handler to ensure on-click behaviors configured in the Braze dashboard are executed. |
|[`dismissCard`](https://js.appboycdn.com/web-sdk/latest/doc/classes/braze.card.html#dismisscard)| Programmatically dismisses a card, removing it from the user's feed. Use this to allow users to dismiss cards in your custom UI. |
{: .reset-td-br-1 .reset-td-br-2 aria-label="Custom feed methods" }
For more details, refer to the [SDK reference documentation](https://js.appboycdn.com/web-sdk/latest/doc/modules/braze.html).
## Best practices
### Call methods in the correct order
For custom feeds, Content Cards refresh only on session start if `subscribeToContentCardsUpdates()` is called before `openSession()`. Call your Braze methods in this order:
```javascript
import * as braze from "@braze/web-sdk";
// Step 1: Initialize the SDK
braze.initialize("YOUR-API-KEY", { baseUrl: "YOUR-SDK-ENDPOINT" });
// Step 2: Subscribe to card updates
braze.subscribeToContentCardsUpdates((updates) => {
const cards = updates.cards;
renderCards(cards);
});
// Step 3: Identify the user
braze.changeUser("USER_ID");
// Step 4: Start the session
braze.openSession();
```
### Use cached cards to persist content across page loads
Because `subscribeToContentCardsUpdates()` invokes only its callback when there are new updates (such as on session start), cards can disappear from your custom feed if a user refreshes the page mid-session. To prevent this, use `getCachedContentCards()` to immediately render cards from the local cache, alongside your subscription for new updates:
```javascript
import * as braze from "@braze/web-sdk";
function renderCards(cards) {
const container = document.getElementById("content-cards");
container.textContent = "";
const displayedCards = [];
cards.forEach(card => {
if (card instanceof braze.ClassicCard || card instanceof braze.CaptionedImage) {
const cardElement = document.createElement("div");
const h3 = document.createElement("h3");
h3.textContent = card.title || "";
cardElement.appendChild(h3);
const p = document.createElement("p");
p.textContent = card.description || "";
cardElement.appendChild(p);
if (card.imageUrl) {
const img = document.createElement("img");
img.src = card.imageUrl;
img.alt = card.title || "";
cardElement.appendChild(img);
}
if (card.url) {
cardElement.addEventListener("click", () => {
braze.logContentCardClick(card);
braze.handleBrazeAction(card.url);
});
}
container.appendChild(cardElement);
displayedCards.push(card);
}
});
if (displayedCards.length > 0) {
braze.logContentCardImpressions(displayedCards);
}
}
// Display cached cards immediately
const cached = braze.getCachedContentCards();
if (cached && cached.cards.length > 0) {
renderCards(cached.cards);
}
// Subscribe to future updates
braze.subscribeToContentCardsUpdates((updates) => {
renderCards(updates.cards);
});
```
### Log analytics for custom feeds
When using a custom UI, impressions, clicks, and dismissals are not tracked automatically. You must log each event manually:
- **Impressions:** Call `logContentCardImpressions([card1, card2, ...])` with an array of card objects when cards become visible to the user.
- **Clicks:** Call `logContentCardClick(card)` when a user interacts with a card.
- **On-click behavior:** Call `handleBrazeAction(card.url)` to execute the card's configured on-click action (such as navigating to a URL or logging a custom event).
**Warning:**
The argument passed to `logContentCardClick()` must be an original Braze `Card` object. If you transform or reconstruct the card data (for example, by serializing and deserializing), clicks are not logged and you see the error: "card must be a Card object."
## Using Google Tag Manager
Google Tag Manager works by injecting the [Braze CDN](https://www.braze.com/docs/fr/fr/developer_guide/platform_integration_guides/web/initial_sdk_setup#install-cdn) (a version of our Web SDK) directly into your website code, which means that all SDK methods are available just as if you had integrated the SDK without Google Tag Manager, except when implementing Content Cards.
### Setting up Content Cards
For a standard integration of the Content Card feed, you can use a **Custom HTML** tag in Google Tag Manager. Add the following to your Custom HTML tag, which will activate the standard Content Card feed:
```html
```

For more freedom over customizing the appearance of Content Cards and their feed, you can directly integrate Content Cards into your native website. There are two approaches you can take with this: using the standard feed UI or creating a custom feed UI.
When implementing the [standard feed UI](https://www.braze.com/docs/fr/fr/developer_guide/platform_integration_guides/web/content_cards/integration/#standard-feed-ui), Braze methods must have `window.` added to the start of the method. For example, `braze.showContentCards` should instead be `window.braze.showContentCards`.
For [custom feed](https://www.braze.com/docs/fr/fr/developer_guide/content_cards/creating_cards/) styling, the steps are the same as if you had integrated the SDK without GTM. For example, if you want to customize the width of the Content Card feed, you can paste the following into your CSS file:
```css
body .ab-feed {
width: 800px;
}
```
### Upgrading templates {#upgrading}
To upgrade to the latest version of the Braze Web SDK, take the following three steps in your Google Tag Manager dashboard:
1. **Update tag template** Go to the **Templates** page within your workspace. Here you should see an icon indicating an update is available.

Click that icon and after reviewing the change, click to **Accept Update**.

2. **Update version number** Once your tag template has been updated, edit the Braze Initialization Tag, and update the SDK version to the most recent `major.minor` version. For example, if the latest version is `4.1.2`, enter `4.1`. You can view a list of SDK versions in our [changelog](https://github.com/braze-inc/braze-web-sdk/blob/master/CHANGELOG.md).

3. **QA and publish** Verify the new SDK version is working using Google Tag Manager's [debugging tool](https://support.google.com/tagmanager/answer/6107056?hl=en) prior to publishing an update to your tag container.
### Troubleshooting {#troubleshooting}
#### Enable tag debugging {#debugging}
Each Braze tag template has an optional **GTM Tag Debugging** checkbox which can be used to log debug messages to your web page's JavaScript console.

#### Enter debug mode
Another way to help debug your Google Tag Manager integration is using Google's [Preview mode](https://support.google.com/tagmanager/answer/6107056) feature.
This will help identify what values are being sent from your web page's data layer to each triggered Braze tag and will also explain which tags were or were not triggered.

#### Verify tag sequencing for custom events {#tag-sequencing}
If custom events or other actions aren't logging in Braze, a common cause is a race condition where an action tag (such as **Custom Event** or **Purchase**) fires before the **Braze Initialization** tag has completed. To fix this, configure [tag sequencing](https://support.google.com/tagmanager/answer/6238868) in GTM:
1. Open the action tag that isn't logging correctly.
2. Under **Advanced Settings** > **Tag Sequencing**, select **A tag that fires before \[this tag\]**.
3. Choose your **Braze Initialization** tag as the setup tag.
This ensures the SDK is fully initialized before any action tags attempt to send data to Braze.
#### Enable verbose logging
To capture detailed logs for troubleshooting, you can enable verbose logging on your Google Tag Manager integration. These logs will appear in the **Console** tab of your browser's [developer tools](https://developer.mozilla.org/en-US/docs/Learn/Common_questions/What_are_browser_developer_tools).
In your Google Tag Manager integration, navigate to your Braze Initialization Tag and select **Enable Web SDK Logging**.

[changelog]: https://github.com/braze-inc/braze-web-sdk/blob/master/CHANGELOG.md
## Prerequisites
Before you can use Braze Content Cards, you'll need to integrate the [Braze Android SDK](https://www.braze.com/docs/fr/fr/developer_guide/sdk_integration/?sdktab=android) into your app. However, no additional setup is required.
## Google fragments
In Android, the Content Cards feed is implemented as a [fragment](https://developer.android.com/guide/components/fragments.html) available in the Braze Android UI project. The [`ContentCardsFragment`](https://braze-inc.github.io/braze-android-sdk/kdoc/braze-android-sdk/com.braze.ui.contentcards/-content-cards-fragment/index.html) class will automatically refresh and display the contents of the Content Cards and log usage analytics. The cards that can appear in a user's `ContentCards` are created on the Braze dashboard.
To learn how to add a fragment to an activity, see [Google's fragments documentation](https://developer.android.com/guide/fragments#Adding).
## Card types and properties
The Content Cards data model is available in the Android SDK and offers the following unique Content Card types. Each type shares a base model, which allows them to inherit common properties from the base model, in addition to having their own unique properties. For full reference documentation, see [`com.braze.models.cards`](https://braze-inc.github.io/braze-android-sdk/kdoc/braze-android-sdk/com.braze.models.cards/index.html).
### Base card model {#base-card-for-android}
The [base card](https://braze-inc.github.io/braze-android-sdk/kdoc/braze-android-sdk/com.braze.models.cards/-card/index.html) model provides foundational behavior for all cards.
|Property | Description |
|---|---|
|`getId()` | Returns the card's ID set by Braze.|
|`getViewed()` | Returns a boolean reflects if the card is read or unread by the user.|
|`getExtras()` | Returns a map of key-value extras for this card.|
|`getCreated()` | Returns the unix timestamp of the card's creation time from Braze.|
|`isPinned` | Returns a boolean that reflects whether the card is pinned.|
|`getOpenUriInWebView()` | Returns a boolean that reflects whether Uris for this card should be opened in the Braze WebView or not.|
|`getExpiredAt()` | Gets the expiration date of the card.|
|`isRemoved()` | Returns a boolean that reflects whether the end user has dismissed this card.|
|`isDismissibleByUser()` | Returns a boolean that reflects whether the card is dismissible by the user.|
|`isClicked()` | Returns a boolean that reflects the clicked state of this card.|
|`isDismissed` | Returns a boolean that reflects whether the card has been dismissed. Set to `true` to mark the card as dismissed. If a card is already marked as dismissed, it cannot be marked as dismissed again.|
|`isControl()` | Returns a boolean if this card is a control card and should not be rendered.|
{: .reset-td-br-1 .reset-td-br-2 aria-label="Base card model #base-card-for-android" }
### Image only {#banner-image-card-for-android}
[Image only cards](https://braze-inc.github.io/braze-android-sdk/kdoc/braze-android-sdk/com.braze.models.cards/-image-only-card/index.html) are clickable full-sized images.
|Property | Description |
|---|---|
|`getImageUrl()` | Returns the URL of the card's image.|
|`getUrl()` | Returns the URL that will be opened after the card is clicked. It can be a HTTP(s) URL or a protocol URL.|
|`getDomain()` | Returns link text for the property URL.|
{: .reset-td-br-1 .reset-td-br-2 aria-label="Image only #banner-image-card-for-android" }
### Captioned image {#captioned-image-card-for-android}
[Captioned image cards](https://braze-inc.github.io/braze-android-sdk/kdoc/braze-android-sdk/com.braze.models.cards/-captioned-image-card/index.html) are clickable, full-sized images with accompanying descriptive text.
|Property | Description |
|---|---|
|`getImageUrl()` | Returns the URL of the card's image.|
|`getTitle()` | Returns the title text for the card.|
|`getDescription()` | Returns the body text for the card.|
|`getUrl()` | Returns the URL that will be opened after the card is clicked. It can be a HTTP(s) URL or a protocol URL.|
|`getDomain()` | Returns the link text for the property URL. |
{: .reset-td-br-1 .reset-td-br-2 aria-label="Captioned image #captioned-image-card-for-android" }
### Classic {#text-Announcement-card-for-android}
A classic card without an image included will result in a [text announcement card](https://braze-inc.github.io/braze-android-sdk/kdoc/braze-android-sdk/com.braze.models.cards/-text-announcement-card/index.html). If an image is included, you will receive a [short news card](https://braze-inc.github.io/braze-android-sdk/kdoc/braze-android-sdk/com.braze.models.cards/-short-news-card/index.html).
|Property | Description |
|---|---|
|`getTitle()` | Returns the title text for the card. |
|`getDescription()` | Returns the body text for the card. |
|`getUrl()` | Returns the URL that will be opened after the card is clicked. It can be a HTTP(s) URL or a protocol URL. |
|`getDomain()` | Returns the link text for the property URL. |
|`getImageUrl()` | Returns the URL of the card's image, applies only to the classic Short News Card. |
|`isDismissed` | Returns a boolean that reflects whether the card has been dismissed. Set to `true` to mark the card as dismissed. If a card is already marked as dismissed, it cannot be marked as dismissed again. |
{: .reset-td-br-1 .reset-td-br-2 aria-label="Classic #text-Announcement-card-for-android" }
## Card methods
All [`Card`](https://braze-inc.github.io/braze-android-sdk/kdoc/braze-android-sdk/com.braze.models.cards/index.html) data model objects offer the following analytics methods for logging user events to Braze servers.
|Method | Description |
|---|---|
|`logImpression()` | Manually log an impression to Braze for a particular card. |
|`logClick()` | Manually log a click to Braze for a particular card. |
{: .reset-td-br-1 .reset-td-br-2 aria-label="Card methods" }
## Prerequisites
Before you can use Content Cards, you'll need to integrate the [Braze Swift SDK](https://www.braze.com/docs/fr/fr/developer_guide/sdk_integration/?sdktab=swift) into your app. However, no additional setup is required.
## View controller contexts
The default Content Cards UI can be integrated from the `BrazeUI` library of the Braze SDK. Create the Content Cards view controller using the `braze` instance. If you wish to intercept and react to the Content Card UI lifecycle, implement [`BrazeContentCardUIViewControllerDelegate`](https://braze-inc.github.io/braze-swift-sdk/documentation/brazeui/brazecontentcarduiviewcontrollerdelegate) as the delegate for your `BrazeContentCardUI.ViewController`.
**Note:**
For more information about iOS view controller options, refer to the [Apple developer documentation](https://developer.apple.com/documentation/uikit/view_controllers/showing_and_hiding_view_controllers).
The `BrazeUI` library of the Swift SDK provides two default view controller contexts: [navigation](#swift_navigation) or [modal](#swift_modal). This means you can integrate Content Cards in these contexts by adding a few lines of code to your app or site. Both views offer customization and styling options as described in the [customization guide](https://www.braze.com/docs/fr/fr/developer_guide/customization_guides/content_cards/customizing_styles/?tab=ios). You can also create a custom Content Card view controller instead of using the standard Braze one for even more customization options—refer to the [Content Cards UI tutorial](https://braze-inc.github.io/braze-swift-sdk/tutorials/braze/c2-contentcardsui/) for an example.
**Important:**
To handle control variant Content Cards in your custom UI, pass in your [`Braze.ContentCard.Control`](https://braze-inc.github.io/braze-swift-sdk/documentation/brazekit/braze/contentcard/control(_:)) object, then call the `logImpression` method as you would with any other Content Card type. The object will implicitly log a control impression to inform our analytics of when a user would have seen the control card.
### Navigation
A navigation controller is a view controller that manages one or more child view controllers in a navigation interface. Here is an example of pushing a `BrazeContentCardUI.ViewController` instance into a navigation controller:
```swift
func pushViewController() {
guard let braze = AppDelegate.braze else { return }
let contentCardsController = BrazeContentCardUI.ViewController(braze: braze)
// Implement and set `BrazeContentCardUIViewControllerDelegate` if you wish to intercept click actions.
contentCardsController.delegate = self
self.navigationController?.pushViewController(contentCardsController, animated: true)
}
```
```objc
- (void)pushViewController {
BRZContentCardUIViewController *contentCardsController = [[BRZContentCardUIViewController alloc] initWithBraze:self.braze];
// Implement and set `BrazeContentCardUIViewControllerDelegate` if you wish to intercept click actions.
[contentCardsController setDelegate:self];
[self.navigationController pushViewController:contentCardsController animated:YES];
}
```
### Modal
Use modal presentations to create temporary interruptions in your app’s workflow, such as prompting the user for important information. This model view has a navigation bar on top and a **Done** button on the side of the bar. Here is an example of pushing a `BrazeContentCard.ViewController` instance into a modal controller:
```swift
func presentModalViewController() {
guard let braze = AppDelegate.braze else { return }
let contentCardsModal = BrazeContentCardUI.ModalViewController(braze: braze)
// Implement and set `BrazeContentCardUIViewControllerDelegate` if you wish to intercept click actions.
contentCardsModal.viewController.delegate = self
self.navigationController?.present(contentCardsModal, animated: true, completion: nil)
}
```
```objc
- (void)presentModalViewController {
BRZContentCardUIModalViewController *contentCardsModal = [[BRZContentCardUIModalViewController alloc] initWithBraze:AppDelegate.braze];
// Implement and set `BrazeContentCardUIViewControllerDelegate` if you wish to intercept click actions.
[contentCardsModal.viewController setDelegate:self];
[self.navigationController presentViewController:contentCardsModal animated:YES completion:nil];
}
```
For example usage of `BrazeUI` view controllers, check out the corresponding Content Cards UI samples in our [Examples app](https://github.com/braze-inc/braze-swift-sdk/tree/main/Examples).
## Base card model
The Content Cards data model is available in the `BrazeKit` module of the Braze Swift SDK. This module contains the following Content Card types, which are an implementation of the `Braze.ContentCard` type. For a full list of Content Card properties and their usage, see [`ContentCard` class](https://braze-inc.github.io/braze-swift-sdk/documentation/brazekit/braze/contentcard).
- Image only
- Captioned image
- Classic
- Classic image
- Control
To access the Content Cards data model, call `contentCards.cards` on your `braze` instance. See [Logging analytics](https://www.braze.com/docs/fr/fr/developer_guide/content_cards/logging_analytics/) for more information on subscribing to card data.
**Note:**
Keep in mind, `BrazeKit` offers an alternative [`ContentCardRaw`](https://braze-inc.github.io/braze-swift-sdk/documentation/brazekit/braze/contentcardraw) class for Objective-C compatibility.
## Card methods
Each card is initialized with a `Context` object, which contains various methods for managing your card's state. Call these methods when you want to modify the corresponding state property on a particular card object.
| Method | Description |
|--------------------------------------|------------------------------------------------------------------------------------------------------------------------------------------|
| `card.context?.logImpression()` | Log the content card impression event. |
| `card.context?.logClick()` | Log the content card click event. |
| `card.context?.processClickAction()` | Process a given [`ClickAction`](https://braze-inc.github.io/braze-swift-sdk/documentation/brazekit/braze/contentcard/clickaction) input. |
| `card.context?.logDismissed()` | Log the content card dismissed event. |
| `card.context?.logError()` | Log an error related to the content card. |
| `card.context?.loadImage()` | Load a given content card image from a URL. This method can be nil when the content card does not have an image. |
{: .reset-td-br-1 .reset-td-br-2 aria-label="Card methods" }
For more details, refer to the [`Context` class documentation](https://braze-inc.github.io/braze-swift-sdk/documentation/brazekit/braze/contentcardraw/context-swift.class)
## Prerequisites
Before you can use this feature, you'll need to [integrate the Cordova Braze SDK](https://www.braze.com/docs/fr/fr/developer_guide/sdk_integration/?sdktab=cordova).
## Card Feeds
The Braze SDK includes a default card feed. To show the default card feed, you can use the `launchContentCards()` method. This method handles all analytics tracking, dismissals, and rendering for a user's Content Cards.
## Content Cards
You can use these additional methods to build a custom Content Cards Feed within your app:
|Method | Description |
|---|---|
|`requestContentCardsRefresh()`|Sends a background request to request the latest Content Cards from the Braze SDK server.|
|`getContentCardsFromServer(successCallback, errorCallback)`|Retrieves Content Cards from the Braze SDK. This will request the latest Content Cards from the server and return the list of cards upon completion.|
|`getContentCardsFromCache(successCallback, errorCallback)`|Retrieves Content Cards from the Braze SDK. This will return the latest list of cards from the local cache, which was updated at the last refresh.|
|`logContentCardClicked(cardId)`|Logs a click for the given Content Card ID.|
|`logContentCardImpression(cardId)`|Logs an impression for the given Content Card ID.|
|`logContentCardDismissed(cardId)`|Logs a dismissal for the given Content Card ID.|
{: .reset-td-br-1 .reset-td-br-2 aria-label="Content Cards" }
## About Flutter Content Cards
The Braze SDK includes a default card feed to get you started with Content Cards. To show the card feed, you can use the `braze.launchContentCards()` method. The default card feed included with the Braze SDK will handle all analytics tracking, dismissals, and rendering for a user's Content Cards.
## Prerequisites
Before you can use this feature, you'll need to [integrate the Flutter Braze SDK](https://www.braze.com/docs/fr/fr/developer_guide/sdk_integration/?sdktab=flutter).
## Card methods
You can use these additional methods to build a custom Content Cards Feed within your app by using the following methods available on the [plugin public interface](https://github.com/braze-inc/braze-flutter-sdk/blob/master/lib/braze_plugin.dart):
| Method | Description |
| ---------------------------------------------- | ------------------------------------------------------------------------------------------------------ |
| `braze.requestContentCardsRefresh()` | Requests the latest Content Cards from the Braze SDK server. |
| `braze.logContentCardClicked(contentCard)` | Logs a click for the given Content Card object. |
| `braze.logContentCardImpression(contentCard)` | Logs an impression for the given Content Card object. |
| `braze.logContentCardDismissed(contentCard)` | Logs a dismissal for the given Content Card object. |
{: .reset-td-br-1 .reset-td-br-2 aria-label="Card methods" }
## Receiving Content Card data
To receive Content Card data in your Flutter app, the `BrazePlugin` supports sending Content Card data by using [Dart Streams](https://dart.dev/tutorials/language/streams).
The `BrazeContentCard` [object](https://pub.dev/documentation/braze_plugin/latest/braze_plugin/BrazeContentCard-class.html) supports a subset of fields available in the native model objects, including `description`, `title`, `image`, `url`, `extras`, and more.
### Listen for Content Card data in the Dart layer
To receive Content Card data in the Dart layer, use the code below to create a `StreamSubscription` and call `braze.subscribeToContentCards()`. Remember to `cancel()` the stream subscription when it is no longer needed.
```dart
// Create stream subscription
StreamSubscription contentCardsStreamSubscription;
contentCardsStreamSubscription = braze.subscribeToContentCards((List contentCards) {
// Handle Content Cards
}
// Cancel stream subscription
contentCardsStreamSubscription.cancel();
```
For an example, see [main.dart](https://github.com/braze-inc/braze-flutter-sdk/blob/master/example/lib/main.dart) in the Braze Flutter SDK sample application.
### Forward Content Card data from the native iOS layer
Content Card data is automatically forwarded from both the Android and iOS native layers. No additional setup is required.
If you're using Flutter SDK 17.1.0 or earlier, Content Card data forwarding from the iOS native layer requires manual setup. Your application likely contains a `contentCards.subscribeToUpdates` callback that calls `BrazePlugin.processContentCards(contentCards)`. To migrate to Flutter SDK 18.0.0, remove the `BrazePlugin.processContentCards(_:)` call—data forwarding is now handled automatically.
For an example, see [AppDelegate.swift](https://github.com/braze-inc/braze-flutter-sdk/blob/master/example/ios/Runner/AppDelegate.swift) in the Braze Flutter SDK sample application.
#### Replaying the callback for Content Cards
To store any Content Cards triggered before the callback is available and replay them after it is set, add the following entry to the `customConfigs` map when initializing the `BrazePlugin`:
```dart
BrazePlugin braze = new BrazePlugin(customConfigs: {replayCallbacksConfigKey: true});
```
## About React Native Content Cards
The Braze SDKs include a default card feed to get you started with Content Cards. To show the card feed, you can use the `Braze.launchContentCards()` method. The default card feed included with the Braze SDK will handle all analytics tracking, dismissals, and rendering for a user's Content Cards.
## Prerequisites
Before you can use this feature, you'll need to [integrate the React Native Braze SDK](https://www.braze.com/docs/fr/fr/developer_guide/sdk_integration/?sdktab=react%20native).
## Cards methods
To build your own UI, you can get a list of available cards, and listen for updates to cards:
```javascript
// Set initial cards
const [cards, setCards] = useState([]);
// Listen for updates as a result of card refreshes, such as:
// a new session, a manual refresh with `requestContentCardsRefresh()`, or after the timeout period
Braze.addListener(Braze.Events.CONTENT_CARDS_UPDATED, async (update) => {
setCards(update.cards);
});
// Manually trigger a refresh of cards
Braze.requestContentCardsRefresh();
```
**Important:**
If you choose to build your own UI to display cards, you must call `logContentCardImpression` in order to receive analytics for those cards. This includes `control` cards, which must be tracked even though they are not displayed to the user.
You can use these additional methods to build a custom Content Cards Feed within your app:
| Method | Description |
| ---------------------------------------- | ------------------------------------------------------------------------------------------------------ |
| `launchContentCards()` | Launches the Content Cards UI element. |
| `requestContentCardsRefresh()` | Requests the latest Content Cards from the Braze SDK server. The resulting list of cards is passed to each of the previously registered [content card event listeners](#reactnative_cards-methods). |
| `getContentCards()` | Retrieves Content Cards from the Braze SDK. This returns a promise that resolves with the latest list of cards from the server. |
| `getCachedContentCards()` | Returns the most recent Content Cards array from the cache. |
| `logContentCardClicked(cardId)` | Logs a click for the given Content Card ID. This method is used only for analytics. To execute the click action, call `processContentCardClickAction(cardId)` in addition. |
| `logContentCardImpression(cardId)` | Logs an impression for the given Content Card ID. |
| `logContentCardDismissed(cardId)` | Logs a dismissal for the given Content Card ID. |
| `processContentCardClickAction(cardId)` | Perform the action of a particular card. |
{: .reset-td-br-1 .reset-td-br-2 aria-label="Cards methods" }
## Card types and properties
The Content Cards data model is available in the React Native SDK and offers the following Content Cards card types: [Image Only](#image-only), [Captioned Image](#captioned-image), and [Classic](#classic). There's also a special [Control](#control) card type, which is returned to users that are in the control group for a given card. Each type inherits common properties from a base model in addition to its own unique properties.
**Tip:**
For a full reference of the Content Card data model, see the [Android](https://braze-inc.github.io/braze-android-sdk/kdoc/braze-android-sdk/com.braze.models.cards/index.html) and [iOS](https://braze-inc.github.io/braze-swift-sdk/documentation/brazekit/braze/contentcard) documentation.
### Base card model
The base card model provides foundational behavior for all cards.
|Property | Description |
|--------------|------------------------------------------------------------------------------------------------------------------------|
|`id` | The card's ID set by Braze. |
|`created` | The UNIX timestamp of the card's creation time from Braze. |
|`expiresAt` | The UNIX timestamp of the card's expiration time. When the value is less than 0, it means the card never expires. |
|`viewed` | Whether the card is read or unread by the user. This does not log analytics. |
|`clicked` | Whether the card has been clicked by the user. |
|`pinned` | Whether the card is pinned. |
|`dismissed` | Whether the user has dismissed this card. Marking a card as dismissed that has already been dismissed will be a no-op. |
|`dismissible` | Whether the card is dismissible by the user. |
|`url` | (Optional) The URL string associated with the card click action. |
|`openURLInWebView` | Whether URLs for this card should be opened in the Braze WebView or not. |
|`isControl` | Whether this card is a control card. Control cards should not be displayed to the user. |
|`extras` | The map of key-value extras for this card. |
{: .reset-td-br-1 .reset-td-br-2 aria-label="Base card model" }
For a full reference of the base card, see the [Android](https://braze-inc.github.io/braze-android-sdk/kdoc/braze-android-sdk/com.braze.models.cards/-card/index.html) and [iOS](https://braze-inc.github.io/braze-swift-sdk/documentation/brazekit/braze/contentcard/data-swift.struct) documentation.
### Image only
Image only cards are clickable, full-sized images.
|Property | Description |
|-------------------|-------------------------------------------------------------------------------------------------------------------|
|`type` | The Content Card type, `IMAGE_ONLY`. |
|`image` | The URL of the card's image. |
|`imageAspectRatio` | The aspect ratio of the card's image. It is meant to serve as a hint before image loading completes. Note that the property may not be supplied in certain circumstances. |
{: .reset-td-br-1 .reset-td-br-2 aria-label="Image only" }
For a full reference of the image only card, see the [Android](https://braze-inc.github.io/braze-android-sdk/kdoc/braze-android-sdk/com.braze.models.cards/-image-only-card/index.html) and [iOS](https://braze-inc.github.io/braze-swift-sdk/documentation/brazekit/braze/contentcard/imageonly-swift.struct) documentation.
### Captioned image
Captioned image cards are clickable, full-sized images with accompanying descriptive text.
|Property | Description |
|-------------------|-------------------------------------------------------------------------------------------------------------------|
|`type` | The Content Card type, `CAPTIONED`. |
|`image` | The URL of the card's image. |
|`imageAspectRatio` | The aspect ratio of the card's image. It is meant to serve as a hint before image loading completes. Note that the property may not be supplied in certain circumstances. |
|`title` | The title text for the card. |
|`cardDescription` | The description text for the card. |
|`domain` | (Optional) The link text for the property URL, for example, `"braze.com/resources/"`. It can be displayed on the card's UI to indicate the action/direction of clicking on the card. |
{: .reset-td-br-1 .reset-td-br-2 aria-label="Captioned image" }
For a full reference of the captioned image card, see the [Android](https://braze-inc.github.io/braze-android-sdk/kdoc/braze-android-sdk/com.braze.models.cards/-captioned-image-card/index.html) and [iOS](https://braze-inc.github.io/braze-swift-sdk/documentation/brazekit/braze/contentcard/captionedimage-swift.struct) documentation.
### Classic
Classic cards have a title, description, and an optional image on the left of the text.
|Property | Description |
|-------------------|-------------------------------------------------------------------------------------------------------------------|
|`type` | The Content Card type, `CLASSIC`. |
|`image` | (Optional) The URL of the card's image. |
|`title` | The title text for the card. |
|`cardDescription` | The description text for the card. |
|`domain` | (Optional) The link text for the property URL, for example, `"braze.com/resources/"`. It can be displayed on the card's UI to indicate the action/direction of clicking on the card. |
{: .reset-td-br-1 .reset-td-br-2 aria-label="Classic" }
For a full reference of the classic (text announcement) Content Card, see the [Android](https://braze-inc.github.io/braze-android-sdk/kdoc/braze-android-sdk/com.braze.models.cards/-text-announcement-card/index.html) and [iOS](https://braze-inc.github.io/braze-swift-sdk/documentation/brazekit/braze/contentcard/classic-swift.struct) documentation. For the classic image (short news) card, see the [Android](https://braze-inc.github.io/braze-android-sdk/kdoc/braze-android-sdk/com.braze.models.cards/-short-news-card/index.html) and [iOS](https://braze-inc.github.io/braze-swift-sdk/documentation/brazekit/braze/contentcard/classicimage-swift.struct) documentation.
### Control
Control cards include all of the base properties, with a few important differences. Most importantly:
- The `isControl` property is guaranteed to be `true`.
- The `extras` property is guaranteed to be empty.
For a full reference of the control card, see the [Android](https://braze-inc.github.io/braze-android-sdk/kdoc/braze-android-sdk/com.braze.models.cards/-control-card/index.html) and [iOS](https://braze-inc.github.io/braze-swift-sdk/documentation/brazekit/braze/contentcard/control-swift.struct) documentation.
## Prerequisites
Before you can use Content Cards, you'll need to integrate the [Braze Swift SDK](https://www.braze.com/docs/fr/fr/developer_guide/sdk_integration/?sdktab=swift) into your app. Then you'll need to complete the steps for setting up your tvOS app.
**Important:**
Keep in mind, you'll need to implement your own custom UI since Content Cards are supported via headless UI using the Swift SDK—which does not include any default UI or views for tvOS.
## Setting up your tvOS app
### Step 1: Create a new iOS app
In Braze, select **Settings** > **App Settings**, then select **Add App**. Enter a name for your tvOS app, select **iOS**—_not tvOS_—then select **Add App**.
{: style="width:70%"}
**Warning:**
If you select the **tvOS** checkbox, you will not be able to customize Content Cards for tvOS.
### Step 2: Get your app's API key
In your app settings, select your new tvOS app then take note of your app's API key. You'll use this key to configure your app in Xcode.
{: style="width:70%"}
### Step 3: Integrate BrazeKit
Use your app's API key to integrate the [Braze Swift SDK](https://github.com/braze-inc/braze-swift-sdk) into your tvOS project in Xcode. You only need to integrate BrazeKit from the Braze Swift SDK.
### Step 4: Create your custom UI
Because Braze doesn't provide a default UI for content cards on tvOS, you'll need to customize it yourself. For a full walkthrough, see our step-by-step tutorial: [Customizing content cards for tvOS](https://braze-inc.github.io/braze-swift-sdk/documentation/braze/content-cards-customization/). For a sample project, see [Braze Swift SDK samples](https://github.com/braze-inc/braze-swift-sdk/tree/main/Examples#contentcards-custom-ui).
## Prerequisites
Before you can use this feature, you'll need to [integrate the Unity Braze SDK](https://www.braze.com/docs/fr/fr/developer_guide/sdk_integration/?sdktab=unity).
## Displaying Content Cards natively {#unity-content-cards-native-ui}
You can display the default UI for Content Cards using the following call:
```csharp
Appboy.AppboyBinding.DisplayContentCards();
```
## Receiving Content Card data in Unity
You may register Unity game objects to be notified of incoming Content Cards. We recommend setting game object listeners from the Braze configuration editor.
If you need to configure your game object listener at runtime, use `AppboyBinding.ConfigureListener()` and specify `BrazeUnityMessageType.CONTENT_CARDS_UPDATED`.
Note, you will additionally need to make a call to `AppboyBinding.RequestContentCardsRefresh()` to start receiving data in your game object listener on iOS.
## Parsing Content Cards
Incoming `string` messages received in your Content Cards game object callback can be parsed into our pre-supplied [`ContentCard`](https://github.com/braze-inc/braze-unity-sdk/blob/master/Assets/Plugins/Appboy/Models/Cards/ContentCard.cs) model object for convenience.
Parsing Content Cards requires JSON parsing, see the following example for details:
##### Example Content Cards callback
```csharp
void ExampleCallback(string message) {
try {
JSONClass json = (JSONClass)JSON.Parse(message);
// Content Card data is contained in the `mContentCards` field of the top level object.
if (json["mContentCards"] != null) {
JSONArray jsonArray = (JSONArray)JSON.Parse(json["mContentCards"].ToString());
Debug.Log(String.Format("Parsed content cards array with {0} cards", jsonArray.Count));
// Iterate over the card array to parse individual cards.
for (int i = 0; i < jsonArray.Count; i++) {
JSONClass cardJson = jsonArray[i].AsObject;
try {
ContentCard card = new ContentCard(cardJson);
Debug.Log(String.Format("Created card object for card: {0}", card));
// Example of logging Content Card analytics on the ContentCard object
card.LogImpression();
card.LogClick();
} catch {
Debug.Log(String.Format("Unable to create and log analytics for card {0}", cardJson));
}
}
}
} catch {
throw new ArgumentException("Could not parse content card JSON message.");
}
}
```
## Refreshing Content Cards
To refresh Content Cards from Braze, call either of the following methods:
```csharp
// results in a network request to Braze
AppboyBinding.RequestContentCardsRefresh()
AppboyBinding.RequestContentCardsRefreshFromCache()
```
## Analytics
Clicks and impressions must be manually logged for Content Cards not displayed directly by Braze.
Use `LogClick()` and `LogImpression()` on [ContentCard](https://github.com/braze-inc/braze-unity-sdk/blob/master/Assets/Plugins/Appboy/Models/Cards/ContentCard.cs) to log clicks and impressions for specific cards.
## About .NET MAUI Content Cards
The Braze .NET MAUI (formerly Xamarin) SDK includes a default card feed to get you started with Content Cards. The default card feed included with the Braze SDK will handle all analytics tracking, dismissals, and rendering for a user’s Content Cards.
## Prerequisites
Before you can use this feature, you'll need to [integrate the .NET MAUI Braze SDK](https://www.braze.com/docs/fr/fr/developer_guide/sdk_integration/?sdktab=.net%20maui%20(xamarin)).
## Card types and properties
The Braze .NET MAUI SDK has three unique Content Cards card types that share a base model: [Banner](#xamarin_banner), [Captioned Image](#xamarin_captioned-image), and [Classic](#xamarin_classic). Each type inherits common properties from a base model and has the following additional properties.
### Base card model
|Property | Description |
|-------------------|------------------------------------------------------------------------------------------------------------------------|
|`idString` | The card's ID set by Braze. |
|`created` | The UNIX timestamp of the card's creation time from Braze. |
|`expiresAt` | The UNIX timestamp of the card's expiration time. When the value is less than 0, it means the card never expires. |
|`viewed` | Whether the card is read or unread by the user. This does not log analytics. |
|`clicked` | Whether the card has been clicked by the user. |
|`pinned` | Whether the card is pinned. |
|`dismissed` | Whether the user has dismissed this card. Marking a card as dismissed that has already been dismissed will be a no-op. |
|`dismissible` | Whether the card is dismissible by the user. |
|`urlString` | (Optional) The URL string associated with the card click action. |
|`openUrlInWebView` | Whether URLs for this card should be opened in the Braze WebView or not. |
|`isControlCard` | Whether this card is a control card. Control cards should not be displayed to the user. |
|`extras` | The map of key-value extras for this card. |
|`isTest` | Whether this card is a test card. |
{: .reset-td-br-1 .reset-td-br-2 aria-label="Base card model" }
For a full reference of the base card, see the [Android](https://braze-inc.github.io/braze-android-sdk/kdoc/braze-android-sdk/com.braze.models.cards/-card/index.html) and [iOS](https://braze-inc.github.io/braze-swift-sdk/documentation/brazekit/braze/contentcard/data-swift.struct) documentation.
### Banner
Banner cards are clickable, full-sized images.
|Property | Description |
|-------------------|-------------------------------------------------------------------------------------------------------------------|
|`image` | The URL of the card's image. |
|`imageAspectRatio` | The aspect ratio of the card's image. It is meant to serve as a hint before image loading completes. Note that the property may not be supplied in certain circumstances. |
{: .reset-td-br-1 .reset-td-br-2 aria-label="Banner" }
For a full reference of the banner card, see the [Android](https://braze-inc.github.io/braze-android-sdk/kdoc/braze-android-sdk/com.braze.models.cards/-image-only-card/index.html) and [iOS](https://braze-inc.github.io/braze-swift-sdk/documentation/brazekit/braze/contentcard/imageonly-swift.struct) documentation (now renamed to image only).
### Captioned image
Captioned image cards are clickable, full-sized images with accompanying descriptive text.
|Property | Description |
|-------------------|-------------------------------------------------------------------------------------------------------------------|
|`image` | The URL of the card's image. |
|`imageAspectRatio` | The aspect ratio of the card's image. It is meant to serve as a hint before image loading completes. Note that the property may not be supplied in certain circumstances. |
|`title` | The title text for the card. |
|`cardDescription` | The description text for the card. |
|`domain` | (Optional) The link text for the property URL, for example, `"braze.com/resources/"`. It can be displayed on the card's UI to indicate the action/direction of clicking on the card. |
{: .reset-td-br-1 .reset-td-br-2 aria-label="Captioned image" }
For a full reference of the captioned image card, see the [Android](https://braze-inc.github.io/braze-android-sdk/kdoc/braze-android-sdk/com.braze.models.cards/-captioned-image-card/index.html) and [iOS](https://braze-inc.github.io/braze-swift-sdk/documentation/brazekit/braze/contentcard/captionedimage-swift.struct) documentation.
### Classic
Classic cards have a title, description, and an optional image on the left of the text.
|Property | Description |
|-------------------|-------------------------------------------------------------------------------------------------------------------|
|`image` | (Optional) The URL of the card's image. |
|`title` | The title text for the card. |
|`cardDescription` | The description text for the card. |
|`domain` | (Optional) The link text for the property URL, for example, `"braze.com/resources/"`. It can be displayed on the card's UI to indicate the action/direction of clicking on the card. |
{: .reset-td-br-1 .reset-td-br-2 aria-label="Classic" }
For a full reference of the classic (text announcement) Content Card, see the [Android](https://braze-inc.github.io/braze-android-sdk/kdoc/braze-android-sdk/com.braze.models.cards/-text-announcement-card/index.html) and [iOS](https://braze-inc.github.io/braze-swift-sdk/documentation/brazekit/braze/contentcard/classic-swift.struct) documentation. For a full reference of the classic image (short news) card, see the [Android](https://braze-inc.github.io/braze-android-sdk/kdoc/braze-android-sdk/com.braze.models.cards/-short-news-card/index.html) and [iOS](https://braze-inc.github.io/braze-swift-sdk/documentation/brazekit/braze/contentcard/classicimage-swift.struct) documentation.
## Card methods
You can use these additional methods to build a custom Content Cards Feed within your app:
| Method | Description |
| ---------------------------------------- | ------------------------------------------------------------------------------------------------------ |
| `requestContentCardsRefresh()` | Requests the latest Content Cards from the Braze SDK server. |
| `getContentCards()` | Retrieves Content Cards from the Braze SDK. This will return the latest list of cards from the server. |
| `logContentCardClicked(cardId)` | Logs a click for the given Content Card ID. This method is used only for analytics. |
| `logContentCardImpression(cardId)` | Logs an impression for the given Content Card ID. |
| `logContentCardDismissed(cardId)` | Logs a dismissal for the given Content Card ID. |
{: .reset-td-br-1 .reset-td-br-2 aria-label="Card methods" }
# Créer des Content Cards
Source: /docs/fr/developer_guide/content_cards/creating_cards/index.md
# Créer des Content Cards {#create-content-cards}
> Cet article présente l'approche de base pour mettre en œuvre des Content Cards personnalisées, ainsi que trois cas d'utilisation courants. Il part du principe que vous avez déjà lu les autres articles du guide de personnalisation des Content Cards pour comprendre ce qui peut être fait par défaut et ce qui nécessite du code personnalisé. Il est particulièrement utile de comprendre comment [enregistrer les analyses](https://www.braze.com/docs/fr/fr/developer_guide/content_cards/logging_analytics/) pour vos Content Cards personnalisées.
**Tip:**
Using Content Cards for banner-style messages? Try out [Banners](https://www.braze.com/docs/fr/fr/user_guide/message_building_by_channel/banners/)— perfect for inline, persistent in-app and web messages.
## Création d'une carte {#creating-a-card}
### Étape 1 : Créer une IU personnalisée {#step-1-create-a-custom-ui}
Commencez par créer votre composant HTML personnalisé qui servira à afficher les cartes.
Commencez par créer votre propre fragment personnalisé. Le [`ContentCardsFragment`](https://braze-inc.github.io/braze-android-sdk/kdoc/braze-android-sdk/com.braze.ui.contentcards/-content-cards-fragment/index.html) par défaut est uniquement conçu pour gérer les types de Content Cards standard, mais il constitue un bon point de départ.
Commencez par créer votre propre composant de contrôleur de vue personnalisé. Le [`BrazeContentCardUI.ViewController`](https://braze-inc.github.io/braze-swift-sdk/documentation/brazeui/brazecontentcardui/viewcontroller) par défaut est uniquement conçu pour gérer les types de Content Cards standard, mais il constitue un bon point de départ.
### Étape 2 : S'abonner aux mises à jour des cartes {#step-2-subscribe-to-card-updates}
Enregistrez une fonction de rappel pour vous abonner aux mises à jour des données lorsque les cartes sont actualisées. Vous pouvez analyser les objets Content Cards et extraire leurs données utiles, telles que `title`, `cardDescription` et `imageUrl`, puis utiliser les données du modèle résultant pour alimenter votre IU personnalisée.
Pour obtenir les modèles de données des Content Cards, abonnez-vous aux mises à jour des Content Cards. Portez une attention particulière aux propriétés suivantes :
* **`id` :** Représente la chaîne de caractères d'ID de la Content Card. Il s'agit de l'identifiant unique utilisé pour enregistrer les analyses des Content Cards personnalisées.
* **`extras` :** Englobe toutes les paires clé-valeur du tableau de bord de Braze.
Toutes les propriétés en dehors de `id` et `extras` sont facultatives pour les Content Cards personnalisées. Pour plus d'informations sur le modèle de données, consultez l'article d'intégration de chaque plateforme : [Android](https://www.braze.com/docs/fr/fr/developer_guide/content_cards/?sdktab=android), [iOS](https://www.braze.com/docs/fr/fr/developer_guide/content_cards/?sdktab=swift), [Web](https://www.braze.com/docs/fr/fr/developer_guide/content_cards/?sdktab=web).
```javascript
import * as braze from "@braze/web-sdk";
braze.subscribeToContentCardsUpdates((updates) => {
const cards = updates.cards;
// For example:
cards.forEach(card => {
if (card.isControl) {
// Do not display the control card, but remember to call `logContentCardImpressions([card])`
}
else if (card instanceof braze.ClassicCard || card instanceof braze.CaptionedImage) {
// Use `card.title`, `card.imageUrl`, etc.
}
else if (card instanceof braze.ImageOnly) {
// Use `card.imageUrl`, etc.
}
})
});
braze.openSession();
```
**Note:**
Les Content Cards ne sont actualisées au démarrage de la session que si `subscribeToContentCardsUpdates()` est appelé avant `openSession()`. Vous pouvez également [actualiser manuellement le flux](https://www.braze.com/docs/fr/fr/developer_guide/content_cards/customizing_cards/feed/) à tout moment.
#### Étape 2a : Créer une variable d'abonné privée {#step-2a-create-a-private-subscriber-variable}
Pour vous abonner aux mises à jour des cartes, déclarez d'abord une variable privée dans votre classe personnalisée pour contenir votre abonné :
```java
// subscriber variable
private IEventSubscriber mContentCardsUpdatedSubscriber;
```
#### Étape 2b : S'abonner aux mises à jour {#step-2b-subscribe-to-updates}
Ajoutez le code suivant pour vous abonner aux mises à jour des Content Cards de Braze, généralement dans la méthode `Activity.onCreate()` de votre activité Content Cards personnalisée :
```java
// Remove the previous subscriber before rebuilding a new one with our new activity.
Braze.getInstance(context).removeSingleSubscription(mContentCardsUpdatedSubscriber, ContentCardsUpdatedEvent.class);
mContentCardsUpdatedSubscriber = new IEventSubscriber() {
@Override
public void trigger(ContentCardsUpdatedEvent event) {
// List of all Content Cards
List allCards = event.getAllCards();
// Your logic below
}
};
Braze.getInstance(context).subscribeToContentCardsUpdates(mContentCardsUpdatedSubscriber);
Braze.getInstance(context).requestContentCardsRefresh();
```
#### Étape 2c : Se désabonner {#step-2c-unsubscribe}
Désabonnez-vous lorsque votre activité personnalisée n'est plus visible. Ajoutez le code suivant à la méthode de cycle de vie `onDestroy()` de votre activité :
```java
Braze.getInstance(context).removeSingleSubscription(mContentCardsUpdatedSubscriber, ContentCardsUpdatedEvent.class);
```
#### Étape 2a : Créer une variable d'abonné privée
Pour vous abonner aux mises à jour des cartes, déclarez d'abord une variable privée dans votre classe personnalisée pour contenir votre abonné :
```kotlin
private var contentCardsUpdatedSubscriber: IEventSubscriber? = null
```
#### Étape 2b : S'abonner aux mises à jour
Ajoutez le code suivant pour vous abonner aux mises à jour des Content Cards de Braze, généralement dans la méthode `Activity.onCreate()` de votre activité Content Cards personnalisée :
```kotlin
// Remove the previous subscriber before rebuilding a new one with our new activity.
Braze.getInstance(context).subscribeToContentCardsUpdates(contentCardsUpdatedSubscriber)
Braze.getInstance(context).requestContentCardsRefresh()
// List of all Content Cards
val allCards = event.allCards
// Your logic below
}
Braze.getInstance(context).subscribeToContentCardsUpdates(mContentCardsUpdatedSubscriber)
Braze.getInstance(context).requestContentCardsRefresh(true)
```
#### Étape 2c : Se désabonner
Désabonnez-vous lorsque votre activité personnalisée n'est plus visible. Ajoutez le code suivant à la méthode de cycle de vie `onDestroy()` de votre activité :
```kotlin
Braze.getInstance(context).removeSingleSubscription(contentCardsUpdatedSubscriber, ContentCardsUpdatedEvent::class.java)
```
Pour accéder au modèle de données des Content Cards, appelez [`contentCards.cards`](https://braze-inc.github.io/braze-swift-sdk/documentation/brazekit/braze/contentcards-swift.class/cards) sur votre instance `braze`.
```swift
let cards: [Braze.ContentCard] = AppDelegate.braze?.contentCards.cards
```
Vous pouvez également maintenir un abonnement pour observer les changements dans vos Content Cards. Deux approches sont possibles :
1. Maintenir un cancellable ; ou
2. Maintenir un `AsyncStream`.
##### Cancellable {#cancellable}
```swift
// This subscription is maintained through a Braze cancellable, which will observe for changes until the subscription is cancelled.
// You must keep a strong reference to the cancellable to keep the subscription active.
// The subscription is canceled either when the cancellable is deinitialized or when you call its `.cancel()` method.
let cancellable = AppDelegate.braze?.contentCards.subscribeToUpdates { [weak self] contentCards in
// Implement your completion handler to respond to updates in `contentCards`.
}
```
##### AsyncStream
```swift
let stream: AsyncStream<[Braze.ContentCard]> = AppDelegate.braze?.contentCards.cardsStream
```
```objc
NSArray *contentCards = AppDelegate.braze.contentCards.cards;
```
Si vous souhaitez maintenir un abonnement à vos Content Cards, vous pouvez appeler [`subscribeToUpdates`](https://braze-inc.github.io/braze-swift-sdk/documentation/brazekit/braze/contentcards-swift.class/subscribetoupdates(_:)) :
```objc
// This subscription is maintained through Braze cancellable, which will continue to observe for changes until the subscription is cancelled.
BRZCancellable *cancellable = [self.braze.contentCards subscribeToUpdates:^(NSArray *contentCards) {
// Implement your completion handler to respond to updates in `contentCards`.
}];
```
### Étape 3 : Mettre en œuvre les analyses {#step-3-implement-analytics}
Les impressions, clics et fermetures de Content Cards ne sont pas automatiquement enregistrés dans votre vue personnalisée. Vous devez [mettre en œuvre chaque méthode correspondante](https://www.braze.com/docs/fr/fr/developer_guide/content_cards/logging_analytics/) pour enregistrer correctement tous les indicateurs dans les analyses du tableau de bord de Braze.
### Étape 4 : Tester votre carte (facultatif) {#step-4-test-your-card-optional}
Pour tester votre Content Card :
1. Définissez un utilisateur actif dans votre application en appelant la méthode [`changeUser()`](https://js.appboycdn.com/web-sdk/latest/doc/modules/braze.html#changeuser).
2. Dans Braze, accédez à **Campaigns**, puis [créez une nouvelle campagne de Content Cards](https://www.braze.com/docs/fr/fr/user_guide/channels/content_cards/create_a_content_card/).
3. Dans votre campagne, sélectionnez **Test**, puis saisissez le `user-id` de l'utilisateur test. Lorsque vous êtes prêt, sélectionnez **Send Test**. Vous pourrez bientôt lancer une Content Card sur votre appareil.

## Placements des Content Cards {#content-card-placements}
Les Content Cards peuvent être utilisées de nombreuses façons. Trois implémentations courantes consistent à les utiliser comme centre de messages, comme bannière d'image dynamique ou comme carrousel d'images. Pour chacun de ces placements, vous attribuerez des [paires clé-valeur](https://www.braze.com/docs/fr/fr/developer_guide/customization_guides/content_cards/customizing_behavior/#key-value-pairs) (la propriété `extras` dans le modèle de données) à vos Content Cards et, en fonction des valeurs, ajusterez dynamiquement le comportement, l'apparence ou la fonctionnalité de la carte au moment de l'exécution.
{: style="border:0px;"}
### Boîte de réception de messages {#message-inbox}
Les Content Cards peuvent être utilisées pour simuler un centre de messages. Dans ce format, chaque message est sa propre carte contenant des [paires clé-valeur](https://www.braze.com/docs/fr/fr/developer_guide/customization_guides/content_cards/customizing_behavior/#key-value-pairs) qui alimentent les événements au clic. Ces paires clé-valeur sont les identifiants clés que l'application examine pour décider où rediriger l'utilisateur lorsqu'il clique sur un message de la boîte de réception. Les valeurs des paires clé-valeur sont arbitraires.
#### Exemple {#example}
Par exemple, vous pouvez créer deux cartes de message : un appel à l'action pour inciter les utilisateurs à activer les recommandations de lecture, et un code de coupon destiné à votre nouveau segment d'utilisateurs abonnés.
Les clés telles que `body`, `title` et `buttonText` peuvent comporter des valeurs de chaînes de caractères simples que vos marketeurs peuvent définir. Les clés telles que `terms` peuvent avoir des valeurs fournissant une petite collection de phrases approuvées par votre service juridique. Les clés telles que `style` et `class_type` ont des valeurs de chaînes de caractères que vous pouvez définir pour déterminer le rendu de votre carte sur votre application ou votre site.
Paires clé-valeur pour la carte de recommandation de lecture :
| Clé | Valeur |
|------------|----------------------------------------------------------------------|
| `body` | Add your interests to your Politer Weekly profile for personal reading recommendations. |
| `style` | info |
| `class_type` | notification_center |
| `card_priority` | 1 |
{: .reset-td-br-1 .reset-td-br-2 role="presentation" }
Paires clé-valeur pour un coupon destiné aux nouveaux utilisateurs abonnés :
| Clé | Valeur |
|------------|------------------------------------------------------------------|
| `title` | Subscribe for unlimited games |
| `body` | End of Summer Special - Enjoy 10% off Politer games |
| `buttonText` | Subscribe Now |
| `style` | promo |
| `class_type` | notification_center |
| `card_priority` | 2 |
| `terms` | new_subscribers_only |
{: .reset-td-br-1 .reset-td-br-2 role="presentation" }
**Informations supplémentaires pour Android**
Dans le SDK Android et FireOS, la logique du centre de messages est pilotée par la valeur `class_type` fournie par les paires clé-valeur de Braze. La méthode [`createContentCardable`](https://www.braze.com/docs/fr/fr/developer_guide/content_cards/) vous permet de filtrer et d'identifier ces types de classes.
**Utilisation de `class_type` pour le comportement au clic**
Lorsque nous intégrons les données de la Content Card dans nos classes personnalisées, nous utilisons la propriété `ContentCardClass` des données pour déterminer quelle sous-classe concrète doit être utilisée pour stocker les données.
```kotlin
private fun createContentCardable(metadata: Map, type: ContentCardClass?): ContentCardable?{
return when(type){
ContentCardClass.AD -> Ad(metadata)
ContentCardClass.MESSAGE_WEB_VIEW -> WebViewMessage(metadata)
ContentCardClass.NOTIFICATION_CENTER -> FullPageMessage(metadata)
ContentCardClass.ITEM_GROUP -> Group(metadata)
ContentCardClass.ITEM_TILE -> Tile(metadata)
ContentCardClass.COUPON -> Coupon(metadata)
else -> null
}
}
```
Ensuite, lors du traitement de l'interaction utilisateur avec la liste des messages, nous utilisons le type de message pour déterminer la vue à afficher à l'utilisateur.
```kotlin
override fun onCreate(savedInstanceState: Bundle?) {
super.onCreate(savedInstanceState)
//...
listView.onItemClickListener = AdapterView.OnItemClickListener { parent, view, position, id ->
when (val card = dataProvider[position]){
is WebViewMessage -> {
val intent = Intent(this, WebViewActivity::class.java)
val bundle = Bundle()
bundle.putString(WebViewActivity.INTENT_PAYLOAD, card.contentString)
intent.putExtras(bundle)
startActivity(intent)
}
is FullPageMessage -> {
val intent = Intent(this, FullPageContentCard::class.java)
val bundle = Bundle()
bundle.putString(FullPageContentCard.CONTENT_CARD_IMAGE, card.icon)
bundle.putString(FullPageContentCard.CONTENT_CARD_TITLE, card.messageTitle)
bundle.putString(FullPageContentCard.CONTENT_CARD_DESCRIPTION, card.cardDescription)
intent.putExtras(bundle)
startActivity(intent)
}
}
}
}
```
**Utilisation de `class_type` pour le comportement au clic**
Lorsque nous intégrons les données de la Content Card dans nos classes personnalisées, nous utilisons la propriété `ContentCardClass` des données pour déterminer quelle sous-classe concrète doit être utilisée pour stocker les données.
```java
private ContentCardable createContentCardable(Map metadata, ContentCardClass type){
switch(type){
case ContentCardClass.AD:{
return new Ad(metadata);
}
case ContentCardClass.MESSAGE_WEB_VIEW:{
return new WebViewMessage(metadata);
}
case ContentCardClass.NOTIFICATION_CENTER:{
return new FullPageMessage(metadata);
}
case ContentCardClass.ITEM_GROUP:{
return new Group(metadata);
}
case ContentCardClass.ITEM_TILE:{
return new Tile(metadata);
}
case ContentCardClass.COUPON:{
return new Coupon(metadata);
}
default:{
return null;
}
}
}
```
Ensuite, lors du traitement de l'interaction utilisateur avec la liste des messages, nous utilisons le type de message pour déterminer la vue à afficher à l'utilisateur.
```java
@Override
protected void onCreate(Bundle savedInstanceState) {
super.onCreate(savedInstanceState)
//...
listView.setOnItemClickListener(new AdapterView.OnItemClickListener() {
@Override
public void onItemClick(AdapterView parent, View view, int position, long id){
ContentCardable card = dataProvider.get(position);
if (card instanceof WebViewMessage){
Bundle intent = new Intent(this, WebViewActivity.class);
Bundle bundle = new Bundle();
bundle.putString(WebViewActivity.INTENT_PAYLOAD, card.getContentString());
intent.putExtras(bundle);
startActivity(intent);
}
else if (card instanceof FullPageMessage){
Intent intent = new Intent(this, FullPageContentCard.class);
Bundle bundle = Bundle();
bundle.putString(FullPageContentCard.CONTENT_CARD_IMAGE, card.getIcon());
bundle.putString(FullPageContentCard.CONTENT_CARD_TITLE, card.getMessageTitle());
bundle.putString(FullPageContentCard.CONTENT_CARD_DESCRIPTION, card.getCardDescription());
intent.putExtras(bundle)
startActivity(intent)
}
}
});
}
```
### Carrousel {#carousel}
Vous pouvez intégrer des Content Cards dans un flux de carrousel entièrement personnalisé, permettant aux utilisateurs de balayer l'écran pour découvrir d'autres cartes en vedette. Par défaut, les Content Cards sont triées par date de création (la plus récente en premier), et vos utilisateurs verront toutes les cartes auxquelles ils ont droit.
Pour mettre en place un carrousel de Content Cards :
1. Créez une logique personnalisée qui observe les [changements dans vos Content Cards](https://www.braze.com/docs/fr/fr/developer_guide/customization_guides/content_cards/customizing_feed/#refreshing-the-feed) et gère l'arrivée de nouvelles cartes.
2. Créez une logique personnalisée côté client pour afficher un nombre spécifique de cartes dans le carrousel à un instant donné. Par exemple, vous pouvez sélectionner les cinq premiers objets Content Cards du tableau ou introduire des paires clé-valeur pour créer une logique conditionnelle.
**Tip:**
Si vous implémentez un carrousel en tant que flux secondaire de Content Cards, veillez à [trier les cartes dans le flux approprié à l'aide de paires clé-valeur](https://www.braze.com/docs/fr/fr/developer_guide/customization_guides/content_cards/customizing_feed/#multiple-feeds).
### Image seule {#image-only}
Les Content Cards n'ont pas besoin de ressembler à des « cartes ». Par exemple, elles peuvent prendre la forme d'une image dynamique affichée en permanence sur votre page d'accueil ou en haut de pages spécifiques.
Pour y parvenir, vos marketeurs créeront une campagne ou une étape du Canvas avec une Content Card de type **Image Only**. Définissez ensuite les paires clé-valeur appropriées pour utiliser les [Content Cards en tant que contenu supplémentaire](https://www.braze.com/docs/fr/fr/developer_guide/customization_guides/content_cards/customizing_behavior/#content-cards-as-supplemental-content).
# Personnaliser les cartes
Source: /docs/fr/developer_guide/content_cards/customizing_cards/index.md
**Tip:**
Using Content Cards for banner-style messages? Try out [Banners](https://www.braze.com/docs/fr/fr/user_guide/message_building_by_channel/banners/)— perfect for inline, persistent in-app and web messages.
# Personnaliser le style des Content Cards
Source: /docs/fr/developer_guide/content_cards/customizing_cards/style/index.md
# Personnaliser le style des Content Cards {#customize-the-style-of-content-cards}
> Les Content Cards de Braze sont livrées avec une apparence par défaut. Cet article présente les options de style disponibles pour vos Content Cards, afin de les adapter à l'identité de votre marque. Pour consulter la liste complète des types de cartes de contenu, voir [À propos des Content Cards](https://www.braze.com/docs/fr/fr/developer_guide/content_cards/).
## Créer un style personnalisé {#creating-a-custom-style}
L'interface utilisateur par défaut des Content Cards est importée depuis la couche UI du SDK Braze. Vous pouvez ensuite ajuster certains aspects du style des cartes, l'ordre d'affichage et la manière dont le flux est présenté à vos utilisateurs.

**Note:**
Les propriétés des Content Cards telles que `title`, `cardDescription`, `imageUrl`, etc., sont directement modifiables depuis le [tableau de bord](https://www.braze.com/docs/fr/fr/user_guide/channels/content_cards/creative_details/). C'est la méthode recommandée pour modifier ces informations.
Les styles par défaut de Braze sont définis en CSS au sein du SDK Braze. En surchargeant certains styles dans votre application, vous pouvez personnaliser le flux standard avec vos propres images d'arrière-plan, familles de polices, styles, tailles, animations, etc. Par exemple, voici une surcharge qui affiche les Content Cards avec une largeur de 800 px :
``` css
body .ab-feed {
width: 800px;
}
```
Pour consulter la liste complète des propriétés modifiables, voir [les options de configuration du SDK Braze](https://js.appboycdn.com/web-sdk/latest/doc/modules/braze.html).
Par défaut, les Content Cards du SDK Android et FireOS respectent les directives d'interface utilisateur standard d'Android pour offrir une expérience fluide. Vous pouvez consulter ces styles par défaut dans le fichier [`res/values/styles.xml`](https://github.com/braze-inc/braze-android-sdk/blob/master/android-sdk-ui/src/main/res/values/styles.xml) de la distribution du SDK Braze :
```xml
```
Pour personnaliser le style des Content Cards, surchargez ce style par défaut. Pour ce faire, copiez-le intégralement dans le fichier `styles.xml` de votre projet, puis apportez vos modifications. Le style doit être copié en entier dans votre fichier local `styles.xml` pour que tous les attributs soient correctement définis.
```xml
```
```xml
```
Par défaut, les Content Cards du SDK Android et FireOS respectent les directives d'interface utilisateur standard d'Android pour offrir une expérience fluide.
Vous pouvez appliquer un style de deux manières. La première consiste à passer un [`ContentCardListStyling`](https://braze-inc.github.io/braze-android-sdk/kdoc/braze-android-sdk/com.braze.jetpackcompose.contentcards.styling/-content-card-list-styling/index.html) et un [`ContentCardStyling`](https://braze-inc.github.io/braze-android-sdk/kdoc/braze-android-sdk/com.braze.jetpackcompose.contentcards.styling/-content-card-styling/index.html) à [`ContentCardsList`](https://braze-inc.github.io/braze-android-sdk/kdoc/braze-android-sdk/com.braze.jetpackcompose.contentcards/-content-cards-list.html), comme dans l'exemple suivant :
```kotlin
ContentCardsList(
style = ContentCardListStyling(listBackgroundColor = Color.Red),
cardStyle = ContentCardStyling(
titleTextStyle = TextStyle(
fontFamily = fontFamily,
fontSize = 25.sp
),
shadowRadius = 10.dp,
shortNewsContentCardStyle = BrazeShortNewsContentCardStyling(
shadowRadius = 15.dp
)
)
)
```
La seconde consiste à utiliser [`BrazeStyle`](https://braze-inc.github.io/braze-android-sdk/kdoc/braze-android-sdk/com.braze.jetpackcompose/-braze-style.html) pour créer un style global applicable aux composants Braze, comme dans l'exemple suivant :
```kotlin
BrazeStyle(
contentCardStyle = ContentCardStyling(
textAnnouncementContentCardStyle = BrazeTextAnnouncementContentCardStyling(
cardBackgroundColor = Color.Red,
descriptionTextStyle = TextStyle(
fontFamily = fontFamily,
fontSize = 25.sp,
)
),
titleTextColor = Color.Magenta
)
) {
// Your app here, including any ContentCardsList() in it
}
```
Le contrôleur de vue des Content Cards vous permet de personnaliser l'apparence et le comportement de toutes les cellules via la structure [`BrazeContentCardUI.ViewController.Attributes`](https://braze-inc.github.io/braze-swift-sdk/documentation/brazeui/brazecontentcardui/viewcontroller/attributes-swift.struct). Configurer les Content Cards à l'aide des `Attributes` est une option simple qui vous permet de lancer l'interface des Content Cards avec une configuration minimale.
**Important:**
La personnalisation via `Attributes` n'est disponible qu'en Swift.
**Modifier `Attributes.default`**
Personnalisez l'apparence de toutes les instances du contrôleur de vue des Content Cards Braze en modifiant directement la variable statique [`Attributes.defaults`](https://braze-inc.github.io/braze-swift-sdk/documentation/brazeui/brazecontentcardui/viewcontroller/attributes-swift.struct/defaults).
Par exemple, pour modifier la taille d'image et le rayon des coins par défaut pour toutes les cellules :
```swift
BrazeContentCardUI.ViewController.Attributes.defaults.cellAttributes.cornerRadius = 20
BrazeContentCardUI.ViewController.Attributes.defaults.cellAttributes.classicImageSize = CGSize(width: 65, height: 65)
```
**Initialiser le contrôleur de vue avec des attributs**
Si vous souhaitez modifier uniquement une instance spécifique du contrôleur de vue des Content Cards Braze, utilisez l'initialisateur [`init(braze:attributes:)`](https://braze-inc.github.io/braze-swift-sdk/documentation/brazeui/brazecontentcardui/viewcontroller/init(braze:attributes:)/) pour transmettre une structure `Attributes` personnalisée au contrôleur de vue.
Par exemple, vous pouvez modifier la taille d'image et le rayon des coins pour une instance spécifique du contrôleur de vue :
```swift
var attributes = BrazeContentCardUI.ViewController.Attributes.defaults
attributes.cellAttributes.cornerRadius = 20
attributes.cellAttributes.classicImageSize = CGSize(width: 65, height: 65)
let viewController = BrazeContentCardUI.ViewController(braze: AppDelegate.braze, attributes: attributes)
```
**Personnaliser les cellules par sous-classement**
Vous pouvez également créer des interfaces personnalisées en enregistrant des classes personnalisées pour chaque type de carte souhaité. Pour utiliser votre sous-classe au lieu de la cellule par défaut, modifiez la propriété [`cells`](https://braze-inc.github.io/braze-swift-sdk/documentation/brazeui/brazecontentcardui/viewcontroller/attributes-swift.struct/cells) dans la structure `Attributes`. Par exemple :
```swift
var attributes = BrazeContentCardUI.ViewController.Attributes.defaults
// Register your own custom cell
attributes.cells[BrazeContentCardUI.ClassicImageCell.identifier] = CustomClassicImageCell.self
let viewController = BrazeContentCardUI.ViewController(braze: AppDelegate.braze, attributes: attributes)
```
**Modifier les Content Cards par programmation**
Vous pouvez modifier les Content Cards par programmation en assignant la closure [`transform`](https://braze-inc.github.io/braze-swift-sdk/documentation/brazeui/brazecontentcardui/viewcontroller/attributes-swift.struct/transform) à votre structure `Attributes`. L'exemple ci-dessous modifie les champs `title` et `description` des cartes compatibles :
```swift
var attributes = BrazeContentCardUI.ViewController.Attributes.defaults
attributes.transform = { cards in
cards.map { card in
var card = card
if let title = card.title {
card.title = "[modified] \(title)"
}
if let description = card.description {
card.description = "[modified] \(description)"
}
return card
}
}
let viewController = BrazeContentCardUI.ViewController(braze: AppDelegate.braze, attributes: attributes)
```
Consultez l'[application d'exemple Examples](https://github.com/braze-inc/braze-swift-sdk/tree/main/Examples/Swift) pour un exemple complet.
La personnalisation des Content Cards via `Attributes` n'est pas prise en charge avec Objective-C.
## Exemples de personnalisation {#customization-examples}
### Police personnalisée {#custom-font}
Personnaliser la police de vos Content Cards vous permet de préserver l'identité de votre marque et de créer une expérience visuellement attrayante pour vos utilisateurs. Utilisez ces recettes pour définir la police de toutes les Content Cards par programmation.
Comme tout autre élément web, vous pouvez facilement personnaliser l'apparence des Content Cards via CSS. Dans votre fichier CSS ou vos styles en ligne, utilisez la propriété `font-family` et spécifiez le nom de la police ou la pile de polices souhaitée.
```css
/* CSS selector targeting the Content Card element */
.card-element {
font-family: "Helvetica Neue", Arial, sans-serif;
}
```
Pour modifier la police par défaut par programmation, définissez un style pour les cartes et utilisez l'attribut `fontFamily` pour indiquer à Braze d'utiliser votre famille de polices personnalisée.
Par exemple, pour mettre à jour la police de tous les titres des cartes image sous-titrées, surchargez le style `Braze.ContentCards.CaptionedImage.Title` et référencez votre famille de polices personnalisée. La valeur de l'attribut doit pointer vers une famille de polices dans votre répertoire `res/font`.
Voici un exemple tronqué avec une famille de polices personnalisée `my_custom_font_family`, référencée sur la dernière ligne :
```xml
```
Pour en savoir plus sur la personnalisation des polices dans le SDK Android, consultez le [guide des familles de polices](https://www.braze.com/docs/fr/fr/developer_guide/platform_integration_guides/android/advanced_use_cases/font_customization/#font-customization).
Pour modifier la police par défaut par programmation, vous pouvez définir le paramètre [`titleTextStyle`](https://braze-inc.github.io/braze-android-sdk/kdoc/braze-android-sdk/com.braze.jetpackcompose.contentcards.styling/-content-card-styling/index.html#715371549%2FProperties%2F-1725759721) de `ContentCardStyling`.
Vous pouvez également définir `titleTextStyle` pour un type de carte spécifique en le configurant sur [`BrazeShortNewsContentCardStyling`](https://braze-inc.github.io/braze-android-sdk/kdoc/braze-android-sdk/com.braze.jetpackcompose.contentcards.styling/-braze-short-news-content-card-styling/index.html) et en le passant au paramètre [`shortNewsContentCardStyle`](https://braze-inc.github.io/braze-android-sdk/kdoc/braze-android-sdk/com.braze.jetpackcompose.contentcards.styling/-content-card-styling/index.html#8580250%2FProperties%2F-1725759721) de `ContentCardStyling`.
```kotlin
val fontFamily = FontFamily(
Font(R.font.sailec_bold)
)
ContentCardStyling(
titleTextStyle = TextStyle(
fontFamily = fontFamily
)
)
```
Personnalisez vos polices en modifiant les `Attributes` de la propriété d'instance [`cellAttributes`](https://braze-inc.github.io/braze-swift-sdk/documentation/brazeui/brazecontentcardui/viewcontroller/attributes-swift.struct/cellattributes/). Par exemple :
```swift
var attributes = BrazeContentCardUI.ViewController.Attributes.defaults
attributes.cellAttributes.titleFont = .preferredFont(textStyle: .callout, weight: .bold)
attributes.cellAttributes.descriptionFont = .preferredFont(textStyle: .footnote, weight: .regular)
attributes.cellAttributes.domainFont = .preferredFont(textStyle: .footnote, weight: .medium)
let viewController = BrazeContentCardUI.ViewController.init(braze: braze, attributes: attributes)
```
La personnalisation des polices via `Attributes` n'est pas prise en charge en Objective-C.
Consultez l'[application d'exemple Examples](https://github.com/braze-inc/braze-swift-sdk/blob/main/Examples/ObjC/Sources/ContentCards-Custom-UI/CardsInfoViewController.m#L97) pour savoir comment créer votre propre interface utilisateur avec des polices personnalisées.
### Icônes d'épingle personnalisées {#custom-pinned-icons}
Lors de la création d'une Content Card, les marketeurs ont la possibilité de l'épingler. Une carte épinglée s'affiche en haut du flux de l'utilisateur et ne peut pas être masquée. Lorsque vous personnalisez le style de vos cartes, vous pouvez modifier l'apparence de l'icône d'épingle.
{:style="border:none"}
La structure de l'icône d'épingle de la Content Card est la suivante :
```css
```
Si vous souhaitez utiliser une autre icône FontAwesome, remplacez le nom de classe de l'élément `i` par celui de l'icône souhaitée.
Si vous souhaitez changer complètement l'icône, supprimez l'élément `i` et ajoutez l'icône personnalisée en tant qu'enfant de `ab-pinned-indicator`. Il existe plusieurs méthodes pour modifier l'icône, mais une approche simple consiste à utiliser `replaceChildren()` sur l'élément `ab-pinned-indicator`.
Par exemple :
```javascript
// Get the parent element
const pinnedIndicator = document.querySelector('.ab-pinned-indicator');
// Create a new custom icon element
const customIcon = document.createElement('span');
customIcon.classList.add('customIcon');
// Replace the existing icon with the custom icon
pinnedIndicator.replaceChildren(customIcon);
```
Pour définir une icône d'épingle personnalisée, surchargez le style `Braze.ContentCards.PinnedIcon`. Votre ressource d'image personnalisée doit être déclarée dans l'élément `android:src`. Par exemple :
```xml
```
Pour modifier l'icône d'épingle par défaut, vous pouvez définir le paramètre [`pinnedResourceId`](https://braze-inc.github.io/braze-android-sdk/kdoc/braze-android-sdk/com.braze.jetpackcompose.contentcards.styling/-content-card-styling/index.html#794044424%2FProperties%2F-1725759721) de `ContentCardStyling`. Par exemple :
```kotlin
ContentCardStyling(
pinnedResourceId = R.drawable.pushpin,
pinnedImageAlignment = Alignment.TopCenter
)
```
Vous pouvez également spécifier un Composable dans [`pinnedComposable`](https://braze-inc.github.io/braze-android-sdk/kdoc/braze-android-sdk/com.braze.jetpackcompose.contentcards.styling/-content-card-styling/index.html#1460938052%2FProperties%2F-1725759721) de `ContentCardStyling`. Si `pinnedComposable` est spécifié, il prend le pas sur la valeur de `pinnedResourceId`.
```kotlin
ContentCardStyling(
pinnedComposable = {
Box(Modifier.fillMaxWidth()) {
Text(
modifier = Modifier
.align(Alignment.Center)
.width(50.dp),
text = "This message is not read. Please read it."
)
}
}
)
```
Personnalisez l'icône d'épingle en modifiant les propriétés `pinIndicatorColor` et `pinIndicatorImage` de la propriété d'instance [`cellAttributes`](https://braze-inc.github.io/braze-swift-sdk/documentation/brazeui/brazecontentcardui/viewcontroller/attributes-swift.struct/cellattributes/). Par exemple :
```swift
var attributes = BrazeContentCardUI.ViewController.Attributes.defaults
attributes.cellAttributes.pinIndicatorColor = .red
attributes.cellAttributes.pinIndicatorImage = UIImage(named: "my-image")
let viewController = BrazeContentCardUI.ViewController.init(braze: braze, attributes: attributes)
```
Vous pouvez également utiliser le sous-classement pour créer votre propre version personnalisée de `BrazeContentCardUI.Cell`, qui inclut l'indicateur d'épingle. Par exemple :
```swift
var attributes = BrazeContentCardUI.ViewController.Attributes.defaults
attributes.cells[BrazeContentCardUI.ClassicImageCell.identifier] = CustomClassicImageCell.self
let viewController = BrazeContentCardUI.ViewController(braze: AppDelegate.braze, attributes: attributes)
```
La personnalisation de l'indicateur d'épingle via `Attributes` n'est pas prise en charge en Objective-C.
### Modifier la couleur de l'indicateur de non-lecture {#changing-the-unread-indicator-color}
Les Content Cards comportent une ligne bleue en bas de la carte qui indique si celle-ci a été consultée ou non.

Pour modifier la couleur de l'indicateur de non-lecture d'une carte, ajoutez du CSS personnalisé à votre page web. Par exemple, pour définir la couleur de l'indicateur en vert :
```css
.ab-unread-indicator { background-color: green; }
```
Modifiez la couleur de la barre d'indicateur de non-lecture en changeant la valeur de `com_braze_content_cards_unread_bar_color` dans votre fichier `colors.xml` :
```xml
#1676d0
```
Pour changer la couleur de la barre d'indicateur de non-lecture, modifiez la valeur de [`unreadIndicatorColor`](https://braze-inc.github.io/braze-android-sdk/kdoc/braze-android-sdk/com.braze.jetpackcompose.contentcards.styling/-content-card-styling/index.html#-1669590042%2FProperties%2F-1725759721) dans `ContentCardStyling` :
```kotlin
ContentCardStyling(
unreadIndicatorColor = Color.Red
)
```
Modifiez la couleur de la barre d'indicateur de non-lecture en assignant une valeur à la couleur de teinte de votre instance `BrazeContentCardUI.ViewController` :
```swift
let viewController = BrazeContentCardUI.ViewController(braze: AppDelegate.braze)
viewController.view.tintColor = .systemGreen
```
Si vous souhaitez modifier uniquement l'indicateur de non-consultation, vous pouvez accéder à la propriété `unviewedIndicatorColor` de votre structure `BrazeContentCardUI.ViewController.Attributes`. Si vous utilisez les implémentations `UITableViewCell` de Braze, accédez à la propriété avant que la cellule ne soit dessinée.
Par exemple, pour définir la couleur de l'indicateur de non-consultation en rouge :
```swift
var attributes = BrazeContentCardUI.ViewController.Attributes.defaults
attributes.cellAttributes.unviewedIndicatorColor = .red
let viewController = BrazeContentCardUI.ViewController(braze: AppDelegate.braze, attributes: attributes)
```
Consultez l'[application d'exemple Examples](https://github.com/braze-inc/braze-swift-sdk/tree/main/Examples/Swift) pour un exemple complet.
Modifiez la couleur de la barre d'indicateur de non-lecture en assignant une valeur à la couleur de teinte de votre `BRZContentCardUIViewController` :
```objc
BRZContentCardUIViewController *viewController = [[BRZContentCardUIViewController alloc] initWithBraze:AppDelegate.braze];
[viewController.view setTintColor:[UIColor systemGreenColor]];
```
La personnalisation de l'indicateur de non-consultation uniquement via `Attributes` n'est pas prise en charge en Objective-C.
### Mode sombre {#dark-mode}
Pour afficher différentes images ou styles selon le mode sombre ou clair de l'appareil, utilisez des [paires clé-valeur](https://www.braze.com/docs/fr/fr/user_guide/message_building_by_channel/content_cards/creative_details/#key-value-pairs) dans votre message Content Card. Par exemple, ajoutez une paire clé-valeur comme `dark_mode_image` avec l'URL de votre ressource d'image en mode sombre. Ensuite, dans votre application, ajoutez une logique personnalisée pour vérifier le mode d'apparence actuel de l'appareil et afficher l'image appropriée.
```swift
if let darkImageUrl = card.extras["dark_mode_image"],
view.traitCollection.userInterfaceStyle == .dark {
// Use darkImageUrl for the image
}
```
```kotlin
val darkModeImage = card.extras["dark_mode_image"]
val isDarkMode = (resources.configuration.uiMode and Configuration.UI_MODE_NIGHT_MASK) == Configuration.UI_MODE_NIGHT_YES
if (isDarkMode && darkModeImage != null) {
// Use darkModeImage for the image
}
```
```javascript
const darkModeImage = card.extras?.dark_mode_image;
const isDarkMode = window.matchMedia("(prefers-color-scheme: dark)").matches;
if (isDarkMode && darkModeImage) {
// Use darkModeImage for the image
}
```
Ce modèle fonctionne pour tout contenu dépendant de l'apparence, y compris le texte, les couleurs ou les dispositions. Téléchargez vos ressources d'image en mode sombre dans la [bibliothèque multimédia](https://www.braze.com/docs/fr/fr/user_guide/messaging/design_and_edit/media_library/image_specifications/), puis référencez-les dans une paire clé-valeur.
### Désactiver l'indicateur de non-lecture {#disabling-unread-indicator}
Masquez la barre d'indicateur de non-lecture en ajoutant le style suivant à votre `css` :
```css
.ab-unread-indicator { display: none; }
```
Masquez la barre d'indicateur de non-lecture en définissant [`setUnreadBarVisible`](https://braze-inc.github.io/braze-android-sdk/kdoc/braze-android-sdk/com.braze.ui.contentcards.view/-content-card-view-holder/set-unread-bar-visible.html?query=fun%20setUnreadBarVisible(isVisible:%20Boolean)) sur `ContentCardViewHolder` à `false`.
La désactivation de l'indicateur de non-lecture n'est pas prise en charge dans Jetpack Compose.
Masquez la barre d'indicateur de non-lecture en définissant la propriété `attributes.cellAttributes.unviewedIndicatorColor` de votre structure `Attributes` sur `.clear`.
La personnalisation de l'indicateur de non-consultation uniquement via `Attributes` n'est pas prise en charge en Objective-C.
# Personnaliser le comportement des Content Cards
Source: /docs/fr/developer_guide/content_cards/customizing_cards/behavior/index.md
# Personnaliser le comportement des Content Cards {#customize-the-behavior-of-content-cards}
> Ce guide de mise en œuvre aborde la modification du comportement des Content Cards, l'ajout d'éléments supplémentaires tels que des paires clé-valeur à votre payload, ainsi que des recettes pour des personnalisations courantes. Pour obtenir la liste complète des types de cartes de contenu, consultez [À propos des Content Cards](https://www.braze.com/docs/fr/fr/developer_guide/content_cards/).
## Paires clé-valeur {#key-value-pairs}
Braze vous permet d'envoyer des payloads de données supplémentaires via les Content Cards aux appareils des utilisateurs à l'aide de paires clé-valeur. Celles-ci peuvent vous aider à suivre les indicateurs internes, à mettre à jour le contenu de l'application et à personnaliser les propriétés. [Ajoutez des paires clé-valeur à l'aide du tableau de bord](https://www.braze.com/docs/fr/fr/user_guide/message_building_by_channel/content_cards/create/#step-4-configure-additional-settings-optional).
**Note:**
Nous vous déconseillons d'envoyer des valeurs JSON imbriquées sous forme de paires clé-valeur. Aplanissez plutôt le JSON avant de l'envoyer.
Les paires clé-valeur sont stockées sur des objets `card` sous la forme `extras`. Elles peuvent être utilisées pour envoyer des données avec une carte en vue d'un traitement ultérieur par l'application. Appelez `card.extras` pour accéder à ces valeurs.
Les paires clé-valeur sont stockées sur des objets `card` sous la forme `extras`. Elles peuvent être utilisées pour envoyer des données avec une carte en vue d'un traitement ultérieur par l'application. Appelez `card.extras` pour accéder à ces valeurs.
Les paires clé-valeur sont stockées sur des objets `card` sous la forme `extras`. Elles peuvent être utilisées pour envoyer des données avec une carte en vue d'un traitement ultérieur par l'application. Appelez `card.extras` pour accéder à ces valeurs.
**Tip:**
Il est important que vos équipes marketing et de développement se coordonnent sur les paires clé-valeur qui seront utilisées (par exemple, `feed_type = brand_homepage`), car toutes les paires clé-valeur saisies par les marketeurs dans le tableau de bord de Braze doivent correspondre exactement aux paires clé-valeur que les développeurs intègrent dans la logique de l'application.
## Content Cards en tant que contenu supplémentaire {#content-cards-as-supplemental-content}
{: style="float:right;max-width:25%;margin-left:15px;border:0;"}
Vous pouvez intégrer de façon fluide les Content Cards dans un flux existant, ce qui permet de charger simultanément les données de plusieurs flux. Cela crée une expérience cohésive et harmonieuse avec les Content Cards de Braze et le contenu du flux existant.
L'exemple à droite montre un flux avec une liste hybride d'éléments alimentés par des données locales et des Content Cards propulsées par Braze. Avec cette approche, les Content Cards peuvent être indifférenciables du contenu existant.
### Paires clé-valeur déclenchées par l'API {#api-triggered-key-value-pairs}
Les [campagnes déclenchées par l'API](https://www.braze.com/docs/fr/fr/user_guide/messaging/campaigns/schedule_your_campaign/api_triggered_delivery/) sont une bonne stratégie à employer lorsque les valeurs d'une carte dépendent de facteurs externes pour déterminer le contenu à afficher à l'utilisateur. Par exemple, pour afficher du contenu supplémentaire, définissez des paires clé-valeur à l'aide de Liquid. Notez que `class_type` doit être connu au moment de la configuration.
{: style="max-width:60%;"}
## Content Cards en tant que contenu interactif {#content-cards-as-interactive-content}
{: style="border:0;"}{: style="float:right;max-width:45%;border:0;margin-left:15px;"}
Les Content Cards peuvent être exploitées pour créer des expériences dynamiques et interactives pour vos utilisateurs. Dans l'exemple à droite, une fenêtre contextuelle de Content Card apparaît au moment du paiement, proposant aux utilisateurs des promotions de dernière minute. Des cartes bien placées comme celle-ci constituent un excellent moyen d'inciter les utilisateurs à effectuer des actions spécifiques.
Les paires clé-valeur pour ce cas d'usage comprennent `discount_percentage` défini comme le montant de remise souhaité et `class_type` défini comme `coupon_code`. Ces paires clé-valeur vous permettent de filtrer et d'afficher des Content Cards spécifiques à un type sur l'écran de paiement. Pour plus d'informations sur l'utilisation de paires clé-valeur pour gérer plusieurs flux, consultez [Personnaliser le flux par défaut des Content Cards](https://www.braze.com/docs/fr/fr/developer_guide/customization_guides/content_cards/customizing_feed/#multiple-feeds).
{: style="max-width:80%;"}
## Badges de Content Cards {#content-card-badges}
{: style="max-width:35%;float:right;margin-left:15px;border:none;"}
Les badges sont de petites icônes idéales pour attirer l'attention d'un utilisateur. L'utilisation de badges pour alerter l'utilisateur sur le nouveau contenu des Content Cards peut inciter les utilisateurs à revenir sur votre application et augmenter le nombre de sessions.
### Affichage du nombre de Content Cards non lues sous forme de badge {#displaying-the-number-of-unread-content-cards-as-a-badge}
Vous pouvez afficher le nombre de Content Cards non lues de votre utilisateur sous forme de badge sur l'icône de votre application.
Vous pouvez à tout moment demander le nombre de cartes non lues en appelant :
```javascript
braze.getCachedContentCards().getUnviewedCardCount();
```
Vous pouvez ensuite utiliser ces informations pour afficher un badge indiquant le nombre de Content Cards non lues. Consultez la documentation de référence du SDK pour plus d'informations.
Vous pouvez à tout moment demander le nombre de cartes non lues en appelant :
```java
Braze.getInstance(context).getContentCardUnviewedCount();
```
```kotlin
Braze.getInstance(context).contentCardUnviewedCount
```
Vous pouvez ensuite utiliser ces informations pour afficher un badge indiquant le nombre de Content Cards non lues. Consultez la documentation de référence du SDK pour plus d'informations.
L'exemple suivant utilise `braze.contentCards` pour demander et afficher le nombre de Content Cards non lues. Après la fermeture de l'application et la fin de la session de l'utilisateur, ce code demande un décompte des cartes, en filtrant le nombre de cartes en fonction de la propriété `viewed`.
```swift
func applicationDidEnterBackground(_ application: UIApplication)
```
Dans cette méthode, implémentez le code suivant, qui actualise activement le nombre de badges pendant que l'utilisateur consulte les cartes au cours d'une session donnée :
```swift
let unreadCards = AppDelegate.braze?.contentCards.cards.filter { $0.viewed == false }
UIApplication.shared.applicationIconBadgeNumber = unreadCards?.count ?? 0
```
```objc
(void)applicationDidEnterBackground:(UIApplication *)application
```
Dans cette méthode, implémentez le code suivant, qui actualise activement le nombre de badges pendant que l'utilisateur consulte les cartes au cours d'une session donnée :
```objc
NSInteger unreadCardCount = 0;
for (BRZContentCardRaw *card in AppDelegate.braze.contentCards.cards) {
if (card.viewed == NO) {
unreadCardCount += 1;
}
}
[UIApplication sharedApplication].applicationIconBadgeNumber = unreadCardCount;
```
# Personnaliser le flux pour les Content Cards
Source: /docs/fr/developer_guide/content_cards/customizing_cards/feed/index.md
# Personnaliser le flux pour les Content Cards {#customize-the-feed-for-content-cards}
> Un flux de Content Cards correspond à la séquence de Content Cards dans vos applications mobiles ou Web. Cet article traite de la configuration du moment où le flux est actualisé, de l'ordre des cartes, de la gestion de plusieurs flux et des messages d'erreur « flux vide ». Pour obtenir la liste complète des types de cartes de contenu, consultez [À propos des Content Cards](https://www.braze.com/docs/fr/fr/developer_guide/content_cards/).
## About the session lifecycle
A session refers to the period of time the Braze SDK tracks user activity in your app after it's launched. You can also force a new session by [calling the `changeUser()` method](https://www.braze.com/docs/fr/fr/developer_guide/analytics/setting_user_ids/#setting-a-user-id).
By default, a session starts when you first call `braze.openSession()`. The session will remain active for up to `30` minutes of inactivity (unless you [change the default session timeout](https://www.braze.com/docs/fr/fr/developer_guide/analytics/tracking_sessions/?tab=web#change-session-timeout) or the user closes the app.
**Note:**
If you've set up the [activity lifecycle callback](https://www.braze.com/docs/fr/fr/developer_guide/platform_integration_guides/android/initial_sdk_setup/android_sdk_integration/#step-4-tracking-user-sessions-in-android) for Android, Braze will automatically call [`openSession()`](https://braze-inc.github.io/braze-android-sdk/kdoc/braze-android-sdk/com.braze/-i-braze/open-session.html) and [`closeSession()`](https://braze-inc.github.io/braze-android-sdk/kdoc/braze-android-sdk/com.braze/-i-braze/close-session.html) for each activity in your app.
By default, a session starts when `openSession()` is first called. If your app goes to the background and then returns to the foreground, the SDK will check if more than 10 seconds have passed since the session started (unless you [change the default session timeout](https://www.braze.com/docs/fr/fr/developer_guide/analytics/tracking_sessions/?tab=android#change-session-timeout)). If so, a new session will begin. Keep in mind that if the user closes your app while it's in the background, session data may not be sent to Braze until they reopen the app.
Calling `closeSession()` will not immediately end the session. Instead, it will end the session after 10 seconds if `openSession()` isn't called again by the user starting another activity.
By default, a session starts when you call `Braze.init(configuration:)`. This occurs when the `UIApplicationWillEnterForegroundNotification` notification is triggered, meaning the app has entered the foreground.
If your app goes to the background, `UIApplicationDidEnterBackgroundNotification` is triggered. The app does not remain in an active session while in the background. When your app returns to the foreground, the SDK compares the time elapsed since the session started against the session timeout (unless you [change the default session timeout](https://www.braze.com/docs/fr/fr/developer_guide/analytics/tracking_sessions/?tab=swift#change-session-timeout)). If the time since the session started exceeds the timeout period, a new session begins.
## Actualiser le flux {#refreshing-the-feed}
### Actualisation automatique {#automatic-refresh}
Par défaut, le flux de Content Cards s'actualise automatiquement lorsque :
- Une nouvelle session est lancée
- Le flux par défaut de Content Cards est fermé puis rouvert après plus de 60 secondes depuis la dernière actualisation.
**Tip:**
Pour afficher dynamiquement des Content Cards à jour sans les actualiser manuellement, sélectionnez **À la première impression** lors de la création de la carte. Ces cartes seront actualisées dès qu'elles seront disponibles.
### Actualisation manuelle {#manual-refresh}
Pour actualiser manuellement le flux à un moment précis :
Demandez à tout moment une actualisation manuelle des Content Cards Braze à partir du SDK Web en appelant [`requestContentCardsRefresh()`](https://js.appboycdn.com/web-sdk/latest/doc/modules/braze.html#requestcontentcardsrefresh).
Vous pouvez également appeler [`getCachedContentCards`](https://js.appboycdn.com/web-sdk/latest/doc/modules/braze.html#getcachedcontentcards) pour obtenir toutes les cartes actuellement disponibles depuis la dernière actualisation des Content Cards.
```javascript
import * as braze from "@braze/web-sdk";
function refresh() {
braze.requestContentCardsRefresh();
}
```
Pour ouvrir les liens des Content Cards dans un nouvel onglet du navigateur au lieu du même onglet, définissez `openCardsInNewTab: true` dans les options d'initialisation de votre SDK Web. Pour plus d'informations sur les options d'initialisation, consultez le [guide du dépôt du SDK Web](https://www.braze.com/docs/fr/fr/developer_guide/sdk_repository_guides/web/).
Demandez à tout moment une actualisation manuelle des Content Cards Braze à partir du SDK Android en appelant [`requestContentCardsRefresh`](https://braze-inc.github.io/braze-android-sdk/kdoc/braze-android-sdk/com.braze/-i-braze/request-content-cards-refresh.html).
```java
Braze.getInstance(context).requestContentCardsRefresh();
```
```kotlin
Braze.getInstance(context).requestContentCardsRefresh()
```
Demandez à tout moment une actualisation manuelle des Content Cards Braze à partir du SDK Swift en appelant la méthode [`requestRefresh`](https://braze-inc.github.io/braze-swift-sdk/documentation/brazekit/braze/contentcards-swift.class/requestrefresh(_:)) de la classe [`Braze.ContentCards`](https://braze-inc.github.io/braze-swift-sdk/documentation/brazekit/braze/contentcards-swift.class) :
Dans Swift, les Content Cards peuvent être actualisées soit avec un gestionnaire d'achèvement facultatif, soit avec un retour asynchrone en utilisant les API de concurrence natives de Swift.
#### Gestionnaire d'achèvement {#completion-handler}
```swift
AppDelegate.braze?.contentCards.requestRefresh { result in
// Implement completion handler
}
```
#### Async/Await
```swift
let contentCards = await AppDelegate.braze?.contentCards.requestRefresh()
```
```objc
[AppDelegate.braze.contentCards requestRefreshWithCompletion:^(NSArray * contentCards, NSError * error) {
// Implement completion handler
}];
```
### Synchronisation complète vs synchronisation partielle {#full-sync-vs-partial-sync}
Le SDK Braze utilise deux types de synchronisation lors de la récupération des Content Cards depuis le serveur :
- **Synchronisation complète :** récupère toutes les Content Cards auxquelles un utilisateur est éligible. Les synchronisations complètes se produisent automatiquement tous les 7 jours ou chaque fois que `changeUser()` est appelé.
- **Synchronisation partielle :** récupère uniquement les nouvelles Content Cards depuis la dernière requête. Si l'utilisateur n'est éligible à aucune nouvelle carte, la réponse renvoie zéro carte. Les synchronisations partielles se produisent chaque fois que `requestContentCardsRefresh()` est appelé (sauf si 7 jours se sont écoulés depuis la dernière synchronisation complète, auquel cas une synchronisation complète est déclenchée à la place).
Les synchronisations partielles réduisent la charge serveur et la consommation de batterie de l'appareil. Les Content Cards déjà reçues sont stockées localement dans le SDK, de sorte que les utilisateurs continueront à voir leurs cartes disponibles même lorsqu'une synchronisation partielle ne renvoie aucune nouvelle carte.
### Limite de débit {#rate-limit}
Braze utilise un algorithme de compartiment à jetons pour appliquer les limites de débit suivantes :
- Jusqu'à 5 appels d'actualisation par appareil, partagés entre les utilisateurs et les appels à `openSession()`
- Une fois la limite atteinte, un nouvel appel devient disponible toutes les 180 secondes (3 minutes)
- Le système conserve jusqu'à cinq appels que vous pouvez utiliser à tout moment
- `subscribeToContentCards()` renverra toujours les cartes mises en cache, même lorsque la limite de débit est atteinte
**Important:**
Le SDK Braze applique également des limites de débit pour garantir les performances et la fiabilité. Gardez cela à l'esprit lorsque vous effectuez des tests automatisés ou des tests d'assurance qualité manuels. Consultez les [limites de débit du SDK Braze](https://www.braze.com/docs/fr/fr/developer_guide/sdk_integration/rate_limits/) pour plus d'informations.
## Personnaliser l'ordre d'affichage des cartes {#customizing-displayed-card-order}
Vous pouvez modifier l'ordre d'affichage de vos Content Cards. Cela vous permet d'affiner l'expérience utilisateur en donnant la priorité à certains types de contenu, comme les promotions urgentes.
Personnalisez l'ordre d'affichage des Content Cards dans votre flux en utilisant le paramètre [`filterFunction`](https://js.appboycdn.com/web-sdk/latest/doc/modules/braze.html#showcontentcards) de `showContentCards():`. Par exemple :
```javascript
braze.showContentCards(null, (cards) => {
return sortBrazeCards(cards); // Where sortBrazeCards is your sorting function that returns the sorted card array
});
```
Le [`ContentCardsFragment`](https://braze-inc.github.io/braze-android-sdk/kdoc/braze-android-sdk/com.braze.ui.contentcards/-content-cards-fragment/index.html) s'appuie sur un [`IContentCardsUpdateHandler`](https://braze-inc.github.io/braze-android-sdk/kdoc/braze-android-sdk/com.braze.ui.contentcards.handlers/-i-content-cards-update-handler/index.html) pour gérer tout tri ou modification des Content Cards avant leur affichage dans le flux. Un gestionnaire de mise à jour personnalisé peut être défini via [`setContentCardUpdateHandler`](https://braze-inc.github.io/braze-android-sdk/kdoc/braze-android-sdk/com.braze.ui.contentcards/-content-cards-fragment/set-content-card-update-handler.html) sur votre `ContentCardsFragment`.
Voici le `IContentCardsUpdateHandler` par défaut, qui peut servir de point de départ pour la personnalisation :
**Afficher l'exemple Java**
```java
public class DefaultContentCardsUpdateHandler implements IContentCardsUpdateHandler {
// Interface that must be implemented and provided as a public CREATOR
// field that generates instances of your Parcelable class from a Parcel.
public static final Parcelable.Creator CREATOR = new Parcelable.Creator() {
public DefaultContentCardsUpdateHandler createFromParcel(Parcel in) {
return new DefaultContentCardsUpdateHandler();
}
public DefaultContentCardsUpdateHandler[] newArray(int size) {
return new DefaultContentCardsUpdateHandler[size];
}
};
@Override
public List handleCardUpdate(ContentCardsUpdatedEvent event) {
List sortedCards = event.getAllCards();
// Sort by pinned, then by the 'updated' timestamp descending
// Pinned before non-pinned
Collections.sort(sortedCards, new Comparator() {
@Override
public int compare(Card cardA, Card cardB) {
// A displays above B
if (cardA.getIsPinned() && !cardB.getIsPinned()) {
return -1;
}
// B displays above A
if (!cardA.getIsPinned() && cardB.getIsPinned()) {
return 1;
}
// At this point, both A & B are pinned or both A & B are non-pinned
// A displays above B since A is newer
if (cardA.getUpdated() > cardB.getUpdated()) {
return -1;
}
// B displays above A since A is newer
if (cardA.getUpdated() < cardB.getUpdated()) {
return 1;
}
// At this point, every sortable field matches so keep the natural ordering
return 0;
}
});
return sortedCards;
}
// Parcelable interface method
@Override
public int describeContents() {
return 0;
}
// Parcelable interface method
@Override
public void writeToParcel(Parcel dest, int flags) {
// No state is kept in this class so the parcel is left unmodified
}
}
```
**Afficher l'exemple Kotlin**
```kotlin
class DefaultContentCardsUpdateHandler : IContentCardsUpdateHandler {
override fun handleCardUpdate(event: ContentCardsUpdatedEvent): List {
val sortedCards = event.allCards
// Sort by pinned, then by the 'updated' timestamp descending
// Pinned before non-pinned
sortedCards.sortWith(Comparator sort@{ cardA: Card, cardB: Card ->
// A displays above B
if (cardA.isPinned && !cardB.isPinned) {
return@sort -1
}
// B displays above A
if (!cardA.isPinned && cardB.isPinned) {
return@sort 1
}
// At this point, both A & B are pinned or both A & B are non-pinned
// A displays above B since A is newer
if (cardA.updated > cardB.updated) {
return@sort -1
}
// B displays above A since A is newer
if (cardA.updated < cardB.updated) {
return@sort 1
}
0
})
return sortedCards
}
// Parcelable interface method
override fun describeContents(): Int {
return 0
}
// Parcelable interface method
override fun writeToParcel(dest: Parcel, flags: Int) {
// No state is kept in this class so the parcel is left unmodified
}
companion object {
// Interface that must be implemented and provided as a public CREATOR
// field that generates instances of your Parcelable class from a Parcel.
val CREATOR: Parcelable.Creator = object : Parcelable.Creator {
override fun createFromParcel(`in`: Parcel): DefaultContentCardsUpdateHandler? {
return DefaultContentCardsUpdateHandler()
}
override fun newArray(size: Int): Array {
return arrayOfNulls(size)
}
}
}
}
```
**Tip:**
Le code source de `ContentCardsFragment` est disponible sur [GitHub](https://github.com/braze-inc/braze-android-sdk/blob/master/android-sdk-ui/src/main/java/com/braze/ui/contentcards/ContentCardsFragment.kt).
Pour filtrer et trier les Content Cards dans Jetpack Compose, définissez le paramètre `cardUpdateHandler`. Par exemple :
```kotlin
ContentCardsList(
cardUpdateHandler = {
it.sortedWith { cardA, cardB ->
// A displays above B
if (cardA.isPinned && !cardB.isPinned) {
return@sortedWith -1
}
// B displays above A
if (!cardA.isPinned && cardB.isPinned) {
return@sortedWith 1
}
// At this point, both A & B are pinned or both A & B are non-pinned
// A displays above B since A is newer
if (cardA.updated > cardB.updated) {
return@sortedWith -1
}
// B displays above A since A is newer
if (cardA.updated < cardB.updated) {
return@sortedWith 1
}
0
}
}
)
```
Personnalisez l'ordre du flux de cartes en modifiant directement la variable statique [`Attributes.defaults`](https://braze-inc.github.io/braze-swift-sdk/documentation/brazeui/brazecontentcardui/viewcontroller/attributes-swift.struct/defaults).
```swift
var attributes = BrazeContentCardUI.ViewController.Attributes.defaults
attributes.transform = { cards in
cards.sorted {
if $0.pinned && !$1.pinned {
return true
} else if !$0.pinned && $1.pinned {
return false
} else {
return $0.createdAt > $1.createdAt
}
}
}
let viewController = BrazeContentCardUI.ViewController(braze: AppDelegate.braze, attributes: attributes)
```
La personnalisation via `BrazeContentCardUI.ViewController.Attributes` n'est pas disponible en Objective-C.
## Personnaliser le message « flux vide » {#customizing-empty-feed-message}
Lorsqu'un utilisateur n'est éligible à aucune Content Card, le SDK affiche un message d'erreur « flux vide » indiquant : « Nous n'avons pas de mises à jour. Veuillez vérifier à nouveau plus tard. » Vous pouvez personnaliser ce message d'erreur de la manière suivante :

Le SDK Web ne permet pas de remplacer le texte du « flux vide » par programmation. Vous pouvez choisir de le remplacer à chaque affichage du flux, mais cela n'est pas recommandé car le flux peut mettre un certain temps à s'actualiser et le texte du flux vide ne s'affichera pas immédiatement.
Si le [`ContentCardsFragment`](https://braze-inc.github.io/braze-android-sdk/kdoc/braze-android-sdk/com.braze.ui.contentcards/-content-cards-fragment/index.html) détermine que l'utilisateur n'est éligible à aucune Content Card, il affiche le message d'erreur du flux vide.
Un adaptateur spécial, le [`EmptyContentCardsAdapter`](https://github.com/braze-inc/braze-android-sdk/blob/master/android-sdk-ui/src/main/java/com/braze/ui/contentcards/adapters/EmptyContentCardsAdapter.kt), remplace l'adaptateur standard [`ContentCardAdapter`](https://github.com/braze-inc/braze-android-sdk/blob/master/android-sdk-ui/src/main/java/com/braze/ui/contentcards/adapters/ContentCardAdapter.kt) pour afficher ce message d'erreur. Pour définir le message personnalisé, remplacez la ressource de chaîne de caractères `com_braze_feed_empty`.
Le style utilisé pour afficher ce message est accessible via [`Braze.ContentCardsDisplay.Empty`](https://github.com/braze-inc/braze-android-sdk/blob/2e386dfa59a87bfc24ef7cb6ff5adf6b16f44d24/android-sdk-ui/src/main/res/values/styles.xml#L522-L530) et est reproduit dans l'extrait de code suivant :
```xml
```
Pour plus d'informations sur la personnalisation des éléments de style des Content Cards, consultez [Personnaliser le style](https://www.braze.com/docs/fr/fr/developer_guide/content_cards/customizing_cards/style/).
Pour personnaliser le message d'erreur « flux vide » avec Jetpack Compose, vous pouvez passer une `emptyString` à [`ContentCardsList`](https://braze-inc.github.io/braze-android-sdk/kdoc/braze-android-sdk/com.braze.jetpackcompose.contentcards/-content-cards-list.html). Vous pouvez également transmettre [`emptyTextStyle`](https://braze-inc.github.io/braze-android-sdk/kdoc/braze-android-sdk/com.braze.jetpackcompose.contentcards.styling/-content-card-list-styling/index.html#1193499348%2FProperties%2F-1725759721) à `ContentCardListStyling` pour personnaliser davantage ce message.
```kotlin
ContentCardsList(
emptyString = "No messages today",
style = ContentCardListStyling(
emptyTextStyle = TextStyle(...)
)
)
```
Si vous souhaitez afficher un Composable à la place, vous pouvez passer `emptyComposable` à [`ContentCardsList`](https://braze-inc.github.io/braze-android-sdk/kdoc/braze-android-sdk/com.braze.jetpackcompose.contentcards/-content-cards-list.html). Si `emptyComposable` est spécifié, `emptyString` ne sera pas utilisé.
```kotlin
ContentCardsList(
emptyComposable = {
Image(
painter = painterResource(id = R.drawable.noMessages),
contentDescription = "No messages"
)
}
)
```
Personnalisez l'état vide du contrôleur de vue en définissant les [`Attributes`](https://braze-inc.github.io/braze-swift-sdk/documentation/brazeui/brazecontentcardui/viewcontroller/attributes-swift.struct/defaults) associés.
```swift
var attributes = BrazeContentCardUI.ViewController.Attributes.defaults
attributes.emptyStateMessage = "This is a custom empty state message"
attributes.emptyStateMessageFont = .preferredFont(forTextStyle: .title1)
attributes.emptyStateMessageColor = .secondaryLabel
```
Modifiez le texte qui s'affiche automatiquement dans les flux de Content Cards vides en redéfinissant les chaînes de caractères localisables des Content Cards dans le fichier [`ContentCardsLocalizable.strings`](https://github.com/braze-inc/braze-swift-sdk/tree/main/Sources/BrazeUI/Resources/Localization/en.lproj) de votre application.
**Note:**
Si vous souhaitez mettre à jour ce message dans différentes langues, recherchez la langue correspondante dans la [structure du dossier Resources](https://github.com/braze-inc/braze-swift-sdk/tree/main/Sources/BrazeUI/Resources/Localization) avec la chaîne de caractères `ContentCardsLocalizable.strings`.
## Implémenter plusieurs flux {#implementing-multiple-feeds}
Les Content Cards peuvent être filtrées dans votre application afin que seules certaines cartes soient affichées, ce qui vous permet de disposer de plusieurs flux de Content Cards pour différents cas d'utilisation. Par exemple, vous pouvez gérer à la fois un flux transactionnel et un flux marketing. Pour ce faire, créez différentes catégories de Content Cards en définissant des paires clé-valeur dans le tableau de bord de Braze. Ensuite, créez des flux dans votre application ou votre site qui traitent ces types de Content Cards différemment, en filtrant certains types et en affichant les autres.
### Étape 1 : Définir des paires clé-valeur sur les cartes {#step-1-set-key-value-pairs-on-cards}
Lors de la création d'une campagne de Content Cards, définissez des [données de paires clé-valeur](https://www.braze.com/docs/fr/fr/developer_guide/content_cards/customizing_cards/behavior/) sur chaque carte. Vous utiliserez cette paire clé-valeur pour catégoriser les cartes. Les paires clé-valeur sont stockées dans la propriété `extras` du modèle de données de la carte.
Pour cet exemple, nous allons définir une paire clé-valeur avec la clé `feed_type` qui désignera dans quel flux de Content Cards la carte doit s'afficher. La valeur correspondra à vos flux personnalisés, par exemple `home_screen` ou `marketing`.
### Étape 2 : Filtrer les Content Cards {#step-2-filter-content-cards}
Une fois les paires clé-valeur attribuées, créez un flux avec une logique qui affichera les cartes souhaitées et filtrera les cartes d'autres types. Dans cet exemple, nous n'afficherons que les cartes dont la paire clé-valeur correspond à `feed_type: "Transactional"`.
L'exemple suivant affiche le flux de Content Cards pour les cartes de type `Transactional` :
```javascript
/**
* @param {String} feed_type - value of the "feed_type" KVP to filter
*/
function showCardsByFeedType(feed_type) {
braze.showContentCards(null, function(cards) {
return cards.filter((card) => card.extras["feed_type"] === feed_type);
});
}
```
Ensuite, vous pouvez configurer un bouton de basculement pour votre flux personnalisé :
```javascript
// show the "Transactional" feed when this button is clicked
document.getElementById("show-transactional-feed").onclick = function() {
showCardsByFeedType("Transactional");
};
```
Pour plus d'informations, consultez la [documentation des méthodes du SDK](https://js.appboycdn.com/web-sdk/latest/doc/modules/braze.html#showcontentcards).
Par défaut, le flux de Content Cards s'affiche dans un [`ContentCardsFragment`](https://braze-inc.github.io/braze-android-sdk/kdoc/braze-android-sdk/com.braze.ui.contentcards/-content-cards-fragment/index.html) et [`IContentCardsUpdateHandler`](https://braze-inc.github.io/braze-android-sdk/kdoc/braze-android-sdk/com.braze.ui.contentcards.handlers/-i-content-cards-update-handler/index.html) renvoie une liste de cartes à afficher après avoir reçu un [`ContentCardsUpdatedEvent`](https://braze-inc.github.io/braze-android-sdk/kdoc/braze-android-sdk/com.braze.events/-content-cards-updated-event/index.html) du SDK Braze. Cependant, il ne fait que trier les cartes et ne gère pas directement le filtrage.
#### Étape 2.1 : Créer un gestionnaire personnalisé {#step-21-create-a-custom-handler}
Vous pouvez filtrer les Content Cards en implémentant un [`IContentCardsUpdateHandler`](https://braze-inc.github.io/braze-android-sdk/kdoc/braze-android-sdk/com.braze.ui.contentcards.handlers/-i-content-cards-update-handler/index.html) personnalisé en utilisant les paires clé-valeur définies par [`Card.getExtras()`](https://braze-inc.github.io/braze-android-sdk/kdoc/braze-android-sdk/com.braze.models.cards/-card/extras.html) dans le tableau de bord, puis en le modifiant pour supprimer de la liste toutes les cartes qui ne correspondent pas à la valeur de `feed_type` que vous avez définie précédemment.
**Afficher l'exemple Java**
```java
private IContentCardsUpdateHandler getUpdateHandlerForFeedType(final String desiredFeedType) {
return new IContentCardsUpdateHandler() {
@Override
public List handleCardUpdate(ContentCardsUpdatedEvent event) {
// Use the default card update handler for a first
// pass at sorting the cards. This is not required
// but is done for convenience.
final List cards = new DefaultContentCardsUpdateHandler().handleCardUpdate(event);
final Iterator cardIterator = cards.iterator();
while (cardIterator.hasNext()) {
final Card card = cardIterator.next();
// Make sure the card has our custom KVP
// from the dashboard with the key "feed_type"
if (card.getExtras().containsKey("feed_type")) {
final String feedType = card.getExtras().get("feed_type");
if (!desiredFeedType.equals(feedType)) {
// The card has a feed type, but it doesn't match
// our desired feed type, remove it.
cardIterator.remove();
}
} else {
// The card doesn't have a feed
// type at all, remove it
cardIterator.remove();
}
}
// At this point, all of the cards in this list have
// a feed type that explicitly matches the value we put
// in the dashboard.
return cards;
}
};
}
```
**Afficher l'exemple Kotlin**
```kotlin
private fun getUpdateHandlerForFeedType(desiredFeedType: String): IContentCardsUpdateHandler {
return IContentCardsUpdateHandler { event ->
// Use the default card update handler for a first
// pass at sorting the cards. This is not required
// but is done for convenience.
val cards = DefaultContentCardsUpdateHandler().handleCardUpdate(event)
val cardIterator = cards.iterator()
while (cardIterator.hasNext()) {
val card = cardIterator.next()
// Make sure the card has our custom KVP
// from the dashboard with the key "feed_type"
if (card.extras.containsKey("feed_type")) {
val feedType = card.extras["feed_type"]
if (desiredFeedType != feedType) {
// The card has a feed type, but it doesn't match
// our desired feed type, remove it.
cardIterator.remove()
}
} else {
// The card doesn't have a feed
// type at all, remove it
cardIterator.remove()
}
}
// At this point, all of the cards in this list have
// a feed type that explicitly matches the value we put
// in the dashboard.
cards
}
}
```
#### Étape 2.2 : L'ajouter à un fragment {#step-22-add-it-to-a-fragment}
Après avoir créé un [`IContentCardsUpdateHandler`](https://braze-inc.github.io/braze-android-sdk/kdoc/braze-android-sdk/com.braze.ui.contentcards.handlers/-i-content-cards-update-handler/index.html), créez un [`ContentCardsFragment`](https://braze-inc.github.io/braze-android-sdk/kdoc/braze-android-sdk/com.braze.ui.contentcards/-content-cards-fragment/index.html) qui l'utilise. Ce flux personnalisé peut être utilisé comme n'importe quel autre `ContentCardsFragment`. Dans les différentes parties de votre application, affichez différents flux de Content Cards en fonction de la clé fournie dans le tableau de bord. Chaque flux `ContentCardsFragment` affichera un ensemble unique de cartes grâce au `IContentCardsUpdateHandler` personnalisé sur chaque fragment.
**Afficher l'exemple Java**
```java
// We want a Content Cards feed that only shows "Transactional" cards.
ContentCardsFragment customContentCardsFragment = new ContentCardsFragment();
customContentCardsFragment.setContentCardUpdateHandler(getUpdateHandlerForFeedType("Transactional"));
```
**Afficher l'exemple Kotlin**
```kotlin
// We want a Content Cards feed that only shows "Transactional" cards.
val customContentCardsFragment = ContentCardsFragment()
customContentCardsFragment.contentCardUpdateHandler = getUpdateHandlerForFeedType("Transactional")
```
Pour filtrer les Content Cards affichées dans ce flux, utilisez `cardUpdateHandler`. Par exemple :
```kotlin
ContentCardsList(
cardUpdateHandler = {
it.filter { card ->
card.extras["feed_type"] == "Transactional"
}
}
)
```
The following example will show the Content Cards feed for `Transactional` type cards:
```swift
// Filter cards by the `Transactional` feed type based on your key-value pair.
let transactionalCards = cards.filter { $0.extras["feed_type"] as? String == "Transactional" }
```
Pour aller plus loin, les cartes présentées dans le contrôleur de vue peuvent être filtrées en définissant la propriété `transform` sur votre structure `Attributes` afin de n'afficher que les cartes filtrées selon vos critères.
```swift
var attributes = BrazeContentCardUI.ViewController.Attributes.defaults
attributes.transform = { cards in
cards.filter { $0.extras["feed_type"] as? String == "Transactional" }
}
// Pass your attributes containing the transformed cards to the Content Card UI.
let viewController = BrazeContentCardUI.ViewController(braze: AppDelegate.braze, attributes: attributes)
```
```objc
// Filter cards by the `Transactional` feed type based on your key-value pair.
NSMutableArray *transactionalCards = [[NSMutableArray alloc] init];
for (BRZContentCardRaw *card in AppDelegate.braze.contentCards.cards) {
if ([card.extras[@"feed_type"] isEqualToString:@"Transactional"]) {
[transactionalCards addObject:card];
}
}
```
# Enregistrer les analyses
Source: /docs/fr/developer_guide/content_cards/logging_analytics/index.md
# Enregistrer les analyses {#log-analytics}
> When building a custom UI for Content Cards, you must manually log analytics like impressions, clicks, and dismissals, as this is only handled automatically for default card models. Logging these events is a standard part of a Content Card integration and is essential for accurate campaign reporting and billing. To do this, populate your custom UI with data from the Braze data models and then manually log the events. Once you understand how to log analytics, you can see common ways Braze customers [create custom Content Cards](https://www.braze.com/docs/fr/fr/developer_guide/content_cards/creating_cards/).
## Logging analytics
When implementing your custom Content Cards, you can parse the Content Card objects and extract their payload data such as `title`, `cardDescription`, and `imageUrl`. Then, you can use the resulting model data to populate your custom UI.
To obtain the Content Card data models, subscribe to Content Card updates. There are two properties to pay particular attention to:
* **`id`**: Represents the Content Card ID string. This is the unique identifier used to log analytics from custom Content Cards.
* **`extras`**: Encompasses all the key-value pairs from the Braze dashboard.
All properties outside of `id` and `extras` are optional to parse for custom Content Cards. For more information on the data model, see each platform's integration article: [Android](https://www.braze.com/docs/fr/fr/developer_guide/content_cards/?sdktab=android), [iOS](https://www.braze.com/docs/fr/fr/developer_guide/content_cards/?sdktab=swift), [Web](https://www.braze.com/docs/fr/fr/developer_guide/content_cards/?sdktab=web).
Register a callback function to subscribe for updates when cards are refreshed.
```javascript
import * as braze from "@braze/web-sdk";
braze.subscribeToContentCardsUpdates((updates) => {
const cards = updates.cards;
// For example:
cards.forEach(card => {
if (card.isControl) {
// Do not display the control card, but remember to call `logContentCardImpressions([card])`
}
else if (card instanceof braze.ClassicCard || card instanceof braze.CaptionedImage) {
// Use `card.title`, `card.imageUrl`, etc.
}
else if (card instanceof braze.ImageOnly) {
// Use `card.imageUrl`, etc.
}
})
});
braze.openSession();
```
**Note:**
Content Cards will only refresh on session start if a subscribe request is called before `openSession()`. You can always choose to [manually refresh the feed](https://www.braze.com/docs/fr/fr/developer_guide/content_cards/customizing_cards/feed/) as well.
### Step 1: Create a private subscriber variable
To subscribe to card updates, first declare a private variable in your custom class to hold your subscriber:
```java
// subscriber variable
private IEventSubscriber mContentCardsUpdatedSubscriber;
```
### Step 2: Subscribe to updates
Next, add the following code to subscribe to Content Card updates from Braze, typically inside of your custom Content Cards activity's `Activity.onCreate()`:
```java
// Remove the previous subscriber before rebuilding a new one with our new activity.
Braze.getInstance(context).removeSingleSubscription(mContentCardsUpdatedSubscriber, ContentCardsUpdatedEvent.class);
mContentCardsUpdatedSubscriber = new IEventSubscriber() {
@Override
public void trigger(ContentCardsUpdatedEvent event) {
// List of all Content Cards
List allCards = event.getAllCards();
// Your logic below
}
};
Braze.getInstance(context).subscribeToContentCardsUpdates(mContentCardsUpdatedSubscriber);
Braze.getInstance(context).requestContentCardsRefresh();
```
### Step 3: Unsubscribe
We also recommend unsubscribing when your custom activity moves out of view. Add the following code to your activity's `onDestroy()` lifecycle method:
```java
Braze.getInstance(context).removeSingleSubscription(mContentCardsUpdatedSubscriber, ContentCardsUpdatedEvent.class);
```
### Step 1: Create a private subscriber variable
To subscribe to card updates, first declare a private variable in your custom class to hold your subscriber:
```kotlin
private var contentCardsUpdatedSubscriber: IEventSubscriber? = null
```
### Step 2: Subscribe to updates
Next, add the following code to subscribe to Content Card updates from Braze, typically inside of your custom Content Cards activity's `Activity.onCreate()`:
```kotlin
// Remove the previous subscriber before rebuilding a new one with our new activity.
Braze.getInstance(context).removeSingleSubscription(contentCardsUpdatedSubscriber, ContentCardsUpdatedEvent::class.java)
contentCardsUpdatedSubscriber = IEventSubscriber { event ->
// List of all Content Cards
val allCards = event.allCards
// Your logic below
}
Braze.getInstance(context).subscribeToContentCardsUpdates(contentCardsUpdatedSubscriber)
Braze.getInstance(context).requestContentCardsRefresh(true)
```
### Step 3: Unsubscribe
We also recommend unsubscribing when your custom activity moves out of view. Add the following code to your activity's `onDestroy()` lifecycle method:
```kotlin
Braze.getInstance(context).removeSingleSubscription(contentCardsUpdatedSubscriber, ContentCardsUpdatedEvent::class.java)
```
To access the Content Cards data model, call [`contentCards.cards`](https://braze-inc.github.io/braze-swift-sdk/documentation/brazekit/braze/contentcards-swift.class/cards) on your `braze` instance.
```swift
let cards: [Braze.ContentCard] = AppDelegate.braze?.contentCards.cards
```
Additionally, you can also maintain a subscription to observe for changes in your Content Cards. You can do so in one of two ways:
1. Maintaining a cancellable; or
2. Maintaining an `AsyncStream`.
### Cancellable
```swift
// This subscription is maintained through a Braze cancellable, which will observe for changes until the subscription is cancelled.
// You must keep a strong reference to the cancellable to keep the subscription active.
// The subscription is canceled either when the cancellable is deinitialized or when you call its `.cancel()` method.
let cancellable = AppDelegate.braze?.contentCards.subscribeToUpdates { [weak self] contentCards in
// Implement your completion handler to respond to updates in `contentCards`.
}
```
### AsyncStream
```swift
let stream: AsyncStream<[Braze.ContentCard]> = AppDelegate.braze?.contentCards.cardsStream
```
```objc
NSArray *contentCards = AppDelegate.braze.contentCards.cards;
```
Additionally, if you wish to maintain a subscription to your content cards, you can call [`subscribeToUpdates`](https://braze-inc.github.io/braze-swift-sdk/documentation/brazekit/braze/contentcards-swift.class/subscribetoupdates(_:)):
```objc
// This subscription is maintained through Braze cancellable, which will continue to observe for changes until the subscription is cancelled.
BRZCancellable *cancellable = [self.braze.contentCards subscribeToUpdates:^(NSArray *contentCards) {
// Implement your completion handler to respond to updates in `contentCards`.
}];
```
To get the Content Card data, use the `getContentCards` method:
```javascript
import Braze from "@braze/react-native-sdk";
const cards = await Braze.getContentCards();
```
To listen for updates, subscribe to Content Card update events:
```javascript
const subscription = Braze.addListener(Braze.Events.CONTENT_CARDS_UPDATED, (update) => {
const cards = update.cards;
cards.forEach(card => {
if (card.isControl) {
// Do not display the control card, but remember to log an impression
} else {
// Use card.title, card.cardDescription, card.image, etc.
}
});
});
```
To request a manual refresh of Content Cards from Braze servers:
```javascript
Braze.requestContentCardsRefresh();
```
To get cached Content Cards without a network request:
```javascript
const cachedCards = await Braze.getCachedContentCards();
```
## Logging events
Logging valuable metrics like impressions, clicks, and dismissals is quick and simple. Set a custom click listener to manually handle these analytics.
Log impression events when cards are viewed by users using [`logContentCardImpressions`](https://js.appboycdn.com/web-sdk/latest/doc/modules/braze.html#logcontentcardimpressions):
```javascript
import * as braze from "@braze/web-sdk";
braze.logContentCardImpressions([card1, card2, card3]);
```
Log card click events when users interact with a card using [`logContentCardClick`](https://js.appboycdn.com/web-sdk/latest/doc/modules/braze.html#logcontentcardclick):
```javascript
import * as braze from "@braze/web-sdk";
braze.logContentCardClick(card);
```
The [`BrazeManager`](https://github.com/braze-inc/braze-growth-shares-android-demo-app/blob/main/app/src/main/java/com/braze/advancedsamples/BrazeManager.kt) can reference Braze SDK dependencies such as the Content Card objects array list to get the [`Card`](https://braze-inc.github.io/braze-android-sdk/kdoc/braze-android-sdk/com.braze.models.cards/-card/index.html) to call the Braze logging methods. Use the `ContentCardable` base class to easily reference and provide data to the `BrazeManager`.
To log an impression or click on a card, call [`Card.logClick()`](https://braze-inc.github.io/braze-android-sdk/kdoc/braze-android-sdk/com.braze.models.cards/-card/log-click.html) or [`Card.logImpression()`](https://braze-inc.github.io/braze-android-sdk/kdoc/braze-android-sdk/com.braze.models.cards/-card/log-impression.html) respectively.
You can manually log or set a Content Card as "dismissed" to Braze for a particular card with [`isDismissed`](https://braze-inc.github.io/braze-android-sdk/kdoc/braze-android-sdk/com.braze.models.cards/-card/is-dismissed.html). If a card is already marked as dismissed, it cannot be marked as dismissed again.
To create a custom click listener, create a class that implements [`IContentCardsActionListener`](https://braze-inc.github.io/braze-android-sdk/kdoc/braze-android-sdk/com.braze.ui.contentcards.listeners/-i-content-cards-action-listener/index.html) and register it with [`BrazeContentCardsManager`](https://braze-inc.github.io/braze-android-sdk/kdoc/braze-android-sdk/com.braze.ui.contentcards.managers/-braze-content-cards-manager/index.html). Implement the [`onContentCardClicked()`](https://braze-inc.github.io/braze-android-sdk/kdoc/braze-android-sdk/com.braze.ui.contentcards.listeners/-i-content-cards-action-listener/on-content-card-clicked.html) method, which will be called when the user clicks a Content Card. Then, instruct Braze to use your Content Card click listener.
For example:
```java
BrazeContentCardsManager.getInstance().setContentCardsActionListener(new IContentCardsActionListener() {
@Override
public boolean onContentCardClicked(Context context, Card card, IAction cardAction) {
return false;
}
@Override
public void onContentCardDismissed(Context context, Card card) {
}
});
```
For example:
```kotlin
BrazeContentCardsManager.getInstance().contentCardsActionListener = object : IContentCardsActionListener {
override fun onContentCardClicked(context: Context, card: Card, cardAction: IAction): Boolean {
return false
}
override fun onContentCardDismissed(context: Context, card: Card) {
}
}
```
**Important:**
To handle control variant Content Cards in your custom UI, pass in your [`com.braze.models.cards.Card`](https://braze-inc.github.io/braze-android-sdk/kdoc/braze-android-sdk/com.braze.models.cards/-card/index.html) object, then call the `logImpression` method as you would with any other Content Card type. The object will implicitly log a control impression to inform our analytics of when a user would have seen the control card.
Implement the [`BrazeContentCardUIViewControllerDelegate`](https://braze-inc.github.io/braze-swift-sdk/documentation/brazeui/brazecontentcarduiviewcontrollerdelegate) protocol and set your delegate object as the `delegate` property of your `BrazeContentCardUI.ViewController`. This delegate will handle passing the data of your custom object back to Braze to be logged. For an example, see [Content Cards UI tutorial](https://braze-inc.github.io/braze-swift-sdk/tutorials/braze/c2-contentcardsui/).
```swift
// Set the delegate when creating the Content Cards controller
contentCardsController.delegate = delegate
// Method to implement in delegate
func contentCard(
_ controller: BrazeContentCardUI.ViewController,
shouldProcess clickAction: Braze.ContentCard.ClickAction,
card: Braze.ContentCard
) -> Bool {
// Intercept the content card click action here.
return true
}
```
```objc
// Set the delegate when creating the Content Cards controller
contentCardsController.delegate = delegate;
// Method to implement in delegate
- (BOOL)contentCardController:(BRZContentCardUIViewController *)controller
shouldProcess:(NSURL *)url
card:(BRZContentCardRaw *)card {
// Intercept the content card click action here.
return YES;
}
```
**Important:**
To handle control variant Content Cards in your custom UI, pass in your [`Braze.ContentCard.Control`](https://braze-inc.github.io/braze-swift-sdk/documentation/brazekit/braze/contentcard/control(_:)) object, then call the `logImpression` method as you would with any other Content Card type. The object will implicitly log a control impression to inform our analytics of when a user would have seen the control card.
Log impression events when cards are viewed by users:
```javascript
Braze.logContentCardImpression(card.id);
```
Log card click events when users interact with a card:
```javascript
Braze.logContentCardClicked(card.id);
```
Log dismissal events when a user dismisses a card:
```javascript
Braze.logContentCardDismissed(card.id);
```
## Handling on-click behavior
When a user clicks a Content Card in a custom feed, the on-click behavior (such as navigating to a URL, deep linking, or logging a custom event) is not handled automatically. Use [`handleBrazeAction`](https://js.appboycdn.com/web-sdk/latest/doc/modules/braze.html#handlebrazeaction) to process the card's URL and execute the configured on-click action, including Braze actions (`brazeActions://` URLs).
```javascript
import * as braze from "@braze/web-sdk";
// In your card click handler
function onCardClick(card) {
// Log the click
braze.logContentCardClick(card);
// Handle the on-click behavior
if (card.url) {
braze.handleBrazeAction(card.url);
}
}
```
| Parameter | Description |
|---|---|
| `url` | A valid URL, or a valid Braze action URL with the scheme `brazeActions://`. |
| `openLinkInNewTab` | (Optional) Whether the URL should open in a new tab. Defaults to `false`. |
{: .reset-td-br-1 .reset-td-br-2 aria-label="Handling on-click behavior" }
**Important:**
If you don't call `handleBrazeAction()`, on-click behaviors configured in the Braze dashboard (such as "Log Custom Event" or "Navigate to URL") won't execute for cards displayed in a custom feed.
On-click behavior is handled automatically by the default Content Cards UI. For custom implementations, use the [`IContentCardsActionListener`](https://braze-inc.github.io/braze-android-sdk/kdoc/braze-android-sdk/com.braze.ui.contentcards.listeners/-i-content-cards-action-listener/index.html) interface described in the [Logging analytics](#logging-analytics) section above.
On-click behavior is handled automatically by the default Content Cards UI. For custom implementations, use the [`BrazeContentCardUIViewControllerDelegate`](https://braze-inc.github.io/braze-swift-sdk/documentation/brazeui/brazecontentcarduiviewcontrollerdelegate) protocol described in the [Logging analytics](#logging-analytics) section above.
## Fermetures uniques supérieures aux impressions uniques {#unique-dismissals-higher-than-unique-impressions}
Si les *fermetures uniques* dépassent les *impressions uniques*, votre intégration personnalisée de Content Cards a enregistré des fermetures sans enregistrer les impressions pour ces mêmes cartes. L'interface par défaut des Content Cards de Braze enregistre les deux automatiquement, ce décalage n'apparaît donc que lorsque vous utilisez une interface personnalisée.
Enregistrez une impression chaque fois que vous affichez une carte, et enregistrez une fermeture lorsque l'utilisateur la rejette. Pour les noms de méthodes et des exemples, consultez les sections par plateforme ci-dessous.
## Analyses manquantes pour les Content Cards {#missing-content-cards-analytics}
Si les Content Cards s'affichent correctement dans votre application mais que vous ne recevez systématiquement aucune donnée analytique (impressions, clics, etc.), il s'agit probablement d'un problème d'intégration SDK.
- **Vues personnalisées de Content Cards (Android, iOS, Web) :** L'interface par défaut de Braze enregistre automatiquement les impressions et les clics sur toutes les plateformes. Si vous utilisez une vue ou une implémentation personnalisée de Content Cards, vous devez appeler explicitement les méthodes d'enregistrement appropriées dans votre application. Consultez [Enregistrer les analyses](https://www.braze.com/docs/fr/fr/developer_guide/content_cards/logging_analytics/) pour votre plateforme. Pour les implémentations Web personnalisées en particulier, vérifiez que le SDK Web de Braze est chargé, consultez la console du navigateur pour détecter d'éventuelles erreurs et assurez-vous que les données des cartes sont bien reçues.
- **Initialisation du SDK et identification de l'utilisateur :** Assurez-vous que le SDK est entièrement initialisé avant d'afficher les cartes. Les événements sont silencieusement ignorés (et non mis en file d'attente) si le SDK n'est pas initialisé, s'il est en mode d'initialisation différée ou s'il est désactivé pour le RGPD. Le SDK enregistre bien les analyses pour les utilisateurs anonymes, mais les indicateurs du tableau de bord comme « impressions quotidiennes uniques » nécessitent une identité utilisateur résolue. Appelez donc `changeUser` avant l'affichage des cartes dans la mesure du possible.
## ID de Content Card {#content-card-id}
Chaque envoi d'une Campaign à un destinataire génère un nouvel ID de Content Card. Si le même utilisateur reçoit la Campaign à nouveau lors d'un envoi ultérieur, Braze attribue un nouvel ID. Référencez l'`id` de la carte lorsque vous enregistrez les impressions, les clics et les fermetures dans vos implémentations personnalisées.
# Création de liens profonds dans les Content Cards
Source: /docs/fr/developer_guide/content_cards/deep_linking/index.md
# Création de liens profonds dans les Content Cards {#deep-linking-in-content-cards}
> Découvrez comment créer des liens profonds dans une carte de contenu à l'aide du SDK de Braze. Pour en savoir plus sur les liens profonds, consultez la rubrique [Qu'est-ce que la création de liens profonds ?](https://www.braze.com/docs/fr/fr/user_guide/messaging/design_and_edit/personalize/actions_and_media_urls/#what-is-deep-linking).
Pour l'instant, les liens profonds des Content Cards ne sont pas pris en charge par le SDK Web de Braze.
## Prerequisites
Before you can use this feature, you'll need to [integrate the Android Braze SDK](https://www.braze.com/docs/fr/fr/developer_guide/sdk_integration/?sdktab=android).
## Creating a universal delegate
The Android SDK provides the ability to set a single delegate object to custom handle all deep links opened by Braze across Content Cards, in-app messages, and push notifications.
Your delegate object should implement the [`IBrazeDeeplinkHandler`](https://braze-inc.github.io/braze-android-sdk/kdoc/braze-android-sdk/com.braze.ui/-braze-deeplink-handler/index.html) interface and be set using [`BrazeDeeplinkHandler.setBrazeDeeplinkHandler()`](https://braze-inc.github.io/braze-android-sdk/kdoc/braze-android-sdk/com.braze.ui/-braze-deeplink-handler/-companion/set-braze-deeplink-handler.html). In most cases, the delegate should be set in your app's `Application.onCreate()`.
The following is an example of overriding the default [`UriAction`](https://braze-inc.github.io/braze-android-sdk/kdoc/braze-android-sdk/com.braze.ui.actions/-uri-action/index.html) behavior with custom intent flags and custom behavior for YouTube URLs:
```java
public class CustomDeeplinkHandler implements IBrazeDeeplinkHandler {
private static final String TAG = BrazeLogger.getBrazeLogTag(CustomDeeplinkHandler.class);
@Override
public void gotoUri(Context context, UriAction uriAction) {
String uri = uriAction.getUri().toString();
// Open YouTube URLs in the YouTube app and not our app
if (!StringUtils.isNullOrBlank(uri) && uri.contains("youtube.com")) {
uriAction.setUseWebView(false);
}
CustomUriAction customUriAction = new CustomUriAction(uriAction);
customUriAction.execute(context);
}
public static class CustomUriAction extends UriAction {
public CustomUriAction(@NonNull UriAction uriAction) {
super(uriAction);
}
@Override
protected void openUriWithActionView(Context context, Uri uri, Bundle extras) {
Intent intent = getActionViewIntent(context, uri, extras);
intent.setFlags(Intent.FLAG_ACTIVITY_NEW_TASK | Intent.FLAG_ACTIVITY_CLEAR_TOP | Intent.FLAG_ACTIVITY_SINGLE_TOP);
if (intent.resolveActivity(context.getPackageManager()) != null) {
context.startActivity(intent);
} else {
BrazeLogger.w(TAG, "Could not find appropriate activity to open for deep link " + uri + ".");
}
}
}
}
```
```kotlin
class CustomDeeplinkHandler : IBrazeDeeplinkHandler {
override fun gotoUri(context: Context, uriAction: UriAction) {
val uri = uriAction.uri.toString()
// Open YouTube URLs in the YouTube app and not our app
if (!StringUtils.isNullOrBlank(uri) && uri.contains("youtube.com")) {
uriAction.useWebView = false
}
val customUriAction = CustomUriAction(uriAction)
customUriAction.execute(context)
}
class CustomUriAction(uriAction: UriAction) : UriAction(uriAction) {
override fun openUriWithActionView(context: Context, uri: Uri, extras: Bundle) {
val intent = getActionViewIntent(context, uri, extras)
intent.flags = Intent.FLAG_ACTIVITY_NEW_TASK or Intent.FLAG_ACTIVITY_CLEAR_TOP or Intent.FLAG_ACTIVITY_SINGLE_TOP
if (intent.resolveActivity(context.packageManager) != null) {
context.startActivity(intent)
} else {
BrazeLogger.w(TAG, "Could not find appropriate activity to open for deep link $uri.")
}
}
}
companion object {
private val TAG = BrazeLogger.getBrazeLogTag(CustomDeeplinkHandler::class.java)
}
}
```
## Deep linking to app settings
To allow deep links to directly open your app's settings, you'll need a custom `BrazeDeeplinkHandler`. In the following example, the presence of a custom key-value pair called `open_notification_page` will make the deep link open the app's settings page:
```java
BrazeDeeplinkHandler.setBrazeDeeplinkHandler(new IBrazeDeeplinkHandler() {
@Override
public void gotoUri(Context context, UriAction uriAction) {
final Bundle extras = uriAction.getExtras();
if (extras.containsKey("open_notification_page")) {
Intent intent = new Intent();
intent.setAction("android.settings.APP_NOTIFICATION_SETTINGS");
intent.setFlags(Intent.FLAG_ACTIVITY_NEW_TASK);
//for Android 5-7
intent.putExtra("app_package", context.getPackageName());
intent.putExtra("app_uid", context.getApplicationInfo().uid);
// for Android 8 and later
intent.putExtra("android.provider.extra.APP_PACKAGE", context.getPackageName());
context.startActivity(intent);
}
}
});
```
```kotlin
BrazeDeeplinkHandler.setBrazeDeeplinkHandler(object : IBrazeDeeplinkHandler {
override fun gotoUri(context: Context, uriAction: UriAction) {
val extras = uriAction.extras
if (extras.containsKey("open_notification_page")) {
val intent = Intent()
intent.action = "android.settings.APP_NOTIFICATION_SETTINGS"
intent.flags = Intent.FLAG_ACTIVITY_NEW_TASK
//for Android 5-7
intent.putExtra("app_package", context.packageName)
intent.putExtra("app_uid", context.applicationInfo.uid)
// for Android 8 and later
intent.putExtra("android.provider.extra.APP_PACKAGE", context.packageName)
context.startActivity(intent)
}
}
})
```
## Customizing WebView activity {#Custom_Webview_Activity}
When Braze opens website deeplinks inside the app, the deeplinks are handled by [`BrazeWebViewActivity`](https://braze-inc.github.io/braze-android-sdk/kdoc/braze-android-sdk/com.braze.ui/-braze-web-view-activity/index.html).
**Note:**
For custom HTML in-app messages, links configured with `target="_blank"` open in the device's default web browser and are not handled by `BrazeWebViewActivity`.
To change this:
1. Create a new Activity that handles the target URL from `Intent.getExtras()` with the key `com.braze.Constants.BRAZE_WEBVIEW_URL_EXTRA`. For an example, see [`BrazeWebViewActivity.kt`](https://github.com/braze-inc/braze-android-sdk/blob/master/android-sdk-ui/src/main/java/com/braze/ui/BrazeWebViewActivity.kt).
2. Add that activity to `AndroidManifest.xml` and set `exported` to `false`.
```xml
```
3. Set your custom Activity in a `BrazeConfig` [builder object](https://braze-inc.github.io/braze-android-sdk/kdoc/braze-android-sdk/com.braze.configuration/-braze-config/-builder/set-custom-web-view-activity-class.html). Build the builder and pass it to [`Braze.configure()`](https://braze-inc.github.io/braze-android-sdk/kdoc/braze-android-sdk/com.braze/-braze/-companion/configure.html) in your [`Application.onCreate()`](https://developer.android.com/reference/android/app/Application.html#onCreate()).
```java
BrazeConfig brazeConfig = new BrazeConfig.Builder()
.setCustomWebViewActivityClass(MyCustomWebViewActivity::class)
...
.build();
Braze.configure(this, brazeConfig);
```
```kotlin
val brazeConfig = BrazeConfig.Builder()
.setCustomWebViewActivityClass(MyCustomWebViewActivity::class.java)
...
.build()
Braze.configure(this, brazeConfig)
```
## Troubleshooting
If deep links from push notifications aren't working on Android, try the following steps:
1. **Test the deep link outside of Braze.** Open the deep link URL from another app, such as email or a browser. If it doesn't open your app, the deep link may not be configured correctly in your `AndroidManifest.xml`. For more information, see Android's [Create Deep Links](https://developer.android.com/training/app-links/deep-linking) documentation.
2. **Check that automatic deep link handling is enabled.** Verify that `com_braze_handle_push_deep_links_automatically` is set to `true` in `braze.xml`, or set this option through [runtime configuration](https://www.braze.com/docs/fr/fr/developer_guide/sdk_initalization/?sdktab=android). Without this setting, Braze doesn't automatically open your app and deep link destination when someone taps a push notification.
3. **Verify your deep link handler delegate.** If you set a custom `IBrazeDeeplinkHandler`, confirm that your `gotoUri` implementation handles the URI and doesn't drop it.
4. **Test across channels.** If the same deep link works in an in-app message but not from push, the issue is likely in your push deep link handling, not in the deep link itself.
## Using Jetpack Compose
To handle deeplinks when using Jetpack Compose with NavHost:
1. Ensure that the activity handling your deeplink is registered in the Android Manifest.
```xml
```
2. In NavHost, specify which deeplinks you want it to handle.
```kotlin
composableWithCompositionLocal(
route = "YOUR_ROUTE_HERE",
deepLinks = listOf(navDeepLink {
uriPattern = "myapp://articles/{${MainDestinations.ARTICLE_ID_KEY}}"
}),
arguments = listOf(
navArgument(MainDestinations.ARTICLE_ID_KEY) {
type = NavType.LongType
}
),
) { backStackEntry ->
val arguments = requireNotNull(backStackEntry.arguments)
val articleId = arguments.getLong(MainDestinations.ARTICLE_ID_KEY)
ArticleDetail(
articleId
)
}
```
3. Depending on your app architecture, you may need to handle the new intent that's sent to your current activity as well.
```kotlin
DisposableEffect(Unit) {
val listener = Consumer {
navHostController.handleDeepLink(it)
}
addOnNewIntentListener(listener)
onDispose { removeOnNewIntentListener(listener) }
}
```
## Prerequisites
Before you can use this feature, you'll need to [integrate the Swift Braze SDK](https://www.braze.com/docs/fr/fr/developer_guide/sdk_integration/?sdktab=swift).
**Tip:**
For help choosing between custom scheme deep links, universal links, and "Open Web URL Inside App," see [iOS deep linking guide](https://www.braze.com/docs/fr/fr/developer_guide/push_notifications/ios_deep_linking_guide). For troubleshooting, see [Deep linking troubleshooting](https://www.braze.com/docs/fr/fr/developer_guide/push_notifications/deep_linking_troubleshooting).
## Handling deep links
### Step 1: Register a scheme {#register-a-scheme}
To handle deep linking, a custom scheme must be stated in your `Info.plist` file. The navigation structure is defined by an array of dictionaries. Each of those dictionaries contains an array of strings.
Use Xcode to edit your `Info.plist` file:
1. Add a new key, `URL types`. Xcode will automatically make this an array containing a dictionary called `Item 0`.
2. Within `Item 0`, add a key `URL identifier`. Set the value to your custom scheme.
3. Within `Item 0`, add a key `URL Schemes`. This will automatically be an array containing a `Item 0` string.
4. Set `URL Schemes` >> `Item 0` to your custom scheme.
Alternatively, if you wish to edit your `Info.plist` file directly, you can follow this spec:
```html
CFBundleURLTypesCFBundleURLNameYOUR.SCHEMECFBundleURLSchemesYOUR.SCHEME
```
### Step 2: Add a scheme allowlist
You must declare the URL schemes you wish to pass to `canOpenURL(_:)` by adding the `LSApplicationQueriesSchemes` key to your app's Info.plist file. Attempting to call schemes outside this allowlist will cause the system to record an error in the device's logs, and the deep link will not open. An example of this error will look like this:
```
: -canOpenURL: failed for URL: "yourapp://deeplink" – error: "This app is not allowed to query for scheme yourapp"
```
For example, if an in-app message should open the Facebook app when tapped, the app has to have the Facebook custom scheme (`fb`) in your allowlist. Otherwise, the system will reject the deep link. Deep links that direct to a page or view inside your own app still require that your app's custom scheme be listed in your app's `Info.plist`.
Your example allowlist might look something like:
```html
LSApplicationQueriesSchemesmyappfbtwitter
```
For more information, refer to [Apple's documentation](https://developer.apple.com/library/content/documentation/General/Reference/InfoPlistKeyReference/Articles/LaunchServicesKeys.html#//apple_ref/doc/uid/TP40009250-SW14) on the `LSApplicationQueriesSchemes` key.
### Step 3: Implement a handler
After activating your app, iOS will call the method [`application:openURL:options:`](https://developer.apple.com/reference/uikit/uiapplicationdelegate/1623112-application?language=objc). The important argument is the [NSURL](https://developer.apple.com/library/ios/DOCUMENTATION/Cocoa/Reference/Foundation/Classes/NSURL_Class/Reference/Reference.html#//apple_ref/doc/c_ref/NSURL) object.
```swift
func application(_ app: UIApplication, open url: URL, options: [UIApplication.OpenURLOptionsKey : Any] = [:]) -> Bool {
let path = url.path
let query = url.query
// Insert your code here to take some action based upon the path and query.
return true
}
```
```objc
- (BOOL)application:(UIApplication *)app openURL:(NSURL *)url options:(NSDictionary *)options {
NSString *path = [url path];
NSString *query = [url query];
// Insert your code here to take some action based upon the path and query.
return YES;
}
```
## App Transport Security (ATS)
As defined by [Apple](https://developer.apple.com/library/prerelease/ios/releasenotes/General/WhatsNewIniOS/Articles/iOS9.html#//apple_ref/doc/uid/TP40016198-SW14), "App Transport Security is a feature that improves the security of connections between an app and web services. The feature consists of default connection requirements that conform to best practices for secure connections. Apps can override this default behavior and turn off transport security."
ATS is applied by default. It requires that all connections use HTTPS and are encrypted using TLS 1.2 with forward secrecy. Refer to [Requirements for Connecting Using ATS](https://developer.apple.com/library/ios/documentation/General/Reference/InfoPlistKeyReference/Articles/CocoaKeys.html#//apple_ref/doc/uid/TP40009251-SW35) for more information. All images served by Braze to end devices are handled by a content delivery network ("CDN") that supports TLS 1.2 and is compatible with ATS.
Unless they are specified as exceptions in your application's `Info.plist`, connections that do not follow these requirements will fail with errors that are similar to the following.
**Example Error 1:**
```bash
CFNetwork SSLHandshake failed (-9801)
Error Domain=NSURLErrorDomain Code=-1200 "An SSL error has occurred, and a secure connection to the server cannot be made."
```
**Example Error 2:**
```bash
NSURLSession/NSURLConnection HTTP load failed (kCFStreamErrorDomainSSL, -9802)
```
ATS compliance is enforced for links opened within the mobile app (our default handling of clicked links) and does not apply to sites opened externally via a web browser.
### Working with ATS
You can handle ATS in either of the following ways, but we recommend **complying with ATS requirements**.
Your Braze integration can satisfy ATS requirements by ensuring that any existing links you drive users to (for example, though in-app message and push campaigns) satisfy ATS requirements. While there are ways to bypass ATS restrictions, our recommendation is to ensure that all linked URLs are ATS-compliant. Given Apple's increasing emphasis on application security, the following approaches to allowing ATS exceptions are not guaranteed to be supported by Apple.
You can allow a subset of links with certain domains or schemes to be treated as exceptions to the ATS rules. Your Braze integration will satisfy ATS requirements if every link you use in a Braze messaging channel is either ATS compliant or handled by an exception.
To add a domain as an exception of the ATS, add following to your app's `Info.plist` file:
```html
NSAppTransportSecurityNSAllowsArbitraryLoadsNSExceptionDomainsexample.comNSExceptionAllowsInsecureHTTPLoadsNSIncludesSubdomains
```
Refer to Apple's article on [app transport security keys](https://developer.apple.com/library/ios/documentation/General/Reference/InfoPlistKeyReference/Articles/CocoaKeys.html#//apple_ref/doc/uid/TP40009251-SW33) for more information.
You can turn off ATS entirely. Note that this is not recommended practice, due to both lost security protections and future iOS compatibility. To disable ATS, insert the following in your app's `Info.plist` file:
```html
NSAppTransportSecurityNSAllowsArbitraryLoads
```
## Decoding URLs
The SDK percent-encodes links to create valid `URL`s. All link characters that are not allowed in a properly formed URL, such as Unicode characters, will be percent escaped.
To decode an encoded link, use the `String` property [`removingPercentEncoding`](https://developer.apple.com/documentation/swift/stringprotocol/removingpercentencoding). You must also return `true` in the `BrazeDelegate.braze(_:shouldOpenURL:)`. A call to action is required to trigger the handling of the URL by your app. For example:
```swift
func application(_ app: UIApplication, open url: URL, options: [UIApplication.OpenURLOptionsKey : Any] = [:]) -> Bool {
let urlString = url.absoluteString.removingPercentEncoding
// Handle urlString
return true
}
```
```objc
- (BOOL)application:(UIApplication *)application openURL:(NSURL *)url options:(NSDictionary *)options {
NSString *urlString = [url.absoluteString stringByRemovingPercentEncoding];
// Handle urlString
return YES;
}
```
## Deep linking to app settings
You can take advantage of `UIApplicationOpenSettingsURLString` to deep link users to your app's settings from Braze push notifications and in-app messages.
To take users from your app into the iOS settings:
1. First, make sure your application is set up for either [scheme-based deep links](#swift_register-a-scheme) or [universal links](#swift_universal-links).
2. Decide on a URI for deep linking to the **Settings** page (for example, `myapp://settings` or `https://www.braze.com/settings`).
3. If you are using custom scheme-based deep links, add the following code to your `application:openURL:options:` method:
```swift
func application(_ app: UIApplication, open url: URL, options: [UIApplicationOpenURLOptionsKey : Any] = [:]) -> Bool {
let path = url.path
if (path == "settings") {
UIApplication.shared.openURL(URL(string:UIApplication.openSettingsURLString)!)
}
return true
}
```
```objc
- (BOOL)application:(UIApplication *)app
openURL:(NSURL *)url
options:(NSDictionary *)options {
NSString *path = [url path];
if ([path isEqualToString:@"settings"]) {
NSURL *settingsURL = [NSURL URLWithString:UIApplicationOpenSettingsURLString];
[[UIApplication sharedApplication] openURL:settingsURL];
}
return YES;
}
```
## Customization options {#customization-options}
### Default WebView customization
The `Braze.WebViewController` class displays web URLs opened by the SDK, typically when "Open Web URL Inside App" is selected for a web deep link.
You can customize the `Braze.WebViewController` via the [`BrazeDelegate.braze(_:willPresentModalWithContext:)`](https://braze-inc.github.io/braze-swift-sdk/documentation/brazekit/brazedelegate/braze(_:willpresentmodalwithcontext:)-12sqy/) delegate method.
### Linking handling customization
The `BrazeDelegate` protocol can be used to customize the handling of URLs such as deep links, web URLs, and universal links. To set the delegate during Braze initialization, set a delegate object on the `Braze` instance. Braze will then call your delegate's implementation of `shouldOpenURL` before handling any URIs.
When a push notification or in-app message uses **Open web URL inside mobile app**, Braze passes `context.useWebView == true` on [`Braze.URLContext`](https://braze-inc.github.io/braze-swift-sdk/documentation/brazekit/braze/urlcontext). When the message opens the URL in the system browser instead, `useWebView` is `false`. Inspect `context.useWebView` in `braze(_:shouldOpenURL:)` to branch your custom handling—for example, to open an in-app `WebViewController` only when the campaign requested in-app display.
#### Universal links {#universal-links}
Braze supports universal links in push notifications, in-app messages, and Content Cards. To enable universal link support, [`configuration.forwardUniversalLinks`](https://braze-inc.github.io/braze-swift-sdk/documentation/brazekit/braze/configuration-swift.class/forwarduniversallinks) must be set to `true`.
When enabled, Braze will forward universal links to your app's `AppDelegate` via the [`application:continueUserActivity:restorationHandler:`](https://developer.apple.com/documentation/uikit/uiapplicationdelegate/1623072-application) method.
Your application also needs to be set up to handle universal links. Refer to [Apple's documentation](https://developer.apple.com/documentation/xcode/supporting-universal-links-in-your-app) to ensure your application is configured correctly for universal links.
**Warning:**
Universal link forwarding requires access to the application entitlements. When running the application in a simulator, these entitlements are not directly available and universal links are not forwarded to the system handlers.
To add support to simulator builds, you can add the application `.entitlements` file to the _Copy Bundle Resources_ build phase. See [`forwardUniversalLinks`](https://braze-inc.github.io/braze-swift-sdk/documentation/brazekit/braze/configuration-swift.class/forwarduniversallinks) documentation for more details.
**Note:**
The SDK does not query your domains' `apple-app-site-association` file. It performs the differentiation between universal links and regular URLs by looking at the domain name only. As a result, the SDK does not respect any exclusion rule defined in the `apple-app-site-association` per [Supporting associated domains](https://developer.apple.com/documentation/xcode/supporting-associated-domains).
## Examples
### BrazeDelegate
Here's an example using `BrazeDelegate`. For more information, see [Braze Swift SDK reference](https://braze-inc.github.io/braze-swift-sdk/documentation/brazekit/brazedelegate).
```swift
func braze(_ braze: Braze, shouldOpenURL context: Braze.URLContext) -> Bool {
if context.url.host == "MY-DOMAIN.com" {
// Custom handle link here
return false
}
// Let Braze handle links otherwise
return true
}
```
```objc
- (BOOL)braze:(Braze *)braze shouldOpenURL:(BRZURLContext *)context {
if ([[context.url.host lowercaseString] isEqualToString:@"MY-DOMAIN.com"]) {
// Custom handle link here
return NO;
}
// Let Braze handle links otherwise
return YES;
}
```
# Intégrer des GIF dans les cartes de contenu
Source: /docs/fr/developer_guide/content_cards/embedding_gifs/index.md
# Intégrer des GIF dans les cartes de contenu
> Découvrez comment intégrer des GIF dans les cartes de contenu à l'aide du SDK de Braze.
**Note:**
Pour les SDK wrapper non répertoriés, utilisez plutôt la méthode native Android ou Swift correspondante. Gardez à l'esprit que les SDK Android et Swift Braze ne prennent pas en charge les GIF animés de manière native, vous mettrez donc en œuvre les GIF de la carte de contenu à l'aide d'outils tiers à la place.
La prise en charge du format GIF est incluse par défaut dans l'intégration SDK Web.
## About GIFs
Braze offers the ability to use a custom image library to display animated GIFs. Although the example below uses [Glide](https://bumptech.github.io/glide/), any image library that supports GIFs is compatible.
## Integrating a custom image library
### Step 1: Creating the image loader delegate
The Image Loader delegate must implement the following methods:
* [`getInAppMessageBitmapFromUrl()`](https://braze-inc.github.io/braze-android-sdk/kdoc/braze-android-sdk/com.braze.images/-i-braze-image-loader/get-in-app-message-bitmap-from-url.html)
* [`getPushBitmapFromUrl()`](https://braze-inc.github.io/braze-android-sdk/kdoc/braze-android-sdk/com.braze.images/-i-braze-image-loader/get-push-bitmap-from-url.html)
* [`renderUrlIntoCardView()`](https://braze-inc.github.io/braze-android-sdk/kdoc/braze-android-sdk/com.braze.images/-i-braze-image-loader/render-url-into-card-view.html)
* [`renderUrlIntoInAppMessageView()`](https://braze-inc.github.io/braze-android-sdk/kdoc/braze-android-sdk/com.braze.images/-i-braze-image-loader/render-url-into-in-app-message-view.html)
* [`setOffline()`](https://braze-inc.github.io/braze-android-sdk/kdoc/braze-android-sdk/com.braze.images/-i-braze-image-loader/set-offline.html)
The integration example below is taken from the [Glide integration sample app](https://github.com/braze-inc/braze-android-sdk/tree/master/samples/glide-image-integration) included with the Braze Android SDK.
```java
import com.braze.support.BrazeLogger;
import com.bumptech.glide.load.resource.gif.GifDrawable;
import android.graphics.drawable.Drawable;
public class GlideBrazeImageLoader implements IBrazeImageLoader {
private static final String TAG = GlideBrazeImageLoader.class.getName();
private RequestOptions mRequestOptions = new RequestOptions();
@Override
public void renderUrlIntoCardView(Context context, Card card, String imageUrl, ImageView imageView, BrazeViewBounds viewBounds) {
renderUrlIntoView(context, imageUrl, imageView);
}
@Override
public void renderUrlIntoInAppMessageView(Context context, IInAppMessage inAppMessage, String imageUrl, ImageView imageView, BrazeViewBounds viewBounds) {
renderUrlIntoView(context, imageUrl, imageView);
}
@Override
public Bitmap getPushBitmapFromUrl(Context context, Bundle extras, String imageUrl, BrazeViewBounds viewBounds) {
return getBitmapFromUrl(context, imageUrl, viewBounds);
}
@Override
public Bitmap getInAppMessageBitmapFromUrl(Context context, IInAppMessage inAppMessage, String imageUrl, BrazeViewBounds viewBounds) {
return getBitmapFromUrl(context, imageUrl, viewBounds);
}
private void renderUrlIntoView(Context context, String imageUrl, ImageView imageView) {
try {
final Drawable drawable = Glide.with(context)
.load(imageUrl)
.apply(mRequestOptions)
.submit()
.get();
imageView.post(() -> {
imageView.setImageDrawable(drawable);
if (drawable instanceof GifDrawable) {
((GifDrawable) drawable).start();
}
});
} catch (Exception e) {
BrazeLogger.e(TAG, "Failed to render URL into view: " + imageUrl, e);
}
}
private Bitmap getBitmapFromUrl(Context context, String imageUrl, BrazeViewBounds viewBounds) {
try {
return Glide.with(context)
.asBitmap()
.apply(mRequestOptions)
.load(imageUrl).submit().get();
} catch (Exception e) {
Log.e(TAG, "Failed to retrieve bitmap at url: " + imageUrl, e);
}
return null;
}
@Override
public void setOffline(boolean isOffline) {
// If the loader is offline, then we should only be retrieving from the cache
mRequestOptions = mRequestOptions.onlyRetrieveFromCache(isOffline);
}
}
```
```kotlin
import com.braze.support.BrazeLogger
import com.bumptech.glide.load.resource.gif.GifDrawable
class GlideBrazeImageLoader : IBrazeImageLoader {
companion object {
private val TAG = GlideBrazeImageLoader::class.qualifiedName
}
private var mRequestOptions = RequestOptions()
override fun renderUrlIntoCardView(context: Context, card: Card, imageUrl: String, imageView: ImageView, viewBounds: BrazeViewBounds) {
renderUrlIntoView(context, imageUrl, imageView)
}
override fun renderUrlIntoInAppMessageView(context: Context, inAppMessage: IInAppMessage, imageUrl: String, imageView: ImageView, viewBounds: BrazeViewBounds) {
renderUrlIntoView(context, imageUrl, imageView)
}
override fun getPushBitmapFromUrl(context: Context, extras: Bundle, imageUrl: String, viewBounds: BrazeViewBounds): Bitmap? {
return getBitmapFromUrl(context, imageUrl, viewBounds)
}
override fun getInAppMessageBitmapFromUrl(context: Context, inAppMessage: IInAppMessage, imageUrl: String, viewBounds: BrazeViewBounds): Bitmap? {
return getBitmapFromUrl(context, imageUrl, viewBounds)
}
private fun renderUrlIntoView(context: Context, imageUrl: String, imageView: ImageView) {
try {
val drawable = Glide.with(context)
.load(imageUrl)
.apply(mRequestOptions)
.submit()
.get()
imageView.post {
imageView.setImageDrawable(drawable)
if (drawable is GifDrawable) {
drawable.start()
}
}
} catch (e: Exception) {
BrazeLogger.e(TAG, "Failed to render URL into view: $imageUrl", e)
}
}
private fun getBitmapFromUrl(context: Context, imageUrl: String, viewBounds: BrazeViewBounds): Bitmap? {
try {
return Glide.with(context)
.asBitmap()
.apply(mRequestOptions)
.load(imageUrl).submit().get()
} catch (e: Exception) {
Log.e(TAG, "Failed to retrieve bitmap at url: $imageUrl", e)
}
return null
}
override fun setOffline(isOffline: Boolean) {
// If the loader is offline, then we should only be retrieving from the cache
mRequestOptions = mRequestOptions.onlyRetrieveFromCache(isOffline)
}
}
```
### Fixing image loading for Android SDK 36.0.0 and later
In Android SDK 36.0.0 and later, `displayInAppMessage()` is a `suspend` function. This means `renderUrlIntoInAppMessageView()` runs on a background thread instead of the main thread.
If your custom image loader calls `Glide.into(imageView)` in `renderUrlIntoInAppMessageView()`, your app can fail with "You must call this method on the main thread."
To avoid this:
1. Load the image on the background thread with `submit().get()`.
2. Post the UI update to the main thread with `imageView.post { ... }`.
3. If the loaded result is a GIF drawable, start the animation after setting it on the view.
This separates image loading from UI rendering, and keeps your custom image loader compatible with Android SDK 36.0.0 and later.
This guidance applies to Android custom image loaders. Web in-app messages support GIFs out of the box.
The following Kotlin sample uses placeholder values to show this pattern:
```kotlin
private const val TAG = "SampleGlideLoader"
private const val glideBrazeImageLoaderTag = "sample-loader"
private fun renderUrlIntoView(
context: Context,
imageUrl: String,
imageView: ImageView
) {
try {
val drawable: Drawable = Glide.with(context)
.load(imageUrl)
.apply(mRequestOptions)
.submit()
.get()
imageView.post {
imageView.setImageDrawable(drawable)
if (drawable is GifDrawable) {
drawable.start()
}
}
} catch (e: Exception) {
Log.e(TAG, "$glideBrazeImageLoaderTag renderUrlIntoView failed: url=$imageUrl", e)
}
}
```
### Step 2: Setting the image loader delegate
The Braze SDK will use any custom image loader set with [`IBrazeImageLoader`](https://braze-inc.github.io/braze-android-sdk/kdoc/braze-android-sdk/com.braze.images/-i-braze-image-loader/index.html). We recommend setting the custom image loader in a custom application subclass:
```java
public class GlideIntegrationApplication extends Application {
@Override
public void onCreate() {
super.onCreate();
Braze.getInstance(context).setImageLoader(new GlideBrazeImageLoader());
}
}
```
```kotlin
class GlideIntegrationApplication : Application() {
override fun onCreate() {
super.onCreate()
Braze.getInstance(context).imageLoader = GlideBrazeImageLoader()
}
}
```
## Custom Image Loading with Jetpack Compose
To override image loading with Jetpack Compose, you can pass in a value to [`imageComposable`](https://braze-inc.github.io/braze-android-sdk/kdoc/braze-android-sdk/com.braze.jetpackcompose.contentcards.styling/-content-card-styling/index.html#-808910455%2FProperties%2F-1725759721). This function will take a `Card` and render the image and the modifiers needed. Alternatively, you can use `customCardComposer` of `ContentCardsList` to render the entire card.
In the following example, Glide's Compose library is used for the cards listed in the `imageComposable` function:
```kotlin
ContentCardsList(
cardStyle = ContentCardStyling(
imageComposable = { card ->
when (card.cardType) {
CardType.CAPTIONED_IMAGE -> {
val captionedImageCard = card as CaptionedImageCard
GlideImage(
modifier = Modifier
.fillMaxWidth()
.wrapContentHeight()
.run {
if (captionedImageCard.aspectRatio > 0) {
aspectRatio(captionedImageCard.aspectRatio)
} else {
this
}
},
contentScale = ContentScale.Crop,
model = captionedImageCard.url,
loading = placeholder(R.drawable.pushpin),
contentDescription = ""
)
}
CardType.IMAGE -> {
val imageOnlyCard = card as ImageOnlyCard
GlideImage(
modifier = Modifier
.fillMaxWidth()
.run {
if (imageOnlyCard.aspectRatio > 0) {
aspectRatio(imageOnlyCard.aspectRatio)
} else {
this
}
},
contentScale = ContentScale.Crop,
model = imageOnlyCard.url,
loading = placeholder(R.drawable.pushpin),
contentDescription = ""
)
}
CardType.SHORT_NEWS -> {
val shortNews = card as ShortNewsCard
GlideImage(
modifier = Modifier
.width(100.dp)
.height(100.dp),
model = shortNews.url,
loading = placeholder(R.drawable.pushpin),
contentDescription = ""
)
}
else -> Unit
}
}
)
)
```
## Prerequisites
Before you can use this feature, you'll need to [integrate the Swift Braze SDK](https://www.braze.com/docs/fr/fr/developer_guide/sdk_integration/?sdktab=swift).
## Integrating a custom image library
### Step 1: Integrate SDWebImage
Integrate the [SDWebImage repository](https://github.com/SDWebImage/SDWebImage) into your Xcode project.
### Step 2: Create a new Swift file
In your Xcode project, create a new file named `SDWebImageGIFViewProvider.swift` and import the following:
```swift
import UIKit
import BrazeUI
import SDWebImage
```
### Step 3: Add `GIFViewProvider`
Next, add our sample SDWebImage [`GIFViewProvider`](https://braze-inc.github.io/braze-swift-sdk/documentation/brazeui/gifviewprovider/). Your file should be similar to the following:
```swift
import UIKit
import BrazeUI
import SDWebImage
extension GIFViewProvider {
/// A GIF view provider using [SDWebImage](https://github.com/SDWebImage/SDWebImage) as a
/// rendering library.
public static let sdWebImage = Self(
view: { SDAnimatedImageView(image: image(for: $0)) },
updateView: { ($0 as? SDAnimatedImageView)?.image = image(for: $1) }
)
private static func image(for url: URL?) -> UIImage? {
guard let url else { return nil }
return url.pathExtension == "gif"
? SDAnimatedImage(contentsOfFile: url.path)
: UIImage(contentsOfFile: url.path)
}
}
```
### Step 4: Modify your `AppDelegate.swift`
In your project's `AppDelegate.swift`, add GIF support to your `BrazeUI` components using `GIFViewProvider`. Your file should be similar to the following:
```swift
import UIKit
import BrazeKit
import BrazeUI
@main
class AppDelegate: UIResponder, UIApplicationDelegate {
static var braze: Braze? = nil
func application(
_ application: UIApplication,
didFinishLaunchingWithOptions launchOptions: [UIApplication.LaunchOptionsKey: Any]?
) -> Bool {
/* ... */
GIFViewProvider.shared = .sdWebImage
return true
}
}
```
# Tutoriel : Création d'une boîte de réception avec des cartes de contenu
Source: /docs/fr/developer_guide/content_cards/content_card_inbox/index.md
# Tutoriel : Création d'une boîte de réception avec des cartes de contenu
> Veuillez suivre l'exemple de code fourni dans ce tutoriel pour créer une boîte de réception avec les cartes de contenu Braze.
## Prerequisites
Before you can use this feature, you'll need to [integrate the Android Braze SDK](https://www.braze.com/docs/fr/fr/developer_guide/sdk_integration/?sdktab=android).
## Création d'une boîte de réception avec des cartes de contenu pour Android (Compose)
**Important:**
We're piloting this new tutorial format. [Tell us what you think](https://docs.google.com/forms/d/e/1FAIpQLSe_5uhWM7eXXk9F_gviO_pvA4rkYO3WA9B6tNJZ3TY91md5bw/viewform?usp=pp_url&entry.569173304=General+Feedback) — your feedback helps us improve future guides.
```kotlin file=MainApplication.kt
import android.app.Application
import com.braze.Braze
import com.braze.support.BrazeLogger
import com.braze.configuration.BrazeConfig
import android.util.Log
class ContentCardsApplication : Application() {
override fun onCreate() {
super.onCreate()
// Turn on verbose Braze logging
BrazeLogger.enableVerboseLogging()
// Configure Braze with your SDK key & endpoint
val config = BrazeConfig.Builder()
.setApiKey("YOUR_API_KEY")
.setCustomEndpoint("YOUR_API_ENDPOINT")
.build()
Braze.configure(this, config)
}
}
```
```kotlin file=ContentCardsInboxScreen.kt
import android.content.Intent
import android.net.Uri
import androidx.compose.foundation.clickable
import androidx.compose.foundation.layout.*
import androidx.compose.foundation.lazy.LazyColumn
import androidx.compose.foundation.lazy.items
import androidx.compose.material3.*
import androidx.compose.runtime.*
import androidx.compose.ui.Modifier
import androidx.compose.ui.platform.LocalContext
import androidx.compose.ui.text.font.FontWeight
import androidx.compose.ui.unit.dp
import androidx.compose.ui.unit.sp
import com.braze.Braze
import com.braze.events.ContentCardsUpdatedEvent
import com.braze.events.IEventSubscriber
import com.braze.models.cards.*
@Composable
fun ContentCardInboxScreen() {
val context = LocalContext.current
var cards by remember { mutableStateOf>(emptyList()) }
val loggedImpressions = remember { mutableSetOf() }
DisposableEffect(Unit) {
val subscriber = IEventSubscriber { event ->
cards = event.allCards.filter { !it.isControl }
}
Braze.getInstance(context).subscribeToContentCardsUpdates(subscriber)
Braze.getInstance(context).requestContentCardsRefresh(false)
onDispose {
Braze.getInstance(context)
.removeSingleSubscription(subscriber, ContentCardsUpdatedEvent::class.java)
}
}
Column(modifier = Modifier.fillMaxSize()) {
Text(
text = "Message Inbox",
fontSize = 20.sp,
fontWeight = FontWeight.Bold,
modifier = Modifier.padding(start = 16.dp, end = 16.dp, top = 12.dp, bottom = 8.dp)
)
LazyColumn(
modifier = Modifier
.fillMaxSize()
.padding(horizontal = 16.dp)
) {
items(cards, key = { it.id }) { card ->
ContentCardItem(
card = card,
onImpression = {
if (!loggedImpressions.contains(card.id)) {
card.logImpression()
loggedImpressions.add(card.id)
}
},
onClick = {
card.logClick()
card.url?.let {
context.startActivity(Intent(Intent.ACTION_VIEW, Uri.parse(it)))
}
}
)
}
}
}
}
@Composable
fun ContentCardItem(
card: Card,
onImpression: () -> Unit,
onClick: () -> Unit
) {
// Log impression when the card becomes visible
LaunchedEffect(card.id) {
onImpression()
}
val title = when (card) {
is CaptionedImageCard -> card.title
is ShortNewsCard -> card.title
is TextAnnouncementCard -> card.title
else -> null
}
val description = when (card) {
is CaptionedImageCard -> card.description
is ShortNewsCard -> card.description
is TextAnnouncementCard -> card.description
else -> null
}
Card(
modifier = Modifier
.fillMaxWidth()
.padding(vertical = 4.dp)
.clickable { onClick() }
) {
Column(modifier = Modifier.padding(16.dp)) {
title?.let {
Text(
text = it,
fontWeight = FontWeight.Bold,
fontSize = 16.sp
)
}
description?.let {
Spacer(modifier = Modifier.height(4.dp))
Text(
text = it,
fontSize = 14.sp
)
}
}
}
}
```
!étape
lignes-MainApplication.kt=12
#### 1\. Activer le débogage (facultatif)
Pour faciliter la résolution des problèmes lors du développement, pensez à activer le débogage.
!étape
lignes-=47-69ContentCardsInboxScreen.kt
#### 2\. Créer une vue d'interface utilisateur
Pour Jetpack Compose, veuillez utiliser un[`LazyColumn`]() pour afficher les cartes de contenu dans une liste déroulante.
!étape
lignes-=25-37ContentCardsInboxScreen.kt
#### 3\. Veuillez vous abonner aux mises à jour de la carte de contenu.
Veuillez utiliser un[`DisposableEffect`]() pour gérer le cycle de vie de l'abonnement, en veillant à ce que le nettoyage soit effectué correctement lorsque le composable quitte la composition.
!étape
lignes-=84-95ContentCardsInboxScreen.kt
#### 4\. Créer une interface utilisateur personnalisée pour la boîte de réception
L'utilisation des [attributs]() de carte de contenu tels que `title`,`description` et vous`url` permet de créer des cartes de contenu adaptées à vos besoins spécifiques en matière d'interface utilisateur. Dans ce cas, nous créons une boîte de réception à l'aide des composables`Column` et `Card`de Jetpack Compose.
!étape
lignes-=57ContentCardsInboxScreen.kt,62
#### 5\. Suivre les impressions et les clics
Vous pouvez enregistrer les impressions et les clics à l'aide des méthodes[`logImpressions`]() [`logClick`]()et disponibles pour les cartes de contenu.
Les impressions ne doivent être enregistrées qu'une seule fois lorsqu'une carte est consultée par l'utilisateur. Veuillez utiliser cette fonction`LaunchedEffect` pour enregistrer les impressions lorsqu'une carte devient visible. Veuillez noter qu'il peut être nécessaire de prendre en compte le cycle de vie de votre application, ainsi que les cas d'utilisation, afin de garantir que les impressions sont correctement enregistrées.
## Création d'une boîte de réception avec des cartes de contenu pour Android (RecyclerView)
```kotlin file=MainApplication.kt
import android.app.Application
import com.braze.Braze
import com.braze.support.BrazeLogger
import com.braze.configuration.BrazeConfig
import android.util.Log
class ContentCardsApplication : Application() {
override fun onCreate() {
super.onCreate()
// Turn on verbose Braze logging
BrazeLogger.enableVerboseLogging()
// Configure Braze with your SDK key & endpoint
val config = BrazeConfig.Builder()
.setApiKey("YOUR_API_KEY")
.setCustomEndpoint("YOUR_API_ENDPOINT")
.build()
Braze.configure(this, config)
}
}
```
```kotlin file=ContentCardInboxActivity.kt
import android.content.Intent
import android.net.Uri
import android.os.Bundle
import androidx.activity.ComponentActivity
import androidx.recyclerview.widget.LinearLayoutManager
import androidx.recyclerview.widget.RecyclerView
import android.view.*
import android.widget.TextView
import com.braze.Braze
import com.braze.events.ContentCardsUpdatedEvent
import com.braze.events.IEventSubscriber
import com.braze.models.cards.*
class ContentCardsActivity : ComponentActivity() {
private val cards = mutableListOf()
private var subscriber: IEventSubscriber? = null
private lateinit var recyclerView: RecyclerView
private val adapter = ContentCardAdapter()
override fun onCreate(savedInstanceState: Bundle?) {
super.onCreate(savedInstanceState)
setContentView(R.layout.content_card_inbox)
recyclerView = findViewById(R.id.contentCardsRecyclerView)
recyclerView.layoutManager = LinearLayoutManager(this)
recyclerView.adapter = adapter
// Prepare the subscriber (attach/detach in onStart/onStop)
subscriber = IEventSubscriber { event ->
runOnUiThread {
cards.clear()
cards.addAll(event.allCards.filter { !it.isControl })
adapter.notifyDataSetChanged()
}
}
}
override fun onStart() {
super.onStart()
subscriber?.let {
Braze.getInstance(this).subscribeToContentCardsUpdates(it)
}
// Fetch fresh cards
Braze.getInstance(this).requestContentCardsRefresh(false)
}
override fun onStop() {
// Avoid leaks by removing the subscription when not visible
Braze.getInstance(this)
.removeSingleSubscription(subscriber, ContentCardsUpdatedEvent::class.java)
super.onStop()
}
inner class ContentCardAdapter :
RecyclerView.Adapter() {
inner class CardViewHolder(v: View) : RecyclerView.ViewHolder(v) {
val title: TextView = v.findViewById(android.R.id.text1)
val description: TextView = v.findViewById(android.R.id.text2)
}
override fun onCreateViewHolder(parent: ViewGroup, viewType: Int): CardViewHolder {
val view = LayoutInflater.from(parent.context)
.inflate(android.R.layout.simple_list_item_2, parent, false)
return CardViewHolder(view)
}
override fun getItemCount() = cards.size
override fun onBindViewHolder(holder: CardViewHolder, position: Int) {
val card = cards[position]
val title = when (card) {
is CaptionedImageCard -> card.title
is ShortNewsCard -> card.title
is TextAnnouncementCard -> card.title
else -> null
}
val description = when (card) {
is CaptionedImageCard -> card.description
is ShortNewsCard -> card.description
is TextAnnouncementCard -> card.description
else -> null
}
holder.title.text = title.orEmpty()
holder.description.text = description.orEmpty()
// Naive impression guard: only log the first time we bind a not-yet-viewed card.
if (!card.viewed) card.logImpression()
holder.itemView.setOnClickListener {
card.logClick()
card.url?.let { startActivity(Intent(Intent.ACTION_VIEW, Uri.parse(it))) }
}
}
}
}
```
```xml file=content_card_inbox.xml
```
!étape
lignes-MainApplication.kt=12
#### 1\. Activer le débogage (facultatif)
Pour faciliter la résolution des problèmes lors du développement, pensez à activer le débogage.
!étape
lines-content_card_inbox.xml=1-24
#### 2\. Créer une vue d'interface utilisateur
Dans ce tutoriel, nous utilisons Android[`RecyclerView`]()pour afficher des cartes de contenu, mais nous vous recommandons de créer une interface utilisateur avec des classes et des composants adaptés à votre cas d'utilisation. Braze fournit l'interface utilisateur par défaut, mais ce tutoriel vous guide dans la création d'une vue personnalisée afin de personnaliser l'apparence et le comportement.
!étape
lignes 29 à ContentCardInboxActivity.kt35, 40 à 42 et 44
#### 3\. Veuillez vous abonner aux mises à jour de la carte de contenu.
Veuillez utiliser cette [`subscribeToContentCardsUpdates`]()fonctionnalité pour permettre à votre interface utilisateur de réagir lorsque de nouvelles cartes de contenu sont disponibles. Ici, les utilisateurs abonnés sont enregistrés et supprimés dans les hooks du cycle de vie de l'activité.
!étape
lignes-=73-84ContentCardInboxActivity.kt
#### 4\. Créer une interface utilisateur personnalisée pour la boîte de réception
L'utilisation des [attributs]() de la carte de contenu tels que `title`,`description` et vous`url` permet de créer des cartes de contenu adaptées à vos besoins spécifiques en matière d'interface utilisateur. Dans ce cas, nous créons une boîte de réception avec le natif Android`RecyclerView`.
!étape
lignes-=90ContentCardInboxActivity.kt,93
#### 5\. Suivre les impressions et les clics
Vous pouvez enregistrer les impressions et les clics à l'aide des méthodes[`logImpressions`]() [`logClick`]()et disponibles pour les cartes de contenu.
Les impressions ne doivent être enregistrées qu'une seule fois lorsqu'une carte est consultée par l'utilisateur. Ici, nous utilisons un mécanisme simple pour éviter les doublons dans les journaux grâce à un indicateur par carte. Veuillez noter qu'il peut être nécessaire de prendre en compte le cycle de vie de votre application, ainsi que les cas d'utilisation, afin de garantir que les impressions sont correctement enregistrées.
## Prerequisites
Before you can use this feature, you'll need to [integrate the Swift Braze SDK](https://www.braze.com/docs/fr/fr/developer_guide/sdk_integration/?sdktab=swift). Il vous sera également nécessaire d'[activer les messages in-app pour Swift](https://www.braze.com/docs/fr/fr/developer_guide/in_app_messages/?sdktab=swift#swift_enabling-in-app-messages).
## Création d'une boîte de réception avec des cartes de contenu pour Swift
**Important:**
We're piloting this new tutorial format. [Tell us what you think](https://docs.google.com/forms/d/e/1FAIpQLSe_5uhWM7eXXk9F_gviO_pvA4rkYO3WA9B6tNJZ3TY91md5bw/viewform?usp=pp_url&entry.569173304=General+Feedback) — your feedback helps us improve future guides.
```swift file=AppDelegate.swift
import SwiftUI
import BrazeKit
import BrazeUI
class AppDelegate: UIResponder, UIApplicationDelegate {
static var braze: Braze!
func application(
_ application: UIApplication,
didFinishLaunchingWithOptions launchOptions: [UIApplication.LaunchOptionsKey: Any]?
) -> Bool {
// Braze configuration with your SDK API key and endpoint
let configuration = Braze.Configuration(apiKey: "YOUR_API_ENDPOINT", endpoint: "YOUR_API_KEY")
configuration.logger.level = .debug
// Initialize Braze SDK instance
AppDelegate.braze = Braze(configuration: configuration)
return true
}
}
struct InboxViewControllerRepresentable: UIViewControllerRepresentable {
func makeUIViewController(context: Context) -> UINavigationController {
let vc = BrazeInboxViewController(style: .plain)
return UINavigationController(rootViewController: vc)
}
func updateUIViewController(_ uiViewController: UINavigationController, context: Context) {}
}
struct ContentView: View {
var body: some View {
NavigationView {
InboxViewControllerRepresentable()
.navigationTitle("Message Inbox")
}
}
}
```
```swift file=SampleApp.swift
import SwiftUI
@main
struct SampleApp: App {
@UIApplicationDelegateAdaptor(AppDelegate.self) var delegate
var body: some Scene {
WindowGroup {
ContentView()
}
}
}
```
```swift file=BrazeInboxView.swift
import SwiftUI
import UIKit
import BrazeKit
class BrazeInboxViewController: UITableViewController {
private var cards: [Braze.ContentCard] = []
private var subscription: Any?
private var loggedImpressions = Set()
override func viewDidLoad() {
super.viewDidLoad()
tableView.register(UITableViewCell.self, forCellReuseIdentifier: "CardCell")
tableView.rowHeight = 100
subscription = AppDelegate.braze.contentCards.subscribeToUpdates { [weak self] updatedCards in
self?.cards = updatedCards
self?.tableView.reloadData()
}
AppDelegate.braze.contentCards.requestRefresh()
}
override func numberOfSections(in tableView: UITableView) -> Int { 1 }
override func tableView(_ tableView: UITableView, numberOfRowsInSection section: Int) -> Int {
cards.count
}
override func tableView(_ tableView: UITableView, cellForRowAt indexPath: IndexPath) -> UITableViewCell {
let card = cards[indexPath.row]
let cell = tableView.dequeueReusableCell(withIdentifier: "CardCell", for: indexPath)
// Work with the content card's title and description
cell.textLabel?.numberOfLines = 2
cell.textLabel?.text = [card.title, card.description].compactMap { $0 }.joined(separator: "\n")
return cell
}
override func tableView(_ tableView: UITableView, didSelectRowAt indexPath: IndexPath) {
let card = cards[indexPath.row]
card.logClick(using: AppDelegate.braze)
if let url = card.clickAction?.url {
UIApplication.shared.open(url, options: [:], completionHandler: nil)
}
tableView.deselectRow(at: indexPath, animated: true)
}
override func tableView(_ tableView: UITableView,
willDisplay cell: UITableViewCell,
forRowAt indexPath: IndexPath) {
let card = cards[indexPath.row]
if !loggedImpressions.contains(card.id) {
card.logImpression(using: AppDelegate.braze)
}
}
}
```
!étape
lignes-=15AppDelegate.swift
#### 1\. Activer le débogage (facultatif)
Pour faciliter la résolution des problèmes lors du développement, pensez à activer le débogage.
!étape
lignes-BrazeInboxView.swift=5
#### 2\. Créer une vue d'interface utilisateur
Dans ce tutoriel, nous utilisons Swift[`UITableViewController`](https://developer.apple.com/documentation/uikit/uitableviewcontroller), mais nous vous recommandons de créer une interface utilisateur avec des classes et des composants adaptés à votre cas d'utilisation.
!étape
lignes-BrazeInboxView.swift=15-20
#### 3\. Veuillez vous abonner aux mises à jour de la carte de contenu.
Veuillez vous abonner à l'écouteur de cartes de contenu afin de recevoir les dernières mises à jour, puis appelez`requestRefresh()`pour demander les dernières cartes de contenu pour cet utilisateur.
!étape
lignes-=34-35BrazeInboxView.swift
#### 4\. Créer une interface utilisateur personnalisée pour la boîte de réception
L'utilisation des cartes de contenu[`attributes`](https://braze-inc.github.io/braze-swift-sdk/documentation/brazekit/braze/contentcard) telles que `title`, `description`, et vous`imageUrl` permet de créer des cartes de contenu adaptées à vos besoins spécifiques en matière d'interface utilisateur. Dans ce cas, nous créons une boîte de réception à l'aide des API de table natives de Swift.
!étape
lignes-=8BrazeInboxView.swift,43,49-56
#### 5\. Suivre les impressions et les clics
Vous pouvez enregistrer les impressions et les clics à l'aide des méthodes[`logClick(using:)`]() [`logImpression(using:)`]()et disponibles pour une carte de contenu.
De plus, vous pouvez utiliser[`logDismissed(using:)`]() pour les licenciements.
Les impressions ne doivent être enregistrées qu'une seule fois lorsqu'elles sont consultées par l'utilisateur. Ici, un mécanisme simple utilisant un`Set` et un`willDisplay` est utilisé pour atteindre cet objectif. Veuillez noter qu'il peut être nécessaire de prendre en compte le cycle de vie de l'interface utilisateur de votre application, ainsi que les cas d'utilisation, afin de garantir que les impressions sont correctement enregistrées.
## Prerequisites
Before you can use this feature, you'll need to [integrate the Web Braze SDK](https://www.braze.com/docs/fr/fr/developer_guide/sdk_integration/?sdktab=web). Cependant, aucune configuration supplémentaire n'est nécessaire.
## Création d'une boîte de réception avec des cartes de contenu pour le Web
**Important:**
We're piloting this new tutorial format. [Tell us what you think](https://docs.google.com/forms/d/e/1FAIpQLSe_5uhWM7eXXk9F_gviO_pvA4rkYO3WA9B6tNJZ3TY91md5bw/viewform?usp=pp_url&entry.569173304=General+Feedback) — your feedback helps us improve future guides.
```js file=main.js
import * as braze from "@braze/web-sdk";
// Uncomment this if you'd like to run braze web SDK methods in the console
// window.braze = braze;
// initialize the Braze SDK
braze.initialize("YOUR_API_KEY", {
baseUrl: "YOUR_API_ENDPOINT",
enableLogging: true,
});
braze.openSession();
// --- DOM refs ---
const listEl = document.getElementById("cards-list");
// --- State for impression de-duping & lookup ---
const loggedImpressions = new Set();
const idToCard = new Map();
let observer = null;
// Utility: clean observer between renders
function resetObserver() {
if (observer) observer.disconnect();
observer = new IntersectionObserver(onIntersect, { threshold: 0.6 });
}
// Intersection callback: logs impression once when ≥60% visible
function onIntersect(entries) {
entries.forEach((entry) => {
if (!entry.isIntersecting) return;
const id = entry.target.dataset.cardId;
if (!id || loggedImpressions.has(id)) return;
const card = idToCard.get(id);
if (!card) return;
// Log a single-card impression and stop observing this element
braze.logContentCardImpressions([card]);
loggedImpressions.add(id);
observer.unobserve(entry.target);
});
}
// Renders cards into the DOM, sets up click + visibility tracking
function renderCards(cards) {
// Rebuild lookup and observer each render
idToCard.clear();
resetObserver();
listEl.textContent = ""; // clear list
cards.forEach((card) => {
// Skip control-group cards in UI; (optional) you could log impressions for them elsewhere
if (card.isControl) return;
idToCard.set(card.id, card);
const item = document.createElement("article");
item.className = "card-item";
item.dataset.cardId = card.id;
const h3 = document.createElement("h3");
h3.textContent = card.title || "";
const p = document.createElement("p");
p.textContent = card.description || "";
let img = undefined;
if (card.imageUrl) {
img = document.createElement("img");
img.src = card.imageUrl;
item.append(img);
}
const children = [h3, p];
if (img) {
children.push(img);
}
item.append(...children);
// Click tracking + action
item.addEventListener("click", (e) => {
braze.logContentCardClick(card);
if (card.url) {
// any url-handling logic for your use case
}
});
listEl.appendChild(item);
observer.observe(item);
});
}
// Subscribe to updates *then* ask for a refresh
braze.subscribeToContentCardsUpdates((updates) => {
const cards = updates.cards || [];
renderCards(cards);
});
braze.requestContentCardsRefresh();
```
```html file=index.html
Message Inbox
```
!étape
lignes-=3-4main.js,9
#### 1\. Activer le débogage (facultatif)
Pour faciliter la résolution des problèmes lors du développement, pensez à activer le débogage. Vous avez également la possibilité d'exécuter les méthodes Braze Web SDK dans la console.
!étape
lignes-=1-44index.html
#### 2\. Créer l'interface utilisateur
Veuillez créer une interface utilisateur pour la page de la boîte de réception. Nous créons ici une page HTML de base, qui comprend un élément`div`avec l'ID `cards-list`. Ceci est utilisé comme conteneur cible pour le rendu des cartes de contenu.
!étape
lignes-=96-99main.js,101
#### 3\. Veuillez vous abonner aux mises à jour de la carte de contenu.
Veuillez vous abonner à l'écouteur de cartes de contenu afin de recevoir les dernières mises à jour, puis appelez[`requestContentCardsRefresh()`]()pour demander les dernières cartes de contenu pour cet utilisateur. Vous pouvez également contacter l'utilisateur abonné avant`openSession()` pour actualiser la session au début.
!étape
lignes-=64main.js,67,70-74
#### 4\. Créer les éléments de la boîte de réception
L'utilisation des [attributs]() de la carte de contenu tels que `title`,`description` et vous`url` permet d'afficher des cartes de contenu adaptées à vos besoins spécifiques en matière d'interface utilisateur.
!étape
lignes main.js22 à 25, 28 à 43, 84 et 91
#### 5\. Suivre les impressions et les clics
Vous pouvez enregistrer les impressions et les clics à l'aide des méthodes[`logContentCardImpressions`]() [`logContentCardClick`]()et disponibles pour les cartes de contenu.
De plus, vous pouvez utiliser[`logCardDismissal`]() pour les licenciements.
Les impressions ne doivent être enregistrées qu'une seule fois lorsqu'elles sont consultées par l'utilisateur. Ici, un`IntersectionObserver` plus un`Set` clé par`card.id` empêche la duplication des journaux. Veuillez noter qu'il peut être nécessaire de prendre en compte le cycle de vie de l'interface utilisateur de votre application, ainsi que les cas d'utilisation, afin de garantir que les impressions sont correctement enregistrées.
# Messages in-app pour le SDK de Braze
Source: /docs/fr/developer_guide/in_app_messages/index.md
# in-app Messages
> Découvrez les messages in-app et comment les configurer pour le SDK de Braze.
## Prerequisites
Before you can use this feature, you'll need to [integrate the Web Braze SDK](https://www.braze.com/docs/fr/fr/developer_guide/sdk_integration/?sdktab=web). However, no additional setup is required.
## Message types
All in-app messages inherit their prototype from [`InAppMessage`](https://js.appboycdn.com/web-sdk/latest/doc/classes/braze.inappmessage.html), which defines basic behavior and traits for all in-app messages. The prototypical subclasses are [`SlideUpMessage`](https://js.appboycdn.com/web-sdk/latest/doc/classes/braze.slideupmessage.html), [`ModalMessage`](https://js.appboycdn.com/web-sdk/latest/doc/classes/braze.modalmessage.html), [`FullScreenMessage`](https://js.appboycdn.com/web-sdk/latest/doc/classes/braze.fullscreenmessage.html), and [`HtmlMessage`](https://js.appboycdn.com/web-sdk/latest/doc/classes/braze.htmlmessage.html).
Each in-app message type is customizable across content, images, icons, click actions, analytics, display, and delivery.
[`SlideUp`](https://js.appboycdn.com/web-sdk/latest/doc/classes/braze.slideupmessage.html) in-app messages are so-named because traditionally on mobile platforms, they "slide up" or "slide down" from the top or bottom of the screen. In the Braze Web SDK, these messages are displayed as more of a Growl or Toast style notification to align with the web's dominant paradigm. They cover a small portion of the screen and provide an effective and non-intrusive messaging capability.
{: style="border:0px;"}
[`Modal`](https://js.appboycdn.com/web-sdk/latest/doc/classes/braze.modalmessage.html) in-app messages appear in the center of the screen and are framed by a translucent panel. Useful for more critical messaging, they can be equipped with up to two click action and analytics-enabled buttons.
{: style="border:0px;"}
[`Full`](https://js.appboycdn.com/web-sdk/latest/doc/classes/braze.fullscreenmessage.html) in-app messages are useful for maximizing the content and impact of your user communication. On narrow browser windows (for example, the mobile web), `full` in-app messages take up the entire browser window. On larger browser windows, `full` in-app messages appear similarly to `modal` in-app messages. The upper half of a `full` in-app message contains an image, and the lower half allows up to eight lines of text as well as up to two click action, and analytics-enabled buttons
{: style="border:0px;"}
[`HTML`](https://js.appboycdn.com/web-sdk/latest/doc/classes/braze.htmlmessage.html) in-app messages are useful for creating fully customized user content. User-defined HTML is displayed in an iFrame and may contain rich content, such as images, fonts, videos, and interactive elements, allowing for full control over message appearance and functionality. These support a JavaScript `brazeBridge` interface to call methods on the Braze Web SDK from within your HTML, see our [best practices](https://www.braze.com/docs/fr/fr/user_guide/message_building_by_channel/in-app_messages/best_practices/) for more details.
**Important:**
To enable HTML in-app messages through the Web SDK, you **must** supply the `allowUserSuppliedJavascript` initialization option to Braze, for example, `braze.initialize('YOUR-API_KEY', {allowUserSuppliedJavascript: true})`. This is for security reasons. HTML in-app messages can execute JavaScript, so we require a site maintainer to enable them.
The following example shows a paginated HTML in-app message:

## Prerequisites
Before you can use this feature, you'll need to [integrate the Android Braze SDK](https://www.braze.com/docs/fr/fr/developer_guide/sdk_integration/?sdktab=android). You'll also need to enable in-app messages.
## Message types
Braze offers several default in-app message types, each customizable with messages, images, [Font Awesome](https://fontawesome.com/icons?d=gallery&p=2) icons, click actions, analytics, color schemes, and more.
Their basic behavior and traits are defined by the [`IInAppMessage`](https://braze-inc.github.io/braze-android-sdk/kdoc/braze-android-sdk/com.braze.models.inappmessage/-i-in-app-message/index.html) interface, in a subclass called [`InAppMessageBase`](https://braze-inc.github.io/braze-android-sdk/kdoc/braze-android-sdk/com.braze.models.inappmessage/-in-app-message-base/index.html). `IInAppMessage` also includes a subinterface, [`IInAppMessageImmersive`](https://braze-inc.github.io/braze-android-sdk/kdoc/braze-android-sdk/com.braze.models.inappmessage/-i-in-app-message-immersive/index.html), which lets you add close, click-action, and analytics [buttons](https://braze-inc.github.io/braze-android-sdk/kdoc/braze-android-sdk/com.braze.models.inappmessage/-message-button/index.html) to your app.
**Important:**
Keep in mind, in-app messages containing buttons will include the `clickAction` message in the final payload if the click action is added prior to adding the button text.
[`slideup`](https://braze-inc.github.io/braze-android-sdk/kdoc/braze-android-sdk/com.braze.models.inappmessage/-in-app-message-slideup/index.html) in-app messages are so-named because they "slide up" or "slide down" from the top or bottom of the screen. They cover a small portion of the screen and provide an effective and non-intrusive messaging capability.
The `slideup` in-app message object extends [`InAppMessageBase`](https://braze-inc.github.io/braze-android-sdk/kdoc/braze-android-sdk/com.braze.models.inappmessage/-in-app-message-base/index.html).
{: style="border:0px;"}
[`modal`](https://braze-inc.github.io/braze-android-sdk/kdoc/braze-android-sdk/com.braze.models.inappmessage/-in-app-message-modal/index.html) in-app messages appear in the center of the screen and are framed by a translucent panel. Useful for more critical messaging, they can be equipped with two click-action and analytics-enabled buttons.
This message type is a subclass of [`InAppMessageImmersiveBase`](https://braze-inc.github.io/braze-android-sdk/kdoc/braze-android-sdk/com.braze.models.inappmessage/-in-app-message-immersive-base/index.html), an abstract class that implements `IInAppMessageImmersive`, giving you the option to add custom functionality to your locally generated in-app messages.
{: style="border:0px;"}
[`full`](https://braze-inc.github.io/braze-android-sdk/kdoc/braze-android-sdk/com.braze.models.inappmessage/-in-app-message-full/index.html) in-app messages are useful for maximizing the content and impact of your user communication. The upper half of a `full` in-app message contains an image, and the lower half displays text and up to two click action and analytics-enabled buttons.
This message type extends [`InAppMessageImmersiveBase`](https://braze-inc.github.io/braze-android-sdk/kdoc/braze-android-sdk/com.braze.models.inappmessage/-in-app-message-immersive-base/index.html), giving you the option to add custom functionality to your locally generated in-app messages.

[`HTML`](https://braze-inc.github.io/braze-android-sdk/kdoc/braze-android-sdk/com.braze.models.inappmessage/-in-app-message-html/index.html) in-app messages are useful for creating fully customized user content. User-defined HTML in-app message content is displayed in a `WebView` and may optionally contain other rich content, such as images and fonts, allowing for full control over message appearance and functionality.
This message type implements [`IInAppMessageHtml`](https://braze-inc.github.io/braze-android-sdk/kdoc/braze-android-sdk/com.braze.models.inappmessage/-i-in-app-message-html/index.html), which is a subclass of [`IInAppMessage`](https://braze-inc.github.io/braze-android-sdk/kdoc/braze-android-sdk/com.braze.models.inappmessage/-i-in-app-message/index.html).
**Note:**
On Android, links configured with `target="_blank"` in custom HTML in-app messages open in the device's default web browser.
Android in-app messages support a JavaScript `brazeBridge` interface to call methods on the Braze Android SDK from within your HTML, see our JavaScript bridge page for more details.
{: style="border:0px;"}
**Important:**
We currently do not support the display of custom HTML in-app messages in an iFrame on the iOS and Android platforms.
**Tip:**
You can also define custom in-app message views for your app. For a full walkthrough, see [Setting custom factories](https://www.braze.com/docs/fr/fr/developer_guide/in_app_messages/customization#android_setting-custom-factories).
## Enabling in-app messages
### Step 1: Register `BrazeInAppMessageManager`
In-app message display is managed by the [`BrazeInAppMessageManager`](https://braze-inc.github.io/braze-android-sdk/kdoc/braze-android-sdk/com.braze.ui.inappmessage/-braze-in-app-message-manager/index.html) class. Every activity in your app must be registered with the `BrazeInAppMessageManager` to allow it to add in-app message views to the view hierarchy. There are two ways to accomplish this:
The [activity lifecycle callback integration](https://www.braze.com/docs/fr/fr/developer_guide/sdk_integration#android_step-4-enable-user-session-tracking) handles in-app message registration automatically; no extra integration is required. This is the recommended method for handling in-app message registration.
**Warning:**
If you're using activity lifecycle callback for automatic registration, do not complete this step.
In your [`Application.onCreate()`](https://developer.android.com/reference/android/app/Application.html#onCreate()), call [`ensureSubscribedToInAppMessageEvents()`](https://braze-inc.github.io/braze-android-sdk/kdoc/braze-android-sdk/com.braze.ui.inappmessage/-braze-in-app-message-manager/ensure-subscribed-to-in-app-message-events.html):
```java
BrazeInAppMessageManager.getInstance().ensureSubscribedToInAppMessageEvents(context);
```
```kotlin
BrazeInAppMessageManager.getInstance().ensureSubscribedToInAppMessageEvents(context)
```
In every activity where in-app messages can be shown, call [`registerInAppMessageManager()`](https://braze-inc.github.io/braze-android-sdk/kdoc/braze-android-sdk/com.braze.ui.inappmessage/-braze-in-app-message-manager/register-in-app-message-manager.html) in that activity's `onResume()`:
```java
@Override
public void onResume() {
super.onResume();
// Registers the BrazeInAppMessageManager for the current Activity. This Activity will now listen for
// in-app messages from Braze.
BrazeInAppMessageManager.getInstance().registerInAppMessageManager(activity);
}
```
```kotlin
public override fun onResume() {
super.onResume()
// Registers the BrazeInAppMessageManager for the current Activity. This Activity will now listen for
// in-app messages from Braze.
BrazeInAppMessageManager.getInstance().registerInAppMessageManager(this)
}
```
In every activity where [`registerInAppMessageManager()`](https://braze-inc.github.io/braze-android-sdk/kdoc/braze-android-sdk/com.braze.ui.inappmessage/-braze-in-app-message-manager/register-in-app-message-manager.html) was called, call [`unregisterInAppMessageManager()`](https://braze-inc.github.io/braze-android-sdk/kdoc/braze-android-sdk/com.braze.ui.inappmessage/-braze-in-app-message-manager/unregister-in-app-message-manager.html) in that activity's `onPause()`:
```java
@Override
public void onPause() {
super.onPause();
// Unregisters the BrazeInAppMessageManager for the current Activity.
BrazeInAppMessageManager.getInstance().unregisterInAppMessageManager(activity);
}
```
```kotlin
public override fun onPause() {
super.onPause()
// Unregisters the BrazeInAppMessageManager.
BrazeInAppMessageManager.getInstance().unregisterInAppMessageManager(this)
}
```
### Step 2: Update the manager's blocklist (optional)
In your integration, you may require that certain activities in your app should not show in-app messages. The [activity lifecycle callback integration](https://www.braze.com/docs/fr/fr/developer_guide/sdk_integration#android_step-4-enable-user-session-tracking) provides an easy way to accomplish this.
The following sample code adds two activities to the in-app message registration blocklist, `SplashActivity` and `SettingsActivity`:
```java
public class MyApplication extends Application {
@Override
public void onCreate() {
super.onCreate();
Set inAppMessageBlocklist = new HashSet<>();
inAppMessageBlocklist.add(SplashActivity.class);
inAppMessageBlocklist.add(SettingsActivity.class);
registerActivityLifecycleCallbacks(new BrazeActivityLifecycleCallbackListener(inAppMessageBlocklist));
}
}
```
```kotlin
class MyApplication : Application() {
override fun onCreate() {
super.onCreate()
val inAppMessageBlocklist = HashSet>()
inAppMessageBlocklist.add(SplashActivity::class.java)
inAppMessageBlocklist.add(SettingsActivity::class.java)
registerActivityLifecycleCallbacks(BrazeActivityLifecycleCallbackListener(inAppMessageBlocklist))
}
}
```
## Prerequisites
Before you can use this feature, you'll need to [integrate the Swift Braze SDK](https://www.braze.com/docs/fr/fr/developer_guide/sdk_integration/?sdktab=swift). You'll also need to enable in-app messages.
## Message types
Each in-app message type is highly customizable across content, images, icons, click actions, analytics, display, and delivery. They are enumerated types of `Braze.InAppMessage`, which defines basic behavior and traits for all in-app messages. For the full list of in-app message properties and usage, see the [`InAppMessage` class](https://braze-inc.github.io/braze-swift-sdk/documentation/brazekit/braze/inappmessage).
These are the available in-app message types in Braze and how they will look like for end-users.
[`Slideup`](https://braze-inc.github.io/braze-swift-sdk/documentation/brazekit/braze/inappmessage/slideup-swift.struct) in-app messages are given this name because they "slide up" or "slide down" from the top or bottom of the screen. They cover a small portion of the screen and provide an effective and non-intrusive messaging capability.
{: style="max-width:35%;border:none;"}
[`Modal`](https://braze-inc.github.io/braze-swift-sdk/documentation/brazekit/braze/inappmessage/modal-swift.struct) in-app messages appear in the center of the screen and are framed by a translucent panel. Useful for more critical messaging, they can be equipped with up to two analytics-enabled buttons.
{: style="max-width:35%;border:none;"}
[`Modal Image`](https://braze-inc.github.io/braze-swift-sdk/documentation/brazekit/braze/inappmessage/modalimage-swift.struct) in-app messages appear in the center of the screen and are framed by a translucent panel. These messages are similar to the `Modal` type except without header or message text. Useful for more critical messaging, they can be equipped with up to two analytics-enabled buttons.
{: style="max-width:35%;border:none;"}
[`Full`](https://braze-inc.github.io/braze-swift-sdk/documentation/brazekit/braze/inappmessage/full-swift.struct) in-app messages are useful for maximizing the content and impact of your user communication. The upper half of a `Full` in-app message contains an image, and the lower half displays text and up to two analytics-enabled buttons.
{: style="max-width:35%;border:none;"}
[`Full Image`](https://braze-inc.github.io/braze-swift-sdk/documentation/brazekit/braze/inappmessage/fullimage-swift.struct) in-app messages are similar to `Full` in-app messages except without header or message text. This message type is useful for maximizing the content and impact of your user communication. A `Full Image` in-app message contains an image spanning the entire screen, with the option to display up to two analytics-enabled buttons.
{: style="max-width:35%;border:none;"}
[`HTML`](https://braze-inc.github.io/braze-swift-sdk/documentation/brazekit/braze/inappmessage/html-swift.struct) in-app messages are useful for creating fully customized user content. User-defined HTML Full in-app message content is displayed in a `WKWebView`and may optionally contain other rich content, such as images and fonts, allowing for full control over message appearance and functionality.
iOS in-app messages support a JavaScript `brazeBridge` interface to call methods on the Braze Web SDK from within your HTML, see our [best practices](https://www.braze.com/docs/fr/fr/user_guide/message_building_by_channel/in-app_messages/best_practices/) for more details.
The following example shows a paginated HTML Full in-app message:

Note that we currently do not support the display of custom HTML in-app messages in an iFrame on the iOS and Android platforms.
[`Control`](https://braze-inc.github.io/braze-swift-sdk/documentation/brazekit/braze/inappmessage/control-swift.struct) in-app messages do not contain a UI component and are used primarily for analytics purposes. This type is used to verify receipt of an in-app message sent to a control group.
For further details about Intelligent Selection and control groups, refer to [Intelligent Selection](https://www.braze.com/docs/fr/fr/user_guide/brazeai/intelligence/intelligent_selection/).
## Enabling in-app messages
### Step 1: Create an implementation of `BrazeInAppMessagePresenter`
To let Braze display in-app messages, create an implementation of the `BrazeInAppMessagePresenter` protocol and assign it to the optional `inAppMessagePresenter` on your Braze instance. You can also use the default Braze UI presenter by instantiating a `BrazeInAppMessageUI` object.
Note that you will need to import the `BrazeUI` library to access the `BrazeInAppMessageUI` class.
```swift
AppDelegate.braze?.inAppMessagePresenter = BrazeInAppMessageUI()
```
```objc
AppDelegate.braze.inAppMessagePresenter = [[BrazeInAppMessageUI alloc] init];
```
### Step 2: Handle no matching triggers
Implement [`BrazeDelegate.(_:noMatchingTriggerForEvent)`](https://braze-inc.github.io/braze-swift-sdk/documentation/brazekit/brazedelegate/braze(_:nomatchingtriggerforevent:)-8rt7y/) within the relevant `BrazeDelegate` class. When Braze fails to find a matching trigger for a particular event, it will call this method automatically.
## Prerequisites
Before you can use this feature, you'll need to [integrate the Android Braze SDK](https://www.braze.com/docs/fr/fr/developer_guide/sdk_integration/?sdktab=android).
## About TV and OTT support
The Android Braze SDK natively supports displaying in-app messages on OTT devices like Android TV or Fire Stick. However, there's some key differences between native Android and OTT in-app messages. For OTT devices:
- In-app messages that require touch mode, such as slideup, are disabled on OTT.
- The currently selected or focused item, such as a button or close button, will be highlighted.
- Body clicks on the in-app message itself, such as not on a button, are not supported.
## Prerequisites
Before you can use this feature, you'll need to [integrate the Cordova Braze SDK](https://www.braze.com/docs/fr/fr/developer_guide/sdk_integration/?sdktab=cordova).
## Message types
Braze offers several default in-app message types, each customizable with messages, images, [Font Awesome](https://fontawesome.com/icons?d=gallery&p=2) icons, click actions, analytics, color schemes, and more.
Their basic behavior and traits are defined by the [`IInAppMessage`](https://braze-inc.github.io/braze-android-sdk/kdoc/braze-android-sdk/com.braze.models.inappmessage/-i-in-app-message/index.html) interface, in a subclass called [`InAppMessageBase`](https://braze-inc.github.io/braze-android-sdk/kdoc/braze-android-sdk/com.braze.models.inappmessage/-in-app-message-base/index.html). `IInAppMessage` also includes a subinterface, [`IInAppMessageImmersive`](https://braze-inc.github.io/braze-android-sdk/kdoc/braze-android-sdk/com.braze.models.inappmessage/-i-in-app-message-immersive/index.html), which lets you add close, click-action, and analytics [buttons](https://braze-inc.github.io/braze-android-sdk/kdoc/braze-android-sdk/com.braze.models.inappmessage/-message-button/index.html) to your app.
**Important:**
Keep in mind, in-app messages containing buttons will include the `clickAction` message in the final payload if the click action is added prior to adding the button text.
[`slideup`](https://braze-inc.github.io/braze-android-sdk/kdoc/braze-android-sdk/com.braze.models.inappmessage/-in-app-message-slideup/index.html) in-app messages are so-named because they "slide up" or "slide down" from the top or bottom of the screen. They cover a small portion of the screen and provide an effective and non-intrusive messaging capability.
The `slideup` in-app message object extends [`InAppMessageBase`](https://braze-inc.github.io/braze-android-sdk/kdoc/braze-android-sdk/com.braze.models.inappmessage/-in-app-message-base/index.html).
{: style="border:0px;"}
[`modal`](https://braze-inc.github.io/braze-android-sdk/kdoc/braze-android-sdk/com.braze.models.inappmessage/-in-app-message-modal/index.html) in-app messages appear in the center of the screen and are framed by a translucent panel. Useful for more critical messaging, they can be equipped with two click-action and analytics-enabled buttons.
This message type is a subclass of [`InAppMessageImmersiveBase`](https://braze-inc.github.io/braze-android-sdk/kdoc/braze-android-sdk/com.braze.models.inappmessage/-in-app-message-immersive-base/index.html), an abstract class that implements `IInAppMessageImmersive`, giving you the option to add custom functionality to your locally generated in-app messages.
{: style="border:0px;"}
[`full`](https://braze-inc.github.io/braze-android-sdk/kdoc/braze-android-sdk/com.braze.models.inappmessage/-in-app-message-full/index.html) in-app messages are useful for maximizing the content and impact of your user communication. The upper half of a `full` in-app message contains an image, and the lower half displays text and up to two click action and analytics-enabled buttons.
This message type extends [`InAppMessageImmersiveBase`](https://braze-inc.github.io/braze-android-sdk/kdoc/braze-android-sdk/com.braze.models.inappmessage/-in-app-message-immersive-base/index.html), giving you the option to add custom functionality to your locally generated in-app messages.

[`HTML`](https://braze-inc.github.io/braze-android-sdk/kdoc/braze-android-sdk/com.braze.models.inappmessage/-in-app-message-html/index.html) in-app messages are useful for creating fully customized user content. User-defined HTML in-app message content is displayed in a `WebView` and may optionally contain other rich content, such as images and fonts, allowing for full control over message appearance and functionality.
This message type implements [`IInAppMessageHtml`](https://braze-inc.github.io/braze-android-sdk/kdoc/braze-android-sdk/com.braze.models.inappmessage/-i-in-app-message-html/index.html), which is a subclass of [`IInAppMessage`](https://braze-inc.github.io/braze-android-sdk/kdoc/braze-android-sdk/com.braze.models.inappmessage/-i-in-app-message/index.html).
**Note:**
On Android, links configured with `target="_blank"` in custom HTML in-app messages open in the device's default web browser.
Android in-app messages support a JavaScript `brazeBridge` interface to call methods on the Braze Android SDK from within your HTML, see our JavaScript bridge page for more details.
{: style="border:0px;"}
**Important:**
We currently do not support the display of custom HTML in-app messages in an iFrame on the iOS and Android platforms.
**Tip:**
You can also define custom in-app message views for your app. For a full walkthrough, see [Setting custom factories](https://www.braze.com/docs/fr/fr/developer_guide/in_app_messages/customization#android_setting-custom-factories).
Each in-app message type is highly customizable across content, images, icons, click actions, analytics, display, and delivery. They are enumerated types of `Braze.InAppMessage`, which defines basic behavior and traits for all in-app messages. For the full list of in-app message properties and usage, see the [`InAppMessage` class](https://braze-inc.github.io/braze-swift-sdk/documentation/brazekit/braze/inappmessage).
These are the available in-app message types in Braze and how they will look like for end-users.
[`Slideup`](https://braze-inc.github.io/braze-swift-sdk/documentation/brazekit/braze/inappmessage/slideup-swift.struct) in-app messages are given this name because they "slide up" or "slide down" from the top or bottom of the screen. They cover a small portion of the screen and provide an effective and non-intrusive messaging capability.
{: style="max-width:35%;border:none;"}
[`Modal`](https://braze-inc.github.io/braze-swift-sdk/documentation/brazekit/braze/inappmessage/modal-swift.struct) in-app messages appear in the center of the screen and are framed by a translucent panel. Useful for more critical messaging, they can be equipped with up to two analytics-enabled buttons.
{: style="max-width:35%;border:none;"}
[`Modal Image`](https://braze-inc.github.io/braze-swift-sdk/documentation/brazekit/braze/inappmessage/modalimage-swift.struct) in-app messages appear in the center of the screen and are framed by a translucent panel. These messages are similar to the `Modal` type except without header or message text. Useful for more critical messaging, they can be equipped with up to two analytics-enabled buttons.
{: style="max-width:35%;border:none;"}
[`Full`](https://braze-inc.github.io/braze-swift-sdk/documentation/brazekit/braze/inappmessage/full-swift.struct) in-app messages are useful for maximizing the content and impact of your user communication. The upper half of a `Full` in-app message contains an image, and the lower half displays text and up to two analytics-enabled buttons.
{: style="max-width:35%;border:none;"}
[`Full Image`](https://braze-inc.github.io/braze-swift-sdk/documentation/brazekit/braze/inappmessage/fullimage-swift.struct) in-app messages are similar to `Full` in-app messages except without header or message text. This message type is useful for maximizing the content and impact of your user communication. A `Full Image` in-app message contains an image spanning the entire screen, with the option to display up to two analytics-enabled buttons.
{: style="max-width:35%;border:none;"}
[`HTML`](https://braze-inc.github.io/braze-swift-sdk/documentation/brazekit/braze/inappmessage/html-swift.struct) in-app messages are useful for creating fully customized user content. User-defined HTML Full in-app message content is displayed in a `WKWebView`and may optionally contain other rich content, such as images and fonts, allowing for full control over message appearance and functionality.
iOS in-app messages support a JavaScript `brazeBridge` interface to call methods on the Braze Web SDK from within your HTML, see our [best practices](https://www.braze.com/docs/fr/fr/user_guide/message_building_by_channel/in-app_messages/best_practices/) for more details.
The following example shows a paginated HTML Full in-app message:

Note that we currently do not support the display of custom HTML in-app messages in an iFrame on the iOS and Android platforms.
[`Control`](https://braze-inc.github.io/braze-swift-sdk/documentation/brazekit/braze/inappmessage/control-swift.struct) in-app messages do not contain a UI component and are used primarily for analytics purposes. This type is used to verify receipt of an in-app message sent to a control group.
For further details about Intelligent Selection and control groups, refer to [Intelligent Selection](https://www.braze.com/docs/fr/fr/user_guide/brazeai/intelligence/intelligent_selection/).
## Prerequisites
Before you can use this feature, you'll need to [integrate the Flutter Braze SDK](https://www.braze.com/docs/fr/fr/developer_guide/sdk_integration/?sdktab=flutter).
## Message types
Braze offers several default in-app message types, each customizable with messages, images, [Font Awesome](https://fontawesome.com/icons?d=gallery&p=2) icons, click actions, analytics, color schemes, and more.
Their basic behavior and traits are defined by the [`IInAppMessage`](https://braze-inc.github.io/braze-android-sdk/kdoc/braze-android-sdk/com.braze.models.inappmessage/-i-in-app-message/index.html) interface, in a subclass called [`InAppMessageBase`](https://braze-inc.github.io/braze-android-sdk/kdoc/braze-android-sdk/com.braze.models.inappmessage/-in-app-message-base/index.html). `IInAppMessage` also includes a subinterface, [`IInAppMessageImmersive`](https://braze-inc.github.io/braze-android-sdk/kdoc/braze-android-sdk/com.braze.models.inappmessage/-i-in-app-message-immersive/index.html), which lets you add close, click-action, and analytics [buttons](https://braze-inc.github.io/braze-android-sdk/kdoc/braze-android-sdk/com.braze.models.inappmessage/-message-button/index.html) to your app.
**Important:**
Keep in mind, in-app messages containing buttons will include the `clickAction` message in the final payload if the click action is added prior to adding the button text.
[`slideup`](https://braze-inc.github.io/braze-android-sdk/kdoc/braze-android-sdk/com.braze.models.inappmessage/-in-app-message-slideup/index.html) in-app messages are so-named because they "slide up" or "slide down" from the top or bottom of the screen. They cover a small portion of the screen and provide an effective and non-intrusive messaging capability.
The `slideup` in-app message object extends [`InAppMessageBase`](https://braze-inc.github.io/braze-android-sdk/kdoc/braze-android-sdk/com.braze.models.inappmessage/-in-app-message-base/index.html).
{: style="border:0px;"}
[`modal`](https://braze-inc.github.io/braze-android-sdk/kdoc/braze-android-sdk/com.braze.models.inappmessage/-in-app-message-modal/index.html) in-app messages appear in the center of the screen and are framed by a translucent panel. Useful for more critical messaging, they can be equipped with two click-action and analytics-enabled buttons.
This message type is a subclass of [`InAppMessageImmersiveBase`](https://braze-inc.github.io/braze-android-sdk/kdoc/braze-android-sdk/com.braze.models.inappmessage/-in-app-message-immersive-base/index.html), an abstract class that implements `IInAppMessageImmersive`, giving you the option to add custom functionality to your locally generated in-app messages.
{: style="border:0px;"}
[`full`](https://braze-inc.github.io/braze-android-sdk/kdoc/braze-android-sdk/com.braze.models.inappmessage/-in-app-message-full/index.html) in-app messages are useful for maximizing the content and impact of your user communication. The upper half of a `full` in-app message contains an image, and the lower half displays text and up to two click action and analytics-enabled buttons.
This message type extends [`InAppMessageImmersiveBase`](https://braze-inc.github.io/braze-android-sdk/kdoc/braze-android-sdk/com.braze.models.inappmessage/-in-app-message-immersive-base/index.html), giving you the option to add custom functionality to your locally generated in-app messages.

[`HTML`](https://braze-inc.github.io/braze-android-sdk/kdoc/braze-android-sdk/com.braze.models.inappmessage/-in-app-message-html/index.html) in-app messages are useful for creating fully customized user content. User-defined HTML in-app message content is displayed in a `WebView` and may optionally contain other rich content, such as images and fonts, allowing for full control over message appearance and functionality.
This message type implements [`IInAppMessageHtml`](https://braze-inc.github.io/braze-android-sdk/kdoc/braze-android-sdk/com.braze.models.inappmessage/-i-in-app-message-html/index.html), which is a subclass of [`IInAppMessage`](https://braze-inc.github.io/braze-android-sdk/kdoc/braze-android-sdk/com.braze.models.inappmessage/-i-in-app-message/index.html).
**Note:**
On Android, links configured with `target="_blank"` in custom HTML in-app messages open in the device's default web browser.
Android in-app messages support a JavaScript `brazeBridge` interface to call methods on the Braze Android SDK from within your HTML, see our JavaScript bridge page for more details.
{: style="border:0px;"}
**Important:**
We currently do not support the display of custom HTML in-app messages in an iFrame on the iOS and Android platforms.
**Tip:**
You can also define custom in-app message views for your app. For a full walkthrough, see [Setting custom factories](https://www.braze.com/docs/fr/fr/developer_guide/in_app_messages/customization#android_setting-custom-factories).
Each in-app message type is highly customizable across content, images, icons, click actions, analytics, display, and delivery. They are enumerated types of `Braze.InAppMessage`, which defines basic behavior and traits for all in-app messages. For the full list of in-app message properties and usage, see the [`InAppMessage` class](https://braze-inc.github.io/braze-swift-sdk/documentation/brazekit/braze/inappmessage).
These are the available in-app message types in Braze and how they will look like for end-users.
[`Slideup`](https://braze-inc.github.io/braze-swift-sdk/documentation/brazekit/braze/inappmessage/slideup-swift.struct) in-app messages are given this name because they "slide up" or "slide down" from the top or bottom of the screen. They cover a small portion of the screen and provide an effective and non-intrusive messaging capability.
{: style="max-width:35%;border:none;"}
[`Modal`](https://braze-inc.github.io/braze-swift-sdk/documentation/brazekit/braze/inappmessage/modal-swift.struct) in-app messages appear in the center of the screen and are framed by a translucent panel. Useful for more critical messaging, they can be equipped with up to two analytics-enabled buttons.
{: style="max-width:35%;border:none;"}
[`Modal Image`](https://braze-inc.github.io/braze-swift-sdk/documentation/brazekit/braze/inappmessage/modalimage-swift.struct) in-app messages appear in the center of the screen and are framed by a translucent panel. These messages are similar to the `Modal` type except without header or message text. Useful for more critical messaging, they can be equipped with up to two analytics-enabled buttons.
{: style="max-width:35%;border:none;"}
[`Full`](https://braze-inc.github.io/braze-swift-sdk/documentation/brazekit/braze/inappmessage/full-swift.struct) in-app messages are useful for maximizing the content and impact of your user communication. The upper half of a `Full` in-app message contains an image, and the lower half displays text and up to two analytics-enabled buttons.
{: style="max-width:35%;border:none;"}
[`Full Image`](https://braze-inc.github.io/braze-swift-sdk/documentation/brazekit/braze/inappmessage/fullimage-swift.struct) in-app messages are similar to `Full` in-app messages except without header or message text. This message type is useful for maximizing the content and impact of your user communication. A `Full Image` in-app message contains an image spanning the entire screen, with the option to display up to two analytics-enabled buttons.
{: style="max-width:35%;border:none;"}
[`HTML`](https://braze-inc.github.io/braze-swift-sdk/documentation/brazekit/braze/inappmessage/html-swift.struct) in-app messages are useful for creating fully customized user content. User-defined HTML Full in-app message content is displayed in a `WKWebView`and may optionally contain other rich content, such as images and fonts, allowing for full control over message appearance and functionality.
iOS in-app messages support a JavaScript `brazeBridge` interface to call methods on the Braze Web SDK from within your HTML, see our [best practices](https://www.braze.com/docs/fr/fr/user_guide/message_building_by_channel/in-app_messages/best_practices/) for more details.
The following example shows a paginated HTML Full in-app message:

Note that we currently do not support the display of custom HTML in-app messages in an iFrame on the iOS and Android platforms.
[`Control`](https://braze-inc.github.io/braze-swift-sdk/documentation/brazekit/braze/inappmessage/control-swift.struct) in-app messages do not contain a UI component and are used primarily for analytics purposes. This type is used to verify receipt of an in-app message sent to a control group.
For further details about Intelligent Selection and control groups, refer to [Intelligent Selection](https://www.braze.com/docs/fr/fr/user_guide/brazeai/intelligence/intelligent_selection/).
## Enabling in-app messages
The Braze Flutter SDK automatically sets up the default in-app message presenter on both Android and iOS. In-app messages are displayed and forwarded to the Dart layer without additional setup.
### Customizing the in-app message presenter on iOS
To override the default in-app message presenter on iOS, use the `postInitialization` closure in `BrazePlugin.configure(_:postInitialization:)`. Your custom presenter must call `BrazePlugin.processInAppMessage(message)` to forward in-app message data to the Dart layer.
```swift
import BrazeUI
BrazePlugin.configure(
{ configuration in
// Set non-API-key configurations here.
},
postInitialization: { braze in
let customPresenter = CustomInAppMessagePresenter()
braze.inAppMessagePresenter = customPresenter
}
)
```
In the custom presenter class, call `BrazePlugin.processInAppMessage(message)` and `super.present(message: message)` to forward data to Dart and display the default UI.
```swift
class CustomInAppMessagePresenter: BrazeInAppMessageUI {
override func present(message: Braze.InAppMessage) {
BrazePlugin.processInAppMessage(message)
super.present(message: message)
}
}
```
**Note:**
This step is for iOS only. The default implementation for in-app messages is already set up on Android.
To set up the default presenter for in-app messages on iOS, create an implementation of the `BrazeInAppMessagePresenter` protocol and assign it to the optional `inAppMessagePresenter` on your Braze instance. You can also use the default Braze UI presenter by instantiating a `BrazeInAppMessageUI` object.
You must import the `BrazeUI` library to access the `BrazeInAppMessageUI` class.
```swift
import BrazeUI
override func application(
_ application: UIApplication,
didFinishLaunchingWithOptions launchOptions: [UIApplication.LaunchOptionsKey : Any]? = nil
) -> Bool {
...
let braze = BrazePlugin.initBraze(configuration)
braze.inAppMessagePresenter = BrazeInAppMessageUI()
AppDelegate.braze = braze
return true
}
```
```objc
@import BrazeUI;
- (BOOL)application:(UIApplication *)application
didFinishLaunchingWithOptions:(NSDictionary *)launchOptions {
...
Braze *braze = [BrazePlugin initBraze:configuration];
braze.inAppMessagePresenter = [[BrazeInAppMessageUI alloc] init];
AppDelegate.braze = braze;
[self.window makeKeyAndVisible];
return YES;
}
```
For more information about accessing in-app message data, refer to [Logging in-app message data](https://www.braze.com/docs/fr/fr/developer_guide/in_app_messages/logging_message_data?sdktab=flutter).
## Prerequisites
Before you can use this feature, you'll need to [integrate the React Native Braze SDK](https://www.braze.com/docs/fr/fr/developer_guide/sdk_integration/?sdktab=react%20native).
## Message types
Braze offers several default in-app message types, each customizable with messages, images, [Font Awesome](https://fontawesome.com/icons?d=gallery&p=2) icons, click actions, analytics, color schemes, and more.
Their basic behavior and traits are defined by the [`IInAppMessage`](https://braze-inc.github.io/braze-android-sdk/kdoc/braze-android-sdk/com.braze.models.inappmessage/-i-in-app-message/index.html) interface, in a subclass called [`InAppMessageBase`](https://braze-inc.github.io/braze-android-sdk/kdoc/braze-android-sdk/com.braze.models.inappmessage/-in-app-message-base/index.html). `IInAppMessage` also includes a subinterface, [`IInAppMessageImmersive`](https://braze-inc.github.io/braze-android-sdk/kdoc/braze-android-sdk/com.braze.models.inappmessage/-i-in-app-message-immersive/index.html), which lets you add close, click-action, and analytics [buttons](https://braze-inc.github.io/braze-android-sdk/kdoc/braze-android-sdk/com.braze.models.inappmessage/-message-button/index.html) to your app.
**Important:**
Keep in mind, in-app messages containing buttons will include the `clickAction` message in the final payload if the click action is added prior to adding the button text.
[`slideup`](https://braze-inc.github.io/braze-android-sdk/kdoc/braze-android-sdk/com.braze.models.inappmessage/-in-app-message-slideup/index.html) in-app messages are so-named because they "slide up" or "slide down" from the top or bottom of the screen. They cover a small portion of the screen and provide an effective and non-intrusive messaging capability.
The `slideup` in-app message object extends [`InAppMessageBase`](https://braze-inc.github.io/braze-android-sdk/kdoc/braze-android-sdk/com.braze.models.inappmessage/-in-app-message-base/index.html).
{: style="border:0px;"}
[`modal`](https://braze-inc.github.io/braze-android-sdk/kdoc/braze-android-sdk/com.braze.models.inappmessage/-in-app-message-modal/index.html) in-app messages appear in the center of the screen and are framed by a translucent panel. Useful for more critical messaging, they can be equipped with two click-action and analytics-enabled buttons.
This message type is a subclass of [`InAppMessageImmersiveBase`](https://braze-inc.github.io/braze-android-sdk/kdoc/braze-android-sdk/com.braze.models.inappmessage/-in-app-message-immersive-base/index.html), an abstract class that implements `IInAppMessageImmersive`, giving you the option to add custom functionality to your locally generated in-app messages.
{: style="border:0px;"}
[`full`](https://braze-inc.github.io/braze-android-sdk/kdoc/braze-android-sdk/com.braze.models.inappmessage/-in-app-message-full/index.html) in-app messages are useful for maximizing the content and impact of your user communication. The upper half of a `full` in-app message contains an image, and the lower half displays text and up to two click action and analytics-enabled buttons.
This message type extends [`InAppMessageImmersiveBase`](https://braze-inc.github.io/braze-android-sdk/kdoc/braze-android-sdk/com.braze.models.inappmessage/-in-app-message-immersive-base/index.html), giving you the option to add custom functionality to your locally generated in-app messages.

[`HTML`](https://braze-inc.github.io/braze-android-sdk/kdoc/braze-android-sdk/com.braze.models.inappmessage/-in-app-message-html/index.html) in-app messages are useful for creating fully customized user content. User-defined HTML in-app message content is displayed in a `WebView` and may optionally contain other rich content, such as images and fonts, allowing for full control over message appearance and functionality.
This message type implements [`IInAppMessageHtml`](https://braze-inc.github.io/braze-android-sdk/kdoc/braze-android-sdk/com.braze.models.inappmessage/-i-in-app-message-html/index.html), which is a subclass of [`IInAppMessage`](https://braze-inc.github.io/braze-android-sdk/kdoc/braze-android-sdk/com.braze.models.inappmessage/-i-in-app-message/index.html).
**Note:**
On Android, links configured with `target="_blank"` in custom HTML in-app messages open in the device's default web browser.
Android in-app messages support a JavaScript `brazeBridge` interface to call methods on the Braze Android SDK from within your HTML, see our JavaScript bridge page for more details.
{: style="border:0px;"}
**Important:**
We currently do not support the display of custom HTML in-app messages in an iFrame on the iOS and Android platforms.
**Tip:**
You can also define custom in-app message views for your app. For a full walkthrough, see [Setting custom factories](https://www.braze.com/docs/fr/fr/developer_guide/in_app_messages/customization#android_setting-custom-factories).
Each in-app message type is highly customizable across content, images, icons, click actions, analytics, display, and delivery. They are enumerated types of `Braze.InAppMessage`, which defines basic behavior and traits for all in-app messages. For the full list of in-app message properties and usage, see the [`InAppMessage` class](https://braze-inc.github.io/braze-swift-sdk/documentation/brazekit/braze/inappmessage).
These are the available in-app message types in Braze and how they will look like for end-users.
[`Slideup`](https://braze-inc.github.io/braze-swift-sdk/documentation/brazekit/braze/inappmessage/slideup-swift.struct) in-app messages are given this name because they "slide up" or "slide down" from the top or bottom of the screen. They cover a small portion of the screen and provide an effective and non-intrusive messaging capability.
{: style="max-width:35%;border:none;"}
[`Modal`](https://braze-inc.github.io/braze-swift-sdk/documentation/brazekit/braze/inappmessage/modal-swift.struct) in-app messages appear in the center of the screen and are framed by a translucent panel. Useful for more critical messaging, they can be equipped with up to two analytics-enabled buttons.
{: style="max-width:35%;border:none;"}
[`Modal Image`](https://braze-inc.github.io/braze-swift-sdk/documentation/brazekit/braze/inappmessage/modalimage-swift.struct) in-app messages appear in the center of the screen and are framed by a translucent panel. These messages are similar to the `Modal` type except without header or message text. Useful for more critical messaging, they can be equipped with up to two analytics-enabled buttons.
{: style="max-width:35%;border:none;"}
[`Full`](https://braze-inc.github.io/braze-swift-sdk/documentation/brazekit/braze/inappmessage/full-swift.struct) in-app messages are useful for maximizing the content and impact of your user communication. The upper half of a `Full` in-app message contains an image, and the lower half displays text and up to two analytics-enabled buttons.
{: style="max-width:35%;border:none;"}
[`Full Image`](https://braze-inc.github.io/braze-swift-sdk/documentation/brazekit/braze/inappmessage/fullimage-swift.struct) in-app messages are similar to `Full` in-app messages except without header or message text. This message type is useful for maximizing the content and impact of your user communication. A `Full Image` in-app message contains an image spanning the entire screen, with the option to display up to two analytics-enabled buttons.
{: style="max-width:35%;border:none;"}
[`HTML`](https://braze-inc.github.io/braze-swift-sdk/documentation/brazekit/braze/inappmessage/html-swift.struct) in-app messages are useful for creating fully customized user content. User-defined HTML Full in-app message content is displayed in a `WKWebView`and may optionally contain other rich content, such as images and fonts, allowing for full control over message appearance and functionality.
iOS in-app messages support a JavaScript `brazeBridge` interface to call methods on the Braze Web SDK from within your HTML, see our [best practices](https://www.braze.com/docs/fr/fr/user_guide/message_building_by_channel/in-app_messages/best_practices/) for more details.
The following example shows a paginated HTML Full in-app message:

Note that we currently do not support the display of custom HTML in-app messages in an iFrame on the iOS and Android platforms.
[`Control`](https://braze-inc.github.io/braze-swift-sdk/documentation/brazekit/braze/inappmessage/control-swift.struct) in-app messages do not contain a UI component and are used primarily for analytics purposes. This type is used to verify receipt of an in-app message sent to a control group.
For further details about Intelligent Selection and control groups, refer to [Intelligent Selection](https://www.braze.com/docs/fr/fr/user_guide/brazeai/intelligence/intelligent_selection/).
## Data model
The in-app message model is available in the React Native SDK. Braze has four in-app message types that share the same data model: **slideup**, **modal**, **full** and **HTML full**.
### Messages
The in-app message model provides the base for all in-app messages.
|Property | Description |
|------------------|------------------------------------------------------------------------------------------------------------------------|
|`inAppMessageJsonString` | The message JSON representation. |
|`message` | The message text. |
|`header` | The message header. |
|`uri` | The URI associated with the button click action. |
|`imageUrl` | The message image URL. |
|`zippedAssetsUrl` | The zipped assets prepared to display HTML content. |
|`useWebView` | Indicates whether the button click action should redirect using a web view. |
|`duration` | The message display duration. |
|`clickAction` | The button click action type. The types are: `URI`, and `NONE`. |
|`dismissType` | The message close type. The two types are: `SWIPE` and `AUTO_DISMISS`. |
|`messageType` | The in-app message type supported by the SDK. The four types are: `SLIDEUP`, `MODAL`, `FULL` and `HTML_FULL`. |
|`extras` | The message extras dictionary. Default value: `[:]`. |
|`buttons` | The list of buttons on the in-app message. |
|`toString()` | The message as a String representation. |
{: .reset-td-br-1 .reset-td-br-2 aria-label="Messages" }
For a full reference of the in-app message model, see the [Android](https://braze-inc.github.io/braze-android-sdk/kdoc/braze-android-sdk/com.braze.models.inappmessage/index.html) and [iOS](https://braze-inc.github.io/braze-swift-sdk/documentation/brazekit/braze/inappmessage) documentation.
### Buttons
Buttons can be added to in-app messages to perform actions and log analytics. The button model provides the base for all in-app message buttons.
|Property | Description |
|------------------|-----------------------------------------------------------------------------------------------------------------------------|
|`text` | The text on the button. |
|`uri` | The URI associated with the button click action. |
|`useWebView` | Indicates whether the button click action should redirect using a web view. |
|`clickAction` | The type of click action processed when the user clicks on the button. The types are: `URI`, and `NONE`. |
|`id` | The button ID on the message. |
|`toString()` | The button as a String representation. |
{: .reset-td-br-1 .reset-td-br-2 aria-label="Buttons" }
For a full reference of button model, see the [Android](https://braze-inc.github.io/braze-android-sdk/kdoc/braze-android-sdk/com.braze.models.inappmessage/-message-button/index.html) and [iOS](https://braze-inc.github.io/braze-swift-sdk/documentation/brazekit/braze/inappmessage/button) documentation.
## Prerequisites
Before you can use this feature, you'll need to [integrate the Roku Braze SDK](https://www.braze.com/docs/fr/fr/developer_guide/sdk_integration/?sdktab=roku).
Additionally, in-app messages will only be sent to Roku devices running the minimum supported SDK version:
## Message types
Braze offers several default in-app message types, each customizable with messages, images, [Font Awesome](https://fontawesome.com/icons?d=gallery&p=2) icons, click actions, analytics, color schemes, and more.
Their basic behavior and traits are defined by the [`IInAppMessage`](https://braze-inc.github.io/braze-android-sdk/kdoc/braze-android-sdk/com.braze.models.inappmessage/-i-in-app-message/index.html) interface, in a subclass called [`InAppMessageBase`](https://braze-inc.github.io/braze-android-sdk/kdoc/braze-android-sdk/com.braze.models.inappmessage/-in-app-message-base/index.html). `IInAppMessage` also includes a subinterface, [`IInAppMessageImmersive`](https://braze-inc.github.io/braze-android-sdk/kdoc/braze-android-sdk/com.braze.models.inappmessage/-i-in-app-message-immersive/index.html), which lets you add close, click-action, and analytics [buttons](https://braze-inc.github.io/braze-android-sdk/kdoc/braze-android-sdk/com.braze.models.inappmessage/-message-button/index.html) to your app.
**Important:**
Keep in mind, in-app messages containing buttons will include the `clickAction` message in the final payload if the click action is added prior to adding the button text.
[`slideup`](https://braze-inc.github.io/braze-android-sdk/kdoc/braze-android-sdk/com.braze.models.inappmessage/-in-app-message-slideup/index.html) in-app messages are so-named because they "slide up" or "slide down" from the top or bottom of the screen. They cover a small portion of the screen and provide an effective and non-intrusive messaging capability.
The `slideup` in-app message object extends [`InAppMessageBase`](https://braze-inc.github.io/braze-android-sdk/kdoc/braze-android-sdk/com.braze.models.inappmessage/-in-app-message-base/index.html).
{: style="border:0px;"}
[`modal`](https://braze-inc.github.io/braze-android-sdk/kdoc/braze-android-sdk/com.braze.models.inappmessage/-in-app-message-modal/index.html) in-app messages appear in the center of the screen and are framed by a translucent panel. Useful for more critical messaging, they can be equipped with two click-action and analytics-enabled buttons.
This message type is a subclass of [`InAppMessageImmersiveBase`](https://braze-inc.github.io/braze-android-sdk/kdoc/braze-android-sdk/com.braze.models.inappmessage/-in-app-message-immersive-base/index.html), an abstract class that implements `IInAppMessageImmersive`, giving you the option to add custom functionality to your locally generated in-app messages.
{: style="border:0px;"}
[`full`](https://braze-inc.github.io/braze-android-sdk/kdoc/braze-android-sdk/com.braze.models.inappmessage/-in-app-message-full/index.html) in-app messages are useful for maximizing the content and impact of your user communication. The upper half of a `full` in-app message contains an image, and the lower half displays text and up to two click action and analytics-enabled buttons.
This message type extends [`InAppMessageImmersiveBase`](https://braze-inc.github.io/braze-android-sdk/kdoc/braze-android-sdk/com.braze.models.inappmessage/-in-app-message-immersive-base/index.html), giving you the option to add custom functionality to your locally generated in-app messages.

[`HTML`](https://braze-inc.github.io/braze-android-sdk/kdoc/braze-android-sdk/com.braze.models.inappmessage/-in-app-message-html/index.html) in-app messages are useful for creating fully customized user content. User-defined HTML in-app message content is displayed in a `WebView` and may optionally contain other rich content, such as images and fonts, allowing for full control over message appearance and functionality.
This message type implements [`IInAppMessageHtml`](https://braze-inc.github.io/braze-android-sdk/kdoc/braze-android-sdk/com.braze.models.inappmessage/-i-in-app-message-html/index.html), which is a subclass of [`IInAppMessage`](https://braze-inc.github.io/braze-android-sdk/kdoc/braze-android-sdk/com.braze.models.inappmessage/-i-in-app-message/index.html).
**Note:**
On Android, links configured with `target="_blank"` in custom HTML in-app messages open in the device's default web browser.
Android in-app messages support a JavaScript `brazeBridge` interface to call methods on the Braze Android SDK from within your HTML, see our JavaScript bridge page for more details.
{: style="border:0px;"}
**Important:**
We currently do not support the display of custom HTML in-app messages in an iFrame on the iOS and Android platforms.
**Tip:**
You can also define custom in-app message views for your app. For a full walkthrough, see [Setting custom factories](https://www.braze.com/docs/fr/fr/developer_guide/in_app_messages/customization#android_setting-custom-factories).
Each in-app message type is highly customizable across content, images, icons, click actions, analytics, display, and delivery. They are enumerated types of `Braze.InAppMessage`, which defines basic behavior and traits for all in-app messages. For the full list of in-app message properties and usage, see the [`InAppMessage` class](https://braze-inc.github.io/braze-swift-sdk/documentation/brazekit/braze/inappmessage).
These are the available in-app message types in Braze and how they will look like for end-users.
[`Slideup`](https://braze-inc.github.io/braze-swift-sdk/documentation/brazekit/braze/inappmessage/slideup-swift.struct) in-app messages are given this name because they "slide up" or "slide down" from the top or bottom of the screen. They cover a small portion of the screen and provide an effective and non-intrusive messaging capability.
{: style="max-width:35%;border:none;"}
[`Modal`](https://braze-inc.github.io/braze-swift-sdk/documentation/brazekit/braze/inappmessage/modal-swift.struct) in-app messages appear in the center of the screen and are framed by a translucent panel. Useful for more critical messaging, they can be equipped with up to two analytics-enabled buttons.
{: style="max-width:35%;border:none;"}
[`Modal Image`](https://braze-inc.github.io/braze-swift-sdk/documentation/brazekit/braze/inappmessage/modalimage-swift.struct) in-app messages appear in the center of the screen and are framed by a translucent panel. These messages are similar to the `Modal` type except without header or message text. Useful for more critical messaging, they can be equipped with up to two analytics-enabled buttons.
{: style="max-width:35%;border:none;"}
[`Full`](https://braze-inc.github.io/braze-swift-sdk/documentation/brazekit/braze/inappmessage/full-swift.struct) in-app messages are useful for maximizing the content and impact of your user communication. The upper half of a `Full` in-app message contains an image, and the lower half displays text and up to two analytics-enabled buttons.
{: style="max-width:35%;border:none;"}
[`Full Image`](https://braze-inc.github.io/braze-swift-sdk/documentation/brazekit/braze/inappmessage/fullimage-swift.struct) in-app messages are similar to `Full` in-app messages except without header or message text. This message type is useful for maximizing the content and impact of your user communication. A `Full Image` in-app message contains an image spanning the entire screen, with the option to display up to two analytics-enabled buttons.
{: style="max-width:35%;border:none;"}
[`HTML`](https://braze-inc.github.io/braze-swift-sdk/documentation/brazekit/braze/inappmessage/html-swift.struct) in-app messages are useful for creating fully customized user content. User-defined HTML Full in-app message content is displayed in a `WKWebView`and may optionally contain other rich content, such as images and fonts, allowing for full control over message appearance and functionality.
iOS in-app messages support a JavaScript `brazeBridge` interface to call methods on the Braze Web SDK from within your HTML, see our [best practices](https://www.braze.com/docs/fr/fr/user_guide/message_building_by_channel/in-app_messages/best_practices/) for more details.
The following example shows a paginated HTML Full in-app message:

Note that we currently do not support the display of custom HTML in-app messages in an iFrame on the iOS and Android platforms.
[`Control`](https://braze-inc.github.io/braze-swift-sdk/documentation/brazekit/braze/inappmessage/control-swift.struct) in-app messages do not contain a UI component and are used primarily for analytics purposes. This type is used to verify receipt of an in-app message sent to a control group.
For further details about Intelligent Selection and control groups, refer to [Intelligent Selection](https://www.braze.com/docs/fr/fr/user_guide/brazeai/intelligence/intelligent_selection/).
## Enabling in-app messages
### Step 1: Add an observer
To process in-app messages, you can add an observer on `BrazeTask.BrazeInAppMessage`:
```brightscript
m.BrazeTask.observeField("BrazeInAppMessage", "onInAppMessageReceived")
```
### Step 2: Access triggered messages
Then within your handler, you have access to the highest in-app message that your campaigns have triggered:
```brightscript
sub onInAppMessageReceived()
in_app_message = m.BrazeTask.BrazeInAppMessage
...
end sub
```
## Message fields
### Handling
The following lists the fields you will need to handle your in-app messages:
| Fields | Description |
| ------ | ----------- |
| `buttons` | List of buttons (could be an empty list). |
| `click_action` | `"URI"` or `"NONE"`. Use this field to indicate whether the in-app message should open to a URI link or close the message when clicked. When there are no buttons, this should happen when the user clicks "OK" when the in-app message is displayed. |
| `dismiss_type` | `"AUTO_DISMISS"` or `"SWIPE"`. Use this field to indicate whether your in-app message will auto dismiss or require a swipe to dismiss. |
| `display_delay` | How long (seconds) to wait until displaying the in-app message. |
| `duration` | How long (milliseconds) the message should be displayed when `dismiss_type` is set to `"AUTO_DISMISS"`. |
| `extras` | Key-value pairs. |
| `header` | The header text. |
| `id` | The ID used to log impressions or clicks. |
| `image_url` | In-app message image URL. |
| `message` | Message body text. |
| `uri` | Your URI users will be sent to based on your `click_action`. This field must be included when `click_action` is `"URI"`. |
{: .reset-td-br-1 .reset-td-br-2 aria-label="Handling" }
**Important:**
For in-app messages containing buttons, the message `click_action` will also be included in the final payload if the click action is added prior to adding the button text.
### Styling
There are also various styling fields that you could choose to use from the dashboard:
| Fields | Description |
| ------ | ----------- |
| `bg_color` | Background color. |
| `close_button_color` | Close button color. |
| `frame_color` | The color of the background screen overlay. |
| `header_text_color` | Header text color. |
| `message_text_color` | Message text color. |
| `text_align` | "START", "CENTER", or "END". Your selected text alignment. |
{: .reset-td-br-1 .reset-td-br-2 aria-label="Styling" }
Alternatively, you could implement the in-app message and style it within your Roku application using a standard palette:
### Buttons
| Fields | Description |
| ------ | ----------- |
| `click_action` | `"URI"` or `"NONE"`. Use this field to indicate whether the in-app message should open to a URI link or close the message when clicked. |
| `id` | The ID value of the button itself. |
| `text` | The text to display on the button. |
| `uri` | Your URI users will be sent to based on your `click_action`. This field must be included when `click_action` is `"URI"`. |
{: .reset-td-br-1 .reset-td-br-2 aria-label="Buttons" }
**Important:**
Keep in mind, you'll need to implement your own custom UI since in-app messaging is supported via headless UI using the Swift SDK—which does not include any default UI or views for tvOS.
## Prerequisites
Before you can use this feature, you'll need to [integrate the Swift Braze SDK](https://www.braze.com/docs/fr/fr/developer_guide/sdk_integration/?sdktab=swift).
## Enabling in-app messages
### Step 1: Create a new iOS app
In Braze, select **Settings** > **App Settings**, then select **Add App**. Enter a name for your tvOS app, select **iOS**—_not tvOS_—then select **Add App**.
{: style="width:70%"}
**Warning:**
If you select the **tvOS** checkbox, you will not be able to customize in-app messages for tvOS.
### Step 2: Get your app's API key
In your app settings, select your new tvOS app then take note of your app's API key. You'll use this key to configure your app in Xcode.
{: style="width:70%"}
### Step 3: Integrate BrazeKit
Use your app's API key to integrate the [Braze Swift SDK](https://github.com/braze-inc/braze-swift-sdk) into your tvOS project in Xcode. You only need to integrate BrazeKit from the Braze Swift SDK.
### Step 4: Create your custom UI
Because Braze doesn't provide a default UI for in-app messages on tvOS, you'll need to customize it yourself. For a full walkthrough, see our step-by-step tutorial: [Customizing in-app messages for tvOS](https://braze-inc.github.io/braze-swift-sdk/documentation/braze/in-app-message-customization). For a sample project, see [Braze Swift SDK samples](https://github.com/braze-inc/braze-swift-sdk/tree/main/Examples#inappmessages-custom-ui).
## Prerequisites
Before you can use this feature, you'll need to [integrate the Unity Braze SDK](https://www.braze.com/docs/fr/fr/developer_guide/sdk_integration/?sdktab=unity).
## Message types
Braze offers several default in-app message types, each customizable with messages, images, [Font Awesome](https://fontawesome.com/icons?d=gallery&p=2) icons, click actions, analytics, color schemes, and more.
Their basic behavior and traits are defined by the [`IInAppMessage`](https://braze-inc.github.io/braze-android-sdk/kdoc/braze-android-sdk/com.braze.models.inappmessage/-i-in-app-message/index.html) interface, in a subclass called [`InAppMessageBase`](https://braze-inc.github.io/braze-android-sdk/kdoc/braze-android-sdk/com.braze.models.inappmessage/-in-app-message-base/index.html). `IInAppMessage` also includes a subinterface, [`IInAppMessageImmersive`](https://braze-inc.github.io/braze-android-sdk/kdoc/braze-android-sdk/com.braze.models.inappmessage/-i-in-app-message-immersive/index.html), which lets you add close, click-action, and analytics [buttons](https://braze-inc.github.io/braze-android-sdk/kdoc/braze-android-sdk/com.braze.models.inappmessage/-message-button/index.html) to your app.
**Important:**
Keep in mind, in-app messages containing buttons will include the `clickAction` message in the final payload if the click action is added prior to adding the button text.
[`slideup`](https://braze-inc.github.io/braze-android-sdk/kdoc/braze-android-sdk/com.braze.models.inappmessage/-in-app-message-slideup/index.html) in-app messages are so-named because they "slide up" or "slide down" from the top or bottom of the screen. They cover a small portion of the screen and provide an effective and non-intrusive messaging capability.
The `slideup` in-app message object extends [`InAppMessageBase`](https://braze-inc.github.io/braze-android-sdk/kdoc/braze-android-sdk/com.braze.models.inappmessage/-in-app-message-base/index.html).
{: style="border:0px;"}
[`modal`](https://braze-inc.github.io/braze-android-sdk/kdoc/braze-android-sdk/com.braze.models.inappmessage/-in-app-message-modal/index.html) in-app messages appear in the center of the screen and are framed by a translucent panel. Useful for more critical messaging, they can be equipped with two click-action and analytics-enabled buttons.
This message type is a subclass of [`InAppMessageImmersiveBase`](https://braze-inc.github.io/braze-android-sdk/kdoc/braze-android-sdk/com.braze.models.inappmessage/-in-app-message-immersive-base/index.html), an abstract class that implements `IInAppMessageImmersive`, giving you the option to add custom functionality to your locally generated in-app messages.
{: style="border:0px;"}
[`full`](https://braze-inc.github.io/braze-android-sdk/kdoc/braze-android-sdk/com.braze.models.inappmessage/-in-app-message-full/index.html) in-app messages are useful for maximizing the content and impact of your user communication. The upper half of a `full` in-app message contains an image, and the lower half displays text and up to two click action and analytics-enabled buttons.
This message type extends [`InAppMessageImmersiveBase`](https://braze-inc.github.io/braze-android-sdk/kdoc/braze-android-sdk/com.braze.models.inappmessage/-in-app-message-immersive-base/index.html), giving you the option to add custom functionality to your locally generated in-app messages.

[`HTML`](https://braze-inc.github.io/braze-android-sdk/kdoc/braze-android-sdk/com.braze.models.inappmessage/-in-app-message-html/index.html) in-app messages are useful for creating fully customized user content. User-defined HTML in-app message content is displayed in a `WebView` and may optionally contain other rich content, such as images and fonts, allowing for full control over message appearance and functionality.
This message type implements [`IInAppMessageHtml`](https://braze-inc.github.io/braze-android-sdk/kdoc/braze-android-sdk/com.braze.models.inappmessage/-i-in-app-message-html/index.html), which is a subclass of [`IInAppMessage`](https://braze-inc.github.io/braze-android-sdk/kdoc/braze-android-sdk/com.braze.models.inappmessage/-i-in-app-message/index.html).
**Note:**
On Android, links configured with `target="_blank"` in custom HTML in-app messages open in the device's default web browser.
Android in-app messages support a JavaScript `brazeBridge` interface to call methods on the Braze Android SDK from within your HTML, see our JavaScript bridge page for more details.
{: style="border:0px;"}
**Important:**
We currently do not support the display of custom HTML in-app messages in an iFrame on the iOS and Android platforms.
**Tip:**
You can also define custom in-app message views for your app. For a full walkthrough, see [Setting custom factories](https://www.braze.com/docs/fr/fr/developer_guide/in_app_messages/customization#android_setting-custom-factories).
Each in-app message type is highly customizable across content, images, icons, click actions, analytics, display, and delivery. They are enumerated types of `Braze.InAppMessage`, which defines basic behavior and traits for all in-app messages. For the full list of in-app message properties and usage, see the [`InAppMessage` class](https://braze-inc.github.io/braze-swift-sdk/documentation/brazekit/braze/inappmessage).
These are the available in-app message types in Braze and how they will look like for end-users.
[`Slideup`](https://braze-inc.github.io/braze-swift-sdk/documentation/brazekit/braze/inappmessage/slideup-swift.struct) in-app messages are given this name because they "slide up" or "slide down" from the top or bottom of the screen. They cover a small portion of the screen and provide an effective and non-intrusive messaging capability.
{: style="max-width:35%;border:none;"}
[`Modal`](https://braze-inc.github.io/braze-swift-sdk/documentation/brazekit/braze/inappmessage/modal-swift.struct) in-app messages appear in the center of the screen and are framed by a translucent panel. Useful for more critical messaging, they can be equipped with up to two analytics-enabled buttons.
{: style="max-width:35%;border:none;"}
[`Modal Image`](https://braze-inc.github.io/braze-swift-sdk/documentation/brazekit/braze/inappmessage/modalimage-swift.struct) in-app messages appear in the center of the screen and are framed by a translucent panel. These messages are similar to the `Modal` type except without header or message text. Useful for more critical messaging, they can be equipped with up to two analytics-enabled buttons.
{: style="max-width:35%;border:none;"}
[`Full`](https://braze-inc.github.io/braze-swift-sdk/documentation/brazekit/braze/inappmessage/full-swift.struct) in-app messages are useful for maximizing the content and impact of your user communication. The upper half of a `Full` in-app message contains an image, and the lower half displays text and up to two analytics-enabled buttons.
{: style="max-width:35%;border:none;"}
[`Full Image`](https://braze-inc.github.io/braze-swift-sdk/documentation/brazekit/braze/inappmessage/fullimage-swift.struct) in-app messages are similar to `Full` in-app messages except without header or message text. This message type is useful for maximizing the content and impact of your user communication. A `Full Image` in-app message contains an image spanning the entire screen, with the option to display up to two analytics-enabled buttons.
{: style="max-width:35%;border:none;"}
[`HTML`](https://braze-inc.github.io/braze-swift-sdk/documentation/brazekit/braze/inappmessage/html-swift.struct) in-app messages are useful for creating fully customized user content. User-defined HTML Full in-app message content is displayed in a `WKWebView`and may optionally contain other rich content, such as images and fonts, allowing for full control over message appearance and functionality.
iOS in-app messages support a JavaScript `brazeBridge` interface to call methods on the Braze Web SDK from within your HTML, see our [best practices](https://www.braze.com/docs/fr/fr/user_guide/message_building_by_channel/in-app_messages/best_practices/) for more details.
The following example shows a paginated HTML Full in-app message:

Note that we currently do not support the display of custom HTML in-app messages in an iFrame on the iOS and Android platforms.
[`Control`](https://braze-inc.github.io/braze-swift-sdk/documentation/brazekit/braze/inappmessage/control-swift.struct) in-app messages do not contain a UI component and are used primarily for analytics purposes. This type is used to verify receipt of an in-app message sent to a control group.
For further details about Intelligent Selection and control groups, refer to [Intelligent Selection](https://www.braze.com/docs/fr/fr/user_guide/brazeai/intelligence/intelligent_selection/).
## Prerequisites
Before you can use this feature, you'll need to [integrate the .NET MAUI Braze SDK](https://www.braze.com/docs/fr/fr/developer_guide/sdk_integration/?sdktab=.net%20maui%20(xamarin)).
## Message types
Braze offers several default in-app message types, each customizable with messages, images, [Font Awesome](https://fontawesome.com/icons?d=gallery&p=2) icons, click actions, analytics, color schemes, and more.
Their basic behavior and traits are defined by the [`IInAppMessage`](https://braze-inc.github.io/braze-android-sdk/kdoc/braze-android-sdk/com.braze.models.inappmessage/-i-in-app-message/index.html) interface, in a subclass called [`InAppMessageBase`](https://braze-inc.github.io/braze-android-sdk/kdoc/braze-android-sdk/com.braze.models.inappmessage/-in-app-message-base/index.html). `IInAppMessage` also includes a subinterface, [`IInAppMessageImmersive`](https://braze-inc.github.io/braze-android-sdk/kdoc/braze-android-sdk/com.braze.models.inappmessage/-i-in-app-message-immersive/index.html), which lets you add close, click-action, and analytics [buttons](https://braze-inc.github.io/braze-android-sdk/kdoc/braze-android-sdk/com.braze.models.inappmessage/-message-button/index.html) to your app.
**Important:**
Keep in mind, in-app messages containing buttons will include the `clickAction` message in the final payload if the click action is added prior to adding the button text.
[`slideup`](https://braze-inc.github.io/braze-android-sdk/kdoc/braze-android-sdk/com.braze.models.inappmessage/-in-app-message-slideup/index.html) in-app messages are so-named because they "slide up" or "slide down" from the top or bottom of the screen. They cover a small portion of the screen and provide an effective and non-intrusive messaging capability.
The `slideup` in-app message object extends [`InAppMessageBase`](https://braze-inc.github.io/braze-android-sdk/kdoc/braze-android-sdk/com.braze.models.inappmessage/-in-app-message-base/index.html).
{: style="border:0px;"}
[`modal`](https://braze-inc.github.io/braze-android-sdk/kdoc/braze-android-sdk/com.braze.models.inappmessage/-in-app-message-modal/index.html) in-app messages appear in the center of the screen and are framed by a translucent panel. Useful for more critical messaging, they can be equipped with two click-action and analytics-enabled buttons.
This message type is a subclass of [`InAppMessageImmersiveBase`](https://braze-inc.github.io/braze-android-sdk/kdoc/braze-android-sdk/com.braze.models.inappmessage/-in-app-message-immersive-base/index.html), an abstract class that implements `IInAppMessageImmersive`, giving you the option to add custom functionality to your locally generated in-app messages.
{: style="border:0px;"}
[`full`](https://braze-inc.github.io/braze-android-sdk/kdoc/braze-android-sdk/com.braze.models.inappmessage/-in-app-message-full/index.html) in-app messages are useful for maximizing the content and impact of your user communication. The upper half of a `full` in-app message contains an image, and the lower half displays text and up to two click action and analytics-enabled buttons.
This message type extends [`InAppMessageImmersiveBase`](https://braze-inc.github.io/braze-android-sdk/kdoc/braze-android-sdk/com.braze.models.inappmessage/-in-app-message-immersive-base/index.html), giving you the option to add custom functionality to your locally generated in-app messages.

[`HTML`](https://braze-inc.github.io/braze-android-sdk/kdoc/braze-android-sdk/com.braze.models.inappmessage/-in-app-message-html/index.html) in-app messages are useful for creating fully customized user content. User-defined HTML in-app message content is displayed in a `WebView` and may optionally contain other rich content, such as images and fonts, allowing for full control over message appearance and functionality.
This message type implements [`IInAppMessageHtml`](https://braze-inc.github.io/braze-android-sdk/kdoc/braze-android-sdk/com.braze.models.inappmessage/-i-in-app-message-html/index.html), which is a subclass of [`IInAppMessage`](https://braze-inc.github.io/braze-android-sdk/kdoc/braze-android-sdk/com.braze.models.inappmessage/-i-in-app-message/index.html).
**Note:**
On Android, links configured with `target="_blank"` in custom HTML in-app messages open in the device's default web browser.
Android in-app messages support a JavaScript `brazeBridge` interface to call methods on the Braze Android SDK from within your HTML, see our JavaScript bridge page for more details.
{: style="border:0px;"}
**Important:**
We currently do not support the display of custom HTML in-app messages in an iFrame on the iOS and Android platforms.
**Tip:**
You can also define custom in-app message views for your app. For a full walkthrough, see [Setting custom factories](https://www.braze.com/docs/fr/fr/developer_guide/in_app_messages/customization#android_setting-custom-factories).
Each in-app message type is highly customizable across content, images, icons, click actions, analytics, display, and delivery. They are enumerated types of `Braze.InAppMessage`, which defines basic behavior and traits for all in-app messages. For the full list of in-app message properties and usage, see the [`InAppMessage` class](https://braze-inc.github.io/braze-swift-sdk/documentation/brazekit/braze/inappmessage).
These are the available in-app message types in Braze and how they will look like for end-users.
[`Slideup`](https://braze-inc.github.io/braze-swift-sdk/documentation/brazekit/braze/inappmessage/slideup-swift.struct) in-app messages are given this name because they "slide up" or "slide down" from the top or bottom of the screen. They cover a small portion of the screen and provide an effective and non-intrusive messaging capability.
{: style="max-width:35%;border:none;"}
[`Modal`](https://braze-inc.github.io/braze-swift-sdk/documentation/brazekit/braze/inappmessage/modal-swift.struct) in-app messages appear in the center of the screen and are framed by a translucent panel. Useful for more critical messaging, they can be equipped with up to two analytics-enabled buttons.
{: style="max-width:35%;border:none;"}
[`Modal Image`](https://braze-inc.github.io/braze-swift-sdk/documentation/brazekit/braze/inappmessage/modalimage-swift.struct) in-app messages appear in the center of the screen and are framed by a translucent panel. These messages are similar to the `Modal` type except without header or message text. Useful for more critical messaging, they can be equipped with up to two analytics-enabled buttons.
{: style="max-width:35%;border:none;"}
[`Full`](https://braze-inc.github.io/braze-swift-sdk/documentation/brazekit/braze/inappmessage/full-swift.struct) in-app messages are useful for maximizing the content and impact of your user communication. The upper half of a `Full` in-app message contains an image, and the lower half displays text and up to two analytics-enabled buttons.
{: style="max-width:35%;border:none;"}
[`Full Image`](https://braze-inc.github.io/braze-swift-sdk/documentation/brazekit/braze/inappmessage/fullimage-swift.struct) in-app messages are similar to `Full` in-app messages except without header or message text. This message type is useful for maximizing the content and impact of your user communication. A `Full Image` in-app message contains an image spanning the entire screen, with the option to display up to two analytics-enabled buttons.
{: style="max-width:35%;border:none;"}
[`HTML`](https://braze-inc.github.io/braze-swift-sdk/documentation/brazekit/braze/inappmessage/html-swift.struct) in-app messages are useful for creating fully customized user content. User-defined HTML Full in-app message content is displayed in a `WKWebView`and may optionally contain other rich content, such as images and fonts, allowing for full control over message appearance and functionality.
iOS in-app messages support a JavaScript `brazeBridge` interface to call methods on the Braze Web SDK from within your HTML, see our [best practices](https://www.braze.com/docs/fr/fr/user_guide/message_building_by_channel/in-app_messages/best_practices/) for more details.
The following example shows a paginated HTML Full in-app message:

Note that we currently do not support the display of custom HTML in-app messages in an iFrame on the iOS and Android platforms.
[`Control`](https://braze-inc.github.io/braze-swift-sdk/documentation/brazekit/braze/inappmessage/control-swift.struct) in-app messages do not contain a UI component and are used primarily for analytics purposes. This type is used to verify receipt of an in-app message sent to a control group.
For further details about Intelligent Selection and control groups, refer to [Intelligent Selection](https://www.braze.com/docs/fr/fr/user_guide/brazeai/intelligence/intelligent_selection/).
## Étapes suivantes
Êtes-vous prêt à approfondir vos connaissances ? Veuillez consulter ces tutoriels étape par étape :
- Ajustez le moment de la réception/distribution des messages en [différant et](https://www.braze.com/docs/fr/fr/developer_guide/in_app_messages/tutorials/deferring_triggered_messages) en [rétablissant les messages déclenchés](https://www.braze.com/docs/fr/fr/developer_guide/in_app_messages/tutorials/deferring_triggered_messages).
- Affinez le ciblage des messages en [définissant des règles d'affichage conditionnelles](https://www.braze.com/docs/fr/fr/developer_guide/in_app_messages/tutorials/conditionally_displaying_messages).
- Adaptez l'apparence de votre marque en [personnalisant le style des messages à l'aide de paires clé-valeur](https://www.braze.com/docs/fr/fr/developer_guide/in_app_messages/tutorials/customizing_message_styling).
# Personnalisez les messages in-app pour le SDK Braze.
Source: /docs/fr/developer_guide/in_app_messages/customization/index.md
# Personnaliser les messages in-app
> Découvrez comment personnaliser les messages in-app pour le SDK de Braze. Pour découvrir des techniques de mise en forme avancées, veuillez consulter notre tutoriel sur [la personnalisation de la mise en forme des messages à l'aide de paires clé-valeur](https://www.braze.com/docs/fr/fr/developer_guide/in_app_messages/tutorials/customizing_message_styling).
## Prerequisites
Before you can use this feature, you'll need to [integrate the Web Braze SDK](https://www.braze.com/docs/fr/fr/developer_guide/sdk_integration/?sdktab=web).
## Custom styles
Braze UI elements come with a default look and feel that create a neutral in-app message experience and aim for consistency with other Braze mobile platforms. The default Braze styles are defined in CSS within the Braze SDK.
### Setting a default style
By overriding selected styles in your application, you can customize our standard in-app message types with your own background images, font families, styles, sizes, animations, and more.
For instance, the following is an example override that will cause an in-app message's headers to appear italicized:
```css
body .ab-in-app-message .ab-message-header {
font-style: italic;
}
```
See the [JSDocs](https://js.appboycdn.com/web-sdk/latest/doc/classes/braze.inappmessage.html) for more information.
### Customizing the z-index
By default, in-app messages are displayed using `z-index: 9001`. This is configurable using the `inAppMessageZIndex ` [initialization option](https://js.appboycdn.com/web-sdk/latest/doc/modules/braze.html#initializationoptions) in the scenario that your website styles elements with higher values than that.
```javascript
braze.initialize("YOUR-API-KEY", {
baseUrl: "YOUR-API-ENDPOINT",
inAppMessageZIndex: 12000
});
```
**Important:**
This feature is only available for Web Braze SDK v3.3.0 and later.
## Customizing message dismissals
By default, when an in-app message is showing, pressing the escape button or a click on the grayed-out background of the page will dismiss the message. Configure the `requireExplicitInAppMessageDismissal` [initialization option](https://js.appboycdn.com/web-sdk/latest/doc/modules/braze.html#initializationoptions) to `true` to prevent this behavior and require an explicit button click to dismiss messages.
```javascript
import * as braze from "@braze/web-sdk";
braze.initialize("YOUR-API-KEY", {
baseUrl: "YOUR-API-ENDPOINT",
requireExplicitInAppMessageDismissal: true
});
```
## Customizing display timing
To override the default display timing, remove calls to `braze.automaticallyShowInAppMessages()` and handle messages in `braze.subscribeToInAppMessage()`. Register your callback before `braze.openSession()`, so you can intercept session-start messages and decide whether to display or defer each message.
By default, Braze displays in-app messages when they are triggered and eligible to display. If you need different behavior for your app experience, use a custom callback to defer or display messages based on your own logic.
The following example shows how to subscribe to triggered in-app messages, defer selected messages, and display deferred messages later:
```javascript
import * as braze from "@braze/web-sdk";
braze.initialize("YOUR-API-KEY", {
baseUrl: "YOUR-API-ENDPOINT"
});
braze.subscribeToInAppMessage(function (message) {
// Control-group messages should always be "shown" to log analytics.
if (message.isControl || message instanceof braze.ControlMessage) {
braze.showInAppMessage(message);
return;
}
const shouldDefer = true; // Replace with your own display logic
if (shouldDefer) {
braze.deferInAppMessage(message);
return;
}
braze.showInAppMessage(message);
});
braze.openSession();
// Later, when your app is ready to display a deferred message:
const deferredMessage = braze.getDeferredInAppMessage();
if (deferredMessage) {
braze.showInAppMessage(deferredMessage);
}
```
For related delivery customization guidance, see:
- [Web `deferInAppMessage` reference](https://js.appboycdn.com/web-sdk/latest/doc/modules/braze.html#deferinappmessage)
- [Web `subscribeToInAppMessage` reference](https://js.appboycdn.com/web-sdk/latest/doc/modules/braze.html#subscribetoinappmessage)
## Opening links in a new tab
To set your in-app message links to open in a new tab, set the `openInAppMessagesInNewTab` option to `true` to force all links from in-app message clicks open in a new tab or window.
```javascript
braze.initialize('api-key', { openInAppMessagesInNewTab: true} );
```
## Prerequisites
Before you can use this feature, you'll need to [integrate the Android Braze SDK](https://www.braze.com/docs/fr/fr/developer_guide/sdk_integration/?sdktab=android). You'll also need to [set up in-app messages](https://www.braze.com/docs/fr/fr/developer_guide/in_app_messages).
## Setting custom manager listeners
While the `BrazeInAppMessageManager` listener can automatically handle the display and lifecycle of in-app messages, you'll need to implement a custom manager listener if you'd like to fully customize your messages.
The Braze SDK has a default `DefaultHtmlInAppMessageActionListener` class that is used if no custom listener is defined and takes appropriate action automatically. If you require more control over how a user interacts with different buttons inside a custom HTML in-app message, implement a custom `IHtmlInAppMessageActionListener` class.
This listener applies to __both__ messages built with custom HTML and messages created using the Drag-and-Drop (DnD) editor. It does not apply to traditional IAMs. Traditional IAMs are Braze's built-in, SDK-rendered message types (for example, slideup, modal, and full) created in the original in-app message composer using predefined layouts. Unlike custom HTML and DnD IAMs, they do not run through the HTML action listener flow.
If you set a custom `IHtmlInAppMessageActionListener`, its logic will override the default click behavior for _all_ DnD messages. Please ensure your marketing team is aware of this, as it may affect their campaigns in unexpected ways.
### Step 1: Implement the custom manager listener
#### Step 1.1: Implement `IInAppMessageManagerListener`
Create a class that implements [`IInAppMessageManagerListener`](https://braze-inc.github.io/braze-android-sdk/kdoc/braze-android-sdk/com.braze.ui.inappmessage.listeners/-i-in-app-message-manager-listener/index.html).
The callbacks in your `IInAppMessageManagerListener` will also be called at various points in the in-app message lifecycle. For example, if you set a custom manager listener when an in-app message is received from Braze, the [`beforeInAppMessageDisplayed()`](https://braze-inc.github.io/braze-android-sdk/kdoc/braze-android-sdk/com.braze.ui.inappmessage.listeners/-i-in-app-message-manager-listener/before-in-app-message-displayed.html) method will be called. If your implementation of this method returns [`InAppMessageOperation.DISCARD`](https://braze-inc.github.io/braze-android-sdk/kdoc/braze-android-sdk/com.braze.ui.inappmessage/-in-app-message-operation/-d-i-s-c-a-r-d/index.html), that signals to Braze that the in-app message will be handled by the host app and should not be displayed by Braze. If [`InAppMessageOperation.DISPLAY_NOW`](https://braze-inc.github.io/braze-android-sdk/kdoc/braze-android-sdk/com.braze.ui.inappmessage/-in-app-message-operation/-d-i-s-p-l-a-y_-n-o-w/index.html) is returned, Braze will attempt to display the in-app message. This method should be used if you choose to display the in-app message in a customized manner.
`IInAppMessageManagerListener` also includes delegate methods for message clicks and buttons, which can be used in cases like intercepting a message when a button or message is clicked for further processing.
#### Step 1.2: Hook into IAM view lifecycle methods (optional)
The [`IInAppMessageManagerListener`](https://braze-inc.github.io/braze-android-sdk/kdoc/braze-android-sdk/com.braze.ui.inappmessage.listeners/-i-in-app-message-manager-listener/index.html) interface has in-app message view methods called at distinct points in the in-app message view lifecycle. These methods are called in the following order:
1. [`beforeInAppMessageViewOpened`](https://braze-inc.github.io/braze-android-sdk/kdoc/braze-android-sdk/com.braze.ui.inappmessage.listeners/-i-in-app-message-manager-listener/before-in-app-message-view-opened.html): Called just before the in-app message is added to the activity's view. The in-app message is not yet visible to the user at this time.
2. [`afterInAppMessageViewOpened`](https://braze-inc.github.io/braze-android-sdk/kdoc/braze-android-sdk/com.braze.ui.inappmessage.listeners/-i-in-app-message-manager-listener/after-in-app-message-view-opened.html): Called just after the in-app message is added to the activity's view. The in-app message is now visible to the user at this time.
3. [`beforeInAppMessageViewClosed`](https://braze-inc.github.io/braze-android-sdk/kdoc/braze-android-sdk/com.braze.ui.inappmessage.listeners/-i-in-app-message-manager-listener/before-in-app-message-view-closed.html): Called just before the in-app message is removed from the activity's view. The in-app message is still visible to the user at this time.
4. [`afterInAppMessageViewClosed`](https://braze-inc.github.io/braze-android-sdk/kdoc/braze-android-sdk/com.braze.ui.inappmessage.listeners/-i-in-app-message-manager-listener/after-in-app-message-view-closed.html): Called just after the in-app message is removed from the activity's view. The in-app message is no longer visible to the user at this time.
Note that the time between [`afterInAppMessageViewOpened`](https://braze-inc.github.io/braze-android-sdk/kdoc/braze-android-sdk/com.braze.ui.inappmessage.listeners/-i-in-app-message-manager-listener/after-in-app-message-view-opened.html) and [`beforeInAppMessageViewClosed`](https://braze-inc.github.io/braze-android-sdk/kdoc/braze-android-sdk/com.braze.ui.inappmessage.listeners/-i-in-app-message-manager-listener/before-in-app-message-view-closed.html) is when the in-app message view is on screen, visible to the user.
**Note:**
Implementation of these methods is not required. They're only provided to track and inform the in-app message view lifecycle. You can leave these method implementations empty.
Create a class that implements [`IHtmlInAppMessageActionListener`](https://braze-inc.github.io/braze-android-sdk/kdoc/braze-android-sdk/com.braze.ui.inappmessage.listeners/-i-html-in-app-message-action-listener/index.html).
The callbacks in your `IHtmlInAppMessageActionListener` will be called whenever the user initiates any of the following actions inside the HTML in-app message:
- Clicks on the close button
- Fires a custom event
- Clicks on a URL inside HTML in-app message
```java
public class CustomHtmlInAppMessageActionListener implements IHtmlInAppMessageActionListener {
private final Context mContext;
public CustomHtmlInAppMessageActionListener(Context context) {
mContext = context;
}
@Override
public void onCloseClicked(IInAppMessage inAppMessage, String url, Bundle queryBundle) {
Toast.makeText(mContext, "HTML In App Message closed", Toast.LENGTH_LONG).show();
BrazeInAppMessageManager.getInstance().hideCurrentlyDisplayingInAppMessage(false);
}
@Override
public boolean onCustomEventFired(IInAppMessage inAppMessage, String url, Bundle queryBundle) {
Toast.makeText(mContext, "Custom event fired. Ignoring.", Toast.LENGTH_LONG).show();
return true;
}
@Override
public boolean onOtherUrlAction(IInAppMessage inAppMessage, String url, Bundle queryBundle) {
Toast.makeText(mContext, "Custom url pressed: " + url + " . Ignoring", Toast.LENGTH_LONG).show();
BrazeInAppMessageManager.getInstance().hideCurrentlyDisplayingInAppMessage(false);
return true;
}
}
```
```kotlin
class CustomHtmlInAppMessageActionListener(private val mContext: Context) : IHtmlInAppMessageActionListener {
override fun onCloseClicked(inAppMessage: IInAppMessage, url: String, queryBundle: Bundle) {
Toast.makeText(mContext, "HTML In App Message closed", Toast.LENGTH_LONG).show()
BrazeInAppMessageManager.getInstance().hideCurrentlyDisplayingInAppMessage(false)
}
override fun onCustomEventFired(inAppMessage: IInAppMessage, url: String, queryBundle: Bundle): Boolean {
Toast.makeText(mContext, "Custom event fired. Ignoring.", Toast.LENGTH_LONG).show()
return true
}
override fun onOtherUrlAction(inAppMessage: IInAppMessage, url: String, queryBundle: Bundle): Boolean {
Toast.makeText(mContext, "Custom url pressed: $url . Ignoring", Toast.LENGTH_LONG).show()
BrazeInAppMessageManager.getInstance().hideCurrentlyDisplayingInAppMessage(false)
return true
}
}
```
### Step 2: Instruct Braze to use the custom manager listener
After you create `IInAppMessageManagerListener`, call `BrazeInAppMessageManager.getInstance().setCustomInAppMessageManagerListener()` to instruct `BrazeInAppMessageManager`
to use your custom `IInAppMessageManagerListener` instead of the default listener. Do this in your [`Application.onCreate()`](https://developer.android.com/reference/android/app/Application.html#onCreate()) before any other calls to Braze, so the custom listener is set before any in-app messages are displayed.
#### Altering in-app messages before display
When a new in-app message is received, and there is already an in-app message being displayed, the new message will be put onto the top of the stack and can be displayed at a later time.
However, if there is no in-app message being displayed, the following delegate method in `IInAppMessageManagerListener` will be called:
```java
@Override
public InAppMessageOperation beforeInAppMessageDisplayed(IInAppMessage inAppMessage) {
return InAppMessageOperation.DISPLAY_NOW;
}
```
```kotlin
override fun beforeInAppMessageDisplayed(inAppMessage: IInAppMessage): InAppMessageOperation {
return InAppMessageOperation.DISPLAY_NOW
}
```
The `InAppMessageOperation()` return value can control when the message should be displayed. The suggested usage of this method would be to delay messages in certain parts of the app by returning `DISPLAY_LATER` when in-app messages would be distracting to the user's app experience.
| `InAppMessageOperation` return value | Behavior |
| -------------------------- | -------- |
| `DISPLAY_NOW` | The message will be displayed |
| `DISPLAY_LATER` | The message will be returned to the stack and displayed at the next available opportunity |
| `DISCARD` | The message will be discarded |
| `null` | The message will be ignored. This method should **NOT** return `null` |
{: .reset-td-br-1 .reset-td-br-2 .reset-td-br-3 aria-label="Altering in-app messages before display" }
See [`InAppMessageOperation`](https://braze-inc.github.io/braze-android-sdk/kdoc/braze-android-sdk/com.braze.ui.inappmessage/-in-app-message-operation/index.html) for more details.
**Tip:**
If you choose to `DISCARD` the in-app message and replace it with your in-app message view, you will need to log in-app message clicks and impressions manually.
On Android, this is done by calling `logClick` and `logImpression` on in-app messages and `logButtonClick` on immersive in-app messages.
**Tip:**
Once an in-app message has been placed on the stack, you can request for it to be retrieved and displayed at any time by calling [`BrazeInAppMessageManager.getInstance().requestDisplayInAppMessage()`](https://braze-inc.github.io/braze-android-sdk/kdoc/braze-android-sdk/com.braze.ui.inappmessage/-braze-in-app-message-manager/request-display-in-app-message.html). This method requests Braze to display the next available in-app message from the stack.
After your `IHtmlInAppMessageActionListener` is created, call `BrazeInAppMessageManager.getInstance().setCustomHtmlInAppMessageActionListener()` to instruct `BrazeInAppMessageManager` to use your custom `IHtmlInAppMessageActionListener` instead of the default action listener.
We recommend setting your `IHtmlInAppMessageActionListener` in your [`Application.onCreate()`](https://developer.android.com/reference/android/app/Application.html#onCreate()) before any other calls to Braze. This will set the custom action listener before any in-app message is displayed:
```java
BrazeInAppMessageManager.getInstance().setCustomHtmlInAppMessageActionListener(new CustomHtmlInAppMessageActionListener(context));
```
```kotlin
BrazeInAppMessageManager.getInstance().setCustomHtmlInAppMessageActionListener(CustomHtmlInAppMessageActionListener(context))
```
## Setting custom factories
You can override a number of defaults through custom factory objects. These can be registered with the Braze SDK as needed to achieve the desired results. However, if you decide to override a factory, you'll likely need to explicitly defer to the default or reimplement the functionality provided by the Braze default. The following code snippet illustrates how to supply custom implementations of the `IInAppMessageViewFactory` and the `IInAppMessageViewWrapperFactory` interfaces.
**In-app message types**
```kotlin
class BrazeDemoApplication : Application(){
override fun onCreate() {
super.onCreate()
registerActivityLifecycleCallbacks(BrazeActivityLifecycleCallbackListener(true, true))
BrazeInAppMessageManager.getInstance().setCustomInAppMessageViewWrapperFactory(CustomInAppMessageViewWrapperFactory())
BrazeInAppMessageManager.getInstance().setCustomInAppMessageViewFactory(CustomInAppMessageViewFactory())
}
}
```
**In-app message types**
```java
public class BrazeDemoApplication extends Application {
@Override
public void onCreate{
super.onCreate();
registerActivityLifecycleCallbacks(new BrazeActivityLifecycleCallbackListener(true, true));
BrazeInAppMessageManager.getInstance().setCustomInAppMessageViewWrapperFactory(new CustomInAppMessageViewWrapperFactory());
BrazeInAppMessageManager.getInstance().setCustomInAppMessageViewFactory(new CustomInAppMessageViewFactory());
}
}
```
Braze in-app message types are versatile enough to cover most custom use cases. However, if you want to fully define the visual appearance of your in-app messages instead of using a default type, Braze makes this possible by setting a custom view factory.
The `BrazeInAppMessageManager` automatically handles placing the in-app message model into the existing activity view hierarchy by default using [`DefaultInAppMessageViewWrapper`](https://braze-inc.github.io/braze-android-sdk/kdoc/braze-android-sdk/com.braze.ui.inappmessage/-default-in-app-message-view-wrapper/index.html). If you need to customize how in-app messages are placed into the view hierarchy, you should use a custom [`IInAppMessageViewWrapperFactory`](https://braze-inc.github.io/braze-android-sdk/kdoc/braze-android-sdk/com.braze.ui.inappmessage/-i-in-app-message-view-wrapper-factory/index.html).
In-app messages have preset animation behavior. `Slideup` messages slide into the screen; `full` and `modal` messages fade in and out. If you want to define custom animation behaviors for your in-app messages, Braze makes this possible by setting up a custom animation factory.
### Step 1: Implement the factory
Create a class that implements [`IInAppMessageViewFactory`](https://braze-inc.github.io/braze-android-sdk/kdoc/braze-android-sdk/com.braze.ui.inappmessage/-i-in-app-message-view-factory/index.html):
```java
public class CustomInAppMessageViewFactory implements IInAppMessageViewFactory {
@Override
public View createInAppMessageView(Activity activity, IInAppMessage inAppMessage) {
// Uses a custom view for slideups, modals, and full in-app messages.
// HTML in-app messages and any other types will use the Braze default in-app message view factories
switch (inAppMessage.getMessageType()) {
case SLIDEUP:
case MODAL:
case FULL:
// Use a custom view of your choosing
return createMyCustomInAppMessageView();
default:
// Use the default in-app message factories
final IInAppMessageViewFactory defaultInAppMessageViewFactory = BrazeInAppMessageManager.getInstance().getDefaultInAppMessageViewFactory(inAppMessage);
return defaultInAppMessageViewFactory.createInAppMessageView(activity, inAppMessage);
}
}
}
```
```kotlin
class CustomInAppMessageViewFactory : IInAppMessageViewFactory {
override fun createInAppMessageView(activity: Activity, inAppMessage: IInAppMessage): View {
// Uses a custom view for slideups, modals, and full in-app messages.
// HTML in-app messages and any other types will use the Braze default in-app message view factories
when (inAppMessage.messageType) {
MessageType.SLIDEUP, MessageType.MODAL, MessageType.FULL ->
// Use a custom view of your choosing
return createMyCustomInAppMessageView()
else -> {
// Use the default in-app message factories
val defaultInAppMessageViewFactory = BrazeInAppMessageManager.getInstance().getDefaultInAppMessageViewFactory(inAppMessage)
return defaultInAppMessageViewFactory!!.createInAppMessageView(activity, inAppMessage)
}
}
}
}
```
Create a class that implements [`IInAppMessageViewWrapperFactory`](https://braze-inc.github.io/braze-android-sdk/kdoc/braze-android-sdk/com.braze.ui.inappmessage/-i-in-app-message-view-wrapper-factory/index.html) and returns an [`IInAppMessageViewWrapper`](https://braze-inc.github.io/braze-android-sdk/kdoc/braze-android-sdk/com.braze.ui.inappmessage/-i-in-app-message-view-wrapper/index.html).
This factory is called immediately after the in-app message view is created. The easiest way to implement a custom [`IInAppMessageViewWrapper`](https://braze-inc.github.io/braze-android-sdk/kdoc/braze-android-sdk/com.braze.ui.inappmessage/-i-in-app-message-view-wrapper/index.html) is just to extend the default [`DefaultInAppMessageViewWrapper`](https://braze-inc.github.io/braze-android-sdk/kdoc/braze-android-sdk/com.braze.ui.inappmessage/-default-in-app-message-view-wrapper/index.html):
```java
public class CustomInAppMessageViewWrapper extends DefaultInAppMessageViewWrapper {
public CustomInAppMessageViewWrapper(View inAppMessageView,
IInAppMessage inAppMessage,
IInAppMessageViewLifecycleListener inAppMessageViewLifecycleListener,
BrazeConfigurationProvider brazeConfigurationProvider,
Animation openingAnimation,
Animation closingAnimation, View clickableInAppMessageView) {
super(inAppMessageView,
inAppMessage,
inAppMessageViewLifecycleListener,
brazeConfigurationProvider,
openingAnimation,
closingAnimation,
clickableInAppMessageView);
}
@Override
public void open(@NonNull Activity activity) {
super.open(activity);
Toast.makeText(activity.getApplicationContext(), "Opened in-app message", Toast.LENGTH_SHORT).show();
}
@Override
public void close() {
super.close();
Toast.makeText(mInAppMessageView.getContext().getApplicationContext(), "Closed in-app message", Toast.LENGTH_SHORT).show();
}
}
```
```kotlin
class CustomInAppMessageViewWrapper(inAppMessageView: View,
inAppMessage: IInAppMessage,
inAppMessageViewLifecycleListener: IInAppMessageViewLifecycleListener,
brazeConfigurationProvider: BrazeConfigurationProvider,
openingAnimation: Animation,
closingAnimation: Animation, clickableInAppMessageView: View) :
DefaultInAppMessageViewWrapper(inAppMessageView,
inAppMessage,
inAppMessageViewLifecycleListener,
brazeConfigurationProvider,
openingAnimation,
closingAnimation,
clickableInAppMessageView) {
override fun open(activity: Activity) {
super.open(activity)
Toast.makeText(activity.applicationContext, "Opened in-app message", Toast.LENGTH_SHORT).show()
}
override fun close() {
super.close()
Toast.makeText(mInAppMessageView.context.applicationContext, "Closed in-app message", Toast.LENGTH_SHORT).show()
}
}
```
Create a class that implements [`IInAppMessageAnimationFactory`](https://braze-inc.github.io/braze-android-sdk/kdoc/braze-android-sdk/com.braze.ui.inappmessage/-i-in-app-message-animation-factory/index.html):
```java
public class CustomInAppMessageAnimationFactory implements IInAppMessageAnimationFactory {
@Override
public Animation getOpeningAnimation(IInAppMessage inAppMessage) {
Animation animation = new AlphaAnimation(0, 1);
animation.setInterpolator(new AccelerateInterpolator());
animation.setDuration(2000L);
return animation;
}
@Override
public Animation getClosingAnimation(IInAppMessage inAppMessage) {
Animation animation = new AlphaAnimation(1, 0);
animation.setInterpolator(new DecelerateInterpolator());
animation.setDuration(2000L);
return animation;
}
}
```
```kotlin
class CustomInAppMessageAnimationFactory : IInAppMessageAnimationFactory {
override fun getOpeningAnimation(inAppMessage: IInAppMessage): Animation {
val animation: Animation = AlphaAnimation(0, 1)
animation.interpolator = AccelerateInterpolator()
animation.duration = 2000L
return animation
}
override fun getClosingAnimation(inAppMessage: IInAppMessage): Animation {
val animation: Animation = AlphaAnimation(1, 0)
animation.interpolator = DecelerateInterpolator()
animation.duration = 2000L
return animation
}
}
```
### Step 2: Instruct Braze to use the factory
After your `IInAppMessageViewFactory` is created, call `BrazeInAppMessageManager.getInstance().setCustomInAppMessageViewFactory()` to instruct `BrazeInAppMessageManager`
to use your custom `IInAppMessageViewFactory` instead of the default view factory.
**Tip:**
We recommend setting your `IInAppMessageViewFactory` in your `Application.onCreate()` before any other calls to Braze. This will set the custom view factory before any in-app message is displayed.
#### How it works
The `slideup` in-app message view implements [`IInAppMessageView`](https://braze-inc.github.io/braze-android-sdk/kdoc/braze-android-sdk/com.braze.ui.inappmessage.views/-i-in-app-message-view/index.html). The `full` and `modal` type message views implement [`IInAppMessageImmersiveView`](https://braze-inc.github.io/braze-android-sdk/kdoc/braze-android-sdk/com.braze.ui.inappmessage.views/-i-in-app-message-immersive-view/index.html). Implementing one of these classes allows Braze to add click listeners to your custom view where appropriate. All Braze view classes extend Android's [`View`](http://developer.android.com/reference/android/view/View.html) class.
Implementing `IInAppMessageView` allows you to define a certain portion of your custom view as clickable. Implementing [`IInAppMessageImmersiveView`](https://braze-inc.github.io/braze-android-sdk/kdoc/braze-android-sdk/com.braze.ui.inappmessage.views/-i-in-app-message-immersive-view/index.html) allows you to define message button views and a close button view.
After your [`IInAppMessageViewWrapper`](https://braze-inc.github.io/braze-android-sdk/kdoc/braze-android-sdk/com.braze.ui.inappmessage/-i-in-app-message-view-wrapper/index.html) is created, call [`BrazeInAppMessageManager.getInstance().setCustomInAppMessageViewWrapperFactory()`](https://braze-inc.github.io/braze-android-sdk/kdoc/braze-android-sdk/com.braze.ui.inappmessage/-in-app-message-manager-base/set-custom-in-app-message-view-factory.html) to instruct `BrazeInAppMessageManager` to use your custom [`IInAppMessageViewWrapperFactory`](https://braze-inc.github.io/braze-android-sdk/kdoc/braze-android-sdk/com.braze.ui.inappmessage/-i-in-app-message-view-wrapper-factory/index.html) instead of the default view wrapper factory.
We recommend setting your [`IInAppMessageViewWrapperFactory`](https://braze-inc.github.io/braze-android-sdk/kdoc/braze-android-sdk/com.braze.ui.inappmessage/-i-in-app-message-view-wrapper-factory/index.html) in your [`Application.onCreate()`](https://developer.android.com/reference/android/app/Application.html#onCreate()) before any other calls to Braze. This will set the custom view wrapper factory before any in-app message is displayed:
```java
BrazeInAppMessageManager.getInstance().setCustomInAppMessageViewWrapperFactory(new CustomInAppMessageViewWrapper());
```
```kotlin
BrazeInAppMessageManager.getInstance().setCustomInAppMessageViewWrapperFactory(CustomInAppMessageViewWrapper())
```
Once your `IInAppMessageAnimationFactory` is created, call `BrazeInAppMessageManager.getInstance().setCustomInAppMessageAnimationFactory()` to instruct `BrazeInAppMessageManager`
to use your custom `IInAppMessageAnimationFactory` instead of the default animation factory.
We recommend setting your `IInAppMessageAnimationFactory` in your [`Application.onCreate()`](https://developer.android.com/reference/android/app/Application.html#onCreate()) before any other calls to Braze. This will set the custom animation factory before any in-app message is displayed.
## Custom styles
Braze UI elements come with a default look and feel that matches the Android standard UI guidelines and provides a seamless experience. This reference article covers custom in-app messaging styling for your Android or FireOS application.
### Setting a default style
You can see default styles in the Braze SDK's [`styles.xml`](https://github.com/braze-inc/braze-android-sdk/blob/master/android-sdk-ui/src/main/res/values/styles.xml) file:
```xml
```
If you would prefer, you can override these styles to create a look and feel that better suits your app.
To override a style, copy it in its entirety to the `styles.xml` file in your project and make modifications. The whole style must be copied over to your local `styles.xml` file for all attributes to be correctly set. Note that these custom styles are for changes to individual UI elements, not wholesale changes to layouts. Layout-level changes need to be handled with custom views.
**Note:**
You can customize some colors directly in your Braze campaign without modifying the XML. Keep in mind, colors set in the Braze dashboard will override colors you set anywhere else.
### Customizing the font
You can set a custom font by locating the typeface in the `res/font` directory. To use it, override the style for message text, headers, and button text and use the `fontFamily` attribute to instruct Braze to use your custom font family.
For example, to update the font on your in-app message button text, override the `Braze.InAppMessage.Button` style and reference your custom font family. The attribute value should point to a font family in your `res/font` directory.
Here is a truncated example with a custom font family, `my_custom_font_family`, referenced on the last line:
```xml
```
Aside from the `Braze.InAppMessage.Button` style for button text, the style for message text is `Braze.InAppMessage.Message` and the style for message headers is `Braze.InAppMessage.Header`. If you want to use your custom font family across all possible in-app message text, you can set your font family on the `Braze.InAppMessage` style, which is the parent style for all in-app messages.
**Important:**
As with other custom styles, the entire style must be copied over to your local `styles.xml` file for all attributes to be correctly set.
## Message dismissals
### Swiping to dismiss slideup messages
By default, slideup in-app messages can be dismissed with a swipe gesture. The direction of the swipe depends on the slideup position:
- **Left or right swipe:** Dismisses the slideup regardless of its position.
- **Slideup from the bottom:** Swiping from top to bottom dismisses the message. Swiping from bottom to top does not dismiss it.
- **Slideup from the top:** Swiping from bottom to top dismisses the message. Swiping from top to bottom does not dismiss it.
This swipe behavior is built into the default [`DefaultInAppMessageViewWrapper`](https://braze-inc.github.io/braze-android-sdk/kdoc/braze-android-sdk/com.braze.ui.inappmessage/-default-in-app-message-view-wrapper/index.html) and applies only to slideup in-app messages. Modal and full in-app messages don't support swipe-to-dismiss. To customize this behavior, you can implement a [custom view wrapper factory](#android_setting-custom-factories).
**Note:**
Tapping outside of a slideup message does not dismiss it by default. This behavior differs from modal messages, which can be configured for outside tap dismissal. For slideups, use the swipe gesture or the close button to dismiss the message.
### Disabling back button dismissals
By default, the hardware back button dismisses Braze in-app messages. This behavior can be disabled on a per-message basis via [`BrazeInAppMessageManager.setBackButtonDismissesInAppMessageView()`](https://braze-inc.github.io/braze-android-sdk/kdoc/braze-android-sdk/com.braze.ui.inappmessage/-in-app-message-manager-base/set-back-button-dismisses-in-app-message-view.html).
In the following example, `disable_back_button` is a custom key-value pair set on the in-app message that signifies whether the message should allow for the back button to dismiss the message:
```java
BrazeInAppMessageManager.getInstance().setCustomInAppMessageManagerListener(new DefaultInAppMessageManagerListener() {
@Override
public void beforeInAppMessageViewOpened(View inAppMessageView, IInAppMessage inAppMessage) {
super.beforeInAppMessageViewOpened(inAppMessageView, inAppMessage);
final Map extras = inAppMessage.getExtras();
if (extras != null && extras.containsKey("disable_back_button")) {
BrazeInAppMessageManager.getInstance().setBackButtonDismissesInAppMessageView(false);
}
}
@Override
public void afterInAppMessageViewClosed(IInAppMessage inAppMessage) {
super.afterInAppMessageViewClosed(inAppMessage);
BrazeInAppMessageManager.getInstance().setBackButtonDismissesInAppMessageView(true);
}
});
```
```kotlin
BrazeInAppMessageManager.getInstance().setCustomInAppMessageManagerListener(object : DefaultInAppMessageManagerListener() {
override fun beforeInAppMessageViewOpened(inAppMessageView: View, inAppMessage: IInAppMessage) {
super.beforeInAppMessageViewOpened(inAppMessageView, inAppMessage)
val extras = inAppMessage.extras
if (extras != null && extras.containsKey("disable_back_button")) {
BrazeInAppMessageManager.getInstance().setBackButtonDismissesInAppMessageView(false)
}
}
override fun afterInAppMessageViewClosed(inAppMessage: IInAppMessage) {
super.afterInAppMessageViewClosed(inAppMessage)
BrazeInAppMessageManager.getInstance().setBackButtonDismissesInAppMessageView(true)
}
})
```
**Note:**
Note that if this functionality is disabled, the host activity's hardware back button default behavior will be used instead. This may lead to the back button closing the application instead of the displayed in-app message.
### Enabling outside tap dismissals
By default, dismissing the modal using an outside tap is set to `false`. Setting this value to `true` will result in the modal in-app message being dismissed when the user taps outside of the in-app message. This behavior can be toggled on by calling:
```java
BrazeInAppMessageManager.getInstance().setClickOutsideModalViewDismissInAppMessageView(true)
```
## Customizing the orientation
To set a fixed orientation for an in-app message, first [set a custom in-app message manager listener](https://www.braze.com/docs/fr/fr/developer_guide/in_app_messages/customization/?sdktab=android#android_setting-custom-manager-listeners). Then, update the orientation on the `IInAppMessage` object in the `beforeInAppMessageDisplayed()` delegate method:
```java
public InAppMessageOperation beforeInAppMessageDisplayed(IInAppMessage inAppMessage) {
// Set the orientation to portrait
inAppMessage.setOrientation(Orientation.PORTRAIT);
return InAppMessageOperation.DISPLAY_NOW;
}
```
```kotlin
override fun beforeInAppMessageDisplayed(inAppMessage: IInAppMessage): InAppMessageOperation {
// Set the orientation to portrait
inAppMessage.orientation = Orientation.PORTRAIT
return InAppMessageOperation.DISPLAY_NOW
}
```
For tablet devices, in-app messages will appear in the user's preferred orientation style regardless of actual screen orientation.
## Disabling dark theme {#android-in-app-message-dark-theme-customization}
By default, `IInAppMessageManagerListener`'s `beforeInAppMessageDisplayed()` checks the system settings and conditionally enables dark theme styling on the message with the following code:
```java
@Override
public InAppMessageOperation beforeInAppMessageDisplayed(IInAppMessage inAppMessage) {
if (inAppMessage instanceof IInAppMessageThemeable && ViewUtils.isDeviceInNightMode(BrazeInAppMessageManager.getInstance().getApplicationContext())) {
((IInAppMessageThemeable) inAppMessage).enableDarkTheme();
}
return InAppMessageOperation.DISPLAY_NOW;
}
```
```kotlin
override fun beforeInAppMessageDisplayed(inAppMessage: IInAppMessage): InAppMessageOperation {
if (inAppMessage is IInAppMessageThemeable && ViewUtils.isDeviceInNightMode(BrazeInAppMessageManager.getInstance().applicationContext!!)) {
(inAppMessage as IInAppMessageThemeable).enableDarkTheme()
}
return InAppMessageOperation.DISPLAY_NOW
}
```
To change this, you can call [`enableDarkTheme`](https://braze-inc.github.io/braze-android-sdk/kdoc/braze-android-sdk/com.braze.models.inappmessage/-i-in-app-message-themeable/enable-dark-theme.html) at any step in the pre-display process to implement your own conditional logic.
## Customizing the Google Play review prompt
Due to the limitations and restrictions set by Google, custom Google Play review prompts are not currently supported by Braze. While some users have been able to integrate these prompts successfully, others have shown low success rates due to [Google Play quotas](https://developer.android.com/guide/playcore/in-app-review#quotas). Integrate at your own risk. Refer to documentation on [Google Play in-app review prompts](https://developer.android.com/guide/playcore/in-app-review).
## Prerequisites
Before you can use this feature, you'll need to [integrate the Swift Braze SDK](https://www.braze.com/docs/fr/fr/developer_guide/sdk_integration/?sdktab=swift).
## Setting up the UI delegate (required)
To customize the presentation of in-app messages and react to various lifecycle events, you'll need to set up [`BrazeInAppMessageUIDelegate`](https://braze-inc.github.io/braze-swift-sdk/documentation/brazeui/brazeinappmessageuidelegate). This is a delegate protocol used for receiving and processing triggered in-app message payloads, receiving display lifecycle events, and controlling display timing. To use `BrazeInAppMessageUIDelegate`, you must:
- Use the default [`BrazeInAppMessageUI`](https://braze-inc.github.io/braze-swift-sdk/documentation/brazeui/brazeinappmessageui) implementation as your `inAppMessagePresenter`.
- Include the `BrazeUI` library in your project.
### Step 1: Implement the `BrazeInAppMessageUIDelegate` protocol
First, implement the `BrazeInAppMessageUIDelegate` protocol and any corresponding methods you wish. In our example below, we are implementing this protocol in our application's `AppDelegate` class.
```swift
extension AppDelegate: BrazeInAppMessageUIDelegate {
// Implement your protocol methods here.
}
```
```objc
@interface AppDelegate ()
@end
@implementation AppDelegate
// Implement your protocol methods here.
@end
```
### Step 2: Assign the `delegate` object
Assign the `delegate` object on the `BrazeInAppMessageUI` instance before assigning this in-app message UI as your `inAppMessagePresenter`.
```swift
let inAppMessageUI = BrazeInAppMessageUI()
inAppMessageUI.delegate = self
AppDelegate.braze?.inAppMessagePresenter = inAppMessageUI
```
```objc
BrazeInAppMessageUI *inAppMessageUI = [[BrazeInAppMessageUI alloc] init];
inAppMessageUI.delegate = self;
AppDelegate.braze.inAppMessagePresenter = inAppMessageUI;
```
**Important:**
Not all delegate methods are available in Objective-C due to the incompatibility of their parameters with the language runtime.
**Tip:**
For a step-by-step implementation of the in-app message UI delegate, refer to this [tutorial](https://braze-inc.github.io/braze-swift-sdk/tutorials/braze/c1-inappmessageui).
## On-click behavior
Each `Braze.InAppMessage` object contains a corresponding [`ClickAction`](https://braze-inc.github.io/braze-swift-sdk/documentation/brazekit/braze/inappmessage/clickaction), which defines the behavior upon clicking.
### Click action types
The `clickAction` property on your `Braze.InAppMessage` defaults to `.none` but can be set to one of the following values:
| `ClickAction` | On-Click Behavior |
| -------------------------- | -------- |
| `.url(URL, useWebView: Bool)` | Opens the given URL in an external browser. If `useWebView` is set to `true`, it will open in a web view. |
| `.none` | The message will be dismissed when clicked. |
{: .reset-td-br-1 .reset-td-br-2 aria-label="Click action types" }
**Important:**
For in-app messages containing buttons, the message `clickAction` will also be included in the final payload if the click action is added prior to adding the button text.
### Customizing on-click behavior
To customize this behavior, you may modify the `clickAction` property by referring to the following sample:
```swift
func inAppMessage(
_ ui: BrazeInAppMessageUI,
prepareWith context: inout BrazeInAppMessageUI.PresentationContext
) {
if let newUrl = URL(string: "{your-url}") {
context.message.clickAction = .url(newUrl, useWebView: true)
}
}
```
The `inAppMessage(_:prepareWith:)` method is not available in Objective-C.
### Handling the custom behavior
The following [`BrazeInAppMessageUIDelegate`](https://braze-inc.github.io/braze-swift-sdk/documentation/brazeui/brazeinappmessageuidelegate) delegate method is called when a user clicks an in-app message. This callback is triggered for user-initiated clicks on in-app message buttons and HTML in-app message buttons (links), and a button ID is provided as an optional parameter for these interactions. This callback is not invoked for programmatic clicks triggered through `brazeBridge.logClick()`.
```swift
func inAppMessage(
_ ui: BrazeInAppMessageUI,
shouldProcess clickAction: Braze.InAppMessage.ClickAction,
buttonId: String?,
message: Braze.InAppMessage,
view: InAppMessageView
) -> Bool
```
```objc
- (BOOL)inAppMessage:(BrazeInAppMessageUI *)ui
shouldProcess:(enum BRZInAppMessageRawClickAction)clickAction
url:(NSURL *)uri
buttonId:(NSString *)buttonId
message:(BRZInAppMessageRaw *)message
view:(UIView *)view;
```
This method returns a boolean value to indicate if Braze should continue to execute the click action.
```swift
func inAppMessage(
_ ui: BrazeInAppMessageUI, shouldProcess clickAction: Braze.InAppMessage.ClickAction,
buttonId: String?, message: Braze.InAppMessage, view: InAppMessageView
) -> Bool {
guard let buttonId,
let idInt = Int(buttonId)
else { return true }
var button: BrazeKit.Braze.InAppMessage.Button? = nil
switch message {
case .modal(let modal):
button = modal.buttons[idInt]
case .modalImage(let modalImage):
button = modalImage.buttons[idInt]
case .full(let full):
button = full.buttons[idInt]
case .fullImage(let fullImage):
button = fullImage.buttons[idInt]
default:
break
}
print(button?.id)
print(button?.text)
print(button?.clickAction)
return true
}
```
```objc
- (BOOL)inAppMessage:(BrazeInAppMessageUI *)ui
shouldProcess:(enum BRZInAppMessageRawClickAction)clickAction
url:(NSURL *)uri
buttonId:(NSString *)buttonId
message:(BRZInAppMessageRaw *)message
view:(UIView *)view {
NSInteger buttonInt = [buttonId integerValue];
if (message.type == BRZInAppMessageRawTypeFull || message.type == BRZInAppMessageRawTypeModal) {
BRZInAppMessageRawButton *button = message.buttons[buttonInt];
NSLog(@"%ld", (long)button.identifier);
NSLog(@"%@", button.text);
NSLog(@"%ld", (long)button.clickAction);
}
return YES;
}
```
## Swiping to dismiss slideup messages
By default, slideup in-app messages can be dismissed with a swipe gesture. The direction of the swipe depends on the slideup position:
- **Left or right swipe:** Dismisses the slideup regardless of its position.
- **Slideup from the bottom:** Swiping from top to bottom dismisses the message. Swiping from bottom to top does not dismiss it.
- **Slideup from the top:** Swiping from bottom to top dismisses the message. Swiping from top to bottom does not dismiss it.
This swipe behavior is built into the default `BrazeInAppMessageUI` [`SlideupView`](https://braze-inc.github.io/braze-swift-sdk/documentation/brazeui/brazeinappmessageui/slideupview) and applies only to slideup in-app messages. Modal and full in-app messages don't support swipe-to-dismiss. To further customize the slideup view, including swipe behavior, you can modify the [`SlideupView.Attributes`](https://braze-inc.github.io/braze-swift-sdk/documentation/brazeui/brazeinappmessageui/slideupview/attributes-swift.struct) or provide a custom view via subclassing.
**Note:**
Tapping outside of a slideup message does not dismiss it. For modal or full in-app messages, you can enable outside tap dismissals using the `dismissOnBackgroundTap` attribute described below.
## Customizing modal dismissals
To enable outside tap dismissals, you can modify the `dismissOnBackgroundTap` property on the `Attributes` struct of the in-app message type you wish to customize.
For example, if you wish to enable this feature for modal image in-app messages, you can configure the following:
```swift
BrazeInAppMessageUI.ModalImageView.Attributes.defaults.dismissOnBackgroundTap = true
```
Customization via `Attributes` is not available in Objective-C.
The default value is `false`. This determines if the modal in-app message will be dismissed when the user taps outside of the in-app message.
| `DismissModalOnOutsideTap` | Description |
|----------|-------------|
| `true` | Modal in-app messages will be dismissed on outside tap. |
| `false` | Default, modal in-app messages will not be dismissed on outside tap. |
{: .reset-td-br-1 .reset-td-br-2 aria-label="Customizing modal dismissals" }
For more details on in-app message customization, refer to this [article](https://braze-inc.github.io/braze-swift-sdk/documentation/braze/in-app-message-customization).
## Customizing message orientation
You can customize the orientation of your in-app messages. You can set a new default orientation for all messages or set a custom orientation for a single message.
To choose a default orientation for all in-app messages, use the [`inAppMessage(_:prepareWith:)`](https://braze-inc.github.io/braze-swift-sdk/documentation/brazeui/brazeinappmessageuidelegate/inappmessage(_:preparewith:)-11fog) method to set the `preferredOrientation` property on the `PresentationContext`.
For example, to set portrait as the default orientation:
```swift
func inAppMessage(
_ ui: BrazeInAppMessageUI,
prepareWith context: inout BrazeInAppMessageUI.PresentationContext
) {
context.preferredOrientation = .portrait
}
```
```objc
- (void)inAppMessage:(BrazeInAppMessageUI *)ui
prepareWith:(BrazeInAppMessageUIPresentationContextRaw *)context {
context.preferredOrientation = BRZInAppMessageRawOrientationPortrait;
}
```
To set the orientation for a single message, modify the `orientation` property of `Braze.InAppMessage`:
```swift
// Set inAppMessage orientation to support any configuration
inAppMessage.orientation = .any
// Set inAppMessage orientation to only display in portrait
inAppMessage.orientation = .portrait
// Set inAppMessage orientation to only display in landscape
inAppMessage.orientation = .landscape
```
```objc
// Set inAppMessage orientation to support any configuration
inAppMessage.orientation = BRZInAppMessageRawOrientationAny;
// Set inAppMessage orientation to only display in portrait
inAppMessage.orientation = BRZInAppMessageRawOrientationPortrait;
// Set inAppMessage orientation to only display in landscape
inAppMessage.orientation = BRZInAppMessageRawOrientationLandscape;
```
After the in-app message is displayed, any device orientation changes while the message is still being displayed will cause the message to rotate with the device (provided it's supported by the message's `orientation` configuration).
The device orientation must also be supported by the in-app message's `orientation` property for the message to display. Additionally, the `preferredOrientation` setting will only be respected if it is included in your application's supported interface orientations under the **Deployment Info** section of your target's settings in Xcode.

**Note:**
The orientation is applied only for the presentation of the message. After the device changes orientation, the message view adopts one of the orientations it supports. On smaller devices (iPhones, iPod Touch), setting a landscape orientation for a modal or full in-app message may lead to truncated content.
## Customizing display timing
You can control if an available in-app message will display during certain points of your user experience. If there are situations where you would not want the in-app message to appear, such as during a fullscreen game or on a loading screen, you can delay or discard pending in-app message messages. To control the timing of in-app message, use the `inAppMessage(_:displayChoiceForMessage:)` [delegate method](https://braze-inc.github.io/braze-swift-sdk/documentation/brazeui/brazeinappmessageuidelegate/inappmessage(_:displaychoiceformessage:)-9w1nb) to set the `BrazeInAppMessageUI.DisplayChoice` property.
```swift
func inAppMessage(
_ ui: BrazeInAppMessageUI,
displayChoiceForMessage message: Braze.InAppMessage
) -> BrazeInAppMessageUI.DisplayChoice
```
```objc
- (enum BRZInAppMessageUIDisplayChoice)inAppMessage:(BrazeInAppMessageUI *)ui displayChoiceForMessage:(BRZInAppMessageRaw *)message
```
Configure `BrazeInAppMessageUI.DisplayChoice` to return one of the following values:
| Display Choice | Behavior |
| ----------------------------------- | --------------------------------------------------------------------------------------------------------------------------- |
| `.now` | The message will be displayed immediately. This is the default value. |
| `.reenqueue` | The message will be not be displayed and will be placed back on the top of the stack. |
| `.later` | The message will be not be displayed and will be placed back on the top of the stack. (Deprecated, please use `.reenqueue`) |
| `.discard` | The message will be discarded and will not be displayed. |
{: .reset-td-br-1 .reset-td-br-2 aria-label="Customizing display timing" }
**Tip:**
For a sample of `InAppMessageUI`, check out our [Swift Braze SDK repository](https://github.com/braze-inc/braze-swift-sdk/tree/main/Examples/Swift/Sources/InAppMessageUI) and [Objective-C](https://github.com/braze-inc/braze-swift-sdk/tree/main/Examples/ObjC/Sources/InAppMessageUI).
## Hiding the status bar
For `Full`, `FullImage` and `HTML` in-app messages, the SDK will hide the status bar by default. For other types of in-app messages, the status bar is left untouched. To configure this behavior, use the `inAppMessage(_:prepareWith:)` [delegate method](https://braze-inc.github.io/braze-swift-sdk/documentation/brazeui/brazeinappmessageuidelegate/inappmessage(_:preparewith:)-11fog) to set the `statusBarHideBehavior` property on the `PresentationContext`. This field takes one of the following values:
| Status Bar Hide Behavior | Description |
| ----------------------------------- | ------------------------------------------------------------------------------------- |
| `.auto` | The message view decides the status bar hidden state. |
| `.hidden` | Always hide the status bar. |
| `.visible` | Always display the status bar. |
{: .reset-td-br-1 .reset-td-br-2 aria-label="Hiding the status bar" }
## Disabling dark mode
To prevent in-app messages from adopting dark mode styling when the user device has dark mode enabled, implement the `inAppMessage(_:prepareWith:)` [delegate method](https://braze-inc.github.io/braze-swift-sdk/documentation/brazeui/brazeinappmessageuidelegate/inappmessage(_:preparewith:)-11fog) method. The `PresentationContext` passed to the method contains a reference to the `InAppMessage` object to be presented. Each `InAppMessage` has a `themes` property containing a `dark` and `light` mode theme. If you set the `themes.dark` property to `nil`, Braze will automatically present the in-app message using its light theme.
In-app message types with buttons have an additional `themes` object on their `buttons` property. To prevent buttons from adopting dark mode styling, you can use [`map(_:)`](https://developer.apple.com/documentation/swift/array/map(_:)-87c4d) to create a new array of buttons with a `light` theme and no `dark` theme.
```swift
func inAppMessage(
_ ui: BrazeInAppMessageUI,
prepareWith context: inout BrazeInAppMessageUI.PresentationContext
) {
switch context.message {
case .slideup:
guard var slideup = context.message.slideup else { return }
slideup.themes.dark = nil
context.message.slideup = slideup
case .modal:
guard var modal = context.message.modal else { return }
modal.themes.dark = nil
modal.buttons = modal.buttons.map {
var newButton = $0
newButton.themes = .init(themes: ["light": $0.themes.light])
return newButton
}
context.message.modal = modal
case .modalImage:
guard var modalImage = context.message.modalImage else { return }
modalImage.themes.dark = nil
modalImage.buttons = modalImage.buttons.map {
var newButton = $0
newButton.themes = .init(themes: ["light": $0.themes.light])
return newButton
}
context.message.modalImage = modalImage
case .full:
guard var full = context.message.full else { return }
full.themes.dark = nil
full.buttons = full.buttons.map {
var newButton = $0
newButton.themes = .init(themes: ["light": $0.themes.light])
return newButton
}
context.message.full = full
case .fullImage:
guard var fullImage = context.message.fullImage else { return }
fullImage.themes.dark = nil
fullImage.buttons = fullImage.buttons.map {
var newButton = $0
newButton.themes = .init(themes: ["light": $0.themes.light])
return newButton
}
context.message.fullImage = fullImage
default:
break
}
}
```
```objc
- (void)inAppMessage:(BrazeInAppMessageUI *)ui
prepareWith:(BrazeInAppMessageUIPresentationContextRaw *)context {
switch (context.message.type) {
case BRZInAppMessageRawTypeSlideup: {
NSMutableDictionary *updatedThemes = [context.message.themes mutableCopy];
[updatedThemes removeObjectForKey:@"dark"];
context.message.themes = updatedThemes;
break;
}
case BRZInAppMessageRawTypeModal:
case BRZInAppMessageRawTypeFull:
{
NSMutableDictionary *updatedThemes = [context.message.themes mutableCopy];
[updatedThemes removeObjectForKey:@"dark"];
context.message.themes = updatedThemes;
NSMutableArray *updatedButtons = [NSMutableArray arrayWithCapacity:context.message.buttons.count];
for (BRZInAppMessageRawButton *button in context.message.buttons) {
BRZInAppMessageRawButtonTheme *lightTheme = BRZInAppMessageRawButtonTheme.defaultLight;
BRZInAppMessageRawButton *newButton = [button mutableCopy];
newButton.textColor = lightTheme.textColor;
newButton.backgroundColor = lightTheme.backgroundColor;
newButton.borderColor = lightTheme.borderColor;
[updatedButtons addObject:newButton];
}
context.message.buttons = updatedButtons;
break;
}
default:
break;
}
}
```
## Customizing the app store review prompt
You can use in-app messages in a campaign to ask users for an App Store review.
**Note:**
Because this example prompt overrides default behavior of Braze, we cannot automatically track impressions if it is implemented. You must [log your own analytics](https://www.braze.com/docs/fr/fr/developer_guide/analytics/).
### Step 1: Set the in-app message delegate
First, set the [`BrazeInAppMessageUIDelegate`](https://www.braze.com/docs/fr/fr/developer_guide/in_app_messages/customization/#swift_setting-up-the-ui-delegate-required) in your app.
### Step 2: Disable the default App Store review message
Next, implement the `inAppMessage(_:displayChoiceForMessage:)` [delegate method](https://braze-inc.github.io/braze-swift-sdk/documentation/brazeui/brazeinappmessageuidelegate/inappmessage(_:displaychoiceformessage:)-9w1nb) to disable the default App Store review message.
```swift
func inAppMessage(_ ui: BrazeInAppMessageUI, displayChoiceForMessage message: Braze.InAppMessage) -> BrazeInAppMessageUI.DisplayChoice {
if message.extras["AppStore Review"] != nil,
let messageUrl = message.clickAction.url {
UIApplication.shared.open(messageUrl, options: [:], completionHandler: nil)
return .discard
} else {
return .now
}
}
```
```objc
- (enum BRZInAppMessageUIDisplayChoice)inAppMessage:(BrazeInAppMessageUI *)ui
displayChoiceForMessage:(BRZInAppMessageRaw *)message {
if (message.extras != nil && message.extras[@"AppStore Review"] != nil) {
[[UIApplication sharedApplication] openURL:message.url options:@{} completionHandler:nil];
return BRZInAppMessageUIDisplayChoiceDiscard;
} else {
return BRZInAppMessageUIDisplayChoiceNow;
}
}
```
### Step 3: Create a deep link
In your deep link handling code, add the following code to process the `{YOUR-APP-SCHEME}:app-store-review` deep link. Note that you will need to import `StoreKit` to use `SKStoreReviewController`:
```swift
func application(_ app: UIApplication, open url: URL, options: [UIApplicationOpenURLOptionsKey : Any] = [:]) -> Bool {
let urlString = url.absoluteString.removingPercentEncoding
if (urlString == "{YOUR-APP-SCHEME}:app-store-review") {
SKStoreReviewController.requestReview()
return true;
}
// Other deep link handling code…
}
```
```objc
- (BOOL)application:(UIApplication *)app openURL:(NSURL *)url options:(NSDictionary *)options {
NSString *urlString = url.absoluteString.stringByRemovingPercentEncoding;
if ([urlString isEqualToString:@"{YOUR-APP-SCHEME}:app-store-review"]) {
[SKStoreReviewController requestReview];
return YES;
}
// Other deep link handling code…
}
```
### Step 4: Set custom on-click behavior
Next, create an in-app messaging campaign with the following:
- The key-value pair `"AppStore Review" : "true"`
- The on-click behavior set to "Deep Link Into App", using the deep link `{YOUR-APP-SCHEME}:app-store-review`.
**Tip:**
Apple limits App Store review prompts to a maximum of three times per year for each user, so your campaign should be [rate-limited](https://www.braze.com/docs/fr/fr/user_guide/engagement_tools/campaigns/building_campaigns/rate-limiting/) to three times per year per user.
Users may turn off App Store review prompts. As a result, your custom review prompt should not promise that a native App Store review prompt will appear or directly ask for a review.
## Prerequisites
Before you can use this feature, you'll need to [integrate the React Native Braze SDK](https://www.braze.com/docs/fr/fr/developer_guide/sdk_integration/?sdktab=react%20native).
## Methods for logging
You can use these methods by passing your `BrazeInAppMessage` instance to log analytics and perform actions:
| Method | Description |
| --------------------------------------------------------- | ------------------------------------------------------------------------------------- |
| `logInAppMessageClicked(inAppMessage)` | Logs a click for the provided in-app message data. |
| `logInAppMessageImpression(inAppMessage)` | Logs an impression for the provided in-app message data. |
| `logInAppMessageButtonClicked(inAppMessage, buttonId)` | Logs a button click for the provided in-app message data and button ID. |
| `hideCurrentInAppMessage()` | Dismisses the currently displayed in-app message. |
| `performInAppMessageAction(inAppMessage)` | Performs the action for an in-app message. |
| `performInAppMessageButtonAction(inAppMessage, buttonId)` | Performs the action for an in-app message button. |
{: .reset-td-br-1 .reset-td-br-2 aria-label="Methods for logging" }
## Handling message data
In most cases, you can use the `Braze.addListener` method to register event listeners to handle data coming from in-app messages.
Additionally, you can access the in-app message data in the JavaScript layer by calling the `Braze.subscribeToInAppMessage` method to have the SDKs publish an `inAppMessageReceived` event when an in-app message is triggered. Pass a callback to this method to execute your own code when the in-app message is triggered and received by the listener.
To customize how message data is handled, refer to the following implementation examples:
To enhance the default behavior, or if you don't have access to customize the native iOS or Android code, we recommend that you disable the default UI while still receiving in-app message events from Braze. To disable the default UI, pass `false` to the `Braze.subscribeToInAppMessage` method and use the in-app message data to construct your own message in JavaScript. Note that you will need to manually log analytics on your messages if you choose to disable the default UI.
```javascript
import Braze from "@braze/react-native-sdk";
// Option 1: Listen for the event directly via `Braze.addListener`.
//
// You may use this method to accomplish the same thing if you don't
// wish to make any changes to the default Braze UI.
Braze.addListener(Braze.Events.IN_APP_MESSAGE_RECEIVED, (event) => {
console.log(event.inAppMessage);
});
// Option 2: Call `subscribeToInAppMessage`.
//
// Pass in `false` to disable the automatic display of in-app messages.
Braze.subscribeToInAppMessage(false, (event) => {
console.log(event.inAppMessage);
// Use `event.inAppMessage` to construct your own custom message UI.
});
```
To include more advanced logic to determine whether or not to show an in-app message using the built-in UI, implement in-app messages through the native layer.
**Warning:**
Since this is an advanced customization option, note that overriding the default Braze implementation will also nullify the logic to emit in-app message events to your JavaScript listeners. If you wish to still use `Braze.subscribeToInAppMessage` or `Braze.addListener` as described in [Accessing in-app message data](#accessing-in-app-message-data), you will need to handle publishing the events yourself.
Implement the `IInAppMessageManagerListener` as described in our Android article on [Custom Manager Listener](https://www.braze.com/docs/fr/fr/developer_guide/in_app_messages/customization/?sdktab=android#android_setting-custom-manager-listeners). In your `beforeInAppMessageDisplayed` implementation, you can access the `inAppMessage` data, send it to the JavaScript layer, and decide to show or not show the native message based on the return value.
For more on these values, see our [Android documentation](https://www.braze.com/docs/fr/fr/developer_guide/in_app_messages/).
```java
// In-app messaging
@Override
public InAppMessageOperation beforeInAppMessageDisplayed(IInAppMessage inAppMessage) {
WritableMap parameters = new WritableNativeMap();
parameters.putString("inAppMessage", inAppMessage.forJsonPut().toString());
getReactNativeHost()
.getReactInstanceManager()
.getCurrentReactContext()
.getJSModule(DeviceEventManagerModule.RCTDeviceEventEmitter.class)
.emit("inAppMessageReceived", parameters);
// Note: return InAppMessageOperation.DISCARD if you would like
// to prevent the Braze SDK from displaying the message natively.
return InAppMessageOperation.DISPLAY_NOW;
}
```
### Overriding the default UI delegate
By default, [`BrazeInAppMessageUI`](https://braze-inc.github.io/braze-swift-sdk/documentation/brazeui/brazeinappmessageui/) is created and assigned when you initialize the `braze` instance. `BrazeInAppMessageUI` is an implementation of the [`BrazeInAppMessagePresenter`](https://braze-inc.github.io/braze-swift-sdk/documentation/brazekit/brazeinappmessagepresenter) protocol and comes with a `delegate` property that can be used to customize the handling of in-app messages that have been received.
1. Implement the `BrazeInAppMessageUIDelegate` delegate as described in [our iOS article here](https://braze-inc.github.io/braze-swift-sdk/tutorials/braze/c1-inappmessageui).
2. In the `inAppMessage(_:displayChoiceForMessage:)` delegate method, you can access the `inAppMessage` data, send it to the JavaScript layer, and decide to show or not show the native message based on the return value.
For more details on these values, see our [iOS documentation](https://braze-inc.github.io/braze-swift-sdk/documentation/brazeui/brazeinappmessageuidelegate/).
```objc
- (enum BRZInAppMessageUIDisplayChoice)inAppMessage:(BrazeInAppMessageUI *)ui
displayChoiceForMessage:(BRZInAppMessageRaw *)message {
// Convert the message to a JavaScript representation.
NSData *inAppMessageData = [message json];
NSString *inAppMessageString = [[NSString alloc] initWithData:inAppMessageData encoding:NSUTF8StringEncoding];
NSDictionary *arguments = @{
@"inAppMessage" : inAppMessageString
};
// Send to JavaScript.
[self sendEventWithName:@"inAppMessageReceived" body:arguments];
// Note: Return `BRZInAppMessageUIDisplayChoiceDiscard` if you would like
// to prevent the Braze SDK from displaying the message natively.
return BRZInAppMessageUIDisplayChoiceNow;
}
```
To use this delegate, assign it to `brazeInAppMessagePresenter.delegate` after initializing the `braze` instance.
**Note:**
`BrazeUI` can only be imported in Objective-C or Swift. If you are using Objective-C++, you will need to handle this in a separate file.
```objc
@import BrazeUI;
- (BOOL)application:(UIApplication *)application didFinishLaunchingWithOptions:(NSDictionary *)launchOptions {
BRZConfiguration *configuration = [[BRZConfiguration alloc] initWithApiKey:apiKey endpoint:endpoint];
Braze *braze = [BrazeReactBridge initBraze:configuration];
((BrazeInAppMessageUI *)braze.inAppMessagePresenter).delegate = [[CustomDelegate alloc] init];
AppDelegate.braze = braze;
}
```
### Overriding the default native UI
If you wish to fully customize the presentation of your in-app messages at the native iOS layer, conform to the [`BrazeInAppMessagePresenter`](https://braze-inc.github.io/braze-swift-sdk/documentation/brazekit/brazeinappmessagepresenter) protocol and assign your custom presenter following the sample below:
```objc
BRZConfiguration *configuration = [[BRZConfiguration alloc] initWithApiKey:apiKey endpoint:endpoint];
Braze *braze = [BrazeReactBridge initBraze:configuration];
braze.inAppMessagePresenter = [[MyCustomPresenter alloc] init];
AppDelegate.braze = braze;
```
## Customizing the display behavior
You can change the display behavior of in-app messages at runtime via the following:
```csharp
// Sets in-app messages to display immediately when triggered.
Appboy.AppboyBinding.SetInAppMessageDisplayAction(BrazeUnityInAppMessageDisplayActionType.IAM_DISPLAY_NOW);
// Sets in-app messages to display at a later time and be saved in a stack.
Appboy.AppboyBinding.SetInAppMessageDisplayAction(BrazeUnityInAppMessageDisplayActionType.IAM_DISPLAY_LATER);
// Sets in-app messages to be discarded after being triggered.
Appboy.AppboyBinding.SetInAppMessageDisplayAction(BrazeUnityInAppMessageDisplayActionType.IAM_DISCARD);
```
## Setting a custom listener
If you require more control over how a user interacts with in-app messages, use a `BrazeInAppMessageListener` and assign it to `Appboy.AppboyBinding.inAppMessageListener`. For any delegates you don't want to use, you can simply leave them as `null`.
```csharp
BrazeInAppMessageListener listener = new BrazeInAppMessageListener() {
BeforeInAppMessageDisplayed = BeforeInAppMessageDisplayed,
OnInAppMessageButtonClicked = OnInAppMessageButtonClicked,
OnInAppMessageClicked = OnInAppMessageClicked,
OnInAppMessageHTMLClicked = OnInAppMessageHTMLClicked,
OnInAppMessageDismissed = OnInAppMessageDismissed,
};
Appboy.AppboyBinding.inAppMessageListener = listener;
public void BeforeInAppMessageDisplayed(IInAppMessage inAppMessage) {
// Executed before an in-app message is displayed.
}
public void OnInAppMessageButtonClicked(IInAppMessage inAppMessage, InAppMessageButton inAppMessageButton) {
// Executed whenever an in-app message button is clicked.
}
public void OnInAppMessageClicked(IInAppMessage inAppMessage) {
// Executed whenever an in-app message is clicked.
}
public void OnInAppMessageHTMLClicked(IInAppMessage inAppMessage, Uri uri) {
// Executed whenever an HTML in-app message is clicked.
}
public void OnInAppMessageDismissed(IInAppMessage inAppMessage) {
// Executed whenever an in-app message is dismissed without a click.
}
```
# Déclencher des messages in-app via le SDK Braze
Source: /docs/fr/developer_guide/in_app_messages/triggering_messages/index.md
# Déclencher des messages in-app {#trigger-in-app-messages}
> Découvrez comment déclencher des messages in-app grâce au SDK de Braze.
## Déclencheurs et réception/distribution de messages {#message-triggers-and-delivery}
Les messages in-app sont déclenchés lorsque le SDK enregistre l'un des types d'événements personnalisés suivants : `Session Start`, `Push Click`, `Any Purchase`, `Specific Purchase` et `Custom Event` (les deux derniers contenant des filtres de propriétés robustes).
Au début de la session d'un utilisateur, Braze enverra tous les messages in-app éligibles à son appareil, tout en préchargeant simultanément les ressources pour minimiser la latence d'affichage. Si l'événement déclencheur comporte plusieurs messages in-app éligibles, seul le message ayant la priorité la plus élevée sera délivré. Pour plus d'informations, voir [Cycle de vie des sessions](https://www.braze.com/docs/fr/fr/developer_guide/analytics/tracking_sessions/#about-the-session-lifecycle).
**Note:**
Les messages in-app ne peuvent pas être déclenchés par l'API ou par des événements de l'API—uniquement par des événements personnalisés enregistrés par le SDK. Pour en savoir plus sur la journalisation, reportez-vous à la section [Journalisation des événements personnalisés](https://www.braze.com/docs/fr/fr/developer_guide/analytics/logging_events/).
## Types de messages in-app {#types-of-in-app-messages}
Braze envoie les types de messages in-app suivants aux appareils des utilisateurs au début de la session : `inapp` et `templated_iam`. En tant qu'utilisateur du tableau de bord, vous ne voyez pas les différents types, mais Braze les traite différemment en fonction de la configuration et du contenu.
### `inapp` (standard) {#inapp-standard}
Un message in-app `inapp` (ou « [standard](https://www.braze.com/docs/fr/fr/user_guide/message_building_by_channel/in-app_messages/#standard-message-types) ») est déjà modélisé avec les informations nécessaires, telles que les attributs personnalisés que Braze connaît déjà. En général, lorsque le message in-app est téléchargé sur l'appareil, l'événement déclencheur amène le SDK à afficher le message in-app `inapp` même lorsque l'appareil est hors ligne ou en mode avion.
### `templated_iam` (modélisé) {#templated_iam-templated}
Un message in-app `templated_iam` (ou « modélisé ») n'est pas encore modélisé avec les informations nécessaires. Braze doit effectuer une autre requête pour récupérer les informations avant que le message puisse apparaître.
In-app messages are delivered as templated in-app messages when **Re-evaluate campaign eligibility before displaying** is selected or if any of the following Liquid tags exist in the message:
- `canvas_entry_properties`
- `connected_content`
- SMS variables such as `{sms.${*}}`
- `catalog_items`
- `catalog_selection_items`
- `event_properties`
This means that during session start, the device will receive the trigger of that in-app message instead of the entire message. When the user triggers the in-app message, the user's device will make a network request to fetch the actual message.
**Note:**
The message will not be delivered if the device doesn't have access to the internet. The message might not be delivered if the Liquid logic takes too long to resolve.
## Paires clé-valeur {#key-value-pairs}
Lorsque vous créez une Campaign dans Braze, vous pouvez définir des paires clé-valeur en tant qu'`extras`, que l'objet de message in-app peut utiliser pour envoyer des données à votre application.
```javascript
import * as braze from "@braze/web-sdk";
braze.subscribeToInAppMessage(function(inAppMessage) {
// control group messages should always be "shown"
// this will log an impression and not show a visible message
if (inAppMessage instanceof braze.ControlMessage) {
return braze.showInAppMessage(inAppMessage);
}
if (inAppMessage instanceof braze.InAppMessage) {
const extras = inAppMessage.extras;
if (extras) {
for (const key in extras) {
console.log("key: " + key + ", value: " + extras[key]);
}
}
}
braze.showInAppMessage(inAppMessage);
});
```
```java
Map getExtras()
```
```kotlin
extras: Map
```
**Tip:**
Pour plus d'informations, consultez le [KDoc](https://braze-inc.github.io/braze-android-sdk/kdoc/braze-android-sdk/com.braze.models.inappmessage/-i-in-app-message/index.html#1498425856%2FProperties%2F-1725759721).
L'exemple suivant utilise une logique personnalisée pour définir la présentation d'un message in-app en fonction de ses paires clé-valeur dans `extras`. Pour un exemple de personnalisation complète, consultez [notre exemple d'application](https://github.com/braze-inc/braze-swift-sdk/tree/main/Examples).
```swift
let customization = message.extras["custom-display"] as? String
if customization == "colorful-slideup" {
// Perform your custom logic.
}
```
```objc
if ([message.extras[@"custom-display"] isKindOfClass:[NSString class]]) {
NSString *customization = message.extras[@"custom-display"];
if ([customization isEqualToString:@"colorful-slideup"]) {
// Perform your custom logic.
}
}
```
## Désactivation des déclencheurs automatiques {#disabling-automatic-triggers}
Par défaut, les messages in-app se déclenchent automatiquement. Pour désactiver cette fonction :
Supprimez l'appel à `braze.automaticallyShowInAppMessages()` dans votre extrait de code de chargement, puis créez une logique personnalisée pour gérer l'affichage ou non d'un message in-app.
```javascript
braze.subscribeToInAppMessage(function(inAppMessage) {
// control group messages should always be "shown"
// this will log an impression and not show a visible message
if (inAppMessage.isControl) { // v4.5.0+, otherwise use `inAppMessage instanceof braze.ControlMessage`
return braze.showInAppMessage(inAppMessage);
}
// Display the in-app message. You could defer display here by pushing this message to code within your own application.
// If you don't want to use the display capabilities in Braze, you could alternatively pass the in-app message to your own display code here.
if ( should_show_the_message_according_to_your_custom_logic ) {
braze.showInAppMessage(inAppMessage);
} else {
// do nothing
}
});
```
**Important:**
Si vous appelez `braze.showInAppMessage` sans retirer `braze.automaticallyShowInAppMessages()`, les messages peuvent s'afficher deux fois.
Pour un contrôle plus avancé du timing des messages, y compris le report et la restauration des messages déclenchés, veuillez vous référer à notre [tutoriel : Report et restauration des messages déclenchés](https://www.braze.com/docs/fr/fr/developer_guide/in_app_messages/tutorials/deferring_triggered_messages/).
1. Implémentez [`IInAppMessageManagerListener`](https://www.braze.com/docs/fr/fr/developer_guide/in_app_messages/customization/?sdktab=android&tab=global%20listener#android_step-1-implement-the-custom-manager-listener) pour définir un écouteur personnalisé.
2. Mettez à jour votre méthode [`beforeInAppMessageDisplayed()`](https://braze-inc.github.io/braze-android-sdk/kdoc/braze-android-sdk/com.braze.ui.inappmessage.listeners/-i-in-app-message-manager-listener/before-in-app-message-displayed.html) afin qu'elle renvoie [`InAppMessageOperation.DISCARD`](https://braze-inc.github.io/braze-android-sdk/kdoc/braze-android-sdk/com.braze.ui.inappmessage/-in-app-message-operation/-d-i-s-c-a-r-d/index.html).
Pour un contrôle plus avancé du timing des messages, y compris l'affichage différé et la remise en file d'attente, veuillez consulter notre page [Personnalisation des messages](https://www.braze.com/docs/fr/fr/developer_guide/in_app_messages/customization/?tab=global%20listener&subtab=kotlin#android_step-2-instruct-braze-to-use-the-custom-manager-listener).
1. Implémentez le délégué `BrazeInAppMessageUIDelegate` dans votre application. Pour un guide complet, veuillez vous référer au [tutoriel : Interface utilisateur des messages in-app](https://braze-inc.github.io/braze-swift-sdk/tutorials/braze/c1-inappmessageui).
2. Mettez à jour votre méthode de délégué `inAppMessage(_:displayChoiceForMessage:)` pour qu'elle retourne `.discard`.
Pour un contrôle plus avancé du timing des messages, y compris le report et la restauration des messages déclenchés, veuillez vous référer à notre [tutoriel : Report et restauration des messages déclenchés](https://www.braze.com/docs/fr/fr/developer_guide/in_app_messages/tutorials/deferring_triggered_messages/).
1. Vérifiez que vous utilisez l'initialisateur d'intégration automatique, qui est activé par défaut dans les versions `2.2.0` et ultérieures.
2. Définissez l'opération par défaut de message in-app sur `DISCARD` en ajoutant la ligne suivante à votre fichier `braze.xml`.
```xml
DISCARD
```
Pour Android, désélectionnez **Automatically Display In-App Messages** dans l'éditeur de configuration de Braze. Vous pouvez également définir `com_braze_inapp_show_inapp_messages_automatically` sur `false` dans le fichier `braze.xml` de votre projet Unity.
Le fonctionnement initial de l'affichage des messages in-app peut être défini dans la configuration de Braze à l'aide de « In App Message Manager Initial Display Operation ».
Pour iOS, définissez les écouteurs d'objets de jeu dans l'éditeur de configuration de Braze et assurez-vous que **Braze Displays In-App Messages** n'est pas sélectionné.
Le fonctionnement initial de l'affichage des messages in-app peut être défini dans la configuration de Braze à l'aide de « In App Message Manager Initial Display Operation ».
## Enchaîner deux messages in-app au cours d'une même session {#chaining-two-in-app-messages-in-one-session}
Vous pouvez déclencher un message in-app au démarrage de la session, puis déclencher un second message in-app après l'appui sur un bouton du premier. Pour ce faire, enregistrez un événement personnalisé pour le clic sur le bouton qui déclenchera le second message. Le déclencheur du second message doit déjà être présent sur l'appareil (l'utilisateur doit déjà être éligible au second message) et se produire côté appareil (le SDK Braze ne prendra pas en compte les modifications d'attributs personnalisés effectuées sur les serveurs de Braze). Le délai de refroidissement par défaut de 30 secondes entre les déclenchements de messages in-app doit être modifié pour afficher plusieurs messages in-app en succession rapide. Pour la configuration spécifique à chaque plateforme, voir [Remplacement de la limite de débit par défaut](#overriding-the-default-rate-limit).
## Remplacement de la limite de débit par défaut {#overriding-the-default-rate-limit}
Par défaut, le SDK limite le débit des messages in-app déclenchés à une fois toutes les 30 secondes. Pour remplacer ce comportement, ajoutez la propriété suivante à votre fichier de configuration avant l'initialisation de l'instance de Braze. Cette valeur sera utilisée comme nouvelle limite de débit en secondes.
Pour les applications en production, ne définissez pas cette valeur en dessous de 10 secondes, afin que les utilisateurs ne soient pas submergés par des messages in-app successifs. Pour les tests et les flux d'applications de démonstration, 5 secondes est un réglage courant.
Vous pouvez définir cet intervalle sur `0` pour les tests. Cependant, un intervalle de `0` seconde ne force pas l'affichage simultané de plusieurs messages in-app. Si un message in-app est déjà visible, un autre message déclenché ne s'affichera pas tant que le message actuel n'aura pas été fermé.
```javascript
// Sets the minimum time interval between triggered in-app messages to 5 seconds instead of the default 30
braze.initialize('YOUR-API-KEY', { minimumIntervalBetweenTriggerActionsInSeconds: 5 })
```
```xml
5
```
```swift
let configuration = Braze.Configuration(
apiKey: "YOUR-APP-IDENTIFIER-API-KEY",
endpoint: "YOUR-BRAZE-ENDPOINT"
)
// Sets the minimum trigger time interval to 5 seconds
configuration.triggerMinimumTimeInterval = 5
let braze = Braze(configuration: configuration)
AppDelegate.braze = braze
```
```objc
BRZConfiguration *configuration =
[[BRZConfiguration alloc] initWithApiKey:@""
endpoint:@""];
// Sets the minimum trigger time interval to 5 seconds
configuration.triggerMinimumTimeInterval = 5;
Braze *braze = [BrazePlugin initBraze:configuration];
AppDelegate.braze = braze;
```
## Déclenchement manuel des messages {#manually-triggering-messages}
Par défaut, les messages in-app sont automatiquement déclenchés lorsque le SDK enregistre un événement personnalisé. Toutefois, vous pouvez également déclencher manuellement des messages à l'aide des méthodes suivantes.
### Utilisation d'un événement côté serveur {#using-a-server-side-event}
À l'heure actuelle, le SDK Web de Braze ne prend pas en charge le déclenchement manuel de messages à l'aide d'événements côté serveur.
Pour déclencher un message in-app à l'aide d'un événement envoyé par le serveur, envoyez une notification push silencieuse à l'appareil, ce qui permet à un rappel push personnalisé d'enregistrer un événement basé sur le SDK. Cet événement déclenchera alors le message in-app destiné à l'utilisateur.
#### Étape 1 : Créer un rappel push pour recevoir la notification push silencieuse {#step-1-create-a-push-callback-to-receive-the-silent-push}
Enregistrez votre rappel push personnalisé pour écouter une notification push silencieuse spécifique. Pour plus d'informations, veuillez vous référer à la section [Configuration des notifications push](https://www.braze.com/docs/fr/fr/developer_guide/push_notifications/#android_setting-up-push-notifications).
Deux événements seront enregistrés pour que le message in-app soit livré, un par le serveur et l'autre à partir de votre rappel push personnalisé. Pour vous assurer que le même événement n'est pas dupliqué, l'événement enregistré dans votre rappel push doit suivre une convention de dénomination générique, par exemple « événement déclencheur de message in-app », et ne pas porter le même nom que l'événement envoyé par le serveur. Si cela n'est pas fait, la segmentation et les données utilisateur peuvent être affectées par des événements enregistrés en double pour une seule action utilisateur.
```java
Braze.getInstance(context).subscribeToPushNotificationEvents(event -> {
final Bundle kvps = event.getNotificationPayload().getBrazeExtras();
if (kvps.containsKey("IS_SERVER_EVENT")) {
BrazeProperties eventProperties = new BrazeProperties();
// The campaign name is a string extra that clients can include in the push
String campaignName = kvps.getString("CAMPAIGN_NAME");
eventProperties.addProperty("campaign_name", campaignName);
Braze.getInstance(context).logCustomEvent("IAM Trigger", eventProperties);
}
});
```
```kotlin
Braze.getInstance(applicationContext).subscribeToPushNotificationEvents { event ->
val kvps = event.notificationPayload.brazeExtras
if (kvps.containsKey("IS_SERVER_EVENT")) {
val eventProperties = BrazeProperties()
// The campaign name is a string extra that clients can include in the push
val campaignName = kvps.getString("CAMPAIGN_NAME")
eventProperties.addProperty("campaign_name", campaignName)
Braze.getInstance(applicationContext).logCustomEvent("IAM Trigger", eventProperties)
}
}
```
#### Étape 2 : Créer une Campaign de notification push {#step-2-create-a-push-campaign}
Créez une [Campaign de push silencieuse](https://www.braze.com/docs/fr/fr/developer_guide/push_notifications/silent/?sdktab=android) déclenchée par l'événement envoyé par le serveur.

La Campaign de notification push doit inclure des extras de paires clé-valeur qui indiquent que cette Campaign de notification push est envoyée pour enregistrer un événement personnalisé SDK. Cet événement sera utilisé pour déclencher le message in-app.
{: style="max-width:70%;" }
Le code exemple de rappel push présenté précédemment reconnaît les paires clé-valeur et enregistre l'événement personnalisé SDK approprié.
Si vous souhaitez inclure des propriétés d'événement à joindre à votre événement « déclencheur de message in-app », vous pouvez y parvenir en les transmettant dans les paires clé-valeur du payload de la notification push. Dans cet exemple, le nom de Campaign du message in-app suivant a été inclus. Votre rappel push personnalisé peut ensuite transmettre la valeur comme paramètre de la propriété de l'événement lors de l'enregistrement de l'événement personnalisé.
#### Étape 3 : Créer une Campaign de message in-app {#step-3-create-an-in-app-message-campaign}
Créez votre Campaign de messages in-app visible par l'utilisateur dans le tableau de bord de Braze. Cette Campaign doit avoir une livraison par événement et être déclenchée par l'événement personnalisé enregistré à partir de votre rappel push personnalisé.
Dans l'exemple suivant, le message in-app spécifique à déclencher a été configuré en envoyant la propriété de l'événement dans le cadre de la première notification push silencieuse.

Si un événement envoyé par le serveur est enregistré alors que l'application n'est pas au premier plan, l'événement sera enregistré, mais le message in-app ne s'affichera pas. Si vous souhaitez que l'événement soit retardé jusqu'à ce que l'application soit au premier plan, une vérification doit être incluse dans votre récepteur push personnalisé pour rejeter ou retarder l'événement jusqu'à ce que l'application passe au premier plan.
#### Étape 1 : Gérer les notifications push silencieuses et les paires clé-valeur {#step-1-handle-silent-push-and-key-value-pairs}
Implémentez la fonction suivante et appelez-la dans la méthode [`application(_:didReceiveRemoteNotification:fetchCompletionHandler:)`](https://developer.apple.com/documentation/uikit/uiapplicationdelegate/1623013-application/) :
```swift
func handleExtras(userInfo: [AnyHashable : Any]) {
print("A push was received")
if userInfo != nil && (userInfo["IS_SERVER_EVENT"] as? String) != nil && (userInfo["CAMPAIGN_NAME"] as? String) != nil {
AppDelegate.braze?.logCustomEvent("IAM Trigger", properties: ["campaign_name": userInfo["CAMPAIGN_NAME"]])
}
}
```
```objc
- (void)handleExtrasFromPush:(NSDictionary *)userInfo {
NSLog(@"A push was received.");
if (userInfo !=nil && userInfo[@"IS_SERVER_EVENT"] !=nil && userInfo[@"CAMPAIGN_NAME"]!=nil) {
[AppDelegate.braze logCustomEvent:@"IAM Trigger" properties:@{@"campaign_name": userInfo[@"CAMPAIGN_NAME"]}];
}
};
```
Lorsque la notification push silencieuse est reçue, un événement enregistré par le SDK « in-app message trigger » sera consigné dans le profil utilisateur.
**Important:**
En raison de l'utilisation d'un message push pour enregistrer un événement personnalisé du SDK, Braze devra stocker un jeton de notification push pour chaque utilisateur afin de permettre cette solution. Pour les utilisateurs iOS, Braze ne stocke un jeton qu'à partir du moment où un utilisateur a reçu l'invite de notification push du système d'exploitation. Avant cela, l'utilisateur ne sera pas joignable par notification push, et la solution précédente ne sera pas possible.
#### Étape 2 : Créer une Campaign de push silencieuse {#step-2-create-a-silent-push-campaign}
Créez une [Campaign de push silencieuse](https://www.braze.com/docs/fr/fr/developer_guide/push_notifications/silent/?sdktab=swift) déclenchée par l'événement envoyé par le serveur.

La Campaign de notification push doit inclure des extras de paires clé-valeur qui indiquent que cette Campaign de notification push est envoyée pour enregistrer un événement personnalisé SDK. Cet événement sera utilisé pour déclencher le message in-app.

Le code de la méthode `application(_:didReceiveRemoteNotification:fetchCompletionHandler:)` vérifie la clé `IS_SERVER_EVENT` et enregistrera un événement personnalisé SDK si celle-ci est présente.
Vous pouvez modifier le nom de l'événement ou les propriétés d'événement en envoyant la valeur souhaitée dans les extras de paires clé-valeur du payload de la notification push. Lors de la journalisation de l'événement personnalisé, ces extras peuvent être utilisés comme paramètre du nom de l'événement ou comme propriété de l'événement.
#### Étape 3 : Créer une Campaign de message in-app
Créez votre Campaign de messages in-app visible par l'utilisateur dans le tableau de bord de Braze. Cette Campaign doit avoir une livraison par événement et être déclenchée par l'événement personnalisé enregistré à partir de la méthode `application(_:didReceiveRemoteNotification:fetchCompletionHandler:)`.
Dans l'exemple suivant, le message in-app spécifique à déclencher a été configuré en envoyant la propriété de l'événement dans le cadre de la première notification push silencieuse.

**Note:**
Notez que ces messages in-app ne se déclencheront que si la notification push silencieuse est reçue pendant que l'application se trouve au premier plan.
### Affichage d'un message prédéfini {#displaying-a-pre-defined-message}
Pour afficher manuellement un message in-app prédéfini, utilisez la méthode suivante :
Pour le SDK Web, utilisez `braze.showInAppMessage(inAppMessage)` pour afficher tout message in-app. Pour plus de détails et un exemple, consultez [Affichage d'un message en temps réel](#displaying-a-message-in-real-time).
```java
BrazeInAppMessageManager.getInstance().addInAppMessage(inAppMessage);
```
```kotlin
BrazeInAppMessageManager.getInstance().addInAppMessage(inAppMessage)
```
```swift
if let inAppMessage = AppDelegate.braze?.inAppMessagePresenter?.nextAvailableMessage() {
AppDelegate.braze?.inAppMessagePresenter?.present(message: inAppMessage)
}
```
### Affichage d'un message en temps réel {#displaying-a-message-in-real-time}
Vous pouvez également créer et afficher des messages in-app locaux en temps réel, en utilisant les mêmes options de personnalisation que celles disponibles sur le tableau de bord. Pour ce faire :
```javascript
// Displays a slideup type in-app message.
var message = new braze.SlideUpMessage("Welcome to Braze! This is an in-app message.");
message.slideFrom = braze.InAppMessage.SlideFrom.TOP;
braze.showInAppMessage(message);
```
```java
// Initializes a new slideup type in-app message and specifies its message.
InAppMessageSlideup inAppMessage = new InAppMessageSlideup();
inAppMessage.setMessage("Welcome to Braze! This is a slideup in-app message.");
```
```kotlin
// Initializes a new slideup type in-app message and specifies its message.
val inAppMessage = InAppMessageSlideup()
inAppMessage.message = "Welcome to Braze! This is a slideup in-app message."
```
**Important:**
N'affichez pas les messages in-app lorsque le clavier logiciel est affiché à l'écran, car le rendu n'est pas défini dans ce cas.
Appelez manuellement la méthode [`present(message:)`](https://braze-inc.github.io/braze-swift-sdk/documentation/brazekit/brazeinappmessagepresenter/present(message:)) sur votre `inAppMessagePresenter`. Par exemple :
```swift
let customInAppMessage = Braze.InAppMessage.slideup(
.init(message: "YOUR_CUSTOM_SLIDEUP_MESSAGE", slideFrom: .bottom, themes: .defaults)
)
AppDelegate.braze?.inAppMessagePresenter?.present(message: customInAppMessage)
```
```objc
BRZInAppMessageRaw *customInAppMessage = [[BRZInAppMessageRaw alloc] init];
customInAppMessage.type = BRZInAppMessageRawTypeSlideup;
customInAppMessage.message = @"YOUR_CUSTOM_SLIDEUP_MESSAGE";
customInAppMessage.slideFrom = BRZInAppMessageRawSlideFromBottom;
customInAppMessage.themes = @{
@"light": BRZInAppMessageRawTheme.defaultLight,
@"dark": BRZInAppMessageRawTheme.defaultDark
};
[AppDelegate.braze.inAppMessagePresenter presentMessage:customInAppMessage];
```
**Note:**
En créant votre propre message in-app, vous renoncez à tout suivi analytique et devrez gérer manuellement l'enregistrement des clics et des impressions à l'aide de votre `message.context`.
Pour afficher le message suivant dans la pile, utilisez la méthode `DisplayNextInAppMessage()`. Les messages seront enregistrés dans cette pile si `DISPLAY_LATER` ou `BrazeUnityInAppMessageDisplayActionType.IAM_DISPLAY_LATER` est choisi comme action d'affichage des messages in-app.
```csharp
Appboy.AppboyBinding.DisplayNextInAppMessage();
```
## Causes des retards de messages in-app {#causes-of-in-app-message-delays}
Si vous recevez une Campaign de messages in-app quelques secondes après le démarrage de la session, le retard peut avoir été causé par :
- Un retard dans le déclencheur de la Campaign
- Des personnalisations
- L'enregistrement de l'événement déclencheur plus tard que prévu (par exemple avec un `templated_iam`)
## Messages d'intention de sortie pour le web {#exit-intent-messages-for-web}
Les messages d'intention de sortie sont des messages in-app non perturbateurs utilisés pour communiquer des informations importantes aux visiteurs avant qu'ils ne quittent votre site web.
Pour configurer des déclencheurs pour ces types de messages dans le SDK Web, implémentez une bibliothèque d'intention de sortie sur votre site web (telle que la [bibliothèque open source de ouibounce](https://github.com/carlsednaoui/ouibounce)), puis utilisez le code suivant pour enregistrer `'exit intent'` en tant qu'événement personnalisé dans Braze. Désormais, vos futures Campaigns de messages in-app peuvent utiliser ce type de message comme déclencheur d'événement personnalisé.
```javascript
var _ouibounce = ouibounce(false, {
callback: function() { braze.logCustomEvent('exit intent'); }
});
```
# Messages in-app HTML
Source: /docs/fr/developer_guide/in_app_messages/html_messages/index.md
# Messages in-app HTML {#html-in-app-messages}
> Découvrez comment ajouter l'interface JavaScript de Braze à votre application, afin d'utiliser l'API de Braze pour créer des [messages HTML in-app](https://www.braze.com/docs/fr/fr/user_guide/channels/in_app_messages/message_types/custom_html/) dans vos WebViews personnalisées.
## Prerequisites
Before you can use this feature, you'll need to [integrate the Android Braze SDK](https://www.braze.com/docs/fr/fr/developer_guide/sdk_integration/?sdktab=android).
## About HTML messages
With the Braze JavaScript interface, you can leverage Braze inside the custom WebViews within your app. The [`InAppMessageJavascriptInterface`](https://braze-inc.github.io/braze-android-sdk/kdoc/braze-android-sdk/com.braze.ui.inappmessage.jsinterface/-in-app-message-javascript-interface/index.html) is responsible for:
1. Injecting the Braze JavaScript bridge into your WebView, as outlined in [User Guide: HTML in-app messages](https://www.braze.com/docs/fr/fr/user_guide/message_building_by_channel/in-app_messages/customize/#custom-html-messages).
2. Passing the bridge methods received from your WebView to the [Braze Android SDK](https://github.com/braze-inc/braze-android-sdk).
## Adding the interface to a WebView
Using Braze functionality from a WebView in your app can be done by adding the Braze JavaScript interface to your WebView. After the interface has been added, the same API available for [User Guide: HTML in-app messages](https://www.braze.com/docs/fr/fr/user_guide/message_building_by_channel/in-app_messages/customize/#custom-html-messages) will be available within your custom WebView.
```java
String javascriptString = BrazeFileUtils.getAssetFileStringContents(context.getAssets(), "braze-html-bridge.js");
myWebView.loadUrl("javascript:" + javascriptString);
final InAppMessageJavascriptInterface javascriptInterface = new InAppMessageJavascriptInterface(context, inAppMessage);
myWebView.addJavascriptInterface(javascriptInterface, "brazeInternalBridge");
```
```kotlin
val javascriptString = context.assets.getAssetFileStringContents("braze-html-bridge.js")
myWebView.loadUrl("javascript:" + javascriptString!!)
val javascriptInterface = InAppMessageJavascriptInterface(context, inAppMessage)
myWebView.addJavascriptInterface(javascriptInterface, "brazeInternalBridge")
```
## Embedding YouTube content
YouTube and other HTML5 content can play in HTML in-app messages. This requires hardware acceleration to be enabled in the activity where the in-app message is being displayed; see the [Android developer guide](https://developer.android.com/guide/topics/graphics/hardware-accel.html#controlling) for more details. Hardware acceleration is only available on Android API versions 11 and later.
The following is an example of an embedded YouTube video in an HTML snippet:
```html
```
## Using deep links
When using deep links or external links in Android HTML in-app messages, **do not** call `brazeBridge.closeMessage()` in your JavaScript. The SDK's internal logic automatically closes the in-app message when it redirects to a link. Calling `brazeBridge.closeMessage()` interferes with this process and may cause the message to become unresponsive when users return to your app.
The following is an example of a deep link in a code snippet:
```javascript
```
## Prerequisites
Before you can use this feature, you'll need to [integrate the Swift Braze SDK](https://www.braze.com/docs/fr/fr/developer_guide/sdk_integration/?sdktab=swift).
## About HTML messages
With the Braze JavaScript interface, you can leverage Braze inside the custom WebViews within your app. The interface's [`ScriptMessageHandler`](https://braze-inc.github.io/braze-swift-sdk/documentation/brazekit/braze/webviewbridge/scriptmessagehandler) is responsible for:
1. Injecting the Braze JavaScript bridge into your WebView, as outlined in [User Guide: HTML in-app messages](https://www.braze.com/docs/fr/fr/user_guide/message_building_by_channel/in-app_messages/customize/#custom-html-messages).
2. Passing the bridge methods received from your WebView to the [Braze Swift SDK](https://github.com/braze-inc/braze-swift-sdk).
## Adding the interface to a WebView
First, add the [`ScriptMessageHandler`](https://braze-inc.github.io/braze-swift-sdk/documentation/brazekit/braze/webviewbridge/scriptmessagehandler) from `WebViewBridge` to your app.
```swift
let scriptMessageHandler = Braze.WebViewBridge.ScriptMessageHandler(braze: braze)
```
Add the initialized `scriptMessageHandler` to a WkWebView's `userContentController`.
```swift
configuration.userContentController.add(
scriptMessageHandler,
name: Braze.WebViewBridge.ScriptMessageHandler.name
)
```
Then create the WebView using your configuration.
```swift
let webView = WKWebView(frame: .zero, configuration: configuration)
```
When you're finished, your code should be similar to the following:
```swift
// Create the script message handler using your initialized Braze instance.
let scriptMessageHandler = Braze.WebViewBridge.ScriptMessageHandler(braze: braze)
// Create a web view configuration and setup the script message handler.
let configuration = WKWebViewConfiguration()
configuration.userContentController.addUserScript(
Braze.WebViewBridge.ScriptMessageHandler.script
)
configuration.userContentController.add(
scriptMessageHandler,
name: Braze.WebViewBridge.ScriptMessageHandler.name
)
// Create the webview using the configuration
let webView = WKWebView(frame: .zero, configuration: configuration)
```
## Example: Logging a custom event
In the following example, `BrazeBridge` logs a custom event from existing web content to the Braze Swift SDK.
```javascript
Logging data via BrazeBridge Example
```
# Création de liens profonds dans les messages in-app pour le SDK de Braze
Source: /docs/fr/developer_guide/in_app_messages/deep_linking/index.md
# Création de liens profonds dans les messages in-app {#in-app-message-deep-linking}
> Découvrez comment créer des liens profonds dans un message in-app à l'aide du SDK de Braze.
## Prerequisites
Before you can use this feature, you'll need to [integrate the Android Braze SDK](https://www.braze.com/docs/fr/fr/developer_guide/sdk_integration/?sdktab=android).
## Creating a universal delegate
The Android SDK provides the ability to set a single delegate object to custom handle all deep links opened by Braze across Content Cards, in-app messages, and push notifications.
Your delegate object should implement the [`IBrazeDeeplinkHandler`](https://braze-inc.github.io/braze-android-sdk/kdoc/braze-android-sdk/com.braze.ui/-braze-deeplink-handler/index.html) interface and be set using [`BrazeDeeplinkHandler.setBrazeDeeplinkHandler()`](https://braze-inc.github.io/braze-android-sdk/kdoc/braze-android-sdk/com.braze.ui/-braze-deeplink-handler/-companion/set-braze-deeplink-handler.html). In most cases, the delegate should be set in your app's `Application.onCreate()`.
The following is an example of overriding the default [`UriAction`](https://braze-inc.github.io/braze-android-sdk/kdoc/braze-android-sdk/com.braze.ui.actions/-uri-action/index.html) behavior with custom intent flags and custom behavior for YouTube URLs:
```java
public class CustomDeeplinkHandler implements IBrazeDeeplinkHandler {
private static final String TAG = BrazeLogger.getBrazeLogTag(CustomDeeplinkHandler.class);
@Override
public void gotoUri(Context context, UriAction uriAction) {
String uri = uriAction.getUri().toString();
// Open YouTube URLs in the YouTube app and not our app
if (!StringUtils.isNullOrBlank(uri) && uri.contains("youtube.com")) {
uriAction.setUseWebView(false);
}
CustomUriAction customUriAction = new CustomUriAction(uriAction);
customUriAction.execute(context);
}
public static class CustomUriAction extends UriAction {
public CustomUriAction(@NonNull UriAction uriAction) {
super(uriAction);
}
@Override
protected void openUriWithActionView(Context context, Uri uri, Bundle extras) {
Intent intent = getActionViewIntent(context, uri, extras);
intent.setFlags(Intent.FLAG_ACTIVITY_NEW_TASK | Intent.FLAG_ACTIVITY_CLEAR_TOP | Intent.FLAG_ACTIVITY_SINGLE_TOP);
if (intent.resolveActivity(context.getPackageManager()) != null) {
context.startActivity(intent);
} else {
BrazeLogger.w(TAG, "Could not find appropriate activity to open for deep link " + uri + ".");
}
}
}
}
```
```kotlin
class CustomDeeplinkHandler : IBrazeDeeplinkHandler {
override fun gotoUri(context: Context, uriAction: UriAction) {
val uri = uriAction.uri.toString()
// Open YouTube URLs in the YouTube app and not our app
if (!StringUtils.isNullOrBlank(uri) && uri.contains("youtube.com")) {
uriAction.useWebView = false
}
val customUriAction = CustomUriAction(uriAction)
customUriAction.execute(context)
}
class CustomUriAction(uriAction: UriAction) : UriAction(uriAction) {
override fun openUriWithActionView(context: Context, uri: Uri, extras: Bundle) {
val intent = getActionViewIntent(context, uri, extras)
intent.flags = Intent.FLAG_ACTIVITY_NEW_TASK or Intent.FLAG_ACTIVITY_CLEAR_TOP or Intent.FLAG_ACTIVITY_SINGLE_TOP
if (intent.resolveActivity(context.packageManager) != null) {
context.startActivity(intent)
} else {
BrazeLogger.w(TAG, "Could not find appropriate activity to open for deep link $uri.")
}
}
}
companion object {
private val TAG = BrazeLogger.getBrazeLogTag(CustomDeeplinkHandler::class.java)
}
}
```
## Deep linking to app settings
To allow deep links to directly open your app's settings, you'll need a custom `BrazeDeeplinkHandler`. In the following example, the presence of a custom key-value pair called `open_notification_page` will make the deep link open the app's settings page:
```java
BrazeDeeplinkHandler.setBrazeDeeplinkHandler(new IBrazeDeeplinkHandler() {
@Override
public void gotoUri(Context context, UriAction uriAction) {
final Bundle extras = uriAction.getExtras();
if (extras.containsKey("open_notification_page")) {
Intent intent = new Intent();
intent.setAction("android.settings.APP_NOTIFICATION_SETTINGS");
intent.setFlags(Intent.FLAG_ACTIVITY_NEW_TASK);
//for Android 5-7
intent.putExtra("app_package", context.getPackageName());
intent.putExtra("app_uid", context.getApplicationInfo().uid);
// for Android 8 and later
intent.putExtra("android.provider.extra.APP_PACKAGE", context.getPackageName());
context.startActivity(intent);
}
}
});
```
```kotlin
BrazeDeeplinkHandler.setBrazeDeeplinkHandler(object : IBrazeDeeplinkHandler {
override fun gotoUri(context: Context, uriAction: UriAction) {
val extras = uriAction.extras
if (extras.containsKey("open_notification_page")) {
val intent = Intent()
intent.action = "android.settings.APP_NOTIFICATION_SETTINGS"
intent.flags = Intent.FLAG_ACTIVITY_NEW_TASK
//for Android 5-7
intent.putExtra("app_package", context.packageName)
intent.putExtra("app_uid", context.applicationInfo.uid)
// for Android 8 and later
intent.putExtra("android.provider.extra.APP_PACKAGE", context.packageName)
context.startActivity(intent)
}
}
})
```
## Customizing WebView activity {#Custom_Webview_Activity}
When Braze opens website deeplinks inside the app, the deeplinks are handled by [`BrazeWebViewActivity`](https://braze-inc.github.io/braze-android-sdk/kdoc/braze-android-sdk/com.braze.ui/-braze-web-view-activity/index.html).
**Note:**
For custom HTML in-app messages, links configured with `target="_blank"` open in the device's default web browser and are not handled by `BrazeWebViewActivity`.
To change this:
1. Create a new Activity that handles the target URL from `Intent.getExtras()` with the key `com.braze.Constants.BRAZE_WEBVIEW_URL_EXTRA`. For an example, see [`BrazeWebViewActivity.kt`](https://github.com/braze-inc/braze-android-sdk/blob/master/android-sdk-ui/src/main/java/com/braze/ui/BrazeWebViewActivity.kt).
2. Add that activity to `AndroidManifest.xml` and set `exported` to `false`.
```xml
```
3. Set your custom Activity in a `BrazeConfig` [builder object](https://braze-inc.github.io/braze-android-sdk/kdoc/braze-android-sdk/com.braze.configuration/-braze-config/-builder/set-custom-web-view-activity-class.html). Build the builder and pass it to [`Braze.configure()`](https://braze-inc.github.io/braze-android-sdk/kdoc/braze-android-sdk/com.braze/-braze/-companion/configure.html) in your [`Application.onCreate()`](https://developer.android.com/reference/android/app/Application.html#onCreate()).
```java
BrazeConfig brazeConfig = new BrazeConfig.Builder()
.setCustomWebViewActivityClass(MyCustomWebViewActivity::class)
...
.build();
Braze.configure(this, brazeConfig);
```
```kotlin
val brazeConfig = BrazeConfig.Builder()
.setCustomWebViewActivityClass(MyCustomWebViewActivity::class.java)
...
.build()
Braze.configure(this, brazeConfig)
```
## Troubleshooting
If deep links from push notifications aren't working on Android, try the following steps:
1. **Test the deep link outside of Braze.** Open the deep link URL from another app, such as email or a browser. If it doesn't open your app, the deep link may not be configured correctly in your `AndroidManifest.xml`. For more information, see Android's [Create Deep Links](https://developer.android.com/training/app-links/deep-linking) documentation.
2. **Check that automatic deep link handling is enabled.** Verify that `com_braze_handle_push_deep_links_automatically` is set to `true` in `braze.xml`, or set this option through [runtime configuration](https://www.braze.com/docs/fr/fr/developer_guide/sdk_initalization/?sdktab=android). Without this setting, Braze doesn't automatically open your app and deep link destination when someone taps a push notification.
3. **Verify your deep link handler delegate.** If you set a custom `IBrazeDeeplinkHandler`, confirm that your `gotoUri` implementation handles the URI and doesn't drop it.
4. **Test across channels.** If the same deep link works in an in-app message but not from push, the issue is likely in your push deep link handling, not in the deep link itself.
## Using Jetpack Compose
To handle deeplinks when using Jetpack Compose with NavHost:
1. Ensure that the activity handling your deeplink is registered in the Android Manifest.
```xml
```
2. In NavHost, specify which deeplinks you want it to handle.
```kotlin
composableWithCompositionLocal(
route = "YOUR_ROUTE_HERE",
deepLinks = listOf(navDeepLink {
uriPattern = "myapp://articles/{${MainDestinations.ARTICLE_ID_KEY}}"
}),
arguments = listOf(
navArgument(MainDestinations.ARTICLE_ID_KEY) {
type = NavType.LongType
}
),
) { backStackEntry ->
val arguments = requireNotNull(backStackEntry.arguments)
val articleId = arguments.getLong(MainDestinations.ARTICLE_ID_KEY)
ArticleDetail(
articleId
)
}
```
3. Depending on your app architecture, you may need to handle the new intent that's sent to your current activity as well.
```kotlin
DisposableEffect(Unit) {
val listener = Consumer {
navHostController.handleDeepLink(it)
}
addOnNewIntentListener(listener)
onDispose { removeOnNewIntentListener(listener) }
}
```
## Prerequisites
Before you can use this feature, you'll need to [integrate the Swift Braze SDK](https://www.braze.com/docs/fr/fr/developer_guide/sdk_integration/?sdktab=swift).
**Tip:**
For help choosing between custom scheme deep links, universal links, and "Open Web URL Inside App," see [iOS deep linking guide](https://www.braze.com/docs/fr/fr/developer_guide/push_notifications/ios_deep_linking_guide). For troubleshooting, see [Deep linking troubleshooting](https://www.braze.com/docs/fr/fr/developer_guide/push_notifications/deep_linking_troubleshooting).
## Handling deep links
### Step 1: Register a scheme {#register-a-scheme}
To handle deep linking, a custom scheme must be stated in your `Info.plist` file. The navigation structure is defined by an array of dictionaries. Each of those dictionaries contains an array of strings.
Use Xcode to edit your `Info.plist` file:
1. Add a new key, `URL types`. Xcode will automatically make this an array containing a dictionary called `Item 0`.
2. Within `Item 0`, add a key `URL identifier`. Set the value to your custom scheme.
3. Within `Item 0`, add a key `URL Schemes`. This will automatically be an array containing a `Item 0` string.
4. Set `URL Schemes` >> `Item 0` to your custom scheme.
Alternatively, if you wish to edit your `Info.plist` file directly, you can follow this spec:
```html
CFBundleURLTypesCFBundleURLNameYOUR.SCHEMECFBundleURLSchemesYOUR.SCHEME
```
### Step 2: Add a scheme allowlist
You must declare the URL schemes you wish to pass to `canOpenURL(_:)` by adding the `LSApplicationQueriesSchemes` key to your app's Info.plist file. Attempting to call schemes outside this allowlist will cause the system to record an error in the device's logs, and the deep link will not open. An example of this error will look like this:
```
: -canOpenURL: failed for URL: "yourapp://deeplink" – error: "This app is not allowed to query for scheme yourapp"
```
For example, if an in-app message should open the Facebook app when tapped, the app has to have the Facebook custom scheme (`fb`) in your allowlist. Otherwise, the system will reject the deep link. Deep links that direct to a page or view inside your own app still require that your app's custom scheme be listed in your app's `Info.plist`.
Your example allowlist might look something like:
```html
LSApplicationQueriesSchemesmyappfbtwitter
```
For more information, refer to [Apple's documentation](https://developer.apple.com/library/content/documentation/General/Reference/InfoPlistKeyReference/Articles/LaunchServicesKeys.html#//apple_ref/doc/uid/TP40009250-SW14) on the `LSApplicationQueriesSchemes` key.
### Step 3: Implement a handler
After activating your app, iOS will call the method [`application:openURL:options:`](https://developer.apple.com/reference/uikit/uiapplicationdelegate/1623112-application?language=objc). The important argument is the [NSURL](https://developer.apple.com/library/ios/DOCUMENTATION/Cocoa/Reference/Foundation/Classes/NSURL_Class/Reference/Reference.html#//apple_ref/doc/c_ref/NSURL) object.
```swift
func application(_ app: UIApplication, open url: URL, options: [UIApplication.OpenURLOptionsKey : Any] = [:]) -> Bool {
let path = url.path
let query = url.query
// Insert your code here to take some action based upon the path and query.
return true
}
```
```objc
- (BOOL)application:(UIApplication *)app openURL:(NSURL *)url options:(NSDictionary *)options {
NSString *path = [url path];
NSString *query = [url query];
// Insert your code here to take some action based upon the path and query.
return YES;
}
```
## App Transport Security (ATS)
As defined by [Apple](https://developer.apple.com/library/prerelease/ios/releasenotes/General/WhatsNewIniOS/Articles/iOS9.html#//apple_ref/doc/uid/TP40016198-SW14), "App Transport Security is a feature that improves the security of connections between an app and web services. The feature consists of default connection requirements that conform to best practices for secure connections. Apps can override this default behavior and turn off transport security."
ATS is applied by default. It requires that all connections use HTTPS and are encrypted using TLS 1.2 with forward secrecy. Refer to [Requirements for Connecting Using ATS](https://developer.apple.com/library/ios/documentation/General/Reference/InfoPlistKeyReference/Articles/CocoaKeys.html#//apple_ref/doc/uid/TP40009251-SW35) for more information. All images served by Braze to end devices are handled by a content delivery network ("CDN") that supports TLS 1.2 and is compatible with ATS.
Unless they are specified as exceptions in your application's `Info.plist`, connections that do not follow these requirements will fail with errors that are similar to the following.
**Example Error 1:**
```bash
CFNetwork SSLHandshake failed (-9801)
Error Domain=NSURLErrorDomain Code=-1200 "An SSL error has occurred, and a secure connection to the server cannot be made."
```
**Example Error 2:**
```bash
NSURLSession/NSURLConnection HTTP load failed (kCFStreamErrorDomainSSL, -9802)
```
ATS compliance is enforced for links opened within the mobile app (our default handling of clicked links) and does not apply to sites opened externally via a web browser.
### Working with ATS
You can handle ATS in either of the following ways, but we recommend **complying with ATS requirements**.
Your Braze integration can satisfy ATS requirements by ensuring that any existing links you drive users to (for example, though in-app message and push campaigns) satisfy ATS requirements. While there are ways to bypass ATS restrictions, our recommendation is to ensure that all linked URLs are ATS-compliant. Given Apple's increasing emphasis on application security, the following approaches to allowing ATS exceptions are not guaranteed to be supported by Apple.
You can allow a subset of links with certain domains or schemes to be treated as exceptions to the ATS rules. Your Braze integration will satisfy ATS requirements if every link you use in a Braze messaging channel is either ATS compliant or handled by an exception.
To add a domain as an exception of the ATS, add following to your app's `Info.plist` file:
```html
NSAppTransportSecurityNSAllowsArbitraryLoadsNSExceptionDomainsexample.comNSExceptionAllowsInsecureHTTPLoadsNSIncludesSubdomains
```
Refer to Apple's article on [app transport security keys](https://developer.apple.com/library/ios/documentation/General/Reference/InfoPlistKeyReference/Articles/CocoaKeys.html#//apple_ref/doc/uid/TP40009251-SW33) for more information.
You can turn off ATS entirely. Note that this is not recommended practice, due to both lost security protections and future iOS compatibility. To disable ATS, insert the following in your app's `Info.plist` file:
```html
NSAppTransportSecurityNSAllowsArbitraryLoads
```
## Decoding URLs
The SDK percent-encodes links to create valid `URL`s. All link characters that are not allowed in a properly formed URL, such as Unicode characters, will be percent escaped.
To decode an encoded link, use the `String` property [`removingPercentEncoding`](https://developer.apple.com/documentation/swift/stringprotocol/removingpercentencoding). You must also return `true` in the `BrazeDelegate.braze(_:shouldOpenURL:)`. A call to action is required to trigger the handling of the URL by your app. For example:
```swift
func application(_ app: UIApplication, open url: URL, options: [UIApplication.OpenURLOptionsKey : Any] = [:]) -> Bool {
let urlString = url.absoluteString.removingPercentEncoding
// Handle urlString
return true
}
```
```objc
- (BOOL)application:(UIApplication *)application openURL:(NSURL *)url options:(NSDictionary *)options {
NSString *urlString = [url.absoluteString stringByRemovingPercentEncoding];
// Handle urlString
return YES;
}
```
## Deep linking to app settings
You can take advantage of `UIApplicationOpenSettingsURLString` to deep link users to your app's settings from Braze push notifications and in-app messages.
To take users from your app into the iOS settings:
1. First, make sure your application is set up for either [scheme-based deep links](#swift_register-a-scheme) or [universal links](#swift_universal-links).
2. Decide on a URI for deep linking to the **Settings** page (for example, `myapp://settings` or `https://www.braze.com/settings`).
3. If you are using custom scheme-based deep links, add the following code to your `application:openURL:options:` method:
```swift
func application(_ app: UIApplication, open url: URL, options: [UIApplicationOpenURLOptionsKey : Any] = [:]) -> Bool {
let path = url.path
if (path == "settings") {
UIApplication.shared.openURL(URL(string:UIApplication.openSettingsURLString)!)
}
return true
}
```
```objc
- (BOOL)application:(UIApplication *)app
openURL:(NSURL *)url
options:(NSDictionary *)options {
NSString *path = [url path];
if ([path isEqualToString:@"settings"]) {
NSURL *settingsURL = [NSURL URLWithString:UIApplicationOpenSettingsURLString];
[[UIApplication sharedApplication] openURL:settingsURL];
}
return YES;
}
```
## Customization options {#customization-options}
### Default WebView customization
The `Braze.WebViewController` class displays web URLs opened by the SDK, typically when "Open Web URL Inside App" is selected for a web deep link.
You can customize the `Braze.WebViewController` via the [`BrazeDelegate.braze(_:willPresentModalWithContext:)`](https://braze-inc.github.io/braze-swift-sdk/documentation/brazekit/brazedelegate/braze(_:willpresentmodalwithcontext:)-12sqy/) delegate method.
### Linking handling customization
The `BrazeDelegate` protocol can be used to customize the handling of URLs such as deep links, web URLs, and universal links. To set the delegate during Braze initialization, set a delegate object on the `Braze` instance. Braze will then call your delegate's implementation of `shouldOpenURL` before handling any URIs.
When a push notification or in-app message uses **Open web URL inside mobile app**, Braze passes `context.useWebView == true` on [`Braze.URLContext`](https://braze-inc.github.io/braze-swift-sdk/documentation/brazekit/braze/urlcontext). When the message opens the URL in the system browser instead, `useWebView` is `false`. Inspect `context.useWebView` in `braze(_:shouldOpenURL:)` to branch your custom handling—for example, to open an in-app `WebViewController` only when the campaign requested in-app display.
#### Universal links {#universal-links}
Braze supports universal links in push notifications, in-app messages, and Content Cards. To enable universal link support, [`configuration.forwardUniversalLinks`](https://braze-inc.github.io/braze-swift-sdk/documentation/brazekit/braze/configuration-swift.class/forwarduniversallinks) must be set to `true`.
When enabled, Braze will forward universal links to your app's `AppDelegate` via the [`application:continueUserActivity:restorationHandler:`](https://developer.apple.com/documentation/uikit/uiapplicationdelegate/1623072-application) method.
Your application also needs to be set up to handle universal links. Refer to [Apple's documentation](https://developer.apple.com/documentation/xcode/supporting-universal-links-in-your-app) to ensure your application is configured correctly for universal links.
**Warning:**
Universal link forwarding requires access to the application entitlements. When running the application in a simulator, these entitlements are not directly available and universal links are not forwarded to the system handlers.
To add support to simulator builds, you can add the application `.entitlements` file to the _Copy Bundle Resources_ build phase. See [`forwardUniversalLinks`](https://braze-inc.github.io/braze-swift-sdk/documentation/brazekit/braze/configuration-swift.class/forwarduniversallinks) documentation for more details.
**Note:**
The SDK does not query your domains' `apple-app-site-association` file. It performs the differentiation between universal links and regular URLs by looking at the domain name only. As a result, the SDK does not respect any exclusion rule defined in the `apple-app-site-association` per [Supporting associated domains](https://developer.apple.com/documentation/xcode/supporting-associated-domains).
## Examples
### BrazeDelegate
Here's an example using `BrazeDelegate`. For more information, see [Braze Swift SDK reference](https://braze-inc.github.io/braze-swift-sdk/documentation/brazekit/brazedelegate).
```swift
func braze(_ braze: Braze, shouldOpenURL context: Braze.URLContext) -> Bool {
if context.url.host == "MY-DOMAIN.com" {
// Custom handle link here
return false
}
// Let Braze handle links otherwise
return true
}
```
```objc
- (BOOL)braze:(Braze *)braze shouldOpenURL:(BRZURLContext *)context {
if ([[context.url.host lowercaseString] isEqualToString:@"MY-DOMAIN.com"]) {
// Custom handle link here
return NO;
}
// Let Braze handle links otherwise
return YES;
}
```
# Intégrer des GIF dans les messages in-app pour le SDK Braze
Source: /docs/fr/developer_guide/in_app_messages/gifs/index.md
# Intégrer des GIF dans les messages in-app
> Découvrez comment intégrer des GIF dans les messages in-app pour le SDK de Braze.
## About GIFs
Braze offers the ability to use a custom image library to display animated GIFs. Although the example below uses [Glide](https://bumptech.github.io/glide/), any image library that supports GIFs is compatible.
## Integrating a custom image library
### Step 1: Creating the image loader delegate
The Image Loader delegate must implement the following methods:
* [`getInAppMessageBitmapFromUrl()`](https://braze-inc.github.io/braze-android-sdk/kdoc/braze-android-sdk/com.braze.images/-i-braze-image-loader/get-in-app-message-bitmap-from-url.html)
* [`getPushBitmapFromUrl()`](https://braze-inc.github.io/braze-android-sdk/kdoc/braze-android-sdk/com.braze.images/-i-braze-image-loader/get-push-bitmap-from-url.html)
* [`renderUrlIntoCardView()`](https://braze-inc.github.io/braze-android-sdk/kdoc/braze-android-sdk/com.braze.images/-i-braze-image-loader/render-url-into-card-view.html)
* [`renderUrlIntoInAppMessageView()`](https://braze-inc.github.io/braze-android-sdk/kdoc/braze-android-sdk/com.braze.images/-i-braze-image-loader/render-url-into-in-app-message-view.html)
* [`setOffline()`](https://braze-inc.github.io/braze-android-sdk/kdoc/braze-android-sdk/com.braze.images/-i-braze-image-loader/set-offline.html)
The integration example below is taken from the [Glide integration sample app](https://github.com/braze-inc/braze-android-sdk/tree/master/samples/glide-image-integration) included with the Braze Android SDK.
```java
import com.braze.support.BrazeLogger;
import com.bumptech.glide.load.resource.gif.GifDrawable;
import android.graphics.drawable.Drawable;
public class GlideBrazeImageLoader implements IBrazeImageLoader {
private static final String TAG = GlideBrazeImageLoader.class.getName();
private RequestOptions mRequestOptions = new RequestOptions();
@Override
public void renderUrlIntoCardView(Context context, Card card, String imageUrl, ImageView imageView, BrazeViewBounds viewBounds) {
renderUrlIntoView(context, imageUrl, imageView);
}
@Override
public void renderUrlIntoInAppMessageView(Context context, IInAppMessage inAppMessage, String imageUrl, ImageView imageView, BrazeViewBounds viewBounds) {
renderUrlIntoView(context, imageUrl, imageView);
}
@Override
public Bitmap getPushBitmapFromUrl(Context context, Bundle extras, String imageUrl, BrazeViewBounds viewBounds) {
return getBitmapFromUrl(context, imageUrl, viewBounds);
}
@Override
public Bitmap getInAppMessageBitmapFromUrl(Context context, IInAppMessage inAppMessage, String imageUrl, BrazeViewBounds viewBounds) {
return getBitmapFromUrl(context, imageUrl, viewBounds);
}
private void renderUrlIntoView(Context context, String imageUrl, ImageView imageView) {
try {
final Drawable drawable = Glide.with(context)
.load(imageUrl)
.apply(mRequestOptions)
.submit()
.get();
imageView.post(() -> {
imageView.setImageDrawable(drawable);
if (drawable instanceof GifDrawable) {
((GifDrawable) drawable).start();
}
});
} catch (Exception e) {
BrazeLogger.e(TAG, "Failed to render URL into view: " + imageUrl, e);
}
}
private Bitmap getBitmapFromUrl(Context context, String imageUrl, BrazeViewBounds viewBounds) {
try {
return Glide.with(context)
.asBitmap()
.apply(mRequestOptions)
.load(imageUrl).submit().get();
} catch (Exception e) {
Log.e(TAG, "Failed to retrieve bitmap at url: " + imageUrl, e);
}
return null;
}
@Override
public void setOffline(boolean isOffline) {
// If the loader is offline, then we should only be retrieving from the cache
mRequestOptions = mRequestOptions.onlyRetrieveFromCache(isOffline);
}
}
```
```kotlin
import com.braze.support.BrazeLogger
import com.bumptech.glide.load.resource.gif.GifDrawable
class GlideBrazeImageLoader : IBrazeImageLoader {
companion object {
private val TAG = GlideBrazeImageLoader::class.qualifiedName
}
private var mRequestOptions = RequestOptions()
override fun renderUrlIntoCardView(context: Context, card: Card, imageUrl: String, imageView: ImageView, viewBounds: BrazeViewBounds) {
renderUrlIntoView(context, imageUrl, imageView)
}
override fun renderUrlIntoInAppMessageView(context: Context, inAppMessage: IInAppMessage, imageUrl: String, imageView: ImageView, viewBounds: BrazeViewBounds) {
renderUrlIntoView(context, imageUrl, imageView)
}
override fun getPushBitmapFromUrl(context: Context, extras: Bundle, imageUrl: String, viewBounds: BrazeViewBounds): Bitmap? {
return getBitmapFromUrl(context, imageUrl, viewBounds)
}
override fun getInAppMessageBitmapFromUrl(context: Context, inAppMessage: IInAppMessage, imageUrl: String, viewBounds: BrazeViewBounds): Bitmap? {
return getBitmapFromUrl(context, imageUrl, viewBounds)
}
private fun renderUrlIntoView(context: Context, imageUrl: String, imageView: ImageView) {
try {
val drawable = Glide.with(context)
.load(imageUrl)
.apply(mRequestOptions)
.submit()
.get()
imageView.post {
imageView.setImageDrawable(drawable)
if (drawable is GifDrawable) {
drawable.start()
}
}
} catch (e: Exception) {
BrazeLogger.e(TAG, "Failed to render URL into view: $imageUrl", e)
}
}
private fun getBitmapFromUrl(context: Context, imageUrl: String, viewBounds: BrazeViewBounds): Bitmap? {
try {
return Glide.with(context)
.asBitmap()
.apply(mRequestOptions)
.load(imageUrl).submit().get()
} catch (e: Exception) {
Log.e(TAG, "Failed to retrieve bitmap at url: $imageUrl", e)
}
return null
}
override fun setOffline(isOffline: Boolean) {
// If the loader is offline, then we should only be retrieving from the cache
mRequestOptions = mRequestOptions.onlyRetrieveFromCache(isOffline)
}
}
```
### Fixing image loading for Android SDK 36.0.0 and later
In Android SDK 36.0.0 and later, `displayInAppMessage()` is a `suspend` function. This means `renderUrlIntoInAppMessageView()` runs on a background thread instead of the main thread.
If your custom image loader calls `Glide.into(imageView)` in `renderUrlIntoInAppMessageView()`, your app can fail with "You must call this method on the main thread."
To avoid this:
1. Load the image on the background thread with `submit().get()`.
2. Post the UI update to the main thread with `imageView.post { ... }`.
3. If the loaded result is a GIF drawable, start the animation after setting it on the view.
This separates image loading from UI rendering, and keeps your custom image loader compatible with Android SDK 36.0.0 and later.
This guidance applies to Android custom image loaders. Web in-app messages support GIFs out of the box.
The following Kotlin sample uses placeholder values to show this pattern:
```kotlin
private const val TAG = "SampleGlideLoader"
private const val glideBrazeImageLoaderTag = "sample-loader"
private fun renderUrlIntoView(
context: Context,
imageUrl: String,
imageView: ImageView
) {
try {
val drawable: Drawable = Glide.with(context)
.load(imageUrl)
.apply(mRequestOptions)
.submit()
.get()
imageView.post {
imageView.setImageDrawable(drawable)
if (drawable is GifDrawable) {
drawable.start()
}
}
} catch (e: Exception) {
Log.e(TAG, "$glideBrazeImageLoaderTag renderUrlIntoView failed: url=$imageUrl", e)
}
}
```
### Step 2: Setting the image loader delegate
The Braze SDK will use any custom image loader set with [`IBrazeImageLoader`](https://braze-inc.github.io/braze-android-sdk/kdoc/braze-android-sdk/com.braze.images/-i-braze-image-loader/index.html). We recommend setting the custom image loader in a custom application subclass:
```java
public class GlideIntegrationApplication extends Application {
@Override
public void onCreate() {
super.onCreate();
Braze.getInstance(context).setImageLoader(new GlideBrazeImageLoader());
}
}
```
```kotlin
class GlideIntegrationApplication : Application() {
override fun onCreate() {
super.onCreate()
Braze.getInstance(context).imageLoader = GlideBrazeImageLoader()
}
}
```
## Custom Image Loading with Jetpack Compose
To override image loading with Jetpack Compose, you can pass in a value to [`imageComposable`](https://braze-inc.github.io/braze-android-sdk/kdoc/braze-android-sdk/com.braze.jetpackcompose.contentcards.styling/-content-card-styling/index.html#-808910455%2FProperties%2F-1725759721). This function will take a `Card` and render the image and the modifiers needed. Alternatively, you can use `customCardComposer` of `ContentCardsList` to render the entire card.
In the following example, Glide's Compose library is used for the cards listed in the `imageComposable` function:
```kotlin
ContentCardsList(
cardStyle = ContentCardStyling(
imageComposable = { card ->
when (card.cardType) {
CardType.CAPTIONED_IMAGE -> {
val captionedImageCard = card as CaptionedImageCard
GlideImage(
modifier = Modifier
.fillMaxWidth()
.wrapContentHeight()
.run {
if (captionedImageCard.aspectRatio > 0) {
aspectRatio(captionedImageCard.aspectRatio)
} else {
this
}
},
contentScale = ContentScale.Crop,
model = captionedImageCard.url,
loading = placeholder(R.drawable.pushpin),
contentDescription = ""
)
}
CardType.IMAGE -> {
val imageOnlyCard = card as ImageOnlyCard
GlideImage(
modifier = Modifier
.fillMaxWidth()
.run {
if (imageOnlyCard.aspectRatio > 0) {
aspectRatio(imageOnlyCard.aspectRatio)
} else {
this
}
},
contentScale = ContentScale.Crop,
model = imageOnlyCard.url,
loading = placeholder(R.drawable.pushpin),
contentDescription = ""
)
}
CardType.SHORT_NEWS -> {
val shortNews = card as ShortNewsCard
GlideImage(
modifier = Modifier
.width(100.dp)
.height(100.dp),
model = shortNews.url,
loading = placeholder(R.drawable.pushpin),
contentDescription = ""
)
}
else -> Unit
}
}
)
)
```
## Prerequisites
Before you can use this feature, you'll need to [integrate the Swift Braze SDK](https://www.braze.com/docs/fr/fr/developer_guide/sdk_integration/?sdktab=swift).
## Integrating a custom image library
### Step 1: Integrate SDWebImage
Integrate the [SDWebImage repository](https://github.com/SDWebImage/SDWebImage) into your Xcode project.
### Step 2: Create a new Swift file
In your Xcode project, create a new file named `SDWebImageGIFViewProvider.swift` and import the following:
```swift
import UIKit
import BrazeUI
import SDWebImage
```
### Step 3: Add `GIFViewProvider`
Next, add our sample SDWebImage [`GIFViewProvider`](https://braze-inc.github.io/braze-swift-sdk/documentation/brazeui/gifviewprovider/). Your file should be similar to the following:
```swift
import UIKit
import BrazeUI
import SDWebImage
extension GIFViewProvider {
/// A GIF view provider using [SDWebImage](https://github.com/SDWebImage/SDWebImage) as a
/// rendering library.
public static let sdWebImage = Self(
view: { SDAnimatedImageView(image: image(for: $0)) },
updateView: { ($0 as? SDAnimatedImageView)?.image = image(for: $1) }
)
private static func image(for url: URL?) -> UIImage? {
guard let url else { return nil }
return url.pathExtension == "gif"
? SDAnimatedImage(contentsOfFile: url.path)
: UIImage(contentsOfFile: url.path)
}
}
```
### Step 4: Modify your `AppDelegate.swift`
In your project's `AppDelegate.swift`, add GIF support to your `BrazeUI` components using `GIFViewProvider`. Your file should be similar to the following:
```swift
import UIKit
import BrazeKit
import BrazeUI
@main
class AppDelegate: UIResponder, UIApplicationDelegate {
static var braze: Braze? = nil
func application(
_ application: UIApplication,
didFinishLaunchingWithOptions launchOptions: [UIApplication.LaunchOptionsKey: Any]?
) -> Bool {
/* ... */
GIFViewProvider.shared = .sdWebImage
return true
}
}
```
# Enregistrez les données des messages in-app via le SDK Braze.
Source: /docs/fr/developer_guide/in_app_messages/logging_message_data/index.md
# Enregistrer les données des messages in-app
> Découvrez comment enregistrer les données des messages in-app (IAM) via le SDK de Braze.
## Prerequisites
Before you can use this feature, you'll need to [integrate the Web Braze SDK](https://www.braze.com/docs/fr/fr/developer_guide/sdk_integration/?sdktab=web).
## Logging message data
Logging in-app message [impressions](https://js.appboycdn.com/web-sdk/latest/doc/modules/braze.html#loginappmessageimpression) and [clicks](https://js.appboycdn.com/web-sdk/latest/doc/modules/braze.html#loginappmessagebuttonclick) is performed automatically when you use the `showInAppMessage` or `automaticallyShowInAppMessage` method.
If you do not use either method and opt to manually display the message using your own UI code, use the following methods to log analytics:
```javascript
// Registers that a user has viewed an in-app message with the Braze server.
braze.logInAppMessageImpression(inAppMessage);
// Registers that a user has clicked on the specified in-app message with the Braze server.
braze.logInAppMessageClick(inAppMessage);
// Registers that a user has clicked a specified in-app message button with the Braze server.
braze.logInAppMessageButtonClick(button, inAppMessage);
// Registers that a user has clicked on a link in an HTML in-app message with the Braze server.
braze.logInAppMessageHtmlClick(inAppMessage, buttonId?, url?)
```
## Prerequisites
Before you can use this feature, you'll need to [integrate the Flutter Braze SDK](https://www.braze.com/docs/fr/fr/developer_guide/sdk_integration/?sdktab=flutter).
## Logging message data
To log analytics using your `BrazeInAppMessage`, pass the instance into the desired analytics function:
- `logInAppMessageClicked`
- `logInAppMessageImpression`
- `logInAppMessageButtonClicked` (along with the button index)
For example:
```dart
// Log a click
braze.logInAppMessageClicked(inAppMessage);
// Log an impression
braze.logInAppMessageImpression(inAppMessage);
// Log button index `0` being clicked
braze.logInAppMessageButtonClicked(inAppMessage, 0);
```
## Accessing message data
To access in-app message data in your Flutter app, the `BrazePlugin` supports sending in-app message data using [Dart Streams](https://dart.dev/tutorials/language/streams).
The `BrazeInAppMessage` object supports a subset of fields available in the native model objects, including `uri`, `message`, `header`, `buttons`, `extras`, and more.
### Listen for in-app message data in the Dart layer
To receive in-app message data in the Dart layer, use the code below to create a `StreamSubscription` and call `braze.subscribeToInAppMessages()`. Remember to `cancel()` the stream subscription when it is no longer needed.
```dart
// Create stream subscription
StreamSubscription inAppMessageStreamSubscription;
inAppMessageStreamSubscription = braze.subscribeToInAppMessages((BrazeInAppMessage inAppMessage) {
// Handle in-app messages
}
// Cancel stream subscription
inAppMessageStreamSubscription.cancel();
```
For an example, see [main.dart](https://github.com/braze-inc/braze-flutter-sdk/blob/master/example/lib/main.dart) in the Braze Flutter SDK sample application.
### Forward in-app message data from the native layer
In-app message data is automatically forwarded from both the Android and iOS native layers. No additional setup is required.
If you're using Flutter SDK 17.1.0 or earlier, in-app message data forwarding from the iOS native layer requires manual setup. Your application likely contains one of the following. To migrate to Flutter SDK 18.0.0, remove the `BrazePlugin.processInAppMessage(_:)` call—data forwarding is now handled automatically.
Remove the `BrazePlugin.processInAppMessage(_:)` call from your [`willPresent` delegate implementation](https://braze-inc.github.io/braze-swift-sdk/documentation/brazeui/brazeinappmessageuidelegate/inappmessage(_:willpresent:view:)-4pzvv).
Remove the `BrazePlugin.processInAppMessage(message)` call from your custom presenter's [`present(message:)`](https://braze-inc.github.io/braze-swift-sdk/documentation/brazeui/brazeinappmessageui/present(message:)-f2ra) implementation:
```swift
class CustomInAppMessagePresenter: BrazeInAppMessageUI {
override func present(message: Braze.InAppMessage) {
// Pass in-app message data to the Dart layer.
BrazePlugin.processInAppMessage(message)
// If you want the default UI to display the in-app message.
super.present(message: message)
}
}
```
### Replaying the callback for in-app messages (optional)
To store any in-app messages triggered before the callback is available and replay them after it is set, add the following entry to the `customConfigs` map when initializing the `BrazePlugin`:
```dart
BrazePlugin braze = new BrazePlugin(customConfigs: {replayCallbacksConfigKey: true});
```
## Prerequisites
Before you can use this feature, you'll need to [integrate the React Native Braze SDK](https://www.braze.com/docs/fr/fr/developer_guide/sdk_integration/?sdktab=react%20native).
## Methods for logging
You can use these methods by passing your `BrazeInAppMessage` instance to log analytics and perform actions:
| Method | Description |
| --------------------------------------------------------- | ------------------------------------------------------------------------------------- |
| `logInAppMessageClicked(inAppMessage)` | Logs a click for the provided in-app message data. |
| `logInAppMessageImpression(inAppMessage)` | Logs an impression for the provided in-app message data. |
| `logInAppMessageButtonClicked(inAppMessage, buttonId)` | Logs a button click for the provided in-app message data and button ID. |
| `hideCurrentInAppMessage()` | Dismisses the currently displayed in-app message. |
| `performInAppMessageAction(inAppMessage)` | Performs the action for an in-app message. |
| `performInAppMessageButtonAction(inAppMessage, buttonId)` | Performs the action for an in-app message button. |
{: .reset-td-br-1 .reset-td-br-2 aria-label="Methods for logging" }
## Handling message data
In most cases, you can use the `Braze.addListener` method to register event listeners to handle data coming from in-app messages.
Additionally, you can access the in-app message data in the JavaScript layer by calling the `Braze.subscribeToInAppMessage` method to have the SDKs publish an `inAppMessageReceived` event when an in-app message is triggered. Pass a callback to this method to execute your own code when the in-app message is triggered and received by the listener.
To customize how message data is handled, refer to the following implementation examples:
To enhance the default behavior, or if you don't have access to customize the native iOS or Android code, we recommend that you disable the default UI while still receiving in-app message events from Braze. To disable the default UI, pass `false` to the `Braze.subscribeToInAppMessage` method and use the in-app message data to construct your own message in JavaScript. Note that you will need to manually log analytics on your messages if you choose to disable the default UI.
```javascript
import Braze from "@braze/react-native-sdk";
// Option 1: Listen for the event directly via `Braze.addListener`.
//
// You may use this method to accomplish the same thing if you don't
// wish to make any changes to the default Braze UI.
Braze.addListener(Braze.Events.IN_APP_MESSAGE_RECEIVED, (event) => {
console.log(event.inAppMessage);
});
// Option 2: Call `subscribeToInAppMessage`.
//
// Pass in `false` to disable the automatic display of in-app messages.
Braze.subscribeToInAppMessage(false, (event) => {
console.log(event.inAppMessage);
// Use `event.inAppMessage` to construct your own custom message UI.
});
```
To include more advanced logic to determine whether or not to show an in-app message using the built-in UI, implement in-app messages through the native layer.
**Warning:**
Since this is an advanced customization option, note that overriding the default Braze implementation will also nullify the logic to emit in-app message events to your JavaScript listeners. If you wish to still use `Braze.subscribeToInAppMessage` or `Braze.addListener` as described in [Accessing in-app message data](#accessing-in-app-message-data), you will need to handle publishing the events yourself.
Implement the `IInAppMessageManagerListener` as described in our Android article on [Custom Manager Listener](https://www.braze.com/docs/fr/fr/developer_guide/in_app_messages/customization/?sdktab=android#android_setting-custom-manager-listeners). In your `beforeInAppMessageDisplayed` implementation, you can access the `inAppMessage` data, send it to the JavaScript layer, and decide to show or not show the native message based on the return value.
For more on these values, see our [Android documentation](https://www.braze.com/docs/fr/fr/developer_guide/in_app_messages/).
```java
// In-app messaging
@Override
public InAppMessageOperation beforeInAppMessageDisplayed(IInAppMessage inAppMessage) {
WritableMap parameters = new WritableNativeMap();
parameters.putString("inAppMessage", inAppMessage.forJsonPut().toString());
getReactNativeHost()
.getReactInstanceManager()
.getCurrentReactContext()
.getJSModule(DeviceEventManagerModule.RCTDeviceEventEmitter.class)
.emit("inAppMessageReceived", parameters);
// Note: return InAppMessageOperation.DISCARD if you would like
// to prevent the Braze SDK from displaying the message natively.
return InAppMessageOperation.DISPLAY_NOW;
}
```
### Overriding the default UI delegate
By default, [`BrazeInAppMessageUI`](https://braze-inc.github.io/braze-swift-sdk/documentation/brazeui/brazeinappmessageui/) is created and assigned when you initialize the `braze` instance. `BrazeInAppMessageUI` is an implementation of the [`BrazeInAppMessagePresenter`](https://braze-inc.github.io/braze-swift-sdk/documentation/brazekit/brazeinappmessagepresenter) protocol and comes with a `delegate` property that can be used to customize the handling of in-app messages that have been received.
1. Implement the `BrazeInAppMessageUIDelegate` delegate as described in [our iOS article here](https://braze-inc.github.io/braze-swift-sdk/tutorials/braze/c1-inappmessageui).
2. In the `inAppMessage(_:displayChoiceForMessage:)` delegate method, you can access the `inAppMessage` data, send it to the JavaScript layer, and decide to show or not show the native message based on the return value.
For more details on these values, see our [iOS documentation](https://braze-inc.github.io/braze-swift-sdk/documentation/brazeui/brazeinappmessageuidelegate/).
```objc
- (enum BRZInAppMessageUIDisplayChoice)inAppMessage:(BrazeInAppMessageUI *)ui
displayChoiceForMessage:(BRZInAppMessageRaw *)message {
// Convert the message to a JavaScript representation.
NSData *inAppMessageData = [message json];
NSString *inAppMessageString = [[NSString alloc] initWithData:inAppMessageData encoding:NSUTF8StringEncoding];
NSDictionary *arguments = @{
@"inAppMessage" : inAppMessageString
};
// Send to JavaScript.
[self sendEventWithName:@"inAppMessageReceived" body:arguments];
// Note: Return `BRZInAppMessageUIDisplayChoiceDiscard` if you would like
// to prevent the Braze SDK from displaying the message natively.
return BRZInAppMessageUIDisplayChoiceNow;
}
```
To use this delegate, assign it to `brazeInAppMessagePresenter.delegate` after initializing the `braze` instance.
**Note:**
`BrazeUI` can only be imported in Objective-C or Swift. If you are using Objective-C++, you will need to handle this in a separate file.
```objc
@import BrazeUI;
- (BOOL)application:(UIApplication *)application didFinishLaunchingWithOptions:(NSDictionary *)launchOptions {
BRZConfiguration *configuration = [[BRZConfiguration alloc] initWithApiKey:apiKey endpoint:endpoint];
Braze *braze = [BrazeReactBridge initBraze:configuration];
((BrazeInAppMessageUI *)braze.inAppMessagePresenter).delegate = [[CustomDelegate alloc] init];
AppDelegate.braze = braze;
}
```
### Overriding the default native UI
If you wish to fully customize the presentation of your in-app messages at the native iOS layer, conform to the [`BrazeInAppMessagePresenter`](https://braze-inc.github.io/braze-swift-sdk/documentation/brazekit/brazeinappmessagepresenter) protocol and assign your custom presenter following the sample below:
```objc
BRZConfiguration *configuration = [[BRZConfiguration alloc] initWithApiKey:apiKey endpoint:endpoint];
Braze *braze = [BrazeReactBridge initBraze:configuration];
braze.inAppMessagePresenter = [[MyCustomPresenter alloc] init];
AppDelegate.braze = braze;
```
## Prerequisites
Before you can use this feature, you'll need to [integrate the Android Braze SDK](https://www.braze.com/docs/fr/fr/developer_guide/sdk_integration/?sdktab=android).
## Logging message data
You will need to make sure certain functions are called to handle the analytics for your campaign.
### Displayed messages
When a message is displayed or seen, log an impression:
```brightscript
LogInAppMessageImpression(in_app_message.id, brazetask)
```
### Clicked messages
Once a user clicks on the message, log a click and then process `in_app_message.click_action`:
```brightscript
LogInAppMessageClick(in_app_message.id, brazetask)
```
### Clicked buttons
If the user clicks on a button, log the button click and then process `inappmessage.buttons[selected].click_action`:
```brightscript
LogInAppMessageButtonClick(inappmessage.id, inappmessage.buttons[selected].id, brazetask)
```
### After processing a message
After processing an in-app message, you should clear the field:
```brightscript
m.BrazeTask.BrazeInAppMessage = invalid
```
## Subscribing to in-app messages
You may register Unity game objects to be notified of incoming in-app messages. We recommend setting game object listeners from the Braze configuration editor. In the configuration editor, listeners must be set separately for Android and iOS.
If you need to configure your game object listener at runtime, use `AppboyBinding.ConfigureListener()` and specify `BrazeUnityMessageType.IN_APP_MESSAGE`.
## Parsing messages
Incoming `string` messages received in your in-app message game object callback can be parsed into our pre-supplied model objects for convenience.
Use `InAppMessageFactory.BuildInAppMessage()` to parse your in-app message. The resulting object will either be an instance of [`IInAppMessage.cs`](https://github.com/braze-inc/braze-unity-sdk/blob/18cb8ee89f1841c576eb954793edb6e06f9130b4/Assets/Plugins/Appboy/Models/InAppMessage/IInAppMessage.cs) or [`IInAppMessageImmersive.cs`](https://github.com/braze-inc/braze-unity-sdk/blob/18cb8ee89f1841c576eb954793edb6e06f9130b4/Assets/Plugins/Appboy/Models/InAppMessage/IInAppMessageImmersive.cs) depending on its type.
```csharp
// Automatically logs a button click, if present.
void InAppMessageReceivedCallback(string message) {
IInAppMessage inApp = InAppMessageFactory.BuildInAppMessage(message);
if (inApp is IInAppMessageImmersive) {
IInAppMessageImmersive inAppImmersive = inApp as IInAppMessageImmersive;
if (inAppImmersive.Buttons != null && inAppImmersive.Buttons.Count > 0) {
inAppImmersive.LogButtonClicked(inAppImmersive.Buttons[0].ButtonID);
}
}
}
```
## Logging message data
Clicks and impressions must be manually logged for in-app messages not displayed directly by Braze.
Use `LogClicked()` and `LogImpression()` on [`IInAppMessage`](https://github.com/braze-inc/braze-unity-sdk/blob/18cb8ee89f1841c576eb954793edb6e06f9130b4/Assets/Plugins/Appboy/Models/InAppMessage/IInAppMessage.cs) to log clicks and impressions on your message.
Use `LogButtonClicked(int buttonID)` on [`IInAppMessageImmersive`](https://github.com/braze-inc/braze-unity-sdk/blob/18cb8ee89f1841c576eb954793edb6e06f9130b4/Assets/Plugins/Appboy/Models/InAppMessage/IInAppMessageImmersive.cs) to log button clicks. Note that buttons are represented as lists of[`InAppMessageButton`](https://github.com/braze-inc/braze-unity-sdk/blob/18cb8ee89f1841c576eb954793edb6e06f9130b4/Assets/Plugins/Appboy/Models/InAppMessage/InAppMessageButton.cs) instances, each of which contains a `ButtonID`.
# Veuillez envoyer un message test pour le SDK Braze.
Source: /docs/fr/developer_guide/in_app_messages/sending_test_messages/index.md
# Sending test messages
> Before sending out a messaging campaign to your users, you may want to test it to make sure it looks right and operates in the intended manner. You can use the dashboard to create and send test messages with push notifications, in-app messages (IAM), or email.
## Sending a test message
### Step 1: Create a designated test segment
After you set up a test segment, you can use it to test any of your Braze messaging channels. When set up correctly, this only needs to be done a single time.
To set up a test segment, go to **Segments** and create a new segment. Select **Add Filter**, then choose a one of the test filters.

With test filters, you can ensure that only users with a specific email address or [external user ID](https://www.braze.com/docs/fr/fr/developer_guide/platform_integration_guides/swift/analytics/setting_user_ids/#setting-user-ids) are sent the test message.

Both email address and external user ID filters offer the following options:
| Operator | Description |
|------------------|--------------------------------------------------------------------------------------------------------------------------------|
| `equals` | This will look for an exact match of the email or user ID that you provide. Use this if you only want to send the test campaigns to devices associated with a single email or user ID. |
| `does not equal` | Use this if you want to exclude a particular email or user ID from test campaigns. |
| `matches` | This will find users that have email addresses or user IDs that match part of the search term you provide. You could use this to find only the users that have an `@yourcompany.com` address, allowing you to send messages to everyone on your team. |
{: .reset-td-br-1 .reset-td-br-2 aria-label="Step 1: Create a designated test segment a class="margin-fix" name="test-segment"/a" }
You can select multiple specific emails using the "`matches`" option and separating the email addresses with a | character. For example: "`matches`" "`email1@braze.com` | `email2@braze.com`". You can also combine multiple operators together. For example, the test segment could include an email address filter that "`matches`" "`@braze.com`" and another filter that "`does not equal`" "`sales@braze.com`".
After adding the testing filters to your test segment, you can verify it's working by selecting **Preview** or by selecting **Settings** > **CSV Export All User Data** to export that segment's user data to a CSV file.

**Note:**
Exporting the segment's User Data to a CSV file is the most accurate verification method, as the preview will only show a sample of your users and may not include all users.
### Step 2: Send the message
You can send a message using the Braze dashboard or the command line.
To send test push notifications or in-app messages, you need to target your previously created test segment. Begin by creating your campaign and following the usual steps. When you reach the **Target Audiences** step, select your test segment from the dropdown menu.

Confirm your campaign and launch it to test your push notification and in-app messages.
**Note:**
Be sure to select **Allow users to become re-eligible to receive campaign** under the **Schedule** portion of the campaign composer if you intend to use a single campaign to send a test message to yourself more than once.
If you're only testing email messages, you do not necessarily have to set up a test segment. In the first step of the campaign composer where you compose your campaign's email message, click **Send Test** and enter the email address to which you wish to send a test email.

**Tip:**
You can also enable or disable [TEST (or SEED)](https://www.braze.com/docs/fr/fr/user_guide/administrative/app_settings/email_settings/#append-email-subject-lines) being appended on your test messages.
Alternatively, you can send a single notification using cURL and the [Braze Messaging API](https://www.braze.com/docs/fr/fr/api/endpoints/messaging/). Note that these examples make a request using the `US-01` instance. To find out yours, refer to [API endpoints](https://www.braze.com/docs/fr/fr/api/basics/#endpoints).
```bash
curl -X POST -H "Content-Type: application/json" -H "Authorization: Bearer {BRAZE_API_KEY}" -d '{
"external_user_ids":["EXTERNAL_USER_ID"],
"messages": {
"android_push": {
"title":"Test push title",
"alert":"Test push",
"extra":{
"CUSTOM_KEY":"CUSTOM_VALUE"
}
}
}
}' https://rest.iad-01.braze.com/messages/send
```
```bash
curl -X POST -H "Content-Type: application/json" -H "Authorization: Bearer {BRAZE_API_KEY}" -d '{
"external_user_ids":["EXTERNAL_USER_ID"],
"messages": {
"apple_push": {
"alert": "Test push",
"extra": {
"CUSTOM_KEY" :"CUSTOM_VALUE"
}
}
}
}' https://rest.iad-01.braze.com/messages/send
```
```bash
curl -X POST -H "Content-Type: application/json" -H "Authorization: Bearer {BRAZE_API_KEY}" -d '{
"external_user_ids":["EXTERNAL_USER_ID"],
"messages": {
"kindle_push": {
"title":"Test push title",
"alert":"Test push",
"extra":{
"CUSTOM_KEY":"CUSTOM_VALUE"
}
}
}
}' https://rest.iad-01.braze.com/messages/send
```
Replace the following:
| Placeholder | Description |
|---------------------|-----------------------------------------------------------|
| `BRAZE_API_KEY` | Your Braze API key used for authentication. In Braze, go to **Settings** > **API Keys** to locate your key. |
| `EXTERNAL_USER_ID` | The external user ID used to send your message to a specific user. In Braze, go to **Audience** > **Search users**, then search for a user. |
| `CUSTOM_KEY` | (Optional) A custom key for additional data. |
| `CUSTOM_VALUE` | (Optional) A custom value assigned to your custom key. |
{: .reset-td-br-1 .reset-td-br-2 aria-label="Step 2: Send the message" }
## Test limitations
There are a few situations where test messages don't have complete feature parity with launching a campaign or Canvas to a real set of users. In these instances, to validate this behavior, you should launch the campaign or Canvas to a limited set of test users.
- Viewing the Braze [preference center](https://www.braze.com/docs/fr/fr/user_guide/message_building_by_channel/email/managing_user_subscriptions/#subscription-groups) from **Test Messages** will cause the submit button to be grayed out.
- The list-unsubscribe header is not included in emails sent by the test message functionality.
- For in-app messages and Content Cards, the target user must have a push token for the target device.
# Tutoriels
Source: /docs/fr/developer_guide/in_app_messages/tutorials/index.md
# Tutoriel : Affichage conditionnel des messages in-app
Source: /docs/fr/developer_guide/in_app_messages/tutorials/conditionally_displaying_messages/index.md
# Tutoriel : Affichage conditionnel des messages in-app
> Suivez l'exemple de code de ce tutoriel pour afficher de manière conditionnelle des messages in-app à l'aide du SDK de Braze.
## Prerequisites
Before you can use this feature, you'll need to [integrate the Web Braze SDK](https://www.braze.com/docs/fr/fr/developer_guide/sdk_integration/?sdktab=web). Cependant, aucune configuration supplémentaire n'est nécessaire.
## Affichage conditionnel des messages in-app pour le web
**Important:**
We're piloting this new tutorial format. [Tell us what you think](https://docs.google.com/forms/d/e/1FAIpQLSe_5uhWM7eXXk9F_gviO_pvA4rkYO3WA9B6tNJZ3TY91md5bw/viewform?usp=pp_url&entry.569173304=General+Feedback) — your feedback helps us improve future guides.
```js file=index.js
import * as braze from "@braze/web-sdk";
// Remove any calls to `braze.automaticallyShowInAppMessages()`
braze.initialize("YOUR-API-KEY", {
baseUrl: "YOUR-ENDPOINT",
enableLogging: true,
});
braze.subscribeToInAppMessage(function (message) {
if (
location.pathname === "/checkout" ||
document.getElementById("#checkout")
) {
// do not show the message
} else {
braze.showInAppMessage(message);
}
});
```
!étape
lignes-index.js=2
#### 1\. Supprimer les appels à `automaticallyShowInAppMessages()`
Supprimez tous les appels à [`automaticallyShowInAppMessages()`](https://js.appboycdn.com/web-sdk/latest/doc/modules/braze.html#automaticallyshowinappmessages)car ils remplaceront toute logique personnalisée que vous mettrez en œuvre ultérieurement.
!étape
lignes-index.js=6
#### 2\. Activer le débogage (facultatif)
Pour faciliter la résolution des problèmes lors du développement, pensez à activer le débogage.
!étape
lignes-index.js=9-18
#### 3\. S'abonner aux envois de messages in-app
Enregistrez un rappel avec [`subscribeToInAppMessage(callback)`](https://js.appboycdn.com/web-sdk/latest/doc/modules/braze.html#subscribetoinappmessage) pour recevoir un `message` chaque fois qu'un message in-app est déclenché.
!étape
lignes-index.js=10-13
#### 4\. Créer une logique conditionnelle
Créez une logique personnalisée pour contrôler l'affichage des messages. Dans cet exemple, la logique vérifie si l'URL contient `"checkout"` ou si un élément `#checkout` existe sur la page.
!étape
lignes-index.js=16
#### 5\. Affichage des messages avec `showInAppMessage`
Pour afficher le message, appelez la touche [`showInAppMessage(message)`](https://js.appboycdn.com/web-sdk/latest/doc/modules/braze.html#showinappmessage). En cas d'omission, le message sera ignoré.
## Prerequisites
Before you can use this feature, you'll need to [integrate the Android Braze SDK](https://www.braze.com/docs/fr/fr/developer_guide/sdk_integration/?sdktab=android). Il vous sera également nécessaire d'[activer les messages in-app pour Android](https://www.braze.com/docs/fr/fr/developer_guide/in_app_messages/?sdktab=android#android_enabling-in-app-messages).
## Affichage conditionnel des messages in-app pour Android
**Important:**
We're piloting this new tutorial format. [Tell us what you think](https://docs.google.com/forms/d/e/1FAIpQLSe_5uhWM7eXXk9F_gviO_pvA4rkYO3WA9B6tNJZ3TY91md5bw/viewform?usp=pp_url&entry.569173304=General+Feedback) — your feedback helps us improve future guides.
```kotlin file=MainApplication.kt
import android.app.Application
import com.braze.Braze
import com.braze.support.BrazeLogger
import com.braze.configuration.BrazeConfig
import com.braze.ui.inappmessage.BrazeInAppMessageManager
import com.braze.BrazeActivityLifecycleCallbackListener
import com.braze.ui.inappmessage.listeners.IInAppMessageManagerListener
import com.braze.models.inappmessage.IInAppMessage
import com.braze.ui.inappmessage.InAppMessageOperation
import android.util.Log
class MyApplication : Application() {
override fun onCreate() {
super.onCreate()
// Enable verbose Braze SDK logs
BrazeLogger.logLevel = Log.VERBOSE
// Initialize Braze
val brazeConfig = BrazeConfig.Builder()
.setApiKey("YOUR-API-KEY")
.setCustomEndpoint("YOUR-ENDPOINT")
.build()
Braze.configure(this, brazeConfig)
registerActivityLifecycleCallbacks(
BrazeActivityLifecycleCallbackListener()
)
// Set up in-app message listener
BrazeInAppMessageManager.getInstance().setCustomInAppMessageManagerListener(object : IInAppMessageManagerListener {
override fun beforeInAppMessageDisplayed(inAppMessage: IInAppMessage): InAppMessageOperation {
// Check if we should show the message
val shouldShow = inAppMessage.extras["should_display_message"] == "true"
return if (shouldShow) {
// Show the message using Braze's UI
InAppMessageOperation.DISPLAY_NOW
} else {
// Discard the message (or we could also create our own UI using KVP values)
InAppMessageOperation.DISCARD
}
}
})
}
}
```
!étape
lignes-MainApplication.kt=17
#### 1\. Activer le débogage (facultatif)
Pour faciliter la résolution des problèmes lors du développement, pensez à activer le débogage.
!étape
lignes-MainApplication.kt=26-28
#### 2\. Enregistrer les fonctions de rappel du cycle de vie des activités
Enregistrez l'auditeur par défaut de Braze pour gérer le cycle de vie des messages in-app.
!étape
lignes-MainApplication.kt=30-44
#### 3\. Configurer un récepteur de messages in-app
Utilisez `BrazeInAppMessageManager` pour définir un récepteur personnalisé qui intercepte les messages avant qu'ils ne soient affichés.
!étape
lignes-MainApplication.kt=34-42
#### 4\. Créer une logique conditionnelle
Utilisez une logique personnalisée pour contrôler la synchronisation de l'affichage des messages. Dans cet exemple, la logique personnalisée vérifie si l'option `should_display_message` est définie sur `"true"`.
!étape
lignes-MainApplication.kt=38,41
#### 5\. Renvoyer ou rejeter le message
Retournez un `InAppMessageOperation` avec `DISPLAY_NOW` pour afficher le message, ou avec `DISCARD` pour le supprimer.
## Prerequisites
Before you can use this feature, you'll need to [integrate the Swift Braze SDK](https://www.braze.com/docs/fr/fr/developer_guide/sdk_integration/?sdktab=swift). Il vous sera également nécessaire d'[activer les messages in-app pour Swift](https://www.braze.com/docs/fr/fr/developer_guide/in_app_messages/?sdktab=swift#swift_enabling-in-app-messages).
## Affichage conditionnel des messages in-app pour Swift
**Important:**
We're piloting this new tutorial format. [Tell us what you think](https://docs.google.com/forms/d/e/1FAIpQLSe_5uhWM7eXXk9F_gviO_pvA4rkYO3WA9B6tNJZ3TY91md5bw/viewform?usp=pp_url&entry.569173304=General+Feedback) — your feedback helps us improve future guides.
```swift file=AppDelegate.swift
import SwiftUI
import BrazeKit
import BrazeUI
class AppDelegate: NSObject, UIApplicationDelegate, BrazeInAppMessageUIDelegate {
static var braze: Braze?
func application(_ application: UIApplication,
didFinishLaunchingWithOptions launchOptions: [UIApplication.LaunchOptionsKey: Any]? = nil) -> Bool {
// 1. Braze configuration with your SDK API key and endpoint
let configuration = Braze.Configuration(apiKey: "YOUR_API_ENDPOINT", endpoint: "YOUR_API_KEY")
configuration.logger.level = .debug
// 2. Initialize Braze SDK instance
let brazeInstance = Braze(configuration: configuration)
AppDelegate.braze = brazeInstance
// 3. Set up Braze In-App Message UI and delegate
let inAppMessageUI = BrazeInAppMessageUI()
inAppMessageUI.delegate = self
brazeInstance.inAppMessagePresenter = inAppMessageUI
return true
}
func inAppMessage(_ ui: BrazeInAppMessageUI,
displayChoiceForMessage message: Braze.InAppMessage) -> BrazeInAppMessageUI.DisplayChoice {
if let showFlag = message.extras["should_display_message"] as? String, showFlag == "true" {
return .now
} else {
return .discard
}
}
}
```
```swift file=SampleApp.swift
import SwiftUI
@main
struct SampleApp: App {
@UIApplicationDelegateAdaptor(AppDelegate.self) var appDelegate
var body: some Scene {
WindowGroup {
YourView()
}
}
}
```
!étape
lignes-AppDelegate.swift=5
#### 1\. Mettre en œuvre le `BrazeInAppMessageUIDelegate`
Dans votre classe AppDelegate, implémentez la méthode [`BrazeInAppMessageUIDelegate`](https://braze-inc.github.io/braze-swift-sdk/documentation/brazeui/brazeinappmessageui/delegate) afin que vous puissiez remplacer sa méthode `inAppMessage` ultérieurement.
!étape
lignes-AppDelegate.swift=12
#### 2\. Activer le débogage (facultatif)
Pour faciliter la résolution des problèmes lors du développement, pensez à activer le débogage.
!étape
lignes-AppDelegate.swift=19-21
#### 3\. Configurez votre interface utilisateur Braze et déléguez.
`BrazeInAppMessageUI()` rend les messages in-app par défaut. En attribuant à `self` le statut de délégué, vous pouvez intercepter et traiter les messages avant qu'ils ne soient affichés.
!étape
lignes-AppDelegate.swift=26-33
#### 4\. Remplacer `DisplayChoice` par une logique conditionnelle
Remplacer [`inAppMessage(_:displayChoiceForMessage:)`](https://braze-inc.github.io/braze-swift-sdk/documentation/brazeui/brazeinappmessageuidelegate/inappmessage(_:displaychoiceformessage:)-9w1nb) pour décider si un message doit être affiché. Retournez `.now` pour afficher le message ou `.discard` pour le supprimer.
# Tutoriel : Personnalisation du style à l'aide de paires clé-valeur
Source: /docs/fr/developer_guide/in_app_messages/tutorials/customizing_message_styling/index.md
# Tutoriel : Personnalisation du style des messages à l'aide de paires clé-valeur
> Suivez l'exemple de code de ce didacticiel pour personnaliser le style de vos messages in-app à l'aide de paires clé-valeur dans le SDK de Braze.
## Prerequisites
Before you can use this feature, you'll need to [integrate the Web Braze SDK](https://www.braze.com/docs/fr/fr/developer_guide/sdk_integration/?sdktab=web). Cependant, aucune configuration supplémentaire n'est nécessaire.
## Personnalisation du style personnalisé des messages à l'aide de paires clé-valeur pour le Web
**Important:**
We're piloting this new tutorial format. [Tell us what you think](https://docs.google.com/forms/d/e/1FAIpQLSe_5uhWM7eXXk9F_gviO_pvA4rkYO3WA9B6tNJZ3TY91md5bw/viewform?usp=pp_url&entry.569173304=General+Feedback) — your feedback helps us improve future guides.
```js file=index.js
import * as braze from "@braze/web-sdk";
// Remove any calls to `braze.automaticallyShowInAppMessages()`
braze.initialize("YOUR-API-KEY", {
baseUrl: "YOUR-ENDPOINT",
enableLogging: true,
});
braze.subscribeToInAppMessage(function (message) {
const extras = message.extras;
const customTemplateType = extras["custom-template"] || "";
const customColor = extras["custom-color"] || "";
const customMessageId = extras["message-id"] || "";
if (customTemplateType) {
// add your own custom code to render this message
} else {
// otherwise, use Braze built-in UI
braze.showInAppMessage(message);
}
});
```
!étape
lignes-index.js=2
#### 1\. Supprimer les appels à `automaticallyShowInAppMessages()`
Supprimez tous les appels à [`automaticallyShowInAppMessages()`](https://js.appboycdn.com/web-sdk/latest/doc/modules/braze.html#automaticallyshowinappmessages) car ils remplaceront toute logique personnalisée que vous mettrez en œuvre ultérieurement.
!étape
lignes-index.js=6
#### 2\. Activer le débogage (facultatif)
Pour faciliter la résolution des problèmes lors du développement, pensez à activer le débogage.
!étape
lignes-index.js=9-21
#### 3\. S'abonner au gestionnaire de rappel des messages in-app.
Enregistrez un rappel avec [`subscribeToInAppMessage(callback)`](https://js.appboycdn.com/web-sdk/latest/doc/modules/braze.html#subscribetoinappmessage) pour recevoir un message chaque fois qu'un message in-app est déclenché.
!étape
lignes-index.js=10-13
#### 4\. Accéder à la propriété `message.extras`
Utilisez `message.extras` pour accéder aux types de personnalisation, aux attributs de style ou à toute autre valeur définie dans le tableau de bord. Toutes les valeurs sont renvoyées sous forme de chaînes de caractères.
!étape
lignes-index.js=19
#### 5\. Appel conditionnel `showInAppMessage`
Pour afficher le message, appelez la touche [`showInAppMessage(message)`](https://js.appboycdn.com/web-sdk/latest/doc/modules/braze.html#showinappmessage). Sinon, utilisez les propriétés personnalisées nécessaires.
## Prerequisites
Before you can use this feature, you'll need to [integrate the Android Braze SDK](https://www.braze.com/docs/fr/fr/developer_guide/sdk_integration/?sdktab=android). Il vous sera également nécessaire d'[activer les messages in-app pour Android](https://www.braze.com/docs/fr/fr/developer_guide/in_app_messages/?sdktab=android#android_enabling-in-app-messages).
## Personnalisation du style des messages à l'aide de paires clé-valeur pour Android
**Important:**
We're piloting this new tutorial format. [Tell us what you think](https://docs.google.com/forms/d/e/1FAIpQLSe_5uhWM7eXXk9F_gviO_pvA4rkYO3WA9B6tNJZ3TY91md5bw/viewform?usp=pp_url&entry.569173304=General+Feedback) — your feedback helps us improve future guides.
```kotlin file=MainApplication.kt
package com.example.brazedevlab
import android.app.Application
import com.braze.Braze
import com.braze.support.BrazeLogger
import com.braze.configuration.BrazeConfig
import com.braze.ui.inappmessage.BrazeInAppMessageManager
import com.braze.BrazeActivityLifecycleCallbackListener
import com.braze.ui.inappmessage.listeners.IInAppMessageManagerListener
import com.braze.models.inappmessage.IInAppMessage
import com.braze.ui.inappmessage.InAppMessageOperation
import android.util.Log
class MyApplication : Application() {
override fun onCreate() {
super.onCreate()
// Enable verbose Braze SDK logs
BrazeLogger.logLevel = Log.VERBOSE
// Initialize Braze
val brazeConfig = BrazeConfig.Builder()
.setApiKey("YOUR-API-KEY")
.setCustomEndpoint("YOUR-ENDPOINT")
.build()
Braze.configure(this, brazeConfig)
registerActivityLifecycleCallbacks(
BrazeActivityLifecycleCallbackListener()
)
// Set up custom in-app message view factory
BrazeInAppMessageManager.getInstance()
.setCustomInAppMessageViewFactory(CustomInAppMessageViewFactory())
}
}
```
```kotlin file=CustomInAppMessageViewFactory.kt
import android.app.Activity
import android.graphics.Color
import android.view.View
import com.braze.models.inappmessage.IInAppMessage
import com.braze.ui.inappmessage.BrazeInAppMessageManager
import com.braze.ui.inappmessage.IInAppMessageViewFactory
class CustomInAppMessageViewFactory : IInAppMessageViewFactory {
override fun createInAppMessageView(
activity: Activity,
inAppMessage: IInAppMessage
): View {
// 1) Obtain Braze’s default view factory for this message type
val defaultFactory =
BrazeInAppMessageManager.getInstance()
.getDefaultInAppMessageViewFactory(inAppMessage)
?: throw IllegalStateException(
"Braze default IAM view factory is missing"
)
// 2) Inflate the default view
val iamView = defaultFactory
.createInAppMessageView(activity, inAppMessage)
?: throw IllegalStateException(
"Braze default IAM view is null"
)
// 3) Get your KVP extras
val extras = inAppMessage.extras ?: emptyMap()
val customization = extras["customization"]
val overrideColor = extras["custom-color"]
// 4) Style your root view
if (customization == "slideup-attributes" && overrideColor != null) {
try {
iamView.setBackgroundColor(Color.parseColor(overrideColor))
} catch (_: IllegalArgumentException) {
// ignore bad styling
}
}
return iamView
}
}
```
!étape
lignes-MainApplication.kt=19
#### 1\. Activer le débogage (facultatif)
Pour faciliter la résolution des problèmes lors du développement, pensez à activer le débogage.
!étape
lignes-MainApplication.kt=28-30
#### 2\. Enregistrer les fonctions de rappel du cycle de vie des activités
Enregistrez l'auditeur par défaut de Braze pour gérer le cycle de vie des messages in-app.
!étape
lignes-CustomInAppMessageViewFactory.kt=8
#### 3\. Créez votre classe de fabrique de vues personnalisée
Assurez-vous que votre classe est conforme à [`IInAppMessageViewFactory`](https://braze-inc.github.io/braze-android-sdk/kdoc/braze-android-sdk/com.braze.ui.inappmessage/-i-in-app-message-view-factory/index.html) afin qu'elle puisse construire et renvoyer des messages personnalisés.
!étape
lignes-CustomInAppMessageViewFactory.kt=15-20
#### 4\. Déléguer à l'usine par défaut de Braze
Déléguez à la fabrique par défaut pour conserver le style intégré de Braze avant d'appliquer vos propres modifications conditionnelles.
!étape
lignes-CustomInAppMessageViewFactory.kt=30-32,35-41
#### 5\. Accéder à des paires clé-valeur à partir de `inAppMessage.extras`
Utilisez `inAppMessage.extras` pour accéder aux types de personnalisation, aux attributs de style ou à toute autre valeur définie dans le tableau de bord. Appliquer les surcharges de style avant de renvoyer la vue.
!étape
lignes-MainApplication.kt=33-34
#### 6\. Mettre en place un système personnalisé de `IInAppMessageViewFactory`
Mettre en œuvre [`IInAppMessageViewFactory`](https://braze-inc.github.io/braze-android-sdk/kdoc/braze-android-sdk/com.braze.ui.inappmessage/-i-in-app-message-view-factory/index.html) dans votre classe personnalisée pour construire et afficher les messages in-app.
## Prerequisites
Before you can use this feature, you'll need to [integrate the Swift Braze SDK](https://www.braze.com/docs/fr/fr/developer_guide/sdk_integration/?sdktab=swift). Il vous sera également nécessaire d'[activer les messages in-app pour Swift](https://www.braze.com/docs/fr/fr/developer_guide/in_app_messages/?sdktab=swift#swift_enabling-in-app-messages).
## Personnalisation du style des messages à l'aide de paires clé-valeur pour Swift
**Important:**
We're piloting this new tutorial format. [Tell us what you think](https://docs.google.com/forms/d/e/1FAIpQLSe_5uhWM7eXXk9F_gviO_pvA4rkYO3WA9B6tNJZ3TY91md5bw/viewform?usp=pp_url&entry.569173304=General+Feedback) — your feedback helps us improve future guides.
```swift file=AppDelegate.swift
import UIKit
import BrazeKit
import BrazeUI
class AppDelegate: UIResponder, UIApplicationDelegate, BrazeInAppMessageUIDelegate {
var window: UIWindow?
static var braze: Braze?
func application(
_ application: UIApplication,
didFinishLaunchingWithOptions launchOptions: [UIApplication.LaunchOptionsKey: Any]?
) -> Bool {
let configuration = Braze.Configuration(
apiKey: "YOUR-API-KEY",
endpoint: "YOUR-ENDPOINT"
)
configuration.logger.level = .debug
let braze = Braze(configuration: configuration)
AppDelegate.braze = braze
// Set up Braze In-App Message UI and delegate
let inAppMessageUI = BrazeInAppMessageUI()
inAppMessageUI.delegate = self
brazeInstance.inAppMessagePresenter = inAppMessageUI
return true
}
func inAppMessage(
_ ui: BrazeInAppMessageUI,
prepareWith context: inout BrazeInAppMessageUI.PresentationContext
) {
let customization = context.message.extras["customization"] as? String
if customization == "slideup-attributes" {
// Create a new attributes object and make customizations.
var attributes = context.attributes?.slideup
attributes?.font = UIFont(name: "Chalkduster", size: 17)!
attributes?.imageSize = CGSize(width: 65, height: 65)
attributes?.cornerRadius = 20
attributes?.imageCornerRadius = 10
if #available(iOS 13.0, *) {
attributes?.cornerCurve = .continuous
attributes?.imageCornerCurve = .continuous
}
context.attributes?.slideup = attributes
}
}
}
```
```swift file=SampleApp.swift
import SwiftUI
@main
struct SampleApp: App {
@UIApplicationDelegateAdaptor(AppDelegate.self) var appDelegate
var body: some Scene {
WindowGroup {
YourView()
}
}
}
```
!étape
lignes-AppDelegate.swift=5
#### 1\. Mettre en œuvre `BrazeInAppMessageUIDelegate`
Dans votre classe `AppDelegate`, implémentez [`BrazeInAppMessageUIDelegate`](https://braze-inc.github.io/braze-swift-sdk/documentation/brazeui/brazeinappmessageui/delegate) afin que vous puissiez remplacer sa méthode `inAppMessage` ultérieurement.
!étape
lignes-AppDelegate.swift=17
#### 2\. Activer le débogage (facultatif)
Pour faciliter la résolution des problèmes lors du développement, pensez à activer le débogage.
!étape
lignes-AppDelegate.swift=30-50
#### 3\. Préparer les messages avant qu'ils ne soient affichés
Braze appelle `inAppMessage(_:prepareWith:)` pendant la préparation du message. Utilisez-le pour personnaliser le style ou appliquer une logique basée sur des paires clé-valeur.
!étape
lignes-AppDelegate.swift=34
#### 4\. Accéder à des paires clé-valeur à partir de `message.extras`
Utilisez `message.extras` pour accéder aux types de personnalisation, aux attributs de style ou à toute autre valeur définie dans le tableau de bord.
!étape
lignes-AppDelegate.swift=38-46
#### 5\. Mise à jour des attributs de style du message
Utilisez [`inAppMessage(_:prepareWith:)`](https://braze-inc.github.io/braze-swift-sdk/documentation/brazeui/brazeinappmessageuidelegate/inappmessage(_:preparewith:)-11fog) pour accéder au site `PresentationContext` et modifier directement les attributs de style. Chaque type de message in-app expose des attributs différents.
# Tutoriel : Report et restauration des messages déclenchés
Source: /docs/fr/developer_guide/in_app_messages/tutorials/deferring_triggered_messages/index.md
# Tutoriel : Report et restauration des messages déclenchés
> Suivez l'exemple de code de ce tutoriel pour différer et restaurer les messages in-app déclenchés à l'aide du SDK de Braze.
## Prerequisites
Before you can use this feature, you'll need to [integrate the Web Braze SDK](https://www.braze.com/docs/fr/fr/developer_guide/sdk_integration/?sdktab=web). Cependant, aucune configuration supplémentaire n'est nécessaire.
## Report et restauration des messages déclenchés pour le Web
**Important:**
We're piloting this new tutorial format. [Tell us what you think](https://docs.google.com/forms/d/e/1FAIpQLSe_5uhWM7eXXk9F_gviO_pvA4rkYO3WA9B6tNJZ3TY91md5bw/viewform?usp=pp_url&entry.569173304=General+Feedback) — your feedback helps us improve future guides.
```js file=index.js
import * as braze from "@braze/web-sdk";
// Remove any calls to `braze.automaticallyShowInAppMessages()`
braze.initialize("YOUR-API-KEY", {
baseUrl: "YOUR-ENDPOINT",
enableLogging: true,
});
braze.subscribeToInAppMessage(function (message) {
const shouldDefer = true; // customize for your own logic
if (shouldDefer) {
braze.deferInAppMessage(message);
} else {
braze.showInAppMessage(message);
}
});
// elsewhere in your app
document.getElementById("button").onclick = function () {
const deferredMessage = braze.getDeferredInAppMessage();
if (deferredMessage) {
braze.showInAppMessage(deferredMessage);
}
};
```
!étape
lignes-index.js=2
#### 1\. Supprimer les appels à `automaticallyShowInAppMessages()`
Supprimez tous les appels à [`automaticallyShowInAppMessages()`](https://js.appboycdn.com/web-sdk/latest/doc/modules/braze.html#automaticallyshowinappmessages) car ils remplaceront toute logique personnalisée que vous mettrez en œuvre ultérieurement.
!étape
lignes-index.js=6
#### 2\. Activer le débogage (facultatif)
Pour faciliter la résolution des problèmes lors du développement, pensez à activer le débogage.
!étape
lignes-index.js=9-16
#### 3\. S'abonner au gestionnaire de rappel des messages in-app.
Enregistrez un rappel avec [`subscribeToInAppMessage(callback)`](https://js.appboycdn.com/web-sdk/latest/doc/modules/braze.html#subscribetoinappmessage) pour recevoir un message chaque fois qu'un message in-app est déclenché.
!étape
lignes-index.js=11-12
#### 4\. Report de l'instance `message`
Pour différer l'envoi du message, appelez le [`deferInAppMessage(message)`](https://js.appboycdn.com/web-sdk/latest/doc/modules/braze.html#deferinappmessage). Braze sérialise et enregistre cet envoi de messages afin que vous puissiez l'afficher lors d'un prochain chargement de page.
!étape
lignes-index.js=18-24
#### 5\. Récupérer un message précédemment différé
Pour récupérer tout envoi de messages précédemment différés, appelez [`getDeferredInAppMessage()`](https://js.appboycdn.com/web-sdk/latest/doc/modules/braze.html#getdeferredinappmessage).
!étape
lignes-index.js=21-23
#### 6\. Afficher l'envoi de messages différés
Après avoir récupéré un message différé, affichez-le en le passant à [`showInAppMessage(message)`](https://js.appboycdn.com/web-sdk/latest/doc/modules/braze.html#showinappmessage).
!étape
lignes-index.js=13-15
#### 7\. Affichage immédiat d'un message
Pour afficher un message au lieu de le différer, appelez [`showInAppMessage(message)`](https://js.appboycdn.com/web-sdk/latest/doc/modules/braze.html#showinappmessage) directement dans votre rappel `subscribeToInAppMessage`.
## Prerequisites
Before you can use this feature, you'll need to [integrate the Android Braze SDK](https://www.braze.com/docs/fr/fr/developer_guide/sdk_integration/?sdktab=android). Il vous sera également nécessaire d'[activer les messages in-app pour Android](https://www.braze.com/docs/fr/fr/developer_guide/in_app_messages/?sdktab=android#android_enabling-in-app-messages).
## Report et restauration des messages déclenchés pour Android
**Important:**
We're piloting this new tutorial format. [Tell us what you think](https://docs.google.com/forms/d/e/1FAIpQLSe_5uhWM7eXXk9F_gviO_pvA4rkYO3WA9B6tNJZ3TY91md5bw/viewform?usp=pp_url&entry.569173304=General+Feedback) — your feedback helps us improve future guides.
```kotlin file=MainApplication.kt
import android.app.Application
import com.braze.Braze
import com.braze.support.BrazeLogger
import com.braze.configuration.BrazeConfig
import com.braze.ui.inappmessage.BrazeInAppMessageManager
import com.braze.BrazeActivityLifecycleCallbackListener
import com.braze.ui.inappmessage.listeners.IInAppMessageManagerListener
import com.braze.models.inappmessage.IInAppMessage
import com.braze.ui.inappmessage.InAppMessageOperation
import android.util.Log
class MyApplication : Application() {
companion object {
private var instance: MyApplication? = null
fun getInstance(): MyApplication = instance!!
}
private var showMessage = false
override fun onCreate() {
super.onCreate()
instance = this
// Enable verbose Braze SDK logs
BrazeLogger.logLevel = Log.VERBOSE
// Initialize Braze
val brazeConfig = BrazeConfig.Builder()
.setApiKey("YOUR-API-KEY")
.setCustomEndpoint("YOUR-ENDPOINT")
.build()
Braze.configure(this, brazeConfig)
registerActivityLifecycleCallbacks(
BrazeActivityLifecycleCallbackListener()
)
// Set up in-app message listener
BrazeInAppMessageManager.getInstance().setCustomInAppMessageManagerListener(object : IInAppMessageManagerListener {
override fun beforeInAppMessageDisplayed(inAppMessage: IInAppMessage): InAppMessageOperation {
return if (showMessage) {
// Show the message using Braze's UI
InAppMessageOperation.DISPLAY_NOW
} else {
// Re-enqueue the message for later
InAppMessageOperation.DISPLAY_LATER
}
}
})
}
fun showDeferredMessage(show: Boolean) {
showMessage = show
BrazeInAppMessageManager.getInstance().requestDisplayInAppMessage()
}
}
```
```kotlin file=MainActivity.kt
import android.os.Bundle
import androidx.activity.ComponentActivity
import androidx.activity.compose.setContent
import androidx.compose.foundation.layout.*
import androidx.compose.material.Button
import androidx.compose.material.Text
import androidx.compose.runtime.Composable
import androidx.compose.ui.Modifier
import androidx.compose.ui.unit.dp
class MainActivity : ComponentActivity() {
override fun onCreate(savedInstanceState: Bundle?) {
super.onCreate(savedInstanceState)
setContent {
ContentView()
}
}
}
@Composable
fun ContentView() {
Column(
modifier = Modifier.padding(16.dp),
verticalArrangement = Arrangement.spacedBy(20.dp)
) {
// ... your UI
Button(onClick = {
MyApplication.getInstance().showDeferredMessage(true)
}) {
Text("Show Deferred IAM")
}
}
}
```
!étape
lignes-MainApplication.kt=13-16
#### 1\. Créer une instance unique de `Application`
Utilisez un objet compagnon pour exposer votre classe `Application` en tant que singleton afin qu'elle soit accessible ultérieurement dans votre code.
!étape
lignes-MainApplication.kt=25
#### 2\. Activer le débogage (facultatif)
Pour faciliter la résolution des problèmes lors du développement, pensez à activer le débogage.
!étape
lignes-MainApplication.kt=34-36
#### 3\. Enregistrer les fonctions de rappel du cycle de vie des activités
Enregistrez l'auditeur par défaut de Braze pour gérer le cycle de vie des messages in-app.
!étape
lignes-MainApplication.kt=39-49
#### 4\. Configurer un récepteur de messages in-app
Utilisez `BrazeInAppMessageManager` pour définir un récepteur personnalisé qui intercepte les messages avant qu'ils ne soient affichés.
!étape
lignes-MainApplication.kt=43,46
#### 5\. Créer une logique conditionnelle
Utilisez le drapeau `showMessage` pour contrôler le délai : renvoyez `DISPLAY_NOW` pour afficher le message maintenant ou `DISPLAY_LATER` pour le différer.
!étape
lignes-MainApplication.kt=52-55
#### 6\. Créer une méthode d'envoi de messages différés
Utilisez `showDeferredMessage` pour déclencher le message in-app suivant. Lorsque `showMessage` est `true`, l'auditeur renvoie `DISPLAY_NOW`.
!étape
lignes-MainActivity.kt=29
#### 7\. Déclencher la méthode à partir de votre interface utilisateur
Pour afficher l'envoi de messages précédemment différé, appelez `showDeferredMessage(true)` à partir de votre interface utilisateur, par exemple en appuyant sur un bouton ou en tapotant.
## Prerequisites
Before you can use this feature, you'll need to [integrate the Swift Braze SDK](https://www.braze.com/docs/fr/fr/developer_guide/sdk_integration/?sdktab=swift). Il vous sera également nécessaire d'[activer les messages in-app pour Swift](https://www.braze.com/docs/fr/fr/developer_guide/in_app_messages/?sdktab=swift#swift_enabling-in-app-messages).
## Report et restauration des messages déclenchés pour Swift
**Important:**
We're piloting this new tutorial format. [Tell us what you think](https://docs.google.com/forms/d/e/1FAIpQLSe_5uhWM7eXXk9F_gviO_pvA4rkYO3WA9B6tNJZ3TY91md5bw/viewform?usp=pp_url&entry.569173304=General+Feedback) — your feedback helps us improve future guides.
```swift file=AppDelegate.swift
import SwiftUI
import BrazeKit
import BrazeUI
class AppDelegate: UIResponder, UIApplicationDelegate, BrazeInAppMessageUIDelegate {
static private(set) var shared: AppDelegate!
private var braze: Braze!
public var showMessage: Bool = false
func application(
_ application: UIApplication,
didFinishLaunchingWithOptions launchOptions: [UIApplication.LaunchOptionsKey: Any]?
) -> Bool {
AppDelegate.shared = self
// 1. Braze configuration with your SDK API key and endpoint
let configuration = Braze.Configuration(apiKey: "a1fc095b-ae3d-40f4-bb33-3fb5176562c0", endpoint: "sondheim.braze.com")
configuration.logger.level = .debug
// 2. Initialize Braze SDK instance
braze = Braze(configuration: configuration)
// 3. Set up Braze In-App Message UI and delegate
let ui = BrazeInAppMessageUI()
ui.delegate = self
braze.inAppMessagePresenter = ui
return true
}
func inAppMessage(
_ ui: BrazeInAppMessageUI,
displayChoiceForMessage message: Braze.InAppMessage
) -> BrazeInAppMessageUI.DisplayChoice {
if !showMessage {
return .reenqueue
}
return .now
}
func showDeferredMessage(showMessage: Bool) {
self.showMessage = showMessage
(braze.inAppMessagePresenter as? BrazeInAppMessageUI)?.presentNext()
}
}
```
```swift file=SampleApp.swift
import SwiftUI
@main
struct IAMDeferApp: App {
@UIApplicationDelegateAdaptor(AppDelegate.self) var delegate
var body: some Scene {
WindowGroup {
ContentView()
}
}
}
```
```swift file=ContentView.swift
import SwiftUI
struct ContentView: View {
var body: some View {
VStack(spacing: 20) {
// ...your UI
Button("Show Deferred IAM") {
AppDelegate.shared.showDeferredMessage(showMessage: true)
}
}
.padding()
}
}
```
!étape
lignes-AppDelegate.swift=5
#### 1\. Mettre en œuvre le `BrazeInAppMessageUIDelegate`
Dans votre classe `AppDelegate`, implémentez la méthode [`BrazeInAppMessageUIDelegate`](https://braze-inc.github.io/braze-swift-sdk/documentation/brazeui/brazeinappmessageuidelegate) afin que vous puissiez remplacer sa méthode `inAppMessage` ultérieurement.
!étape
lignes-AppDelegate.swift=19
#### 2\. Activer le débogage (facultatif)
Pour faciliter la résolution des problèmes lors du développement, pensez à activer le débogage.
!étape
lignes-AppDelegate.swift=25-27
#### 3\. Configurez votre interface utilisateur Braze et déléguez.
`BrazeInAppMessageUI()` rend les messages in-app par défaut. En attribuant à `self` le statut de délégué, vous pouvez intercepter et traiter les messages avant qu'ils ne soient affichés. Veillez à enregistrer l'instance, car vous en aurez besoin ultérieurement pour restaurer les messages différés.
!étape
lignes-AppDelegate.swift=32-41
#### 4\. Remplacer `DisplayChoice` par une logique conditionnelle
Ignorer [`inAppMessage(_:displayChoiceForMessage:)`](https://braze-inc.github.io/braze-swift-sdk/documentation/brazeui/brazeinappmessageuidelegate/inappmessage(_:displaychoiceformessage:)-9w1nb) pour déterminer quand un message doit être affiché. Retournez `.now` pour l'afficher immédiatement, ou `.reenqueue` pour le reporter à plus tard.
!étape
lignes-AppDelegate.swift=43-46
#### 5\. Créer une méthode pour afficher les messages différés
Créez une méthode qui appelle `showDeferredMessage(true)` pour afficher le message différé suivant dans la pile. Lorsqu'il est appelé, `showMessage` est défini comme `true`, ce qui fait que le délégué renvoie `.now`.
!étape
lignes-ContentView.swift=1-14
#### 5\. Déclencher la méthode à partir de votre interface utilisateur
Pour afficher l'envoi de messages précédemment différé, appelez `showDeferredMessage(true)` à partir de votre interface utilisateur, par exemple en appuyant sur un bouton ou en tapotant.
# Résolution des problèmes des messages in-app pour le SDK Braze
Source: /docs/fr/developer_guide/in_app_messages/troubleshooting/index.md
# Résolution des problèmes des messages in-app {#troubleshoot-in-app-messages}
> Utilisez cette page pour diagnostiquer pourquoi les messages in-app ne sont pas distribués ou affichés sur un appareil. Pour la configuration côté tableau de bord (priorité, déclencheurs, segments et rééligibilité), consultez la [FAQ sur les messages in-app](https://www.braze.com/docs/fr/fr/user_guide/channels/in_app_messages/faq/).
Avant de déboguer, ajoutez-vous en tant qu'[utilisateur test](https://www.braze.com/docs/fr/fr/user_guide/administer/global/user_management/internal_groups/#adding-test-users) et consultez [Envoyer des messages de test](https://www.braze.com/docs/fr/fr/developer_guide/in_app_messages/sending_test_messages/).
## Commencez ici : identifiez votre symptôme {#start-here-match-your-symptom}
| Symptôme | Aller à |
| --- | --- |
| Le message in-app ne s'est pas affiché pour un utilisateur | [Un utilisateur](#in-app-message-not-shown-for-one-user) |
| Le message in-app ne s'est pas affiché sur une plateforme (Android, iOS ou Web) | [Une plateforme](#in-app-message-not-shown-on-one-platform) |
| Le message in-app d'une étape **Canvas** ne s'est pas affiché | [Messages in-app Canvas](#canvas-in-app-messages) |
| Le message in-app s'est affiché en retard ou après un délai | [Timing et affichage différé](#timing-and-delayed-display) |
| Les impressions ou les clics semblent incorrects | [Impressions et analyses](#impressions-and-analytics) |
| `triggers` manquant ou vide dans les journaux des événements utilisateurs | [Résolution des problèmes de distribution](#delivery-troubleshooting) |
| Les déclencheurs sont retournés mais rien ne s'affiche sur l'appareil | [Résolution des problèmes d'affichage par plateforme](#platform-specific-display-troubleshooting) |
| Le chargement des ressources du message in-app échoue (iOS, `NSURLError` -1008) | [Chargement des ressources (onglet Swift)](https://www.braze.com/docs/fr/fr/developer_guide/in_app_messages/troubleshooting/?sdktab=swift#asset-loading) |
{: .reset-td-br-1 .reset-td-br-2 aria-label="Symptôme de message in-app" }
## Parcours d'investigation standard {#standard-investigation-path}
Utilisez ce flux de travail pour chaque incident. Commencez à l'étape 1.
1. Confirmez qu'un **démarrage de session** est enregistré pour l'appareil de test. Les messages in-app sont demandés au démarrage de la session.
2. Ouvrez les [journaux des événements utilisateurs](https://www.braze.com/docs/fr/fr/user_guide/administer/global/workspace_settings/logs_and_alerts/event_user_log/) et trouvez la requête SDK pour ce démarrage de session. Dans **Response Data** :
- Dans le JSON brut, confirmez que `respond_with` inclut `"triggers": true`.
- La ligne **Requested Responses** doit inclure **`triggers`**.
- Les lignes **Trigger In-App Message** listent chaque message in-app retourné pour cette requête.
- S'il n'y a pas de clé `triggers` ni de lignes **Trigger In-App Message**, consultez [Résoudre les problèmes de messages non demandés](#troubleshoot-messages-not-being-requested).
- Si `triggers` est présent mais vide (`[]`), consultez [Résoudre les problèmes de messages non retournés](#troubleshoot-messages-not-being-returned).
- Si des lignes **Trigger In-App Message** sont présentes mais que rien ne s'affiche, consultez [Résolution des problèmes d'affichage par plateforme](#platform-specific-display-troubleshooting).
- Chaque payload de déclencheur inclut un `type` : `inapp` (standard) ou `templated_iam` (nécessite une requête de modèle avant l'affichage). Voir [Types de messages in-app](https://www.braze.com/docs/fr/fr/developer_guide/in_app_messages/triggering_messages/#types-of-in-app-messages).
3. Pour l'éligibilité côté tableau de bord (segment, rééligibilité, plafonds de fréquence, priorité, groupes de contrôle), consultez [Résolution des problèmes de distribution](#delivery-troubleshooting) et la [FAQ sur les messages in-app](https://www.braze.com/docs/fr/fr/user_guide/channels/in_app_messages/faq/).
4. Pour les problèmes d'affichage côté appareil (délégués, limites de débit, orientation, délai d'expiration de session), sélectionnez votre onglet SDK sous [Résolution des problèmes d'affichage par plateforme](#platform-specific-display-troubleshooting).
## Messages in-app Canvas {#canvas-in-app-messages}
**Symptôme :** Un utilisateur est entré dans une étape de message in-app Canvas mais n'a pas vu le message au moment attendu.
Trois comportements sont à l'origine de la plupart des tickets liés aux Canvas et aux messages in-app :
1. **Affichage à la session suivante :** Les messages in-app Canvas sont éligibles au *prochain* démarrage de session après le traitement de l'étape, et non immédiatement en cours de session. Voir [Quand les messages in-app dans Canvas sont-ils envoyés ?](https://www.braze.com/docs/fr/fr/user_guide/messaging/canvas/faqs/#when-are-in-app-messages-in-canvas-sent) dans la FAQ Canvas.
2. **Validations de distribution à l'entrée de l'étape :** Si **Valider l'audience à l'envoi du message** est activé sur l'étape Message, l'appartenance au segment et les plafonds de fréquence sont évalués lorsque l'utilisateur **entre dans l'étape**, et non au moment de l'affichage. Voir [Validations de distribution](https://www.braze.com/docs/fr/fr/user_guide/messaging/canvas/canvas_components/message_step/#delivery-validations).
3. **Délai et expiration de session :** Si un utilisateur entre dans une étape de délai plus longue que le délai d'expiration de session de votre SDK, il peut démarrer une nouvelle session avant l'étape du message in-app. Le message pourrait ne pas être récupéré au démarrage de la session au moment où vous vous attendez à ce qu'il s'affiche.
Pour les fenêtres de disponibilité, l'expiration et les _Envois_ à zéro dans les analyses Canvas, consultez [Messages in-app et distribution](https://www.braze.com/docs/fr/fr/user_guide/messaging/canvas/faqs/#messages-and-delivery) dans la FAQ Canvas.
**Important:**
Les messages in-app dans Canvas ne peuvent être déclenchés que par des événements envoyés via le SDK, et non par la REST API.
## Le message in-app ne s'est pas affiché pour un utilisateur {#in-app-message-not-shown-for-one-user}
**Symptôme :** Un utilisateur n'a pas reçu un message in-app attendu ; les autres utilisateurs peuvent ne pas être affectés.
Vérifiez les points suivants :
- L'utilisateur était-il dans le segment au **démarrage de la session**, lorsque le SDK demande les nouveaux messages in-app ?
- L'utilisateur était-il éligible ou rééligible selon les règles de ciblage de la campagne ou du Canvas ? Voir [Rééligibilité pour les Campaigns et Canvas](https://www.braze.com/docs/fr/fr/user_guide/messaging/messaging_fundamentals/re_eligibility/).
- Un [plafond de fréquence](https://www.braze.com/docs/fr/fr/user_guide/messaging/messaging_fundamentals/frequency_capping/) s'est-il appliqué ?
- L'utilisateur faisait-il partie d'un groupe de contrôle de la campagne ? Vérifiez si la campagne est configurée pour un test A/B.
- Un message in-app de priorité supérieure s'est-il affiché à la place ? Voir [Plusieurs messages in-app peuvent-ils s'afficher dans la même session ?](https://www.braze.com/docs/fr/fr/user_guide/channels/in_app_messages/faq/#can-multiple-in-app-messages-display-in-the-same-session) dans la FAQ sur les messages in-app.
- L'appareil était-il dans l'orientation spécifiée par la campagne ?
- Le message a-t-il été supprimé par l'intervalle minimum par défaut de 30 secondes entre les déclencheurs ? Voir [Remplacer la limite de débit par défaut](https://www.braze.com/docs/fr/fr/developer_guide/in_app_messages/triggering_messages/#overriding-the-default-rate-limit).
Suivez ensuite le [parcours d'investigation standard](#standard-investigation-path).
## Le message in-app ne s'est pas affiché sur une plateforme {#in-app-message-not-shown-on-one-platform}
**Symptôme :** Les messages in-app ne s'affichent pas sur Android, iOS ou Web, mais peuvent fonctionner sur d'autres plateformes.
| Cause probable | Ce qu'il faut vérifier |
| --- | --- |
| Mauvaise cible **Envoyer à** | Confirmez que la campagne ou l'étape Canvas cible **Applications mobiles** ou **Navigateurs web** selon le cas. Une campagne Web uniquement ne sera pas envoyée aux appareils Android. |
| Une interface personnalisée ou un gestionnaire supprime l'affichage | Vérifiez les délégués (mobile) ou [`braze.subscribeToInAppMessage`](https://js.appboycdn.com/web-sdk/latest/doc/modules/braze.html#subscribetoinappmessage) (Web). Voir [Personnalisation](https://www.braze.com/docs/fr/fr/developer_guide/in_app_messages/customization/) et votre onglet SDK ci-dessous. |
| L'intégration n'a jamais fonctionné sur cette plateforme | Confirmez que cette plateforme et cette version de l'application ont déjà affiché des messages in-app. |
| Le déclencheur ne s'est pas activé sur l'appareil | Le déclencheur doit se produire localement via le SDK. Un appel REST API ne peut pas déclencher un message in-app dans le SDK. Voir [Déclencher des messages](https://www.braze.com/docs/fr/fr/developer_guide/in_app_messages/triggering_messages/). |
| `triggers` vide dans les journaux des événements utilisateurs | Segment, rééligibilité, plafond de fréquence ou groupe de contrôle. Voir [Résoudre les problèmes de messages non retournés](#troubleshoot-messages-not-being-returned). |
{: .reset-td-br-1 .reset-td-br-2 aria-label="Cause du symptôme par plateforme" }
## Le message in-app ne s'est affiché pour aucun utilisateur {#in-app-message-not-shown-for-all-users}
**Symptôme :** Aucun utilisateur ou moins d'utilisateurs que prévu n'a reçu le message in-app.
Vérifiez les points suivants :
- L'action de déclenchement est-elle correctement configurée dans le tableau de bord et dans l'intégration de l'application ?
- Un message in-app de priorité supérieure a-t-il intercepté la campagne ? Voir la [FAQ sur les messages in-app](https://www.braze.com/docs/fr/fr/user_guide/channels/in_app_messages/faq/#can-multiple-in-app-messages-display-in-the-same-session).
- Utilisez-vous une version récente du SDK ? Certains types de messages in-app ont des exigences minimales de version SDK.
- Les sessions sont-elles correctement intégrées ? Confirmez que les analyses de session fonctionnent pour cette application.
- Une bibliothèque d'interface personnalisée interfère-t-elle avec l'affichage ? Voir [Personnalisation](https://www.braze.com/docs/fr/fr/developer_guide/in_app_messages/customization/).
Suivez ensuite le [parcours d'investigation standard](#standard-investigation-path).
## Timing et affichage différé {#timing-and-delayed-display}
**Symptôme :** Le message in-app est apparu plus tard que prévu ou seulement lors d'une nouvelle session.
Causes courantes :
- **Préchargement au démarrage de session :** Les messages in-app sont mis en cache au démarrage de la session et s'affichent lorsque le déclencheur se produit. Un déclencheur qui se produit avant le prochain démarrage de session ne s'affichera pas avant cette session. Voir [Déclencher des messages](https://www.braze.com/docs/fr/fr/developer_guide/in_app_messages/triggering_messages/).
- **Comportement de session suivante dans Canvas :** Voir [Messages in-app Canvas](#canvas-in-app-messages).
- **Délai planifié dans le tableau de bord :** Vérifiez si un délai est configuré sur la campagne ou l'étape.
- **Condition de concurrence des déclencheurs :** Si les utilisateurs enregistrent un événement immédiatement après le démarrage de la session, les déclencheurs peuvent ne pas encore être synchronisés. Envisagez de déclencher sur le démarrage de session et de segmenter sur l'événement visé afin que la distribution se fasse à la session suivante après l'événement.
- **Messages in-app séquentiels :** Si vous différez ou restaurez des messages dans un parcours, voir [Différer les messages in-app déclenchés](https://www.braze.com/docs/fr/fr/developer_guide/in_app_messages/tutorials/deferring_triggered_messages/).
- **Ressources volumineuses ou CDN lent :** Optimisez les images et les vidéos pour les messages in-app HTML. Sur mobile, les images peuvent être téléchargées avant l'affichage sur les réseaux lents — sélectionnez votre onglet SDK ci-dessous pour les notes spécifiques à la plateforme.
**Note:**
Si votre message in-app est déclenché par le démarrage de session et que vous avez défini un délai d'expiration de session prolongé, fermer et rouvrir l'application dans cette fenêtre ne rafraîchira pas la session. Par exemple, avec un délai d'expiration de 300 secondes, un message in-app déclenché au démarrage de session ne s'affichera pas tant que la session ne sera pas réellement rafraîchie. Ajustez le délai d'expiration de session ou le type de déclencheur si cela affecte votre test.
## Résolution des problèmes de distribution {#delivery-troubleshooting}
La plupart des problèmes de messages in-app relèvent de la **distribution** (l'appareil n'a pas reçu les déclencheurs) ou de l'**affichage** (les déclencheurs sont arrivés mais ne se sont pas affichés). Confirmez d'abord la [distribution](#troubleshooting-in-app-message-delivery), puis vérifiez l'[affichage](#platform-specific-display-troubleshooting).
### Résoudre les problèmes de distribution {#troubleshooting-in-app-message-delivery}
Le SDK demande les messages in-app aux serveurs Braze au démarrage de la session. Confirmez que le SDK demande les déclencheurs et que Braze les retourne.
#### Vérifier si les messages sont demandés et retournés {#check-if-messages-are-requested-and-returned}
1. Ajoutez-vous en tant qu'[utilisateur test](https://www.braze.com/docs/fr/fr/user_guide/administer/global/user_management/internal_groups/#adding-test-users).
2. Configurez une campagne de message in-app ciblant votre utilisateur.
3. Démarrez une nouvelle session dans votre application.
4. Dans les [journaux des événements utilisateurs](https://www.braze.com/docs/fr/fr/user_guide/administer/global/workspace_settings/logs_and_alerts/event_user_log/), trouvez la requête SDK pour l'événement de démarrage de session. Dans **Response Data** :
- Dans le JSON brut, confirmez que `respond_with` inclut `"triggers": true`.
- La ligne **Requested Responses** liste les clés de premier niveau dans la réponse. Pour les messages in-app, attendez-vous à **`triggers`**.
- Les lignes **Trigger In-App Message** listent chaque message in-app retourné pour cette requête.
Puis triez :
- S'il n'y a pas de clé `triggers` ni de lignes **Trigger In-App Message**, voir [Résoudre les problèmes de messages non demandés](#troubleshoot-messages-not-being-requested).
- Si `triggers` est présent mais vide (`[]`), voir [Résoudre les problèmes de messages non retournés](#troubleshoot-messages-not-being-returned).
- Si des lignes **Trigger In-App Message** sont présentes mais que rien ne s'affiche sur l'appareil, voir [Résolution des problèmes d'affichage par plateforme](#platform-specific-display-troubleshooting).
- Chaque payload de déclencheur inclut un `type` : `inapp` (standard) ou `templated_iam` (nécessite une requête de modèle avant l'affichage). Voir [Types de messages in-app](https://www.braze.com/docs/fr/fr/developer_guide/in_app_messages/triggering_messages/#types-of-in-app-messages).
5. Confirmez que les messages in-app corrects apparaissent dans les données de réponse.

##### Résoudre les problèmes de messages non demandés {#troubleshoot-messages-not-being-requested}
Si les messages in-app ne sont pas demandés, votre application ne suit peut-être pas correctement les sessions — les messages in-app se rafraîchissent au démarrage de la session. Confirmez que l'application démarre une session en fonction de la sémantique de votre délai d'expiration de session :

##### Résoudre les problèmes de messages non retournés {#troubleshoot-messages-not-being-returned}
Si les messages in-app ne sont pas retournés, vous rencontrez probablement un problème de ciblage ou d'éligibilité :
1. Votre segment ne contient pas votre utilisateur.
- Vérifiez l'onglet [**Engagement**](https://www.braze.com/docs/fr/fr/user_guide/audience/manage_audience/user_profiles/#engagement-tab) de l'utilisateur pour le segment attendu.
2. Votre utilisateur a déjà reçu le message et n'était pas rééligible.
- Vérifiez les [paramètres de rééligibilité](https://www.braze.com/docs/fr/fr/user_guide/messaging/messaging_fundamentals/re_eligibility/) et la [FAQ sur les messages in-app](https://www.braze.com/docs/fr/fr/user_guide/channels/in_app_messages/faq/#campaigns).
3. Votre utilisateur a atteint le plafond de fréquence.
- Vérifiez les [paramètres de plafond de fréquence](https://www.braze.com/docs/fr/fr/user_guide/messaging/messaging_fundamentals/frequency_capping/).
4. Votre utilisateur est tombé dans un groupe de contrôle.
- Créez un segment avec un filtre **A reçu une variante de campagne** défini sur **Contrôle**, ou désactivez les groupes de contrôle pendant les tests d'intégration.
5. Un message in-app de priorité supérieure a pris le dessus. Voir la [FAQ sur les messages in-app](https://www.braze.com/docs/fr/fr/user_guide/channels/in_app_messages/faq/#can-multiple-in-app-messages-display-in-the-same-session).
Pour les campagnes archivées, la configuration des déclencheurs et les heures calmes, consultez la [FAQ sur les messages in-app](https://www.braze.com/docs/fr/fr/user_guide/channels/in_app_messages/faq/).
## Impressions et analyses {#impressions-and-analytics}
**Symptôme :** Le nombre d'impressions ou de clics ne correspond pas aux attentes.
- **_Impressions_ supérieures aux _Impressions uniques_ :** Cela est attendu lorsque les utilisateurs possèdent plusieurs appareils ou lorsqu'un délai planifié fait qu'un même utilisateur se qualifie plus d'une fois. Voir [Rééligibilité pour les Campaigns et Canvas](https://www.braze.com/docs/fr/fr/user_guide/messaging/messaging_fundamentals/re_eligibility/).
- **Impressions inférieures aux attentes :** Les utilisateurs peuvent ne pas avoir vu le message (les impressions sont enregistrées à l'affichage), plusieurs messages de haute priorité peuvent s'intercepter mutuellement, ou des conditions de concurrence des déclencheurs peuvent s'appliquer. Pour les messages in-app Canvas, voir [Messages in-app Canvas](#canvas-in-app-messages). Pour les définitions complètes des indicateurs, voir [Rapports sur les messages in-app](https://www.braze.com/docs/fr/fr/user_guide/channels/in_app_messages/reporting/) et la [FAQ sur les messages in-app](https://www.braze.com/docs/fr/fr/user_guide/channels/in_app_messages/faq/).
- **Impressions inférieures à avant :** Consultez les journaux de modifications du segment et de la campagne. Confirmez que vous n'avez pas réutilisé le même événement déclencheur dans une campagne de priorité supérieure.

Si vous utilisez un délégué ou un gestionnaire personnalisé pour afficher les messages in-app manuellement, vous devez enregistrer les impressions et les clics vous-même. Consultez votre onglet SDK sous [Résolution des problèmes d'affichage par plateforme](#platform-specific-display-troubleshooting) pour les détails Swift et Android, ou [Enregistrer les données des messages in-app](https://www.braze.com/docs/fr/fr/developer_guide/in_app_messages/logging_message_data/) pour le Web.
## Résolution des problèmes d'affichage par plateforme {#platform-specific-display-troubleshooting}
Si des lignes **Trigger In-App Message** apparaissent dans les journaux des événements utilisateurs mais que rien ne s'affiche sur l'appareil, sélectionnez votre onglet SDK pour les vérifications d'affichage (délégués, limites de débit, orientation et gestionnaires personnalisés).
### Troubleshooting display {#troubleshooting-in-app-message-display}
If your app is requesting and receiving in-app messages but they aren't showing, device-side logic may be preventing display:
1. Is the trigger event firing as expected? To test, configure the message to trigger on a different action (such as session start) and verify whether it displays.
3. Failed image downloads prevent in-app messages with images from displaying. Check device logs for download failures. Try removing the image temporarily to see if the message displays.
### Troubleshooting asset loading (`NSURLError` code `-1008`) {#asset-loading}
When integrating Braze alongside third-party network logging libraries, developers can commonly run into an `NSURLError` with the domain code `-1008`. This error indicates that assets like images and fonts could not be retrieved or failed to cache. To work around such cases, you must register Braze CDN URLs to the list of domains that should be ignored by these libraries.
#### Domains
The full list of CDN domains is as listed below:
* `"appboy-images.com"`
* `"braze-images.com"`
* `"cdn.braze.eu"`
* `"cdn.braze.com"`
#### Examples
Below are libraries that are known to conflict with Braze asset caching, along with example code to work around the issue. If your project uses a library that causes an unavailable resource error and is not listed below, consult the documentation of that library for similar usage APIs.
##### Netfox
```swift
NFX.sharedInstance().ignoreURLs(["https://cdn.braze.com"])
```
```objc
[NFX.sharedInstance ignoreURLs:@[@"https://cdn.braze.com"]];
```
##### NetGuard
```swift
NetGuard.blackListHosts.append(contentsOf: ["cdn.braze.com"])
```
```objc
NSMutableArray *blackListHosts = [NetGuard.blackListHosts mutableCopy];
[blackListHosts addObject:@"cdn.braze.com"];
NetGuard.blackListHosts = blackListHosts;
```
##### XNLogger
```swift
let brazeAssetsHostFilter = XNHostFilter(host: "https://cdn.braze.com")
XNLogger.shared.addFilters([brazeAssetsHostFilter])
```
```objc
XNHostFilter *brazeAssetsHostFilter = [[XNHostFilter alloc] initWithHost: @"https://cdn.braze.com"];
[XNLogger.shared addFilters:@[brazeAssetsHostFilter]];
```
# Notifications push pour le SDK de Braze
Source: /docs/fr/developer_guide/push_notifications/index.md
# Notifications push {#push-notifications}
> Les [notifications push](https://www.braze.com/docs/fr/fr/user_guide/channels/push/) vous permettent d'envoyer des notifications depuis votre application lorsque des événements importants se produisent. Vous pouvez envoyer une notification push lorsque vous avez de nouveaux messages instantanés à livrer, des alertes d'actualité à diffuser ou le dernier épisode de l'émission télévisée préférée de votre utilisateur prêt à être téléchargé pour un visionnage hors ligne. Elles sont également plus efficaces que la récupération en arrière-plan, car votre application ne se lance que lorsque c'est nécessaire.
**Note:**
Si l'option **Redirect to web URL** avec **Open web URL inside app** n'est pas sélectionnée, mais que le lien s'ouvre tout de même dans l'application, il est possible que l'application gère l'URL (par exemple, avec les liens universels sur iOS ou les App Links sur Android). Pour ouvrir le lien dans le navigateur, vérifiez que votre application délègue l'URL au navigateur système lorsque l'utilisateur appuie sur la notification, ou ajustez la gestion des URL de votre application afin que l'action au clic corresponde au paramètre du tableau de bord de Braze. Consultez la documentation push de votre plateforme pour savoir comment les actions au clic et la gestion des URL sont configurées.
**Note:**
This guide uses code samples from the Braze Web SDK 4.0.0+. To upgrade to the latest Web SDK version, see [SDK Upgrade Guide](https://github.com/braze-inc/braze-web-sdk/blob/master/UPGRADE_GUIDE.md).
## Prerequisites
Before you can use this feature, you'll need to [integrate the Web Braze SDK](https://www.braze.com/docs/fr/fr/developer_guide/sdk_integration/?sdktab=web).
## Push protocols
Web push notifications are implemented using the [W3C push standard](http://www.w3.org/TR/push-api/), which most major browsers support. For more information on specific push protocol standards and browser support, you can review resources from [Apple](https://developer.apple.com/notifications/safari-push-notifications/) [Mozilla](https://developer.mozilla.org/en-us/docs/web/api/push_api#browser_compatibility) and [Microsoft](https://developer.microsoft.com/en-us/microsoft-edge/status/pushapi/).
## Setting up push notifications
### Step 1: Configure your service worker
In your project's `service-worker.js` file, add the following snippet and set the [`manageServiceWorkerExternally`](https://js.appboycdn.com/web-sdk/latest/doc/modules/braze.html#initialize) initialization option to `true` when initializing the Web SDK.
**Important:**
Your web server must return a `Content-Type: application/javascript` when serving your service worker file. Additionally, if your service worker file is not `service-worker.js` named, you'll need to use the `serviceWorkerLocation` [initialization option](https://js.appboycdn.com/web-sdk/latest/doc/modules/braze.html#initializationoptions).
### Step 2: Register the browser
To immediately request push permissions from a user so their browser can receive push notifications, call `braze.requestPushPermission()`. To test if push is supported in their browser first, call `braze.isPushSupported()`.
You can also [send a soft push prompt](https://www.braze.com/docs/fr/fr/developer_guide/push_notifications/soft_push_prompts/?sdktab=web) to the user before requesting push permission to show your own push-related UI.
**Important:**
On macOS, both **Google Chrome** and **Google Chrome Helper (Alerts)** must be enabled by the end-user in **System Settings > Notifications** before push notifications can be displayed—even if permissions are granted.
### Step 3: Disable `skipWaiting` (optional)
The Braze service worker file will automatically call `skipWaiting` upon install. If you'd like to disable this functionality, add the following code to your service worker file, after importing Braze:
## Unsubscribing a user
To unsubscribe a user, call `braze.unregisterPush()`.
**Important:**
Recent versions of Safari and Firefox require that you call this method from a short-lived event handler (such as from a button-click handler or soft push prompt). This is consistent with [Chrome's user experience best practices](https://docs.google.com/document/d/1WNPIS_2F0eyDm5SS2E6LZ_75tk6XtBSnR1xNjWJ_DPE) for push registration.
## Alternate domains
To integrate web push, your domain must be [secure](https://w3c.github.io/webappsec-secure-contexts/), which generally means `https`, `localhost`, and other exceptions as defined in the [W3C push standard](https://www.w3.org/TR/service-workers/#security-considerations). You'll also need to be able to register a Service Worker at the root of your domain, or at least be able to control the HTTP headers for that file. This article covers how to integrate Braze Web Push on an alternate domain.
### Use cases
If you can't meet all of the criteria outlined in the [W3C push standard](https://www.w3.org/TR/service-workers/#security-considerations), you can use this method to add a push prompt dialog to your website instead. This can be helpful if you want to let your users opt-in from an `http` website or a browser extension popup that's preventing your push prompt from displaying.
### Considerations
Keep in mind, like many workarounds on the web, browsers continually evolve, and this method may not be viable in the future. Before continuing, ensure that:
- You own a separate secure domain (`https://`) and permissions to register a Service Worker on that domain.
- Users are logged in to your website which ensures push tokens are match to the correct profile.
**Important:**
You cannot use this method to implement push notifications for Shopify. Shopify will automatically remove the headers need to deliver push this way.
### Setting up an alternate push domain
To make the following example clear, we'll use use `http://insecure.com` and `https://secure.com` as our two domains with the goal of getting visitors to register for push on `http://insecure.com`. This example could also be applied to a `chrome-extension://` scheme for a browser extension's popup page.
#### Step 1: Initiate prompting flow
On `insecure.com`, open a new window to your secure domain using a URL parameter to pass the currently logged-in user's Braze external ID.
**http://insecure.com**
```html
```
#### Step 2: Register for push
At this point, `secure.com` will open a popup window in which you can initialize the Braze Web SDK for the same user ID and request the user's permission for Web push.
**https://secure.com/push-registration.html**
#### Step 3: Communicate between domains (optional)
Now that users can opt-in from this workflow originating on `insecure.com`, you may want to modify your site based on if the user is already opted-in or not. There's no point in asking the user to register for push if they already are.
You can use iFrames and the [`postMessage`](https://developer.mozilla.org/en-US/docs/Web/API/Window/postMessage) API to communicate between your two domains.
**insecure.com**
On our `insecure.com` domain, we will ask the secure domain (where push is _actually_ registered) for information on the current user's push registration:
```html
```
**secure.com/push-status.html**
## Frequently Asked Questions (FAQ)
### Service workers
#### What if I can't register a service worker in the root directory?
By default, a service worker can only be used within the same directory it is registered in. For example, if your service worker file exists in `/assets/service-worker.js`, it would only be possible to register it within `example.com/assets/*` or a subdirectory of the `assets` folder, but not on your homepage (`example.com/`). For this reason, it is recommended to host and register the service worker in the root directory (such as `https://example.com/service-worker.js`).
If you cannot register a service worker in your root domain, an alternative approach is to use the [`Service-Worker-Allowed`](https://w3c.github.io/ServiceWorker/#service-worker-script-response) HTTP header when serving your service worker file. By configuring your server to return `Service-Worker-Allowed: /` in the response for the service worker, this will instruct the browser to broaden the scope and allow it to be used from within a different directory.
#### Can I create a service worker using a Tag Manager?
No, service workers must be hosted on your website's server and can't be loaded via Tag Manager.
### Site security
#### Is HTTPS required?
Yes. Web standards require that the domain requesting push notification permission be secure.
#### When is a site considered "secure"?
A site is considered secure if it matches one of the following secure-origin patterns. Braze Web push notifications are built on this open standard, so man-in-the-middle attacks are prevented.
- `(https, , *)`
- `(wss, *, *)`
- `(, localhost, )`
- `(, .localhost, *)`
- `(, 127/8, )`
- `(, ::1/128, *)`
- `(file, *, —)`
- `(chrome-extension, *, —)`
#### What if a secure site is not available?
While industry best practice is to make your whole site secure, customers who cannot secure their site domain can work around the requirement by using a secure modal. Read more in our guide to using [Alternate push domain](https://www.braze.com/docs/fr/fr/developer_guide/platform_integration_guides/web/push_notifications/alternate_push_domain) or view a [working demo](http://appboyj.com/modal-test.html).
## Prerequisites
Before you can use this feature, you'll need to [integrate the Android Braze SDK](https://www.braze.com/docs/fr/fr/developer_guide/sdk_integration/?sdktab=android).
## Built-in features
The following features are built into the Braze Android SDK. To use any other push notification features, you will need to [set up push notifications](#android_setting-up-push-notifications) for your app.
|Feature|Description|
|-------|-----------|
|Push Stories|Android Push Stories are built into the Braze Android SDK by default. To learn more, see [Push Stories](https://www.braze.com/docs/fr/fr/user_guide/message_building_by_channel/push/advanced_push_options/push_stories/).|
|Push Primers|Push primer campaigns encourage your users to enable push notifications on their device for your app. This can be done without SDK customization using our [no code push primer](https://www.braze.com/docs/fr/fr/user_guide/message_building_by_channel/push/best_practices/push_primer_messages/).|
{: .reset-td-br-1 .reset-td-br-2 aria-label="Built-in features" }
## About the push notification lifecycle {#push-notification-lifecycle}
The following flowchart shows how Braze handles the push notification lifecycle, such as permission prompts, token generation, and message delivery.
```mermaid
---
config:
theme: neutral
---
flowchart TD
%% Permission flow
subgraph Permission[Push Permissions]
B{Android version of the device?}
B -->|Android 13+| C["requestPushPermissionPrompt() called"]
B -->|Android 12 and earlier| D[No permissions required]
%% Connect Android 12 path to Braze state
D --> H3[Braze: user subscription state]
H3 --> J3[Defaults to 'subscribed' when user profile created]
C --> E{Did the user grant push permission?}
E -->|Yes| F[POST_NOTIFICATIONS permission granted]
E -->|No| G[POST_NOTIFICATIONS permission denied]
%% Braze subscription state updates
F --> H1[Braze: user subscription state]
G --> H2[Braze: user subscription state]
H1 --> I1{Automatically opt in after permission granted?}
I1 -->|true| J1[Set to 'opted-in']
I1 -->|false| J2[Remains 'subscribed']
H2 --> K1[Remains 'subscribed' or 'unsubscribed']
%% Subscription state legend
subgraph BrazeStates[Braze subscription states]
L1['Subscribed' - default state when user profile created]
L2['Opted-in' - user explicitly wants push notifications]
L3['Unsubscribed' - user explicitly opted out of push]
end
%% Note about user-level states
note1[Note: These states are user-level and apply across all devices for the user]
%% Connect states to legend
J1 -.-> L2
J2 -.-> L1
J3 -.-> L1
K1 -.-> L3
note1 -.-> BrazeStates
end
%% Styling
classDef permissionClass fill:#e3f2fd,stroke:#1565c0,stroke-width:2px
classDef tokenClass fill:#e8f5e9,stroke:#2e7d32,stroke-width:2px
classDef sdkClass fill:#fff3e0,stroke:#e65100,stroke-width:2px
classDef configClass fill:#f3e5f5,stroke:#7b1fa2,stroke-width:2px
classDef displayClass fill:#ffebee,stroke:#c62828,stroke-width:2px
classDef deliveryClass fill:#fce4ec,stroke:#c2185b,stroke-width:2px
classDef brazeClass fill:#e8f5e9,stroke:#2e7d32,stroke-width:3px
class A,B,C,E,F,G permissionClass
class H,I tokenClass
class J,K sdkClass
class N,O,P configClass
class R,S,S1,T,U,V displayClass
class W,X,X1,X2,Y,Z deliveryClass
class H1,H2,H3,I1,J1,J2,J3,K1,L1,L2,L3,note1 brazeClass
```
```mermaid
---
config:
theme: neutral
---
flowchart TD
%% Token generation flow
subgraph Token[Token Generation]
H["Braze SDK initialized"] --> Q{Is FCM auto-registration enabled?}
Q -->|Yes| L{Is required configuration present?}
Q -->|No| M[No FCM token generated]
L -->|Yes| I[Generate FCM token]
L -->|No| M
I --> K[Register token with Braze]
%% Configuration requirements
subgraph Config[Required configuration]
N['google-services.json' file is present]
O['com.google.firebase:firebase-messaging' in gradle]
P['com.google.gms.google-services' plugin in gradle]
end
%% Connect config to check
N -.-> L
O -.-> L
P -.-> L
end
%% Styling
classDef permissionClass fill:#e3f2fd,stroke:#1565c0,stroke-width:2px
classDef tokenClass fill:#e8f5e9,stroke:#2e7d32,stroke-width:2px
classDef sdkClass fill:#fff3e0,stroke:#e65100,stroke-width:2px
classDef configClass fill:#f3e5f5,stroke:#7b1fa2,stroke-width:2px
classDef displayClass fill:#ffebee,stroke:#c62828,stroke-width:2px
classDef deliveryClass fill:#fce4ec,stroke:#c2185b,stroke-width:2px
classDef brazeClass fill:#e8f5e9,stroke:#2e7d32,stroke-width:3px
class A,B,C,E,F,G permissionClass
class H,I tokenClass
class J,K sdkClass
class N,O,P configClass
class R,S,S1,T,U,V displayClass
class W,X,X1,X2,Y,Z deliveryClass
class H1,H2,H3,I1,J1,J2,J3,K1,L1,L2,L3,note1 brazeClass
```
```mermaid
---
config:
theme: neutral
fontSize: 10
---
flowchart TD
subgraph Display[Push Display]
%% Push delivery flow
W[Push sent to FCM servers] --> X{Did FCM receive push?}
X -->|App is terminated| Y[FCM cannot deliver push to the app]
X -->|Delivery conditions met| X1[App receives push from FCM]
X1 --> X2[Braze SDK receives push]
X2 --> R[Push type?]
%% Push Display Flow
R -->|Standard push| S{Is push permission required?}
R -->|Silent push| T[Braze SDK processes silent push]
S -->|Yes| S1{Did the user grant push permission?}
S -->|No| V[Notification is shown to the user]
S1 -->|Yes| V
S1 -->|No| U[Notification is not shown to the user]
end
%% Styling
classDef permissionClass fill:#e3f2fd,stroke:#1565c0,stroke-width:2px
classDef tokenClass fill:#e8f5e9,stroke:#2e7d32,stroke-width:2px
classDef sdkClass fill:#fff3e0,stroke:#e65100,stroke-width:2px
classDef configClass fill:#f3e5f5,stroke:#7b1fa2,stroke-width:2px
classDef displayClass fill:#ffebee,stroke:#c62828,stroke-width:2px
classDef deliveryClass fill:#fce4ec,stroke:#c2185b,stroke-width:2px
classDef brazeClass fill:#e8f5e9,stroke:#2e7d32,stroke-width:3px
class A,B,C,E,F,G permissionClass
class H,I tokenClass
class J,K sdkClass
class N,O,P configClass
class R,S,S1,T,U,V displayClass
class W,X,X1,X2,Y,Z deliveryClass
class H1,H2,H3,I1,J1,J2,J3,K1,L1,L2,L3,note1 brazeClass
```
## Setting up push notifications
**Tip:**
To check out a sample app using FCM with the Braze Android SDK, see [Braze: Firebase Push Sample App](https://github.com/braze-inc/braze-android-sdk/tree/master/samples/firebase-push).
### Rate limits
Firebase Cloud Messaging (FCM) API has a default rate limit of 600,000 requests per minute. If you reach this limit, Braze will automatically try again in a few minutes. To request an increase, contact [Firebase Support](https://firebase.google.com/support).
### Step 1: Add Firebase to your project
First, add Firebase to your Android project. For step-by-step instructions, see Google's [Firebase setup guide](https://firebase.google.com/docs/android/setup).
### Step 2: Add Cloud Messaging to your dependencies
Next, add the Cloud Messaging library to your project dependencies. In your Android project, open `build.gradle`, then add the following line to your `dependencies` block.
```gradle
implementation "google.firebase:firebase-messaging:+"
```
Your dependencies should look similar to the following:
```gradle
dependencies {
implementation project(':android-sdk-ui')
implementation "com.google.firebase:firebase-messaging:+"
}
```
### Step 3: Enable the Firebase Cloud Messaging API
In Google Cloud, select the project your Android app is using, then enable the [Firebase Cloud Messaging API](https://console.cloud.google.com/apis/library/fcm.googleapis.com).
{: style="max-width:80%;"}
### Step 4: Create a service account {#service-account}
Next, create a new service account, so Braze can make authorized API calls when registering FCM tokens. In Google Cloud, go to **Service Accounts**, then choose your project. On the **Service Accounts** page, select **Create Service Account**.

Enter a service account name, ID, and description, then select **Create and continue**.
In the **Role** field, find and select **Firebase Cloud Messaging API Admin** from the list of roles. For more restrictive access, create a [custom role](https://cloud.google.com/iam/docs/creating-custom-roles) with the `cloudmessaging.messages.create` permission, then choose it from the list instead. When you're finished, select **Done**.
**Warning:**
Be sure to select **Firebase Cloud Messaging _API_ Admin**, not **Firebase Cloud Messaging Admin**.

### Step 5: Generate JSON credentials {#json}
Next, generate JSON credentials for your FCM service account. On Google Cloud IAM & Admin, go to **Service Accounts**, then choose your project. Locate the FCM service account [you created earlier](#android_service-account), then select **Actions** > **Manage Keys**.

Select **Add Key** > **Create new key**.

Choose **JSON**, then select **Create**. If you created your service account using a different Google Cloud project ID than your FCM project ID, you'll need to manually update the value assigned to the `project_id` in your JSON file.
Be sure to remember where you downloaded the key—you'll need it in the next step.
{: style="max-width:65%;"}
**Warning:**
Private keys could pose a security risk if compromised. Store your JSON credentials in a secure location for now—you'll delete your key after you upload it to Braze.
### Step 6: Upload your JSON credentials to Braze
Next, upload your JSON credentials to your Braze dashboard. In Braze, select **Settings** > **App Settings**.

Under your Android app's **Push Notification Settings**, choose **Firebase**, then select **Upload JSON File** and upload the credentials [you generated earlier](#android_json). When you're finished, select **Save**.

**Warning:**
Private keys could pose a security risk if compromised. Now that your key is uploaded to Braze, delete the file [you generated previously](#android_json).
### Step 7: Set up automatic token registration
When one of your users opt-in for push notifications, your app needs to generate an FCM token on their device before you can send them push notifications. With the Braze SDK, you can enable automatic FCM token registration for each user's device in your project's Braze configuration files.
First, go to Firebase Console, open your project, then select **Settings** > **Project settings**.

Select **Cloud Messaging**, then under **Firebase Cloud Messaging API (V1)**, copy the number in the **Sender ID** field.

Next, open your Android Studio project and use your Firebase Sender ID to enable automatic FCM token registration within your `braze.xml` or `BrazeConfig`.
To configure automatic FCM token registration, add the following lines to your `braze.xml` file:
```xml
trueFIREBASE_SENDER_ID
```
Replace `FIREBASE_SENDER_ID` with the value you copied from your Firebase project settings. Your `braze.xml` should look similar to the following:
```xml
12345ABC-6789-DEFG-0123-HIJK456789LMtrue603679405392
```
To configure automatic FCM token registration, add the following lines to your `BrazeConfig`:
```java
.setIsFirebaseCloudMessagingRegistrationEnabled(true)
.setFirebaseCloudMessagingSenderIdKey("FIREBASE_SENDER_ID")
```
```kotlin
.setIsFirebaseCloudMessagingRegistrationEnabled(true)
.setFirebaseCloudMessagingSenderIdKey("FIREBASE_SENDER_ID")
```
Replace `FIREBASE_SENDER_ID` with the value you copied from your Firebase project settings. Your `BrazeConfig` should look similar to the following:
```java
BrazeConfig brazeConfig = new BrazeConfig.Builder()
.setApiKey("12345ABC-6789-DEFG-0123-HIJK456789LM")
.setCustomEndpoint("sdk.iad-01.braze.com")
.setSessionTimeout(60)
.setHandlePushDeepLinksAutomatically(true)
.setGreatNetworkDataFlushInterval(10)
.setIsFirebaseCloudMessagingRegistrationEnabled(true)
.setFirebaseCloudMessagingSenderIdKey("603679405392")
.build();
Braze.configure(this, brazeConfig);
```
```kotlin
val brazeConfig = BrazeConfig.Builder()
.setApiKey("12345ABC-6789-DEFG-0123-HIJK456789LM")
.setCustomEndpoint("sdk.iad-01.braze.com")
.setSessionTimeout(60)
.setHandlePushDeepLinksAutomatically(true)
.setGreatNetworkDataFlushInterval(10)
.setIsFirebaseCloudMessagingRegistrationEnabled(true)
.setFirebaseCloudMessagingSenderIdKey("603679405392")
.build()
Braze.configure(this, brazeConfig)
```
**Tip:**
If you'd like manually register FCM tokens instead, you can call [`Braze.setRegisteredPushToken()`](https://braze-inc.github.io/braze-android-sdk/kdoc/braze-android-sdk/com.braze/-braze/registered-push-token.html) inside your app's [`onCreate()`](https://developer.android.com/reference/android/app/Application.html#onCreate()) method.
### Step 8: Remove automatic requests in your application class
To prevent Braze from triggering unnecessary network requests every time you send silent push notifications, remove any automatic network requests configured in your `Application` class's `onCreate()` method. For more information see, [Android Developer Reference: Application](https://developer.android.com/reference/android/app/Application).
## Displaying notifications
### Step 1: Register Braze Firebase Messaging Service
You can either create a new, existing, or non-Braze Firebase Messaging Service. Choose whichever best meets your specific needs.
Braze includes a service to handle push receipt and open intents. Our `BrazeFirebaseMessagingService` class will need to be registered in your `AndroidManifest.xml`:
```xml
```
Our notification code also uses `BrazeFirebaseMessagingService` to handle open and click action tracking. This service must be registered in the `AndroidManifest.xml` to function correctly. Also, remember that Braze prefixes notifications from our system with a unique key so that we only render notifications sent from our systems. You may register additional services separately to render notifications sent from other FCM services. See [`AndroidManifest.xml`](https://github.com/braze-inc/braze-android-sdk/blob/master/samples/firebase-push/src/main/AndroidManifest.xml) in the Firebase push sample app.
**Important:**
Before Braze SDK 3.1.1, `AppboyFcmReceiver` was used to handle FCM push. The `AppboyFcmReceiver` class should be removed from your manifest and replaced with the preceding integration.
If you already have a Firebase Messaging Service registered, you can pass [`RemoteMessage`](https://firebase.google.com/docs/reference/android/com/google/firebase/messaging/RemoteMessage) objects to Braze via [`BrazeFirebaseMessagingService.handleBrazeRemoteMessage()`](https://braze-inc.github.io/braze-android-sdk/kdoc/braze-android-sdk/com.braze.push/-braze-firebase-messaging-service/-companion/handle-braze-remote-message.html). This method will only display a notification if the [`RemoteMessage`](https://firebase.google.com/docs/reference/android/com/google/firebase/messaging/RemoteMessage) object originated from Braze and will safely ignore if not.
```java
public class MyFirebaseMessagingService extends FirebaseMessagingService {
@Override
public void onMessageReceived(RemoteMessage remoteMessage) {
super.onMessageReceived(remoteMessage);
if (BrazeFirebaseMessagingService.handleBrazeRemoteMessage(this, remoteMessage)) {
// This Remote Message originated from Braze and a push notification was displayed.
// No further action is needed.
} else {
// This Remote Message did not originate from Braze.
// No action was taken and you can safely pass this Remote Message to other handlers.
}
}
}
```
```kotlin
class MyFirebaseMessagingService : FirebaseMessagingService() {
override fun onMessageReceived(remoteMessage: RemoteMessage?) {
super.onMessageReceived(remoteMessage)
if (BrazeFirebaseMessagingService.handleBrazeRemoteMessage(this, remoteMessage)) {
// This Remote Message originated from Braze and a push notification was displayed.
// No further action is needed.
} else {
// This Remote Message did not originate from Braze.
// No action was taken and you can safely pass this Remote Message to other handlers.
}
}
}
```
If you have another Firebase Messaging Service you would also like to use, you can also specify a fallback Firebase Messaging Service to call if your application receives a push that isn't from Braze.
In your `braze.xml`, specify:
```xml
truecom.company.OurFirebaseMessagingService
```
or set via [runtime configuration:](https://www.braze.com/docs/fr/fr/developer_guide/sdk_initalization/?sdktab=android)
```java
BrazeConfig brazeConfig = new BrazeConfig.Builder()
.setFallbackFirebaseMessagingServiceEnabled(true)
.setFallbackFirebaseMessagingServiceClasspath("com.company.OurFirebaseMessagingService")
.build();
Braze.configure(this, brazeConfig);
```
```kotlin
val brazeConfig = BrazeConfig.Builder()
.setFallbackFirebaseMessagingServiceEnabled(true)
.setFallbackFirebaseMessagingServiceClasspath("com.company.OurFirebaseMessagingService")
.build()
Braze.configure(this, brazeConfig)
```
### Step 2: Conform small icons to design guidelines
For general information about Android notification icons, visit the [Notifications overview](https://developer.android.com/guide/topics/ui/notifiers/notifications).
Starting in Android N, you should update or remove small notification icon assets that involve color. The Android system (not the Braze SDK) ignores all non-alpha and transparency channels in action icons and the notification small icon. In other words, Android will convert all parts of your notification small icon to monochrome except for transparent regions.
To create a notification small icon asset that displays properly:
- Remove all colors from the image except for white.
- All other non-white regions of the asset should be transparent.
**Note:**
A common symptom of an improper asset is the small notification icon rendering as a solid monochrome square. This is due to the Android system not being able to find any transparent regions in the notification small icon asset.
The following large and small icons pictured are examples of properly designed icons:

### Step 3: Configure notification icons {#configure-icons}
#### Specifying icons in braze.xml
Braze allows you to configure your notification icons by specifying drawable resources in your `braze.xml`:
```xml
REPLACE_WITH_YOUR_ICONREPLACE_WITH_YOUR_ICON
```
Setting a small notification icon is required. **If you do not set one, Braze will default to using the application icon as the small notification icon, which may look suboptimal.**
Setting a large notification icon is optional but recommended.
#### Specifying icon accent color
The notification icon accent color can be overridden in your `braze.xml`. If the color is not specified, the default color is the same gray Lollipop uses for system notifications.
```xml
0xFFf33e3e
```
You may also optionally use a color reference:
```xml
@color/my_color_here
```
### Step 4: Add deep links
#### Enabling automatic deep link opening
To enable Braze to automatically open your app and any deep links when a push notification is clicked, set `com_braze_handle_push_deep_links_automatically` to `true`, in your `braze.xml`:
```xml
true
```
This flag can also be set via [runtime configuration](https://www.braze.com/docs/fr/fr/developer_guide/sdk_initalization/?sdktab=android):
```java
BrazeConfig brazeConfig = new BrazeConfig.Builder()
.setHandlePushDeepLinksAutomatically(true)
.build();
Braze.configure(this, brazeConfig);
```
```kotlin
val brazeConfig = BrazeConfig.Builder()
.setHandlePushDeepLinksAutomatically(true)
.build()
Braze.configure(this, brazeConfig)
```
If you want to custom handle deep links, you will need to create a push callback that listens for push received and opened intents from Braze. For more information, see [Using a callback for push events](https://www.braze.com/docs/fr/fr/developer_guide/push_notifications/customization#android_using-a-callback-for-push-events).
## Handling foreground notifications
By default, when a push notification arrives while your app is in the foreground on Android, the system displays it automatically. To have Braze process the push notification payload (for analytics tracking, deep link handling, and custom processing), route the incoming push data to Braze inside your `FirebaseMessagingService.onMessageReceived` method.
### How it works
When you call `BrazeFirebaseMessagingService.handleBrazeRemoteMessage`, Braze determines if the payload is a Braze push notification and, if so, creates and displays the notification with the `NotificationManagerCompat` method. Unlike iOS, Android displays notifications regardless of whether the app is in the foreground or background.
```java
package com.example.push;
import com.braze.push.BrazeFirebaseMessagingService;
import com.google.firebase.messaging.FirebaseMessagingService;
import com.google.firebase.messaging.RemoteMessage;
public class MyFirebaseMessagingService extends FirebaseMessagingService {
@Override
public void onMessageReceived(RemoteMessage remoteMessage) {
super.onMessageReceived(remoteMessage);
// Let Braze process the payload and display the notification
if (BrazeFirebaseMessagingService.handleBrazeRemoteMessage(this, remoteMessage)) {
// Braze successfully handled the push notification
} else {
// Handle non-Braze messages
}
}
}
```
```kotlin
package com.example.push
import com.braze.push.BrazeFirebaseMessagingService
import com.google.firebase.messaging.FirebaseMessagingService
import com.google.firebase.messaging.RemoteMessage
class MyFirebaseMessagingService : FirebaseMessagingService() {
override fun onMessageReceived(remoteMessage: RemoteMessage) {
super.onMessageReceived(remoteMessage)
// Let Braze process the payload and display the notification
if (BrazeFirebaseMessagingService.handleBrazeRemoteMessage(this, remoteMessage)) {
// Braze successfully handled the push notification
} else {
// Handle non-Braze messages
}
}
}
```
For more information, see the [Firebase integration sample](https://github.com/braze-inc/braze-android-sdk/blob/master/samples/firebase-push/src/main/java/com/braze/firebasepush/FirebaseMessagingService.kt) in the Braze Android SDK repository.
### Customizing foreground behavior
If you want custom foreground behavior, such as suppressing the system notification or showing an in-app UI instead, you can:
- Use `subscribeToPushNotificationEvents` to react to push events and handle deep links with the `BrazeNotificationUtils.routeUserWithNotificationOpenedIntent` method. For more information, see the [Firebase push sample](https://github.com/braze-inc/braze-android-sdk/blob/master/samples/firebase-push/src/main/java/com/braze/firebasepush/FirebaseApplication.kt).
- Build and post your own notification using a custom `IBrazeNotificationFactory`, or suppress the notification by not calling `notificationManager.notify` in your handling path.
For more information on customizing notifications, see [Custom notification factory](https://www.braze.com/docs/fr/fr/developer_guide/push_notifications/customization/?sdktab=android#custom-notification-factory).
#### Creating custom deep links
Follow the instructions found within the [Android developer documentation](http://developer.android.com/training/app-indexing/deep-linking.html) on deep linking if you have not already added deep links to your app. To learn more about what deep links are, see our [FAQ article](https://www.braze.com/docs/fr/fr/user_guide/messaging/design_and_edit/personalize/actions_and_media_urls/#what-is-deep-linking).
#### Adding deep links
The Braze dashboard supports setting deep links or web URLs in push notifications campaigns and Canvases that will be opened when the notification is clicked.

#### Customizing back stack behavior
The Android SDK, by default, will place your host app's main launcher activity in the back stack when following push deep links. Braze allows you to set a custom activity to open in the back stack in place of your main launcher activity or to disable the back stack altogether.
For example, to set an activity called `YourMainActivity` as the back stack activity using [runtime configuration](https://www.braze.com/docs/fr/fr/developer_guide/sdk_initalization/?sdktab=android):
```java
BrazeConfig brazeConfig = new BrazeConfig.Builder()
.setPushDeepLinkBackStackActivityEnabled(true)
.setPushDeepLinkBackStackActivityClass(YourMainActivity.class)
.build();
Braze.configure(this, brazeConfig);
```
```kotlin
val brazeConfig = BrazeConfig.Builder()
.setPushDeepLinkBackStackActivityEnabled(true)
.setPushDeepLinkBackStackActivityClass(YourMainActivity.class)
.build()
Braze.configure(this, brazeConfig)
```
See the equivalent configuration for your `braze.xml`. Note that the class name must be the same as returned by `Class.forName()`.
```xml
trueyour.package.name.YourMainActivity
```
### Step 5: Define notification channels
The Braze Android SDK supports [Android notification channels](https://developer.android.com/preview/features/notification-channels.html). If a Braze notification does not contain the ID for a notification channel or that a Braze notification contains an invalid channel ID, Braze will display the notification with the default notification channel defined in the SDK. Company users use [Android Notification Channels](https://www.braze.com/docs/fr/fr/user_guide/message_building_by_channel/push/android/notification_channels/) within the platform to group notifications.
To set the user facing name of the default Braze notification channel, use [`BrazeConfig.setDefaultNotificationChannelName()`](https://braze-inc.github.io/braze-android-sdk/kdoc/braze-android-sdk/com.braze.configuration/-braze-config/-builder/set-default-notification-channel-name.html).
To set the user facing description of the default Braze notification channel, use [`BrazeConfig.setDefaultNotificationChannelDescription()`](https://braze-inc.github.io/braze-android-sdk/kdoc/braze-android-sdk/com.braze.configuration/-braze-config/-builder/set-default-notification-channel-description.html).
Update any API campaigns with the [Android push object](https://www.braze.com/docs/fr/fr/api/objects_filters/messaging/android_object/) parameter to include the `notification_channel` field. If this field is not specified, Braze will send the notification payload with the [dashboard fallback](https://www.braze.com/docs/fr/fr/user_guide/message_building_by_channel/push/android/notification_channels/#dashboard-fallback-channel) channel ID.
Other than the default notification channel, Braze will not create any channels. All other channels must be programmatically defined by the host app and then entered into the Braze dashboard.
The default channel name and description can also be configured in `braze.xml`.
```xml
Your channel nameYour channel description
```
### Step 6: Test notification display and analytics
#### Testing display
At this point, you should be able to see notifications sent from Braze. To test this, go to the **Campaigns** page on your Braze dashboard and create a **Push Notification** campaign. Choose **Android Push** and design your message. Then click the eye icon in the composer to get the test sender. Enter the user ID or email address of your current user and click **Send Test**. You should see the push show up on your device.

For issues related to push display, see our [troubleshooting guide](https://www.braze.com/docs/fr/fr/developer_guide/push_notifications/troubleshooting/?sdktab=android).
#### Testing analytics
At this point, you should also have analytics logging for push notification opens. Clicking on the notification when it arrives should result in the **Direct Opens** on your campaign results page to increase by 1. Check out our [push reporting](https://www.braze.com/docs/fr/fr/user_guide/message_building_by_channel/push/push_reporting/) article for a break down on push analytics.
For issues related to push analytics, see our [troubleshooting guide](https://www.braze.com/docs/fr/fr/developer_guide/push_notifications/troubleshooting/?sdktab=android).
#### Testing from command line
If you'd like to test in-app and push notifications via the command-line interface, you can send a single notification through the terminal via cURL and the [messaging API](https://www.braze.com/docs/fr/fr/api/endpoints/messaging/). You will need to replace the following fields with the correct values for your test case:
- `YOUR_API_KEY` (Go to **Settings** > **API Keys**.)
- `YOUR_EXTERNAL_USER_ID` (Search for a profile on the **Search Users** page.)
- `YOUR_KEY1` (optional)
- `YOUR_VALUE1` (optional)
```bash
curl -X POST -H "Content-Type: application/json" -H "Authorization: Bearer {YOUR_API_KEY}" -d '{
"external_user_ids":["YOUR_EXTERNAL_USER_ID"],
"messages": {
"android_push": {
"title":"Test push title",
"alert":"Test push",
"extra": {
"YOUR_KEY1":"YOUR_VALUE1"
}
}
}
}' https://rest.iad-01.braze.com/messages/send
```
This example uses the `US-01` instance. If you are not on this instance, replace the `US-01` endpoint with [your endpoint](https://www.braze.com/docs/fr/fr/api/basics/#endpoints).
## Conversation push notifications
{: style="float:right;max-width:35%;margin-left:15px;border: 0;"}
The [people and conversations initiative](https://developer.android.com/guide/topics/ui/conversations) is a multi-year Android initiative that aims to elevate people and conversations in the system surfaces of the phone. This priority is based on the fact that communication and interaction with other people is still the most valued and important functional area for the majority of Android users across all demographics.
### Usage requirements
- This notification type requires the Braze Android SDK v15.0.0+ and Android 11+ devices.
- Unsupported devices or SDKs will fallback to a standard push notification.
This feature is only available over the Braze REST API. See the [Android push object](https://www.braze.com/docs/fr/fr/api/objects_filters/messaging/android_object#android-conversation-push-object) for more information.
## FCM quota exceeded errors
When your limit for Firebase Cloud Messaging (FCM) is exceeded, Google returns "quota exceeded" errors. The default limit for FCM is 600,000 requests per minute. Braze retries sending according to Google's recommended best practices. However, a large volume of these errors can prolong sending time by several minutes. To mitigate potential impact, Braze will send you an alert that the rate limit is being exceeded and steps you can take to prevent the errors.
To check your current limit, go to your **Google Cloud Console** > **APIs & Services** > **Firebase Cloud Messaging API** > **Quotas & System Limits**, or visit the [FCM API Quotas page](https://console.cloud.google.com/apis/api/fcm.googleapis.com/quotas).
### Best practices
We recommend these best practices to keep these error volumes low.
#### Request a rate limit increase from FCM
To request a rate limit increase from FCM, you can contact [Firebase Support](https://firebase.google.com/support) directly or do the following:
1. Go to the [FCM API Quotas page](https://console.cloud.google.com/apis/api/fcm.googleapis.com/quotas).
2. Locate the **Send requests per minute** quota.
3. Select **Edit Quota**.
4. Enter a new value and submit your request.
#### Apply a workspace rate limit
You can apply a workspace rate limit for Android push notifications. This can help regulate the delivery rate of your outgoing messages. For more details, see [Workspace messaging rate limits](https://www.braze.com/docs/fr/fr/user_guide/administrative/app_settings/messaging_rate_limits).
## Rate limits
Push notifications are rate-limited, so don't be afraid of sending as many as your application needs. iOS and the Apple Push Notification service (APNs) servers will control how often they are delivered, and you won't get into trouble for sending too many. If your push notifications are throttled, they might be delayed until the next time the device sends a keep-alive packet or receives another notification.
## Setting up push notifications
### Step 1: Upload your APNs token
Before you can send an iOS push notification using Braze, you need to upload your `.p8` push notification file, as described in [Apple's developer documentation](https://developer.apple.com/documentation/usernotifications/establishing-a-token-based-connection-to-apns):
1. In your Apple developer account, go to [**Certificates, Identifiers & Profiles**](https://developer.apple.com/account/ios/certificate).
2. Under **Keys**, select **All** and click the add button (+) in the upper-right corner.
3. Under **Key Description**, enter a unique name for the signing key.
4. Under **Key Services**, select the **Apple Push Notification service (APNs)** checkbox, then click **Continue**. Click **Confirm**.
5. Note the key ID. Click **Download** to generate and download the key. Make sure to save the downloaded file in a secure place, as you cannot download this more than once.
6. In Braze, go to **Settings** > **App Settings** and upload the `.p8` file under **Apple Push Certificate**. You can upload either your development or production push certificate. To test push notifications after your app is live in the App Store, its recommended to set up a separate workspace for the development version of your app.
7. When prompted, enter your app's [bundle ID](https://developer.apple.com/documentation/foundation/nsbundle/1418023-bundleidentifier), [key ID](https://developer.apple.com/help/account/manage-keys/get-a-key-identifier/), and [team ID](https://developer.apple.com/help/account/manage-your-team/locate-your-team-id). You'll also need to specify whether to send notifications to your app's development or production environment, which is defined by its provisioning profile.
8. When you're finished, select **Save**.
### Step 2: Enable push capabilities
In Xcode, go to the **Signing & Capabilities** section of the main app target and add the push notifications capability.

### Step 3: Set up push handling
You can use the Swift SDK to automate the processing of remote notifications received from Braze. This is the simplest way to handle push notifications and is the recommended handling method.
#### Step 3.1: Enable automation in the push property
To enable the automatic push integration, set the `automation` property of the `push` configuration to `true`:
```swift
let configuration = Braze.Configuration(apiKey: "{YOUR-BRAZE-API-KEY}", endpoint: "{YOUR-BRAZE-API-ENDPOINT}")
configuration.push.automation = true
```
```objc
BRZConfiguration *configuration = [[BRZConfiguration alloc] initWithApiKey:@"{YOUR-BRAZE-API-KEY}" endpoint:@"{YOUR-BRAZE-API-ENDPOINT}"];
configuration.push.automation = [[BRZConfigurationPushAutomation alloc] initEnablingAllAutomations:YES];
```
This instructs the SDK to:
- Register your application for push notification on the system.
- Request the push notification authorization/permission at initialization.
- Dynamically provide implementations for the push notification related system delegate methods.
**Note:**
The automation steps performed by the SDK are compatible with pre-existing push notification handling integrations in your codebase. The SDK only automates the processing of remote notification received from Braze. Any system handler implemented to process your own or another third party SDK remote notifications will continue to work when `automation` is enabled.
**Warning:**
The SDK must be initialized on the main thread to enable push notification automation. SDK initialization must happen before the application has finished launching or in your AppDelegate [`application(_:didFinishLaunchingWithOptions:)`](https://developer.apple.com/documentation/uikit/uiapplicationdelegate/1622921-application) implementation.
If your application requires additional setup before initializing the SDK, please refer to the [Delayed Initialization](https://www.braze.com/docs/fr/fr/developer_guide/sdk_initalization/?sdktab=swift) documentation page.
#### Step 3.2: Override individual configurations (optional)
For more granular control, each automation step can be enabled or disabled individually:
```swift
// Enable all automations and disable the automatic notification authorization request at launch.
configuration.push.automation = true
configuration.push.automation.requestAuthorizationAtLaunch = false
```
```objc
// Enable all automations and disable the automatic notification authorization request at launch.
configuration.push.automation = [[BRZConfigurationPushAutomation alloc] initEnablingAllAutomations:YES];
configuration.push.automation.requestAuthorizationAtLaunch = NO;
```
See [`Braze.Configuration.Push.Automation`](https://braze-inc.github.io/braze-swift-sdk/documentation/brazekit/braze/configuration-swift.class/push-swift.class/automation-swift.class) for all available options and [`automation`](https://braze-inc.github.io/braze-swift-sdk/documentation/brazekit/braze/configuration-swift.class/push-swift.class/automation-swift.property) for more information on the automation behavior.
**Note:**
If you rely on push notifications for additional behavior specific to your app, you may still be able to use automatic push integration instead of manual push notification integration. The [`subscribeToUpdates(_:)`](https://braze-inc.github.io/braze-swift-sdk/documentation/brazekit/braze/notifications-swift.class/subscribetoupdates(_:)) method provides a way to be notified of remote notifications processed by Braze.
#### Step 3.1: Register for push notifications with APNs
Include the appropriate code sample within your app's [`application:didFinishLaunchingWithOptions:` delegate method](https://developer.apple.com/documentation/uikit/uiapplicationdelegate/1622921-application) so that your users' devices can register with APNs. Ensure that you call all push integration code in your application's main thread.
Braze also provides default push categories for push action button support, which must be manually added to your push registration code. Refer to [push action buttons](https://www.braze.com/docs/fr/fr/developer_guide/push_notifications/customization/?sdktab=swift#swift_customizing-push-categories) for additional integration steps.
Add the following code to the `application:didFinishLaunchingWithOptions:` method of your app delegate.
**Note:**
The following code sample includes integration for provisional push authentication (lines 5 and 6). If you are not planning on using provisional authorization in your app, you can remove the lines of code that add `UNAuthorizationOptionProvisional` to the `requestAuthorization` options. Visit [iOS notification options](https://www.braze.com/docs/fr/fr/user_guide/message_building_by_channel/push/ios/notification_options/) to learn more about push provisional authentication.
```swift
application.registerForRemoteNotifications()
let center = UNUserNotificationCenter.current()
center.setNotificationCategories(Braze.Notifications.categories)
center.delegate = self
var options: UNAuthorizationOptions = [.alert, .sound, .badge]
if #available(iOS 12.0, *) {
options = UNAuthorizationOptions(rawValue: options.rawValue | UNAuthorizationOptions.provisional.rawValue)
}
center.requestAuthorization(options: options) { granted, error in
print("Notification authorization, granted: \(granted), error: \(String(describing: error))")
}
```
```objc
[application registerForRemoteNotifications];
UNUserNotificationCenter *center = UNUserNotificationCenter.currentNotificationCenter;
[center setNotificationCategories:BRZNotifications.categories];
center.delegate = self;
UNAuthorizationOptions options = UNAuthorizationOptionAlert | UNAuthorizationOptionSound | UNAuthorizationOptionBadge;
if (@available(iOS 12.0, *)) {
options = options | UNAuthorizationOptionProvisional;
}
[center requestAuthorizationWithOptions:options
completionHandler:^(BOOL granted, NSError *_Nullable error) {
NSLog(@"Notification authorization, granted: %d, "
@"error: %@)",
granted, error);
}];
```
**Warning:**
You must assign your delegate object using `center.delegate = self` synchronously before your app finishes launching, preferably in `application:didFinishLaunchingWithOptions:`. Not doing so may cause your app to miss incoming push notifications. Visit Apple's [`UNUserNotificationCenterDelegate`](https://developer.apple.com/documentation/usernotifications/unusernotificationcenterdelegate) documentation to learn more.
If your app calls `wipeData()` and later re-enables the Braze SDK in the same app run, you must call `registerForRemoteNotifications()` again to re-populate the device token used by the SDK.
#### Step 3.2: Register push tokens with Braze
Once APNs registration is complete, pass the resulting `deviceToken` to Braze to enable for push notifications for the user.
Add the following code to your app's `application(_:didRegisterForRemoteNotificationsWithDeviceToken:)` method:
```swift
AppDelegate.braze?.notifications.register(deviceToken: deviceToken)
```
Add the following code to your app's `application:didRegisterForRemoteNotificationsWithDeviceToken:` method:
```objc
[AppDelegate.braze.notifications registerDeviceToken:deviceToken];
```
**Important:**
The `application:didRegisterForRemoteNotificationsWithDeviceToken:` delegate method is called every time after `application.registerForRemoteNotifications()` is called.
If you are migrating to Braze from another push service and your user's device has already registered with APNs, this method will collect tokens from existing registrations the next time the method is called, and users will not have to re-opt-in to push.
#### Step 3.3: Enable push handling
Next, pass the received push notifications along to Braze. This step is necessary for logging push analytics and link handling. Ensure that you call all push integration code in your application's main thread.
##### Default push handling
To enable the Braze default push handling, add the following code to your app's `application(_:didReceiveRemoteNotification:fetchCompletionHandler:)` method:
```swift
if let braze = AppDelegate.braze, braze.notifications.handleBackgroundNotification(
userInfo: userInfo,
fetchCompletionHandler: completionHandler
) {
return
}
completionHandler(.noData)
```
Next, add the following to your app's `userNotificationCenter(_:didReceive:withCompletionHandler:)` method:
```swift
if let braze = AppDelegate.braze, braze.notifications.handleUserNotification(
response: response,
withCompletionHandler: completionHandler
) {
return
}
completionHandler()
```
To enable the Braze default push handling, add the following code to your application's `application:didReceiveRemoteNotification:fetchCompletionHandler:` method:
```objc
BOOL processedByBraze = AppDelegate.braze != nil && [AppDelegate.braze.notifications handleBackgroundNotificationWithUserInfo:userInfo
fetchCompletionHandler:completionHandler];
if (processedByBraze) {
return;
}
completionHandler(UIBackgroundFetchResultNoData);
```
Next, add the following code to your app's `(void)userNotificationCenter:didReceiveNotificationResponse:withCompletionHandler:` method:
```objc
BOOL processedByBraze = AppDelegate.braze != nil && [AppDelegate.braze.notifications handleUserNotificationWithResponse:response
withCompletionHandler:completionHandler];
if (processedByBraze) {
return;
}
completionHandler();
```
##### Foreground push handling
To enable foreground push notifications and let Braze recognize them when they're received, implement `UNUserNotificationCenter.userNotificationCenter(_:willPresent:withCompletionHandler:)`. If a user taps your foreground notification, the `userNotificationCenter(_:didReceive:withCompletionHandler:)` push delegate will be called and Braze will log the push click event.
```swift
func userNotificationCenter(
_ center: UNUserNotificationCenter,
willPresent notification: UNNotification,
withCompletionHandler completionHandler: @escaping (UNNotificationPresentationOptions
) -> Void) {
if let braze = AppDelegate.braze {
// Forward notification payload to Braze for processing.
braze.notifications.handleForegroundNotification(notification: notification)
}
// Configure application's foreground notification display options.
if #available(iOS 14.0, *) {
completionHandler([.list, .banner])
} else {
completionHandler([.alert])
}
}
```
To enable foreground push notifications and let Braze recognize them when they're received, implement `userNotificationCenter:willPresentNotification:withCompletionHandler:`. If a user taps your foreground notification, the `userNotificationCenter:didReceiveNotificationResponse:withCompletionHandler:` push delegate will be called and Braze will log the push click event.
```objc
- (void)userNotificationCenter:(UNUserNotificationCenter *)center
willPresentNotification:(UNNotification *)notification
withCompletionHandler:(void (^)(UNNotificationPresentationOptions options))completionHandler {
if (AppDelegate.braze != nil) {
// Forward notification payload to Braze for processing.
[AppDelegate.braze.notifications handleForegroundNotificationWithNotification:notification];
}
// Configure application's foreground notification display options.
if (@available(iOS 14.0, *)) {
completionHandler(UNNotificationPresentationOptionList | UNNotificationPresentationOptionBanner);
} else {
completionHandler(UNNotificationPresentationOptionAlert);
}
}
```
## Testing notifications {#push-testing}
If you'd like to test in-app and push notifications via the command line, you can send a single notification through the terminal via CURL and the [messaging API](https://www.braze.com/docs/fr/fr/api/endpoints/messaging/send_messages/post_send_messages/). You will need to replace the following fields with the correct values for your test case:
- `YOUR_API_KEY` - available at **Settings** > **API Keys**.
- `YOUR_EXTERNAL_USER_ID` - available on the **Search Users** page. See [assigning user IDs](https://www.braze.com/docs/fr/fr/developer_guide/platform_integration_guides/swift/analytics/setting_user_ids/#assigning-a-user-id) for more information.
- `YOUR_KEY1` (optional)
- `YOUR_VALUE1` (optional)
In the following example, the `US-01` instance is being used. If you're not on this instance, refer to our [API documentation](https://www.braze.com/docs/fr/fr/api/basics/) to see which endpoint to make requests to.
```bash
curl -X POST -H "Content-Type: application/json" -H "Authorization: Bearer {YOUR_API_KEY}" -d '{
"external_user_ids":["YOUR_EXTERNAL_USER_ID"],
"messages": {
"apple_push": {
"alert":"Test push",
"extra": {
"YOUR_KEY1":"YOUR_VALUE1"
}
}
}
}' https://rest.iad-01.braze.com/messages/send
```
## Subscribing to push notifications updates
To access the push notification payloads processed by Braze, use the [`Braze.Notifications.subscribeToUpdates(payloadTypes:_:)`](https://braze-inc.github.io/braze-swift-sdk/documentation/brazekit/braze/notifications-swift.class/subscribetoupdates(payloadtypes:_:)/) method.
You can use the `payloadTypes` parameter to specify whether you'd like to subscribe to notifications involving push open events, push received events, or both.
```swift
// This subscription is maintained through a Braze cancellable, which will observe for changes until the subscription is cancelled.
// You must keep a strong reference to the cancellable to keep the subscription active.
// The subscription is canceled either when the cancellable is deinitialized or when you call its `.cancel()` method.
let cancellable = AppDelegate.braze?.notifications.subscribeToUpdates(payloadTypes: [.open, .received]) { payload in
print("Braze processed notification with title '\(payload.title)' and body '\(payload.body)'")
}
```
**Important:**
Keep in mind, push received events will only trigger for foreground notifications and `content-available` background notifications. It will not trigger for notifications received while terminated or for background notifications without the `content-available` field.
```objc
NSInteger filtersValue = BRZNotificationsPayloadTypeFilter.opened.rawValue | BRZNotificationsPayloadTypeFilter.received.rawValue;
BRZNotificationsPayloadTypeFilter *filters = [[BRZNotificationsPayloadTypeFilter alloc] initWithRawValue: filtersValue];
BRZCancellable *cancellable = [notifications subscribeToUpdatesWithPayloadTypes:filters update:^(BRZNotificationsPayload * _Nonnull payload) {
NSLog(@"Braze processed notification with title '%@' and body '%@'", payload.title, payload.body);
}];
```
**Important:**
Keep in mind, push received events will only trigger for foreground notifications and `content-available` background notifications. It will not trigger for notifications received while terminated or for background notifications without the `content-available` field.
**Note:**
When using the automatic push integration, `subscribeToUpdates(_:)` is the only way to be notified of remote notifications processed by Braze. The `UIAppDelegate` and `UNUserNotificationCenterDelegate` system methods are not called when the notification is automatically processed by Braze.
**Tip:**
Create your push notification subscription in `application(_:didFinishLaunchingWithOptions:)` to ensure your subscription is triggered after an end-user taps a notification while your app is in a terminated state.
## Handling foreground notifications
By default, when a push notification arrives while your app is in the foreground, iOS does not display it automatically. To display push notifications in the foreground and track them with Braze analytics, call the `handleForegroundNotification(notification:)` method inside your `UNUserNotificationCenterDelegate.userNotificationCenter(_:willPresent:withCompletionHandler:)` implementation.
### How it works
When you call `handleForegroundNotification(notification:)`, Braze processes the notification payload to log analytics and handle any deep links or button actions. The actual display behavior is controlled by the `UNNotificationPresentationOptions` you pass to the completion handler.
```swift
import BrazeKit
import UserNotifications
extension AppDelegate: UNUserNotificationCenterDelegate {
func userNotificationCenter(
_ center: UNUserNotificationCenter,
willPresent notification: UNNotification,
withCompletionHandler completionHandler: @escaping (UNNotificationPresentationOptions) -> Void
) {
// Let Braze process the notification payload
if let braze = AppDelegate.braze {
braze.notifications.handleForegroundNotification(notification: notification)
}
// Control how the notification appears in the foreground
if #available(iOS 14.0, *) {
completionHandler([.banner, .list, .sound])
} else {
completionHandler([.alert, .sound])
}
}
}
```
For a complete example, see the [push notifications manual integration sample](https://github.com/braze-inc/braze-swift-sdk/blob/e31907eaa0dbd151dc2e6826de66cc494242ba60/Examples/Swift/Sources/PushNotifications-Manual/AppDelegate.swift#L1-L120) in the Braze Swift SDK repository.
## Push primers {#push-primers}
Push primer campaigns encourage your users to enable push notifications on their device for your app. This can be done without SDK customization using our [no code push primer](https://www.braze.com/docs/fr/fr/user_guide/message_building_by_channel/push/best_practices/push_primer_messages/).
## Dynamic APNs gateway management
Dynamic Apple Push Notification Service (APNs) gateway management enhances the reliability and efficiency of iOS push notifications by automatically detecting the correct APNs environment. Previously, you would manually select APNs environments (development or production) for your push notifications, which sometimes led to incorrect gateway configurations, delivery failures, and `BadDeviceToken` errors.
With dynamic APNs gateway management, you'll have:
- **Improved reliability:** Notifications are always delivered to the correct APNs environment, reducing failed deliveries.
- **Simplified configuration:** You no longer need to manually manage APNs gateway settings.
- **Error resilience:** Invalid or missing gateway values are gracefully handled, providing uninterrupted service.
### Prerequisites
Braze supports Dynamic APNs gateway management for push notifications on iOS with the following SDK version requirement:
### How it works
When an iOS app integrates with the Braze Swift SDK, it sends device-related data, including [`aps-environment`](https://developer.apple.com/documentation/bundleresources/entitlements/aps-environment) to the Braze SDK API, if available. The `apns_gateway` value indicates whether the app is using the development (`dev`) or production (`prod`) APNs environment.
Braze also stores the reported gateway value for each device. If a new, valid gateway value is received, Braze updates the stored value automatically.
When Braze sends a push notification:
- If a valid gateway value (dev or prod) is stored for the device, Braze uses it to determine the correct APNs environment.
- If no gateway value is stored, Braze defaults to the APNs environment configured in the **App Settings** page.
### Frequently asked questions
#### Why was this feature introduced?
With dynamic APNs gateway management, the correct environment is selected automatically. Previously, you had to manually configure the APNs gateway, which could lead to `BadDeviceToken` errors, token invalidation, and potential APNs rate-limiting issues.
#### How does this impact push delivery performance?
This feature improves delivery rates by always routing push tokens to the correct APNs environment, avoiding failures caused by misconfigured gateways.
#### Can I disable this feature?
Dynamic APNs Gateway Management is turned on by default and provides reliability improvements. If you have specific use cases that require manual gateway selection, contact [Braze Support](https://www.braze.com/docs/fr/fr/user_guide/administrative/access_braze/support/).
## About push notifications for Android TV
{: style="float:right;max-width:25%;margin-left:15px; border: 0"}
While not a native feature, Android TV push integration is made possible by leveraging the Braze Android SDK and Firebase Cloud Messaging to register a push token for Android TV. It is, however, necessary to build a UI to display the notification payload after it is received.
## Prerequisites
To use this feature, you'll need to complete the following:
- [Integrate the Braze Android SDK](https://www.braze.com/docs/fr/fr/developer_guide/sdk_integration/?sdktab=android)
- [Set up push notifications for the Braze Android SDK](https://www.braze.com/docs/fr/fr/developer_guide/platform_integration_guides/android/push_notifications/?tab=android)
## Setting up push notifications
To set up push notifications for Android TV:
1. Create a custom view in your app to display your notifications.
2. Create a [custom notification factory](https://www.braze.com/docs/fr/fr/developer_guide/push_notifications/customization#customization-display). This will override the default SDK behavior and allow you to manually display the notifications. By returning `null`, this will prevent the SDK from processing and will require custom code to display the notification. After these steps have been completed, you can start sending push to Android TV!
3. (Optional) To track click analytics effectively, set up click analytics tracking. This can be achieved by creating a [push callback](https://www.braze.com/docs/fr/fr/developer_guide/push_notifications/customization#push-callback) to listen for Braze push opened and received intents.
**Note:**
These notifications **will not persist** and will only be visible to the user when the device displays them. This is due to Android TV's notification center not supporting historical notifications.
## Testing Android TV push notifications
To test if your push implementation is successful, send a notification from the Braze dashboard as you would normally for an Android device.
- **If the application is closed**: The push message will display a toast notification on the screen.
- **If the application is open**: You have the opportunity to display the message in your own hosted UI. We recommend following the UI styling of our Android Mobile SDK in-app messages.
## Best practices
For marketers using Braze, launching a campaign to Android TV will be identical to launching a push to Android mobile apps. To target these devices exclusively, we recommend selecting the Android TV App in segmentation.
The delivered and clicked response returned by FCM will follow the same convention as a mobile Android device; therefore, any errors will be visible in the message activity log.
## Prerequisites
Before you can use this feature, you'll need to [integrate the Cordova Braze SDK](https://www.braze.com/docs/fr/fr/developer_guide/sdk_integration/?sdktab=cordova). After you integrate the SDK, basic push notification functionality is enabled by default. To use [rich push notifications](https://www.braze.com/docs/fr/fr/developer_guide/push_notifications/rich/?sdktab=cordova) and [push stories](https://www.braze.com/docs/fr/fr/developer_guide/push_notifications/push_stories/?sdktab=cordova), you'll need to set them up individually. To use iOS push messages, you also need to upload a valid push certificate.
**Warning:**
Anytime you add, remove, or update your Cordova plugins, Cordova will overwrite the Podfile in your iOS app's Xcode project. This means you’ll need to set these features up again anytime you modify your Cordova plugins.
## Enabling push deep linking
By default, the Braze Cordova SDK doesn't automatically handle deep links from push notifications. To enable push deep linking, follow the configuration steps in [Deep linking](https://www.braze.com/docs/fr/fr/developer_guide/cordova/deep_linking/).
For more details about these and other push configuration options, see [Optional configurations](https://www.braze.com/docs/fr/fr/developer_guide/sdk_integration?sdktab=cordova#optional).
## Disabling basic push notifications (iOS only)
After you integrate the Braze Cordova SDK for iOS, basic push notification functionality is enabled by default. To disable this functionality in your iOS app, add the following to your `config.xml` file. For more information, see [Optional configurations](https://www.braze.com/docs/fr/fr/developer_guide/sdk_integration?sdktab=cordova#optional).
```xml
```
## Prerequisites
Before you can use this feature, you'll need to [integrate the Flutter Braze SDK](https://www.braze.com/docs/fr/fr/developer_guide/sdk_integration/?sdktab=flutter).
## Setting up push notifications
### Step 1: Complete the initial setup
#### Step 1.1: Register for push
Register for push using Google’s Firebase Cloud Messaging (FCM) API. For a full walkthrough, refer to the following steps from the [Native Android push integration guide](https://www.braze.com/docs/fr/fr/developer_guide/platform_integration_guides/android/push_notifications/?tab=android/):
1. [Add Firebase to your project](https://www.braze.com/docs/fr/fr/developer_guide/platform_integration_guides/android/push_notifications/android/integration/standard_integration/#step-1-add-firebase-to-your-project).
2. [Add Cloud Messaging to your dependencies](https://www.braze.com/docs/fr/fr/developer_guide/platform_integration_guides/android/push_notifications/android/integration/standard_integration/#step-2-add-cloud-messaging-to-your-dependencies).
3. [Create a service account](https://www.braze.com/docs/fr/fr/developer_guide/platform_integration_guides/android/push_notifications/android/integration/standard_integration/#step-3-create-a-service-account).
4. [Generate JSON credentials](https://www.braze.com/docs/fr/fr/developer_guide/platform_integration_guides/android/push_notifications/android/integration/standard_integration/#step-4-generate-json-credentials).
5. [Upload your JSON credentials to Braze](https://www.braze.com/docs/fr/fr/developer_guide/platform_integration_guides/android/push_notifications/android/integration/standard_integration/#step-5-upload-your-json-credentials-to-braze).
#### Step 1.2: Get your Google Sender ID
First, go to Firebase Console, open your project, then select **Settings** > **Project settings**.

Select **Cloud Messaging**, then under **Firebase Cloud Messaging API (V1)**, copy the **Sender ID** to your clipboard.

#### Step 1.3: Update your `braze.xml`
Add the following to your `braze.xml` file. Replace `FIREBASE_SENDER_ID` with the sender ID you copied previously.
```xml
trueFIREBASE_SENDER_ID
```
#### Step 1.1: Upload APNs certificates
Generate an Apple Push Notification service (APNs) certificate and uploaded it to the Braze dashboard. For a full walkthrough, see [Uploading your APNs certificate](https://www.braze.com/docs/fr/fr/developer_guide/platform_integration_guides/swift/push_notifications/integration/#step-1-upload-your-apns-certificate).
#### Step 1.2: Add push notification support to your app
Follow the [native iOS integration guide](https://www.braze.com/docs/fr/fr/developer_guide/platform_integration_guides/swift/push_notifications/integration/?tab=objective-c#automatic-push-integration).
### Step 2: Listen for push notification events (optional)
To listen for push notification events that Braze has detected and handled, call `subscribeToPushNotificationEvents()` and pass in an argument to execute.
**Note:**
Braze push notification events are available on both Android and iOS. Due to platform differences, iOS will only detect Braze push events when a user has interacted with a notification.
```dart
// Create stream subscription
StreamSubscription pushEventsStreamSubscription;
pushEventsStreamSubscription = braze.subscribeToPushNotificationEvents((BrazePushEvent pushEvent) {
print("Push Notification event of type ${pushEvent.payloadType} seen. Title ${pushEvent.title}\n and deeplink ${pushEvent.url}");
// Handle push notification events
});
// Cancel stream subscription
pushEventsStreamSubscription.cancel();
```
##### Push notification event fields
**Note:**
Because of platform limitations on iOS, the Braze SDK can only process push payloads while the app is in the foreground. Listeners will only trigger for the `push_opened` event type on iOS after a user has interacted with a push.
For a full list of push notification fields, refer to the table below:
| Field Name | Type | Description |
| ------------------ | --------- | ----------- |
| `payloadType` | String | Specifies the notification payload type. The two values that are sent from the Braze Flutter SDK are `push_opened` and `push_received`. Only `push_opened` events are supported on iOS. |
| `url` | String | Specifies the URL that was opened by the notification. |
| `useWebview` | Boolean | If `true`, URL will open in-app in a modal webview. If `false`, the URL will open in the device browser. |
| `title` | String | Represents the title of the notification. |
| `body` | String | Represents the body or content text of the notification. |
| `summaryText` | String | Represents the summary text of the notification. This is mapped from `subtitle` on iOS. |
| `badgeCount` | Number | Represents the badge count of the notification. |
| `timestamp` | Number | Represents the time at which the payload was received by the application. |
| `isSilent` | Boolean | If `true`, the payload is received silently. For details on sending Android silent push notifications, refer to [Silent push notifications on Android](https://www.braze.com/docs/fr/fr/developer_guide/push_notifications/silent/?sdktab=android). For details on sending iOS silent push notifications, refer to [Silent push notifications on iOS](https://www.braze.com/docs/fr/fr/developer_guide/push_notifications/silent/?sdktab=swift). |
| `isBrazeInternal`| Boolean | This will be `true` if a notification payload was sent for an internal SDK feature, such as Feature Flag sync or uninstall tracking. The payload is received silently for the user. |
| `imageUrl` | String | Specifies the URL associated with the notification image. |
| `brazeProperties` | Object | Represents Braze properties associated with the campaign (key-value pairs). |
| `ios` | Object | Represents iOS-specific fields. |
| `android` | Object | Represents Android-specific fields. |
{: .reset-td-br-1 .reset-td-br-2 aria-label="Push notification event fields" }
### Step 3: Test displaying push notifications
To test your integration after configuring push notifications in the native layer:
1. Set an active user in the Flutter application. To do so, initialize your plugin by calling `braze.changeUser('your-user-id')`.
2. Head to **Campaigns** and create a new push notification campaign. Choose the platforms that you'd like to test.
3. Compose your test notification and head over to the **Test** tab. Add the same `user-id` as the test user and click **Send Test**.
4. You should receive the notification on your device shortly. You may need to check in the Notification Center or update Settings if it doesn't display.
**Tip:**
Starting with Xcode 14, you can test remote push notifications on an iOS simulator.
## Prerequisites
Before you can use this feature, you'll need to [integrate the Android Braze SDK](https://www.braze.com/docs/fr/fr/developer_guide/sdk_integration/?sdktab=android).
## Setting up push notifications
Newer phones manufactured by [Huawei](https://huaweimobileservices.com/) come equipped with Huawei Mobile Services (HMS) - a service used to deliver push instead of Google's Firebase Cloud Messaging (FCM).
### Step 1: Register for a Huawei developer account
Before getting started, you'll need to register and set up a [Huawei Developer account](https://developer.huawei.com/consumer/en/console). In your Huawei account, go to **My Projects > Project Settings > App Information**, and take note of the `App ID` and `App secret`.

### Step 2: Create a new Huawei app in the Braze dashboard
In the Braze dashboard, go to **App Settings**, listed under the **Settings** navigation.
Click **+ Add App**, provide a name (such as My Huawei App), select `Android` as the platform.
{: style="max-width:60%;"}
Once your new Braze app has been created, locate the push notification settings and select `Huawei` as the push provider. Next, provide your `Huawei Client Secret` and `Huawei App ID`.

### Step 3: Integrate the Huawei messaging SDK into your app
Huawei has provided an [Android integration codelab](https://developer.huawei.com/consumer/en/codelab/HMSPushKit/index.html) detailing integrating the Huawei Messaging Service into your application. Follow those steps to get started.
After completing the codelab, you will need to create a custom [Huawei Message Service](https://developer.huawei.com/consumer/en/doc/development/HMS-References/push-HmsMessageService-cls) to obtain push tokens and forward messages to the Braze SDK.
```java
public class CustomPushService extends HmsMessageService {
@Override
public void onNewToken(String token) {
super.onNewToken(token);
Braze.getInstance(this.getApplicationContext()).setRegisteredPushToken(token);
}
@Override
public void onMessageReceived(RemoteMessage remoteMessage) {
super.onMessageReceived(remoteMessage);
if (BrazeHuaweiPushHandler.handleHmsRemoteMessageData(this.getApplicationContext(), remoteMessage.getDataOfMap())) {
// Braze has handled the Huawei push notification
}
}
}
```
```kotlin
class CustomPushService: HmsMessageService() {
override fun onNewToken(token: String?) {
super.onNewToken(token)
Braze.getInstance(applicationContext).setRegisteredPushToken(token!!)
}
override fun onMessageReceived(hmsRemoteMessage: RemoteMessage?) {
super.onMessageReceived(hmsRemoteMessage)
if (BrazeHuaweiPushHandler.handleHmsRemoteMessageData(applicationContext, hmsRemoteMessage?.dataOfMap)) {
// Braze has handled the Huawei push notification
}
}
}
```
After adding your custom push service, add the following to your `AndroidManifest.xml`:
```xml
```
### Step 4: Handle foreground notifications
By default, when a push notification arrives while your app is in the foreground, Huawei displays it automatically. To have Braze process the push notification payload (for analytics tracking, deep link handling, and custom processing), route the incoming push data to Braze inside your `HmsMessageService.onMessageReceived` method.
When you call `BrazeHuaweiPushHandler.handleHmsRemoteMessageData`, Braze determines if the payload is a Braze push notification and, if so, creates and displays the notification. For more information, see [Handling foreground notifications](https://www.braze.com/docs/fr/fr/developer_guide/push_notifications/?sdktab=android#handling-foreground-notifications) in the Android push notifications documentation.
For a complete example, see the [Huawei handler reference](https://braze-inc.github.io/braze-android-sdk/kdoc/braze-android-sdk/com.braze.push/-braze-huawei-push-handler/index.html) in the Braze Android SDK documentation.
### Step 5: Test your push notifications (optional)
At this point, you've created a new Huawei Android app in the Braze dashboard, configured it with your Huawei developer credentials, and have integrated the Braze and Huawei SDKs into your app.
Next, we can test out the integration by testing a new push campaign in Braze.
#### Step 5.1: Create a new push notification campaign
In the **Campaigns** page, create a new campaign, and choose **Push Notification** as your message type.
After you name your campaign, choose **Android Push** as the push platform.

Next, compose your push campaign with a title and message.
#### Step 5.2: Send a test push
In the **Test** tab, enter your user ID, which you've set in your app using the [`changeUser(USER_ID_STRING)` method](https://www.braze.com/docs/fr/fr/developer_guide/platform_integration_guides/android/analytics/setting_user_ids/#assigning-a-user-id), and click **Send Test** to send a test push.

At this point, you should receive a test push notification on your Huawei (HMS) device from Braze.
#### Step 5.3: Set up Huawei segmentation (optional)
Since your Huawei app in the Braze dashboard is built upon the Android push platform, you have the flexibility to send push to all Android users (Firebase Cloud Messaging and Huawei Mobile Services), or you can choose to segment your campaign audience to specific apps.
To send push to only Huawei apps, [create a new Segment](https://www.braze.com/docs/fr/fr/user_guide/engagement_tools/segments/creating_a_segment/#step-3-choose-your-app-or-platform) and select your Huawei App within the **Apps** section.

Of course, if you want to send the same push to all Android push providers, you can choose not to specify the app which will send to all Android apps configured within the current workspace.
## Prerequisites
Before you can use this feature, you'll need to [integrate the React Native Braze SDK](https://www.braze.com/docs/fr/fr/developer_guide/sdk_integration/?sdktab=react%20native).
## Setting up push notifications {#setting-up-push-notifications}
### Step 1: Complete the initial setup
#### Prerequisites
Before you can use Expo for push notifications, you'll need to [set up the Braze Expo plugin](https://www.braze.com/docs/fr/fr/developer_guide/platform_integration_guides/react_native/sdk_integration/?tab=expo).
#### Step 1.1: Update your `app.json` file
Next update your `app.json` file for Android and iOS:
- **Android:** Add the `enableFirebaseCloudMessaging` option.
- **iOS:** Add the `enableBrazeIosPush` option.
#### Step 1.2: Add your Google Sender ID
First, go to Firebase Console, open your project, then select **Settings** > **Project settings**.

Select **Cloud Messaging**, then under **Firebase Cloud Messaging API (V1)**, copy the **Sender ID** to your clipboard.

Next, open your project's `app.json` file and set your `firebaseCloudMessagingSenderId` property to the Sender ID in your clipboard. For example:
```
"firebaseCloudMessagingSenderId": "693679403398"
```
#### Step 1.3: Add the path to your Google Services JSON
In your project's `app.json` file, add the path to your `google-services.json` file. This file is required when setting `enableFirebaseCloudMessaging: true` in your configuration.
```json
{
"expo": {
"android": {
"googleServicesFile": "PATH_TO_GOOGLE_SERVICES"
},
"plugins": [
[
"@braze/expo-plugin",
{
"androidApiKey": "YOUR-ANDROID-API-KEY",
"iosApiKey": "YOUR-IOS-API-KEY",
"enableBrazeIosPush": true,
"enableFirebaseCloudMessaging": true,
"firebaseCloudMessagingSenderId": "YOUR-FCM-SENDER-ID",
"androidHandlePushDeepLinksAutomatically": true
}
],
]
}
}
```
Note that you will need to use these settings instead of the native setup instructions if you are depending on additional push notification libraries like [Expo Notifications](https://docs.expo.dev/versions/latest/sdk/notifications/).
If you are not using the Braze Expo plugin, or would like to configure these settings natively instead, register for push by referring to the [Native Android push integration guide](https://www.braze.com/docs/fr/fr/developer_guide/platform_integration_guides/android/push_notifications/?tab=android/).
If you are not using the Braze Expo plugin, or would like to configure these settings natively instead, register for push by referring to the following steps from the [Native iOS push integration guide](https://www.braze.com/docs/fr/fr/developer_guide/push_notifications/?sdktab=swift):
#### Step 1.1: Request for push permissions
If you don't plan on requesting push permissions when the app is launched, omit the `requestAuthorizationWithOptions:completionHandler:` call in your AppDelegate. Then, skip to [Step 2](#reactnative_step-2-request-push-notifications-permission). Otherwise, follow the [native iOS integration guide](https://www.braze.com/docs/fr/fr/developer_guide/platform_integration_guides/swift/push_notifications/integration/?tab=objective-c#automatic-push-integration).
#### Step 1.2 (Optional): Migrate your push key
If you were previously using `expo-notifications` to manage your push key, run `expo fetch:ios:certs` from your application's root folder. This will download your push key (a .p8 file), which can then be uploaded to the Braze dashboard.
### Step 2: Request push notifications permission
Use the `Braze.requestPushPermission()` method (available on v1.38.0 and up) to request permission for push notifications from the user on iOS and Android 13+. For Android 12 and below, this method is a no-op.
This method takes in a required parameter that specifies which permissions the SDK should request from the user on iOS. These options have no effect on Android.
```javascript
const permissionOptions = {
alert: true,
sound: true,
badge: true,
provisional: false
};
Braze.requestPushPermission(permissionOptions);
```
#### Step 2.1: Listen for push notifications (optional)
You can additionally subscribe to events where Braze has detected and handled an incoming push notification. Use the listener key `Braze.Events.PUSH_NOTIFICATION_EVENT`.
**Important:**
iOS push received events will only trigger for foreground notifications and `content-available` background notifications. It will not trigger for notifications received while terminated or for background notifications without the `content-available` field.
```javascript
Braze.addListener(Braze.Events.PUSH_NOTIFICATION_EVENT, data => {
console.log(`Push Notification event of type ${data.payload_type} seen. Title ${data.title}\n and deeplink ${data.url}`);
console.log(JSON.stringify(data, undefined, 2));
});
```
##### Push notification event fields
For a full list of push notification fields, refer to the table below:
| Field Name | Type | Description |
| ------------------ | --------- | ----------- |
| `payload_type` | String | Specifies the notification payload type. The two values that are sent from the Braze React Native SDK are `push_opened` and `push_received`. |
| `url` | String | Specifies the URL that was opened by the notification. |
| `use_webview` | Boolean | If `true`, URL will open in-app in a modal webview. If `false`, the URL will open in the device browser. |
| `title` | String | Represents the title of the notification. |
| `body` | String | Represents the body or content text of the notification. |
| `summary_text` | String | Represents the summary text of the notification. This is mapped from `subtitle` on iOS. |
| `badge_count` | Number | Represents the badge count of the notification. |
| `timestamp` | Number | Represents the time at which the payload was received by the application. |
| `is_silent` | Boolean | If `true`, the payload is received silently. For details on sending Android silent push notifications, refer to [Silent push notifications on Android](https://www.braze.com/docs/fr/fr/developer_guide/push_notifications/silent/?sdktab=android). For details on sending iOS silent push notifications, refer to [Silent push notifications on iOS](https://www.braze.com/docs/fr/fr/developer_guide/push_notifications/silent/?sdktab=swift). |
| `is_braze_internal`| Boolean | This will be `true` if a notification payload was sent for an internal SDK feature, such as Feature Flag sync or uninstall tracking. The payload is received silently for the user. |
| `image_url` | String | Specifies the URL associated with the notification image. |
| `braze_properties` | Object | Represents Braze properties associated with the campaign (key-value pairs). |
| `ios` | Object | Represents iOS-specific fields. |
| `android` | Object | Represents Android-specific fields. |
{: .reset-td-br-1 .reset-td-br-2 aria-label="Push notification event fields" }
### Step 3: Enable deep linking (optional)
To enable Braze to handle deep links inside React components when a push notification is clicked, first implement the steps described in [React Native Linking](https://reactnative.dev/docs/linking) library, or with your solution of choice. Then, follow the additional steps below.
To learn more about what deep links are, see our [FAQ article](https://www.braze.com/docs/fr/fr/user_guide/messaging/design_and_edit/personalize/actions_and_media_urls/#what-is-deep-linking).
**Important:**
If you're migrating an existing React Native push integration, re-test deep linking after you upgrade the Braze SDK, React Native, Expo, or related libraries. Confirm that:
- [React Native Linking](https://reactnative.dev/docs/linking) is still configured and handling your deep link URLs.
- Your iOS initial push payload handling (see [Step 3.1: Store the push notification payload on app launch](#step-3-1)) is implemented and still called on app launch.
- Any native delegate or listener methods you use to handle push click events are still registered and invoked as expected.
If you're using the [Braze Expo plugin](https://www.braze.com/docs/fr/fr/developer_guide/platforms/react_native/sdk_integration/?tab=expo#step-2-choose-a-setup-option), you can handle push notification deep links automatically by setting `androidHandlePushDeepLinksAutomatically` to `true` in your `app.json`.
To handle deep links manually instead, refer to the native Android documentation: [Adding deep links](https://www.braze.com/docs/fr/fr/developer_guide/push_notifications/deep_linking).
#### Step 3.1: Store the push notification payload on app launch
**Note:**
This is supported as of React Native SDK 19.1.0.
Add `populateInitialPushPayloadFromIntent` to your main activity's `onCreate()` method. This must be called before React Native initializes to capture the initial Intent data. For example:
```kotlin
override fun onCreate(savedInstanceState: Bundle?) {
BrazeReactUtils.populateInitialPushPayloadFromIntent(intent)
super.onCreate(savedInstanceState)
}
```
#### Step 3.2: Handle deep links from a closed state
In addition to the base scenarios handled by [React Native Linking](https://reactnative.dev/docs/linking), implement the `Braze.getInitialPushPayload` method and retrieve the `url` value to account for deep links from push notifications that open your app when it isn't running. For example:
```javascript
// Handles deep links when an app is launched from a hard close via push click.
Braze.getInitialPushPayload(pushPayload => {
if (pushPayload) {
console.log('Braze.getInitialPushPayload is ' + pushPayload);
showToast('Initial URL is ' + pushPayload.url);
handleOpenUrl({ pushPayload.url });
}
});
```
**Note:**
This method requires the native setup in Step 3.1 for your platform. If you're using the Braze Expo plugin, this may be handled automatically.
**Important:**
To handle deep links from push notifications on iOS, you must also configure link handling in your native iOS layer.
This includes registering a custom URL scheme and implementing a URL handler in your `AppDelegate`. For full setup instructions, see [Handling deep links](https://www.braze.com/docs/fr/fr/developer_guide/platforms/swift/in_app_messages/deep_linking/?tab=objective-c) in the native iOS documentation.
#### Step 3.1: Store the push notification payload on app launch {#step-3-1}
**Note:**
Skip step 3.1 if you're using the Braze Expo plugin, as this functionality is handled automatically.
For iOS, add `populateInitialPayloadFromLaunchOptions` to your AppDelegate's `didFinishLaunchingWithOptions` method. For example:
```objc
- (BOOL)application:(UIApplication *)application didFinishLaunchingWithOptions:(NSDictionary *)launchOptions
{
// ... Perform regular React Native setup
BRZConfiguration *configuration = [[BRZConfiguration alloc] initWithApiKey:apiKey endpoint:endpoint];
configuration.triggerMinimumTimeInterval = 1;
configuration.logger.level = BRZLoggerLevelInfo;
Braze *braze = [BrazeReactBridge initBraze:configuration];
AppDelegate.braze = braze;
[self registerForPushNotifications];
[[BrazeReactUtils sharedInstance] populateInitialPayloadFromLaunchOptions:launchOptions];
return [super application:application didFinishLaunchingWithOptions:launchOptions];
}
```
```swift
func application(
_ application: UIApplication,
didFinishLaunchingWithOptions launchOptions: [UIApplication.LaunchOptionsKey: Any]? = nil
) -> Bool {
// ... Perform regular React Native setup
let configuration = Braze.Configuration(apiKey: apiKey, endpoint: endpoint)
configuration.triggerMinimumTimeInterval = 1
configuration.logger.level = .info
let braze = BrazeReactBridge.initBraze(configuration)
AppDelegate.braze = braze
registerForPushNotifications()
BrazeReactUtils.shared().populateInitialPayload(fromLaunchOptions: launchOptions)
return super.application(application, didFinishLaunchingWithOptions: launchOptions)
}
```
#### Step 3.2: Handle deep links from a closed state
In addition to the base scenarios handled by [React Native Linking](https://reactnative.dev/docs/linking), implement the `Braze.getInitialPushPayload` method and retrieve the `url` value to account for deep links from push notifications that open your app when it isn't running. For example:
```javascript
// Handles deep links when an app is launched from a hard close via push click.
Braze.getInitialPushPayload(pushPayload => {
if (pushPayload) {
console.log('Braze.getInitialPushPayload is ' + pushPayload);
showToast('Initial URL is ' + pushPayload.url);
handleOpenUrl({ pushPayload.url });
}
});
```
**Note:**
This method requires the native setup in Step 3.1 for your platform. If you're using the Braze Expo plugin, this may be handled automatically.
#### Step 3.3: Enable Universal Links (optional)
To enable [universal linking](https://www.braze.com/docs/fr/fr/developer_guide/push_notifications/deep_linking/?sdktab=swift#universal-links) support, implement a Braze delegate that determines whether to open a given URL, then register it with your Braze instance.
Create a `BrazeReactDelegate.swift` file in your `iOS` directory and add the following. Replace `YOUR_DOMAIN_HOST` with your actual domain.
```swift
import Foundation
import BrazeKit
import UIKit
class BrazeReactDelegate: NSObject, BrazeDelegate {
/// This delegate method determines whether to open a given URL.
/// Reference the context to get additional details about the URL payload.
func braze(_ braze: Braze, shouldOpenURL context: Braze.URLContext) -> Bool {
if let host = context.url.host,
host.caseInsensitiveCompare("YOUR_DOMAIN_HOST") == .orderedSame {
// Sample custom handling of universal links
let application = UIApplication.shared
let userActivity = NSUserActivity(activityType: NSUserActivityTypeBrowsingWeb)
userActivity.webpageURL = context.url
// Routes to the `continueUserActivity` method, which should be handled in your AppDelegate.
application.delegate?.application?(
application,
continue: userActivity,
restorationHandler: { _ in }
)
return false
}
// Let Braze handle links otherwise
return true
}
}
```
Then, create and register your `BrazeReactDelegate` in `didFinishLaunchingWithOptions` of your project's `AppDelegate.swift` file.
```swift
import BrazeKit
class AppDelegate: UIResponder, UIApplicationDelegate {
static var braze: Braze?
// Keep a strong reference to the BrazeDelegate so it is not deallocated.
private var brazeDelegate: BrazeReactDelegate?
func application(
_ application: UIApplication,
didFinishLaunchingWithOptions launchOptions: [UIApplication.LaunchOptionsKey: Any]? = nil
) -> Bool {
// Other setup code (e.g., Braze initialization)
brazeDelegate = BrazeReactDelegate()
AppDelegate.braze?.delegate = brazeDelegate
return true
}
}
```
Create a `BrazeReactDelegate.h` file in your `iOS` directory and then add the following code snippet.
```objc
#import
#import
@interface BrazeReactDelegate: NSObject
@end
```
Next, create a `BrazeReactDelegate.m` file and then add the following code snippet. Replace `YOUR_DOMAIN_HOST` with your actual domain.
```objc
#import "BrazeReactDelegate.h"
#import
@implementation BrazeReactDelegate
/// This delegate method determines whether to open a given URL.
///
/// Reference the `BRZURLContext` object to get additional details about the URL payload.
- (BOOL)braze:(Braze *)braze shouldOpenURL:(BRZURLContext *)context {
if ([[context.url.host lowercaseString] isEqualToString:@"YOUR_DOMAIN_HOST"]) {
// Sample custom handling of universal links
UIApplication *application = UIApplication.sharedApplication;
NSUserActivity* userActivity = [[NSUserActivity alloc] initWithActivityType:NSUserActivityTypeBrowsingWeb];
userActivity.webpageURL = context.url;
// Routes to the `continueUserActivity` method, which should be handled in your `AppDelegate`.
[application.delegate application:application
continueUserActivity:userActivity restorationHandler:^(NSArray> * _Nullable restorableObjects) {}];
return NO;
}
// Let Braze handle links otherwise
return YES;
}
@end
```
Then, create and register your `BrazeReactDelegate` in `didFinishLaunchingWithOptions` of your project's `AppDelegate.m` file.
```objc
#import "BrazeReactUtils.h"
#import "BrazeReactDelegate.h"
@interface AppDelegate ()
// Keep a strong reference to the BrazeDelegate to ensure it is not deallocated.
@property (nonatomic, strong) BrazeReactDelegate *brazeDelegate;
@end
- (BOOL)application:(UIApplication *)application didFinishLaunchingWithOptions:(NSDictionary *)launchOptions
{
// Other setup code
self.brazeDelegate = [[BrazeReactDelegate alloc] init];
braze.delegate = self.brazeDelegate;
}
```
For an example integration, reference our sample app [here](https://github.com/braze-inc/braze-react-native-sdk/blob/master/BrazeProject/ios/BrazeProject/AppDelegate.mm).
### Step 4: Handle foreground notifications
Foreground notification handling works differently depending on your platform and setup. Choose the approach that matches your integration:
For iOS, foreground notification handling is the same as the native Swift integration. Call `handleForegroundNotification(notification:)` inside your `UNUserNotificationCenterDelegate.userNotificationCenter(_:willPresent:withCompletionHandler:)` implementation.
For complete details and code examples, see [Handling foreground notifications](https://www.braze.com/docs/fr/fr/developer_guide/push_notifications/?sdktab=swift#handling-foreground-notifications) in the Swift push notifications documentation.
For Android, foreground notification handling is the same as the native Android integration. Call `BrazeFirebaseMessagingService.handleBrazeRemoteMessage` inside your `FirebaseMessagingService.onMessageReceived` method.
For complete details and code examples, see [Handling foreground notifications](https://www.braze.com/docs/fr/fr/developer_guide/push_notifications/?sdktab=android#handling-foreground-notifications) in the Android push notifications documentation.
In Expo-managed workflow, you don't call native notification handlers directly. Instead, use the Expo Notifications API to control foreground presentation, while the Braze Expo Plugin handles native processing automatically.
```javascript
import * as Notifications from 'expo-notifications';
import Braze from '@braze/react-native-sdk';
// Control foreground presentation in Expo
Notifications.setNotificationHandler({
handleNotification: async () => ({
shouldShowAlert: true, // Show alert while in foreground
shouldPlaySound: false,
shouldSetBadge: false,
}),
});
// React to Braze push events
const subscription = Braze.addListener('pushNotificationEvent', (event) => {
console.log('Braze push event', {
type: event.payload_type, // "push_received" | "push_opened"
title: event.title,
url: event.url,
is_silent: event.is_silent,
});
// Handle deep links, custom behavior, etc.
});
// Handle initial payload when app launches via push
Braze.getInitialPushPayload((payload) => {
if (payload) {
console.log('Initial push payload', payload);
}
});
```
**Note:**
In Expo-managed workflow, the Braze Expo Plugin handles native push processing automatically. You control foreground UI via the Expo Notifications presentation options shown above.
For bare workflow integrations, follow the native iOS and Android approaches instead.
### Step 5: Send a test push notification
At this point, you should be able to send notifications to the devices. Adhere to the following steps to test your push integration.
**Note:**
Starting in macOS 13, on certain devices, you can test iOS push notifications on an iOS 16+ simulator running on Xcode 14 or higher. For further details, refer to the [Xcode 14 Release Notes](https://developer.apple.com/documentation/xcode-release-notes/xcode-14-release-notes).
1. Set an active user in the React Native application by calling `Braze.changeUserId('your-user-id')` method.
2. Head to **Campaigns** and create a new push notification campaign. Choose the platforms that you'd like to test.
3. Compose your test notification and head over to the **Test** tab. Add the same `user-id` as the test user and click **Send Test**. You should receive the notification on your device shortly.

## Using the Expo plugin
After you [set up push notifications for Expo](#reactnative_setting-up-push-notifications), you can use it to handle the following push notifications behaviors—without needing to write any code in the native Android or iOS layers.
### Forwarding Android push to additional FMS
If you want to use an additional Firebase Messaging Service (FMS), you can specify a fallback FMS to call if your application receives a push that isn't from Braze. For example:
```json
{
"expo": {
"plugins": [
[
"@braze/expo-plugin",
{
...
"androidFirebaseMessagingFallbackServiceEnabled": true,
"androidFirebaseMessagingFallbackServiceClasspath": "com.company.OurFirebaseMessagingService"
}
]
]
}
}
```
### Using app extensions with Expo Application Services {#app-extensions}
If you are using Expo Application Services (EAS) and have enabled `enableBrazeIosRichPush` or `enableBrazeIosPushStories`, you will need to declare the corresponding bundle identifiers for each app extension in your project. There are multiple ways you can approach this step, depending on how your project is configured to manage code signing with EAS.
One approach is to use the `appExtensions` configuration in your `app.json` file by following Expo's [app extensions documentation](https://docs.expo.dev/build-reference/app-extensions/). Alternatively, you can set up the `multitarget` setting in your `credentials.json` file by following Expo's [local credentials documentation](https://docs.expo.dev/app-signing/local-credentials/#multi-target-project).
### Troubleshooting
These are common troubleshooting steps for push notification integrations with the Braze React Native SDK and Expo plugin.
#### Push notifications stopped working {#troubleshooting-stopped-working}
If push notifications through the Expo plugin have stopped working:
1. Check that the Braze SDK is still tracking sessions.
2. Check that the SDK wasn't disabled by an explicit or implicit call to `wipeData`.
3. Review any recent upgrades to Expo or it's related libraries, as there may be conflicts with your Braze configuration.
4. Review recently added project dependencies and check if they are manually overriding your existing push notification delegate methods.
**Tip:**
For iOS integrations, you can also reference our [push notification setup tutorial](https://braze-inc.github.io/braze-swift-sdk/tutorials/braze/b1-standard-push-notifications) to help you identify potential conflicts with your project dependencies.
#### Device token won't register with Braze {#troubleshooting-token-registration}
If your device token won't register with Braze, first review [Push notifications stopped working](#troubleshooting-stopped-working).
If your issue persists, there may be a separate dependency interfering with your Braze push notification configuration. You can try removing it or manually call `Braze.registerPushToken` instead.
#### Deep links from push notifications don't open {#troubleshooting-deep-links}
If deep links from push notifications stop opening after a migration, check the following:
1. Verify your [React Native Linking](https://reactnative.dev/docs/linking) setup is still valid in your upgraded app.
2. For iOS native integrations, confirm you implemented `populateInitialPayloadFromLaunchOptions` and `Braze.getInitialPushPayload` so that, when the app is launched from a terminated state, it can retrieve the initial push payload and pass its `url` into your deep link handler.
3. If you're using the Braze Expo plugin, verify `androidHandlePushDeepLinksAutomatically` is set correctly for your implementation.
4. Review recently added dependencies for overrides to notification handling or app delegate behavior.
If you've completed these checks and the issue persists, [open a support ticket](https://www.braze.com/docs/fr/fr/user_guide/administrative/access_braze/support/) and include SDK logs plus reproduction steps.
## Prerequisites
Before you can use this feature, you'll need to [integrate the Web Braze SDK](https://www.braze.com/docs/fr/fr/developer_guide/sdk_integration/?sdktab=web). You'll also need to [set up push notifications](https://www.braze.com/docs/fr/fr/developer_guide/push_notifications/?sdktab=web) for the Web SDK. Note that you can only send push notifications to iOS and iPadOS users that are using [Safari v16.4](https://developer.apple.com/documentation/safari-release-notes/safari-16_4-release-notes) or later.
## Setting up Safari push for mobile
### Step 1: Create a manifest file {#manifest}
A [Web Application Manifest](https://developer.mozilla.org/en-US/docs/Web/Manifest) is a JSON file that controls how your website is presented when installed to a user's home screen.
For example, you can set the background theme color and icon that the [App Switcher](https://support.apple.com/en-us/HT202070) uses, whether it renders as full screen to resemble a native app, or whether the app should open in landscape or portrait mode.
Create a new `manifest.json` file in your website's root directory, with the following mandatory fields.
```json
{
"name": "your app name",
"short_name": "your app name",
"display": "fullscreen",
"icons": [{
"src": "favicon.ico",
"sizes": "128x128",
}]
}
```
The full list of supported fields can be found [here](https://developer.mozilla.org/en-US/docs/Web/Manifest).
### Step 2: Link the manifest file {#manifest-link}
Add the following `` tag to your website's `` element pointing to where your manifest file is hosted.
```html
```
### Step 3: Add a service worker {#service-worker}
Your website must have a service worker file that imports the Braze service-worker library, as described in our [web push integration guide](https://www.braze.com/docs/fr/fr/developer_guide/platform_integration_guides/web/push_notifications/integration/#step-1-configure-your-sites-service-worker).
### Step 4: Add to home screen {#add-to-homescreen}
Popular browsers (such as Safari, Chrome, FireFox, and Edge) all support web push notifications in their later versions. To request push permission on iOS or iPadOS, your website must be added to the user's home screen by selecting **Share To** > **Add to Home Screen**. [Add to Homescreen](https://support.apple.com/guide/iphone/bookmark-favorite-webpages-iph42ab2f3a7/ios#iph4f9a47bbc) lets users bookmark your website, adding your icon to their valuable home screen real estate.
{: style="max-width:40%"}
### Step 5: Show the native push prompt {#push-prompt}
After the app has been added to your home screen you can now request push permission when the user takes an action (such as clicking a button). This can be done using the [`requestPushPermission`](https://js.appboycdn.com/web-sdk/latest/doc/modules/braze.html#requestpushpermission) method, or with a [no-code push primer in-app message](https://www.braze.com/docs/fr/fr/user_guide/message_building_by_channel/push/best_practices/push_primer_messages/).
**Note:**
After you accept or decline the prompt, you need to delete and reinstall the website to your home screen to be able to show the prompt again.
{: style="max-width:40%"}
For example:
```typescript
import { requestPushPermission } from "@braze/web-sdk";
button.onclick = function(){
requestPushPermission(() => {
console.log(`User accepted push prompt`);
}, (temporary) => {
console.log(`User ${temporary ? "temporarily dismissed" : "permanently denied"} push prompt`);
});
};
```
## Next steps
Next, send yourself a [test message](https://www.braze.com/docs/fr/fr/developer_guide/in_app_messages/sending_test_messages/) to validate the integration. After your integration is complete, you can use our [no-code push primer messages](https://www.braze.com/docs/fr/fr/user_guide/message_building_by_channel/push/best_practices/push_primer_messages/) to optimize your push opt-in rates.
## Prerequisites
Before you can use this feature, you'll need to [integrate the Unity Braze SDK](https://www.braze.com/docs/fr/fr/developer_guide/sdk_integration/?sdktab=unity).
## Setting up push notification
### Step 1: Set up the platform
#### Step 1.1: Enable Firebase
To get started, follow the [Firebase Unity setup documentation](https://firebase.google.com/docs/unity/setup).
**Note:**
Integrating the Firebase Unity SDK may cause your `AndroidManifest.xml` to be overridden. If that occurs, make sure to revert it to the original.
#### Step 1.2: Set your Firebase credentials
You need to input your Firebase Server Key and Sender ID into the Braze dashboard. To do this, log in to the [Firebase Developers Console](https://console.firebase.google.com/) and select your Firebase project. Next, select **Cloud Messaging** under **Settings** and copy the Server Key and Sender ID: 
In Braze, select your Android app on the **App Settings** page under **Manage Settings**. Next, enter your Firebase Server Key in the **Firebase Cloud Messaging Server Key** field and Firebase Sender ID in the **Firebase Cloud Messaging Sender** ID field.

#### Step 1.1: Verify integration method
Braze provides a native Unity solution for automating iOS push integrations. If you you'd like to set up and manage your integration manually instead, see [Swift: Push Notifications](https://www.braze.com/docs/fr/fr/developer_guide/push_notifications/?sdktab=swift).
Otherwise, continue to the next step.
**Note:**
Our automatic push notification solution takes advantage of iOS 12's Provisional Authorization feature and is not available to use with the native push prompt pop-up.
#### Step 1.1: Enable ADM
1. Create an account with the [Amazon Apps & Games Developer Portal](https://developer.amazon.com/public) if you have not already done so.
2. Obtain [OAuth credentials (Client ID and Client Secret) and an ADM API key](https://developer.amazon.com/public/apis/engage/device-messaging/tech-docs/02-obtaining-adm-credentials).
3. Enable **Automatic ADM Registration Enabled** in the Unity Braze Configuration window.
- Alternatively, you may add the following line to your `res/values/braze.xml` file to enable ADM registration:
```xml
true
```
### Step 2: Configure push notifications
#### Step 2.1: Configure push settings {#unity_step-21-configure-push-settings}
The Braze SDK can automatically handle push registration with the Firebase Cloud Messaging Servers to have devices receive push notifications. In Unity, enable **Automate Unity Android Integration**, then configure the following **Push Notification** settings.
| Setting | Description |
|----------------------------------------|----------------------------------------------------------------------------------------------------------------------------------------------------------|
| Automatic Firebase Cloud Messaging Registration Enabled | Instructs the Braze SDK to automatically retrieve and send an FCM push token for a device. |
| Firebase Cloud Messaging Sender ID | The Sender ID from your Firebase console. |
| Handle Push Deeplinks Automatically | Whether the SDK should handle opening deep links or opening the app when push notifications are clicked. |
| Small Notification Icon Drawable | Android drawable resource reference for the small icon shown when a push arrives. Enter the full reference including the `@drawable/` prefix (for example, `@drawable/hourglass_icon`). The automated integration writes this value into `braze.xml` as entered. If you leave this empty, the notification uses the application icon as the small icon. |
| Large Notification Icon Drawable | Optional large icon for notifications. Use the same `@drawable/` format as the small icon (for example, `@drawable/my_large_icon`). |
{: .reset-td-br-1 .reset-td-br-2 aria-label="Step 2.1: Configure push settings" }
**Note:**
**Small Notification Icon Drawable** and **Large Notification Icon Drawable** appear under **Push Configuration** in **Braze > Braze Configuration**. Both values are written into `braze.xml` as you enter them. Include the `@drawable/` prefix yourself—the Braze Unity integration does not add it for you (for example, `@drawable/hourglass_icon`).
#### Step 2.1: Upload your APNs token
Before you can send an iOS push notification using Braze, you need to upload your `.p8` push notification file, as described in [Apple's developer documentation](https://developer.apple.com/documentation/usernotifications/establishing-a-token-based-connection-to-apns):
1. In your Apple developer account, go to [**Certificates, Identifiers & Profiles**](https://developer.apple.com/account/ios/certificate).
2. Under **Keys**, select **All** and click the add button (+) in the upper-right corner.
3. Under **Key Description**, enter a unique name for the signing key.
4. Under **Key Services**, select the **Apple Push Notification service (APNs)** checkbox, then click **Continue**. Click **Confirm**.
5. Note the key ID. Click **Download** to generate and download the key. Make sure to save the downloaded file in a secure place, as you cannot download this more than once.
6. In Braze, go to **Settings** > **App Settings** and upload the `.p8` file under **Apple Push Certificate**. You can upload either your development or production push certificate. To test push notifications after your app is live in the App Store, its recommended to set up a separate workspace for the development version of your app.
7. When prompted, enter your app's [bundle ID](https://developer.apple.com/documentation/foundation/nsbundle/1418023-bundleidentifier), [key ID](https://developer.apple.com/help/account/manage-keys/get-a-key-identifier/), and [team ID](https://developer.apple.com/help/account/manage-your-team/locate-your-team-id). You'll also need to specify whether to send notifications to your app's development or production environment, which is defined by its provisioning profile.
8. When you're finished, select **Save**.
#### Step 2.2: Enable automatic push
Open the Braze Configuration Settings in the Unity Editor by navigating to **Braze > Braze Configuration**.
Check **Integrate Push With Braze** to automatically register users for push notifications, pass push tokens to Braze, track analytics for push opens, and take advantage of our default push notification handling.
#### Step 2.3: Enable background push (optional)
Check **Enable Background Push** if you want to enable `background mode` for push notifications. This allows the system to wake your application from the `suspended` state when a push notification arrives, enabling your application to download content in response to push notifications. Checking this option is required for our uninstall tracking functionality.

#### Step 2.4: Disable automatic registration (optional)
Users who have not yet opted-in to push notifications will automatically be authorized for push upon opening your application. To disable this feature and manually register users for push, check **Disable Automatic Push Registration**.
- If **Disable Provisional Authorization** is not checked on iOS 12 or later, the user will be provisionally (silently) authorized to receive quiet push. If checked, the user will be shown the native push prompt.
- If you need to configure exactly when the prompt is shown at runtime, disable automatic registration from the Braze configuration editor and use `AppboyBinding.PromptUserForPushPermissions()` instead.

#### Step 2.1: Update `AndroidManifest.xml`
If your app does not have an `AndroidManifest.xml`, you can use the following as a template. Otherwise, if you already have an `AndroidManifest.xml`, ensure that any of the following missing sections are added to your existing `AndroidManifest.xml`.
```xml
```
#### Step 2.2: Store your ADM API key
First, [generate an ADM API Key for your app](https://developer.amazon.com/public/apis/engage/device-messaging/tech-docs/02-obtaining-adm-credentials), then save the key to a file named `api_key.txt` and add it in your project's [`Assets/`](https://docs.unity3d.com/Manual/AndroidAARPlugins.html) directory.
**Important:**
Amazon will not recognize your key if `api_key.txt` contains any white space characters, such as a trailing line break.
Next, in your `mainTemplate.gradle` file, add the following:
```gradle
task copyAmazon(type: Copy) {
def unityProjectPath = $/file:///**DIR_UNITYPROJECT**/$.replace("\\", "/")
from unityProjectPath + '/Assets/api_key.txt'
into new File(projectDir, 'src/main/assets')
}
preBuild.dependsOn(copyAmazon)
```
#### Step 2.3: Add ADM Jar
The required ADM Jar file may be placed anywhere in your project according to the [Unity JAR documentation](https://docs.unity3d.com/Manual/AndroidJARPlugins.html).
#### Step 2.4: Add Client Secret and Client ID to your Braze dashboard
Lastly, you must add the Client Secret and Client ID you obtained in [Step 1](#unity_step-1-enable-adm) to the Braze dashboard's **Manage Settings** page.

### Step 3: Set push listeners
#### Step 3.1: Enable push received listener
The push received listener is fired when a user receives a push notification. To send the push payload to Unity, set the name of your game object and push the received listener callback method under the **Set Push Received Listener**.
#### Step 3.2: Enable push opened listener
The push opened listener is fired when a user launches the app by clicking on a push notification. To send the push payload to Unity, set the name of your game object and push opened listener callback method under the **Set Push Opened Listener**.
#### Step 3.3: Enable push deleted listener
The push deleted listener is fired when a user swipes away or dismisses a push notification. To send the push payload to Unity, set the name of your game object and push deleted listener callback method under the **Set Push Deleted Listener**.
#### Push listener example
The following example implements the `BrazeCallback` game object using a callback method name of `PushNotificationReceivedCallback`, `PushNotificationOpenedCallback`, and `PushNotificationDeletedCallback` respectively.

```csharp
public class MainMenu : MonoBehaviour {
void PushNotificationReceivedCallback(string message) {
#if UNITY_ANDROID
Debug.Log("PushNotificationReceivedCallback message: " + message);
PushNotification pushNotification = new PushNotification(message);
Debug.Log("Push Notification received: " + pushNotification);
#elif UNITY_IOS
ApplePushNotification pushNotification = new ApplePushNotification(message);
Debug.Log("Push received Notification event: " + pushNotification);
#endif
}
void PushNotificationOpenedCallback(string message) {
#if UNITY_ANDROID
Debug.Log("PushNotificationOpenedCallback message: " + message);
PushNotification pushNotification = new PushNotification(message);
Debug.Log("Push Notification opened: " + pushNotification);
#elif UNITY_IOS
ApplePushNotification pushNotification = new ApplePushNotification(message);
Debug.Log("Push opened Notification event: " + pushNotification);
#endif
}
void PushNotificationDeletedCallback(string message) {
#if UNITY_ANDROID
Debug.Log("PushNotificationDeletedCallback message: " + message);
PushNotification pushNotification = new PushNotification(message);
Debug.Log("Push Notification dismissed: " + pushNotification);
#endif
}
}
```
#### Step 3.1: Enable push received listener
The push received listener is fired when a user receives a push notification while actively using the application (such as when the app is foregrounded). Set the push received listener in the Braze configuration editor. If you need to configure your game object listener at runtime, use `AppboyBinding.ConfigureListener()` and specify `BrazeUnityMessageType.PUSH_RECEIVED`.

#### Step 3.2: Enable push opened listener
The push opened listener is fired when a user launches the app by clicking on a push notification. To send the push payload to Unity, set the name of your game object and push opened listener callback method under the **Set Push Opened Listener** option:

If you need to configure your game object listener at runtime, use `AppboyBinding.ConfigureListener()` and specify `BrazeUnityMessageType.PUSH_OPENED`.
#### Push listener example
The following example implements the `AppboyCallback` game object using a callback method name of `PushNotificationReceivedCallback` and `PushNotificationOpenedCallback`, respectively.

```csharp
public class MainMenu : MonoBehaviour {
void PushNotificationReceivedCallback(string message) {
#if UNITY_ANDROID
Debug.Log("PushNotificationReceivedCallback message: " + message);
PushNotification pushNotification = new PushNotification(message);
Debug.Log("Push Notification received: " + pushNotification);
#elif UNITY_IOS
ApplePushNotification pushNotification = new ApplePushNotification(message);
Debug.Log("Push received Notification event: " + pushNotification);
#endif
}
void PushNotificationOpenedCallback(string message) {
#if UNITY_ANDROID
Debug.Log("PushNotificationOpenedCallback message: " + message);
PushNotification pushNotification = new PushNotification(message);
Debug.Log("Push Notification opened: " + pushNotification);
#elif UNITY_IOS
ApplePushNotification pushNotification = new ApplePushNotification(message);
Debug.Log("Push opened Notification event: " + pushNotification);
#endif
}
}
```
By updating your `AndroidManifest.xml` in the [previous step](#unity_step-21-update-androidmanifestxml), push listeners were automatically set up when you added the following lines. So, no further setup is required.
```xml
```
**Note:**
To learn more about ADM push listeners, see [Amazon: Integrate Amazon Device Messaging](https://developer.amazon.com/docs/video-skills-fire-tv-apps/integrate-adm.html).
## Optional configurations
#### Deep linking to in-app resources
Although Braze can handle standard deep links (such as website URLs, Android URIs, etc.) by default, creating custom deep links requires an additional Manifest setup.
For setup guidance, visit [Deep Linking to In-App Resources](https://developer.android.com/training/app-links/deep-linking).
#### Adding Braze push notification icons
**Important:**
Do not add notification icon images under `Assets/Plugins/Android/res`. Unity [deprecated providing Android resources in that path](https://support.unity.com/hc/en-us/articles/115005875443-Providing-Android-resources-in-Assets-Plugins-Android-res-is-deprecated), which can surface build warnings or validation errors. Package your icon drawables in an [Android Archive (AAR) plug-in](https://docs.unity3d.com/Manual/AndroidAARPlugins.html) or Android library project instead so they merge into the built app's resources like any other drawable.
To add push icons to your project, create an AAR plug-in or Android library that contains the icon image files under `res/drawable*` (or density-specific folders), then reference each icon in **Braze > Braze Configuration** using the full `@drawable/` resource name (see [Step 2.1: Configure push settings](#unity_step-21-configure-push-settings)). For Unity's packaging and import steps, see [Android Library Projects and Android Archive plug-ins](https://docs.unity3d.com/Manual/AndroidAARPlugins.html).
For small icon artwork rules (alpha-only, no color), see [Android push notifications](https://www.braze.com/docs/fr/fr/developer_guide/push_notifications/?sdktab=android), Step 2: Conform small icons to design guidelines.
#### Push token callback
To receive a copy of Braze device tokens from the OS, set a delegate using `AppboyBinding.SetPushTokenReceivedFromSystemDelegate()`.
There are no optional configurations for ADM at this time.
## Prerequisites
Before you can use this feature, you'll need to [integrate the .NET MAUI Braze SDK](https://www.braze.com/docs/fr/fr/developer_guide/sdk_integration/?sdktab=.net%20maui%20(xamarin)).
## Setting up push notifications
**Tip:**
To see how namespaces change between Java and C#, check out our [Xample sample app on GitHub](https://github.com/braze-inc/braze-xamarin-sdk/tree/master/appboy-component/samples/android-net-maui/BrazeAndroidMauiSampleApp/BrazeAndroidMauiSampleApp).
To integrate push notifications for .NET MAUI (formerly Xamarin), you'll need to complete the steps for native Android push notifications. The following steps are only a summary. For a full walkthrough, see the [native push notification guide](https://www.braze.com/docs/fr/fr/developer_guide/platform_integration_guides/android/push_notifications/?tab=android/).
### Step 1: Update your project
1. Add Firebase to your Android project.
2. Add the Cloud Messaging library to your Android project's `build.gradle`:
```gradle
implementation "google.firebase:firebase-messaging:+"
```
### Step 2: Create your JSON credentials
1. In Google Cloud, enable the [Firebase Cloud Messaging API](https://console.cloud.google.com/apis/library/fcm.googleapis.com).
2. Select **Service Accounts** > your project > **Create Service Account**, then enter a service account name, ID, and description. When you're finished, select **Create and continue**.
3. In the **Role** field, find and select **Firebase Cloud Messaging API Admin** from the list of roles.
4. In **Service Accounts**, choose your project, then select **Actions** > **Manage Keys** > **Add Key** > **Create new key**. Choose **JSON**, then select **Create**.
### Step 3: Upload your JSON credentials
1. In Braze, select **Settings** > **App Settings**. Under your Android app's **Push Notification Settings**, choose **Firebase**, then select **Upload JSON File** and upload the credentials you generated earlier. When you're finished, select **Save**.
2. Enable automatic FCM token registration, by going to Firebase Console. Open your project, then select **Settings** > **Project settings**. Select **Cloud Messaging**, then under **Firebase Cloud Messaging API (V1)**, copy the number in the **Sender ID** field.
3. In your Android Studio project and the following to your `braze.xml`.
```xml
trueFIREBASE_SENDER_ID
```
**Important:**
To prevent Braze from triggering unnecessary network requests every time you send silent push notifications, remove any automatic network requests configured in your `Application` class's `onCreate()` method. For more information see, [Android Developer Reference: Application](https://developer.android.com/reference/android/app/Application).
### Step 1: Complete the initial setup
See the [Swift integration instructions](https://www.braze.com/docs/fr/fr/developer_guide/push_notifications/?sdktab=swift) for information about setting up your application with push and storing your credentials on our server. Refer to the [iOS MAUI](https://github.com/braze-inc/braze-xamarin-sdk/tree/master/appboy-component/samples/ios-net-maui/BrazeiOSMauiSampleApp) sample application for more details.
### Step 2: Request push notifications permission
Our .NET MAUI SDK now supports automatic push set up. Set up push automation and permissions by adding the following code to your Braze instance configuration:
```csharp
configuration.Push.Automation = new BRZConfigurationPushAutomation(true);
configuration.Push.Automation.RequestAuthorizationAtLaunch = false;
```
Refer to the [iOS MAUI](https://github.com/braze-inc/braze-xamarin-sdk/tree/master/appboy-component/samples/ios-net-maui/BrazeiOSMauiSampleApp) sample application for more details. For more details, see the Xamarin documentation for [Enhanced User Notifications in Xamarin.iOS](https://learn.microsoft.com/en-us/previous-versions/xamarin/ios/platform/user-notifications/enhanced-user-notifications?tabs=macos).
# Personnalisez les notifications push pour le SDK Braze.
Source: /docs/fr/developer_guide/push_notifications/customization/index.md
# Personnaliser les notifications push
> Découvrez comment personnaliser les notifications push pour le SDK de Braze.
## Prerequisites
Before you can use this feature, you'll need to [integrate the Android Braze SDK](https://www.braze.com/docs/fr/fr/developer_guide/sdk_integration/?sdktab=android). You'll also need to [set up push notifications](https://www.braze.com/docs/fr/fr/developer_guide/push_notifications/?sdktab=android).
## Using a callback for push events {#push-callback}
Braze provides a [`subscribeToPushNotificationEvents()`](https://braze-inc.github.io/braze-android-sdk/kdoc/braze-android-sdk/com.braze/-i-braze/subscribe-to-push-notification-events.html) callback for when push notifications are received, opened, or dismissed. It is recommended to place this callback in your `Application.onCreate()` in order to not miss any events occurring while your application is not running.
**Note:**
If previously using a Custom Broadcast Receiver for this functionality in your application, you can safely remove it in favor of this integration option.
```java
Braze.getInstance(context).subscribeToPushNotificationEvents(event -> {
final BrazeNotificationPayload parsedData = event.getNotificationPayload();
//
// The type of notification itself
//
final boolean isPushOpenEvent = event.getEventType() == BrazePushEventType.NOTIFICATION_OPENED;
final boolean isPushReceivedEvent = event.getEventType() == BrazePushEventType.NOTIFICATION_RECEIVED;
// Sent when a user has dismissed a notification
final boolean isPushDeletedEvent = event.getEventType() == BrazePushEventType.NOTIFICATION_DELETED;
//
// Notification data
//
final String pushTitle = parsedData.getTitleText();
final Long pushArrivalTimeMs = parsedData.getNotificationReceivedTimestampMillis();
final String deeplink = parsedData.getDeeplink();
//
// Custom KVP data
//
final String myCustomKvp1 = parsedData.getBrazeExtras().getString("my first kvp");
final String myCustomKvp2 = parsedData.getBrazeExtras().getString("my second kvp");
});
```
```kotlin
Braze.getInstance(context).subscribeToPushNotificationEvents { event ->
val parsedData = event.notificationPayload
//
// The type of notification itself
//
val isPushOpenEvent = event.eventType == BrazePushEventType.NOTIFICATION_OPENED
val isPushReceivedEvent = event.eventType == BrazePushEventType.NOTIFICATION_RECEIVED
// Sent when a user has dismissed a notification
val isPushDeletedEvent = event.eventType == BrazePushEventType.NOTIFICATION_DELETED
//
// Notification data
//
val pushTitle = parsedData.titleText
val pushArrivalTimeMs = parsedData.notificationReceivedTimestampMillis
val deeplink = parsedData.deeplink
//
// Custom KVP data
//
val myCustomKvp1 = parsedData.brazeExtras.getString("my first kvp")
val myCustomKvp2 = parsedData.brazeExtras.getString("my second kvp")
}
```
**Tip:**
With notification action buttons, `BRAZE_PUSH_INTENT_NOTIFICATION_OPENED` intents fire when buttons with `opens app` or `deep link` actions are clicked. Deep link and extras handling remains the same. Buttons with `close` actions don't fire `BRAZE_PUSH_INTENT_NOTIFICATION_OPENED` intents and dismiss the notification automatically.
**Important:**
Create your push notification listener in `Application.onCreate` to ensure your listener is triggered after an end-user taps a notification while your app is in a terminated state.
## Customizing notification display {#customization-display}
### Step 1: Create your custom notification factory
In some scenarios, you may wish to customize push notifications in ways that would be cumbersome or unavailable server side. To give you complete control of notification display, we've added the ability to define your own [`IBrazeNotificationFactory`](https://braze-inc.github.io/braze-android-sdk/kdoc/braze-android-sdk/com.braze/-i-braze-notification-factory/index.html) to create notification objects for display by Braze.
If a custom `IBrazeNotificationFactory` is set, Braze will call your factory's `createNotification()` method upon push receipt before the notification is displayed to the user. Braze will pass in a `Bundle` containing Braze push data and another `Bundle` containing custom key-value pairs sent either via the dashboard or the messaging APIs:
Braze will pass in a [`BrazeNotificationPayload`](https://braze-inc.github.io/braze-android-sdk/kdoc/braze-android-sdk/com.braze.models.push/-braze-notification-payload/index.html) containing data from the Braze push notification.
```java
// Factory method implemented in your custom IBrazeNotificationFactory
@Override
public Notification createNotification(BrazeNotificationPayload brazeNotificationPayload) {
// Example of getting notification title
String title = brazeNotificationPayload.getTitleText();
// Example of retrieving a custom KVP ("my_key" -> "my_value")
String customKvp = brazeNotificationPayload.getBrazeExtras().getString("my_key");
}
```
```kotlin
// Factory method implemented in your custom IBrazeNotificationFactory
override fun createNotification(brazeNotificationPayload: BrazeNotificationPayload): Notification {
// Example of getting notification title
val title = brazeNotificationPayload.getTitleText()
// Example of retrieving a custom KVP ("my_key" -> "my_value")
val customKvp = brazeNotificationPayload.getBrazeExtras().getString("my_key")
}
```
You can return `null` from your custom `createNotification()` method to not show the notification at all, use `BrazeNotificationFactory.getInstance().createNotification()` to obtain our default `notification` object for that data and modify it before display, or generate a completely separate `notification` object for display.
**Note:**
For documentation on Braze push data keys, refer to the [Android SDK](https://braze-inc.github.io/braze-android-sdk/kdoc/braze-android-sdk/com.braze/-constants/index.html).
### Step 2: Set your custom notification factory
To instruct Braze to use your custom notification factory, use the `setCustomBrazeNotificationFactory` method to set your [`IBrazeNotificationFactory`](https://braze-inc.github.io/braze-android-sdk/kdoc/braze-android-sdk/com.braze/-i-braze-notification-factory/index.html):
```java
setCustomBrazeNotificationFactory(IBrazeNotificationFactory brazeNotificationFactory);
```
```kotlin
setCustomBrazeNotificationFactory(brazeNotificationFactory: IBrazeNotificationFactory)
```
The recommended place to set your custom `IBrazeNotificationFactory` is in the `Application.onCreate()` application lifecycle method (not activity). This will allow the notification factory to be set correctly whenever your app process is active.
**Important:**
Creating your own notification from scratch is an advanced use case and should be done only with thorough testing and a deep understanding of the Braze push functionality. For example, you must make sure your notification logs push opens correctly.
To unset your custom [`IBrazeNotificationFactory`](https://braze-inc.github.io/braze-android-sdk/kdoc/braze-android-sdk/com.braze/-i-braze-notification-factory/index.html) and return to default Braze handling for push, pass in `null` to our custom notification factory setter:
```java
setCustomBrazeNotificationFactory(null);
```
```kotlin
setCustomBrazeNotificationFactory(null)
```
## Rendering multicolor text
In Braze SDK version 3.1.1, HTML can be sent to a device to render multicolor text in push notifications.
{: style="max-width:40%;"}
This example is rendered with the following HTML:
```html
MultiColorPush
testmessage
```
Keep in mind that, Android limits which HTML elements and tags are valid in your push notifications. For example, `marquee` is not allowed.
**Important:**
Multicolor text rendering is device-specific and may not display based on Android device or version.
To render multicolor text in a push notification, you can update your `braze.xml` or `BrazeConfig`:
Add the following in your `braze.xml`:
```xml
true
```
Add the following in your [`BrazeConfig`](https://www.braze.com/docs/fr/fr/developer_guide/platform_integration_guides/android/advanced_use_cases/runtime_configuration/#runtime-configuration):
```java
BrazeConfig brazeConfig = new BrazeConfig.Builder()
.setPushHtmlRenderingEnabled(true)
.build();
Braze.configure(this, brazeConfig);
```
```kotlin
val brazeConfig = BrazeConfig.Builder()
.setPushHtmlRenderingEnabled(true)
.build()
Braze.configure(this, brazeConfig)
```
### Supported HTML tags
Currently, Google doesn't list their supported HTML tags for Android directly in their documentation—this information can only be found in their [Git repository's `Html.java` file](https://android.googlesource.com/platform/frameworks/base/+/master/core/java/android/text/Html.java). Keep this in mind when referencing the following table, as this information was pulled from this file, and their supported HTML tags could be subject to change.
Category
HTML Tag
Description
Basic Text Styling
<b>, <strong>
Bold text
<i>, <em>
Italic text
<u>
Underline text
<s>, <strike>, <del>
Strikethrough text
<sup>
Superscript text
<sub>
Subscript text
<tt>
Monospace text
Size/Font
<big>, <small>
Relative text size changes
<font color="...">
Sets foreground color
<span> (with inline CSS)
Inline styles (e.g., color, background)
Paragraph & Block
<p>, <div>
Block-level sections
<br>
Line break
<blockquote>
Quoted block
<ul> + <li>
Unordered list with bullets
Headings
<h1> - <h6>
Headings (various sizes)
Links & Images
<a href="...">
Clickable link
<img src="...">
Inline image
Other Inline
<em>, <strong>, <dfn>, <cite>
Synonyms for italic or bold
{: .reset-td-br-1 .reset-td-br-2 .reset-td-br-3 aria-label="Supported HTML tags" }
## Rendering inline images
### How it works
You can showcase a larger image within your Android push notification using inline image push. With this design, users won't have to manually expand the push to enlarge the image. Unlike regular Android push notifications, inline image push images are in a 3:2 aspect ratio.
{: style="max-width:50%;"}
### Compatibility
While you can send inline images to any device, devices and SDKs that don't meet the minimum versions will display a standard image instead. For inline images to display properly, both the Android Braze SDK v10.0.0+ and a device running Android M+ are required. The SDK must also be enabled for the image to render.
**Note:**
Devices running Android 12 will render differently due to changes in custom push notification styles.
### Sending an inline image push
When creating an Android push message, this feature is available in the **Notification Type** dropdown.

## Settings
There are many advanced settings available for Android push notifications sent through the Braze dashboard. This article will describe these features and how to use them successfully.

### Notification ID {#notification-id}
A **Notification ID** is a unique identifier for a message category of your choosing that informs the messaging service to only respect the most recent message from that ID. Setting a notification ID allows you to send just the most recent and relevant message, rather than a stack of outdated, irrelevant ones.
### Firebase Messaging Delivery priority {#fcm-priority}
The [Firebase Messaging Delivery Priority](https://firebase.google.com/docs/cloud-messaging/android/message-priority#setting-priority-for-messages) field lets you control whether a push is sent with "normal" or "high" priority to Firebase Cloud Messaging.
### Time to live (TTL) {#ttl}
The **Time to Live** (TTL) field allows you to set a custom length of time to store messages with the push messaging service. The default values for time to live are four weeks for FCM and 31 days for ADM.
### Summary text {#summary-text}
The summary text allows you to set additional text in the expanded notification view. It also serves as a caption for notifications with images.
{: style="max-width:65%;"}
The summary text will display under the body of the message in the expanded view.
{: style="max-width:65%;"}
For push notifications that include images, the message text will be shown in the collapsed view, while the summary text will be displayed as the image caption when the notification is expanded.
### Custom URIs {#custom-uri}
The **Custom URI** feature allows you to specify a Web URL or an Android resource to navigate to when the notification is clicked. If no custom URI is specified, clicking on the notification brings users into your app. You can use the custom URI to deep link inside your app and direct users to resources that exist outside of your app. This can be specified via the [Messaging API](https://www.braze.com/docs/fr/fr/api/endpoints/messaging/) or our dashboard under **Advanced Settings** in the push composer as pictured:

### Notification display priority {#notification-priority}
**Important:**
The Notification Display Priority setting is no longer used on devices running Android O or newer. For newer devices, set the priority through [notification channel configuration](https://developer.android.com/training/notify-user/channels#importance).
The priority level of a push notification affects how your notification is displayed in the notification tray relative to other notifications. It can also affect the speed and manner of delivery, as normal and lower priority messages may be sent with slightly higher latency or batched to preserve battery life, whereas high priority messages are always sent immediately.
In Android O, notification priority became a property of notification channels. You will need to work with your developer to define the priority for a channel during its configuration and then use the dashboard to select the proper channel when sending your notification sounds. For devices running versions of Android before O, specifying a priority level for Android notifications is possible via the Braze dashboard and messaging API.
To message your full user base with a specific priority, we recommend that you indirectly specify the priority through [notification channel configuration](https://developer.android.com/training/notify-user/channels#importance) (to target O+ devices) *and* send the individual priority from the dashboard (to target <O devices).
The priority levels that you can set on Android or Fire OS push notifications are:
| Priority | Description/Intended Use | `priority` value (for API messages) |
|----------|--------------------------|-------------------------------------|
| Max | Urgent or time-critical messages | `2` |
| High | Important communication, such as a new message from a friend | `1` |
| Default | Most notifications - use if your message doesn't explicitly fall under any of the other priority types | `0` |
| Low | Information that you want users to know about but does not require immediate action | `-1` |
| Min | Contextual or background information. | `-2` |
{: .reset-td-br-1 .reset-td-br-2 .reset-td-br-3 aria-label="Notification display priority #notification-priority" }
For more information, refer to Google's [Android notification](http://developer.android.com/design/patterns/notifications.html) documentation.
### Sounds {#sounds}
In Android O, notification sounds became a property of notification channels. You will need to work with your developer to define the sound for a channel during its configuration and then use the dashboard to select the proper channel when sending your notifications.
For devices running versions of Android before O, Braze allows you to set the sound of an individual push message through the dashboard composer. You can do so by specifying a local sound resource on the device (for example, `android.resource://com.mycompany.myapp/raw/mysound`). Specifying "default" in this field will play the default notification sound on the device. This can be specified via the [Messaging API](https://www.braze.com/docs/fr/fr/api/endpoints/messaging/) or the dashboard under **Advanced Settings** in the push composer.

Enter the full sound resource URI (for example, `android.resource://com.mycompany.myapp/raw/mysound`) into the dashboard prompt.
To message your full user base with a specific sound, we recommend that you indirectly specify the sound through [notification channel configuration](https://developer.android.com/training/notify-user/channels) (to target O+ devices) *and* send the individual sound from the dashboard (to target <O devices).
## Prerequisites
Before you can use this feature, you'll need to [integrate the Swift Braze SDK](https://www.braze.com/docs/fr/fr/developer_guide/sdk_integration/?sdktab=swift). You'll also need to [set up push notifications](https://www.braze.com/docs/fr/fr/developer_guide/push_notifications/?sdktab=swift).
## Customizing action buttons {#push-action-buttons-integration}
The Braze Swift SDK provides URL handling support for push action buttons. There are four sets of default push action buttons for Braze default push categories: `Accept/Decline`, `Yes/No`, `Confirm/Cancel`, and `More`.
{: style="max-width:60%"}
### Manually registering action buttons
**Important:**
Manually registering push action buttons are not recommended.
If you [set up push notifications](https://www.braze.com/docs/fr/fr/developer_guide/push_notifications/?sdktab=swift) using the `configuration.push.automation` configuration option, Braze automatically registers the action buttons for the default push categories and handles the push action button click analytics and URL routing.
However, you can choose to manually register push action buttons instead.
#### Step 1: Adding Braze default push categories {#registering}
Use the following code to register for the default push categories when you [register for push](https://www.braze.com/docs/fr/fr/developer_guide/platform_integration_guides/swift/push_notifications/integration/#step-4-register-push-tokens-with-braze):
a
```swift
UNUserNotificationCenter.current().setNotificationCategories(Braze.Notifications.categories)
```
```objc
[[UNUserNotificationCenter currentNotificationCenter] setNotificationCategories:BRZNotifications.categories];
```
**Note:**
Clicking on push action buttons with background activation mode will only dismiss the notification and not open the app. The next time the user opens the app, the button click analytics for these actions will be flushed to the server.
#### Step 2: Enable interactive push handling {#enable-push-handling}
To enable our push action button handling, including click analytics and URL routing, add the following code to your app's `didReceive(_:completionHandler:)` delegate method:
```swift
AppDelegate.braze?.notifications.handleUserNotification(response: response, withCompletionHandler: completionHandler)
```
```objc
[AppDelegate.braze.notifications handleUserNotificationWithResponse:response
withCompletionHandler:completionHandler];
```
If you use the `UNNotification` framework and have implemented the Braze [notification methods](https://www.braze.com/docs/fr/fr/developer_guide/platform_integration_guides/swift/push_notifications/integration/#step-5-enable-push-handling), you should already have this method integrated.
## Customizing push categories {#customizing-push-categories}
In addition to providing a set of default push categories, Braze supports custom notification categories and actions. After you register categories in your application, you can use the Braze dashboard to send these custom notification categories to your users.
Here's an example that leverages the `LIKE_CATEGORY` displayed on the device:

### Step 1: Register a category
To register a category in your app, use a similar approach to the following:
```swift
Braze.Notifications.categories.insert(
.init(identifier: "LIKE_CATEGORY",
actions: [
.init(identifier: "LIKE_IDENTIFIER", title: "Like", options: [.foreground]),
.init(identifier: "UNLIKE_IDENTIFIER", title: "Unlike", options: [.foreground])
],
intentIdentifiers: []
)
)
UNUserNotificationCenter.current().setNotificationCategories(Braze.Notifications.categories)
```
```objc
NSMutableSet *categories = [BRZNotifications.categories mutableCopy];
UNNotificationAction *likeAction = [UNNotificationAction actionWithIdentifier:@"LIKE_IDENTIFIER"
title:@"Like"
options:UNNotificationActionOptionForeground];
UNNotificationAction *unlikeAction = [UNNotificationAction actionWithIdentifier:@"UNLIKE_IDENTIFIER"
title:@"Unlike"
options:UNNotificationActionOptionForeground];
UNNotificationCategory *likeCategory = [UNNotificationCategory categoryWithIdentifier:@"LIKE_CATEGORY"
actions:@[likeAction, unlikeAction]
intentIdentifiers:@[]
options:UNNotificationCategoryOptionNone];
[categories addObject:likeCategory];
[UNUserNotificationCenter.currentNotificationCenter setNotificationCategories:categories];
```
**Note:**
When you create a `UNNotificationAction`, you can specify a list of action options. For example, `.foreground` lets your users open your app after tapping the action button. This is necessary for navigational on-click behaviors, such as "Open App" and "Deep Link into Application". If you want an action button that simply dismisses the notification without opening the app, leave `.foreground` out of the action's `options` array. For more information, see [`UNNotificationActionOptions`](https://developer.apple.com/documentation/usernotifications/unnotificationactionoptions).
### Step 2: Select your categories
After you register a category, use the Braze dashboard to send notifications of that type to users.
**Tip:**
You only need to define action buttons on the Braze dashboard for behaviors that can't be created locally in your Swift code, such as deep linking into your app or redirecting to a web URL. These actions need to be configured on the dashboard so they can define what URL or deep link to open. For action buttons that simply dismiss the notification without opening the app, you don't need to configure them on the dashboard—dismissal behavior is handled automatically by iOS. Just register your custom category and its actions in your app code, then enter the matching category name on the dashboard.
1. In the Braze dashboard, select **Messaging** > **Push Notifications**, then choose your iOS [push campaign](https://www.braze.com/docs/fr/fr/user_guide/message_building_by_channel/push/creating_a_push_message).
2. Under **Compose push notification**, turn on **Action Buttons**.
3. In the **iOS Notification Category** dropdown, select **Enter pre-registered custom iOS Category**.
4. Finally, enter one of the categories you created earlier. The following example, uses the custom category: `LIKE_CATEGORY`.

### Example: Custom push category {#example-custom-push-category}
Suppose you want to create a push notification with two action buttons: **Manage**, which deep links into your app, and **Keep**, which simply dismisses the notification.
In the following example, the `MANAGE_IDENTIFIER` action includes the `.foreground` option, which opens the app when tapped—this is necessary because it will deep link into a specific part of the app. The `KEEP_IDENTIFIER` action uses an empty options array, meaning it will dismiss the notification without opening the app.
```swift
Braze.Notifications.categories.insert(
.init(identifier: "YOUR_CATEGORY",
actions: [
.init(identifier: "KEEP_IDENTIFIER", title: "Keep", options: []),
.init(identifier: "MANAGE_IDENTIFIER", title: "Manage", options: [.foreground])
],
intentIdentifiers: []
)
)
UNUserNotificationCenter.current().setNotificationCategories(Braze.Notifications.categories)
```
Because `MANAGE_IDENTIFIER` deep links into the app, you would set up that action button on the Braze dashboard with the associated deep link URL. However, you don't need to define a button on the dashboard for `KEEP_IDENTIFIER` because it only dismisses the notification. On the dashboard, you only need to enter the category name (for example, `YOUR_CATEGORY`) to match what you registered in your app code.
## Customizing badges
Badges are small icons that are ideal for getting a user's attention. You can specify a badge count in the [**Settings**](https://www.braze.com/docs/fr/fr/developer_guide/push_notifications/customization/?sdktab=swift#swift_settings) tab when you compose a push notification using the Braze dashboard. You may also update your badge count manually through your application's [`applicationIconBadgeNumber`](https://developer.apple.com/library/ios/documentation/UIKit/Reference/UIApplication_Class/index.html#//apple_ref/occ/instp/UIApplication/applicationIconBadgeNumber) property or the [remote notification payload](https://developer.apple.com/library/content/documentation/NetworkingInternet/Conceptual/RemoteNotificationsPG/CreatingtheNotificationPayload.html#//apple_ref/doc/uid/TP40008194-CH10-SW1).
Braze will automatically clear the badge count when a Braze notification is received while the app is in the foreground. Manually setting the badge number to 0 will also clear notifications in the notification center.
If you do not have a plan for clearing badges as part of normal app operation or by sending pushes that clear the badge, you should clear the badge when the app becomes active by adding the following code to your app's `applicationDidBecomeActive:` delegate method:
```swift
// For iOS 16.0+
let center = UNUserNotificationCenter.current()
do {
try await center.setBadgeCount(0)
} catch {
// Handle errors
}
// Prior to iOS 16. Deprecated in iOS 17+.
UIApplication.shared.applicationIconBadgeNumber = 0
```
```objc
// For iOS 16.0+
UNUserNotificationCenter *center = [UNUserNotificationCenter currentNotificationCenter];
[center setBadgeCount:0 withCompletionHandler:^(NSError * _Nullable error) {
if (error != nil) {
// Handle errors
}
}];
// Prior to iOS 16. Deprecated in iOS 17+.
[UIApplication sharedApplication].applicationIconBadgeNumber = 0;
```
## Customizing sounds
### Step 1: Host the sound in your app
Custom push notification sounds must be hosted locally within the main bundle of your app. The following audio data formats are accepted:
- Linear PCM
- MA4
- µLaw
- aLaw
You can package the audio data in an AIFF, WAV, or CAF file. In Xcode, add the sound file to your project as a non-localized resource of the application bundle.
**Note:**
Custom sounds must be under 30 seconds when played. If a custom sound is over that limit, the default system sound is played instead.
#### Converting sound files
You can use the afconvert tool to convert sounds. For example, to convert the 16-bit linear PCM system sound Submarine.aiff to IMA4 audio in a CAF file, use the following command in the terminal:
```bash
afconvert /System/Library/Sounds/Submarine.aiff ~/Desktop/sub.caf -d ima4 -f caff -v
```
**Tip:**
You can inspect a sound to determine its data format by opening it in QuickTime Player and choosing **Show Movie Inspector** from the **Movie** menu.
### Step 2: Provide a protocol URL for the sound
You must specify a protocol URL that directs to the location of the sound file in your app. There are two methods for doing this:
* Use the `sound` parameter of the [Apple push object](https://www.braze.com/docs/fr/fr/api/objects_filters/messaging/apple_object#apple-push-object) to pass the URL to Braze.
* Specify the URL in the dashboard. In the [push composer](https://www.braze.com/docs/fr/fr/user_guide/message_building_by_channel/push/creating_a_push_message/#step-3-select-notification-type-ios-and-android), select **Settings** and enter the protocol URL in the **Sound** field.

If the specified sound file doesn't exist or the keyword "default" is entered, Braze will use the default device alert sound. Aside from our dashboard, sound can also be configured via our [messaging API][12].
See the Apple Developer Documentation regarding [preparing custom alert sounds](https://developer.apple.com/library/content/documentation/NetworkingInternet/Conceptual/RemoteNotificationsPG/SupportingNotificationsinYourApp.html) for additional information.
## Settings
When creating a push campaign through the dashboard, click the **Settings** tab on the **Compose** step to view the advanced settings available.

### Key-value pairs
Braze allows you to send custom-defined string key-value pairs, known as `extras`, along with a push notification to your application. Extras can be defined via the dashboard or API and will be available as key-value pairs within the `notification` dictionary passed to your push delegate implementations.
### Alert options
Select the **Alert Options** checkbox to see a dropdown of key-values available to adjust how the notification appears on devices.
### Adding content-available flag
Check the **Add Content-Available Flag** checkbox to instruct devices to download new content in the background. Most commonly, this can be checked if you are interested in sending [silent notifications](https://www.braze.com/docs/fr/fr/developer_guide/push_notifications/silent/?sdktab=swift).
### Adding mutable-content flag
Check the **Add Mutable-Content Flag** checkbox to enable advanced receiver customization. This flag will automatically be sent when composing a [rich notification](https://www.braze.com/docs/fr/fr/developer_guide/push_notifications/rich/?sdktab=swift), regardless of the value of this checkbox.
### Collapse ID
Specify a collapse ID to coalesce similar notifications. If you send multiple notifications with the same collapse ID, the device will only show the most recently received notification. Refer to Apple's documentation on [coalesced notifications](https://developer.apple.com/library/content/documentation/NetworkingInternet/Conceptual/RemoteNotificationsPG/APNSOverview.html#//apple_ref/doc/uid/TP40008194-CH8-SW1).
### Expiry
Checking the **Expiry** checkbox will allow setting an expiration time for your message. Should a user's device lose connectivity, Braze will continue to try and send the message until the specified time. If this is not set, the platform will default to an expiration of 30 days. Note that push notifications that expire before delivery are not considered failed and will not be recorded as a bounce.
## Prerequisites
Before you can use this feature, you'll need to [integrate the Android Braze SDK](https://www.braze.com/docs/fr/fr/developer_guide/sdk_integration/?sdktab=android). You'll also need to [set up push notifications](https://www.braze.com/docs/fr/fr/developer_guide/push_notifications/?sdktab=android).
## Settings
There are many advanced settings available for FireOS push notifications sent through the Braze dashboard. This article will describe these features and how to use them successfully.

### Time to live (TTL) {#ttl}
The **Time to Live** (TTL) field allows you to set a custom length of time to store messages with the push messaging service. The default values for time to live are four weeks for FCM and 31 days for ADM.
### Summary text {#summary-text}
The summary text allows you to set additional text in the expanded notification view. It also serves as a caption for notifications with images.
{: style="max-width:65%;"}
The summary text will display under the body of the message in the expanded view.
{: style="max-width:65%;"}
For push notifications that include images, the message text will be shown in the collapsed view, while the summary text will be displayed as the image caption when the notification is expanded.
### Custom URIs {#custom-uri}
The **Custom URI** feature allows you to specify a Web URL or an Android resource to navigate to when the notification is clicked. If no custom URI is specified, clicking on the notification brings users into your app. You can use the custom URI to deep link inside your app and direct users to resources that exist outside of your app. This can be specified via the [Messaging API](https://www.braze.com/docs/fr/fr/api/endpoints/messaging) or our dashboard under **Advanced Settings** in the push composer as pictured:

### Notification display priority
**Important:**
The Notification Display Priority setting is no longer used on devices running Android O or newer. For newer devices, set the priority through [notification channel configuration](https://developer.android.com/training/notify-user/channels#importance).
The priority level of a push notification affects how your notification is displayed in the notification tray relative to other notifications. It can also affect the speed and manner of delivery, as normal and lower priority messages may be sent with slightly higher latency or batched to preserve battery life whereas high priority messages are always sent immediately.
In Android O, notification priority became a property of notification channels. You will need to work with your developer to define the priority for a channel during its configuration and then use the dashboard to select the proper channel when sending your notification sounds. For devices running versions of Android before O, specifying a priority level for FireOS notifications is possible via the Braze dashboard and messaging API.
To message your full user base with a specific priority, we recommend that you indirectly specify the priority through [notification channel configuration](https://developer.android.com/training/notify-user/channels#importance) (to target O+ devices) *and* send the individual priority from the dashboard (to target <O devices).
The priority levels that you can set on Fire OS push notifications are:
| Priority | Description/Intended Use | `priority` value (for API messages) |
|----------|--------------------------|-------------------------------------|
| Max | Urgent or time-critical messages | `2` |
| High | Important communication, such as a new message from a friend | `1` |
| Default | Most notifications - use if your message doesn't explicitly fall under any of the other priority types | `0` |
| Low | Information that you want users to know about but does not require immediate action | `-1` |
| Min | Contextual or background information. | `-2` |
{: .reset-td-br-1 .reset-td-br-2 .reset-td-br-3 aria-label="Notification display priority" }
For more information, refer to Google's [Android notification](http://developer.android.com/design/patterns/notifications.html) documentation.
### Sounds {#sounds}
In Android O, notification sounds became a property of notification channels. You will need to work with your developer to define the sound for a channel during its configuration and then use the dashboard to select the proper channel when sending your notifications.
For devices running versions of Android before O, Braze allows you to set the sound of an individual push message through the dashboard composer. You can do so by specifying a local sound resource on the device (for example, `android.resource://com.mycompany.myapp/raw/mysound`). Specifying "default" in this field will play the default notification sound on the device. This can be specified via the [Messaging API](https://www.braze.com/docs/fr/fr/api/endpoints/messaging) or the dashboard under **Settings** in the push composer.

Enter the full sound resource URI (for example, `android.resource://com.mycompany.myapp/raw/mysound`) into the dashboard prompt.
To message your full user base with a specific sound, we recommend that you indirectly specify the sound through [notification channel configuration](https://developer.android.com/training/notify-user/channels) (to target O+ devices) *and* send the individual sound from the dashboard (to target <O devices).
## Prerequisites
Before you can use this feature, you'll need to [integrate the React Native Braze SDK](https://www.braze.com/docs/fr/fr/developer_guide/sdk_integration/?sdktab=react%20native). You must also [set up push notifications](https://www.braze.com/docs/fr/fr/developer_guide/push_notifications/?sdktab=react%20native).
## Push customization in React Native
The Braze React Native SDK does not expose push notification customization (action buttons, categories, custom notification factories) through its JavaScript API. These features require native configuration in your iOS and Android projects.
The following table shows which features require native configuration:
| Feature | iOS | Android |
| --- | --- | --- |
| Action buttons | Configure in native Swift/Objective-C | Configure in native Java/Kotlin |
| Push categories | Configure in native Swift/Objective-C | Configure in native Java/Kotlin |
| Custom notification factory | N/A | Configure in native Java/Kotlin |
| Badge customization | Configure in native Swift/Objective-C | N/A |
| Custom sounds | Configure in native Swift/Objective-C | Configure in native Java/Kotlin |
{: .reset-td-br-1 .reset-td-br-2 .reset-td-br-3 aria-label="Push customization in React Native" }
### iOS customization
To add push action buttons, categories, badges, or custom sounds on iOS, implement the native configuration in your `AppDelegate` (Swift or Objective-C). See [Customize push notifications – Swift](https://www.braze.com/docs/fr/fr/developer_guide/push_notifications/customization/?sdktab=swift) for step-by-step instructions.
### Android customization
To add push action buttons, categories, or a custom notification factory on Android, implement the native configuration in your Android project. See [Customize push notifications – Android](https://www.braze.com/docs/fr/fr/developer_guide/push_notifications/customization/?sdktab=android) for step-by-step instructions.
# Création de liens profonds dans les notifications push pour le SDK de Braze
Source: /docs/fr/developer_guide/push_notifications/deep_linking/index.md
# Création de liens profonds dans les notifications push
> Découvrez comment configurer des notifications push silencieuses pour le SDK de Braze.
## Prerequisites
Before you can use this feature, you'll need to [integrate the Android Braze SDK](https://www.braze.com/docs/fr/fr/developer_guide/sdk_integration/?sdktab=android).
## Creating a universal delegate
The Android SDK provides the ability to set a single delegate object to custom handle all deep links opened by Braze across Content Cards, in-app messages, and push notifications.
Your delegate object should implement the [`IBrazeDeeplinkHandler`](https://braze-inc.github.io/braze-android-sdk/kdoc/braze-android-sdk/com.braze.ui/-braze-deeplink-handler/index.html) interface and be set using [`BrazeDeeplinkHandler.setBrazeDeeplinkHandler()`](https://braze-inc.github.io/braze-android-sdk/kdoc/braze-android-sdk/com.braze.ui/-braze-deeplink-handler/-companion/set-braze-deeplink-handler.html). In most cases, the delegate should be set in your app's `Application.onCreate()`.
The following is an example of overriding the default [`UriAction`](https://braze-inc.github.io/braze-android-sdk/kdoc/braze-android-sdk/com.braze.ui.actions/-uri-action/index.html) behavior with custom intent flags and custom behavior for YouTube URLs:
```java
public class CustomDeeplinkHandler implements IBrazeDeeplinkHandler {
private static final String TAG = BrazeLogger.getBrazeLogTag(CustomDeeplinkHandler.class);
@Override
public void gotoUri(Context context, UriAction uriAction) {
String uri = uriAction.getUri().toString();
// Open YouTube URLs in the YouTube app and not our app
if (!StringUtils.isNullOrBlank(uri) && uri.contains("youtube.com")) {
uriAction.setUseWebView(false);
}
CustomUriAction customUriAction = new CustomUriAction(uriAction);
customUriAction.execute(context);
}
public static class CustomUriAction extends UriAction {
public CustomUriAction(@NonNull UriAction uriAction) {
super(uriAction);
}
@Override
protected void openUriWithActionView(Context context, Uri uri, Bundle extras) {
Intent intent = getActionViewIntent(context, uri, extras);
intent.setFlags(Intent.FLAG_ACTIVITY_NEW_TASK | Intent.FLAG_ACTIVITY_CLEAR_TOP | Intent.FLAG_ACTIVITY_SINGLE_TOP);
if (intent.resolveActivity(context.getPackageManager()) != null) {
context.startActivity(intent);
} else {
BrazeLogger.w(TAG, "Could not find appropriate activity to open for deep link " + uri + ".");
}
}
}
}
```
```kotlin
class CustomDeeplinkHandler : IBrazeDeeplinkHandler {
override fun gotoUri(context: Context, uriAction: UriAction) {
val uri = uriAction.uri.toString()
// Open YouTube URLs in the YouTube app and not our app
if (!StringUtils.isNullOrBlank(uri) && uri.contains("youtube.com")) {
uriAction.useWebView = false
}
val customUriAction = CustomUriAction(uriAction)
customUriAction.execute(context)
}
class CustomUriAction(uriAction: UriAction) : UriAction(uriAction) {
override fun openUriWithActionView(context: Context, uri: Uri, extras: Bundle) {
val intent = getActionViewIntent(context, uri, extras)
intent.flags = Intent.FLAG_ACTIVITY_NEW_TASK or Intent.FLAG_ACTIVITY_CLEAR_TOP or Intent.FLAG_ACTIVITY_SINGLE_TOP
if (intent.resolveActivity(context.packageManager) != null) {
context.startActivity(intent)
} else {
BrazeLogger.w(TAG, "Could not find appropriate activity to open for deep link $uri.")
}
}
}
companion object {
private val TAG = BrazeLogger.getBrazeLogTag(CustomDeeplinkHandler::class.java)
}
}
```
## Deep linking to app settings
To allow deep links to directly open your app's settings, you'll need a custom `BrazeDeeplinkHandler`. In the following example, the presence of a custom key-value pair called `open_notification_page` will make the deep link open the app's settings page:
```java
BrazeDeeplinkHandler.setBrazeDeeplinkHandler(new IBrazeDeeplinkHandler() {
@Override
public void gotoUri(Context context, UriAction uriAction) {
final Bundle extras = uriAction.getExtras();
if (extras.containsKey("open_notification_page")) {
Intent intent = new Intent();
intent.setAction("android.settings.APP_NOTIFICATION_SETTINGS");
intent.setFlags(Intent.FLAG_ACTIVITY_NEW_TASK);
//for Android 5-7
intent.putExtra("app_package", context.getPackageName());
intent.putExtra("app_uid", context.getApplicationInfo().uid);
// for Android 8 and later
intent.putExtra("android.provider.extra.APP_PACKAGE", context.getPackageName());
context.startActivity(intent);
}
}
});
```
```kotlin
BrazeDeeplinkHandler.setBrazeDeeplinkHandler(object : IBrazeDeeplinkHandler {
override fun gotoUri(context: Context, uriAction: UriAction) {
val extras = uriAction.extras
if (extras.containsKey("open_notification_page")) {
val intent = Intent()
intent.action = "android.settings.APP_NOTIFICATION_SETTINGS"
intent.flags = Intent.FLAG_ACTIVITY_NEW_TASK
//for Android 5-7
intent.putExtra("app_package", context.packageName)
intent.putExtra("app_uid", context.applicationInfo.uid)
// for Android 8 and later
intent.putExtra("android.provider.extra.APP_PACKAGE", context.packageName)
context.startActivity(intent)
}
}
})
```
## Customizing WebView activity {#Custom_Webview_Activity}
When Braze opens website deeplinks inside the app, the deeplinks are handled by [`BrazeWebViewActivity`](https://braze-inc.github.io/braze-android-sdk/kdoc/braze-android-sdk/com.braze.ui/-braze-web-view-activity/index.html).
**Note:**
For custom HTML in-app messages, links configured with `target="_blank"` open in the device's default web browser and are not handled by `BrazeWebViewActivity`.
To change this:
1. Create a new Activity that handles the target URL from `Intent.getExtras()` with the key `com.braze.Constants.BRAZE_WEBVIEW_URL_EXTRA`. For an example, see [`BrazeWebViewActivity.kt`](https://github.com/braze-inc/braze-android-sdk/blob/master/android-sdk-ui/src/main/java/com/braze/ui/BrazeWebViewActivity.kt).
2. Add that activity to `AndroidManifest.xml` and set `exported` to `false`.
```xml
```
3. Set your custom Activity in a `BrazeConfig` [builder object](https://braze-inc.github.io/braze-android-sdk/kdoc/braze-android-sdk/com.braze.configuration/-braze-config/-builder/set-custom-web-view-activity-class.html). Build the builder and pass it to [`Braze.configure()`](https://braze-inc.github.io/braze-android-sdk/kdoc/braze-android-sdk/com.braze/-braze/-companion/configure.html) in your [`Application.onCreate()`](https://developer.android.com/reference/android/app/Application.html#onCreate()).
```java
BrazeConfig brazeConfig = new BrazeConfig.Builder()
.setCustomWebViewActivityClass(MyCustomWebViewActivity::class)
...
.build();
Braze.configure(this, brazeConfig);
```
```kotlin
val brazeConfig = BrazeConfig.Builder()
.setCustomWebViewActivityClass(MyCustomWebViewActivity::class.java)
...
.build()
Braze.configure(this, brazeConfig)
```
## Troubleshooting
If deep links from push notifications aren't working on Android, try the following steps:
1. **Test the deep link outside of Braze.** Open the deep link URL from another app, such as email or a browser. If it doesn't open your app, the deep link may not be configured correctly in your `AndroidManifest.xml`. For more information, see Android's [Create Deep Links](https://developer.android.com/training/app-links/deep-linking) documentation.
2. **Check that automatic deep link handling is enabled.** Verify that `com_braze_handle_push_deep_links_automatically` is set to `true` in `braze.xml`, or set this option through [runtime configuration](https://www.braze.com/docs/fr/fr/developer_guide/sdk_initalization/?sdktab=android). Without this setting, Braze doesn't automatically open your app and deep link destination when someone taps a push notification.
3. **Verify your deep link handler delegate.** If you set a custom `IBrazeDeeplinkHandler`, confirm that your `gotoUri` implementation handles the URI and doesn't drop it.
4. **Test across channels.** If the same deep link works in an in-app message but not from push, the issue is likely in your push deep link handling, not in the deep link itself.
## Using Jetpack Compose
To handle deeplinks when using Jetpack Compose with NavHost:
1. Ensure that the activity handling your deeplink is registered in the Android Manifest.
```xml
```
2. In NavHost, specify which deeplinks you want it to handle.
```kotlin
composableWithCompositionLocal(
route = "YOUR_ROUTE_HERE",
deepLinks = listOf(navDeepLink {
uriPattern = "myapp://articles/{${MainDestinations.ARTICLE_ID_KEY}}"
}),
arguments = listOf(
navArgument(MainDestinations.ARTICLE_ID_KEY) {
type = NavType.LongType
}
),
) { backStackEntry ->
val arguments = requireNotNull(backStackEntry.arguments)
val articleId = arguments.getLong(MainDestinations.ARTICLE_ID_KEY)
ArticleDetail(
articleId
)
}
```
3. Depending on your app architecture, you may need to handle the new intent that's sent to your current activity as well.
```kotlin
DisposableEffect(Unit) {
val listener = Consumer {
navHostController.handleDeepLink(it)
}
addOnNewIntentListener(listener)
onDispose { removeOnNewIntentListener(listener) }
}
```
## Prerequisites
Before you can use this feature, you'll need to [integrate the Swift Braze SDK](https://www.braze.com/docs/fr/fr/developer_guide/sdk_integration/?sdktab=swift).
**Tip:**
For help choosing between custom scheme deep links, universal links, and "Open Web URL Inside App," see [iOS deep linking guide](https://www.braze.com/docs/fr/fr/developer_guide/push_notifications/ios_deep_linking_guide). For troubleshooting, see [Deep linking troubleshooting](https://www.braze.com/docs/fr/fr/developer_guide/push_notifications/deep_linking_troubleshooting).
## Handling deep links
### Step 1: Register a scheme {#register-a-scheme}
To handle deep linking, a custom scheme must be stated in your `Info.plist` file. The navigation structure is defined by an array of dictionaries. Each of those dictionaries contains an array of strings.
Use Xcode to edit your `Info.plist` file:
1. Add a new key, `URL types`. Xcode will automatically make this an array containing a dictionary called `Item 0`.
2. Within `Item 0`, add a key `URL identifier`. Set the value to your custom scheme.
3. Within `Item 0`, add a key `URL Schemes`. This will automatically be an array containing a `Item 0` string.
4. Set `URL Schemes` >> `Item 0` to your custom scheme.
Alternatively, if you wish to edit your `Info.plist` file directly, you can follow this spec:
```html
CFBundleURLTypesCFBundleURLNameYOUR.SCHEMECFBundleURLSchemesYOUR.SCHEME
```
### Step 2: Add a scheme allowlist
You must declare the URL schemes you wish to pass to `canOpenURL(_:)` by adding the `LSApplicationQueriesSchemes` key to your app's Info.plist file. Attempting to call schemes outside this allowlist will cause the system to record an error in the device's logs, and the deep link will not open. An example of this error will look like this:
```
: -canOpenURL: failed for URL: "yourapp://deeplink" – error: "This app is not allowed to query for scheme yourapp"
```
For example, if an in-app message should open the Facebook app when tapped, the app has to have the Facebook custom scheme (`fb`) in your allowlist. Otherwise, the system will reject the deep link. Deep links that direct to a page or view inside your own app still require that your app's custom scheme be listed in your app's `Info.plist`.
Your example allowlist might look something like:
```html
LSApplicationQueriesSchemesmyappfbtwitter
```
For more information, refer to [Apple's documentation](https://developer.apple.com/library/content/documentation/General/Reference/InfoPlistKeyReference/Articles/LaunchServicesKeys.html#//apple_ref/doc/uid/TP40009250-SW14) on the `LSApplicationQueriesSchemes` key.
### Step 3: Implement a handler
After activating your app, iOS will call the method [`application:openURL:options:`](https://developer.apple.com/reference/uikit/uiapplicationdelegate/1623112-application?language=objc). The important argument is the [NSURL](https://developer.apple.com/library/ios/DOCUMENTATION/Cocoa/Reference/Foundation/Classes/NSURL_Class/Reference/Reference.html#//apple_ref/doc/c_ref/NSURL) object.
```swift
func application(_ app: UIApplication, open url: URL, options: [UIApplication.OpenURLOptionsKey : Any] = [:]) -> Bool {
let path = url.path
let query = url.query
// Insert your code here to take some action based upon the path and query.
return true
}
```
```objc
- (BOOL)application:(UIApplication *)app openURL:(NSURL *)url options:(NSDictionary *)options {
NSString *path = [url path];
NSString *query = [url query];
// Insert your code here to take some action based upon the path and query.
return YES;
}
```
## App Transport Security (ATS)
As defined by [Apple](https://developer.apple.com/library/prerelease/ios/releasenotes/General/WhatsNewIniOS/Articles/iOS9.html#//apple_ref/doc/uid/TP40016198-SW14), "App Transport Security is a feature that improves the security of connections between an app and web services. The feature consists of default connection requirements that conform to best practices for secure connections. Apps can override this default behavior and turn off transport security."
ATS is applied by default. It requires that all connections use HTTPS and are encrypted using TLS 1.2 with forward secrecy. Refer to [Requirements for Connecting Using ATS](https://developer.apple.com/library/ios/documentation/General/Reference/InfoPlistKeyReference/Articles/CocoaKeys.html#//apple_ref/doc/uid/TP40009251-SW35) for more information. All images served by Braze to end devices are handled by a content delivery network ("CDN") that supports TLS 1.2 and is compatible with ATS.
Unless they are specified as exceptions in your application's `Info.plist`, connections that do not follow these requirements will fail with errors that are similar to the following.
**Example Error 1:**
```bash
CFNetwork SSLHandshake failed (-9801)
Error Domain=NSURLErrorDomain Code=-1200 "An SSL error has occurred, and a secure connection to the server cannot be made."
```
**Example Error 2:**
```bash
NSURLSession/NSURLConnection HTTP load failed (kCFStreamErrorDomainSSL, -9802)
```
ATS compliance is enforced for links opened within the mobile app (our default handling of clicked links) and does not apply to sites opened externally via a web browser.
### Working with ATS
You can handle ATS in either of the following ways, but we recommend **complying with ATS requirements**.
Your Braze integration can satisfy ATS requirements by ensuring that any existing links you drive users to (for example, though in-app message and push campaigns) satisfy ATS requirements. While there are ways to bypass ATS restrictions, our recommendation is to ensure that all linked URLs are ATS-compliant. Given Apple's increasing emphasis on application security, the following approaches to allowing ATS exceptions are not guaranteed to be supported by Apple.
You can allow a subset of links with certain domains or schemes to be treated as exceptions to the ATS rules. Your Braze integration will satisfy ATS requirements if every link you use in a Braze messaging channel is either ATS compliant or handled by an exception.
To add a domain as an exception of the ATS, add following to your app's `Info.plist` file:
```html
NSAppTransportSecurityNSAllowsArbitraryLoadsNSExceptionDomainsexample.comNSExceptionAllowsInsecureHTTPLoadsNSIncludesSubdomains
```
Refer to Apple's article on [app transport security keys](https://developer.apple.com/library/ios/documentation/General/Reference/InfoPlistKeyReference/Articles/CocoaKeys.html#//apple_ref/doc/uid/TP40009251-SW33) for more information.
You can turn off ATS entirely. Note that this is not recommended practice, due to both lost security protections and future iOS compatibility. To disable ATS, insert the following in your app's `Info.plist` file:
```html
NSAppTransportSecurityNSAllowsArbitraryLoads
```
## Decoding URLs
The SDK percent-encodes links to create valid `URL`s. All link characters that are not allowed in a properly formed URL, such as Unicode characters, will be percent escaped.
To decode an encoded link, use the `String` property [`removingPercentEncoding`](https://developer.apple.com/documentation/swift/stringprotocol/removingpercentencoding). You must also return `true` in the `BrazeDelegate.braze(_:shouldOpenURL:)`. A call to action is required to trigger the handling of the URL by your app. For example:
```swift
func application(_ app: UIApplication, open url: URL, options: [UIApplication.OpenURLOptionsKey : Any] = [:]) -> Bool {
let urlString = url.absoluteString.removingPercentEncoding
// Handle urlString
return true
}
```
```objc
- (BOOL)application:(UIApplication *)application openURL:(NSURL *)url options:(NSDictionary *)options {
NSString *urlString = [url.absoluteString stringByRemovingPercentEncoding];
// Handle urlString
return YES;
}
```
## Deep linking to app settings
You can take advantage of `UIApplicationOpenSettingsURLString` to deep link users to your app's settings from Braze push notifications and in-app messages.
To take users from your app into the iOS settings:
1. First, make sure your application is set up for either [scheme-based deep links](#swift_register-a-scheme) or [universal links](#swift_universal-links).
2. Decide on a URI for deep linking to the **Settings** page (for example, `myapp://settings` or `https://www.braze.com/settings`).
3. If you are using custom scheme-based deep links, add the following code to your `application:openURL:options:` method:
```swift
func application(_ app: UIApplication, open url: URL, options: [UIApplicationOpenURLOptionsKey : Any] = [:]) -> Bool {
let path = url.path
if (path == "settings") {
UIApplication.shared.openURL(URL(string:UIApplication.openSettingsURLString)!)
}
return true
}
```
```objc
- (BOOL)application:(UIApplication *)app
openURL:(NSURL *)url
options:(NSDictionary *)options {
NSString *path = [url path];
if ([path isEqualToString:@"settings"]) {
NSURL *settingsURL = [NSURL URLWithString:UIApplicationOpenSettingsURLString];
[[UIApplication sharedApplication] openURL:settingsURL];
}
return YES;
}
```
## Customization options {#customization-options}
### Default WebView customization
The `Braze.WebViewController` class displays web URLs opened by the SDK, typically when "Open Web URL Inside App" is selected for a web deep link.
You can customize the `Braze.WebViewController` via the [`BrazeDelegate.braze(_:willPresentModalWithContext:)`](https://braze-inc.github.io/braze-swift-sdk/documentation/brazekit/brazedelegate/braze(_:willpresentmodalwithcontext:)-12sqy/) delegate method.
### Linking handling customization
The `BrazeDelegate` protocol can be used to customize the handling of URLs such as deep links, web URLs, and universal links. To set the delegate during Braze initialization, set a delegate object on the `Braze` instance. Braze will then call your delegate's implementation of `shouldOpenURL` before handling any URIs.
When a push notification or in-app message uses **Open web URL inside mobile app**, Braze passes `context.useWebView == true` on [`Braze.URLContext`](https://braze-inc.github.io/braze-swift-sdk/documentation/brazekit/braze/urlcontext). When the message opens the URL in the system browser instead, `useWebView` is `false`. Inspect `context.useWebView` in `braze(_:shouldOpenURL:)` to branch your custom handling—for example, to open an in-app `WebViewController` only when the campaign requested in-app display.
#### Universal links {#universal-links}
Braze supports universal links in push notifications, in-app messages, and Content Cards. To enable universal link support, [`configuration.forwardUniversalLinks`](https://braze-inc.github.io/braze-swift-sdk/documentation/brazekit/braze/configuration-swift.class/forwarduniversallinks) must be set to `true`.
When enabled, Braze will forward universal links to your app's `AppDelegate` via the [`application:continueUserActivity:restorationHandler:`](https://developer.apple.com/documentation/uikit/uiapplicationdelegate/1623072-application) method.
Your application also needs to be set up to handle universal links. Refer to [Apple's documentation](https://developer.apple.com/documentation/xcode/supporting-universal-links-in-your-app) to ensure your application is configured correctly for universal links.
**Warning:**
Universal link forwarding requires access to the application entitlements. When running the application in a simulator, these entitlements are not directly available and universal links are not forwarded to the system handlers.
To add support to simulator builds, you can add the application `.entitlements` file to the _Copy Bundle Resources_ build phase. See [`forwardUniversalLinks`](https://braze-inc.github.io/braze-swift-sdk/documentation/brazekit/braze/configuration-swift.class/forwarduniversallinks) documentation for more details.
**Note:**
The SDK does not query your domains' `apple-app-site-association` file. It performs the differentiation between universal links and regular URLs by looking at the domain name only. As a result, the SDK does not respect any exclusion rule defined in the `apple-app-site-association` per [Supporting associated domains](https://developer.apple.com/documentation/xcode/supporting-associated-domains).
## Examples
### BrazeDelegate
Here's an example using `BrazeDelegate`. For more information, see [Braze Swift SDK reference](https://braze-inc.github.io/braze-swift-sdk/documentation/brazekit/brazedelegate).
```swift
func braze(_ braze: Braze, shouldOpenURL context: Braze.URLContext) -> Bool {
if context.url.host == "MY-DOMAIN.com" {
// Custom handle link here
return false
}
// Let Braze handle links otherwise
return true
}
```
```objc
- (BOOL)braze:(Braze *)braze shouldOpenURL:(BRZURLContext *)context {
if ([[context.url.host lowercaseString] isEqualToString:@"MY-DOMAIN.com"]) {
// Custom handle link here
return NO;
}
// Let Braze handle links otherwise
return YES;
}
```
## Prerequisites
Before you can implement deep linking into your Flutter iOS app, configure your URL schemes in your `Info.plist` file. For details, refer to [Deep linking for iOS](https://www.braze.com/docs/fr/fr/developer_guide/push_notifications/deep_linking/?sdktab=swift#url-schemes).
For Flutter Android, no additional native setup is required if you're handling deep links on the Dart layer. The minimal implementation shown in this article is sufficient for most Flutter apps.
If you need advanced native-layer link handling (such as custom `IBrazeDeeplinkHandler` implementations), refer to [Deep linking for Android](https://www.braze.com/docs/fr/fr/developer_guide/push_notifications/deep_linking/?sdktab=android).
## Implementing deep linking
### Step 1: Set up Flutter's built-in handling
1. In your Xcode project, open your `Info.plist` file.
2. Add a new key-value pair.
3. Set the key to `FlutterDeepLinkingEnabled`.
4. Set the type to `Boolean`.
5. Set the value to `YES`.

1. In your Android Studio project, open your `AndroidManifest.xml` file.
2. Locate `.MainActivity` in your `activity` tags.
3. Within the `activity` tag, add the following `meta-data` tag:
```xml
```
### Step 2: Forward data to the Dart layer (optional)
You can use native, first-party, or third-party link handling for complex use cases, such as sending a user to a specific location in your app, or calling a specific function.
#### Example: Deep linking to an alert dialog
**Note:**
While the following example does not rely on additional packages, you can use a similar approach to implement native, first-party, or third-party packages, such as [`go_router`](https://pub.dev/packages/go_router). Additional Dart code may be required.
First, a method channel is used in the native layer to forward the deep link's URL string data to the Dart layer.
```swift
extension AppDelegate {
// Delegate method for handling custom scheme links.
override func application(_ app: UIApplication, open url: URL, options: [UIApplication.OpenURLOptionsKey : Any] = [:]) -> Bool {
forwardURL(url)
return true
}
// Delegate method for handling universal links.
override func application(_ application: UIApplication, continue userActivity: NSUserActivity, restorationHandler: @escaping ([UIUserActivityRestoring]?) -> Void) -> Bool {
guard userActivity.activityType == NSUserActivityTypeBrowsingWeb,
let url = userActivity.webpageURL else {
return false
}
forwardURL(url)
return true
}
private func forwardURL(_ url: URL) {
guard let controller: FlutterViewController = window?.rootViewController as? FlutterViewController else { return }
let deepLinkChannel = FlutterMethodChannel(name: "deepLinkChannel", binaryMessenger: controller.binaryMessenger)
deepLinkChannel.invokeMethod("receiveDeepLink", arguments: url.absoluteString)
}
}
```
```kotlin
class MainActivity : FlutterActivity() {
override fun onCreate(savedInstanceState: Bundle?) {
super.onCreate(savedInstanceState)
handleDeepLink(intent)
}
override fun onNewIntent(intent: Intent) {
super.onNewIntent(intent)
handleDeepLink(intent)
}
private fun handleDeepLink(intent: Intent) {
val binaryMessenger = flutterEngine?.dartExecutor?.binaryMessenger
if (intent?.action == Intent.ACTION_VIEW && binaryMessenger != null) {
MethodChannel(binaryMessenger, "deepLinkChannel")
.invokeMethod("receivedDeepLink", intent?.data.toString())
}
}
}
```
Next, a callback function is used in the Dart layer to display an alert dialogue using the URL string data sent previously.
```dart
MethodChannel('deepLinkChannel').setMethodCallHandler((call) async {
deepLinkAlert(call.arguments, context);
});
void deepLinkAlert(String link, BuildContext context) {
showDialog(
context: context,
builder: (BuildContext context) {
return AlertDialog(
title: Text("Deep Link Alert"),
content: Text("Opened with deep link: $link"),
actions: [
TextButton(
child: Text("Close"),
onPressed: () {
Navigator.of(context).pop();
},
),
],
);
},
);
}
```
## Prerequisites
Before you can use this feature, you'll need to [integrate the Cordova Braze SDK](https://www.braze.com/docs/fr/fr/developer_guide/sdk_integration/?sdktab=cordova).
## Enabling push deep linking
By default, the Braze Cordova SDK doesn't automatically handle push deep linking from notifications. To enable push deep linking, add the following preferences to the `platform` element in your project's `config.xml` file.
```xml
```
```xml
```
To customize back stack behavior when deep links are followed, you can also add these optional preferences:
```xml
```
For a full list of available push configuration options, see [Optional configurations](https://www.braze.com/docs/fr/fr/developer_guide/sdk_integration?sdktab=cordova#optional).
# Guide sur la création de liens profonds iOS
Source: /docs/fr/developer_guide/push_notifications/ios_deep_linking_guide/index.md
# Guide sur la création de liens profonds iOS {#ios-deep-linking-guide}
> Ce guide vous aide à choisir la stratégie de création de liens profonds la mieux adaptée à votre application iOS, en fonction du canal de communication que vous utilisez et de votre recours ou non à un fournisseur de liens tiers tel que Branch.
Pour plus de détails sur l'implémentation, consultez [Création de liens profonds](https://www.braze.com/docs/fr/fr/developer_guide/push_notifications/deep_linking/?sdktab=swift). Pour la résolution des problèmes, consultez [Résolution des problèmes de création de liens profonds](https://www.braze.com/docs/fr/fr/developer_guide/push_notifications/deep_linking_troubleshooting/).
## Choisir un type de lien {#choosing-a-link-type}
Il existe trois méthodes pour gérer les liens provenant des messages Braze dans votre application iOS. Chacune fonctionne différemment et convient à différents canaux et cas d'utilisation.
| Type de lien | Exemple | Idéal pour | S'ouvre sans application installée ? |
|---|---|---|---|
| **Schéma personnalisé** | `myapp://products/123` | Notifications push, messages in-app, Content Cards | Non — le lien échoue |
| **Lien universel** | `https://myapp.com/products/123` | E-mails, SMS, canaux avec suivi des clics | Oui — bascule vers le web |
| **Ouvrir l'URL web dans l'application** | Toute URL `https://` | Affichage de contenu web dans une WebView modale | N/A — s'affiche dans la WebView |
{: .reset-td-br-1 .reset-td-br-2 .reset-td-br-3 .reset-td-br-4 aria-label="Choosing a link type" }
### Liens profonds avec schéma personnalisé {#custom-scheme-deep-links}
Les liens profonds avec schéma personnalisé (par exemple, `myapp://products/123`) ouvrent votre application directement sur un écran spécifique. Il s'agit de l'option la plus simple pour les canaux où les liens ne sont pas modifiés par un tiers.
**Utilisez des liens profonds avec schéma personnalisé lorsque :**
- Vous envoyez des notifications push, des messages in-app ou des Content Cards
- Le lien n'a pas besoin de fonctionner si l'application n'est pas installée
- Vous n'avez pas besoin du suivi des clics (encapsulation des liens par l'ESP pour les e-mails)
**N'utilisez pas de liens profonds avec schéma personnalisé lorsque :**
- Vous envoyez des e-mails — les ESP encapsulent les liens pour le suivi des clics, ce qui casse les schémas personnalisés
- Vous avez besoin que le lien redirige vers une page web si l'application n'est pas installée
### Liens universels {#universal-links}
Les liens universels (par exemple, `https://myapp.com/products/123`) sont des URL HTTPS standard qu'iOS peut rediriger vers votre application au lieu de les ouvrir dans un navigateur. Ils nécessitent une configuration côté serveur (un fichier AASA) et une configuration côté application (autorisation de domaines associés).
**Utilisez les liens universels lorsque :**
- Vous envoyez des e-mails. Votre ESP encapsule les liens pour le suivi des clics, les liens doivent donc être en HTTPS.
- Vous envoyez des SMS ou utilisez d'autres canaux où les liens sont encapsulés ou raccourcis.
- Vous avez besoin que le lien redirige vers une page web lorsque l'application n'est pas installée.
- Vous utilisez un fournisseur de liens tiers tel que Branch ou AppsFlyer.
**N'utilisez pas de liens universels lorsque :**
- Vous n'avez besoin que de liens profonds depuis des notifications push, des messages in-app ou des Content Cards. Les schémas personnalisés sont plus simples.
### « Ouvrir l'URL web dans l'application » {#open-web-url-inside-app}
Cette option ouvre une page web dans une WebView modale au sein de votre application. Tout est géré par le SDK Braze via `Braze.WebViewController` — vous n'avez pas besoin d'écrire de code de gestion des URL.
**Utilisez « Ouvrir l'URL web dans l'application » lorsque :**
- Vous souhaitez afficher une page web (telle qu'une promotion ou un article) sans quitter votre application.
- L'URL est une page web HTTPS standard, et non un lien profond vers un écran spécifique de l'application.
**N'utilisez pas « Ouvrir l'URL web dans l'application » lorsque :**
- Vous devez naviguer vers une vue spécifique dans votre application. Utilisez plutôt un schéma personnalisé ou un lien universel.
- La page web nécessite une authentification ou comporte des en-têtes de politique de sécurité du contenu qui empêchent l'intégration.
## Ce dont vous avez besoin pour chaque type de lien {#what-you-need-for-each-link-type}
### Liens profonds avec schéma personnalisé
| Prérequis | Détails |
|---|---|
| Fichier AASA | Non requis |
| `Info.plist` | Enregistrez votre schéma sous `CFBundleURLTypes` et ajoutez-le à `LSApplicationQueriesSchemes` |
| Méthode déléguée de l'application | Implémentez `application(_:open:options:)` pour analyser l'URL et naviguer |
| Configuration du SDK Braze | Aucune — le SDK ouvre les URL avec schéma personnalisé par défaut |
{: .reset-td-br-1 .reset-td-br-2 aria-label="Custom scheme deep links" }
### Liens universels
| Prérequis | Détails |
|---|---|
| Fichier AASA | Requis — hébergez-le à l'adresse `https://yourdomain.com/.well-known/apple-app-site-association` |
| Domaines associés | Ajoutez `applinks:yourdomain.com` dans Xcode sous **Signing & Capabilities** |
| Méthode déléguée de l'application | Implémentez `application(_:continue:restorationHandler:)` pour gérer `NSUserActivity` |
| Configuration du SDK Braze | Définissez `configuration.forwardUniversalLinks = true` |
| BrazeDelegate (facultatif) | Implémentez `braze(_:shouldOpenURL:)` pour un routage personnalisé (par exemple, Branch) |
{: .reset-td-br-1 .reset-td-br-2 aria-label="Universal links" }
**Important:**
Si vous envoyez des e-mails via Braze, votre ESP (SendGrid, SparkPost ou Amazon SES) encapsule les liens dans un domaine de suivi des clics. Vous devez héberger le fichier AASA sur votre domaine de suivi des clics également, et pas uniquement sur votre domaine principal. Pour une configuration complète, consultez [Liens universels et App Links](https://www.braze.com/docs/fr/fr/user_guide/channels/email/customize/universal_links_and_app_links/).
### « Ouvrir l'URL web dans l'application »
| Prérequis | Détails |
|---|---|
| Fichier AASA | Non requis |
| Méthode déléguée de l'application | Non requis — le SDK gère cela automatiquement |
| Configuration du SDK Braze | Aucune — sélectionnez **Open Web URL Inside App** dans l'éditeur de Campaign |
{: .reset-td-br-1 .reset-td-br-2 aria-label="Open Web URL Inside App" }
## Quand avez-vous besoin d'un fichier AASA {#when-aasa}
Un fichier Apple App Site Association (AASA) n'est requis que lorsque vous utilisez des **liens universels**. Il indique à iOS quelles URL votre application peut gérer.
Vous avez besoin d'un fichier AASA lorsque :
- Vous envoyez des liens profonds dans des campagnes par e-mail (car les ESP encapsulent les liens dans des URL HTTPS de suivi des clics).
- Vous envoyez des liens profonds dans des campagnes SMS (car les liens peuvent être raccourcis en URL HTTPS).
- Vous utilisez Branch, AppsFlyer ou un autre fournisseur de liens (car ils utilisent leurs propres domaines HTTPS).
- Vous utilisez des liens universels depuis des notifications push, des messages in-app ou des Content Cards (moins courant, mais possible avec `forwardUniversalLinks = true`).
Vous n'avez pas besoin d'un fichier AASA lorsque :
- Vous n'utilisez que des liens profonds avec schéma personnalisé (par exemple, `myapp://`) depuis des notifications push, des messages in-app ou des Content Cards.
- Vous utilisez l'option **Open Web URL Inside App**.
Pour les instructions de configuration AASA, consultez [Liens universels et App Links](https://www.braze.com/docs/fr/fr/user_guide/message_building_by_channel/email/universal_links/#setting-up-universal-links-and-app-links).
## Quand avez-vous besoin de code applicatif pour gérer les liens {#when-app-code}
La méthode déléguée que vous implémentez dépend du type de lien que vous utilisez :
| Méthode déléguée | Gère | Quand l'implémenter |
|---|---|---|
| `application(_:open:options:)` | Liens profonds avec schéma personnalisé (`myapp://`) | Vous utilisez des liens profonds avec schéma personnalisé depuis n'importe quel canal |
| `application(_:continue:restorationHandler:)` | Liens universels (`https://`) | Vous utilisez des liens universels depuis des e-mails, des SMS ou avec `forwardUniversalLinks = true` |
| `BrazeDelegate.braze(_:shouldOpenURL:)` | Toutes les URL ouvertes par le SDK | Vous avez besoin d'une logique de routage personnalisée (par exemple, Branch, traitement conditionnel, analytique) |
{: .reset-td-br-1 .reset-td-br-2 .reset-td-br-3 aria-label="When you need app code to handle links #when-app-code" }
**Tip:**
Si vous utilisez un fournisseur de liens tiers tel que Branch, implémentez `BrazeDelegate.braze(_:shouldOpenURL:)` pour intercepter les URL et les transmettre au SDK du fournisseur. Consultez [Branch pour la création de liens profonds](https://www.braze.com/docs/fr/fr/partners/message_orchestration/deeplinking/branch_for_deeplinking/) pour un exemple complet.
## Utiliser Branch avec Braze {#branch}
Si vous utilisez [Branch](https://www.braze.com/docs/fr/fr/partners/message_orchestration/deeplinking/branch_for_deeplinking/) comme fournisseur de liens, votre configuration nécessite quelques étapes supplémentaires par rapport à une configuration de lien universel standard :
1. **SDK Branch** : intégrez le SDK Branch en suivant [la documentation de Branch](https://help.branch.io/developers-hub/docs/native-sdks-overview).
2. **Domaines associés** : ajoutez votre domaine Branch (par exemple, `applinks:yourapp.app.link`) dans Xcode sous **Signing & Capabilities**.
3. **BrazeDelegate** : implémentez `braze(_:shouldOpenURL:)` pour router les liens Branch vers le SDK Branch au lieu de laisser Braze les gérer directement.
4. **Transfert des liens universels** : définissez `configuration.forwardUniversalLinks = true` dans la configuration du SDK Braze.
Pour plus de détails sur l'implémentation et des conseils de débogage, consultez [Branch pour la création de liens profonds](https://www.braze.com/docs/fr/fr/partners/message_orchestration/deeplinking/branch_for_deeplinking/).
# Résolution des problèmes de création de liens profonds
Source: /docs/fr/developer_guide/push_notifications/deep_linking_troubleshooting/index.md
# Résolution des problèmes de création de liens profonds {#deep-linking-troubleshooting}
> Cette page traite des problèmes courants liés à la création de liens profonds sur iOS et explique comment les diagnostiquer. Pour obtenir de l'aide afin de choisir le type de lien approprié, consultez le [guide de création de liens profonds iOS](https://www.braze.com/docs/fr/fr/developer_guide/push_notifications/ios_deep_linking_guide/). Pour les détails d'implémentation, consultez [Création de liens profonds](https://www.braze.com/docs/fr/fr/developer_guide/push_notifications/deep_linking/?sdktab=swift).
## Le lien profond de schéma personnalisé n'ouvre pas la vue correcte {#custom-scheme-deep-link-doesnt-open-the-correct-view}
Si un lien profond de schéma personnalisé (par exemple, `myapp://products/123`) ouvre votre application mais ne navigue pas vers l'écran souhaité :
1. **Vérifiez que le schéma est enregistré.** Dans Xcode, vérifiez que votre schéma est répertorié sous `CFBundleURLTypes` dans `Info.plist`.
2. **Vérifiez votre gestionnaire.** Définissez un point d'arrêt dans `application(_:open:options:)` pour confirmer qu'il est bien appelé et inspectez le paramètre `url`.
3. **Testez le lien de manière indépendante.** Exécutez la commande suivante depuis le terminal pour tester le lien profond en dehors de Braze :
```bash
xcrun simctl openurl booted "myapp://products/123"
```
Si le lien ne fonctionne pas ici, le problème provient de la gestion des URL de votre application, et non de Braze.
4. **Vérifiez le format de l'URL.** Vérifiez que l'URL de votre campagne correspond à ce que votre gestionnaire attend. Les erreurs courantes incluent des composants de chemin manquants ou une casse incorrecte.
## Le lien universel s'ouvre dans Safari au lieu de l'application {#universal-link-opens-in-safari-instead-of-the-app}
Si un lien universel (par exemple, `https://myapp.com/products/123`) s'ouvre dans Safari au lieu de votre application :
### Vérifier le droit Associated Domains {#verify-the-associated-domains-entitlement}
Dans Xcode, accédez à la cible de votre application > **Signing & Capabilities** et vérifiez que `applinks:yourdomain.com` est répertorié sous **Associated Domains**.
### Valider le fichier AASA {#validate-the-aasa-file}
Votre fichier Apple App Site Association (AASA) doit être hébergé à l'un des emplacements suivants :
- `https://yourdomain.com/.well-known/apple-app-site-association`
- `https://yourdomain.com/apple-app-site-association`
Vérifiez les éléments suivants :
- Le fichier est servi via HTTPS avec un certificat valide.
- Le `Content-Type` est `application/json`.
- La taille du fichier est inférieure à 128 Ko.
- L'`appID` correspond à votre Team ID et Bundle ID (par exemple, `ABCDE12345.com.example.myapp`).
- Le tableau `paths` ou `components` inclut les modèles d'URL attendus.
Vous pouvez valider votre AASA à l'aide de [l'outil de validation de recherche d'Apple](https://search.developer.apple.com/appsearch-validation-tool/) ou en exécutant :
```bash
swcutil dl -d yourdomain.com
```
### Vérifier l'`AppDelegate` {#check-the-appdelegate}
Vérifiez que `application(_:continue:restorationHandler:)` est implémenté dans votre `AppDelegate` et gère correctement le `NSUserActivity` :
```swift
func application(_ application: UIApplication,
continue userActivity: NSUserActivity,
restorationHandler: @escaping ([UIUserActivityRestoring]?) -> Void) -> Bool {
guard userActivity.activityType == NSUserActivityTypeBrowsingWeb,
let url = userActivity.webpageURL else {
return false
}
// Handle the URL
return true
}
```
### Vérifier la configuration du SDK Braze {#verify-braze-sdk-configuration}
Si vous utilisez des liens universels à partir de notifications push, de messages in-app ou de Content Cards envoyés par Braze, vérifiez que `forwardUniversalLinks` est activé :
```swift
let configuration = Braze.Configuration(apiKey: "", endpoint: "")
configuration.forwardUniversalLinks = true
```
**Note:**
Le transfert de liens universels nécessite l'accès aux droits de l'application. Lors de l'exécution dans un simulateur, ces droits ne sont pas directement disponibles. Pour tester dans un simulateur, ajoutez le fichier `.entitlements` à la phase de build **Copy Bundle Resources**.
### Vérifier le problème lié à l'appui long {#check-for-the-long-press-issue}
Si vous appuyez longuement sur un lien universel et sélectionnez **Open**, iOS peut « rompre » l'association du lien universel pour ce domaine. Il s'agit d'un comportement connu d'iOS. Pour le réinitialiser, appuyez longuement sur le lien à nouveau et sélectionnez **Open in [App Name]**.
## Le lien profond provenant d'un e-mail n'ouvre pas l'application {#deep-link-from-email-doesnt-open-the-app}
Les liens contenus dans les e-mails passent par le système de suivi des clics de votre ESP, qui encapsule les liens dans un domaine de suivi (par exemple, `https://click.yourdomain.com/...`). Pour que les liens universels fonctionnent à partir des e-mails, vous devez configurer le fichier AASA sur votre domaine de suivi des clics, et pas uniquement sur votre domaine principal.
### Vérifier le fichier AASA du domaine de suivi des clics {#verify-click-tracking-domain-aasa}
1. Identifiez votre domaine de suivi des clics à partir des paramètres de votre ESP (SendGrid, SparkPost ou Amazon SES).
2. Hébergez le fichier AASA à l'adresse `https://your-click-tracking-domain/.well-known/apple-app-site-association`.
3. Assurez-vous que le fichier AASA sur le domaine de suivi des clics contient le même `appID` et des modèles de chemin valides.
Pour obtenir des instructions de configuration spécifiques à chaque ESP, consultez [Liens universels et App Links](https://www.braze.com/docs/fr/fr/user_guide/channels/email/customize/universal_links_and_app_links/).
### Vérifier la chaîne de redirection {#check-the-redirect-chain}
Certains ESP effectuent une redirection de l'URL de suivi des clics vers votre URL finale. Les liens universels ne fonctionnent que si iOS reconnaît le domaine *initial* (le domaine de suivi des clics) comme étant associé à votre application. Si la redirection contourne la vérification AASA, le lien s'ouvre dans Safari.
Pour tester :
1. Envoyez-vous un e-mail de test.
2. Appuyez longuement sur le lien et inspectez l'URL — il s'agit de l'URL de suivi des clics.
3. Vérifiez que ce domaine dispose d'un fichier AASA valide.
## Le lien profond fonctionne depuis les notifications push mais pas depuis les messages in-app (ou inversement) {#deep-link-works-from-push-but-not-from-in-app-messages-or-vice-versa}
### Vérifier le BrazeDelegate {#check-the-brazedelegate}
Si vous implémentez `BrazeDelegate.braze(_:shouldOpenURL:)`, vérifiez qu'il gère les liens de manière cohérente sur tous les canaux. Le paramètre `context` inclut le canal source. Recherchez toute logique conditionnelle susceptible de filtrer accidentellement les liens provenant de canaux spécifiques.
### Activer la journalisation détaillée {#enable-verbose-logging}
[Activez la journalisation détaillée](https://www.braze.com/docs/fr/fr/developer_guide/sdk_integration/verbose_logging/) et reproduisez le problème. Recherchez l'entrée de journal `Opening` :
```
Opening '':
- channel:
- useWebView:
- isUniversalLink:
```
Comparez les résultats du journal pour le canal fonctionnel et le canal non fonctionnel. Les différences dans `useWebView` ou `isUniversalLink` indiquent comment le SDK interprète le lien différemment.
### Vérifier les délégués d'affichage personnalisés {#check-for-custom-display-delegates}
Si vous utilisez un délégué d'affichage de messages in-app personnalisé ou un gestionnaire de clics sur les Content Cards, vérifiez qu'il transmet correctement les événements de lien au SDK Braze pour traitement.
## « Ouvrir l'URL Web dans l'application » affiche une page vide ou défectueuse {#open-web-url-inside-app-shows-a-blank-or-broken-page}
Si la sélection de **Open Web URL Inside App** affiche une WebView vide ou défectueuse :
1. **Vérifiez que l'URL utilise HTTPS.** La WebView du SDK nécessite des URL conformes à ATS. Les liens HTTP échouent silencieusement.
2. **Vérifiez les en-têtes Content Security Policy.** Si la page Web cible définit `X-Frame-Options: DENY` ou une `Content-Security-Policy` restrictive, elle bloque le rendu dans une WebView.
3. **Vérifiez les redirections vers des schémas personnalisés.** Si la page Web redirige vers un schéma personnalisé (par exemple, `myapp://`), la WebView ne peut pas le gérer.
4. **Testez l'URL dans Safari.** Si la page ne se charge pas dans Safari sur l'appareil, elle ne se chargera pas non plus dans la WebView.
## Résolution des problèmes de Branch avec Braze {#branch}
Si vous utilisez [Branch](https://www.braze.com/docs/fr/fr/partners/message_orchestration/deeplinking/branch_for_deeplinking/) comme fournisseur de liens :
### Vérifier que le BrazeDelegate route vers Branch {#verify-the-brazedelegate-routes-to-branch}
Votre `BrazeDelegate` doit intercepter les liens Branch et les transmettre au SDK Branch. Vérifiez les éléments suivants :
```swift
func braze(_ braze: Braze, shouldOpenURL context: Braze.URLContext) -> Bool {
if let host = context.url.host, host.contains("app.link") {
// Route to Branch SDK
Branch.getInstance.handleDeepLink(context.url)
return false
}
// Let Braze handle other links
return true
}
```
Si `shouldOpenURL` retourne `true` pour les liens Branch, Braze les traite directement au lieu de les acheminer vers Branch.
### Vérifier le domaine du lien Branch {#check-branch-link-domain}
Vérifiez que le domaine Branch dans votre `BrazeDelegate` correspond à votre domaine de lien Branch réel. Branch utilise plusieurs formats de domaine :
- `yourapp.app.link` (par défaut)
- `yourapp-alternate.app.link` (alternatif)
- Domaines personnalisés (s'ils sont configurés dans le tableau de bord Branch)
### Activer la journalisation des deux SDK {#enable-both-sdks-logging}
Pour diagnostiquer où le lien se rompt dans la chaîne :
1. Activez la [journalisation détaillée Braze](https://www.braze.com/docs/fr/fr/developer_guide/sdk_integration/verbose_logging/) — recherchez les entrées `Opening '':` pour vérifier que le SDK a bien reçu le lien.
2. Activez le [mode test Branch](https://help.branch.io/developers-hub/docs/ios-basic-integration#test-deep-linking) — consultez le tableau de bord Branch pour les événements de clic sur les liens.
1. Activez la [journalisation détaillée Braze](https://www.braze.com/docs/fr/fr/developer_guide/sdk_integration/verbose_logging/). Recherchez les entrées `Opening '':` pour vérifier que le SDK a bien reçu le lien.
2. Activez le [mode test Branch](https://help.branch.io/developers-hub/docs/ios-basic-integration#test-deep-linking). Consultez le tableau de bord Branch pour les événements de clic sur les liens.
3. Si Braze enregistre le lien mais que Branch ne détecte aucun clic, la logique de routage du `BrazeDelegate` est probablement en cause.
### Vérifier la configuration du tableau de bord Branch {#check-branch-dashboard-configuration}
Dans le tableau de bord Branch, vérifiez :
- Le **Bundle ID** et le **Team ID** de votre application correspondent à votre projet Xcode.
- Vos **Associated Domains** incluent le domaine du lien Branch.
- Votre fichier AASA Branch est valide (Branch l'héberge automatiquement sur les domaines `app.link`).
### Tester les liens Branch de manière indépendante {#test-branch-links-independently}
Testez le lien Branch en dehors de Braze pour isoler le problème :
1. Ouvrez le lien Branch dans Safari sur votre appareil. S'il n'ouvre pas l'application, le problème provient de votre configuration Branch ou AASA, et non de Braze.
2. Collez le lien Branch dans l'application Notes et appuyez dessus. Les liens universels fonctionnent de manière plus fiable depuis Notes que depuis la barre d'adresse de Safari.
## Conseils généraux de débogage {#general-debugging-tips}
### Utiliser la journalisation détaillée {#use-verbose-logging}
[Activez la journalisation détaillée](https://www.braze.com/docs/fr/fr/developer_guide/sdk_integration/verbose_logging/) pour observer précisément comment le SDK traite les liens. Entrées clés à rechercher :
| Entrée de journal | Signification |
|---|---|
| `Opening '': - channel: notification` | Le SDK traite un lien provenant d'une notification push |
| `Opening '': - channel: inAppMessage` | Le SDK traite un lien provenant d'un message in-app |
| `Opening '': - channel: contentCard` | Le SDK traite un lien provenant d'une Content Card |
| `useWebView: true` | Le SDK ouvre l'URL dans la WebView intégrée à l'application |
| `isUniversalLink: true` | Le SDK a identifié l'URL comme un lien universel |
{: .reset-td-br-1 .reset-td-br-2 aria-label="Utiliser la journalisation détaillée" }
Pour plus de détails sur la lecture de ces journaux, consultez [Lecture des journaux détaillés](https://www.braze.com/docs/fr/fr/developer_guide/sdk_integration/verbose_logging/).
### Tester les liens de manière isolée {#test-links-in-isolation}
Avant de tester via Braze, vérifiez que votre lien profond ou lien universel fonctionne de manière autonome :
- **Schéma personnalisé** : Exécutez `xcrun simctl openurl booted "myapp://path"` dans le terminal.
- **Lien universel** : Collez l'URL dans l'application Notes sur un appareil physique et appuyez dessus. Ne testez pas depuis la barre d'adresse de Safari, car iOS traite les URL saisies différemment des liens sur lesquels on appuie.
- **Lien Branch** : Ouvrez le lien Branch depuis l'application Notes sur un appareil.
### Tester sur un appareil physique {#test-on-a-physical-device}
Les liens universels ont une prise en charge limitée dans le simulateur iOS. Testez toujours sur un appareil physique pour obtenir des résultats précis. Si vous devez tester dans un simulateur, ajoutez le fichier `.entitlements` à la phase de build **Copy Bundle Resources**.
# Configurer les notifications push silencieuses pour le SDK Braze
Source: /docs/fr/developer_guide/push_notifications/silent/index.md
# Notifications push silencieuses
> Découvrez comment configurer des notifications push silencieuses pour le SDK de Braze.
## Prerequisites
Before you can use this feature, you'll need to [integrate the Android Braze SDK](https://www.braze.com/docs/fr/fr/developer_guide/sdk_integration/?sdktab=android). You'll also need to [set up push notifications](https://www.braze.com/docs/fr/fr/developer_guide/push_notifications/?sdktab=android).
## Setting up silent push notifications
Silent notifications are available through the Braze [Messaging API](https://www.braze.com/docs/fr/fr/api/endpoints/messaging/). To take advantage of them, you need to set the `send_to_sync` flag to `true` within the [Android push object](https://www.braze.com/docs/fr/fr/api/objects_filters/messaging/android_object/) and ensure there are no `title` or `alert` fields set as it will cause errors when used alongside `send_to_sync`—however, you can include data `extras` within the object.
## Prerequisites
Before you can use this feature, you'll need to [integrate the Swift Braze SDK](https://www.braze.com/docs/fr/fr/developer_guide/sdk_integration/?sdktab=swift). You'll also need to [set up push notifications](https://www.braze.com/docs/fr/fr/developer_guide/push_notifications/?sdktab=swift).
## iOS limitations
The iOS operating system may gate notifications for some features. Note that if you are experiencing difficulties with these features, the iOS's silent notifications gate might be the cause. For more details, refer to Apple's [instance method](https://developer.apple.com/documentation/uikit/uiapplicationdelegate/1623013-application) and [unreceived notifications](https://developer.apple.com/library/content/technotes/tn2265/_index.html#//apple_ref/doc/uid/DTS40010376-CH1-TNTAG23) documentation.
## Setting up silent push notifications
To use silent push notifications to trigger background work, you must configure your app to receive notifications even when it is in the background. To do this, add the Background Modes capability using the **Signing & Capabilities** pane to the main app target in Xcode. Select the **Remote notifications** checkbox.

Even with the remote notifications background mode enabled, the system will not launch your app into the background if the user has force-quit the application. The user must explicitly launch the application or reboot the device before the app can be automatically launched into the background by the system.
For more information, refer to [pushing background updates](https://developer.apple.com/documentation/usernotifications/setting_up_a_remote_notification_server/pushing_background_updates_to_your_app) and the `application:didReceiveRemoteNotification:fetchCompletionHandler:` [documentation](https://developer.apple.com/library/ios/documentation/UIKit/Reference/UIApplicationDelegate_Protocol/index.html#//apple_ref/occ/intfm/UIApplicationDelegate/application:didReceiveRemoteNotification:fetchCompletionHandler:).
## Sending silent push notifications
To send a silent push notification, set the `content-available` flag to `1` in a push notification payload.
**Note:**
What Apple calls a remote notification is just a normal push notification with the `content-available` flag set.
The `content-available` flag can be set in the Braze dashboard as well as within our [Apple push object](https://www.braze.com/docs/fr/fr/api/objects_filters/messaging/apple_object/) in the [messaging API](https://www.braze.com/docs/fr/fr/api/endpoints/messaging/).
**Warning:**
Attaching both a title and body with `content-available=1` is not recommended because it can lead to undefined behavior. To ensure that a notification is truly silent, exclude both the title and body when setting the `content-available` flag to `1.` For further details, refer to the official [Apple documentation on background updates](https://developer.apple.com/documentation/usernotifications/setting_up_a_remote_notification_server/pushing_background_updates_to_your_app).

When sending a silent push notification, you might also want to include some data in the notification payload, so your application can reference the event. This could save you a few networking requests and increase the responsiveness of your app.
## Ignoring internal push notifications
Braze uses silent push notifications to internally handle certain advanced features, such as uninstall tracking. If your app takes automatic actions on application launches or background pushes, consider gating that activity so it's not triggered by any internal push notifications.
For example, if you have logic that calls your servers for new content upon every background push or application launch, you may want to prevent triggering Braze’s internal pushes to avoid unnecessary network traffic. Because Braze sends certain kinds of internal pushes to all users at approximately the same time, significant server load may occur if on-launch network calls from internal pushes are not gated.
### Step 1: Check your app for automatic actions
Check your application for automatic actions in the following places and update your code to ignore Braze’s internal pushes:
1. **Push Receivers.** Background push notifications will call `application:didReceiveRemoteNotification:fetchCompletionHandler:` on the `UIApplicationDelegate`.
2. **Application Delegate.** Background pushes can launch [suspended](https://developer.apple.com/documentation/uikit/app_and_environment/managing_your_app_s_life_cycle) apps into the background, triggering the `application:willFinishLaunchingWithOptions:` and `application:didFinishLaunchingWithOptions:` methods on your `UIApplicationDelegate`. Check the `launchOptions` of these methods to determine if the application has been launched from a background push.
### Step 2: Use the internal push utility method
You can use the static utility method in `Braze.Notifications` to check if your app has received or was launched by a Braze internal push. [`Braze.Notifications.isInternalNotification(_:)`](https://braze-inc.github.io/braze-swift-sdk/documentation/brazekit/braze/notifications-swift.class/isinternalnotification(_:)) returns `true` for all Braze internal push notifications, which include uninstall tracking and [Feature flags](https://www.braze.com/docs/fr/fr/user_guide/messaging/feature_flags/) sync notifications.
For example:
```swift
func application(_ application: UIApplication,
didReceiveRemoteNotification userInfo: [AnyHashable : Any],
fetchCompletionHandler completionHandler: @escaping (UIBackgroundFetchResult) -> Void) {
if (!Braze.Notifications.isInternalNotification(userInfo)) {
// Gated logic here (for example pinging server for content)
}
}
```
```objc
- (void)application:(UIApplication *)application didReceiveRemoteNotification:(NSDictionary *)userInfo fetchCompletionHandler:(void (^)(UIBackgroundFetchResult result))completionHandler {
if (![BRZNotifications isInternalNotification:userInfo]) {
// Gated logic here (for example pinging server for content)
}
}
```
## Prerequisites
Before you can use this feature, you'll need to [integrate the Android Braze SDK](https://www.braze.com/docs/fr/fr/developer_guide/sdk_integration/?sdktab=android). You'll also need to [set up push notifications](https://www.braze.com/docs/fr/fr/developer_guide/push_notifications/?sdktab=android).
## Setting up silent push notifications
Silent notifications are available through the Braze [Messaging API](https://www.braze.com/docs/fr/fr/api/endpoints/messaging/). To take advantage of them, you need to set the `send_to_sync` flag to `true` within the [Android push object](https://www.braze.com/docs/fr/fr/api/objects_filters/messaging/android_object/) and ensure there are no `title` or `alert` fields set as it will cause errors when used alongside `send_to_sync`—however, you can include data `extras` within the object.
# Configurer des notifications push riches pour le SDK Braze
Source: /docs/fr/developer_guide/push_notifications/rich/index.md
# Notifications push riches
> Découvrez comment mettre en place des notifications push riches pour le SDK de Braze.
## Prerequisites
Before you can use this feature, you'll need to [integrate the Swift Braze SDK](https://www.braze.com/docs/fr/fr/developer_guide/sdk_integration/?sdktab=swift). You'll also need to [set up push notifications](https://www.braze.com/docs/fr/fr/developer_guide/push_notifications/?sdktab=swift).
## Setting up rich push notifications
### Step 1: Creating a service extension
To create a [notification service extension](https://developer.apple.com/reference/usernotifications/unnotificationserviceextension), navigate to **File > New > Target** in Xcode and select **Notification Service Extension**.
{: style="max-width:90%"}
Ensure that **Embed In Application** is set to embed the extension in your application.
### Step 2: Setting up the notification service extension
A notification service extension is its own binary that is bundled with your app. It must be set up in the [Apple Developer Portal](https://developer.apple.com) with its own app ID and provisioning profile.
The notification service extension's bundle ID must be distinct from your main app target's bundle ID. For example, if your app's bundle ID is `com.company.appname`, you can use `com.company.appname.AppNameServiceExtension` for your service extension.
### Step 3: Adding an App Group
In Xcode, add the App Groups capability from the **Signing & Capabilities** pane to your main app target as well as the Notification Service Extension target. Then, click the **+** button. Use your app's bundle ID to create the app group. For example, if your app's bundle ID is `com.company.appname`, you can name your app group `group.com.company.appname.xyz`.
**Important:**
App Groups in this context refer to Apple's [App Groups Entitlement](https://developer.apple.com/documentation/bundleresources/entitlements/com_apple_security_application-groups) and not your Braze workspace (previously app group) ID.
You need a shared App Group so your main app and the Notification Service Extension can access shared data. If you do not add your app to an app group, your app may fail to populate certain fields from the push payload and will not work fully as expected.
### Step 4: Integrating rich push notifications
For a step-by-step guide on integrating rich push notifications with `BrazeNotificationService`, refer to our [tutorial](https://braze-inc.github.io/braze-swift-sdk/tutorials/braze/b2-rich-push-notifications).
To see a sample, refer to the usage in [`NotificationService`](https://github.com/braze-inc/braze-swift-sdk/blob/main/Examples/Swift/Sources/PushNotificationsServiceExtension/NotificationService.swift) of our Examples app.
#### Adding the rich push framework to your app
After following the [Swift Package Manager integration guide](https://www.braze.com/docs/fr/fr/developer_guide/platform_integration_guides/swift/sdk_integration/?tab=swift%20package%20manager/), add `BrazeNotificationService` to your `Notification Service Extension` by doing the following:
1. In Xcode, under frameworks and libraries, select the add icon to add a framework.

2. Select the "BrazeNotificationService" framework.

Add the following to your Podfile:
```ruby
target 'YourAppTarget' do
pod 'BrazeKit'
pod 'BrazeUI'
pod 'BrazeLocation'
end
target 'YourNotificationServiceExtensionTarget' do
pod 'BrazeNotificationService'
end
# Only include the below if you want to also integrate Push Stories
target 'YourNotificationContentExtensionTarget' do
pod 'BrazePushStory'
end
```
**Note:**
For instructions to implement Push Stories, see the [documentation](https://www.braze.com/docs/fr/fr/developer_guide/platform_integration_guides/swift/push_notifications/push_story/?tab=swift%20package%20manager).
After updating the Podfile, navigate to the directory of your Xcode app project within your terminal and run `pod install`.
To add `BrazeNotificationService.xcframework` to your `Notification Service Extension`, see [Manual integration](https://www.braze.com/docs/fr/fr/developer_guide/platform_integration_guides/swift/sdk_integration?tab=manual/).

#### Using your own UNNotificationServiceExtension
If you need to use your own UNNotificationServiceExtension, you can instead call [`brazeHandle`](https://braze-inc.github.io/braze-swift-sdk/documentation/brazenotificationservice/brazehandle(request:contenthandler:)) in your `didReceive` method.
```swift
import BrazeNotificationService
import UserNotifications
class NotificationService: UNNotificationServiceExtension {
override func didReceive(
_ request: UNNotificationRequest,
withContentHandler contentHandler: @escaping (UNNotificationContent) -> Void
) {
if brazeHandle(request: request, contentHandler: contentHandler) {
return
}
// Custom handling here
contentHandler(request.content)
}
}
```
### Step 5: Configuring the App Group in Braze
Before initializing Braze, assign the name of your app group to your Braze configuration's [`push.appGroup`](https://braze-inc.github.io/braze-swift-sdk/documentation/brazekit/braze/configuration-swift.class/push-swift.class/appgroup) property.
```swift
let configuration = Braze.Configuration(apiKey: "",
endpoint: "")
configuration.push.appGroup = "REPLACE_WITH_APPGROUP"
let braze = Braze(configuration: configuration)
```
### Step 6: Creating a rich notification in your dashboard
Your marketing team can also create rich notifications from the dashboard. Create a push notification through the push composer and attach an image or GIF, or provide a URL that hosts an image, GIF, or video. Note that assets are downloaded on the receipt of push notifications, so you should plan for large, synchronous spikes in requests if you are hosting your content.
## Prerequisites
Before you can use this feature, you'll need to [integrate the Cordova Braze SDK](https://www.braze.com/docs/fr/fr/developer_guide/sdk_integration/?sdktab=cordova). You'll also need to [set up push notifications](https://www.braze.com/docs/fr/fr/developer_guide/push_notifications/?sdktab=cordova).
## Setting up rich push notifications
### Step 1: Create a notification service extension
In your Xcode project, create a notification service extension. For a full walkthrough, see [iOS Rich Push Notifications Tutorial](https://braze-inc.github.io/braze-swift-sdk/tutorials/braze/b2-rich-push-notifications).
### Step 2: Add a new target
Open your Podfile and add `BrazeNotificationService` to the notification service extension target [you just created](#cordova_step-1-create-a-notification-service-extension). If `BrazeNotificationService` is already added to a target, remove it before continuing. To avoid duplicate symbol errors, use static linking.
```ruby
target 'NOTIFICATION_SERVICE_EXTENSION' do
use_frameworks! :linkage => :static
pod 'BrazeNotificationService'
end
```
Replace `NOTIFICATION_SERVICE_EXTENSION` with the name of your notification service extension. Your Podfile should be similar to the following:
```ruby
target 'MyAppRichNotificationService' do
use_frameworks! :linkage => :static
pod 'BrazeNotificationService'
end
```
### Step 3: Reinstall your CocoaPods dependencies
In the terminal, go to your project's iOS directory and reinstall your CocoaPod dependencies.
```bash
cd PATH_TO_PROJECT/platform/ios
pod install
```
## Prerequisites
Before you can use this feature, you'll need to [integrate the React Native Braze SDK](https://www.braze.com/docs/fr/fr/developer_guide/sdk_integration/?sdktab=react%20native). You'll also need to [set up push notifications](https://www.braze.com/docs/fr/fr/developer_guide/push_notifications/?sdktab=react%20native).
## Using Expo to enable rich push notifications
For the React Native SDK, **rich push notifications are available for Android by default**.
To enable rich push notifications on iOS using Expo, configure the `enableBrazeIosRichPush` property to `true` in your `expo.plugins` object in `app.json`:
```json
{
"expo": {
"plugins": [
[
"@braze/expo-plugin",
{
...
"enableBrazeIosRichPush": true
}
]
]
}
}
```
Lastly, add the bundle identifier for this app extension to your project's credentials configuration: `.BrazeExpoRichPush`. For further details on this process, refer to [Using app extensions with Expo Application Services](https://www.braze.com/docs/fr/fr/developer_guide/push_notifications/?sdktab=react%20native#reactnative_app-extensions).
# Configurer le contenu push pour le SDK Braze
Source: /docs/fr/developer_guide/push_notifications/push_stories/index.md
# Contenu push
> Découvrez comment configurer les contenus push pour le SDK de Braze.
## Prerequisites
Before you can use this feature, you'll need to [integrate the Swift Braze SDK](https://www.braze.com/docs/fr/fr/developer_guide/sdk_integration/?sdktab=swift). You'll also need to [set up push notifications](https://www.braze.com/docs/fr/fr/developer_guide/push_notifications/?sdktab=swift), which includes implementing the `UNNotification` framework.
The following minimum SDK version is required to receive Push Stories:
## Setting up Push Stories
### Step 1: Adding the Notification Content Extension target {#notification-content-extension}
In your app project, go to menu **File > New > Target** and add a new `Notification Content Extension` target and activate it.

Xcode should generate a new target for you and create files automatically for you including:
- `NotificationViewController.swift`
- `MainInterface.storyboard`
### Step 2: Enable capabilities {#enable-capabilities}
In Xcode, add the Background Modes capability using the **Signing & Capabilities** pane to the main app target. Select both the **Background fetch** and **Remote notifications** checkboxes.

#### Adding an App Group
Additionally, from the **Signing & Capabilities** pane in Xcode, add the App Groups capability to your main app target as well as the Notification Content Extension targets. Then, click the **+** button. Use your app's bundle ID to create the app group. For example, if your app's bundle ID is `com.company.appname`, you can name your app group `group.com.company.appname.xyz`.
**Important:**
App Groups in this context refer to Apple's [App Groups Entitlement](https://developer.apple.com/documentation/bundleresources/entitlements/com_apple_security_application-groups) and not your Braze workspace (previously app group) ID.
If you do not add your app to an App Group, your app may fail to populate certain fields from the push payload and will not work fully as expected.
### Step 3: Adding the Push Story framework to your app {#enable-capabilities}
After following the [Swift Package Manager integration guide](https://www.braze.com/docs/fr/fr/developer_guide/platform_integration_guides/swift/sdk_integration/?tab=swift%20package%20manager/), add `BrazePushStory` to your `Notification Content Extension`:


Add the following line to your Podfile:
```ruby
target 'YourAppTarget' do
pod 'BrazeKit'
pod 'BrazeUI'
pod 'BrazeLocation'
end
target 'YourNotificationContentExtensionTarget' do
pod 'BrazePushStory'
end
# Only include the below if you want to also integrate Rich Push
target 'YourNotificationServiceExtensionTarget' do
pod 'BrazeNotificationService'
end
```
**Note:**
For instructions to implement Rich Push, see [Rich notifications](https://www.braze.com/docs/fr/fr/developer_guide/platform_integration_guides/swift/push_notifications/customization/rich_notifications/?tab=swift%20package%20manager).
After updating the Podfile, navigate to the directory of your Xcode app project within your terminal and run `pod install`.
Download the latest `BrazePushStory.zip` from the [GitHub release page](https://github.com/braze-inc/braze-swift-sdk/releases), extract it, and add the `BrazePushStory.xcframework` to your project's `Notification Content Extension`.

**Important:**
Make sure that **Do Not Embed** is selected for **BrazePushStory.xcframework** under the **Embed** column.
### Step 4: Updating your notification view controller {#enable-capabilities}
In `NotificationViewController.swift`, add the following line to import the header files:
```swift
import BrazePushStory
```
Next, replace the default implementation by inheriting [`BrazePushStory.NotificationViewController`](https://braze-inc.github.io/braze-swift-sdk/documentation/brazepushstory/notificationviewcontroller/):
```swift
class NotificationViewController: BrazePushStory.NotificationViewController {}
```
#### Custom handling push story events
If you want to implement your own custom logic to handle push story notification events, inherit `BrazePushStory.NotificationViewController` as above and override the [`didReceive`](https://braze-inc.github.io/braze-swift-sdk/documentation/brazepushstory/notificationviewcontroller/didreceive(_:)) methods as below.
```swift
import BrazePushStory
import UserNotifications
import UserNotificationsUI
class NotificationViewController: BrazePushStory.NotificationViewController {
override func didReceive(_ notification: UNNotification) {
super.didReceive(notification)
// Custom handling logic
}
override func didReceive(_ response: UNNotificationResponse, completionHandler completion: @escaping (UNNotificationContentExtensionResponseOption) -> Void) {
super.didReceive(response, completionHandler: completion)
// Custom handling logic
}
}
```
### Step 5: Setting the Notification Content Extension plist {#notification-content-extension}
Open the `Info.plist` file of the `Notification Content Extension`, then add and change the following keys under `NSExtension \ NSExtensionAttributes`:
| Key | Type | Value |
|--------------------------------------------------|---------|------------------------|
| `UNNotificationExtensionCategory` | String | `ab_cat_push_story_v2` |
| `UNNotificationExtensionDefaultContentHidden` | Boolean | `YES` |
| `UNNotificationExtensionInitialContentSizeRatio` | Number | `0.6` |
| `UNNotificationExtensionUserInteractionEnabled` | Boolean | `YES` |
{: .reset-td-br-1 .reset-td-br-2 .reset-td-br-3 aria-label="Step 5: Setting the Notification Content Extension plist #notification-content-extension" }
Additionally, add the following top-level `Braze` dictionary to the same `Info.plist` file, replacing `REPLACE_WITH_APPGROUP` with the App Group you created in [Step 2](#enable-capabilities):
| Key | Type | Value |
|------------------|--------|--------------------------|
| `Braze.AppGroup` | String | `REPLACE_WITH_APPGROUP` |
{: .reset-td-br-1 .reset-td-br-2 .reset-td-br-3 aria-label="Step 5: Setting the Notification Content Extension plist #notification-content-extension" }
Your `Info.plist` file should match the following image:

### Step 6: Updating the Braze integration in your main app {#update-braze}
Before initializing Braze, assign the name of your app group to your Braze configuration's [`push.appGroup`](https://braze-inc.github.io/braze-swift-sdk/documentation/brazekit/braze/configuration-swift.class/push-swift.class/appgroup) property.
```swift
let configuration = Braze.Configuration(apiKey: "",
endpoint: "")
configuration.push.appGroup = "REPLACE_WITH_APPGROUP"
let braze = Braze(configuration: configuration)
```
## Prerequisites
Before you can use this feature, you'll need to [integrate the Cordova Braze SDK](https://www.braze.com/docs/fr/fr/developer_guide/sdk_integration/?sdktab=cordova). You'll also need to [set up push notifications](https://www.braze.com/docs/fr/fr/developer_guide/push_notifications/?sdktab=cordova).
## Setting up push stories
### Step 1: Create a notification content extension
In your Xcode project, create a notification content extension. For a full walkthrough, see [iOS Push Stories Tutorial](https://braze-inc.github.io/braze-swift-sdk/tutorials/braze/b3-push-stories/).
### Step 2: Configure your push app group
In your project's `config.xml` file, configure the push app group [you just created](#cordova_step-1-create-a-notification-content-extension).
```xml
```
Replace `PUSH_APP_GROUP` with the name of your push app group. Your `config.xml` should be similar to the following:
```xml
```
### Step 3: Add a new target
Open your Podfile and add `BrazePushStory` to the notification content extension target [you created previously](#cordova_step-1-create-a-notification-content-extension). To avoid duplicate symbol errors, use static linking.
```ruby
target 'NOTIFICATION_CONTENT_EXTENSION' do
use_frameworks! :linkage => :static
pod 'BrazePushStory'
end
```
Replace `NOTIFICATION_CONTENT_EXTENSION` with the name of your notification content extension. Your Podfile should be similar to the following:
```ruby
target 'MyAppNotificationContentExtension' do
use_frameworks! :linkage => :static
pod 'BrazePushStory'
end
```
### Step 4: Reinstall your CocoaPods dependencies
In the terminal, go to your iOS directory and reinstall your CocoaPod dependencies.
```bash
cd PATH_TO_PROJECT/platform/ios
pod install
```
## Prerequisites
Before you can use this feature, you'll need to [integrate the React Native Braze SDK](https://www.braze.com/docs/fr/fr/developer_guide/sdk_integration/?sdktab=react%20native). You'll also need to [set up push notifications](https://www.braze.com/docs/fr/fr/developer_guide/push_notifications/?sdktab=react%20native).
## Enabling push stories
For the React Native SDK, **push stories are available for Android by default**.
To enable Push Stories on iOS using Expo, ensure you have an app group defined for your application. For more information, see [Adding an App Group](https://www.braze.com/docs/fr/fr/developer_guide/platform_integration_guides/swift/push_notifications/push_story/#adding-an-app-group).
Next, configure the `enableBrazeIosPushStories` property to `true` and assign your app group ID to `iosPushStoryAppGroup` in your `expo.plugins` object in `app.json`:
```json
{
"expo": {
"plugins": [
[
"@braze/expo-plugin",
{
...
"enableBrazeIosPushStories": true,
"iosPushStoryAppGroup": "group.com.company.myApp.PushStories"
}
]
]
}
}
```
Lastly, add the bundle identifier for this app extension to your project's credentials configuration: `.BrazeExpoPushStories`. For further details on this process, refer to [Using app extensions with Expo Application Services](https://www.braze.com/docs/fr/fr/developer_guide/push_notifications/?sdktab=react%20native#reactnative_app-extensions).
**Warning:**
If you are using Push Stories with Expo Application Services, be sure to use the `EXPO_NO_CAPABILITY_SYNC=1` flag when running `eas build`. There is a known issue in the command line which removes the App Groups capability from your extension's provisioning profile.
# Configurer des invites de pression douce pour le SDK Braze
Source: /docs/fr/developer_guide/push_notifications/soft_push_prompts/index.md
# Invitations à pousser pour le Web
> Découvrez comment configurer les invites de poussée douce pour le SDK de Braze.
## Prerequisites
Before you can use this feature, you'll need to [integrate the Web Braze SDK](https://www.braze.com/docs/fr/fr/developer_guide/sdk_integration/?sdktab=web). You'll also need to [set up push notifications](https://www.braze.com/docs/fr/fr/developer_guide/push_notifications/?sdktab=web).
If you're integrating Braze through mParticle's embedded kit on the web, see [Step 3 in mParticle's Braze Web event integration](https://docs.mparticle.com/integrations/braze/event/#web) for instructions to implement soft push prompts.
## About soft push prompts
It's often a good idea for sites to implement a "soft" push prompt where you "prime" the user and make your case for sending them push notifications before requesting push permission. This is useful because the browser throttles how often you may prompt the user directly, and if the user denies permission you can never ask them again.
Alternatively, if you would like to include special custom handling, instead of calling `requestPushPermission()` directly as described in the standard [Web push integration](https://www.braze.com/docs/fr/fr/developer_guide/platform_integration_guides/web/push_notifications/integration/#step-2-browser-registration), use our [triggered in-app messages](https://www.braze.com/docs/fr/fr/developer_guide/in_app_messages/triggering_messages/?tab=web).
**Tip:**
This can be done without SDK customization using our new [no code push primer](https://www.braze.com/docs/fr/fr/user_guide/message_building_by_channel/push/best_practices/push_primer_messages/).
## Setting up soft push prompts
**Note:**
This guide uses code samples from the Braze Web SDK 4.0.0+. To upgrade to the latest Web SDK version, see [SDK Upgrade Guide](https://github.com/braze-inc/braze-web-sdk/blob/master/UPGRADE_GUIDE.md).
### Step 1: Create a push primer campaign
First, you must create a "Prime for Push" in-app messaging campaign in the Braze dashboard:
1. Create a **Modal** in-app message with the text and styling you want.
2. Next, set the on-click behavior to **Close Message**. This behavior will be customized later.
3. Add a key-value pair to the message where the key is `msg-id`, and the value is `push-primer`.
4. Assign a custom event trigger action (such as "prime-for-push") to the message. You can create the custom event manually from the dashboard if needed.
### Step 2: Remove calls
In your Braze SDK integration, find and remove any calls to `automaticallyShowInAppMessages()` from within your loading snippet.
### Step 3: Update integration
Finally, replace the removed call with the following snippet. Call `subscribeToInAppMessage()` before calling `openSession()`. This ensures your in-app message listener is registered in time to receive the push primer message.
```javascript
import * as braze from "@braze/web-sdk";
// Be sure to remove any calls to braze.automaticallyShowInAppMessages()
braze.subscribeToInAppMessage(function(inAppMessage) {
// check if message is not a control variant
if (inAppMessage instanceof braze.inAppMessage) {
// access the key-value pairs, defined as `extras`
const keyValuePairs = inAppMessage.extras || {};
// check the value of our key `msg-id` defined in the Braze dashboard
if (keyValuePairs["msg-id"] === "push-primer") {
// We don't want to display the soft push prompt to users on browsers
// that don't support push, or if the user has already granted/blocked permission
if (
braze.isPushSupported() === false ||
braze.isPushPermissionGranted() ||
braze.isPushBlocked()
) {
// do not call `showInAppMessage`
return;
}
// user is eligible to receive the native prompt
// register a click handler on one of the two buttons
if (inAppMessage.buttons[0]) {
// Prompt the user when the first button is clicked
inAppMessage.buttons[0].subscribeToClickedEvent(function() {
braze.requestPushPermission(
function() {
// success!
},
function() {
// user declined
}
);
});
}
}
}
// show the in-app message now
braze.showInAppMessage(inAppMessage);
});
```
When you wish to display the soft push prompt to the user, call `braze.logCustomEvent` - with whatever event name triggers this in-app message.
# Analytique push et journalisation d'événements personnalisés
Source: /docs/fr/developer_guide/push_notifications/logging_message_data/index.md
# Analytique push et journalisation d'événements personnalisés {#push-analytics-and-custom-event-logging}
> Cette page couvre les workflows suivants : l'analytique push native (ouvertures, ouvertures influencées et rapports de Campaign) et la journalisation de données personnalisées (événements personnalisés et attributs) à partir des payloads push. Utilisez ce guide pour identifier le workflow qui correspond à votre cas d'utilisation et suivez les étapes pour votre plateforme.
## Conditions préalables {#prerequisites}
Avant de commencer, effectuez l'intégration initiale des notifications push pour votre plateforme :
- [Notifications push Android](https://www.braze.com/docs/fr/fr/developer_guide/push_notifications/?sdktab=android)
- [Notifications push Swift](https://www.braze.com/docs/fr/fr/developer_guide/push_notifications/?sdktab=swift)
- [Notifications push Web](https://www.braze.com/docs/fr/fr/developer_guide/push_notifications/?sdktab=web)
## Analytique push native vs. journalisation d'événements personnalisés {#native-push-analytics-vs-custom-event-logging}
Les workflows suivants ont chacun des surfaces de reporting différentes.
| Catégorie d'analytique | Description | Où elle apparaît |
| --- | --- | --- |
| Analytique push native | Indicateurs push tels que les ouvertures et les ouvertures influencées, liés aux Campaigns push de Braze | Analytique des Campaigns push, événements d'engagement lié aux messages Currents, Générateur de rapports |
| Événements personnalisés et attributs | Données analytiques que vous définissez et journalisez via les méthodes du SDK ou l'endpoint `/users/track` | Profils utilisateur, segmentation, Campaigns et Canvas basés sur des actions, analytique des événements personnalisés |
{: .reset-td-br-1 .reset-td-br-2 .reset-td-br-3 aria-label="Analytique push native vs. journalisation d'événements personnalisés" }
**Important:**
Journaliser un événement personnalisé (tel que `push_notification_opened`) n'est pas la même chose que le suivi natif des ouvertures push de Braze. Les événements personnalisés ne renseignent pas les indicateurs natifs d'ouverture des Campaigns push ni l'attribution push.
## Ce que Braze enregistre automatiquement {#what-braze-logs-automatically}
Lorsque votre intégration SDK est configurée, Braze enregistre automatiquement les données d'interaction de base du canal, y compris les ouvertures push et les ouvertures influencées. Aucun code supplémentaire n'est nécessaire pour l'analytique push standard. Pour une liste complète des données collectées automatiquement, consultez [Collecte de données du SDK](https://www.braze.com/docs/fr/fr/user_guide/data/unification/user_data/sdk_data_collection/).
Pour plus de détails, consultez les ressources suivantes :
- [Collecte de données du SDK](https://www.braze.com/docs/fr/fr/user_guide/data/unification/user_data/sdk_data_collection/) pour une liste complète des données collectées automatiquement et facultatives.
- [Ouvertures influencées](https://www.braze.com/docs/fr/fr/user_guide/analytics/tracking/influenced_opens/) pour comprendre comment Braze calcule les ouvertures influencées.
- [Événements d'engagement lié aux messages](https://www.braze.com/docs/fr/fr/user_guide/data/distribution/braze_currents/event_glossary/message_engagement_events/) pour les schémas d'événements en aval dans Currents.
## Préserver l'analytique push native avec un gestionnaire push personnalisé {#preserving-native-push-analytics-with-custom-push-handling}
Vous pouvez utiliser un gestionnaire push personnalisé lorsque vous devez intégrer plusieurs fournisseurs push, traiter des données de payload supplémentaires ou implémenter une logique d'affichage de notification personnalisée. Si vous utilisez un gestionnaire push personnalisé, vous devez tout de même transmettre les payloads push aux méthodes du SDK de Braze. Cela permet à Braze d'extraire les données de suivi intégrées et de journaliser l'analytique push native (ouvertures, ouvertures influencées et indicateurs de distribution).
Si vous avez un `FirebaseMessagingService` personnalisé, appelez `BrazeFirebaseMessagingService.handleBrazeRemoteMessage(...)` dans votre méthode `onMessageReceived`. Gardez à l'esprit que votre sous-classe `FirebaseMessagingService` doit terminer son exécution dans les 9 secondes suivant l'invocation pour éviter d'être [signalée ou terminée](https://firebase.google.com/docs/cloud-messaging/android/receive) par le système Android.
```java
public class MyFirebaseMessagingService extends FirebaseMessagingService {
@Override
public void onMessageReceived(RemoteMessage remoteMessage) {
super.onMessageReceived(remoteMessage);
if (BrazeFirebaseMessagingService.handleBrazeRemoteMessage(this, remoteMessage)) {
// Braze processed a Braze push payload.
} else {
// Non-Braze payload: pass to your other handlers.
}
}
}
```
Pour un exemple d'implémentation complet, consultez l'[application exemple Firebase push du SDK Android de Braze](https://github.com/braze-inc/braze-android-sdk/tree/master/samples/firebase-push).
Dans une intégration push manuelle, transmettez les rappels de notifications en arrière-plan et de notifications utilisateur à Braze.
**Notifications en arrière-plan :**
```swift
if let braze = AppDelegate.braze, braze.notifications.handleBackgroundNotification(
userInfo: userInfo,
fetchCompletionHandler: completionHandler
) {
return
}
completionHandler(.noData)
```
**Réponses aux notifications utilisateur :**
```swift
if let braze = AppDelegate.braze, braze.notifications.handleUserNotification(
response: response,
withCompletionHandler: completionHandler
) {
return
}
completionHandler()
```
**Notifications au premier plan :**
```swift
func userNotificationCenter(
_ center: UNUserNotificationCenter,
willPresent notification: UNNotification,
withCompletionHandler completionHandler: @escaping (UNNotificationPresentationOptions) -> Void
) {
if let braze = AppDelegate.braze {
braze.notifications.handleForegroundNotification(notification: notification)
}
if #available(iOS 14.0, *) {
completionHandler([.banner, .list, .sound])
} else {
completionHandler([.alert, .sound])
}
}
```
Pour un exemple d'implémentation complet, consultez l'[exemple push manuel du SDK Swift de Braze (`AppDelegate.swift`)](https://github.com/braze-inc/braze-swift-sdk/blob/main/Examples/Swift/Sources/PushNotifications-Manual/AppDelegate.swift).
Pour le push web, configurez votre service de traitement et l'initialisation du SDK comme décrit dans [Notifications push Web](https://www.braze.com/docs/fr/fr/developer_guide/push_notifications/?sdktab=web).
Pour plus d'exemples de code, consultez le [dépôt du SDK Web de Braze](https://github.com/braze-inc/braze-web-sdk).
## Journaliser des données personnalisées à partir des payloads push {#logging-custom-data-from-push-payloads}
Utilisez cette section lorsque vous devez journaliser des données supplémentaires à partir des paires clé-valeur du payload push, telles que des événements personnalisés ou des attributs liés à votre logique métier.
Pour plus d'informations sur les événements personnalisés, consultez [Événements personnalisés](https://www.braze.com/docs/fr/fr/user_guide/data/activation/events/custom_events/). Pour journaliser des événements personnalisés via les méthodes du SDK, consultez [Journaliser des événements personnalisés](https://www.braze.com/docs/fr/fr/developer_guide/analytics/logging_events/).
### Option A : Journaliser avec l'endpoint `/users/track` {#option-a-log-with-the-userstrack-endpoint}
Vous pouvez journaliser des données analytiques en temps réel en appelant l'endpoint [`/users/track`](https://www.braze.com/docs/fr/fr/api/endpoints/user_data/post_user_track/).
Pour identifier le profil utilisateur, incluez `braze_id` dans les paires clé-valeur de votre payload push.
**Note:**
Transmettre `braze_id` permet uniquement d'identifier le profil. Vous devez toujours implémenter la logique qui lit les valeurs du payload et envoie la requête `/users/track` avec les événements ou attributs que vous souhaitez journaliser.
### Option B : Journaliser avec les méthodes du SDK après le lancement de l'application {#option-b-log-with-sdk-methods-after-app-launch}
Vous pouvez également enregistrer les données du payload localement et journaliser les événements personnalisés et les attributs via les méthodes du SDK après l'initialisation de l'application. Cette approche est courante dans les flux d'extension de contenu de notification, où les données analytiques sont d'abord persistées puis envoyées au prochain lancement de l'application.
**Important:**
Les données analytiques ne sont pas envoyées à Braze tant que l'application n'est pas lancée. Selon vos paramètres de fermeture, il peut y avoir un délai entre le moment où l'utilisateur ferme la notification et celui où l'application s'ouvre et envoie les données analytiques.
## Journaliser depuis une extension de contenu de notification (Swift) {#logging-from-a-notification-content-extension-swift}
Les étapes suivantes décrivent comment enregistrer et envoyer des événements personnalisés, des attributs personnalisés et des attributs utilisateur depuis une extension de contenu de notification Swift.
### Étape 1 : Configurer les groupes d'applications dans Xcode {#step-1-configure-app-groups-in-xcode}
Dans Xcode, ajoutez la capacité `App Groups` à la cible de votre application principale. Activez **App Groups**, puis cliquez sur **+** pour ajouter un nouveau groupe. Utilisez l'identifiant de bundle de votre application pour créer l'identifiant du groupe (par exemple, `group.com.company.appname.xyz`). Activez **App Groups** à la fois pour la cible de votre application principale et pour la cible de l'extension de contenu.

### Étape 2 : Choisir ce que vous souhaitez journaliser {#step-2-choose-what-to-log}
Avant d'implémenter les extraits de code, choisissez la catégorie d'analytique que vous souhaitez journaliser :
- **Événements personnalisés :** actions effectuées par les utilisateurs (par exemple, compléter un flux ou appuyer sur un élément d'interface spécifique). Utilisez les événements personnalisés pour les déclencheurs basés sur des actions, la segmentation et l'analytique des événements. Pour plus d'informations, consultez [Événements personnalisés](https://www.braze.com/docs/fr/fr/user_guide/data/activation/events/custom_events/) et [Journaliser des événements personnalisés](https://www.braze.com/docs/fr/fr/developer_guide/analytics/logging_events/).
- **Attributs personnalisés :** champs de profil que vous définissez (par exemple, `plan_tier` ou `preferred_language`) et mettez à jour au fil du temps. Pour plus d'informations, consultez [Attributs personnalisés](https://www.braze.com/docs/fr/fr/user_guide/data/activation/custom_data/data_types/) et [Définir les attributs utilisateur](https://www.braze.com/docs/fr/fr/developer_guide/analytics/setting_user_attributes/).
- **Attributs utilisateur :** champs de profil standard (par exemple, e-mail, prénom et numéro de téléphone). Dans l'exemple de code, ceux-ci sont représentés par un modèle typé `UserAttribute` puis mappés aux champs utilisateur de Braze.
Les fichiers utilitaires de cette section (`RemoteStorage`, `UserAttribute` et `EventName Dictionary`) sont des fichiers utilitaires locaux utilisés par cet exemple d'implémentation. Ce ne sont pas des classes intégrées au SDK. Ils stockent les données dérivées du payload dans `UserDefaults`, définissent un modèle typé pour les mises à jour utilisateur en attente et standardisent la construction du payload d'événement. Pour plus d'informations sur le comportement du stockage local des données, consultez [Stockage](https://www.braze.com/docs/fr/fr/developer_guide/storage/?tab=swift).
**Note:**
Les exemples de fichiers utilitaires de cette section sont spécifiques à iOS (Swift et Objective-C). Pour les approches Android et Web de journalisation des événements personnalisés et des attributs, consultez [Journaliser des événements personnalisés](https://www.braze.com/docs/fr/fr/developer_guide/analytics/logging_events/) ([Android](https://www.braze.com/docs/fr/fr/developer_guide/analytics/logging_events/?tab=android), [Web](https://www.braze.com/docs/fr/fr/developer_guide/analytics/logging_events/?tab=web)) et [Définir les attributs utilisateur](https://www.braze.com/docs/fr/fr/developer_guide/analytics/setting_user_attributes/) ([Android](https://www.braze.com/docs/fr/fr/developer_guide/analytics/setting_user_attributes/?tab=android), [Web](https://www.braze.com/docs/fr/fr/developer_guide/analytics/setting_user_attributes/?tab=web)).
#### Enregistrer des événements personnalisés {#saving-custom-events}
Créez le payload analytique en construisant un dictionnaire, en renseignant les métadonnées et en l'enregistrant avec le fichier utilitaire.
1. Initialisez un dictionnaire avec les métadonnées de l'événement.
2. Initialisez `userDefaults` pour récupérer et stocker les données d'événement.
3. Si un tableau existant est trouvé, ajoutez-y les données et enregistrez.
4. Si aucun tableau n'existe, enregistrez un nouveau tableau.
```swift
func saveCustomEvent(with properties: [String: Any]? = nil) {
// 1
let customEventDictionary = Dictionary(eventName: "YOUR-EVENT-NAME", properties: properties)
// 2
let remoteStorage = RemoteStorage(storageType: .suite)
// 3
if var pendingEvents = remoteStorage.retrieve(forKey: .pendingCustomEvents) as? [[String: Any]] {
pendingEvents.append(contentsOf: [customEventDictionary])
remoteStorage.store(pendingEvents, forKey: .pendingCustomEvents)
} else {
// 4
remoteStorage.store([customEventDictionary], forKey: .pendingCustomEvents)
}
}
```
```objc
- (void)saveCustomEvent:(NSDictionary *)properties {
// 1
NSDictionary *customEventDictionary = [[NSDictionary alloc] initWithEventName:@"YOUR-EVENT-NAME" properties:properties];
// 2
RemoteStorage *remoteStorage = [[RemoteStorage alloc] initWithStorageType:StorageTypeSuite];
NSMutableArray *pendingEvents = [[remoteStorage retrieveForKey:RemoteStorageKeyPendingCustomEvents] mutableCopy];
// 3
if (pendingEvents) {
[pendingEvents addObject:customEventDictionary];
[remoteStorage store:pendingEvents forKey:RemoteStorageKeyPendingCustomEvents];
} else {
// 4
[remoteStorage store:@[ customEventDictionary ] forKey:RemoteStorageKeyPendingCustomEvents];
}
}
```
#### Envoyer des événements personnalisés à Braze {#sending-custom-events-to-braze}
Journalisez les données analytiques enregistrées juste après l'initialisation du SDK.
1. Parcourez les événements en attente.
2. Parcourez les paires clé-valeur de chaque événement.
3. Vérifiez la présence de la clé `event_name`.
4. Ajoutez les paires clé-valeur restantes au dictionnaire `properties`.
5. Journalisez chaque événement personnalisé.
6. Supprimez les événements en attente du stockage.
```swift
func logPendingCustomEventsIfNecessary() {
let remoteStorage = RemoteStorage(storageType: .suite)
guard let pendingEvents = remoteStorage.retrieve(forKey: .pendingCustomEvents) as? [[String: Any]] else { return }
// 1
for event in pendingEvents {
var eventName: String?
var properties: [AnyHashable: Any] = [:]
// 2
for (key, value) in event {
if key == "event_name" {
// 3
if let eventNameValue = value as? String {
eventName = eventNameValue
} else {
print("Invalid type for event_name key")
}
} else {
// 4
properties[key] = value
}
}
// 5
if let eventName = eventName {
AppDelegate.braze?.logCustomEvent(name: eventName, properties: properties)
}
}
// 6
remoteStorage.removeObject(forKey: .pendingCustomEvents)
}
```
```objc
- (void)logPendingEventsIfNecessary {
RemoteStorage *remoteStorage = [[RemoteStorage alloc] initWithStorageType:StorageTypeSuite];
NSArray *pendingEvents = [remoteStorage retrieveForKey:RemoteStorageKeyPendingCustomEvents];
// 1
for (NSDictionary *event in pendingEvents) {
NSString *eventName = nil;
NSMutableDictionary *properties = [NSMutableDictionary dictionary];
// 2
for (NSString* key in event) {
if ([key isEqualToString:@"event_name"]) {
// 3
if ([[event objectForKey:key] isKindOfClass:[NSString class]]) {
eventName = [event objectForKey:key];
} else {
NSLog(@"Invalid type for event_name key");
}
} else {
// 4
properties[key] = event[key];
}
}
// 5
if (eventName != nil) {
[AppDelegate.braze logCustomEvent:eventName properties:properties];
}
}
// 6
[remoteStorage removeObjectForKey:RemoteStorageKeyPendingCustomEvents];
}
```
#### Enregistrer des attributs personnalisés {#saving-custom-attributes}
Créez le dictionnaire analytique de zéro, puis persistez-le.
1. Initialisez un dictionnaire avec les métadonnées de l'attribut.
2. Initialisez `userDefaults` pour récupérer et stocker les données d'attribut.
3. Si un tableau existant est trouvé, ajoutez-y les données et enregistrez.
4. Si aucun tableau n'existe, enregistrez un nouveau tableau.
```swift
func saveCustomAttribute() {
// 1
let customAttributeDictionary: [String: Any] = ["YOUR-CUSTOM-ATTRIBUTE-KEY": "YOUR-CUSTOM-ATTRIBUTE-VALUE"]
// 2
let remoteStorage = RemoteStorage(storageType: .suite)
// 3
if var pendingAttributes = remoteStorage.retrieve(forKey: .pendingCustomAttributes) as? [[String: Any]] {
pendingAttributes.append(contentsOf: [customAttributeDictionary])
remoteStorage.store(pendingAttributes, forKey: .pendingCustomAttributes)
} else {
// 4
remoteStorage.store([customAttributeDictionary], forKey: .pendingCustomAttributes)
}
}
```
```objc
- (void)saveCustomAttribute {
// 1
NSDictionary *customAttributeDictionary = @{ @"YOUR-CUSTOM-ATTRIBUTE-KEY": @"YOUR-CUSTOM-ATTRIBUTE-VALUE" };
// 2
RemoteStorage *remoteStorage = [[RemoteStorage alloc] initWithStorageType:StorageTypeSuite];
NSMutableArray *pendingAttributes = [[remoteStorage retrieveForKey:RemoteStorageKeyPendingCustomAttributes] mutableCopy];
// 3
if (pendingAttributes) {
[pendingAttributes addObject:customAttributeDictionary];
[remoteStorage store:pendingAttributes forKey:RemoteStorageKeyPendingCustomAttributes];
} else {
// 4
[remoteStorage store:@[ customAttributeDictionary ] forKey:RemoteStorageKeyPendingCustomAttributes];
}
}
```
#### Envoyer des attributs personnalisés à Braze {#sending-custom-attributes-to-braze}
Journalisez les données analytiques enregistrées juste après l'initialisation du SDK.
1. Parcourez les attributs en attente.
2. Parcourez chaque paire clé-valeur.
3. Journalisez chaque clé et valeur d'attribut personnalisé.
4. Supprimez les attributs en attente du stockage.
```swift
func logPendingCustomAttributesIfNecessary() {
let remoteStorage = RemoteStorage(storageType: .suite)
guard let pendingAttributes = remoteStorage.retrieve(forKey: .pendingCustomAttributes) as? [[String: Any]] else { return }
// 1
pendingAttributes.forEach { setCustomAttributesWith(keysAndValues: $0) }
// 4
remoteStorage.removeObject(forKey: .pendingCustomAttributes)
}
func setCustomAttributesWith(keysAndValues: [String: Any]) {
// 2
for (key, value) in keysAndValues {
// 3
if let value = value as? [String] {
setCustomAttributeArrayWithKey(key, andValue: value)
} else {
setCustomAttributeWithKey(key, andValue: value)
}
}
}
```
```objc
- (void)logPendingCustomAttributesIfNecessary {
RemoteStorage *remoteStorage = [[RemoteStorage alloc] initWithStorageType:StorageTypeSuite];
NSArray *pendingAttributes = [remoteStorage retrieveForKey:RemoteStorageKeyPendingCustomAttributes];
// 1
for (NSDictionary *attribute in pendingAttributes) {
[self setCustomAttributeWith:attribute];
}
// 4
[remoteStorage removeObjectForKey:RemoteStorageKeyPendingCustomAttributes];
}
- (void)setCustomAttributeWith:(NSDictionary *)keysAndValues {
// 2
for (NSString *key in keysAndValues) {
// 3
[self setCustomAttributeWith:key andValue:[keysAndValues objectForKey:key]];
}
}
```
#### Enregistrer des attributs utilisateur {#saving-user-attributes}
Lors de l'enregistrement des attributs utilisateur, créez un objet personnalisé pour capturer quel champ utilisateur est mis à jour (`email`, `first_name`, `phone_number`, etc.). L'objet doit être compatible avec le stockage et la récupération via `UserDefaults`. Consultez le fichier utilitaire `UserAttribute` dans l'onglet **Fichiers utilitaires** pour un exemple.
1. Initialisez un objet `UserAttribute` encodé avec le type correspondant.
2. Initialisez `userDefaults` pour récupérer et stocker les données.
3. Si un tableau existant est trouvé, ajoutez-y les données et enregistrez.
4. Si aucun tableau n'existe, enregistrez un nouveau tableau.
```swift
func saveUserAttribute() {
// 1
guard let data = try? PropertyListEncoder().encode(UserAttribute.email("USER-ATTRIBUTE-VALUE")) else { return }
// 2
let remoteStorage = RemoteStorage(storageType: .suite)
// 3
if var pendingAttributes = remoteStorage.retrieve(forKey: .pendingUserAttributes) as? [Data] {
pendingAttributes.append(contentsOf: [data])
remoteStorage.store(pendingAttributes, forKey: .pendingUserAttributes)
} else {
// 4
remoteStorage.store([data], forKey: .pendingUserAttributes)
}
}
```
```objc
- (void)saveUserAttribute {
// 1
UserAttribute *userAttribute = [[UserAttribute alloc] initWithUserField:@"USER-ATTRIBUTE-VALUE" attributeType:UserAttributeTypeEmail];
NSError *error;
NSData *data = [NSKeyedArchiver archivedDataWithRootObject:userAttribute requiringSecureCoding:YES error:&error];
if (error != nil) {
// log error
}
// 2
RemoteStorage *remoteStorage = [[RemoteStorage alloc] initWithStorageType:StorageTypeSuite];
NSMutableArray *pendingAttributes = [[remoteStorage retrieveForKey:RemoteStorageKeyPendingUserAttributes] mutableCopy];
// 3
if (pendingAttributes) {
[pendingAttributes addObject:data];
[remoteStorage store:pendingAttributes forKey:RemoteStorageKeyPendingUserAttributes];
} else {
// 4
[remoteStorage store:@[data] forKey:RemoteStorageKeyPendingUserAttributes];
}
}
```
#### Envoyer des attributs utilisateur à Braze {#sending-user-attributes-to-braze}
Journalisez les données analytiques enregistrées juste après l'initialisation du SDK.
1. Parcourez les données `pendingAttributes`.
2. Décodez chaque `UserAttribute`.
3. Définissez les champs utilisateur en fonction du type d'attribut.
4. Supprimez les attributs utilisateur en attente du stockage.
```swift
func logPendingUserAttributesIfNecessary() {
let remoteStorage = RemoteStorage(storageType: .suite)
guard let pendingAttributes = remoteStorage.retrieve(forKey: .pendingUserAttributes) as? [Data] else { return }
// 1
for attributeData in pendingAttributes {
// 2
guard let userAttribute = try? PropertyListDecoder().decode(UserAttribute.self, from: attributeData) else { continue }
// 3
switch userAttribute {
case .email(let email):
AppDelegate.braze?.user.set(email: email)
}
}
// 4
remoteStorage.removeObject(forKey: .pendingUserAttributes)
}
```
```objc
- (void)logPendingUserAttributesIfNecessary {
RemoteStorage *remoteStorage = [[RemoteStorage alloc] initWithStorageType:StorageTypeSuite];
NSArray *pendingAttributes = [remoteStorage retrieveForKey:RemoteStorageKeyPendingUserAttributes];
// 1
for (NSData *attributeData in pendingAttributes) {
NSError *error;
// 2
UserAttribute *userAttribute = [NSKeyedUnarchiver unarchivedObjectOfClass:[UserAttribute class] fromData:attributeData error:&error];
if (error != nil) {
// log error
}
// 3
if (userAttribute) {
switch (userAttribute.attributeType) {
case UserAttributeTypeEmail:
[self user].email = userAttribute.userField;
break;
}
}
}
// 4
[remoteStorage removeObjectForKey:RemoteStorageKeyPendingUserAttributes];
}
```
#### Fichier utilitaire RemoteStorage {#remotestorage-helper-file}
```swift
enum RemoteStorageKey: String, CaseIterable {
// MARK: - Notification Content Extension Analytics
case pendingCustomEvents = "pending_custom_events"
case pendingCustomAttributes = "pending_custom_attributes"
case pendingUserAttributes = "pending_user_attributes"
}
enum RemoteStorageType {
case standard
case suite
}
class RemoteStorage: NSObject {
private var storageType: RemoteStorageType = .standard
private lazy var defaults: UserDefaults = {
switch storageType {
case .standard:
return .standard
case .suite:
// Use the App Group identifier you created in Step 1.
return UserDefaults(suiteName: "group.com.company.appname.xyz")!
}
}()
init(storageType: RemoteStorageType = .standard) {
self.storageType = storageType
}
func store(_ value: Any, forKey key: RemoteStorageKey) {
defaults.set(value, forKey: key.rawValue)
}
func retrieve(forKey key: RemoteStorageKey) -> Any? {
return defaults.object(forKey: key.rawValue)
}
func removeObject(forKey key: RemoteStorageKey) {
defaults.removeObject(forKey: key.rawValue)
}
func resetStorageKeys() {
for key in RemoteStorageKey.allCases {
defaults.removeObject(forKey: key.rawValue)
}
}
}
```
```objc
@interface RemoteStorage ()
@property (nonatomic) StorageType storageType;
@property (nonatomic, strong) NSUserDefaults *defaults;
@end
@implementation RemoteStorage
- (id)initWithStorageType:(StorageType)storageType {
if (self = [super init]) {
self.storageType = storageType;
}
return self;
}
- (void)store:(id)value forKey:(RemoteStorageKey)key {
[[self defaults] setValue:value forKey:[self rawValueForKey:key]];
}
- (id)retrieveForKey:(RemoteStorageKey)key {
return [[self defaults] objectForKey:[self rawValueForKey:key]];
}
- (void)removeObjectForKey:(RemoteStorageKey)key {
[[self defaults] removeObjectForKey:[self rawValueForKey:key]];
}
- (void)resetStorageKeys {
[[self defaults] removeObjectForKey:[self rawValueForKey:RemoteStorageKeyPendingCustomEvents]];
[[self defaults] removeObjectForKey:[self rawValueForKey:RemoteStorageKeyPendingCustomAttributes]];
[[self defaults] removeObjectForKey:[self rawValueForKey:RemoteStorageKeyPendingUserAttributes]];
}
- (NSUserDefaults *)defaults {
if (!_defaults) {
switch (self.storageType) {
case StorageTypeStandard:
_defaults = [NSUserDefaults standardUserDefaults];
break;
case StorageTypeSuite:
_defaults = [[NSUserDefaults alloc] initWithSuiteName:@"group.com.company.appname.xyz"];
break;
}
}
return _defaults;
}
- (NSString*)rawValueForKey:(RemoteStorageKey)remoteStorageKey {
switch(remoteStorageKey) {
case RemoteStorageKeyPendingCustomEvents:
return @"pending_custom_events";
case RemoteStorageKeyPendingCustomAttributes:
return @"pending_custom_attributes";
case RemoteStorageKeyPendingUserAttributes:
return @"pending_user_attributes";
default:
[NSException raise:NSGenericException format:@"Unexpected FormatType."];
}
}
```
#### Fichier utilitaire UserAttribute {#userattribute-helper-file}
```swift
enum UserAttribute: Hashable {
case email(String?)
}
// MARK: - Codable
extension UserAttribute: Codable {
private enum CodingKeys: String, CodingKey {
case email
}
func encode(to encoder: Encoder) throws {
var values = encoder.container(keyedBy: CodingKeys.self)
switch self {
case .email(let email):
try values.encodeIfPresent(email, forKey: .email)
}
}
init(from decoder: Decoder) throws {
let values = try decoder.container(keyedBy: CodingKeys.self)
let email = try values.decodeIfPresent(String.self, forKey: .email)
self = .email(email)
}
}
```
```objc
@implementation UserAttribute
- (id)initWithUserField:(NSString *)userField attributeType:(UserAttributeType)attributeType {
if (self = [super init]) {
self.userField = userField;
self.attributeType = attributeType;
}
return self;
}
- (void)encodeWithCoder:(NSCoder *)encoder {
[encoder encodeObject:self.userField forKey:@"userField"];
[encoder encodeInteger:self.attributeType forKey:@"attributeType"];
}
- (id)initWithCoder:(NSCoder *)decoder {
if (self = [super init]) {
self.userField = [decoder decodeObjectForKey:@"userField"];
NSInteger attributeRawValue = [decoder decodeIntegerForKey:@"attributeType"];
self.attributeType = (UserAttributeType) attributeRawValue;
}
return self;
}
@end
```
#### Fichier utilitaire EventName dictionary {#eventname-dictionary-helper-file}
```swift
extension Dictionary where Key == String, Value == Any {
init(eventName: String, properties: [String: Any]? = nil) {
self.init()
self[PushNotificationKey.eventName.rawValue] = eventName
if let properties = properties {
for (key, value) in properties {
self[key] = value
}
}
}
}
```
```objc
@implementation NSMutableDictionary (Helper)
+ (instancetype)dictionaryWithEventName:(NSString *)eventName
properties:(NSDictionary *)properties {
NSMutableDictionary *dict = [NSMutableDictionary dictionary];
dict[@"event_name"] = eventName;
if (properties) {
for (id key in properties) {
dict[key] = properties[key];
}
}
return dict;
}
@end
```
## Analyser les résultats {#analyzing-results}
Utilisez la surface de reporting correspondant à la catégorie d'analytique :
| Catégorie d'analytique | Où consulter dans Braze |
| --- | --- |
| Analytique push native | Pour consulter les indicateurs d'ouverture push au niveau de la Campaign, accédez à la page **Campaign Analytics** de votre Campaign push. Pour les définitions des indicateurs, consultez [Ouvertures influencées](https://www.braze.com/docs/fr/fr/user_guide/analytics/tracking/influenced_opens/). Pour créer des vues analytiques personnalisées, accédez à **Analytics** > **Report Builder (New)**. Pour les étapes de navigation, consultez [Générateur de rapports](https://www.braze.com/docs/fr/fr/user_guide/analytics/reports/report_builder/). Pour les schémas d'événements au niveau de l'entrepôt de données, consultez [Événements d'engagement lié aux messages](https://www.braze.com/docs/fr/fr/user_guide/data/distribution/braze_currents/event_glossary/message_engagement_events/). |
| Événements personnalisés et attributs | Pour consulter les tendances des événements personnalisés, accédez à **Analytics** > **Custom Events Report**. Pour plus de détails, consultez [Événements personnalisés](https://www.braze.com/docs/fr/fr/user_guide/data/activation/events/custom_events/). Pour inspecter les valeurs au niveau utilisateur, accédez à la page **Search Users** et ouvrez un profil. Pour les étapes, consultez [Profils utilisateur](https://www.braze.com/docs/fr/fr/user_guide/audience/manage_audience/user_profiles/). Pour filtrer les audiences par ces valeurs, accédez à **Audience** > **Segments**. Pour les étapes de navigation, consultez [Créer un segment](https://www.braze.com/docs/fr/fr/user_guide/audience/segments/creating_a_segment/) et les options de filtre dans [Filtres de segmentation](https://www.braze.com/docs/fr/fr/user_guide/audience/segments/segmentation_filters/). |
{: .reset-td-br-1 .reset-td-br-2 aria-label="Analyser les résultats" }
Pour la création de rapports personnalisés, consultez [Générateur de rapports](https://www.braze.com/docs/fr/fr/user_guide/analytics/reports/report_builder/).
## Références associées {#related-references}
- [Notifications push](https://www.braze.com/docs/fr/fr/developer_guide/push_notifications/)
- [Journaliser des événements personnalisés](https://www.braze.com/docs/fr/fr/developer_guide/analytics/logging_events/)
- [Événements personnalisés](https://www.braze.com/docs/fr/fr/user_guide/data/activation/events/custom_events/)
- [Endpoint de suivi des utilisateurs (`/users/track`)](https://www.braze.com/docs/fr/fr/api/endpoints/user_data/post_user_track/)
- [Dépôt du SDK Android de Braze](https://github.com/braze-inc/braze-android-sdk)
- [Dépôt du SDK Swift de Braze](https://github.com/braze-inc/braze-swift-sdk)
- [Dépôt du SDK Web de Braze](https://github.com/braze-inc/braze-web-sdk)
# Envoyer des messages de test
Source: /docs/fr/developer_guide/push_notifications/sending_test_messages/index.md
# Sending test messages
> Before sending out a messaging campaign to your users, you may want to test it to make sure it looks right and operates in the intended manner. You can use the dashboard to create and send test messages with push notifications, in-app messages (IAM), or email.
## Sending a test message
### Step 1: Create a designated test segment
After you set up a test segment, you can use it to test any of your Braze messaging channels. When set up correctly, this only needs to be done a single time.
To set up a test segment, go to **Segments** and create a new segment. Select **Add Filter**, then choose a one of the test filters.

With test filters, you can ensure that only users with a specific email address or [external user ID](https://www.braze.com/docs/fr/fr/developer_guide/platform_integration_guides/swift/analytics/setting_user_ids/#setting-user-ids) are sent the test message.

Both email address and external user ID filters offer the following options:
| Operator | Description |
|------------------|--------------------------------------------------------------------------------------------------------------------------------|
| `equals` | This will look for an exact match of the email or user ID that you provide. Use this if you only want to send the test campaigns to devices associated with a single email or user ID. |
| `does not equal` | Use this if you want to exclude a particular email or user ID from test campaigns. |
| `matches` | This will find users that have email addresses or user IDs that match part of the search term you provide. You could use this to find only the users that have an `@yourcompany.com` address, allowing you to send messages to everyone on your team. |
{: .reset-td-br-1 .reset-td-br-2 aria-label="Step 1: Create a designated test segment a class="margin-fix" name="test-segment"/a" }
You can select multiple specific emails using the "`matches`" option and separating the email addresses with a | character. For example: "`matches`" "`email1@braze.com` | `email2@braze.com`". You can also combine multiple operators together. For example, the test segment could include an email address filter that "`matches`" "`@braze.com`" and another filter that "`does not equal`" "`sales@braze.com`".
After adding the testing filters to your test segment, you can verify it's working by selecting **Preview** or by selecting **Settings** > **CSV Export All User Data** to export that segment's user data to a CSV file.

**Note:**
Exporting the segment's User Data to a CSV file is the most accurate verification method, as the preview will only show a sample of your users and may not include all users.
### Step 2: Send the message
You can send a message using the Braze dashboard or the command line.
To send test push notifications or in-app messages, you need to target your previously created test segment. Begin by creating your campaign and following the usual steps. When you reach the **Target Audiences** step, select your test segment from the dropdown menu.

Confirm your campaign and launch it to test your push notification and in-app messages.
**Note:**
Be sure to select **Allow users to become re-eligible to receive campaign** under the **Schedule** portion of the campaign composer if you intend to use a single campaign to send a test message to yourself more than once.
If you're only testing email messages, you do not necessarily have to set up a test segment. In the first step of the campaign composer where you compose your campaign's email message, click **Send Test** and enter the email address to which you wish to send a test email.

**Tip:**
You can also enable or disable [TEST (or SEED)](https://www.braze.com/docs/fr/fr/user_guide/administrative/app_settings/email_settings/#append-email-subject-lines) being appended on your test messages.
Alternatively, you can send a single notification using cURL and the [Braze Messaging API](https://www.braze.com/docs/fr/fr/api/endpoints/messaging/). Note that these examples make a request using the `US-01` instance. To find out yours, refer to [API endpoints](https://www.braze.com/docs/fr/fr/api/basics/#endpoints).
```bash
curl -X POST -H "Content-Type: application/json" -H "Authorization: Bearer {BRAZE_API_KEY}" -d '{
"external_user_ids":["EXTERNAL_USER_ID"],
"messages": {
"android_push": {
"title":"Test push title",
"alert":"Test push",
"extra":{
"CUSTOM_KEY":"CUSTOM_VALUE"
}
}
}
}' https://rest.iad-01.braze.com/messages/send
```
```bash
curl -X POST -H "Content-Type: application/json" -H "Authorization: Bearer {BRAZE_API_KEY}" -d '{
"external_user_ids":["EXTERNAL_USER_ID"],
"messages": {
"apple_push": {
"alert": "Test push",
"extra": {
"CUSTOM_KEY" :"CUSTOM_VALUE"
}
}
}
}' https://rest.iad-01.braze.com/messages/send
```
```bash
curl -X POST -H "Content-Type: application/json" -H "Authorization: Bearer {BRAZE_API_KEY}" -d '{
"external_user_ids":["EXTERNAL_USER_ID"],
"messages": {
"kindle_push": {
"title":"Test push title",
"alert":"Test push",
"extra":{
"CUSTOM_KEY":"CUSTOM_VALUE"
}
}
}
}' https://rest.iad-01.braze.com/messages/send
```
Replace the following:
| Placeholder | Description |
|---------------------|-----------------------------------------------------------|
| `BRAZE_API_KEY` | Your Braze API key used for authentication. In Braze, go to **Settings** > **API Keys** to locate your key. |
| `EXTERNAL_USER_ID` | The external user ID used to send your message to a specific user. In Braze, go to **Audience** > **Search users**, then search for a user. |
| `CUSTOM_KEY` | (Optional) A custom key for additional data. |
| `CUSTOM_VALUE` | (Optional) A custom value assigned to your custom key. |
{: .reset-td-br-1 .reset-td-br-2 aria-label="Step 2: Send the message" }
## Test limitations
There are a few situations where test messages don't have complete feature parity with launching a campaign or Canvas to a real set of users. In these instances, to validate this behavior, you should launch the campaign or Canvas to a limited set of test users.
- Viewing the Braze [preference center](https://www.braze.com/docs/fr/fr/user_guide/message_building_by_channel/email/managing_user_subscriptions/#subscription-groups) from **Test Messages** will cause the submit button to be grayed out.
- The list-unsubscribe header is not included in emails sent by the test message functionality.
- For in-app messages and Content Cards, the target user must have a push token for the target device.
# Exemples de notifications push avancées pour le SDK de Braze
Source: /docs/fr/developer_guide/push_notifications/examples/index.md
# Exemples de notifications push avancées {#advanced-push-notification-examples}
> Le guide suivant couvre quelques exemples de notifications push avancées pour le SDK de Braze.
## Prerequisites
Before you can use this feature, you'll need to [integrate the Android Braze SDK](https://www.braze.com/docs/fr/fr/developer_guide/sdk_integration/?sdktab=android). You'll also need to [set up push notifications](https://www.braze.com/docs/fr/fr/developer_guide/push_notifications/?sdktab=android).
## Custom notification layout
Braze notifications are sent as [data messages](https://firebase.google.com/docs/cloud-messaging/concept-options), which means that your application will always have a chance to respond and perform behavior accordingly, even in the background (in contrast to notification messages, which can be handled automatically by the system when your app is in the background). As such, your application will have a chance to customize the experience by, for example displaying personalized UI elements within the notification delivered to the notification tray. While implementing push in this way may be unfamiliar to some, one of our well-known features at Braze, [Push Stories](https://www.braze.com/docs/fr/fr/user_guide/message_building_by_channel/push/advanced_push_options/push_stories/), are a prime example of using custom view components to create an engaging experience!
**Important:**
Android imposes some limitations on what components can be used to implement custom notification views. Notification view layouts must _only_ contain View objects compatible with the [RemoteViews](https://developer.android.com/reference/android/widget/RemoteViews) framework.
You can use the [`IBrazeNotificationFactory`](https://braze-inc.github.io/braze-android-sdk/kdoc/braze-android-sdk/com.braze/-i-braze-notification-factory/index.html) interface to customize how Braze push notifications are displayed. By extending `BrazeNotificationFactory`, Braze will call your factory's `createNotification()` method before the notification is displayed to the user. It will then pass a payload containing custom key-value pairs sent through the Braze dashboard or REST API.
In this section, you'll partner with Superb Owl, the host of a new game show where wildlife rescue teams compete to see who can save the most owls. They're looking to leverage live updating notifications in their Android app, so they can display the status of an on-going match and make dynamic updates to the notification in realtime.
{: style="max-width:65%;"}
### Step 1: Add a custom layout
You can add one or more custom notification RemoteView layouts to your project. These are helpful for handling how notifications are displayed when collapsed or expanded. Your directory structure should be similar to the following:
```plaintext
.
├── app/
└── res/
└── layout/
├── liveupdate_collapsed.xml
└── liveupdate_expanded.xml
```
In each XML file, create a custom layout. Superb Owl created the following layouts for their collapsed and expanded RemoteView layouts:
```xml
```
**Show the sample code**
```xml
```
### Step 2: Create a custom notification factory
In your application, create a new file named `MyCustomNotificationFactory.kt` that extends [`BrazeNotificationFactory`](https://braze-inc.github.io/braze-android-sdk/kdoc/braze-android-sdk/com.braze/-i-braze-notification-factory/index.html) to handle how custom RemoteView layouts are displayed.
In the following example, Superb Owl created a custom notification factory to display a RemoteView layout for on-going matches. In the [next step](#android_step-3-map-custom-data), they'll create a new method called `getTeamInfo` to map a team's data to the activity.
**Show the sample code**
```kotlin
import android.app.Notification
import android.widget.RemoteViews
import androidx.core.app.NotificationCompat
import com.braze.models.push.BrazeNotificationPayload
import com.braze.push.BrazeNotificationFactory
import com.braze.push.BrazeNotificationUtils.getOrCreateNotificationChannelId
import com.braze.support.BrazeLogger.brazelog
class MyCustomNotificationFactory : BrazeNotificationFactory() {
override fun createNotification(payload: BrazeNotificationPayload): Notification? {
if (payload.extras.containsKey("live_update")) {
val kvp = payload.extras
val notificationChannelId = getOrCreateNotificationChannelId(payload)
val context = payload.context
if (context == null) {
brazelog { "BrazeNotificationPayload has null context. Not creating notification" }
return null
}
val team1 = kvp["team1"]
val team2 = kvp["team2"]
val score1 = kvp["score1"]
val score2 = kvp["score2"]
val time = kvp["time"]
val quarter = kvp["quarter"]
// Superb Owl will define the 'getTeamInfo' method in the next step.
val (team1name, team1icon) = getTeamInfo(team1)
val (team2name, team2icon) = getTeamInfo(team2)
// Get the layouts to use in the custom notification.
val notificationLayoutCollapsed = RemoteViews(BuildConfig.APPLICATION_ID, R.layout.liveupdate_collapsed)
val notificationLayoutExpanded = RemoteViews(BuildConfig.APPLICATION_ID, R.layout.liveupdate_expanded)
// Very simple notification for the small layout
notificationLayoutCollapsed.setTextViewText(
R.id.notification_title,
"$team1 $score1 - $score2 $team2\n$time $quarter"
)
notificationLayoutExpanded.setTextViewText(R.id.score, "$score1 - $score2")
notificationLayoutExpanded.setTextViewText(R.id.team1name, team1name)
notificationLayoutExpanded.setTextViewText(R.id.team2name, team2name)
notificationLayoutExpanded.setTextViewText(R.id.timeInfo, "$time - $quarter")
notificationLayoutExpanded.setImageViewResource(R.id.team1logo, team1icon)
notificationLayoutExpanded.setImageViewResource(R.id.team2logo, team2icon)
val customNotification = NotificationCompat.Builder(context, notificationChannelId)
.setSmallIcon(R.drawable.notification_small_icon)
.setStyle(NotificationCompat.DecoratedCustomViewStyle())
.setCustomContentView(notificationLayout)
.setCustomBigContentView(notificationLayoutExpanded)
.build()
return customNotification
} else {
// Use the BrazeNotificationFactory for all other notifications
return super.createNotification(payload)
}
}
}
```
### Step 3: Map custom data
In `MyCustomNotificationFactory.kt`, create a new method for handling data when Live Updates are displayed.
Superb Owl created the following method to map each team's name and logo to expanded Live Updates:
```kotlin
class CustomNotificationFactory : BrazeNotificationFactory() {
override fun createNotification(payload: BrazeNotificationPayload): Notification? {
// Your existing code
return super.createNotification(payload)
}
// Your new method
private fun getTeamInfo(team: String?): Pair {
return when (team) {
"WBF" -> Pair("Wild Bird Fund", R.drawable.team_wbf)
"OWL" -> Pair("Owl Rehab", R.drawable.team_owl)
else -> Pair("Unknown", R.drawable.notification_small_icon)
}
}
}
```
### Step 4: Set the custom notification factory
In your application class, use [`customBrazeNotificationFactory`](https://braze-inc.github.io/braze-android-sdk/kdoc/braze-android-sdk/com.braze/-braze/-companion/custom-braze-notification-factory.html?query=var%20customBrazeNotificationFactory:%20IBrazeNotificationFactory?)to set your custom notification factory.
```kotlin
import com.braze.Braze
class MyApplication : Application() {
override fun onCreate() {
super.onCreate()
// Tell Braze to use your custom factory for notifications
Braze.customBrazeNotificationFactory = MyCustomNotificationFactory()
}
}
```
### Step 5: Send the activity
You can use the [`/messages/send`](https://www.braze.com/docs/fr/fr/api/endpoints/messaging/send_messages/post_send_messages) REST API endpoint to send a push notification to a user's Android device.
#### Example curl command
Superb Owl sent their request using the following curl command:
```
curl -X POST "https://BRAZE_REST_ENDPOINT/messages/send" \
-H "Authorization: Bearer {REST_API_KEY}" \
-H "Content-Type: application/json" \
--data '{
"external_user_ids": ["USER_ID"],
"messages": {
"android_push": {
"title": "WBF vs OWL",
"alert": "2 to 4 1:33 Q4",
"extra": {
"live_update": "true",
"team1": "WBF",
"team2": "OWL",
"score1": "2",
"score2": "4",
"time": "1:33",
"quarter": "Q4"
},
"notification_id": "ASSIGNED_NOTIFICATION_ID"
}
}
}'
```
**Tip:**
While curl commands are helpful for testing, we recommend handling this call in your backend where you're already handling your [iOS Live Activities](https://www.braze.com/docs/fr/fr/developer_guide/push_notifications/live_notifications/?sdktab=swift).
#### Request parameters
| Key | Description |
| ----------------------------- | ------------------------------------------------------------------------------------------------------------------------------------------------------------------------------------------------------------------------------------------------ |
| `REST_API_KEY` | A Braze REST API key with `messages.send` permissions.
This can be created in the Braze dashboard from **Settings** > **API Keys**. |
| `BRAZE_REST_ENDPOINT` | Your REST endpoint URL. Your endpoint will depend on the [Braze URL for your instance](https://www.braze.com/docs/fr/fr/api/basics/#endpoints). |
| `USER_ID` | The ID of the user you are sending the notification to. |
| `messages.android_push.title` | The message's title. By default, this is not used for the custom notification factory's live notifications, but it may be used as a fallback. |
| `messages.android_push.alert` | The message's body. By default, this is not used for the custom notification factory's live notifications, but it may be used as a fallback. |
| `messages.extra` | Key-value pairs that the custom notification factory uses for live notifications. You can assign any string to this value—however, in the example above, `live_updates` is used to determine if it's a default or live push notification. |
| `ASSIGNED_NOTIFICATION_ID` | The notification ID you want to assign to the chosen user's live notification. The ID must be unique to this game, and must be used in order to [update their existing notification](#android_step-4-update-data-with-the-braze-rest-api) later. |
{: .reset-td-br-1 .reset-td-br-2 aria-label="Request parameters" }
### Step 6: Update the activity
To update the existing RemoteView notification with new data, modify the relevant key-value pairs assigned to `messages.extra`, then use the same `notification_id` and call the `/messages/send` endpoint again.
## Personalized push notifications
Push notifications can display user-specific information inside a custom view hierarchy. In the following example, an API-trigger is used to send personalized push notification to a user so they can track check their current progress after completing a specific task in the app.
{: style="max-width:65%;border:0"}
To set up a personalized push in the dashboard, register the specific category you want to be displayed, then set any relevant user attributes you'd like to display using Liquid.
{: style="max-width:60%;"}
## Prerequisites
Before you can use this feature, you'll need to [integrate the Swift Braze SDK](https://www.braze.com/docs/fr/fr/developer_guide/sdk_integration/?sdktab=swift). You'll also need to [set up push notifications](https://www.braze.com/docs/fr/fr/developer_guide/push_notifications/?sdktab=swift).
**Note:**
This implementation guide is centered around a Swift implementation, but Objective-C snippets are provided for those interested.
## Notification content app extensions
{: style="max-width:65%;border:0;margin-top:10px"}
Notification content app extensions provide you a great option for push notification customization. Notification content app extensions display a custom interface for your app’s notifications when a push notification is expanded.
Push notifications can be expanded in three different ways:
- A long press on the push banner
- Swiping down on the push banner
- Swiping the banner to the left and selecting "View"
These custom views offer smart ways to engage customers by displaying distinct types of content, including interactive notifications, notifications populated with user data, and even push messages that can capture information like phone numbers and email. One of our well-known features at Braze, [Push Stories](https://www.braze.com/docs/fr/fr/user_guide/message_building_by_channel/push/advanced_push_options/push_stories/), are a prime example of what a push notification content app extension can look like!
### Requirements
{: style="float:right;max-width:50%;margin-left:10px; border:0;margin-top:10px"}
- [Push notifications](https://www.braze.com/docs/fr/fr/developer_guide/push_notifications/?sdktab=swift) successfully integrated in your app
- The following files generated by Xcode based on your coding language:
**Swift**
- `NotificationViewController.swift`
- `MainInterface.storyboard`
**Objective-C**
- `NotificationViewController.h`
- `NotificationViewController.m`
- `MainInterface.storyboard`
## Interactive push notification
Push notifications can respond to user actions inside a content app extension. For users running iOS 12 or later, this means you can turn your push notifications into fully interactive messages! This provides an exciting option to introduce interactivity to your promotions and applications. For example, your push notification can include a game for users to play, a spin-to-win wheel for discounts, or a "like" button to save a listing or song.
The following example shows a push notification where users are able to play a match game inside the expanded notification.
{: style="border:0"}
### Dashboard configuration
To create an interactive push notification, you must set a custom view in your dashboard.
1. From the **Campaigns** page, click **Create Campaign** to start a new push notification campaign.
2. On the **Compose** tab, toggle on **Notification Buttons**.
3. Enter a custom iOS category in the **iOS Notification Category** field.
4. In the `.plist` of your Notification Content Extension Target, set the `UNNotificationExtensionCategory` attribute to your custom iOS category. The value given here must match what is set in the Braze dashboard under **iOS Notification Category**.
5. Set the `UNNotificationExtensionInteractionEnabled` key to `true` to enable user interactions in a push notification.
{: style="max-width:75%;border:0;margin-top:10px"}
{: style="max-width:75%;border:0;margin-top:10px"}
## Personalized push notifications
{: style="float:right;max-width:40%;margin-left:15px;border:0"}
Push notifications can display user-specific information inside a content extension. This allows you to create user-focused push content, such as adding the option to share your progress across different platforms, show unlocked achievements, or display onboarding checklists. This example shows a push notification displayed to a user after they have completed a specific task in the Braze Learning course. By expanding the notification, the user can see their progress through their learning path. The information provided here is user-specific and can be fired off as a session is completed or a specific user action is taken by leveraging an API trigger.
### Dashboard configuration
To create a personalized push notification, you must set a custom view in your dashboard.
1. From the **Campaigns** page, click **Create Campaign** to start a new push notification campaign.
2. On the **Compose** tab, toggle on **Notification Buttons**.
3. Enter a custom iOS category in the **iOS Notification Category** field.
4. In the **Settings** tab, create key-value pairs using standard Liquid. Set the appropriate user attributes you want the message to show. These views can be personalized based on specific user attributes of a specific user profile.
5. In the `.plist` of your Notification Content Extension Target, set the `UNNotificationExtensionCategory` attribute to your custom iOS category. The value given here must match what is set in the Braze dashboard under **iOS Notification Category**.
{: style="max-width:60%;"}
### Handling key-value pairs
The method `didReceive` is called when the notification content app extension has received a notification. This method can be found within the `NotificationViewController`. The key-value pairs provided in the dashboard are represented in the code through the use of a `userInfo` dictionary.
#### Parsing Key-Value Pairs from Push Notifications
``` swift
func didReceive(_ notification: UNNotification) {
let userInfo = notification.request.content.userInfo
guard let value = userInfo["YOUR-KEY-VALUE-PAIR"] as? String,
let otherValue = userInfo["YOUR-OTHER-KEY-VALUE-PAIR"] as? String,
else { fatalError("Key-Value Pairs are incorrect.")}
...
}
```
```objc
- (void)didReceiveNotification:(nonnull UNNotification *)notification {
NSDictionary *userInfo = notification.request.content.userInfo;
if (userInfo[@"YOUR-KEY-VALUE-PAIR"] && userInfo[@"YOUR-OTHER-KEY-VALUE-PAIR"]) {
...
} else {
[NSException raise:NSGenericException format:@"Key-Value Pairs are incorrect"];
}
}
```
## Information capture push notification
Push notifications can capture user information inside a content app extension, pushing the limits of what is possible with a push. Requesting user input through push notifications allows you to not only request basic information like name or email, but also prompt users to submit feedback or complete an unfinished user profile.
**Tip:**
For more information, see [Logging push notification data](https://www.braze.com/docs/fr/fr/developer_guide/analytics/logging_channel_data/push_notifications/).
In the following flow, the custom view is able to respond to state changes. Those state change components are represented in each image.
1. User receives a push notification.
2. Push is opened. After expanded, the push prompts the user for information. In this example, the user's email address is requested, but you could request any sort of information.
3. Information is provided, and if in the expected format, the registration button is shown.
3. Confirmation view is displayed, and push gets dismissed.
### Dashboard configuration
To create an information capture push notification, you must set a custom view in your dashboard.
1. From the **Campaigns** page, click **Create Campaign** to start a new push notification campaign.
2. On the **Compose** tab, toggle on **Notification Buttons**.
3. Enter a custom iOS category in the **iOS Notification Category** field.
4. In the **Settings** tab, create key-value pairs using standard Liquid. Set the appropriate user attributes you want the message to show.
5. In the `.plist` of your Notification Content Extension Target, set the `UNNotificationExtensionCategory` attribute to your custom iOS category. The value given here must match what is set in the Braze dashboard under **iOS Notification Category**.
As seen in the example, you may also include an image in your push notification. To do this, you must integrate [rich notifications](https://www.braze.com/docs/fr/fr/developer_guide/push_notifications/rich/?sdktab=swift), set the notification style in your campaign to Rich Notification, and include a rich push image.

### Handling button actions
Each action button is uniquely identified. The code checks if your response identifier is equal to the `actionIdentifier`, and if so, knows that the user clicked the action button.
**Handling Push Notification Action Button Responses**
``` swift
func didReceive(_ response: UNNotificationResponse, completionHandler completion: @escaping (UNNotificationContentExtensionResponseOption) -> Void) {
if response.actionIdentifier == "YOUR-REGISTER-IDENTIFIER" {
// do something
} else {
// do something else
}
}
```
```objc
- (void)didReceiveNotificationResponse:(UNNotificationResponse *)response completionHandler:(void (^)(UNNotificationContentExtensionResponseOption))completion {
if ([response.actionIdentifier isEqualToString:@"YOUR-REGISTER-IDENTIFIER"]) {
completion(UNNotificationContentExtensionResponseOptionDismiss);
} else {
completion(UNNotificationContentExtensionResponseOptionDoNotDismiss);
}
}
```
### Dismissing pushes
Push notifications can be automatically dismissed from an action button press. There are three pre-built push dismissal options that we recommend:
1. `completion(.dismiss)` - Dismisses the notification
2. `completion(.doNotDismiss)` - Notification stays open
3. `completion(.dismissAndForward)` - Push dismisses and the user gets forwarded into the application
# À propos des états d'abonnement push
Source: /docs/fr/developer_guide/push_notifications/subscription_states/index.md
# À propos des états d'abonnement push
## Push subscription states {#push-sub-states}
A "Push Subscription State" in Braze identifies a **user's** global preference for their desire to receive push notifications. Because the subscription state is user-based, it is not specific to any individual app. Subscription states become helpful flags when deciding which users to target for push notifications.
**Note:**
A user's push subscription state applies to their entire user profile, which includes all of the user's devices.
The following subscription state options exist: `Subscribed`, `Opted-In`, and `Unsubscribed`.
By default, for your user to receive your messages through push, their push subscription state must be either `Subscribed` or `Opted-In`, and they must have foreground push enabled. You can override this setting if needed when composing a message.
|Opt-in State|Description|
|---|---|
|`Subscribed`| Default push subscription state when a user profile is created in Braze. |
|`Opted-In`| A user has explicitly expressed a preference to receive push notifications. Braze automatically moves a user's opt-in state to `Opted-In` if the user accepts an OS-level push prompt.
This does not apply to Android 12 or below users.|
|`Unsubscribed`| A user explicitly unsubscribed from push through your application or other methods your brand provides. By default, Braze push campaigns target only users that are `Subscribed` or `Opted-in` for push.|
{: .reset-td-br-1 .reset-td-br-2 aria-label="Push subscription states #push-sub-states" }
**Important:**
Braze does not automatically change a user's push subscription state to `Unsubscribed`. Remember that if a user's push subscription state is `Unsubscribed`, then the user's `Foreground Push Enabled` filter in segmentation is `false`.
### Push registration and reachable users
Push subscription state reflects a user's preference, but whether they count as **reachable** for push in the dashboard also depends on [push registration](https://www.braze.com/docs/fr/fr/user_guide/channels/push/push_setup/push_token_lifecycle/)—that is, a valid foreground push token on their profile. For how Braze calculates channel-level counts, see [Measure segment size](https://www.braze.com/docs/fr/fr/user_guide/audience/segments/measuring_segment_size/).
- **Push campaigns and Canvases:** Users who aren't push registered aren't included in **Reachable users** for Android Push or iOS Push in audience statistics, even when their push subscription state is `Subscribed` or `Opted-In`.
- **Other channels:** The same users can still count as reachable for other channels they qualify for (for example, email or in-app messages).
- **Segments:** Segment membership follows your filters. Users without push registration remain in the segment unless a filter excludes them (for example, **Foreground Push Enabled**). Total segment membership can be higher than the sum of users shown in push-specific **Reachable users** rows.
A user profile can show push subscription state `Subscribed` while no push token is assigned. Those users still don't count toward **Reachable users** for Android Push or iOS Push until Braze records a valid token.
For filter definitions, see [Segmentation filters](https://www.braze.com/docs/fr/fr/user_guide/audience/segments/segmentation_filters/).
### Updating push subscription states {#update-push-subscription-state}
Review the following ways to update a user's push subscription state:
#### Automatic opt-in (default)
By default, Braze sets a user's push subscription state to `Opted-In` when they first authorize push notifications for your app. Braze also does this when a user re-enables push permissions in their system settings after previously disabling them.
To disable this default behavior, add the following property to your Android Studio project's `braze.xml` file:
```xml
false
```
On iOS, a new install typically shows push subscription state **`Subscribed`** until the user allows notifications. After the user selects **Allow** on the OS prompt, Braze sets the state to **`Opted-In`** when automatic opt-in is enabled. If the user selects **Don't Allow** and later turns push on in iOS Settings, the state updates after the user logs a session—not at the moment they change Settings.
Starting with [Braze Swift SDK version 7.5.0](https://github.com/braze-inc/braze-swift-sdk/releases/tag/7.5.0), you can disable or further customize this behavior by adding the `optInWhenPushAuthorized` configuration to your Xcode project's `AppDelegate.swift` file:
```swift
configuration.optInWhenPushAuthorized = false // disables the default behavior
let braze = Braze(configuration: configuration)
AppDelegate.braze = braze
```
#### SDK integration
You can update a user's subscription state with the Braze SDK using the `setPushNotificationSubscriptionType` method on [Web](https://js.appboycdn.com/web-sdk/latest/doc/classes/braze.user.html#setpushnotificationsubscriptiontype), [Android](https://braze-inc.github.io/braze-android-sdk/kdoc/braze-android-sdk/com.braze/-braze-user/set-push-notification-subscription-type.html), or [iOS](https://braze-inc.github.io/braze-swift-sdk/documentation/brazekit/braze/user-swift.class/set(pushnotificationsubscriptionstate:)). For example, you can use this method to create a settings page in your app where users can manually enable or disable push notifications.
#### REST API
You can update a user's subscription state with the Braze REST API using the [`/users/track` endpoint](https://www.braze.com/docs/fr/fr/api/endpoints/user_data/post_user_track/) to update their [`push_subscribe`](https://www.braze.com/docs/fr/fr/api/objects_filters/user_attributes_object) attribute.
### Differences between push enablement and push subscription status
Push enablement refers to whether a user has granted OS- or browser-level permission to receive notifications on a specific device. Push subscription state is a Braze-level setting that represents a user's global preference for receiving push across their profile.
When automatic opt-in is enabled (the default), Braze updates a user's push subscription state to `Opted-In` when they authorize push notifications for your app or re-enable permissions in their system settings (for example, on iOS, Android 13+, and supported web browsers). Otherwise, the user's push subscription state remains `Subscribed` until you explicitly change it using an SDK method or REST API call.
Braze does not automatically change a user's push subscription state to `Unsubscribed` when they opt out of notifications at the OS, browser, or app level. To update a user's push subscription state, you must update it in Braze. For example, if a user disables push from an in-app preference center, update the push subscription state to `Unsubscribed` in Braze. Braze does not update user profiles based on your preference center. To align subscription states with a user's in-app preferences, call the appropriate methods using the [SDK](https://www.braze.com/docs/fr/fr/user_guide/channels/push/push_setup/push_subscription_states/#sdk-integration) (iOS or Android) or [REST API](https://www.braze.com/docs/fr/fr/user_guide/channels/push/push_setup/push_subscription_states/#rest-api).
### Imported push tokens (iOS)
When you [import iOS push tokens](https://www.braze.com/docs/fr/fr/api/endpoints/user_data/post_user_track/#push-token-import) with `push_token_import`, the user's push subscription state is typically **`Subscribed`** until they log a session in your Braze-integrated app. After the first session, Braze may update the state to **`Opted-In`** if [automatic opt-in](#automatic-opt-in-default) applies (for example, when the user authorizes push on iOS and `optInWhenPushAuthorized` is enabled).
Review **Contact Settings** on the user's profile after import and again after the user's first in-app session to confirm the expected state.
### Checking push subscription state
{: style="float:right;max-width:35%;margin-left:15px;"}
You can check a user's push subscription state with Braze in any of the following ways:
* **User profile:** You can access individual user profiles through the Braze dashboard on the **[User Search](https://www.braze.com/docs/fr/fr/user_guide/engagement_tools/segments/user_profiles/)** page. After finding a user's profile (via email address, phone number, or external user ID), you can select the **Engagement** tab to view and manually adjust a user's subscription state.
* **REST API export:** You can export individual user profiles in JSON format using the export [Users by segment](https://www.braze.com/docs/fr/fr/api/endpoints/export/user_data/post_users_segment/) or [Users by identifier](https://www.braze.com/docs/fr/fr/api/endpoints/export/user_data/post_users_identifier/) endpoints. Braze returns a push tokens object that contains push enablement information per device.
# Résolution des problèmes des notifications push pour le SDK Braze
Source: /docs/fr/developer_guide/push_notifications/troubleshooting/index.md
# Résolution des problèmes des notifications push {#troubleshoot-push-notifications}
> Découvrez comment résoudre les problèmes liés aux notifications push pour le SDK Braze.
## Troubleshooting
If you're experiencing issues after setting up push notifications, consider the following:
- Web push notifications require that your site be HTTPS.
- Not all browsers can receive push messages. Ensure that `braze.isPushSupported()` returns `true` in the browser.
- Some browsers, such as Firefox, do not display images in push notifications. For details on browser support, refer to the [MDN documentation for Notification images](https://developer.mozilla.org/en-US/docs/Web/API/Notification/image).
- If a user has denied a site push access, they won't be prompted for permission again unless they remove the denied status from their browser preferences.
## Understanding the Braze push workflow
The Firebase Cloud Messaging (FCM) service is Google's infrastructure for push notifications sent to Android applications. Here is the simplified structure of how push notifications are enabled for your users' devices and how Braze can send push notifications to them:
```mermaid
---
config:
theme: mc
---
sequenceDiagram
participant Device as User Device
participant App as Android App
participant BrazeSDK as Braze SDK
participant BrazeAPI as Braze Server
participant Firebase as Google Firebase
Note over Device, Firebase: Register Option 1 Register Automatically using `com_braze_firebase_cloud_messaging_registration_enabled` in braze.xml
App ->> Braze: App initializes Braze with the first Braze call This could be automatic session handling
BrazeSDK ->> App: Get push token from Firebase Manager
BrazeSDK ->> BrazeAPI: Send push token to Braze Server
Note right of BrazeAPI: Braze will remove push token from any other user who may have previously been logged in on the same device.
Note over Device, Firebase: Register Option 2 Manual registration.
App ->> BrazeSDK: App sets `Braze.registeredPushToken`
BrazeSDK ->> BrazeAPI: Send push token to Braze Server
Note right of BrazeAPI: Braze will remove push token from any other user who may have previously been logged in on the same device.
Note over Device, Firebase: Push permission
BrazeAPI ->> BrazeSDK: In-App Message containing push prompt
BrazeSDK -> App: In-App Message is displayed
App -> BrazeSDK: User requests permissions
BrazeSDK -> App: Displays the Push Authorization prompt
BrazeSDK -> BrazeAPI: If authorized and `com_braze_optin_when_push_authorized`, Opt-In value is sent.
Note over Device, Firebase: Push Notification Is Sent
BrazeAPI ->> Firebase: Sends push message
Firebase ->> Device: Push message sent
Device ->> App: Android will send the push to the App. This could be blocked to Do Not Disturb, Power Saving Mode, etc.
App ->> BrazeSDK: Message is sent to BrazeFirebaseMessagingService
BrazeSDK ->> Device: SDK will check if the push is from Braze. If so, push data is transformed into a Push Notification and displayed.
```
### Step 1: Configuring your Google Cloud API key
In developing your app, you'll need to provide the Braze Android SDK with your Firebase sender ID. Additionally, you'll need to provide an API Key for server applications to the Braze dashboard. Braze will use this API key to send messages to your devices. You will also need to check that FCM service is enabled in Google Developer's console.
**Note:**
A common mistake during this step is using the app identifier API key instead of the REST API key.
### Step 2: Devices register for FCM and provide Braze with push tokens
In typical integrations, the Braze Android SDK will handle registering devices for FCM capability. This will usually happen immediately upon opening the app for the first time. After registration, Braze will be provided with an FCM Registration ID, which is used to send messages to that device specifically. We will store the Registration ID for that user, and that user will become "push registered" if they previously did not have a push token for any of your apps.
### Step 3: Launching a Braze push campaign
When a push campaign is launched, Braze will make requests to FCM to deliver your message. Braze will use the API key copied in the dashboard to authenticate and verify that we can send push notifications to the push tokens provided.
### Step 4: Removing invalid tokens
If FCM informs us that any of the push tokens we were attempting to send a message to are invalid, we remove those tokens from the user profiles they were associated with. If users have no other push tokens, they will no longer show up as "Push Registered" under the **Segments** page.
For more details about FCM, visit [Cloud messaging](https://firebase.google.com/docs/cloud-messaging/).
## Utilizing the push error logs
Braze provides push notification errors within the message activity log. This error log provides a variety of warnings which can be very helpful for identifying why your campaigns aren't working as expected. Clicking on an error message will redirect you to relevant documentation to help you troubleshoot a particular incident.

## Troubleshooting scenarios
### Push isn't sending
Your push messages might not be sending because of the following situations:
- Your credentials exist in the wrong Google Cloud Platform project ID (wrong sender ID).
- Your credentials have the wrong permission scope.
- You uploaded wrong credentials to the wrong Braze workspace (wrong sender ID).
For other issues that may prevent you from sending a push message, refer to [User Guide: Troubleshooting Push Notifications](https://www.braze.com/docs/fr/fr/user_guide/message_building_by_channel/push/troubleshooting/).
### No "push registered" users showing in the Braze dashboard (prior to sending messages)
Confirm that your app is correctly configured to allow push notifications. Common failure points to check include:
#### Incorrect sender ID
Check that the correct FCM sender ID is included in the `braze.xml` file. An incorrect sender ID will lead to `MismatchSenderID` errors reported in the dashboard's message activity log.
#### Braze registration not occurring
Since FCM registration is handled outside of Braze, failure to register can only occur in two places:
1. During registration with FCM
2. When passing the FCM-generated push token to Braze
We recommend setting a breakpoint or logging to confirm that the FCM-generated push token is being sent to Braze. If a token is not generated correctly or at all, we recommend consulting the [FCM documentation](https://firebase.google.com/docs/cloud-messaging/android/client).
#### Google Play Services not present
For FCM push to work, Google Play Services must be present on the device. If Google Play Services isn't on a device, push registration will not occur.
**Note:** Google Play Services is not installed on Android emulators without Google APIs installed.
#### Device not connected to the internet
Check that your device has good internet connectivity and isn't sending network traffic through a proxy.
### Tapping push notification doesn't open the app
Check if `com_braze_handle_push_deep_links_automatically` is set to `true` or `false`. To enable Braze to automatically open the app and any deep links when a push notification is tapped, set `com_braze_handle_push_deep_links_automatically` to `true` in your `braze.xml` file.
If `com_braze_handle_push_deep_links_automatically` is set to its default of `false`, you need to use a Braze Push Callback to listen for and handle the push received and opened intents.
### Push notifications bounced
If a push notification isn't delivered, make sure it didn't bounce by looking in the [developer console](https://www.braze.com/docs/fr/fr/developer_guide/platforms/android/push_notifications/troubleshooting/#utilizing-the-push-error-logs). The following are descriptions of common errors that may be logged in the developer console:
#### Error: MismatchSenderID
`MismatchSenderID` indicates an authentication failure. Confirm your Firebase sender ID and FCM API key are correct.
#### Error: InvalidRegistration
`InvalidRegistration` can be caused by a malformed push token.
1. Make sure to pass a valid push token to Braze from [Firebase Cloud Messaging](https://firebase.google.com/docs/cloud-messaging/android/client#retrieve-the-current-registration-token).
#### Error: NotRegistered
1. `NotRegistered` typically occurs when an app has been deleted from a device. Braze uses `NotRegistered` internally to signal that an app has been uninstalled from a device.
2. `NotRegistered` may also occur when multiple registrations occur and a second registration invalidates the first token.
### Push notifications sent but not displayed on users' devices
There are a few reasons why this could be occurring:
#### Application was force quit
If you force-quit your application through your system settings, your push notifications will not be sent. Launching the app again will re-enable your device to receive push notifications.
#### BrazeFirebaseMessagingService not registered
The BrazeFirebaseMessagingService must be properly registered in `AndroidManifest.xml` for push notifications to appear:
```xml
```
#### Firewall is blocking push
If you are testing push over Wi-Fi, your firewall may be blocking ports necessary for FCM to receive messages. Confirm that ports `5228`, `5229`, and `5230` are open. Additionally, since FCM doesn't specify its IPs, you must also allow your firewall to accept outgoing connections to all IP addresses contained in the IP blocks listed in Google's ASN of `15169`.
#### Custom notification factory returning null
If you have implemented a [custom notification factory](https://www.braze.com/docs/fr/fr/developer_guide/platform_integration_guides/android/push_notifications/android/integration/standard_integration/#custom-displaying-notifications), ensure that it is not returning `null`. This will cause notifications not to be displayed.
### "Push registered" users no longer enabled after sending messages
There are a few reasons why this could be happening:
#### Application was uninstalled
Users have uninstalled the application. This will invalidate their FCM push token.
#### Invalid Firebase Cloud Messaging server key
The Firebase Cloud Messaging server key provided in the Braze dashboard is invalid. The sender ID provided should match the one referenced in your app's `braze.xml` file. The server key and sender ID are found here in your Firebase Console:

### Push clicks not logged
Braze logs push clicks automatically, so this scenario should be comparatively rare.
If push clicks are not being logged, it is possible that push click data has not been flushed to our servers yet. Braze throttles the frequency of its flushes based on the strength of the network connection. With a good network connection, push click-data should arrive at the server within a minute in most circumstances.
### Deep links not working
#### Verify deep link configuration
Deep links can be [tested with ADB](https://developer.android.com/training/app-indexing/deep-linking.html#testing-filters). We recommend testing your deep link with the following command:
`adb shell am start -W -a android.intent.action.VIEW -d "THE_DEEP_LINK" THE_PACKAGE_NAME`
If the deep link fails to work, the deep link may be misconfigured. A misconfigured deep link will not work when sent through Braze push.
#### Verify custom handling logic
If the deep link [works correctly with ADB](https://developer.android.com/training/app-indexing/deep-linking.html#testing-filters) but fails to work from Braze push, check whether any [custom push open handling](https://www.braze.com/docs/fr/fr/developer_guide/platform_integration_guides/android/push_notifications/android/integration/standard_integration/#android-push-listener-callback) has been implemented. If so, verify that the custom handling code properly handles the incoming deep link.
#### Disable back stack behavior
If the deep link [works correctly with ADB](https://developer.android.com/training/app-indexing/deep-linking.html#testing-filters) but fails to work from Braze push, try disabling [back stack](https://developer.android.com/guide/components/activities/tasks-and-back-stack). To do so, update your **braze.xml** file to include:
```xml
false
```
## Understanding the Braze/APNs workflow
The Apple Push Notification service (APNs) is the infrastructure for sending push notifications to applications running on Apple's platforms. Here is the simplified structure of how push notifications are enabled for your users' devices and how Braze can send push notifications to them:
1. You configure the push certificate and provisioning profile
2. Devices register for APNs and provide Braze with push tokens
3. You launch a Braze push campaign
4. Braze removes invalid tokens
### Step 1: Configuring the push certificate and provisioning profile
In developing your app, you'll need to create an SSL certificate to enable push notifications. This certificate will be included in the provisioning profile your app is built with and will also need to be uploaded to the Braze dashboard. The certificate allows Braze to tell APNs that we are allowed to send push notifications on your behalf.
There are two types of [provisioning profiles](https://developer.apple.com/library/content/documentation/IDEs/Conceptual/AppDistributionGuide/MaintainingProfiles/MaintainingProfiles.html) and certificates: development and distribution. We recommend just using distribution profiles and certificates to avoid any confusion. If you choose to use different profiles and certificates for development and distribution, ensure that the certificate uploaded to the dashboard matches the provisioning profile you are currently using.
**Warning:**
Do not change the push certificate environment (development versus production). Changing the push certificate to the wrong environment can lead to your users having their push token accidentally removed, making them unreachable by push.
### Step 2: Devices register for APNs and provide Braze with push tokens
When users open your app, they will be prompted to accept push notifications. If they accept this prompt, APNs will generate a push token for that particular device. The Swift SDK will immediately and asynchronously send up the push token for apps using the default [automatic flush policy](https://www.braze.com/docs/fr/fr/developer_guide/platform_integration_guides/swift/advanced_use_cases/fine_network_traffic_control/#automatic-request-processing). After we have a push token associated with a user, they will show as "Push Registered" in the dashboard on their user profile under the **Engagement** tab and will be eligible to receive push notifications from Braze campaigns.
**Note:**
Starting in macOS 13, on certain devices, you can test push notifications on an iOS 16 Simulator running on Xcode 14. For further details, refer to the [Xcode 14 Release Notes](https://developer.apple.com/documentation/xcode-release-notes/xcode-14-release-notes).
#### Considerations for push token generation
- If users install your app on another device, another token will be created and captured in the same way.
- If users reinstall your app, a new token will be generated and passed to Braze. However, the original token may still be logged as valid by APNs and Braze.
- If users uninstall your app, Braze doesn't get immediately notified of this and the token will still appear as valid until it is retired by APNs.
- At some point, APNs will retire old tokens. Braze doesn't have control or visibility of this.
### Step 3: Launching a Braze push campaign
When a push campaign is launched, Braze will make requests to APNs to deliver your message. Specifically, the requests are passed to APNs for each current valid push token unless **Send to a user's most recent device** is selected. After Braze receives a successful response from APNs, we will log a successful delivery on the user profile, though the user may not have received the actual message for reasons including:
- Their device is powered off.
- Their device isn't connected to the internet (Wi-Fi or cellular).
- They recently uninstalled the app.
Braze will use the SSL push certificate uploaded in the dashboard to authenticate and verify that we are allowed to send push notifications to the push tokens provided. If a device is online, the notification should be received shortly after the campaign has been sent. Note that Braze sets the default APNs [expiration date](https://developer.apple.com/documentation/usernotifications/setting_up_a_remote_notification_server/sending_notification_requests_to_apns#2947607) for notifications to 30 days.
### Step 4: Removing invalid tokens
If [APNs](https://developer.apple.com/library/content/documentation/NetworkingInternet/Conceptual/RemoteNotificationsPG/APNSOverview.html#//apple_ref/doc/uid/TP40008194-CH8-SW1) informs us that any of the push tokens we were attempting to send a message to are invalid, we remove those tokens from the user profiles they were associated with.
**Note:**
It's normal for APNs to initially return a success status even if a token becomes unregistered, as APNs doesn't immediately report token invalidation events. APNs intentionally delays returning a `410` status for invalid tokens on a randomized schedule, designed to protect user privacy and prevent tracking of app uninstalls. You can safely continue sending notifications to an unregistered token until APNs returns a `410` status.
## Using the push error logs
The [Message Activity Log](https://www.braze.com/docs/fr/fr/user_guide/administrative/app_settings/message_activity_log_tab/) gives you the opportunity to see any messages (especially error messages) associated with your campaigns and sends, including push notification errors. This error log provides a variety of warnings which can be very helpful for identifying why your campaigns aren't working as expected. Clicking on an error message will redirect you to relevant documentation to help you troubleshoot a particular incident.

Common errors you might see here include user-specific notifications, such as ["Received Unregistered Sending to Push Token"](#swift_received-unregistered-sending).
In addition, Braze also provides a push changelog on the user profile under the **Engagement** tab. This changelog provides insight into push registration behavior such as token invalidation, push registration errors, tokens being moved to new users, etc.
{: style="max-width:50%;" }
### Message Activity Log errors
#### Received unregistered sending to push token {#received-unregistered-sending}
- Make sure that the push token being sent to Braze from the method `AppDelegate.braze?.notifications.register(deviceToken:)` is valid. You can look in the **Message Activity Log** to see the push token. It should look something like `6e407a9be8d07f0cdeb9e724733a89445f57a89ec890d63867c482a483506fa6`, a long string containing a mix of letters and numbers. If your push token looks different, check your [code](https://www.braze.com/docs/fr/fr/developer_guide/platform_integration_guides/swift/push_notifications/integration/#step-4-register-push-tokens-with-braze) for sending Braze the push tokens.
- Ensure that your push provisioning profile matches the environment you're testing. Universal certificates may be configured in the Braze dashboard to send to either the development or production APNs environment. Using a development certificate for a production app or a production certificate for a development app will not work.
- Check that the push token you have uploaded to Braze matches the provisioning profile you used to build the app you sent the push token from.
#### Device token not for topic
APNs returns `DeviceTokenNotForTopic` (HTTP status 400) when the push token doesn't match the topic (bundle ID) configured for your credentials. Braze may surface this in **Message Activity Log** or push delivery logs as `DeviceTokenNotForTopic`.
To resolve the mismatch:
1. Confirm the app's **bundle ID** matches the **App Bundle ID** in Braze (**Settings** > **App Settings** > **Push Notification Settings**).
2. Verify the provisioning profile used to build the app includes push capability for that bundle ID.
3. Confirm the push credential uploaded to Braze matches the app's environment (development versus production).
4. For `.p8` keys, verify **Team ID** and **Key ID** in Braze match your Apple Developer account.
5. Re-upload a valid `.p8` key or `.p12` certificate if credentials were rotated or revoked.
Prefer `.p8` authentication keys when possible. For credential types and dashboard status indicators, see [Migrate to a .p8 authentication key](https://www.braze.com/docs/fr/fr/user_guide/channels/push/troubleshooting/#migrate-to-a-p8-authentication-key).
#### BadDeviceToken sending to push token
The `BadDeviceToken` is an APNs error code and does not originate from Braze. There could be a number of reasons for this response being returned, including the following:
- The app received a push token that was invalid for the credentials uploaded to the dashboard.
- Push was disabled for this workspace.
- The user has opted out of push.
- The app was uninstalled.
- Apple refreshed the push token, which invalidated the old token.
- The app was built for a production environment, but the push credentials uploaded to Braze are set for a development environment (or the other way around).
## Push registration issues
### No push registration prompt
If the application does not prompt you to register for push notifications, there is likely an issue with your push registration integration. Ensure you have followed our [documentation](https://www.braze.com/docs/fr/fr/developer_guide/push_notifications/?sdktab=swift) and correctly integrated our push registration. You can also set breakpoints in your code to ensure the push registration code is running.
### No "push registered" users showing in the dashboard (prior to sending messages)
Ensure that your app is correctly configured to allow push notifications. Common failure points to check include:
- Check that your app is prompting you to allow push notifications. Typically, this prompt will appear upon your first open of the app, but it can be programmed to appear elsewhere. If it does not appear where it should be, the problem is likely with the basic configuration of your app's push capabilities.
- Verify the steps for [push integration](https://www.braze.com/docs/fr/fr/developer_guide/push_notifications/?sdktab=swift) were successfully completed.
- Check that the provisioning profile your app was built with includes permissions for push. Make sure that you're pulling down all of the available provisioning profiles from your Apple developer account. To confirm this, perform the following steps:
1. In Xcode, navigate to **Preferences > Accounts** (or use the keyboard shortcut Command+,).
2. Select the Apple ID you use for your developer account and click **View Details**.
3. On the next page, click ** Refresh** and confirm that you're pulling all available provisioning profiles.
- Check you have [properly enabled push capability](https://www.braze.com/docs/fr/fr/developer_guide/platform_integration_guides/swift/push_notifications/integration/#step-2-enable-push-capabilities) in your app.
- Check your push provisioning profile matches the environment you're testing in. Universal certificates may be configured in the Braze dashboard to send to either the development or production APNs environment. Using a development certificate for a production app or a production certificate for a development app will not work.
- Check that you are calling our `registerPushToken` method by setting a breakpoint in your code.
- Make sure you're testing using a device (push will not work on a simulator) and have good network connectivity.
## Push notifications sent but not displayed on users’ devices
### "Push registered" users no longer enabled after sending messages
This likely indicates that the user had an invalid push token. This can happen for several reasons:
#### Dashboard and app certificate mismatch
If the push certificate you uploaded in the dashboard is not the same one in the provisioning profile that your app was built with, APNs will reject the token. Verify that you have uploaded the correct certificate and completed another session in the app before attempting another test notification.
#### Application was uninstalled
If a user has uninstalled your application, their push token will be invalid and removed upon the next send.
#### Regenerating your provisioning profile
As a last resort, starting over fresh and creating a whole new provisioning profile can clear up configuration errors that come from working with multiple environments, profiles, and apps at the same time. There are many "moving parts" in setting up push notifications, so sometimes, it is best to retry from the beginning. This will also help isolate the problem if you need to continue troubleshooting.
### Messages not delivered to "push registered" users
#### App is foregrounded
On iOS versions that do not integrate push via the `UserNotifications` framework, if the app is in the foreground when the push message is received, it will not be displayed. You should background the app on your test devices before sending test messages.
#### Test notification scheduled incorrectly
Check the schedule you set for your test message. If it is set to local time zone delivery or [Intelligent Timing](https://www.braze.com/docs/fr/fr/user_guide/brazeai/intelligence/intelligent_timing/), you may have just not received the message yet (or had the app in the foreground when it was received).
### User not "push registered" for the app being tested
Check the user profile of the user you are trying to send a test message to. Under the **Engagement** tab, there should be a list of "pushable apps." Verify the app you are trying to send test messages to is in this list. Users will show up as "Push Registered" if they have a push token for any app in your workspace, so this could be something of a false positive.
The following would indicate a problem with push registration or that the user's token had been returned to Braze as invalid by APNs after being pushed:
{: style="max-width:50%"}
## Push clicks not logged {#push-clicks-not-logged}
- Make sure you have followed the [push integration steps](https://www.braze.com/docs/fr/fr/developer_guide/platform_integration_guides/swift/push_notifications/integration/#step-5-enable-push-handling).
- Braze does not handle push notifications received silently in the foreground (default foreground push behavior prior to the `UserNotifications` framework). This means that links will not be opened, and push clicks will not be logged. If your application has not yet integrated the `UserNotifications` framework, Braze will not handle push notifications when the application state is `UIApplicationStateActive`. Ensure that your app does not delay calls to [push handling methods](https://www.braze.com/docs/fr/fr/developer_guide/platform_integration_guides/swift/push_notifications/integration/#step-5-enable-push-handling); otherwise, the Swift SDK may treat push notifications as silent foreground push events and not handle them.
## Deep links not working
For comprehensive troubleshooting across all channels—including universal links, custom schemes, email, and third-party providers like Branch—see [Deep linking troubleshooting](https://www.braze.com/docs/fr/fr/developer_guide/push_notifications/deep_linking_troubleshooting).
### Web links from push clicks not opening
Links in push notifications need to be ATS compliant to be opened in web views. Ensure that your web links use HTTPS. For more information, refer to [ATS compliance](https://www.braze.com/docs/fr/fr/developer_guide/platform_integration_guides/swift/advanced_use_cases/linking/#app-transport-security-ats).
### Deep links from push clicks not opening
Most of the code that handles deep links also handles push opens. First, ensure that push opens are being logged. If not, fix that issue (as the fix often fixes link handling).
If opens are being logged, check whether it is an issue with the deep link in general or with the deep linking push click handling. To do this, test to see if a deep link from an in-app message click works.
## Understanding the Braze push workflow
The Firebase Cloud Messaging (FCM) service is Google's infrastructure for push notifications sent to Android applications. Here is the simplified structure of how push notifications are enabled for your users' devices and how Braze can send push notifications to them:
```mermaid
---
config:
theme: mc
---
sequenceDiagram
participant Device as User Device
participant App as Android App
participant BrazeSDK as Braze SDK
participant BrazeAPI as Braze Server
participant Firebase as Google Firebase
Note over Device, Firebase: Register Option 1 Register Automatically using `com_braze_firebase_cloud_messaging_registration_enabled` in braze.xml
App ->> Braze: App initializes Braze with the first Braze call This could be automatic session handling
BrazeSDK ->> App: Get push token from Firebase Manager
BrazeSDK ->> BrazeAPI: Send push token to Braze Server
Note right of BrazeAPI: Braze will remove push token from any other user who may have previously been logged in on the same device.
Note over Device, Firebase: Register Option 2 Manual registration.
App ->> BrazeSDK: App sets `Braze.registeredPushToken`
BrazeSDK ->> BrazeAPI: Send push token to Braze Server
Note right of BrazeAPI: Braze will remove push token from any other user who may have previously been logged in on the same device.
Note over Device, Firebase: Push permission
BrazeAPI ->> BrazeSDK: In-App Message containing push prompt
BrazeSDK -> App: In-App Message is displayed
App -> BrazeSDK: User requests permissions
BrazeSDK -> App: Displays the Push Authorization prompt
BrazeSDK -> BrazeAPI: If authorized and `com_braze_optin_when_push_authorized`, Opt-In value is sent.
Note over Device, Firebase: Push Notification Is Sent
BrazeAPI ->> Firebase: Sends push message
Firebase ->> Device: Push message sent
Device ->> App: Android will send the push to the App. This could be blocked to Do Not Disturb, Power Saving Mode, etc.
App ->> BrazeSDK: Message is sent to BrazeFirebaseMessagingService
BrazeSDK ->> Device: SDK will check if the push is from Braze. If so, push data is transformed into a Push Notification and displayed.
```
### Step 1: Configuring your Google Cloud API key
In developing your app, you'll need to provide the Braze Android SDK with your Firebase sender ID. Additionally, you'll need to provide an API Key for server applications to the Braze dashboard. Braze will use this API key to send messages to your devices. You will also need to check that FCM service is enabled in Google Developer's console.
**Note:**
A common mistake during this step is using the app identifier API key instead of the REST API key.
### Step 2: Devices register for FCM and provide Braze with push tokens
In typical integrations, the Braze Android SDK will handle registering devices for FCM capability. This will usually happen immediately upon opening the app for the first time. After registration, Braze will be provided with an FCM Registration ID, which is used to send messages to that device specifically. We will store the Registration ID for that user, and that user will become "push registered" if they previously did not have a push token for any of your apps.
### Step 3: Launching a Braze push campaign
When a push campaign is launched, Braze will make requests to FCM to deliver your message. Braze will use the API key copied in the dashboard to authenticate and verify that we can send push notifications to the push tokens provided.
### Step 4: Removing invalid tokens
If FCM informs us that any of the push tokens we were attempting to send a message to are invalid, we remove those tokens from the user profiles they were associated with. If users have no other push tokens, they will no longer show up as "Push Registered" under the **Segments** page.
For more details about FCM, visit [Cloud messaging](https://firebase.google.com/docs/cloud-messaging/).
## Utilizing the push error logs
Braze provides push notification errors within the message activity log. This error log provides a variety of warnings which can be very helpful for identifying why your campaigns aren't working as expected. Clicking on an error message will redirect you to relevant documentation to help you troubleshoot a particular incident.

## Troubleshooting scenarios
### Push isn't sending
Your push messages might not be sending because of the following situations:
- Your credentials exist in the wrong Google Cloud Platform project ID (wrong sender ID).
- Your credentials have the wrong permission scope.
- You uploaded wrong credentials to the wrong Braze workspace (wrong sender ID).
For other issues that may prevent you from sending a push message, refer to [User Guide: Troubleshooting Push Notifications](https://www.braze.com/docs/fr/fr/user_guide/message_building_by_channel/push/troubleshooting/).
### No "push registered" users showing in the Braze dashboard (prior to sending messages)
Confirm that your app is correctly configured to allow push notifications. Common failure points to check include:
#### Incorrect sender ID
Check that the correct FCM sender ID is included in the `braze.xml` file. An incorrect sender ID will lead to `MismatchSenderID` errors reported in the dashboard's message activity log.
#### Braze registration not occurring
Since FCM registration is handled outside of Braze, failure to register can only occur in two places:
1. During registration with FCM
2. When passing the FCM-generated push token to Braze
We recommend setting a breakpoint or logging to confirm that the FCM-generated push token is being sent to Braze. If a token is not generated correctly or at all, we recommend consulting the [FCM documentation](https://firebase.google.com/docs/cloud-messaging/android/client).
#### Google Play Services not present
For FCM push to work, Google Play Services must be present on the device. If Google Play Services isn't on a device, push registration will not occur.
**Note:** Google Play Services is not installed on Android emulators without Google APIs installed.
#### Device not connected to the internet
Check that your device has good internet connectivity and isn't sending network traffic through a proxy.
### Tapping push notification doesn't open the app
Check if `com_braze_handle_push_deep_links_automatically` is set to `true` or `false`. To enable Braze to automatically open the app and any deep links when a push notification is tapped, set `com_braze_handle_push_deep_links_automatically` to `true` in your `braze.xml` file.
If `com_braze_handle_push_deep_links_automatically` is set to its default of `false`, you need to use a Braze Push Callback to listen for and handle the push received and opened intents.
### Push notifications bounced
If a push notification isn't delivered, make sure it didn't bounce by looking in the [developer console](https://www.braze.com/docs/fr/fr/developer_guide/platforms/android/push_notifications/troubleshooting/#utilizing-the-push-error-logs). The following are descriptions of common errors that may be logged in the developer console:
#### Error: MismatchSenderID
`MismatchSenderID` indicates an authentication failure. Confirm your Firebase sender ID and FCM API key are correct.
#### Error: InvalidRegistration
`InvalidRegistration` can be caused by a malformed push token.
1. Make sure to pass a valid push token to Braze from [Firebase Cloud Messaging](https://firebase.google.com/docs/cloud-messaging/android/client#retrieve-the-current-registration-token).
#### Error: NotRegistered
1. `NotRegistered` typically occurs when an app has been deleted from a device. Braze uses `NotRegistered` internally to signal that an app has been uninstalled from a device.
2. `NotRegistered` may also occur when multiple registrations occur and a second registration invalidates the first token.
### Push notifications sent but not displayed on users' devices
There are a few reasons why this could be occurring:
#### Application was force quit
If you force-quit your application through your system settings, your push notifications will not be sent. Launching the app again will re-enable your device to receive push notifications.
#### BrazeFirebaseMessagingService not registered
The BrazeFirebaseMessagingService must be properly registered in `AndroidManifest.xml` for push notifications to appear:
```xml
```
#### Firewall is blocking push
If you are testing push over Wi-Fi, your firewall may be blocking ports necessary for FCM to receive messages. Confirm that ports `5228`, `5229`, and `5230` are open. Additionally, since FCM doesn't specify its IPs, you must also allow your firewall to accept outgoing connections to all IP addresses contained in the IP blocks listed in Google's ASN of `15169`.
#### Custom notification factory returning null
If you have implemented a [custom notification factory](https://www.braze.com/docs/fr/fr/developer_guide/platform_integration_guides/android/push_notifications/android/integration/standard_integration/#custom-displaying-notifications), ensure that it is not returning `null`. This will cause notifications not to be displayed.
### "Push registered" users no longer enabled after sending messages
There are a few reasons why this could be happening:
#### Application was uninstalled
Users have uninstalled the application. This will invalidate their FCM push token.
#### Invalid Firebase Cloud Messaging server key
The Firebase Cloud Messaging server key provided in the Braze dashboard is invalid. The sender ID provided should match the one referenced in your app's `braze.xml` file. The server key and sender ID are found here in your Firebase Console:

### Push clicks not logged
Braze logs push clicks automatically, so this scenario should be comparatively rare.
If push clicks are not being logged, it is possible that push click data has not been flushed to our servers yet. Braze throttles the frequency of its flushes based on the strength of the network connection. With a good network connection, push click-data should arrive at the server within a minute in most circumstances.
### Deep links not working
#### Verify deep link configuration
Deep links can be [tested with ADB](https://developer.android.com/training/app-indexing/deep-linking.html#testing-filters). We recommend testing your deep link with the following command:
`adb shell am start -W -a android.intent.action.VIEW -d "THE_DEEP_LINK" THE_PACKAGE_NAME`
If the deep link fails to work, the deep link may be misconfigured. A misconfigured deep link will not work when sent through Braze push.
#### Verify custom handling logic
If the deep link [works correctly with ADB](https://developer.android.com/training/app-indexing/deep-linking.html#testing-filters) but fails to work from Braze push, check whether any [custom push open handling](https://www.braze.com/docs/fr/fr/developer_guide/platform_integration_guides/android/push_notifications/android/integration/standard_integration/#android-push-listener-callback) has been implemented. If so, verify that the custom handling code properly handles the incoming deep link.
#### Disable back stack behavior
If the deep link [works correctly with ADB](https://developer.android.com/training/app-indexing/deep-linking.html#testing-filters) but fails to work from Braze push, try disabling [back stack](https://developer.android.com/guide/components/activities/tasks-and-back-stack). To do so, update your **braze.xml** file to include:
```xml
false
```
## Troubleshooting
### Push doesn't appear after app is closed from task switcher
If you observe that push notifications no longer appear after the app is closed from the task switcher, your app is likely in Debug mode. .NET MAUI adds scaffolding in Debug mode that prevents apps from receiving push after their process is killed. If you run your app in Release Mode, you should see push even after the app is closed from the task switcher.
### Custom notification factory not being set correctly
Custom notification factories (and all delegates) must extend [`Java.Lang.Object`](https://developer.xamarin.com/api/type/Android.Runtime.IJavaObject/) to work properly across the C# and Java divide. See [Xamarin](https://developer.xamarin.com/guides/android/advanced_topics/java_integration_overview/working_with_jni/#Implementing_Interfaces) on implementing Java interfaces for more information.
## Sauts de ligne dans les notifications push {#push-linebreaks}
Lors de la rédaction de notifications push avec des étiquettes Liquid, les sauts de ligne adjacents aux étiquettes Liquid sont automatiquement supprimés avant l'envoi du message. Dans le [compositeur de notifications push](https://www.braze.com/docs/fr/fr/user_guide/message_building_by_channel/push/creating_a_push_message/), ces sauts de ligne sont réajoutés afin que votre message reste lisible pendant la modification. Si vous remarquez des sauts de ligne autour des étiquettes Liquid lors de l'enregistrement de votre message, il s'agit d'un comportement attendu.
# Activités en ligne/en production/instantanées pour le SDK Braze
Source: /docs/fr/developer_guide/live_notifications/index.md
Activités en direct
> Apprenez à envoyer des notifications persistantes et dynamiques directement sur l'écran de verrouillage de vos utilisateurs, afin qu'ils puissent obtenir des mises à jour en temps réel sans avoir besoin d'ouvrir votre application. Pour Swift, cette fonction est prise en charge en mode natif.
Apprenez à envoyer des notifications persistantes et dynamiques directement sur l'écran de verrouillage de vos utilisateurs, afin qu'ils puissent recevoir des mises à jour en temps réel sans même ouvrir votre application.
Featured:
- Mise en ligne/en production/instantanée pour Swift
# Mises à jour en direct pour le SDK Android de Braze
Source: /docs/fr/developer_guide/live_notifications/live_updates/index.md
# Mises à jour en direct pour Android {#live-updates-for-android}
> Découvrez comment utiliser les mises à jour en direct Android dans le SDK de Braze, également connues sous le nom de [Progress Centric Notifications](https://developer.android.com/about/versions/16/features/progress-centric-notifications). Ces notifications sont similaires aux [Live Activities pour le SDK Swift de Braze](https://www.braze.com/docs/fr/fr/developer_guide/live_notifications/live_activities/), vous permettant d'afficher des notifications interactives sur l'écran de verrouillage. Android 16 introduit les notifications centrées sur la progression pour aider les utilisateurs à suivre de façon fluide les parcours initiés par l'utilisateur, du début à la fin.
## Fonctionnement {#how-it-works}
Vous pouvez utiliser l'interface [`IBrazeNotificationFactory`](https://braze-inc.github.io/braze-android-sdk/kdoc/braze-android-sdk/com.braze/-i-braze-notification-factory/index.html) pour personnaliser l'affichage des notifications push de Braze. En étendant `BrazeNotificationFactory`, Braze appellera la méthode `createNotification()` de votre fabrique avant que la notification ne soit affichée à l'utilisateur. Il transmettra ensuite un payload contenant des paires clé-valeur personnalisées envoyées via le tableau de bord de Braze ou la REST API.
## Afficher une mise à jour en direct {#displaying-a-live-update}
Dans cette section, vous collaborerez avec Superb Owl, l'animateur d'un nouveau jeu télévisé dans lequel des équipes de sauvetage d'animaux sauvages s'affrontent pour savoir qui peut sauver le plus grand nombre de hiboux. Ils cherchent à exploiter les mises à jour en direct dans leur application Android, afin d'afficher l'état d'un match en cours et de mettre à jour dynamiquement la notification en temps réel.
{: style="max-width:40%;"}
### Prerequisites
Before you can use this feature, you'll need to [integrate the Android Braze SDK](https://www.braze.com/docs/fr/fr/developer_guide/sdk_integration/?sdktab=android).
### Étape 1 : Créer une fabrique de notifications personnalisée {#step-1-create-a-custom-notification-factory}
Dans votre application, créez un nouveau fichier nommé `MyCustomNotificationFactory.kt` qui étend [`BrazeNotificationFactory`](https://braze-inc.github.io/braze-android-sdk/kdoc/braze-android-sdk/com.braze/-i-braze-notification-factory/index.html) pour gérer l'affichage des mises à jour en direct de Braze.
Dans l'exemple suivant, Superb Owl a créé une fabrique de notifications personnalisée pour afficher une mise à jour en direct pour les matchs en cours. À l'étape suivante, vous allez créer une nouvelle méthode appelée `getTeamInfo` pour mapper les données d'une équipe à l'activité.
```kotlin
class MyCustomNotificationFactory : IBrazeNotificationFactory {
override fun createNotification(payload: BrazeNotificationPayload): Notification? {
val notificationBuilder = populateNotificationBuilder(payload)
val context = payload.context ?: return null
if (notificationBuilder == null) {
brazelog { "Notification could not be built. Returning null as created notification." }
return null
}
notificationBuilder.setContentTitle("Android Live Updates").setContentText("Ongoing updates below")
setProgressStyle(notificationBuilder, context)
return notificationBuilder.build()
}
private fun setProgressStyle(notificationBuilder: NotificationCompat.Builder, context: Context) {
val style = NotificationCompat.ProgressStyle()
.setStyledByProgress(false)
.setProgress(200)
.setProgressTrackerIcon(IconCompat.createWithResource(context, R.drawable.notification_small_icon))
.setProgressSegments(
mutableListOf(
NotificationCompat.ProgressStyle.Segment(1000).setColor(Color.GRAY),
NotificationCompat.ProgressStyle.Segment(200).setColor(Color.BLUE),
)
)
.setProgressPoints(
mutableListOf(
NotificationCompat.ProgressStyle.Point(60).setColor(Color.RED),
NotificationCompat.ProgressStyle.Point(560).setColor(Color.GREEN)
)
)
notificationBuilder.setStyle(style)
}
}
```
### Étape 2 : Mapper les données personnalisées {#step-2-map-custom-data}
Dans `MyCustomNotificationFactory.kt`, créez une nouvelle méthode pour traiter les données lorsque des mises à jour en direct sont affichées.
Superb Owl a créé la méthode suivante pour mapper le nom et le logo de chaque équipe aux mises à jour en direct étendues :
```kotlin
class CustomNotificationFactory : BrazeNotificationFactory() {
override fun createNotification(payload: BrazeNotificationPayload): Notification? {
// Your existing code
return super.createNotification(payload)
}
// Your new method
private fun getTeamInfo(team: String?): Pair {
return when (team) {
"WBF" -> Pair("Wild Bird Fund", R.drawable.team_wbf)
"OWL" -> Pair("Owl Rehab", R.drawable.team_owl)
else -> Pair("Unknown", R.drawable.notification_small_icon)
}
}
}
```
### Étape 3 : Définir la fabrique de notifications personnalisée {#step-3-set-the-custom-notification-factory}
Dans votre classe d'application, utilisez [`customBrazeNotificationFactory`](https://braze-inc.github.io/braze-android-sdk/kdoc/braze-android-sdk/com.braze/-braze/-companion/custom-braze-notification-factory.html?query=var%20customBrazeNotificationFactory:%20IBrazeNotificationFactory?) pour définir votre fabrique de notifications personnalisée.
```kotlin
class MyApplication : Application() {
override fun onCreate() {
super.onCreate()
// Tell Braze to use your custom factory for notifications
Braze.customBrazeNotificationFactory = MyCustomNotificationFactory()
}
}
```
### Étape 4 : Envoyer l'activité {#step-4-send-the-activity}
Vous pouvez utiliser l'endpoint REST API [`/messages/send`](https://www.braze.com/docs/fr/fr/api/endpoints/messaging/send_messages/post_send_messages/) pour envoyer une notification push à l'appareil Android d'un utilisateur.
#### Exemple de commande curl {#example-curl-command}
Superb Owl a envoyé sa requête en utilisant la commande curl suivante :
```
curl -X POST "https://BRAZE_REST_ENDPOINT/messages/send" \
-H "Authorization: Bearer {REST_API_KEY}" \
-H "Content-Type: application/json" \
--data '{
"external_user_ids": ["USER_ID"],
"messages": {
"android_push": {
"title": "WBF vs OWL",
"alert": "2 to 4 1:33 Q4",
"extra": {
"live_update": "true",
"team1": "WBF",
"team2": "OWL",
"score1": "2",
"score2": "4",
"time": "1:33",
"quarter": "Q4"
},
"notification_id": "ASSIGNED_NOTIFICATION_ID"
}
}
}'
```
**Tip:**
Bien que les commandes curl soient utiles pour les tests, nous recommandons de gérer cet appel dans votre backend, là où vous gérez déjà vos [Live Activities iOS](https://www.braze.com/docs/fr/fr/developer_guide/push_notifications/live_notifications/?sdktab=swift).
#### Paramètres de la requête {#request-parameters}
| Clé | Description |
|------------------------------|------------|
| `REST_API_KEY` | Une clé REST API de Braze avec les autorisations `messages.send`.
Celle-ci peut être créée dans le tableau de bord de Braze depuis **Paramètres** > **Clés API**. |
| `BRAZE_REST_ENDPOINT` | L'URL de votre endpoint REST. Votre endpoint dépendra de l'[URL de Braze pour votre instance](https://www.braze.com/docs/fr/fr/api/basics/#endpoints). |
| `USER_ID` | L'ID de l'utilisateur auquel vous envoyez la notification. |
| `messages.android_push.title` | Le titre du message. Par défaut, il n'est pas utilisé pour les notifications en direct de la fabrique de notifications personnalisée, mais il peut servir de solution de repli. |
| `messages.android_push.alert` | Le corps du message. Par défaut, il n'est pas utilisé pour les notifications en direct de la fabrique de notifications personnalisée, mais il peut servir de solution de repli. |
| `messages.extra` | Paires clé-valeur que la fabrique de notifications personnalisée utilise pour les notifications en direct. Vous pouvez attribuer n'importe quelle chaîne de caractères à cette valeur—toutefois, dans l'exemple ci-dessus, `live_updates` est utilisé pour déterminer s'il s'agit d'une notification push par défaut ou en direct. |
| `ASSIGNED_NOTIFICATION_ID` | L'ID de notification que vous souhaitez attribuer à la notification en direct de l'utilisateur choisi. L'ID doit être unique pour ce jeu et doit être utilisé pour [mettre à jour la notification existante](#android_step-4-update-data-with-the-braze-rest-api) ultérieurement. |
{: .reset-td-br-1 .reset-td-br-2 aria-label="Paramètres de la requête" }
### Étape 5 : Mettre à jour l'activité {#step-5-update-the-activity}
Pour mettre à jour la mise à jour en direct existante avec de nouvelles données, modifiez les paires clé-valeur pertinentes attribuées à `messages.extra`, puis utilisez le même `notification_id` et appelez à nouveau l'endpoint `/messages/send`.
# Activités en direct pour le SDK Swift de Braze
Source: /docs/fr/developer_guide/live_notifications/live_activities/index.md
# Activités en direct pour Swift {#live-activities-for-swift}
> Découvrez comment implémenter les activités en direct pour le SDK Swift de Braze. Les activités en direct sont des notifications persistantes et interactives qui s'affichent directement sur l'écran de verrouillage, permettant aux utilisateurs d'obtenir des mises à jour dynamiques en temps réel—sans déverrouiller leur appareil.
## Fonctionnement {#how-it-works}
{: style="max-width:40%;float:right;margin-left:15px;"}
Les activités en direct présentent une combinaison d'informations statiques et dynamiques que vous mettez à jour. Par exemple, vous pouvez créer une activité en direct qui fournit un suivi de statut pour une livraison. Cette activité en direct comporterait le nom de votre entreprise comme information statique, ainsi qu'un « délai de livraison » dynamique qui serait mis à jour à mesure que le livreur approche de sa destination.
En tant que développeur, vous pouvez utiliser Braze pour gérer les cycles de vie de vos activités en direct, effectuer des appels à la REST API de Braze pour mettre à jour les activités en direct, et faire en sorte que tous les appareils abonnés reçoivent la mise à jour dès que possible. De plus, comme vous gérez les activités en direct via Braze, vous pouvez les utiliser en tandem avec vos autres canaux de communication—notifications push, messages in-app, Content Cards—pour favoriser l'adoption.
## Diagramme de séquence {#sequence-diagram}
**Afficher le diagramme**
```mermaid
---
config:
theme: mc
---
sequenceDiagram
participant Server as Client Server
participant Device as User Device
participant App as iOS App / Braze SDK
participant BrazeAPI as Braze API
participant APNS as Apple Push Notification Service
Note over Server, APNS: Launch Option 1 Locally Start Activities
App ->> App: Register a Live Activity using `launchActivity(pushTokenTag:activity:)`
App ->> App: Get push token from iOS
App ->> BrazeAPI: Activity ID & Push token automatically sent to Braze
Note over Server, APNS: Launch Option 2 Remotely Start Activities
Device ->> App: Call `registerPushToStart` to collect push tokens early
App ->> BrazeAPI: Push-to-start tokens sent to Braze
Server ->> BrazeAPI: POST /messages/live_activity/start
Note right of BrazeAPI: Payload includes: - push_token - activity_id - external_id - event_name - content_state (optional)
BrazeAPI ->> APNS: Live activity start request
APNS ->> Device: APNS sends activity to device
App ->> App: Get push token from iOS
App ->> BrazeAPI: Activity ID & Push token automatically sent to Braze
Note over Server, APNS: Resuming activities upon app launch
App ->> App: Call `resumeActivities(ofType:)` on each app launch
Note over Server, APNS: Updating a Live Activity
loop update a live activity
Server ->> BrazeAPI: POST /messages/live_activity/update
Note right of BrazeAPI: Payload includes changes to ContentState (dynamic variables)
BrazeAPI ->> APNS: Update sent to APNS
APNS ->> Device: APNS sends update to device
end
Note over Server, APNS: Ending a Live Activity
Server ->> BrazeAPI: POST /messages/live_activity/update
Note right of BrazeAPI: Activity can be ended via: - User manually dismisses - Times out after 12 hours - Setting `end_activity: true` on `/messages/live_activity/update`
APNS ->> Device: Live activity is dismissed
```
## Implémenter une activité en direct {#implementing-a-live-activity}
### Prerequisites
Before you can use this feature, you'll need to [integrate the Swift Braze SDK](https://www.braze.com/docs/fr/fr/developer_guide/sdk_integration/?sdktab=swift). Vous devrez également remplir les conditions suivantes :
- Assurez-vous que votre projet cible iOS 16.1 ou une version ultérieure.
- Ajoutez le droit `Push Notification` sous **Signing & Capabilities** dans votre projet Xcode.
- Assurez-vous que les clés `.p8` sont utilisées pour envoyer des notifications. Les fichiers plus anciens tels que `.p12` ou `.pem` ne sont pas pris en charge.
- À partir de la version 8.2.0 du SDK Swift de Braze, vous pouvez [enregistrer à distance une activité en direct](#swift_step-2-start-the-activity). Pour utiliser cette fonctionnalité, iOS 17.2 ou une version ultérieure est requis.
**Note:**
Bien que les activités en direct et les notifications push soient similaires, leurs autorisations système sont distinctes. Par défaut, toutes les fonctionnalités des activités en direct sont activées, mais les utilisateurs peuvent désactiver cette fonctionnalité par application.
### Étape 1 : Créer une activité {#create-an-activity}
Tout d'abord, assurez-vous d'avoir suivi [Displaying live data with Live Activities](https://developer.apple.com/documentation/activitykit/displaying-live-data-with-live-activities) dans la documentation d'Apple pour configurer les activités en direct dans votre application iOS. Dans le cadre de cette tâche, assurez-vous d'inclure `NSSupportsLiveActivities` défini sur `YES` dans votre `Info.plist`.
Comme la nature exacte de votre activité en direct est spécifique à votre cas d'usage, configurez et initialisez les objets [Activity](https://developer.apple.com/documentation/activitykit/activityattributes). Vous définirez notamment :
* `ActivityAttributes` : Ce protocole définit le contenu statique (immuable) et dynamique (variable) qui apparaît dans votre activité en direct.
* `ActivityAttributes.ContentState` : Ce type définit les données dynamiques qui sont mises à jour au cours de l'activité.
Vous utiliserez également SwiftUI pour créer la présentation de l'interface utilisateur sur l'écran de verrouillage et Dynamic Island sur les appareils pris en charge.
Assurez-vous de bien connaître les [conditions préalables et les limites](https://developer.apple.com/documentation/activitykit/displaying-live-data-with-live-activities#Understand-constraints) d'Apple pour les activités en direct, car ces contraintes sont indépendantes de Braze.
**Note:**
Si vous prévoyez d'envoyer des notifications push fréquentes vers la même activité en direct, vous pouvez éviter d'être limité par le budget d'Apple en définissant `NSSupportsLiveActivitiesFrequentUpdates` sur `YES` dans votre fichier `Info.plist`. Pour plus de détails, reportez-vous à la section [`Determine the update frequency`](https://developer.apple.com/documentation/activitykit/updating-and-ending-your-live-activity-with-activitykit-push-notifications#Determine-the-update-frequency) dans la documentation ActivityKit.
#### Exemple {#example}
Imaginons que nous voulions créer une activité en direct pour donner à nos utilisateurs des mises à jour sur le spectacle Superb Owl, où deux équipes concurrentes de sauvetage d'animaux sauvages reçoivent des points pour les hiboux dont ils s'occupent. Dans cet exemple, nous avons créé une structure appelée `SportsActivityAttributes`, mais vous pouvez utiliser votre propre implémentation d'`ActivityAttributes`.
```swift
#if canImport(ActivityKit)
import ActivityKit
#endif
@available(iOS 16.1, *)
struct SportsActivityAttributes: ActivityAttributes {
public struct ContentState: Codable, Hashable {
var teamOneScore: Int
var teamTwoScore: Int
}
var gameName: String
var gameNumber: String
}
```
### Étape 2 : Démarrer l'activité {#start-the-activity}
Tout d'abord, choisissez le mode d'enregistrement de votre activité :
- **À distance :** Utilisez la méthode [`registerPushToStart`]() au début du cycle de vie de l'utilisateur et avant que le jeton push-to-start ne soit nécessaire, puis démarrez une activité à l'aide de l'endpoint [`/messages/live_activity/start`](https://www.braze.com/docs/fr/fr/api/endpoints/messaging/live_activity/start/).
- **Localement :** Créez une instance de votre activité en direct, puis utilisez la méthode [`launchActivity`]() pour créer des jetons de notification push que Braze pourra gérer.
**Important:**
Pour enregistrer à distance une activité en direct, iOS 17.2 ou une version ultérieure est requis.
#### Étape 2.1 : Ajouter BrazeKit à votre extension de widget {#step-21-add-brazekit-to-your-widget-extension}
Dans votre projet Xcode, sélectionnez le nom de votre application, puis **General**. Sous **Frameworks and Libraries**, vérifiez que `BrazeKit` est inclus dans la liste.

#### Étape 2.2 : Ajouter le protocole BrazeLiveActivityAttributes {#brazeActivityAttributes}
Dans votre implémentation d'`ActivityAttributes`, ajoutez la conformité au protocole `BrazeLiveActivityAttributes`, puis ajoutez la propriété `brazeActivityId` à votre modèle d'attributs.
**Important:**
iOS associe la propriété `brazeActivityId` au champ correspondant dans votre payload push-to-start de l'activité en direct. Elle ne doit donc pas être renommée ni se voir attribuer une autre valeur.
```swift
import BrazeKit
#if canImport(ActivityKit)
import ActivityKit
#endif
@available(iOS 16.1, *)
// 1. Add the `BrazeLiveActivityAttributes` conformance to your `ActivityAttributes` struct.
struct SportsActivityAttributes: ActivityAttributes, BrazeLiveActivityAttributes {
public struct ContentState: Codable, Hashable {
var teamOneScore: Int
var teamTwoScore: Int
}
var gameName: String
var gameNumber: String
// 2. Add the `String?` property to represent the activity ID.
var brazeActivityId: String?
}
```
#### Étape 2.3 : S'inscrire au push-to-start {#step-23-register-for-push-to-start}
Ensuite, enregistrez le type d'activité en direct afin que Braze puisse suivre tous les jetons push-to-start et les instances d'activité en direct associés à ce type.
**Warning:**
Le système d'exploitation iOS ne génère des jetons push-to-start que lors de la première installation de l'application après le redémarrage d'un appareil. Pour vous assurer que vos jetons sont enregistrés de manière fiable, appelez `registerPushToStart` dans votre méthode `didFinishLaunchingWithOptions`.
###### Exemple
Dans l'exemple suivant, la classe `LiveActivityManager` gère des objets d'activité en direct. Ensuite, la méthode `registerPushToStart` enregistre `SportsActivityAttributes` :
```swift
import BrazeKit
#if canImport(ActivityKit)
import ActivityKit
#endif
class LiveActivityManager {
@available(iOS 17.2, *)
func registerActivityType() {
// This method returns a Swift background task.
// You may keep a reference to this task if you need to cancel it wherever appropriate, or ignore the return value if you wish.
let pushToStartObserver: Task = Self.braze?.liveActivities.registerPushToStart(
forType: Activity.self,
name: SportsActivityAttributes.name
)
}
}
```
#### Étape 2.4 : Envoyer une notification push-to-start {#step-24-send-a-push-to-start-notification}
Envoyez une notification push-to-start à distance à l'aide de l'endpoint [`/messages/live_activity/start`](https://www.braze.com/docs/fr/fr/api/endpoints/messaging/live_activity/start/).
Vous pouvez utiliser le [framework ActivityKit d'Apple](https://developer.apple.com/documentation/activitykit) pour obtenir un jeton de notification push que le SDK Braze peut gérer pour vous. Cela vous permet de mettre à jour les activités en direct via l'API Braze, car Braze enverra le jeton de notification push au service de notification push d'Apple (APNs) côté serveur.
1. Créez une instance de votre implémentation d'activité en direct à l'aide des API ActivityKit d'Apple.
2. Définissez le paramètre `pushType` sur `.token`.
3. Transmettez les `ActivitiesAttributes` et le `ContentState` des activités en direct que vous avez définis.
4. Enregistrez votre activité auprès de votre instance Braze en la passant dans [`launchActivity(pushTokenTag:activity:)`](https://braze-inc.github.io/braze-swift-sdk/documentation/brazekit/braze/liveactivities-swift.class). Le paramètre `pushTokenTag` est une chaîne de caractères personnalisée que vous définissez. Elle doit être unique pour chaque activité en direct que vous créez.
Une fois l'activité en direct enregistrée, le SDK Braze extrait et observe les changements dans les jetons de notification push.
#### Exemple
Pour notre exemple, nous allons créer une classe appelée `LiveActivityManager` qui servira d'interface pour nos objets d'activité en direct. Ensuite, nous définirons le `pushTokenTag` sur `"sports-game-2024-03-15"`.
```swift
import BrazeKit
#if canImport(ActivityKit)
import ActivityKit
#endif
class LiveActivityManager {
@available(iOS 16.2, *)
func createActivity() {
let activityAttributes = SportsActivityAttributes(gameName: "Superb Owl", gameNumber: "Game 1")
let contentState = SportsActivityAttributes.ContentState(teamOneScore: "0", teamTwoScore: "0")
let activityContent = ActivityContent(state: contentState, staleDate: nil)
if let activity = try? Activity.request(attributes: activityAttributes,
content: activityContent,
// Setting your pushType as .token allows the Activity to generate push tokens for the server to watch.
pushType: .token) {
// Register your Live Activity with Braze using the pushTokenTag.
// This method returns a Swift background task.
// You may keep a reference to this task if you need to cancel it wherever appropriate, or ignore the return value if you wish.
let liveActivityObserver: Task = AppDelegate.braze?.liveActivities.launchActivity(pushTokenTag: "sports-game-2024-03-15",
activity: activity)
}
}
}
```
Votre widget d'activité en direct affichera ce contenu initial à vos utilisateurs.
{: style="max-width:40%;"}
### Étape 3 : Reprendre le suivi de l'activité {#resume-activity-tracking}
Pour que Braze suive votre activité en direct dès le lancement de l'application :
1. Ouvrez votre fichier `AppDelegate`.
2. Importez le module `ActivityKit` s'il est disponible.
3. Appelez [`resumeActivities(ofType:)`](https://braze-inc.github.io/braze-swift-sdk/documentation/brazekit/braze/liveactivities-swift.class/resumeactivities(oftype:)) dans `application(_:didFinishLaunchingWithOptions:)` pour tous les types d'`ActivityAttributes` que vous avez enregistrés dans votre application.
Cela permet à Braze de reprendre les tâches de suivi des mises à jour des jetons de notification push pour toutes les activités en direct actives. Notez que si un utilisateur a explicitement fermé l'activité en direct sur son appareil, elle est considérée comme supprimée et Braze ne la suivra plus.
###### Exemple
```swift
import UIKit
import BrazeKit
#if canImport(ActivityKit)
import ActivityKit
#endif
@main
class AppDelegate: UIResponder, UIApplicationDelegate {
static var braze: Braze? = nil
func application(
_ application: UIApplication,
didFinishLaunchingWithOptions launchOptions: [UIApplication.LaunchOptionsKey: Any]?
) -> Bool {
if #available(iOS 16.1, *) {
Self.braze?.liveActivities.resumeActivities(
ofType: Activity.self
)
}
return true
}
}
```
### Étape 4 : Mettre à jour l'activité {#update-the-activity}
{: style="max-width:40%;float:right;margin-left:15px;"}
L'endpoint [`/messages/live_activity/update`](https://www.braze.com/docs/fr/fr/api/endpoints/messaging/live_activity/update/) vous permet de mettre à jour une activité en direct via des notifications push transmises par la REST API de Braze. Utilisez cet endpoint pour mettre à jour le `ContentState` de votre activité en direct.
Lorsque vous mettez à jour votre `ContentState`, votre widget d'activité en direct affiche les nouvelles informations. Voici à quoi pourrait ressembler le spectacle Superb Owl à la fin de la première mi-temps.
Pour plus de détails, consultez notre article sur l'endpoint [`/messages/live_activity/update`](https://www.braze.com/docs/fr/fr/api/endpoints/messaging/live_activity/update/).
### Étape 5 : Terminer l'activité {#end-the-activity}
Lorsqu'une activité en direct est active, elle s'affiche à la fois sur l'écran de verrouillage de l'utilisateur et sur Dynamic Island. Pour la terminer via Braze, utilisez l'endpoint [`/messages/live_activity/update`](https://www.braze.com/docs/fr/fr/api/endpoints/messaging/live_activity/update/) avec `end_activity` défini sur `true`.
Pour améliorer la fiabilité lors de la fin d'une activité en direct, suivez ces étapes facultatives :
1. Incluez éventuellement `dismissal_date` dans la même requête `update` pour indiquer à iOS quand supprimer l'interface de l'activité en direct.
2. Vérifiez les résultats de distribution dans le [Journal d'activité des messages](https://www.braze.com/docs/fr/fr/user_guide/administrative/app_settings/message_activity_log_tab/).
#### Planifier la fermeture automatique {#arranging-automatic-dismissal}
Pour planifier une fermeture automatique, programmez une requête de suivi vers l'endpoint de mise à jour après avoir démarré l'activité en direct.
1. Envoyez une requête `/messages/live_activity/start` avec un `activity_id` que vous pouvez suivre.
2. Stockez cet `activity_id` et votre heure de fin cible dans votre planificateur backend.
3. À l'heure de fin cible, envoyez une requête `/messages/live_activity/update` avec `end_activity` défini sur `true`.
4. Configurez la date de fermeture dans la même requête de mise à jour. Pour plus de détails, consultez l'endpoint [`/messages/live_activity/update`](https://www.braze.com/docs/fr/fr/api/endpoints/messaging/live_activity/update/).
Notez que le moment de la fermeture est contrôlé par iOS. Même après l'envoi d'une requête de fin valide, la suppression de l'écran de verrouillage ou de Dynamic Island peut être retardée ou se comporter différemment selon les conditions du système d'exploitation.
Une activité en direct peut également se terminer en dehors de Braze :
* **Fermeture par l'utilisateur** : Un utilisateur peut fermer manuellement une activité en direct.
* **Expiration** : Après une durée par défaut de huit heures, iOS supprime l'activité en direct de Dynamic Island. Après une durée par défaut de 12 heures, iOS supprime l'activité en direct de l'écran de verrouillage.
Pour plus de détails, consultez notre article sur l'endpoint [`/messages/live_activity/update`](https://www.braze.com/docs/fr/fr/api/endpoints/messaging/live_activity/update/).
## Suivi des activités en direct {#tracking-live-activities}
Les événements d'activité en direct sont disponibles dans Currents, Snowflake Data Sharing et le Générateur de requêtes. Les événements suivants peuvent vous aider à comprendre et à surveiller le cycle de vie de vos activités en direct, à suivre la disponibilité des jetons et à diagnostiquer de manière indépendante les problèmes ou à vérifier les statuts de distribution.
- [Live Activity Push To Start Token Change](https://www.braze.com/docs/fr/fr/user_guide/data/braze_currents/event_glossary/customer_behavior_events/#live-activity-push-to-start-token-change-events) : Enregistre lorsqu'un jeton push-to-start (PTS) est ajouté ou mis à jour dans Braze, vous permettant de suivre les enregistrements et la disponibilité des jetons par utilisateur.
- [Live Activity Update Token Change](https://www.braze.com/docs/fr/fr/user_guide/data/braze_currents/event_glossary/customer_behavior_events/#live-activity-update-token-change-events) : Suit l'ajout, la mise à jour ou la suppression des jetons Live Activity Update (LAU).
- [Live Activity Send](https://www.braze.com/docs/fr/fr/user_guide/data/braze_currents/event_glossary/message_engagement_events/#live-activity-send-events) : Enregistre chaque fois qu'une activité en direct est démarrée, mise à jour ou terminée par Braze.
- [Live Activity Outcome](https://www.braze.com/docs/fr/fr/user_guide/data/braze_currents/event_glossary/message_engagement_events/#live-activity-outcome-events) : Indique l'état final de la distribution au service de notification push d'Apple (APNs) pour chaque activité en direct envoyée depuis Braze.
## Observer les événements d'activité en direct (facultatif) {#observe-live-activity-events}
**Important:**
Ne vous abonnez pas directement à ces flux ActivityKit avec Apple, car cela entrerait en conflit avec les abonnements de Braze et empêcherait les activités en direct de fonctionner correctement :
1. [`pushTokenUpdates`](https://developer.apple.com/documentation/activitykit/activity/pushtokenupdates-swift.property)
2. [`activityStateUpdates`](https://developer.apple.com/documentation/activitykit/activity/activitystateupdates-swift.property)
3. [`contentUpdates`](https://developer.apple.com/documentation/activitykit/activity/contentupdates-swift.property)
4. [`pushToStartTokenUpdates`](https://developer.apple.com/documentation/activitykit/activity/pushtostarttokenupdates)
5. [`activityUpdates`](https://developer.apple.com/documentation/activitykit/activity/activityupdates-swift.type.property)
Utilisez plutôt les abonnements mentionnés ci-dessous.
Le SDK Braze fournit deux méthodes d'abonnement sur `braze.liveActivities` pour observer l'ensemble du cycle de vie des activités en direct. Pour un guide pas à pas complet, consultez le [tutoriel sur les activités en direct](https://braze-inc.github.io/braze-swift-sdk/tutorials/brazekit/b4-live-activities).
- [`subscribeToStateUpdates(_:)`](#subscribe-to-state-updates) : Fournit les événements du cycle de vie pour l'enregistrement des jetons push-to-start et les instances d'activité en cours d'exécution.
- [`subscribeToErrors(_:)`](#subscribe-to-errors) : Fournit les erreurs côté SDK et côté serveur rencontrées lors du suivi des activités en direct.
**Note:**
Les deux méthodes renvoient un [`Braze.Cancellable`](https://braze-inc.github.io/braze-swift-sdk/documentation/brazekit/braze/cancellable-swift.typealias). L'abonnement reste actif tant que la valeur renvoyée est conservée via une référence forte (par exemple, stockez-la dans une propriété ayant le même cycle de vie que votre instance `Braze`).
### Configurer les abonnements {#set-up-subscriptions}
Configurez les abonnements une seule fois dans `application(_:didFinishLaunchingWithOptions:)` et conservez-les pendant toute la durée de vie de votre application :
```swift
class AppDelegate: UIResponder, UIApplicationDelegate {
static var braze: Braze?
var stateSubscription: Braze.Cancellable?
var errorSubscription: Braze.Cancellable?
func application(
_ application: UIApplication,
didFinishLaunchingWithOptions launchOptions: [UIApplication.LaunchOptionsKey: Any]?
) -> Bool {
let braze = Braze(configuration: config)
Self.braze = braze
if #available(iOS 16.1, *) {
stateSubscription = Self.braze?.liveActivities.subscribeToStateUpdates { event in
self.handleStateUpdate(event)
}
errorSubscription = Self.braze?.liveActivities.subscribeToErrors { error in
self.handleLiveActivityError(error)
}
}
return true
}
}
```
**Note:**
Les rappels ne sont déclenchés que pour les futurs événements d'activité en direct — ils ne rejouent pas l'état actuel au moment de l'abonnement. Pour interroger l'instantané de l'état actuel, utilisez `Activity.activities`.
### subscribeToStateUpdates {#subscribe-to-state-updates}
`subscribeToStateUpdates(_:)` fournit des valeurs `UpdateEvent` qui couvrent l'ensemble du cycle de vie des activités en direct. Les événements sont répartis en deux portées :
- `.activityType(ActivityType)` : Événements au niveau du type pour l'enregistrement des jetons push-to-start (iOS 17.2+). Aucune instance d'activité n'existe encore.
- `.activityInstance(ActivityInstance)` : Événements au niveau de l'instance pour une activité en cours d'exécution spécifique.
Plusieurs abonnés sont pris en charge — chaque abonnement actif reçoit chaque émission de manière indépendante.
#### Événements au niveau du type {#type-scoped-events}
| Événement | Quand il se déclenche |
| ----- | ------------- |
| `.pushToStartTokenRead(activityType:)` | Un jeton push-to-start a été lu depuis le système d'exploitation. Braze peut désormais démarrer à distance une nouvelle activité de ce type. |
| `.pushToStartTokenFlushed(activityType:)` | Le jeton a été envoyé au serveur Braze. Braze peut envoyer des notifications push-to-start pour ce type. |
| `.pushToStartOptedOut(activityType:)` | L'utilisateur a été désabonné du push-to-start pour ce type d'activité via `optOutPushToStart(type:)`. |
| `.pushToStartOptOutFlushed(activityType:)` | La désinscription a été envoyée au serveur Braze. |
{: .reset-td-br-1 .reset-td-br-2 aria-label="Événements au niveau du type" }
#### Événements au niveau de l'instance {#instance-scoped-events}
| Événement | Quand il se déclenche |
| ----- | ------------- |
| `.started(activityId:activityType:pushTokenTag:launchSource:)` | Le SDK a commencé à suivre cette activité via `launchActivity(pushTokenTag:activity:)`. La valeur `launchSource` est `.local` pour les activités initiées par l'application ou `.pushToStart` pour les activités démarrées à distance. |
| `.resumed(activityId:activityType:pushTokenTag:)` | Le SDK a repris le suivi de cette activité via `resumeActivities(ofType:)`. |
| `.pushTokenFlushed(activityId:activityType:pushTokenTag:)` | Le jeton de notification push de l'activité a été accepté par le serveur Braze — l'activité peut désormais recevoir des mises à jour à distance. |
| `.active(activityId:activityType:)` | L'activité est actuellement active et visible pour l'utilisateur. |
| `.stale(activityId:activityType:staleDate:)` | Le contenu de l'activité est devenu obsolète. Émis uniquement sur iOS 16.2 et versions ultérieures. |
| `.dismissed(activityId:activityType:)` | L'utilisateur a fermé manuellement l'activité. |
| `.ended(activityId:activityType:)` | L'activité s'est terminée. |
| `.contentUpdated(activityId:activityType:)` | L'état du contenu de l'activité a été mis à jour (iOS 16.2+). Utilisez une logique personnalisée pour rechercher l'`Activity` par ID depuis `Activity.activities` et accéder à l'état typé via `activity.content.state`. |
| `.pushTokenUpdated(activityId:activityType:)` | ActivityKit a effectué une rotation du jeton de notification push de l'activité. |
{: .reset-td-br-1 .reset-td-br-2 aria-label="Événements au niveau de l'instance" }
###### Exemple
```swift
func handleStateUpdate(_ event: Braze.LiveActivities.UpdateEvent) {
switch event {
// Type-scoped: push-to-start token lifecycle (iOS 17.2+)
case .activityType(.pushToStartTokenRead(let activityType)):
print("[\(activityType)] Push-to-start token read by SDK")
// ...
// Instance-scoped: SDK tracking
case .activityInstance(.started(let id, let type, let tag, let source)):
print("[\(type)] Activity \(id) started via \(source), tag: \(tag)")
// ...
// Instance-scoped: ActivityKit lifecycle
case .activityInstance(.active(let id, let type)):
print("[\(type)] Activity \(id) is active")
// ...
case .activityInstance(.ended(let id, let type)):
print("[\(type)] Activity \(id) ended")
// Instance-scoped: content updates (iOS 16.2+)
case .activityInstance(.contentUpdated(let id, let type)):
// For more advanced use cases of `contentUpdated`, see the section below
print("[\(type)] Content updated for activity \(id)")
case .activityInstance(.pushTokenUpdated(let id, let type)):
print("[\(type)] Activity \(id) push token rotated")
}
}
```
### subscribeToErrors {#subscribe-to-errors}
`subscribeToErrors(_:)` fournit des valeurs `ErrorEvent` en utilisant les deux mêmes portées que `UpdateEvent` :
- `.activityType(ActivityType)` : Erreurs au niveau du type pour les échecs d'enregistrement push-to-start.
- `.activityInstance(ActivityInstance)` : Erreurs au niveau de l'instance pour une activité en cours d'exécution.
Utilisez le drapeau `isTransient` pour déterminer si une nouvelle tentative est appropriée. Le SDK réessaie automatiquement les échecs transitoires.
#### Erreurs au niveau du type {#type-scoped-errors}
| Erreur | Quand elle se déclenche |
| ----- | ------------- |
| `.pushToStartRegistrationFailed(activityType:isTransient:reason:)` | Le jeton push-to-start n'a pas pu atteindre le serveur Braze. |
{: .reset-td-br-1 .reset-td-br-2 aria-label="Erreurs au niveau du type" }
#### Erreurs au niveau de l'instance {#instance-scoped-errors}
| Erreur | Quand elle se déclenche |
| ----- | ------------- |
| `.registrationFailed(activityId:activityType:pushTokenTag:isTransient:reason:)` | Le jeton de notification push de l'activité n'a pas pu être enregistré auprès de Braze. |
| `.activityNotFound(activityId:activityType:)` | `resumeActivities(ofType:)` a trouvé un mappage stocké pour une activité qui n'est plus en cours d'exécution — elle s'est probablement terminée alors que l'application était fermée. |
| `.invalidPushTokenTag(activityId:activityType:tag:)` | `launchActivity(pushTokenTag:activity:)` a été appelé avec une étiquette invalide. Les étiquettes doivent être non vides et inférieures à 256 octets. |
{: .reset-td-br-1 .reset-td-br-2 aria-label="Erreurs au niveau de l'instance" }
###### Exemple
```swift
func handleLiveActivityError(_ error: Braze.LiveActivities.ErrorEvent) {
switch error {
// Type-scoped errors
case .activityType(.pushToStartRegistrationFailed(let type, let isTransient, let reason)):
if isTransient {
print("[\(type)] Push-to-start registration failed (transient, will retry): \(reason)")
} else {
print("[\(type)] Push-to-start registration failed (permanent): \(reason)")
}
// Instance-scoped errors
case .activityInstance(.registrationFailed(let id, let type, _, let isTransient, let reason)):
if isTransient {
print("[\(type)] Activity \(id) registration failed (transient, retrying): \(reason)")
} else {
print("[\(type)] Activity \(id) registration failed (permanent): \(reason)")
}
case .activityInstance(.activityNotFound(let id, let type)):
print("[\(type)] Stored activity \(id) not found on resume")
case .activityInstance(.invalidPushTokenTag(let id, let type, let tag)):
print("[\(type)] Activity \(id) has invalid push token tag '\(tag)'")
}
}
```
### Gérer les mises à jour de l'état du contenu (facultatif) {#handle-content-state}
Si vous souhaitez utiliser l'état du contenu de l'instance réelle de l'activité en direct, suivez cette section.
Lorsqu'un événement `.contentUpdated` se déclenche, utilisez une logique personnalisée pour rechercher l'`Activity` en cours d'exécution par son ID depuis `Activity.activities`, puis accédez au `ContentState` typé via `activity.content.state`.
#### Type d'attributs unique {#single-attributes-type}
```swift
case .activityInstance(.contentUpdated(let id, let type)):
#if canImport(ActivityKit)
// Add custom logic look up the Activity by ID and access your app's typed ContentState.
// In this example, `SportsActivityAttributes` is the app's custom type.
if #available(iOS 16.2, *),
let activity = findActivityInstance(id: id, as: SportsActivityAttributes.self)
{
// `activityContent` is now strongly typed as a `SportsActivityAttributes`
let activityContent = activity.content.state
print("[\(type)] Game \(id) — score: \(activityContent.teamOneScore)–\(activityContent.teamTwoScore)")
return
}
#endif
print("[\(type)] Content updated for activity \(id)")
// ...
// - MARK: Helper methods
@available(iOS 16.2, *)
func findActivityInstance